3D printing cosplay armor
How to 3D Print Armor and Costumes for Cosplay – Clever Creations
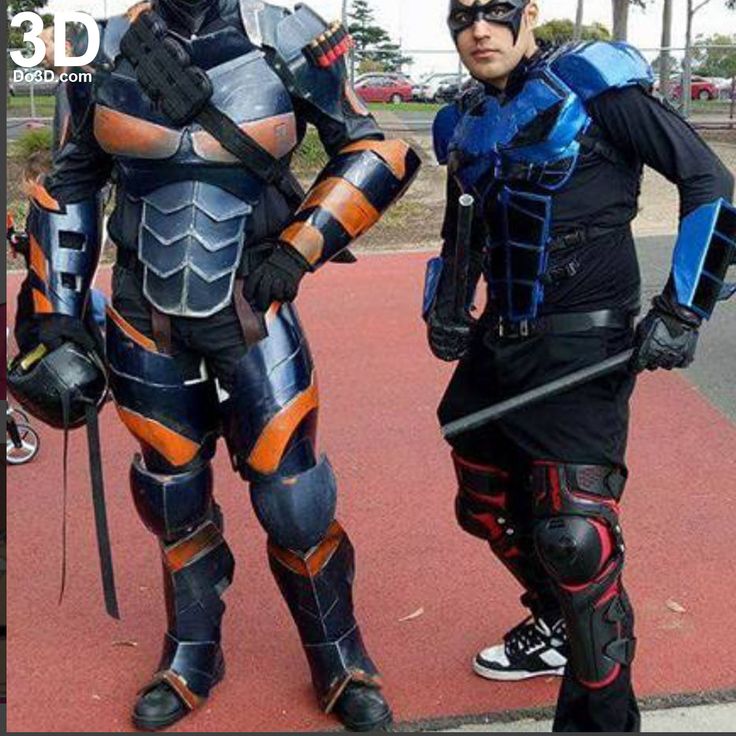
3D printing has made it easier than ever to create detailed and accurate cosplay props and costumes to wear. A set of armor for cosplay used to take days to craft by hand, but with a 3D printer, you can create the base for your armor pieces in a matter of hours.
With the wide selection of affordable 3D printers for cosplay available right now, it’s a hobby that almost anyone can pick up. To get you started, we’ll show you how to design or find 3D models of armor, how to 3D print armor, and how to make your finished prints look like professional cosplay props.
How to 3D Print Armor: A Comprehensive Guide
Get a 3D model of armor
Before you can 3D print your cosplay armor, you will understandably need a 3D model of a wearable armor set.
Designing armor yourself
The most reliable way to get a set of 3D models of armor is to design them yourself. This will ensure the files are sized properly to your body and look the way you want them to.
Designing 3D models for an armor set requires you to properly size them to your (or the intended wearer’s) body measurements and contour the pieces to your body parts. At the same time, it is key to stay accurate to what you’re trying to represent. No matter if you are trying to design Batman, Stormtrooper, Mandalorian, or other Star Wars cosplay armor, you typically want to make sure it resembles that from the show, movie, or video game.
The overall difficulty of such a project depends on your 3D modeling skills and how much detail your armor needs. Luckily there are plenty of learning resources available to help, no matter what (free) 3D modeling software you choose.
Here are a few of our favorite tutorials to get you started, if you choose to design your own 3D printed armor!
Download a 3D model
Downloading a 3D model of armor is much easier than designing it yourself, but it offers you less reliable results.
Since most of the free files uploaded online are from hobbyists trying to share their own projects, the armor pieces are likely sized to their body proportions. You will need to scale them up or down to fit your measurements, which can take some experimentation to get it right.
This Youtube has some great tips for getting a good fit:
There are many websites where you can download free 3D models, but some of our favorites include:
- Thingiverse
- MyMiniMaker
- PrusaPrinters
All models on these sites are submitted by other users. While that does lead to some less-than-stellar designs sometimes, other users will often step in and fix or redesign models that don’t work properly.
Our favorite 3D printed armor models
There are countless options for armor sets available on popular 3D model sharing sites. You can find everything, from generic to historical to recreations from pop culture. Here are some of our favorites:
Mandalorian Beskar Armor
For an easy Mandalorian costume, this simple version of the Beskar armor is one of the best options available.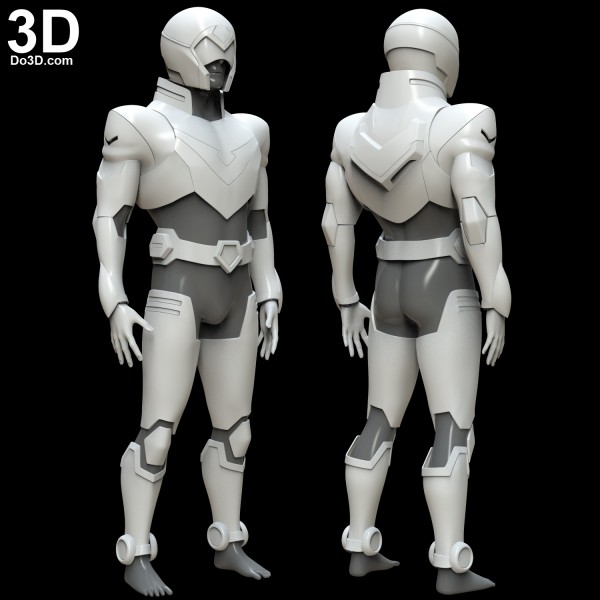 This 3D printed armor attaches to your shirt and pants, so there is no need for buckles or straps. It also doesn’t need much fine detail painting, so you can finish the armor off fairly quickly by painting it with a can of spray paint.
- Found on: Thingiverse
- Designed by: Maurice Sizzlac
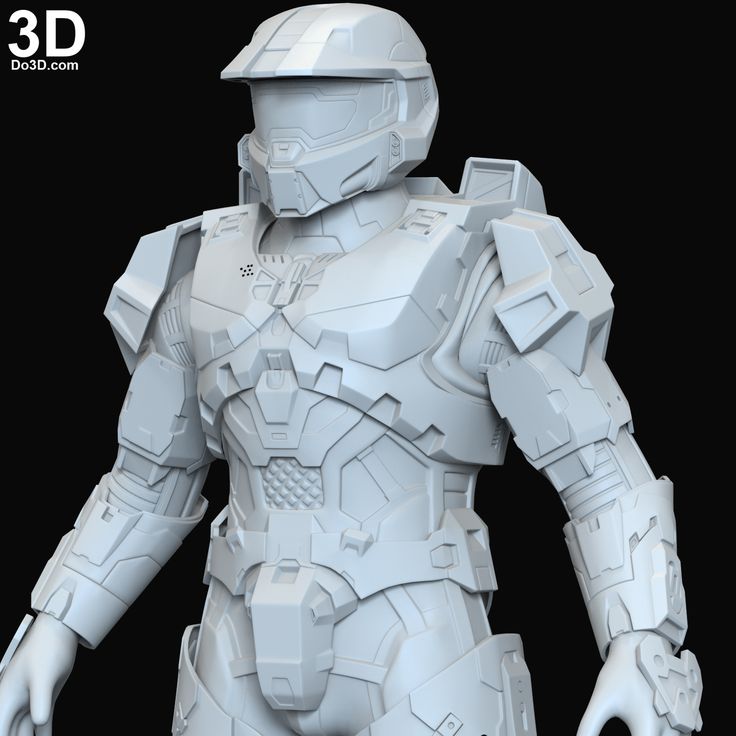
Halo Master Chief Full-Body Armor
As a full-sized version of Master Chief’s suit from Halo, this 3d printed armor is extra bulky. You will need to use a lot more filament for this project than some of the others we have listed and some of the larger pieces will need to be split to fit on your build plate (even with a bigger 3D printer), but the finished look is worth it!
- Found on: Thingiverse
- Designed by: Jason McLachlan
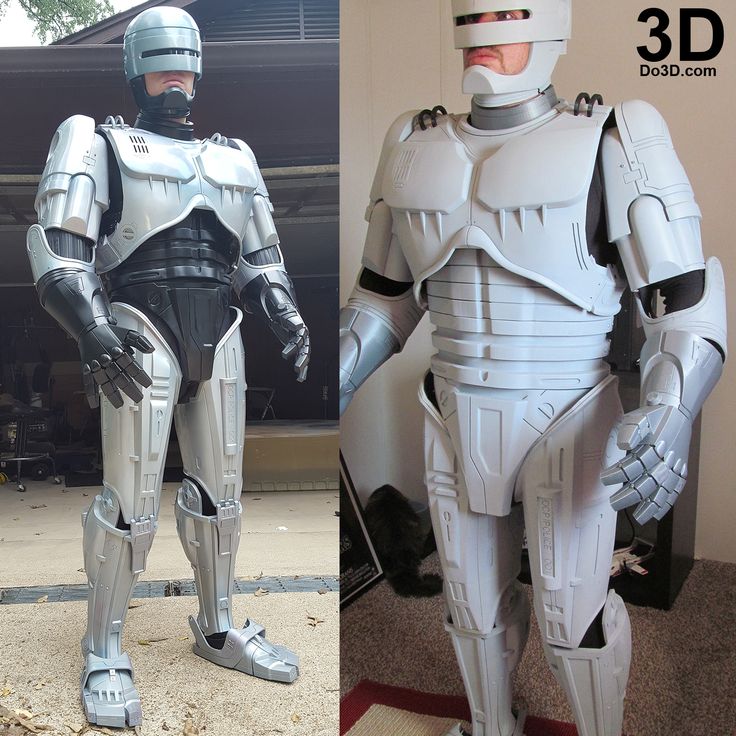
Storm Trooper Armor
You’d be hard-pressed to find a more iconic full-body suit than a Storm Trooper armor, and this particular set pays close attention to detail.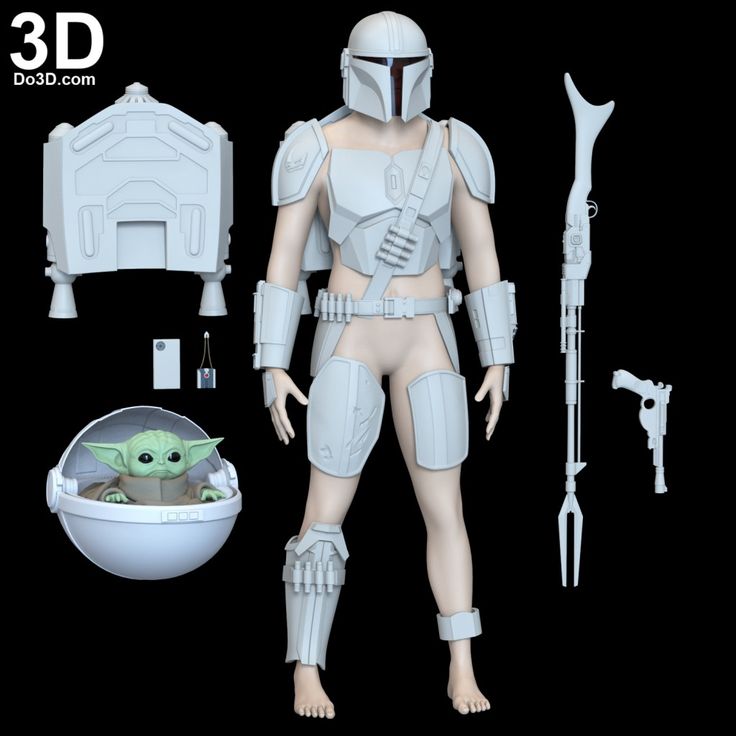 As with any Storm Trooper costume, this one will take quite some time to 3D print and finish since it has full-body coverage. You can expedite the process by using faster 3D print settings, as the armor does not have many fine details.
- Found on: Thingiverse
- Designed by: Matthew Snow
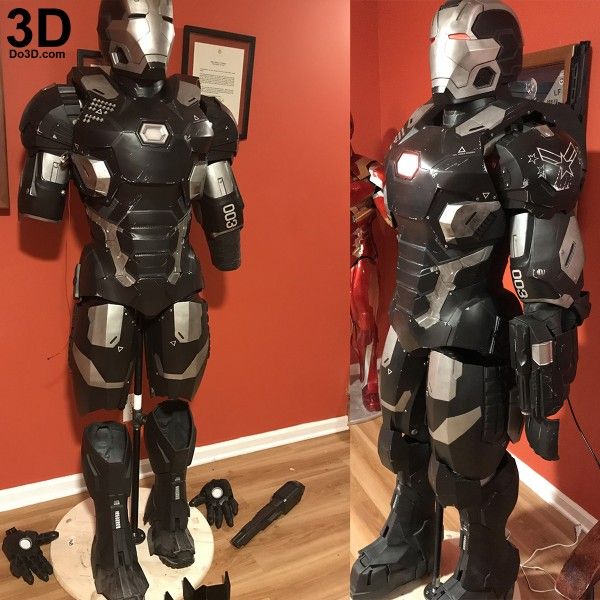
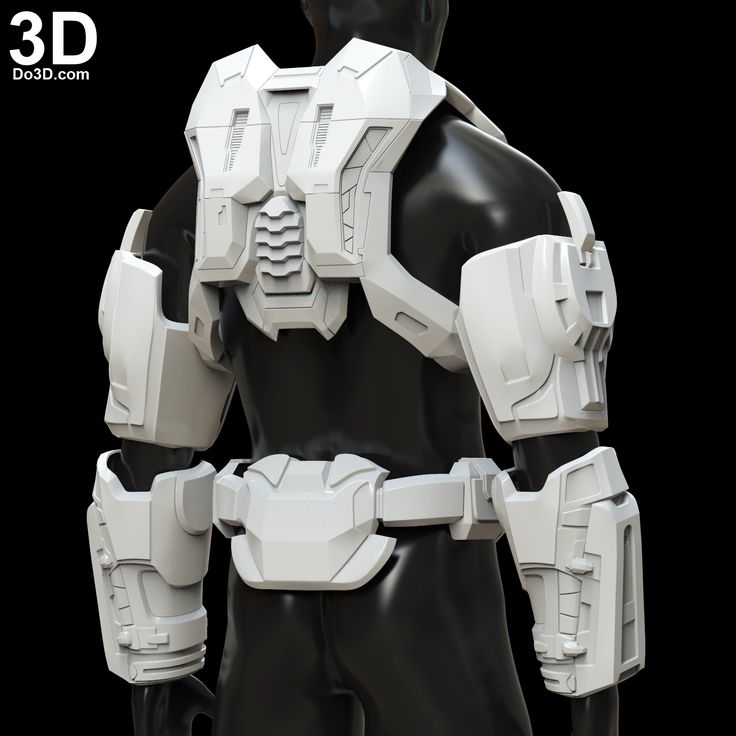
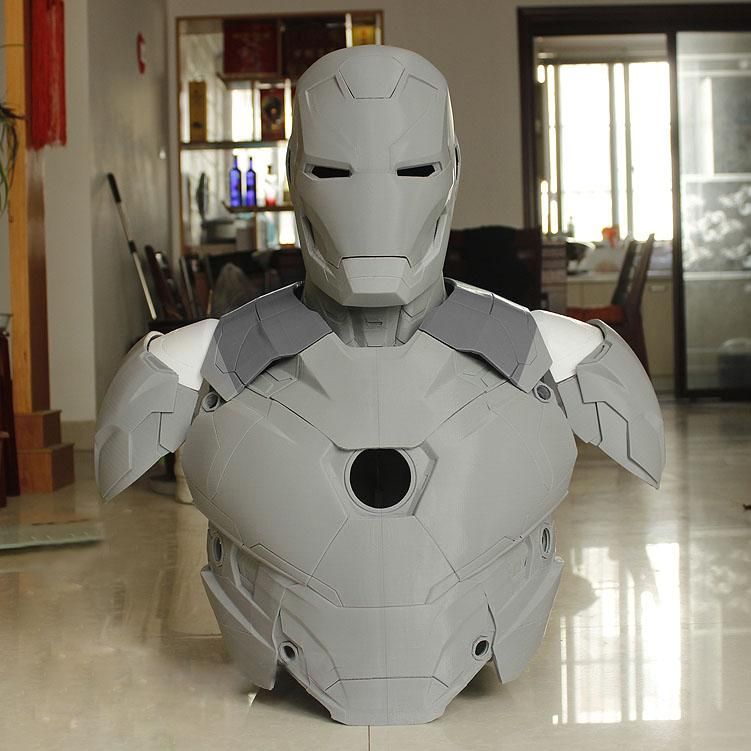
Iron Man Mk 6 Suit
With two sets of files to print either War Machine or the MK 6 Iron Man suit, these 3D printed armor sets are versatile and stunningly detailed. The armor sets are a labor of love to make, especially when you add in the wiring and lighting for the repulsors, but the results speak for themselves.
- Found on: Thingiverse
- Designed by: Steffan Scholtes
Cat Armor
No one should ride into battle without their cat, and thanks to this 3D model, you won’t have to! Designed specifically for your furry companion(s) to wear, this set of armor is made up of several articulated pieces that strap to the cat’s back. This makes it easier to size and fit the armor to different body types and sizes, so you won’t need to worry about measuring or scaling with this project.
- Found on: Cults3D
- Designed by: PrintThatThing
Preparing your armor for 3D printing
Before you can 3D print your armor pieces, there are a few things you’ll need to do first.
Splitting your models
If your armor pieces are too large for your print bed, you will need to split them into multiple pieces and glue them together once they are finished 3D printing. The easiest way to do this is to use the plane cut tool in your favorite 3D printing software. If you are unsure which software to use for this, Autodesk’s MeshMixer, Slic3r, or Netfabb all support the plane cut feature.
For step-by-step instructions for splitting models, we find this video to be of great help:
Generating your GCode
What settings you need to use for your 3D printed armor depends heavily on what 3D printer you have and how you plan to use your finished armor.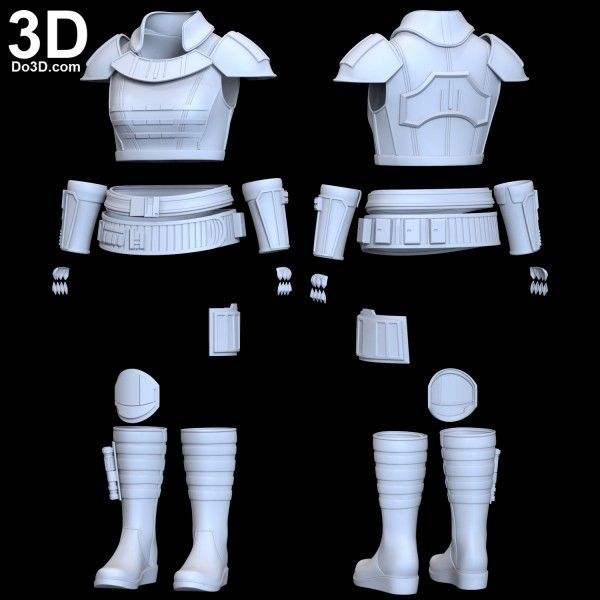 A few things to consider are:
- Infill: How much infill you use can determine how heavy your finished armor will be (especially with larger models) and how much filament your 3D printer will use to print your armor. Less infill means a lighter finished model and less filament used but your armor will be more fragile. More infill means heavier armor and more durability.
For most uses, you can usually get away with a low percentage of infill (10-20%), but it all depends on what type of movements and stress each piece will be under when worn. If you want to optimize for strength, you can also look at using some of the strongest infill patterns. - Wall thickness: Remember that you will most likely have to sand away some of your outer material, so adding an extra outer layer or two can ensure you have extra material to sand away.
- Supports: You may need to use support material to 3D print your armor depending on the shape of the armor pieces.
 You can also use a raft or skirt on your 3D printer bed for better adhesion to the build plate. Those tools are especially useful if the object you are 3D printing is asymmetrical or has narrow first layers.
 - Layer height: Adjusting the layer height will change how quickly your 3D printer prints your armor pieces, but it will also affect your final print resolution. A smaller layer height means your 3D printer will make shorter (and therefore more) layers to make the model, which means greater detail and less visible layer lines. A taller layer height means the opposite, so you will lose detail but spend less time 3D printing. Tall layers are better for large, simple models that you plan to fill in with putty or primer in post-processing (more on that later).
- Temperature/flow/speed: Things like bed and extruder temperature, material flow, and nozzle speed all depend on your 3D printer. Go with the settings you know work well with your machine.
If you’re using models you downloaded from a model-sharing website, the designer sometimes lists what 3D printer, slicer, and settings they used. In those cases, it’s best to at least consider their recommendations when generating GCode in your slicer software.
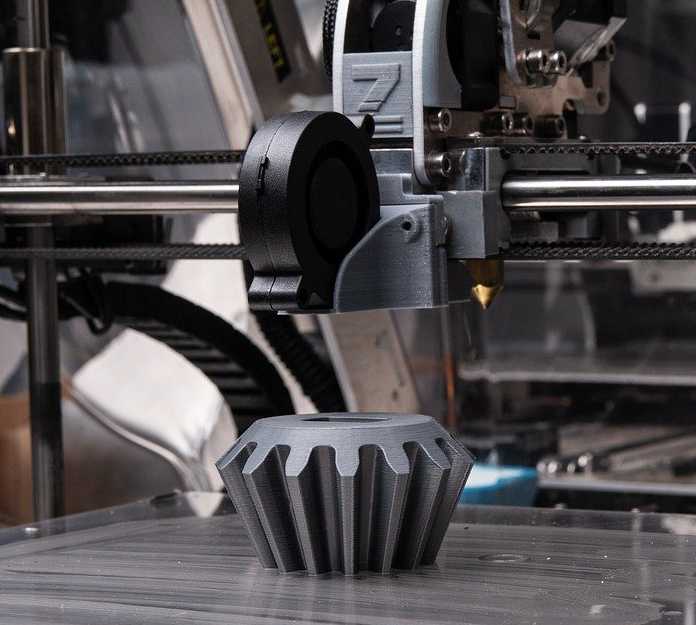
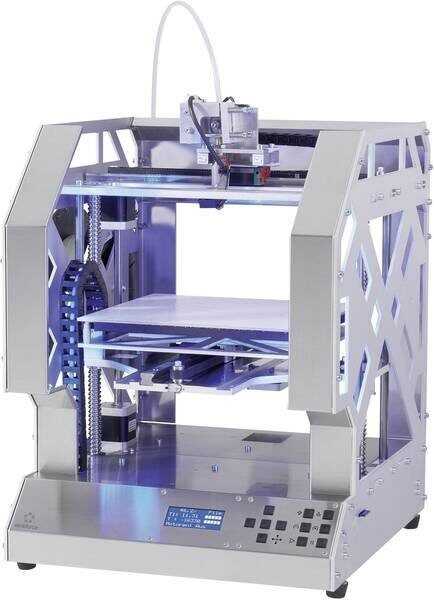
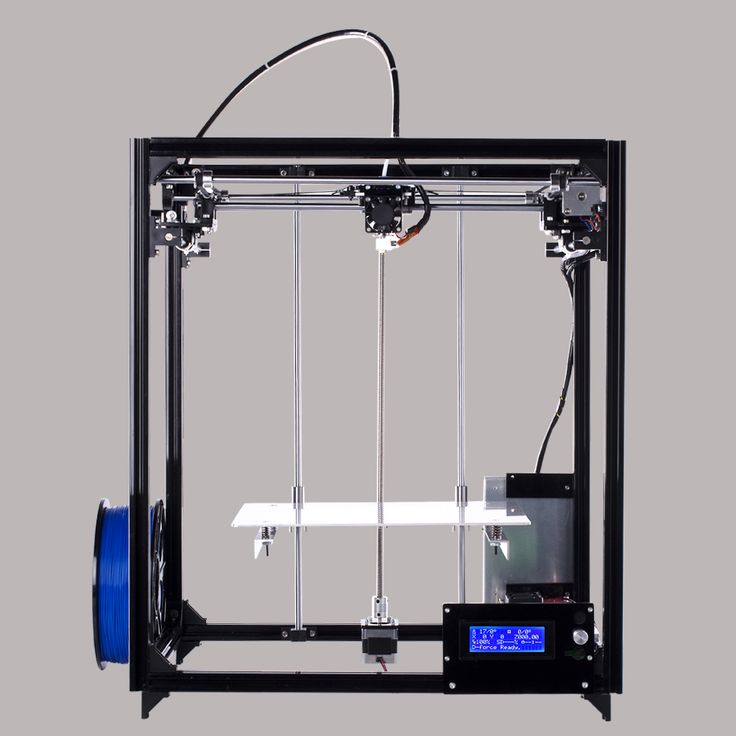
Print your armor
Once your GCode is generated, you can move on to 3D printing your armor. This can be done on almost any 3D printer, but some are better suited to the task than others.
The Prusa i3 MK3S+ is our top choice in printers for creating armor and other cosplay items. It has a large bed, is highly accurate, has advanced mesh auto-leveling, and offers you a choice between purchasing a fully assembled machine or building it from a kit.
If you want to learn more about the Prusa i3 MK3S+ or see our picks for the best 3D printers for cosplay, we have an entire article that you can check out.
Recommended:
The 6 Best 3D Printers for Cosplay
Finish your armor
Your printed armor pieces are most likely going to need a lot of post-processing work.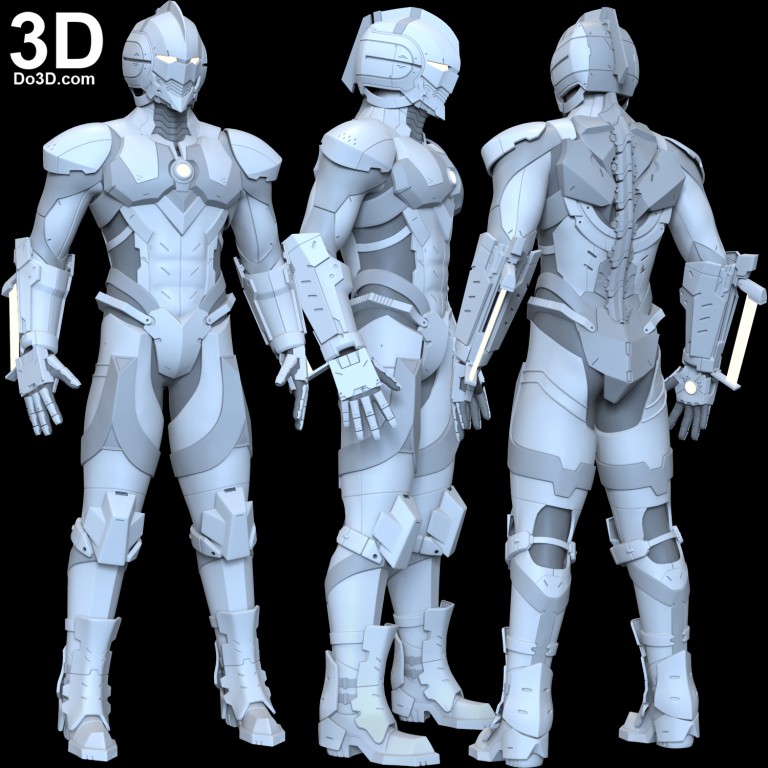 This is especially true if you are using them to cosplay and want them to look as realistic as possible.
Removing supports
If any of your armor pieces needed supports or rafts to print, you’ll need to remove them before you can do anything else. If this is a step you absolutely dread, it may be worth it to invest in a dual extruder 3D printer that supports PVA. It dissolves in water, so you can just run your model under the faucet to break off the supports.
Assembling the pieces
If you split any models to make them fit on a smaller build plate, you will need to assemble them into one piece by gluing them together with super glue, two-part epoxy, or other strong plastic glues. These are a variety of ways to glue 3D prints, and the adhesive you use will depend on the type of filament that you 3D printed in. For more information you can check out our dedicated article on the subject.
Recommended:
How to Glue 3D Prints: The Best Glue for PLA, PETG & ABS
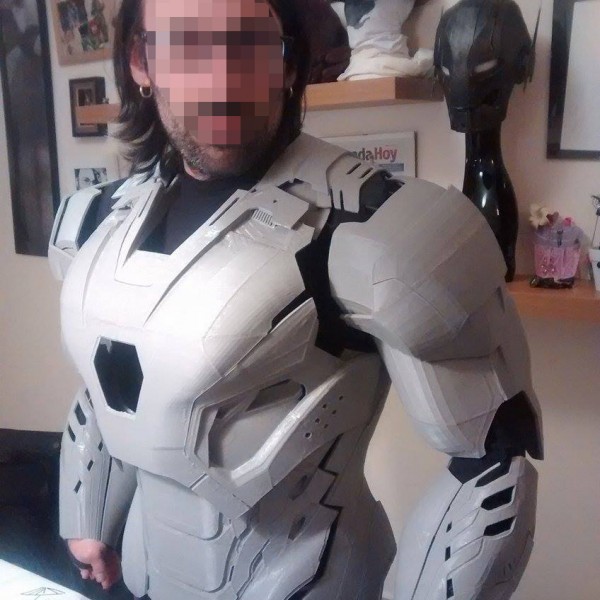
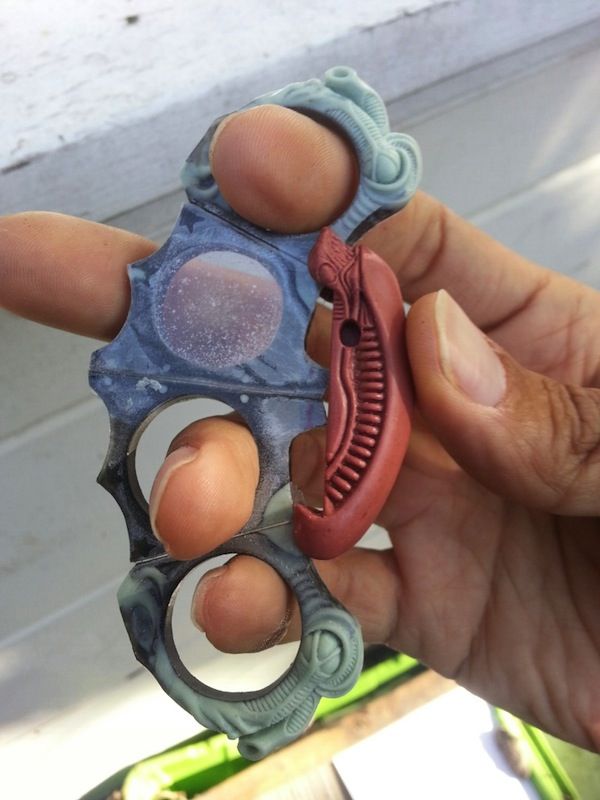
Image: DaDave via Thingiverse
Armor pieces during assemblySanding
Let’s talk about everyone’s least favorite part of post-processing: sanding.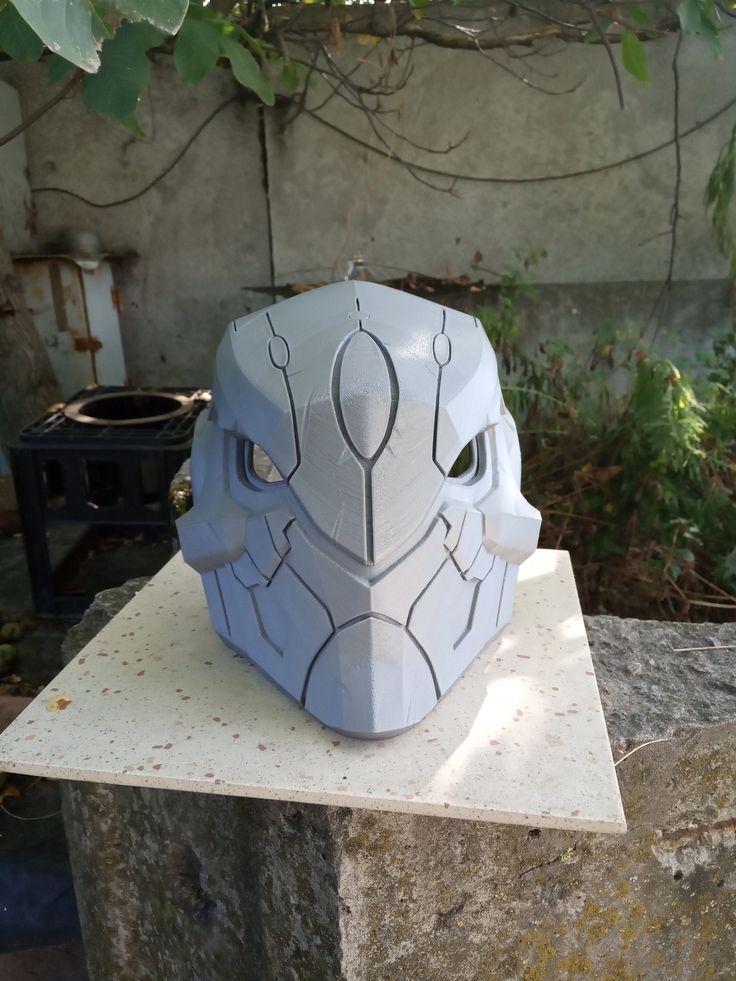 It takes a long time and a lot of elbow grease, but sanding is pretty much a requirement of you want a smooth finish on your armor.
The best way to sand a model is to start with a rough-grit paper like 200 to quickly remove the layer lines, and progressively work your way up to using a fine-grit paper like 2000.
You can cut out some of the initial sanding using something like bondo, wood putty, even resin to fill in the layer lines. Then you just have to sand the filler smooth instead of the actual 3D printed surface.
Recommended:
PLA Smoothing: How to Get Perfectly Smooth PLA 3D Prints
Priming
While some people skip this step, we think it’s a pretty important one. Priming your armor pieces before you paint ensures that you have a good foundation layer for your paint, so you can use less coats to cover your model. You can use a paint and primer combination to ignore this step, but the results vary.
Painting
Once your pieces are smoothed out and primed, you can finally move on to painting them.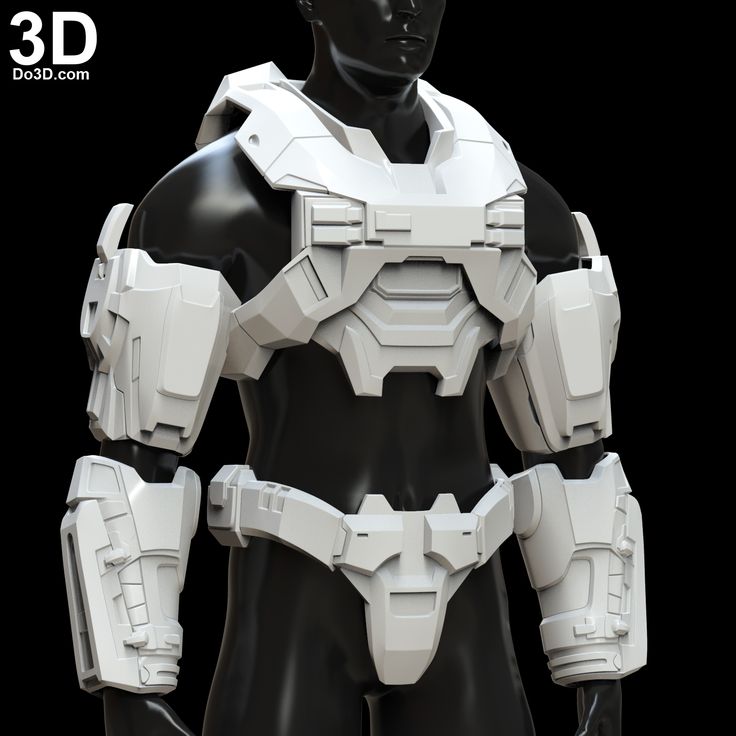 How involved this process is depends on the armor set you’re making and how detailed you want to be.
If your armor doesn’t have any fine details to recreate, you can usually get away with using a can of spray paint to quickly cover your pieces in an even coat. Filigree and other fine detailing has to be done by hand.
You can also use the painting process to make the armor look damaged, rusted, or otherwise less than perfect. This is good if you want to recreate a look from a certain point (like after a specific fight) in a movie, show, or other type of medium.
Conclusion
3D printing a set of armor takes a lot of time and effort, but it is one of the coolest 3D printing projects you can try. If you are thinking of giving it a shot, you might also want to 3D print a helmet to go with it.
Are you planning to design or print your own armor or costume? What questions do you still have about the process? Let us know in the comments.
3d Print Armor - Etsy.
 de
deEtsy is no longer supporting older versions of your web browser in order to ensure that user data remains secure. Please update to the latest version.
Take full advantage of our site features by enabling JavaScript.
Find something memorable, join a community doing good.
( 1,000+ relevant results, with Ads Sellers looking to grow their business and reach more interested buyers can use Etsy’s advertising platform to promote their items. You’ll see ad results based on factors like relevancy, and the amount sellers pay per click. Learn more. )
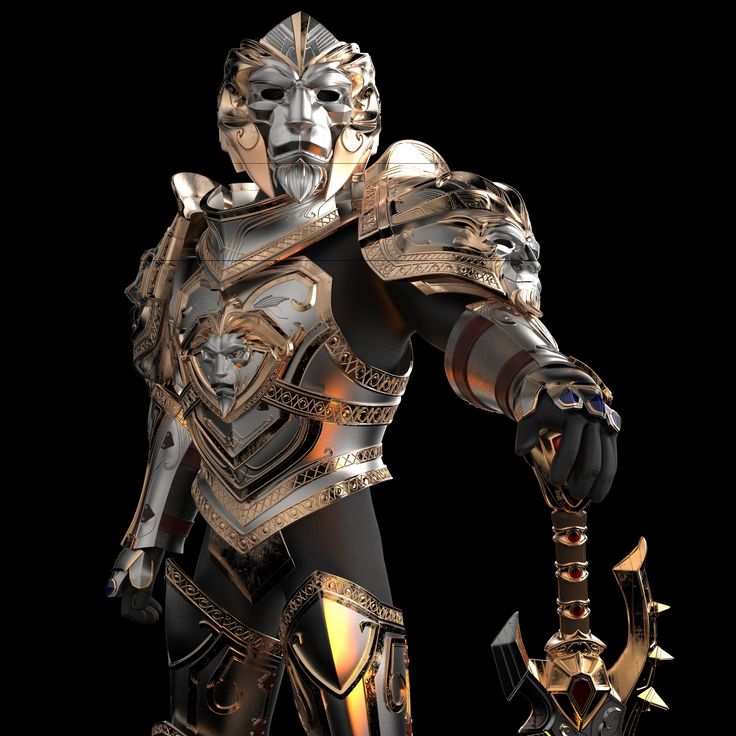
STL file hades Zagreus armor cosplay skull 3d printing・Model download and 3D printing・Cults
Amity Blight Cat Stuff 3D print model owl house
12 €
Owlbert House Eda staff cosplay 3d printable stl model
11 €
valorant yoru mask cosplay 3d print
6,50 €
red cardinal Hunter Staff Owl 3D print model 3D print model
10 €
Killjoy accessories + hacker bracelet.
 3D print for cosplay
 11.75 €
Willow Park Staff - 3D printed model Clover Palisman
9 €
THE OWL HOUSE STAFF COSPLAY Lilith Clawthorne 3D print model
8 €
Robotman mask + arm + sholder
26.97 €
Best 3D printer files in Game category
Deactivated
Secret Lock Book
Free
Pindalu
Free
FUTURAMA 3D: Bender (high detailed) Robot
3.98 €
Hermann Ohme Chess Set
Free
Mecynorhina polyphemus
Free
Neko Robot (ball-joint)
Free
Bestsellers in the Game category
Exolotreftes Truescal
5 €
Mouse in a cheese box
4. 02 €
02 €
Space Dwarves Land Fortress
16.11 €
Champion Alteira
5.03 €
Octopus 2.0
4.02 €
Good flexi dragon
1.77 €
Vodfolk Explorer
10.07 €
Lazy Cat
4.02 €
Dancing Skeleton
3.52 €
Articulated tarantula
4.02 €
Hrafnagud and ROKSS divisions
10.07 €
Emberfolk Fighters
10.07 €
Lev Fu
5.50 €
Cute flexi unicorn
1.05 €
Altair Amberwatch
10.07 €
Short-range artillery for legionnaires
10 €
Do you want to support Cults?
Do you like Cults and want to help us continue our journey on our own ? Please note that we are a small team of 3 people, so it is very easy to support us in maintaining activities and creating future developments. Here are 4 solutions available to everyone:
-
AD: Disable your AdBlock banner blocker and click on our banner ads.
-
AFFILIATION: Shop online with our affiliate links here Amazon.
-
DONATIONS: If you want, you can donate via PayPal here.
-
* INVITE FRIENDS: * Invite your friends, discover the platform and great 3D files shared by the community!
STL file Heimdall's armor cosplay helmet・Template for download and 3D printing・Cults
Black Bolt cosplay
12 €
Mask and helmet with beta rays
5 €
Annihilus helmet cosplay
3,50 €
Robbie Reyes Ghost Rider helmet cosplay
3,50 €
Marvel Watcher Figurine
2 €
Cosmo Space Dog Marvel Action Figure
2 €
Pokemon Trainer Kanto Trio
5. 50 €
50 €
Pokemon figure Noivern
2 €
Jotaro / Star Platinum Jojo Figures
4 €
Kirby Bandana Dee Elfilin Kirby and the Forgotten Land Figure
3 €
Infinity Ultron What If Marvel Figure
2 €
Josuke / Crazy Diamond Jojo Figurine
4 €
Best Files for 3D Printers in the Art Category
Rick and Morty Shrink Head Zanza
€5.52 -25% 4.14 €
Completely black Necro sword and stand for a tree trunk
1,45 €
Zilandal, the Forgotten One
3.50 €
Turtle
9 €
BLACK HAWK HELICOPTER
7,17 €
Vintage Bust of Spiderman
Free
Bath Outlet
Free
Art category bestsellers
Flexi Print-in-Place Foot
1,96 €
Triceratops on flexi printer
2,97 €
Flexi-print Imperial Dragon
3. 98 €
98 €
Cute frog with flexi print
1,96 €
Cute circus baby elephant with flexi print
2,97 €
Articulated bat toy, imprinted body, snap head, cute flexi
3,42 €
SKULL OF A BEARDED PUMPKIN
3,54 €
Cute skeleton with flexi print
2,97 €
Astronaut on flexi printer
2,97 €
Adorable articulated axolotl, imprinted body, snap head, cute flexi
3,42 €
Catacombs Skull of Bones, Creepy Skeleton Skull, Pile of Bones Skull
€4.02
CUTE CROCODILE WITH FLEXIBLE PRINT IN SITE
2.97 €
Bearded dragon toy, body with imprint, head with latch, cute flexi
3,42 €
Baby Crystalwing, Cinderwing3D, articulating Flexi Wiggle Pet, print on site, fantasy
4.