Delta maker 3d printer
DeltaMaker 3D Printer: Change The Way You Look At 3D Printing
Electronics GeekMom Reviews
Dakster Sullivan1
DeltaMaker 2.0 \ Images: DeltaMakerThe DeltaMaker 3D printer has changed the way I look at 3D printing. My previous printer, Creality CR-10 Mini, was a hassle to get assembled, configured, and printing and ended up being more trouble than I had the patience for it. Enter the DeltaMaker, with its easy setup and lack of complicated learning curve.
From the start, I knew this was going to be a different experience because the printer comes fully assembled, configured, and ready to print from the get-go. There are no onboard controls, so everything is done via the web interface.
The DeltaMaker runs off a Raspberry Pi with Octoprint and a built-in Cura Slicer. Once you login to the printer through the built-in hotspot or via ethernet cable, you have the ability to map the bed and level the bed. Leveling the bed is as simple as putting a piece of paper between the bed and the nozzle and clicking a button that tells the printer if it’s too high or too low (you want barely any grip for the right setting). Other than that simple leveling, there’s nothing else to adjust. Woohoo!!
Little hands will be happy to know the bed does not heat up so there’s no worry if someone accidentally touches it out of curiosity.
Let’s get printing!
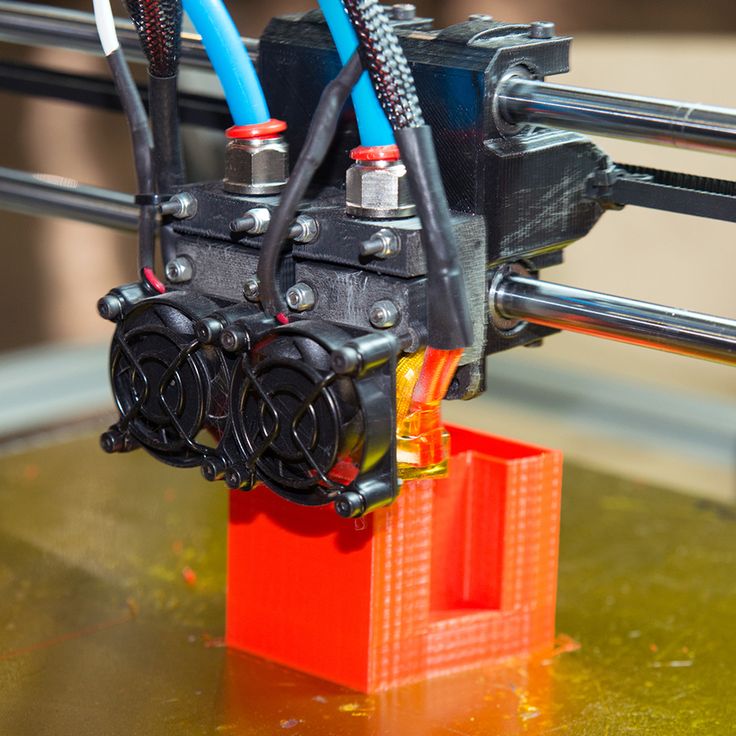
First things first, I had to load the filament. It’s just a matter of pinching a single clip and slipping the filament into the slot and up the tube which leads down to the nozzle. Easy cheesy.
My first print was a Bulbasaur planter. I’ve wanted one ever since I first saw one at Maker Space and it seemed like a good first project. Note to self: check your scaling before printing. My planter ended up not even being able to hold a quarter, let alone a real plant.
I uploaded the STL file to the Cura slicer and sliced it easily. Once completed, it was just a matter of clicking “print” and leaving the rest up to the printer.
Sample Prints \ Image: Dakster SullivanThe printing process went smoothly and rather quickly. With the 360 degrees view, I could see everything that was going on while it was printing and it was almost mesmerizing to watch. The best part was the noise or lack thereof I should say. My DeltaMaker sits less than 50 feet from my bedroom and it was quiet enough I couldn’t hear it at night with my door shut.
How To Classes Available
DeltaMaker is local to Orlando, Florida an offers a host of classes at their main office for the novice to advanced 3D printer hobbyists. Right now they are offering three free classes including Intro to 3D Printing, Intro to 3D Design, Simplify 3D for beginners. There’s also a Simplify 3D advanced class which has a nominal fee.
Specs
- Largest print size – Hexagon shaped bed with 260mm tall, 240mm wide, 22 inches is the tallest print you can manage.
- Availability – Website and Amazon, Cost is $2,649.00
- Support – Printer comes with a 1-year warranty that covers all parts, labor, and any physical upgrade. Extended warranty is available for $350 per year after the 1st year.
- Filament – 1.75 mm PLA only. DeltaMaker filament is recommended but any good brand of PLA filament can be used (Hatchbox is one recommended brand).
- Construction – Aircraft grade aluminum
- Resolution – 100-micron layer
Deltamaker started out as a very successful Kickstarter project and I can see why. It’s easy to use, comes pre-assembled and configured, and it’s so simple I’d have no problems letting my son or even his younger cousins print out their own models. Anyone can use this printer with very little training which to me, makes it the perfect 3D printer for the family.
Disclaimer: GeekMom was given a review sample to use for this post.
Liked it? Take a second to support GeekMom and GeekDad on Patreon!
Tagged Shared to GeekDadGeekMom Masthead
Editor-in-Chief
Jenny Bristol
Publisher
Ken Denmead
Senior Editors
Sophie Brown, Patricia Vollmer, Matt Blum, Z, Jonathan H. Liu
Liu
Core Contributors
Rebecca Angel, Judy Berna, Nivi Engineer, Evil Genius Mum, Marziah Karch, M.J. Kaufmann, Elizabeth MacAndrew, Melanie Meadors, Kali Moulton, Sarah Pinault, Cathé Post, Ruth Suehle, Lisa Tate, Karen Walsh, and Amy Weir
Occasional Contributors
Missy Hayes, Claire Jennings, Jenn Mac, and Andrea Schwalm
Official GeekMom Pet
Fran Wilde
Associate Publishers*
Tim Johnides, Jeff Williams, Dante Lauretta, Magnus Dahlsröm, Jayson Peters, David Michael, Gerry Tolbert, Andrew Smith, Ray Wehrs, Joel Becker, Scott Gaeta, Beth Kee, Joey Mills, talkie_tim, Danny Marquardt, Adam Bruski, John Bain, Bill Moore, Adam Frank, Lacey Hays, Peter Morson, James Needham, Matt Fleming, Adam Anderson, Jim Reynolds, Seiler Hagan, Bryan Wade, Petrov Neutrino, Jay Shapiro
4moms rockaRoo Multi Plush baby swing
The 4moms rockaRoo provides the front to back gliding motion that babies love, in a com. .. [More]
Price: $179.99
Buy Now
Delta 3D Printers | MatterHackers
Technical Specifications
What is 3D Printing?
3D printing is a process where physical, three-dimensional objects are made layer-by-layer from a digital file.
What Types of 3D printing are there?
- Fused Deposition Molding (FDM)
- Stereolithography (SLA)
What is the Best 3D Printer of 2022?
Finding the best 3D printer entirely depends on what you want to make with your 3D printer, and of course, your budget.
Guides & Articles
What is 3D Printing?
3D printing is a process where physical, three-dimensional objects, parts, or models are made layer-by-layer from Computer-Aided Design, or CAD, and digital files.
Anatomy of a 3D Printer
Get an understanding of how 3D printing works, from the inside and out.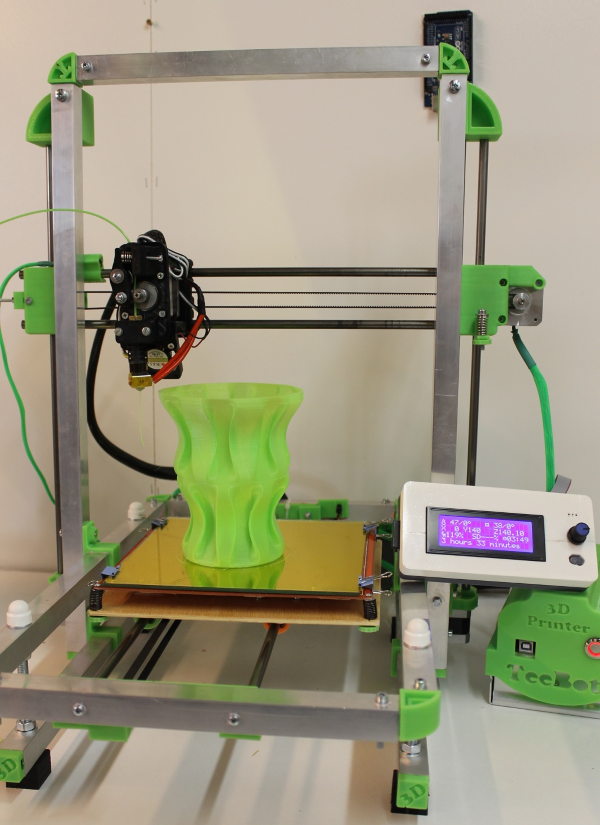 This guide will walk you through each of the critical components of a 3D Printer, answering the question: "How does a 3D printer work?"
The Top Ten Tips For Getting Started With 3D Printing
We were all noobs at one point! Here the ten best tips for getting started with 3D printing - whether it's your first time 3D printing or you need to brush up on the basics, this guide will help you out!
3D Printer Troubleshooting Guide
Use this guide to help you identify and solve the most common issues that may occur while 3D printing.
How To Calibrate Your 3D Printer's Extruder
This quick and informative guide will help you calibrate your extruder perfectly, resulting in accurate, quality prints.
3D Printing 101: How to Succeed with a Perfect First Layer for Every 3D Print
The first layer of your 3D print is the foundation of everything that comes after, which makes it such an important part of the 3D printing process.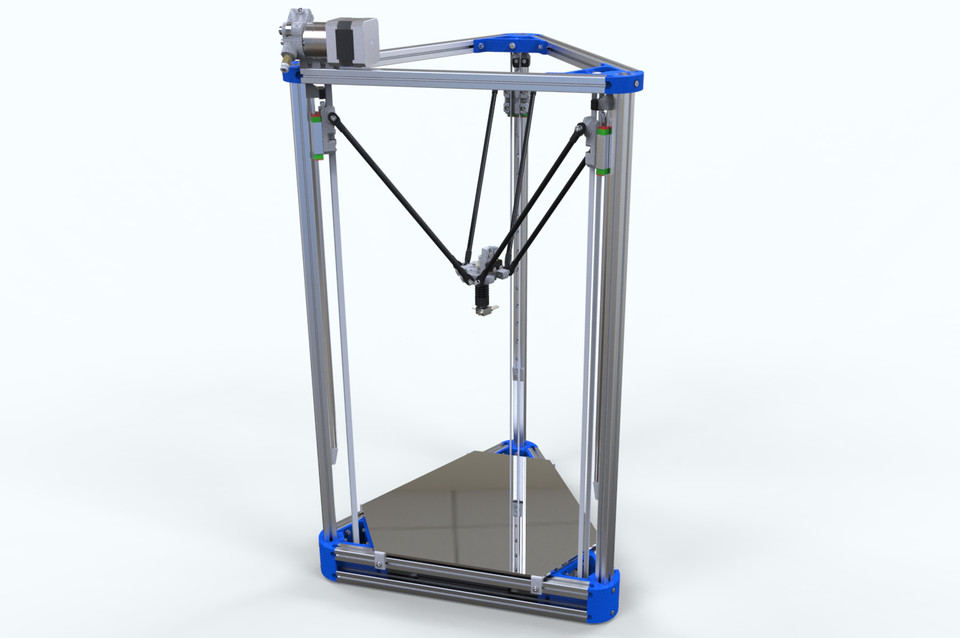
How To Get The Best 3D Printed Parts By Understanding Extrusion Settings
Melting is a critical concept to 3D printing, and yet it hasn’t received a lot of in-depth attention. This article will teach you how to extrude your filament properly so it flows smoothly. Make filament jamming, delamination, and weak parts things of the past.
3D Printing Essentials: How to Succeed with Every Bed Surface Solution
Matching 3D printing filaments with the proper bed surface material is an important part of the 3D printing process. Read more to find out the best path to success.
3D Printing Essentials: Filament Loading
Proper filament loading and unloading is a necessary part of 3D printing without trouble. Read on to learn the essential method you should be following.
3D Printing Essentials: Bed Leveling
For some, levelling a 3D printer's bed can be challenging, but it doesn't need to be.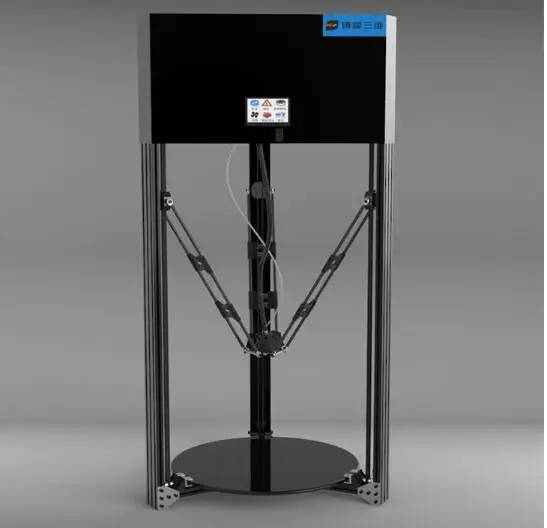 Read this essential guide to see what it takes to do it right.
Quick Tips: How To Get Started With Batch 3D Printing
Utilizing 3D printer time most efficiently is much easier once you start batch printing parts to maintain 3D printer uptime and minimize downtime.
Advantages and disadvantages of delta 3D printers
Among the various designs of 3D printers, the delta system is considered the most successful. Its kinematics has a number of advantages over classical 3D printers with a Cartesian coordinate system. In addition, delta printers look interesting, and the process of their work is simply mesmerizing.
Cartesian 3D Printer Problems and Delta Dominance
80% of all printers are Cartesian. Their axes of movement are independent of each other. Each is responsible only for its own displacement vector, miscalculations for one axis cannot affect the movement of others in any way. nine0003
The problem with Cartesian printers is that it takes too long to travel from point A to point B.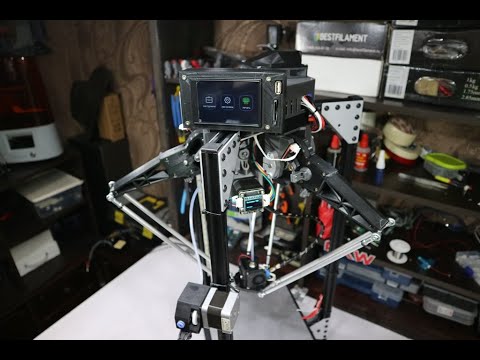 It takes a long time for the system to accelerate and decelerate before the print head reaches its position. As a result, the printing of one part, instead of two hours, can drag on for four.
Of course, you can increase the movement speed, reduce the acceleration and deceleration times by accelerating the stepper motors to higher speeds and adjusting the settings in the firmware. But electronics may not be able to cope with the task, and besides, no one has canceled physics: the parts of the head are too heavy to be accelerated or slowed down at high speeds in time, and therefore the head simply cannot accelerate sharply or stop in time. Engines will have skipping steps, which will inevitably lead to displacement of the layers of the part. nine0003
Delta printers do not have this problem at all. At a low engine speed, the head moves as quickly as possible due to the unique system of rods. With this design, the printer prints at ultra-fast speeds while using far less effort to move the print head.
Pitfalls of delta printers
The movement axes of a delta 3D printer are dependent on each other. A small change in one axis will move the print head in all three directions. To move the head at least in one direction, you need to make calculations using a complex formula, which must take into account the entire design of the printer, the working surface, the length of the rods, the dimensions of the device itself and the backlash. nine0003
If you decide to build your own delta 3D printer, get ready for the fact that the calibration will take weeks. The disadvantage is precisely in the setting, since the slightest backlash or deviation in the geometry of the structure will cause serious distortion of the part when printed.
Another drawback of the delta is its height dimensions. In addition to the selected area for printing, part of the printer's volume is needed to move the head itself.
A few words about the electronics of the Delta 3D printer
Since the delta printer uses complex formulas, you will have to worry about a good controller when building it.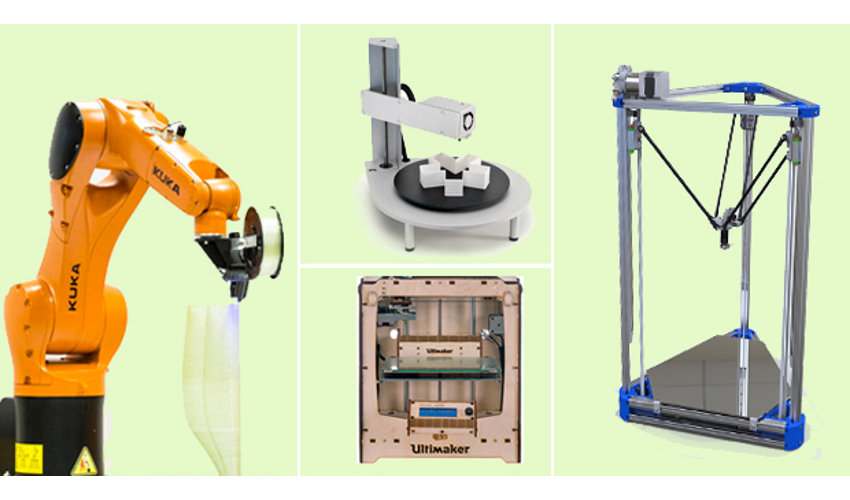 For such a printer, it is desirable to have a 32-bit board. If you take the usual 8-bit, you may have problems moving over long distances. Computation resources will be sorely lacking, and the head will move not along a straight line, but along an arcuate path. In addition, it is worth worrying about the exact calibration of the delta 3D printer - we already talked about how to do it earlier. nine0003
Despite all the shortcomings, the delta design is considered the most successful. If you make the geometry correctly, minimize backlash and install good electronics, you will enjoy your homemade printer for a very long time.
Types of tables for 3D printer
Contents
-
- Print platform materials
- Heated table
- Non-heated table.
- Tabletop
- Types of calibration
- Automatic calibration
- Manual calibration
- Calibration of the 3D printer table with Cartesian kinematics
- Calibration of the delta printer table
- Total
The correct calibration of the 3D printer bed, or as it is also called Hot Bed, is very important. - Print platform materials
-
Heat up the table and nozzle. When heated, the metal expands slightly, so the gap between the printing platform and the nozzle may differ between the “hot” and “cold” ones. nine0003
-
Through the printer menu, send the table and extruder to the "home" or zero position in all axes. Usually the zero point is the near left corner of the extruder and the top position of the print platform. Be sure to make sure that the 3D printer does not rest the nozzle on the table and does not damage it. If this is the first calibration, use the nuts to lower the table as low as possible.

-
Through the printer menu or manually (for this you need to turn off the motors through the menu), move the extruder so that the nozzle is above the adjusting screw. nine0003
-
Use a feeler gauge and adjusting screw to set the gap between the print bed and the nozzle.
-
Repeat all steps for all calibration screws. Usually there are 3 or 4 screws.
-
After aligning the plane above the screws, move the extruder to the center and check the gap. If the gap matches the feeler gauge, then the table plane and platform distance are correctly calibrated. nine0003
 The first layer is like a foundation for a house, if the foundation is fragile, then the house will not stand for a long time.
 If the plane of the printed surface is uneven, then the model may be partially peeled off or deformed. The first layer may not stick to the printing platform at all, and the result of many hours of printing will not be a neat 3D model, but plastic noodles. nine0003
Print failure example
Therefore, it is very important to properly calibrate the table. Printing platforms can be conditionally divided into two types - adjustable and not.
The adjustable table is attached to the printer with spring-loaded screws. It is not rigidly fixed in height and with the help of screws it is possible to calibrate the plane and the gap between the 3D printer table and the nozzle.
Adjusting screw
Unregulated is a printing platform that is rigidly fixed to the printer body.
This solution is used in delta printers. Calibrate them only programmatically.
Non-adjustable delta printer table
Print platform materials
The material from which the table is made may vary depending on whether the table is heated or not. nine0003
Heated table
There are several types of heating elements for a 3D printer platform - aluminum, textolite, silicone and kapton. Each of them has its pros and cons.
Textolite heater - inexpensive, but fragile and can be strongly bent when heated.
Silicone heater - can not be used alone. Usually used in conjunction with a metal base. nine0003
An aluminum table is expensive, but it heats up more evenly and is less subject to thermal deformation than other platforms.
The Kapton heater is very expensive and cannot be used on its own. Usually glued to a metal base. Can be heated up to 200 degrees.
Types of heated printing surfaces
Most often, an aluminum heating table or a silicone heating pad is used in conjunction with an aluminum plate.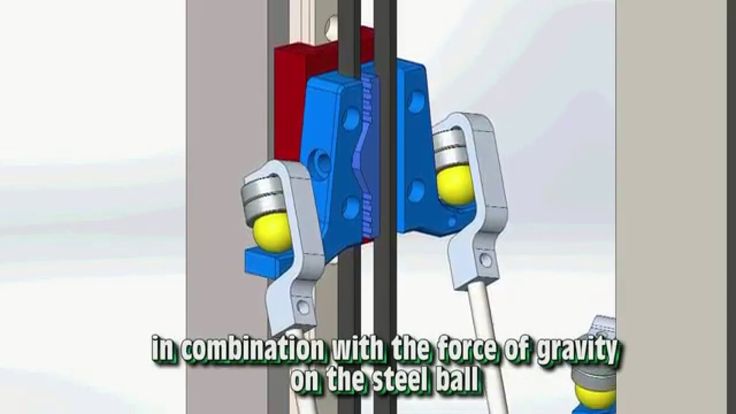 Low price, ease of processing and high thermal conductivity make aluminum the most popular material for the manufacture of heated printing tables. nine0003
The main advantage of heating the printed surface is to increase the adhesion (adhesion) of the first layer of plastic. If the printer is with a closed case and a heated platform, a “passive thermal chamber” is created inside. Due to this, plastics with high shrinkage do not crack in layers during printing, the adhesion of layers (interlayer adhesion) increases, and internal stress is more evenly distributed during cooling.
But there are also disadvantages - when heated, the metal table expands a little, and since it has nowhere to expand, it begins to bend. For a printing platform up to 200x200 in size, deformation will not be very critical, but for larger tables this becomes a tangible problem. nine0003
Each manufacturer of 3D printers with a large printable area solves the problem of deformation of the metal table in its own way.
For example, in Raise 3D, the table is fixed along the entire plane with pins at 13 points.
Heated table fixing Raise 3D
Table without heating.
An unheated printable surface is often used in 3D printers designed to work only with PLA and other low temperature plastics. For example - printers for children or large printers with an open case. nine0003
An unheated printable surface is often used in 3D printers designed to work only with PLA and other low temperature plastics. For example - printers for children or large printers with an open case.
Acrylic Printer for Children
Tables without heating are made of aluminum or acrylic. If the table is aluminum, then glass or any other coating should be used on top. Aluminum is a soft metal and even a brass nozzle can scratch or damage it if not properly adjusted. nine0075
Heating table with aluminum base and mirror
Acrylic tables are often used in inexpensive 3D printers designed for kids. Acrylic is difficult to damage or break. You can print on an acrylic table without glass or other coating.
Free Shipping
Add to compare
Product added to compare Go nine0003
| Manufacturer | Raise3D |
Add to compare
Product added to compare Go
| Manufacturer | Raise3D |
Add to compare
Product added to compare Go
| Manufacturer | Raise3D |
Free Shipping
Add to compare
Product added to compare Go
| Manufacturer | Flash Forge |
Tabletop
In order for the first layer to adhere to the table tightly, different surfaces are used that increase adhesion. It is more convenient to remove the model from the removable surface. If you need to immediately start printing another model, you can simply quickly change from one removable surface to another.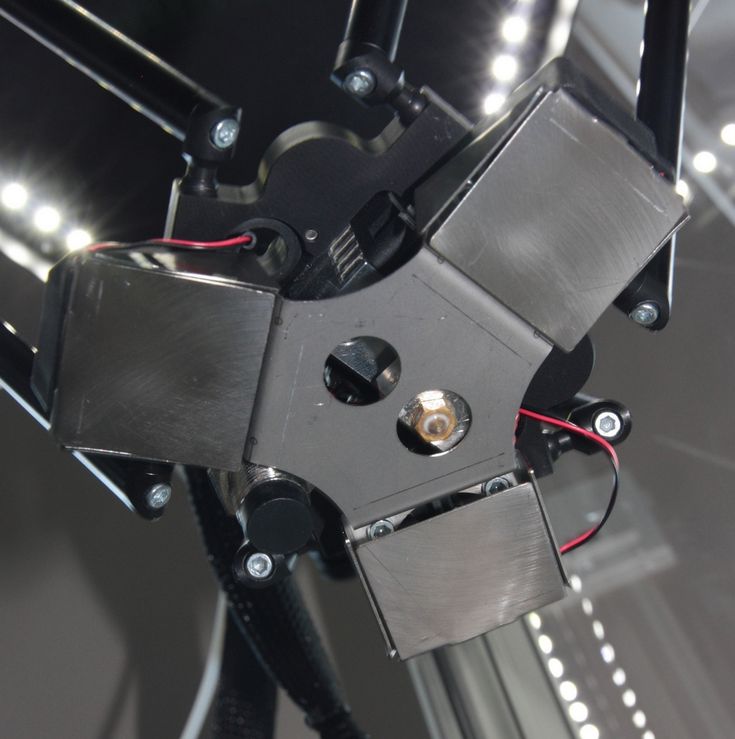 nine0003
The most popular table surface is the regular tempered glass or mirror. It is not expensive and available. It is believed that the accuracy class of the mirror is higher, but for small working areas (up to 200x200 mm), ordinary tempered glass is enough.
Glass itself does not hold the first layer well, so various adhesives or stickers are used to increase adhesion.
Ordinary glass can burst from a temperature difference or “crumble”, then the model comes off along with pieces of glass. Good thing it's easy to replace. nine0097
A piece of glass came off with model
Sitall glass - in fact, it is ordinary glass with the addition of boron oxide. This makes it stronger than ordinary glass and resistant to temperature changes. But the cost of such glass is much higher than ordinary or tempered glass.
Sitall glass
Perforated table - mainly used for printing ABS plastic.
Thanks to the perforation, the plastic adheres firmly to the print platform. In order for the bottom of the model to turn out to be even in the slicer settings, you need to enable printing on a raft (substrate). nine0003
Perforated table used in UP printers!
Stickers - There is a huge variety of stickers for printing platforms. It can be either ordinary masking tape or a specialized surface (rough with an adhesive surface).
The finished model is easier to remove from a flexible substrate than, for example, from glass. With some substrates, the model can be easily removed after the printing platform has cooled down. For some, you need to heat the table and only then tear off the model. nine0003
Separately, you can select a variety of compositions that are applied to the surface of the printing platform to increase the adhesion of the first layers. 3D varnishes, 3D adhesives, etc.
Probably every 3D maker has his own special recipe for the same composition that almost everything sticks to. It can be BF glue mixed with a solvent or alcohol, ABS diluted in acetone, kvass with sugar, glue stick, etc.
Do not spray varnish or other sprays inside the printer. Glue particles can settle on mechanisms, fans, and even get on electronics. This can lead to damage to the 3D printer. Simply remove the platen surface from the printer and apply the adhesive. nine0003
Add to compare
Item added to compare Go
Manufacturer Raise3D Add to compare
Product added to compare Go
Manufacturer Flash Forge Add to Compare
Product added to compare Go
Manufacturer Flash Forge Calibration types
In addition to choosing the surface of the print platform, it is important to correctly level the plane of the table and set the correct gap between the table and the nozzle.
Calibration can be automatic or manual.
Printers with large print surfaces, such as the Raise 3D Pro 2 and Pro 2 Plus, are calibrated at the factory. The user only needs to check the gap between the table and the nozzle, because it may go astray during transportation. nine0003
Automatic calibration
Automatic calibration is performed using a sensor (optical or contact), which is mounted next to the extruder. The printer checks several points on the print platform one by one and remembers the values. The first layer will be printed correct for the curvature of the table.
You can meet the calibration using a conductive substrate that is placed instead of the printed surface. This method is rare, but still has a place to be. It is commonly used to calibrate 3D printers with delta or delta robot kinematics. nine0003
Automatic calibration allows you to quickly and effortlessly level the table. It becomes especially indispensable for printers with delta or delta robot kinematics.
Optical sensors "do not see" glass, so for printers with an optical sensor, it is better to use other surfaces of the print platform.
Some printer models have a menu with hints to help you properly set the platform plane and gap. It is enough to launch the “assistant” and follow the instructions on the screen. This is not exactly automatic calibration, but with such help it becomes much easier for a beginner to correctly calibrate the table. nine0003
An example of a 3D printer with automatic calibration is Raise E2. The Raise E2 extruder has a contact sensor to determine the distance between the nozzle and the printed surface. The resulting values help to correct the print height of the first layer. You can calibrate not the entire table, but only the area on which the model will be located.
Manual calibration
Manual calibration is when the user sets the plane of the table and the gap between the table and the nozzle himself.
To do this, under the printing platform there are screws or winglets with which you can adjust the height of the printing platform. nine0003
Calibration screws
The standard gap between the platform and the nozzle, for most printers, should be - 0.1-0.2mm. If there is no set of probes at hand, a standard A4 sheet folded in half can replace it. Before calibration, the print surface (if it is heated) and the nozzle must be heated.
Sometimes manufacturers of 3D printers recommend a gap between the table and the nozzle - 0. Therefore, read the instructions before calibrating. nine0003
We will consider the calibration of the two most common kinematics - Cartesian and delta.
Cartesian kinematics is based on the Cartesian coordinate system and the movement of the 3D printer's head along the x, y, z axes.
Printer example with Cartesian kinematics
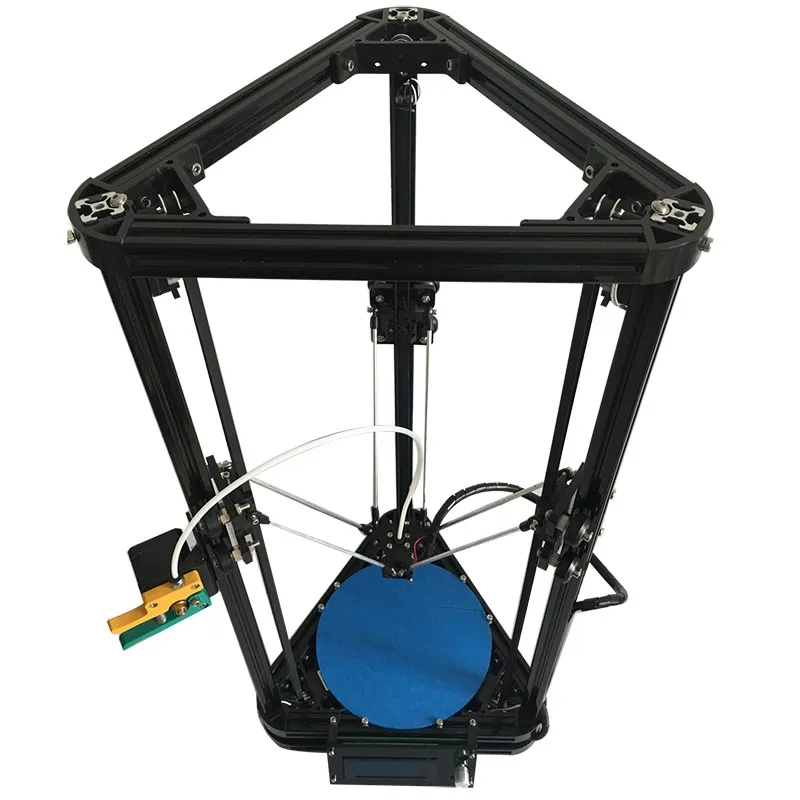
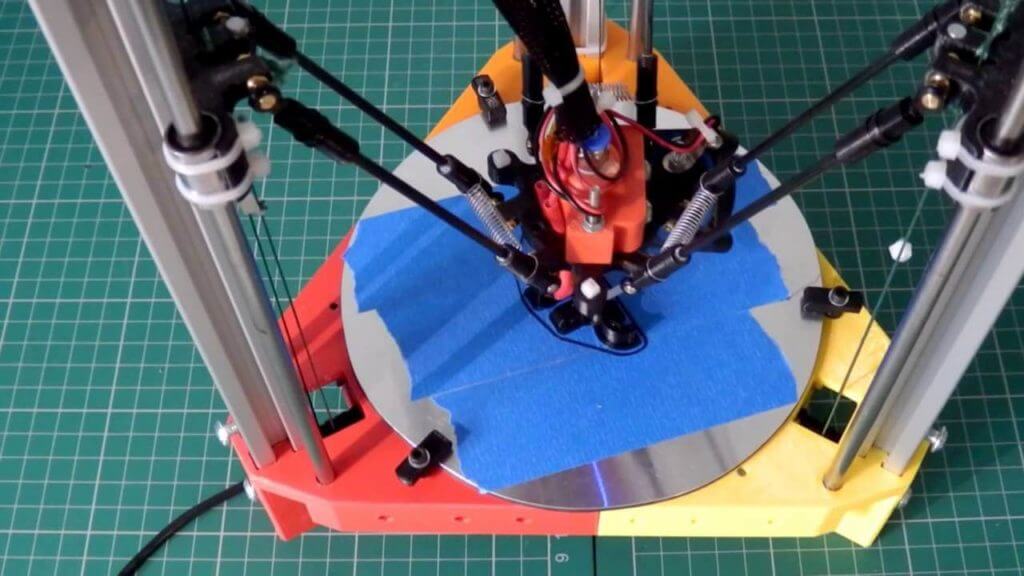
In deltas, the extruder moves along 3 identical axes using carriages moving along vertical guides.
The delta printer can be called a simplified delta robot, but these are still two different kinematics. nine0003
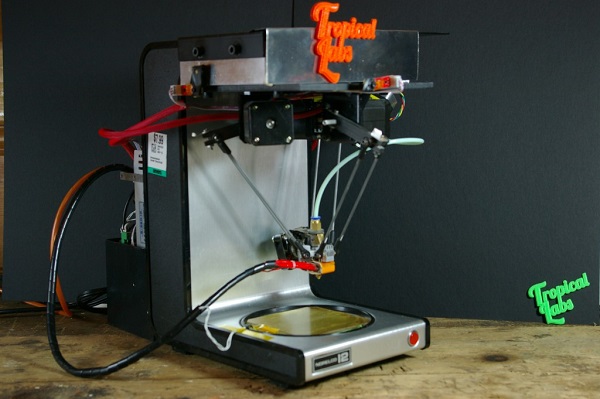
Example of a printer with delta kinematics
3D printer table calibration with Cartesian kinematics
Different manufacturers may have slightly different calibration instructions. We will consider here the calibration of the printer with standard kinematics.
Delta printer table calibration
Calibrating a delta printer is a very large topic, so here we will only describe the general principles.
The delta printer does not have the x, y and z axes we are used to. Instead, the delta printer has 3 towers - A, B, C, on which the carriages move.
Since the delta table is static, it is calibrated programmatically.
The gap is calibrated by 3 points (at the columns) and the lens (center) of the table. The lens can be concave or convex. nine0003
Before calibration, check the mechanics of the printer - the belts must be tensioned evenly, there must be no play in the carriages and the effector (the plate to which the extruder is attached). If the belts are loose or uneven, it will be problematic to calibrate the printer.
Some 3D makers check belt tension with a tuner. Evenly tensioned belts will sound the same, but the correct “note” is found empirically. nine0003
There are a huge number of programs for delta calibration, but one of two is usually used - Pronterface or Repetier-Host. Using them, you can directly access the printer using special commands and change the values in the firmware.
As auxiliary programs, you can use a virtual calculator and from there transfer the values \u200b\u200binto the firmware or download the finished GCode.
They need to specify the parameters of your printer - firmware (usually Marlin or Repetier), diagonal length, circumference, etc. These parameters can be taken from the firmware or measured with a caliper. It is important to specify all the parameters as accurately as possible, otherwise the printer will not be able to calibrate. nine0003
First, 3 points are aligned at towers A, B, C, and only then the lens in the center of the table is corrected.
Manual delta calibration is tricky, but it doesn't have to be repeated often. Typically, the printer only needs to be recalibrated after some mechanical parts, belts, or print bed cover have been replaced.
Totals
The calibration process may seem tedious and complicated, but in fact, once you do it yourself, the process will no longer seem so intimidating. In addition, most manufacturers try to help novice users and equip their printers with auto-calibration sensors or try to simplify this process as much as possible with detailed menu prompts.
Learn more