Cube 3d printer power supply
Cube 3D Printer Review 2022
3.5
See Price
Since the popularization of 3D printers, and give the inherent difficulty of 3D printing, there’s been demand for affordable, easy to use models that work out of the box.
3D Systems and the widely popularized Cube 3D printer strive to plug that gap. Does it live up the hype? Let’s investigate as we pull apart the secret inner workings of the most stylish printer on the market.
| Printing Area | 152x152x152mm |
| Print Tech | Plastic Jet Printing |
| Supported Filament | ABS and PLA |
| Extruders | 2 |
| Layer Thickness | 70 microns and 200 microns |
Table of ContentsShow
Design
3D Systems is onto its third generation of the Cube with all the enhancements this encompasses. An all-in-one cube casing houses the printer, hence the name, and is advertised primarily as a user-friendly personal desktop model. With simplicity in mind, it aims to introduce first-timers to the world of 3D printing without the oft-complicated installation of entry-level DIY models.
Straight out of the box, the Cube is a piece of engineering bliss. Aesthetically pleasing, compact, classy, and dare we say, beautiful, it resembles a product distributed by Apple, where functionality and ease of use are as much a consideration as design.
The sleek white exterior panels are miles away from the functional, bare-bones design of plenty rival models. So much so that the Cube is very much at home sitting alongside other home office devices rather than confined to a workshop. The self-contained shell means keeping track of diverse components isn’t a factor.
The print area is a modest 152x152x152mm, providing enough working space for most small scale projects, especially for beginners trying their hand at 3D printing for the first time. With both 0.2mm and 0.07mm (200 and 70 microns) print resolution layers, the Cube offers a degree of versatility, but not enough to cater for a large variety of print projects.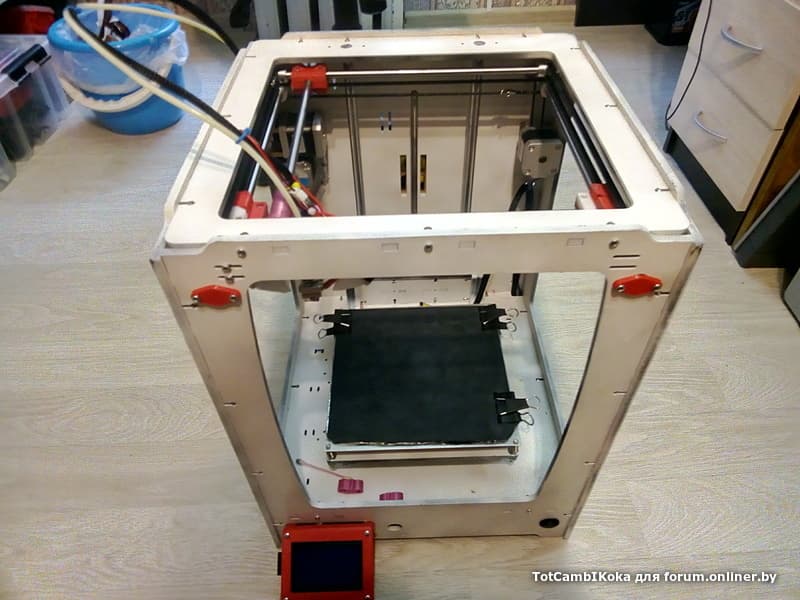
The print head ensures the X-axis, while the PrintPad (read build plate) manages the Y and Z axis. The PrintPad is removable for easy cleaning in hot soapy water. Every print job requires the application of Cube Glue, a weak adhesive produced by 3D Systems that assists the printed filament to solidly in place on the build plate. It takes some practice to apply the appropriate amount, and you need to wait for it to dry enough or suffer the consequences as we did.
The Cube sports dual extruders for simultaneous double color or material prints housed in out of sight purpose-built plastic casings that sit inside the vertical outer side panels. ABS and PLA are the only supported materials, and the Cube only works with 3D Systems proprietary filament Smart Cartridges that come in a selection of twenty-three colors.
These are significantly more expensive than generic filament bought from a hobbyist retailer, which was a big con for us when assessing the Cube 3D printer. These materials are of a higher quality, ostensibly, to justify the higher cost. To give 3D Systems its due, the ABS provided is recyclable, while the PLA is compostable, which softens the blow for the environmentally conscious maker. The company also asks users to ship back empty cartridges for recycling.
Each cartridge includes its own integrated, snap-in nozzle, which it must be said, is incredibly simple to install and, in theory, foregoes the need to battle with removing debris and build up from the extruders every time. Two cartridges come as standard with each new device.
Connectivity through a USB port mounted on the bottom of the side casing (the package includes a USB flash drive) and a WiFi connection allowing the user to trigger prints from their computer or via a flash drive, gives options.
3D Systems have even designed a dedicated Cubify mobile app for both Android and iOS (plus MacOS and Windows through the Cubify software) packed with printing ideas, blueprints, and guides. The software converts into the required file type and forwards the instructions to the printer.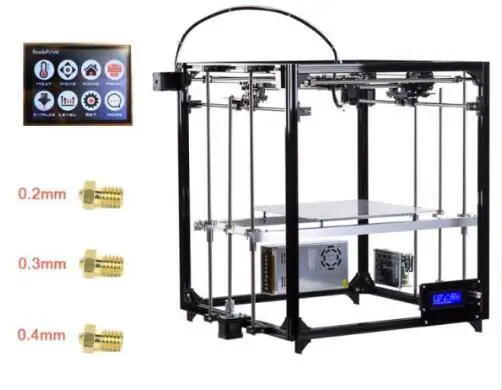 It cannot be used to design prints though.
The user interface, we love. Inviting and perfectly intuitive, it’s hard to go wrong using the in-built 2.5” color touch screen LCD. Beginners should find getting around the settings and options a breeze. Indicators such as how much material is left are welcome additions for users who might not have yet developed the skills to gauge how much filament a project requires.
Printing
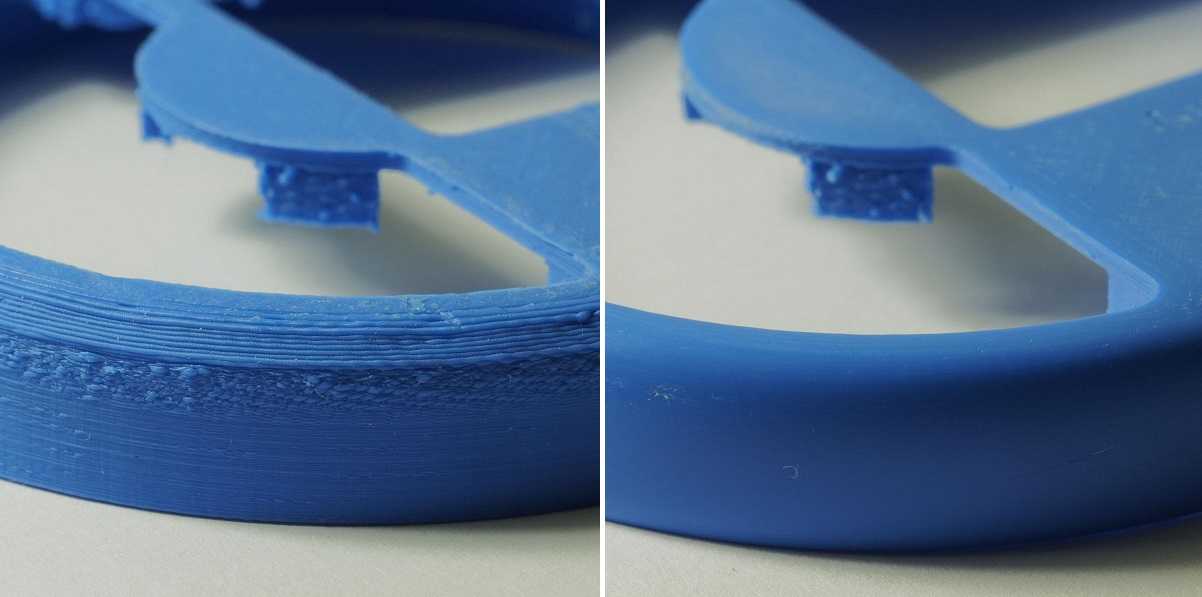
For a 3D printer touted as an out of the box solution, the printing process was hit or miss. The first few prints went well, especially for smaller prints. The results were generally error-free and full of detail with smooth contours and layers with few flaws. Ghosting was all but absent.
However, the Cube starts to struggle with larger projects that more often than not end in a bundle of filament only good for the landfill. The waste is especially hard to stomach given the exorbitant cost of the cartridges. The Cube Glue did little to fix the issue but works well for smaller prints.
Overall, the Cube is ideally suited to small jobs and is relatively economical with the material when it works correctly. From what we can gather, the lack of a heated plate, and the fact the software didn’t factor in the need for supports worked to the detriment of larger prints that require stability and uniform heat distribution as vertical layers build up.
The Cube is loud, to the point that it can become an annoyance by reverberating into adjacent rooms. For such a little machine, the noise is disproportionate possibly due to clanks bouncing off the casing.
Where our opinion of the Cube shifted drastically was when we encountered systematic jamming in the jet on the print head. The problem appeared to happen after only a handful of jobs using a brand new cartridge. Either the filament reacts badly to being exposed and goes brittle, or warehouse storage is conducive to the chemical properties of the plastic to harden more than necessary while sitting in the cartridge. It was hard to tell.
Regardless, we have here a serious design flaw; feeding the filament through a tube doesn’t work well. Once a jam occurs, the nozzle does nothing but churn the plastic into a clumpy mess. If it isn’t a jam, the filament breaks inside the cartridge. There’s not much that can be done other than load in a replacement.
Speed wise, the Cube isn’t remarkable and gets the job done within acceptable limits.
Small prints can take anywhere from four to ten hours depending on the size, while bigger jobs were a bust most of the time, so we were never able to finish them to know how long the process takes.
Assembly
The Cube comes pre-assembled and only requires the user to install the cartridges, a straightforward procedure. The Cube is packaged well and comes with a quick start manual, USB key, cabling, glue, spatula, plyers, power supply, and the printer itself.
The Cube self-calibrates by make sure the build plate is perfectly level and at the right distance from the print head via a set of magnets under the plate, although the device asks the user to tweak the plastic circular knobs below the plate as required.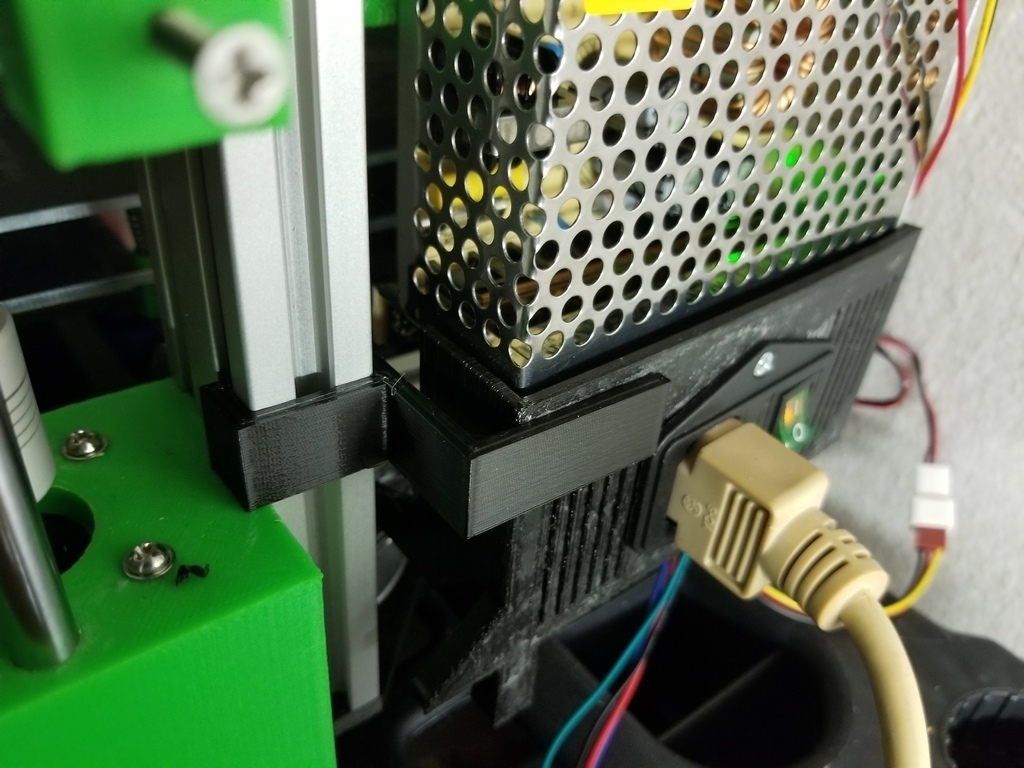 The instructions are straightforward and won’t daunt even the most unversed user.
That aside, the Cube allows you to be up and printing within 45 minutes after unboxing the device, unheard of for printers in this price range where hours of assembly are the name of the game.
Support
3D Systems has discontinued the Cube, and the model is no longer in production, arguably due to lackluster reviews caused by the filament jamming issue.
As a consequence, the Cube is now available at a fraction of the cost of its initial retail price, around the $1000 mark. You can pick one up for around $200-$300 on Amazon, if not less. 3D Systems continues to sell cartridges for the time being, although third-party manufacturers have popped up selling them at a fraction of the cost.
Support wise, 3D Systems offers a 90-day warranty for parts and labor, but no refunds whatsoever due to discontinuing the product. Specific resellers may offer different refund policies.
3D Systems has a robust after-sales support service with a dedicated phone team that can help with the jamming issue by walking through a variety of detailed fixes. They’ll also walk through updating the Cubify software to the latest firmware which helps with printing problems to a certain degree. Alongside are forums, guides, and articles about getting the most out of the Cube.
Verdict
The Cube isn’t a bad printer overall and produces some quality results for smaller projects. The design is the model’s strongest asset, and it’s hard to find fault with the look, feel, and ease of use (bar the jamming issue).
At a much-reduced price, the Cube is an ideal no-nonsense first time 3D printer for those who want to experience the joys of printing without the hassle and tinkering of similarly priced DIY equivalents. The dual extruder setup is also a bargain.
The cartridges are a downside, but if you buy them from a third-party, the costs are more palatable. There’s also a DIY fix for the jamming problem, which isn’t particularly difficult to perform and is an excellent way to introduce a beginner to the modification aspect of the hobby.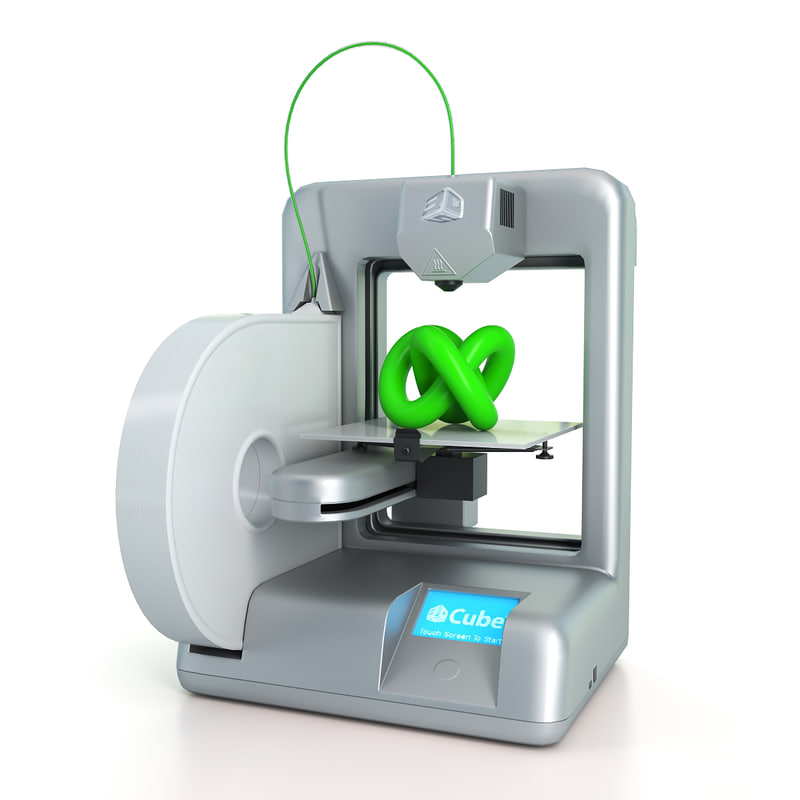
The Cube isn’t ideal, but its hard to argue with for the bargain price.
EKOCYCLE CUBE USER MANUAL Pdf Download
Table Of Contents
2-
page of 111
- Contents
- Table of Contents
- Bookmarks
Advertisement
Table of Contents
Table of Contents
Introduction
Copyright Information
Compliance
Fcc Notice
Warranty
Limitation of Liability
Important Safety Information
Safety Symbols and Definitions
Safety Guidelines
Ekocycle Cube 3D Printer Features
Printer Features
Printer Properties
At a Glance
Specifications and Requirements
Weight
Software
Opengl Version
Windows Requirements
MAC os X Requirements
Android
Wireless Options
Usb Mass Storage Device
Dimensions
Unpacking and Setting up Your Printer
Contents
Unpacking and Installing Your Printer
Initial Setup of the Printer
Menu Overview
Touchscreen Display
Print / Setup
Navigation
Materials
Print Plate Calibration
Printer Calibration
Network
System 1
System 2
System 3
Ekocycle
Installing a Material Cartridge
Printing Your Creation
Printing Procedure
Finishing Your Creation
Removing Your Creation from the Print Pad
Removing Supports
Cubify Software
Cubify Installation
Installing Cubify for Windows
Installing Cubify for Apple os X
Installing Cubify for Android
Installing Cubify for Ios
Cubify Overview
Account Settings
Design Feed Tab
Shop Tab
My Shelf Tab
Print Tab
Settings
Print Settings
Print Settings - Custom
Print Settings - Standard
Print Settings - Draft
EKOCYCLE Cube Info
Recycle Statistics
Connecting Cubify to Your Printer
Connecting Cubify to Your Printer Manually
Printing a Model Via Wireless Connection
Printing from a Desktop Application
Printing from a Mobile Application
Saving a Model to a Mass Storage Device
Desktop Application
Operation Procedures
Applying Cube Glue
Replacing a Material Cartridge
Setting up a Wireless Connection
Setting up a Wi-Fi Connection
Connect to an Ad Hoc Network
Ekocycle Cube Maintenance
General Cleaning
Removing Waste from the Jet Wiper Purge Bins
Replacing the Jet Wipers
Procedure
Print Pad Calibration
Auto Level
Gap Verification
Manual Gap Adjustment
Print Pad Maintenance
Clean the Print Pad
Printer Calibration
Test Print
Cube Name
Updating the Printer Firmware
Updating Firmware Using Wi-Fi
Updating Firmware Using USB
Repacking the Printer
Contacting Support
Cubify Sustainability Program
EKOCYCLE™ Cube®
Personal 3D Printer
User Guide
Original Instructions
Table of Contents
Previous Page
Next Page
Table of Contents
Summary of Contents for EKOCYCLE Cube
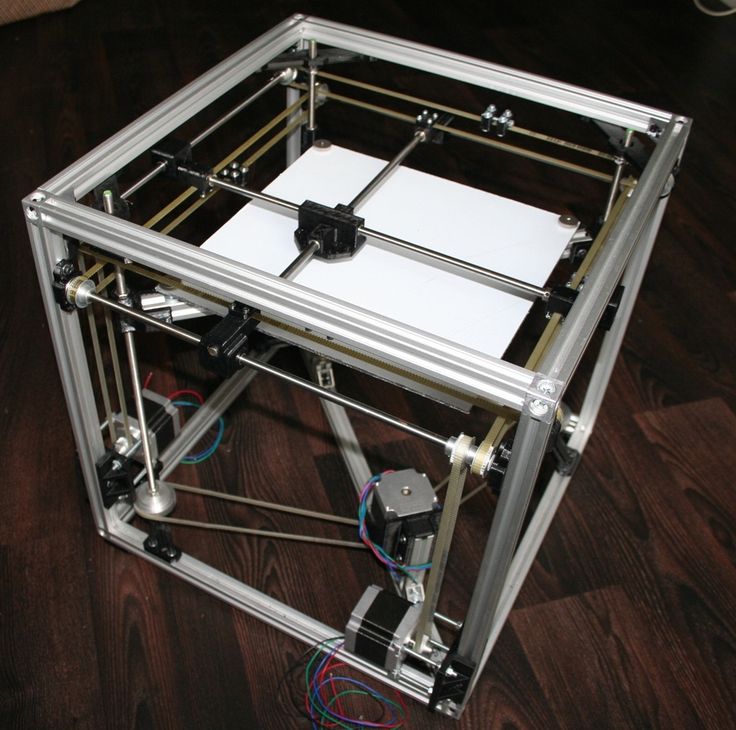
FlSun Cube 3D - overview and some upgrade steps.
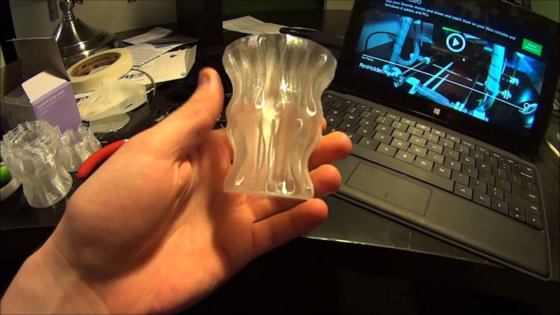
 Blowing the printable area.
 So, finally I assembled and launched the FLSun Cube 3D printer bought more than half a year ago.
It took a long time. But only because I could not bring myself to collect it in the stock version. The poet's soul could not bear it... I had to finish it right away, and this time, thoughts, building and setting up a router for cutting the necessary parts, assembly, alteration, breakdown, elimination, etc. As a result, today he finally earned as a normal full-fledged printer.
So. What can I say about the product codenamed FLSun Cube 3D... Nothing good. I bought it almost by accident, when I was completely disappointed in my old Flying Bear P902. And having encroached in the advertising banner on the "large print area" and the simple kinematics already familiar from the "Bear", I ordered in the maximum configuration. Which he later regretted.
Printer almost entirely - a solid set of examples of how not to make 3D printers. I'll try to be short, but capacious and in order.
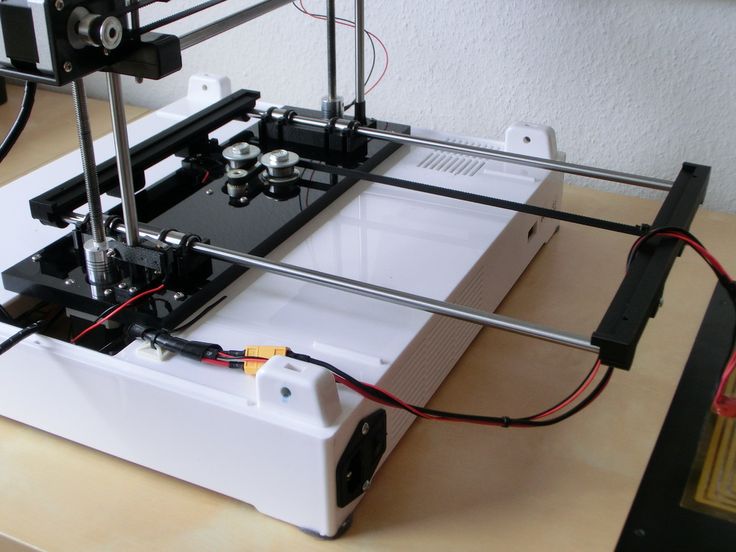
Printer - profile cube, Makerbot kinematics, Bowden feed, V5 extruder, MKS Gen L board, fully equipped - Cyclops and Chimera, capacitive auto level sensor, MKS TFT 32 v4 touch screen, Wifi module. Price at the time of purchase 22500 fully loaded.
A video demonstrating all of the following can be viewed here: https://www.youtube.com/watch?v=bqPOv7ZpjD0
1. Frame. The printer is huge. This is due to a completely wrong way in its design (below, item 6). Well, a large print area. And with such dimensions, it is assembled from a flimsy 20x20 profile. In small corners. Without any slopes. As a result, we have a parallelepiped without a hint of rigidity. There is only one way - to sew up with plexiglass (other sheet material). Otherwise, it's just jelly.
2. Shafts. Again, with such dimensions, the shafts are 8mm. And 500mm long. The carriages hang on them like on laces. The total sag of the Y and X axes, even at rest, reached a few millimeters. I decided by replacing the Y-axis shafts with 12 mm, the corresponding alteration of the Y-axis carriages - I threw it on for a home milling CNC3018 and cut it out of thick plexiglass. I left the X and Z axes on 8 mm shafts - more or less normal.
3. The material of the kinematic elements is thin plexiglass (acrylic). I remade the Y axis to thick acrylic, I haven’t touched the rest yet. Although I know that for someone it just breaks down over time. But I have CNC3018 =)
4. Linear bearings are attached to the carriages with nylon ties. On the Y axis, I replaced it with normal ones, I left it on X. I will change everything at once - both the carriage and the wheels for it.
5. Z axis!!! It was painful. Well, why did a student from a Chinese vocational school design it hanging on cantilever supports outside the frame perimeter ??? I could not leave it and removed the Z axis into the frame. It's SIMPLE and the shafts are even shorter, and the design is more rigid and the dimensions are immediately smaller by 60-80 mm on both sides!
6. The Y-axis carriages are horizontal. This caused the printer to bloat in size to "fit" them.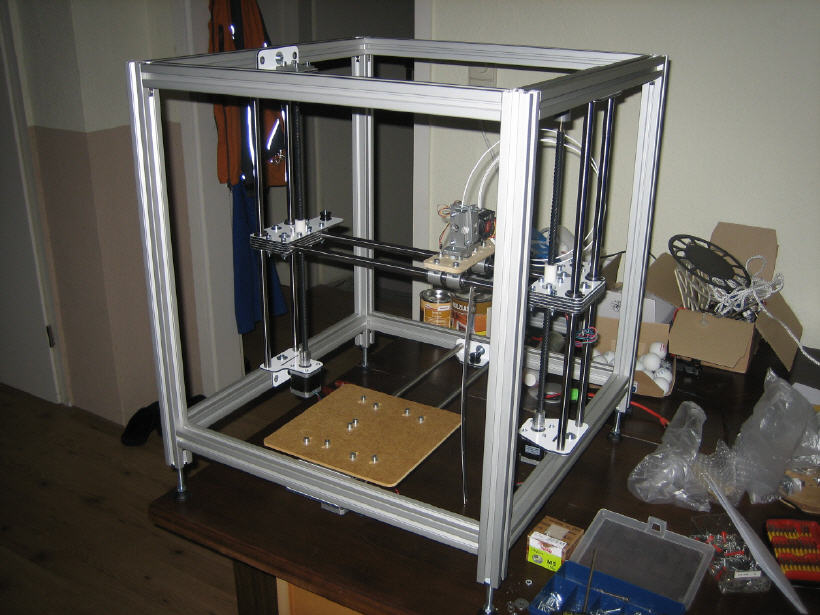 Badly. I mnu in the "Bear" carriages are vertical, and therefore the design is more compact and there is less "emptiness" in the printer. In FLSUN 3D Cube this is bad.
7. Extruder V5. Immediately change to V6 ... And ... look for a long time in the box for BLOWING the print area. And she is not there. And this is a bummer. What to print on this printer? PLA? We don't have airflow... ABS? And we do not have a closed box. At first, I printed ABS-m, covering the printer with a bag for packing car wheels. For a long time on thingiverse.com I selected the airflow for the FlSun Cube so that it was not confused, under 50x15, it blew the print area from both sides, and it fit on the V6 and kept well at the same time. With difficulty I found the FLSun designed for the version of Pryusha. The cards are similar. Combined it with a 40x10 V6 nozzle from another project and put it back together. I printed it out and it worked. Mega satisfied. True, I had to bite off a piece of the carriage X with tongs right on the printer - I had no strength to disassemble and grind neatly .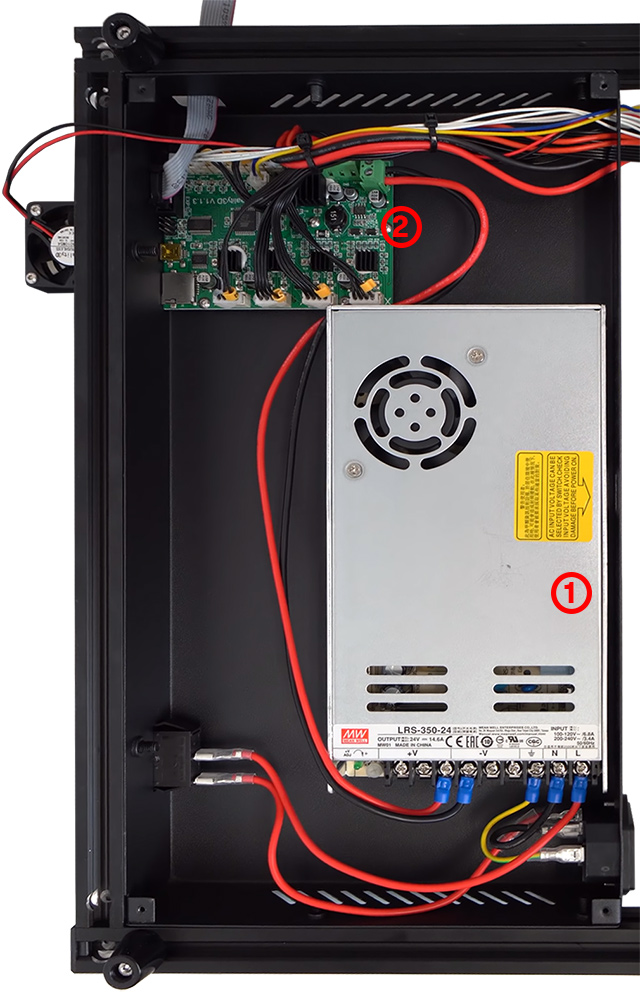 .. I risked the breakdown of the entire carriage, but everything worked out, thank God. The airflow turned out to be powerful and brutal looking.
8. Everything else - all these numerous pieces of plexiglass twisted by dozens of M3 screws, just a feeling of longing during assembly ... The power supply unit is not mounted on the case - the mount does not fit. Shafts are not cut to size. The regular hotend blower mount is funny. Did I mention bearings on tie rods?
9. Regular plastic feeder is inconvenient. Unspringed, changing the filament is terribly inconvenient. It pushes badly. Replaced with aluminum MK8. It became good.
10. Little things. An external mosfet is used to power the table. 5mm mirror on the table, insulation under the table. On the supply wiring ferrite rings. Y Axis motor placed more rigidly and compactly. Under the engines, cork "shock absorbers", legs out of the corners, thick santehrezina foreva. All wiring to carriage X for connectors - heater, thermistor, fans, limit switch, so that everything can be opened.
Prints as a result. But how does it shake him at the same time !!! Prints well, evenly, neatly. All supports, slopes, everything holds. But the speeds are low - do not raise above 40 mm, accelerations and jerks are minimal.
Personal recommendation to buy - do not buy. It is better to do some sort of a clear and promising public project on CoreXY.
This is roughly what I think of this printer. I hope someone will help or decide on a purchase or with ideas for improving this device, if already available.
Faberant Cube V1.0-1.14 3D printer - manual
We noticed that you have JavaScript turned off.
You must enable it for the site to work correctly.
Contents
- Cura Slicing Program
- Print profiles for slicing
- Repetier-Host 3D Printer and Control Software
- Preparing to work with a 3D printer
- Print Bed Calibration
- Filling, plastic removal
- 3D printing launch
- Extruder cleaning
- Nozzle replacement
- Removing and installing doors
- Safety measures
Slosing program “CURA”
Before the first connection of 3D printer Faberate Cube to the computer, it is necessary to install the CURA sliding -printer.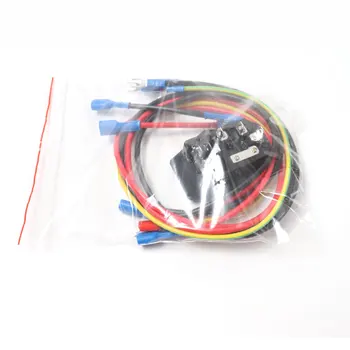
download here: Cura (Win), Cura (MacOS X), Cura (Linux)
Installing Cura
1. Select the last item "Other"
- uncheck the box for sending anonymous information
- click Next (Next)
2. Select the last item "Custom..."
- click Next (Next)
3. Enter information as in the example:
Name - Faberant Cube
Width - 200 mm
Depth - 200 mm
Height - 245 mm
Nozzle diameter - 0.5 mm
Heated table - yes
- click Finish (Finish installation)
After installing Cura, you can connect the USB cable of the Faberant Cube 3D printer to the computer.
After that, you can turn on the power to the printer by pressing the power button on the back.
At the same time, the printer electronics will be recognized and drivers will be automatically installed for it.
Working with Cura slicing software
1. Open the 3D model prepared in advance in a 3D editor or downloaded from www.thingiverse.com in STL format.
2. Open the appropriate profile for printing
*Cura->File->Open Profile
Slicing settings (print profiles) in Cura software for Faberant Cube 3D printer
Download all print profiles
-Host"
*Print quality at high speeds depends on the properties of the particular type of plastic
*Print speed can be increased up to 3 times directly from "Repetier-Host" in real time
* The wall thickness in "Cura" (Shell thickness) must be a multiple of the nozzle diameter. That is, for a nozzle with a diameter of 0.5 mm, the wall thickness is set to 1 mm or 1.5 mm, etc. (0.5 mm for vase printing). For a nozzle with a diameter of 0.3 mm, the wall thickness is set to 0.6 mm or 0.9 mm, etc. (0.3 mm for vase printing)
| Print Profile | Layer height, mm | |
| Beginner - nozzle 0.5 mm The Print Speed is set manually, depending on the dimensions of the part. Minimum - 20 mm/s for small parts and up to 130 mm/s for large parts.* | Medium quality | 0.3 |
| Good quality | 0.2 | |
For advanced - nozzle 0.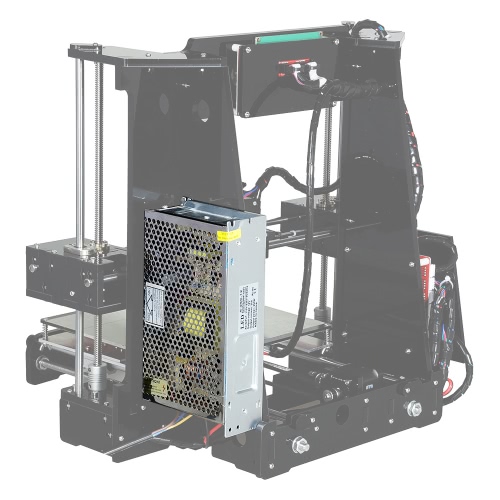 5 mm 5 mm The Print Speed is set manually, depending on the dimensions of the part. Minimum - 20 mm/s for small parts and up to 100 mm/s for large parts.* | High quality | 0.16 |
| Very high quality | 0.1 | |
| Advanced - nozzle 0.3 mm The Print Speed is set manually, depending on the dimensions of the part. Minimum - 15 mm/s for small parts and up to 60 mm/s for large parts.* | Good quality | 0.2 |
| High quality | 0.16 | |
| Very high quality | 0.1 | |
| Super quality | 0.06 | |
| Extremely high quality | 0.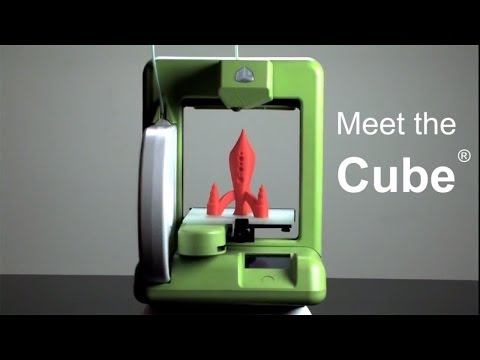 04 04 | |
Attention! For the all-metal Direct extruder of the Faberant Cube 3D printer, for the feed rollback / retract function, set the value from 0.6 to 1 mm!
3. We are waiting for the program to finish calculating the code and save the file in Gcode format for further printing in the Repetier-Host control program
(After installing Cura, the Repetier-Host 3D printer control program is installed)
Faberant Cube “Repetier-Host” 3D Printer and Control Software
After installing the "Repetier-Host" program, you need to insert the SD card supplied with the 3D printer into the computer and run the "Settings for Repetier-Host.reg" file.
download here: Repetier-Host (Win), Repetier-Host (MacOS X), Repetier-Host (Linux)
state to activate all program features.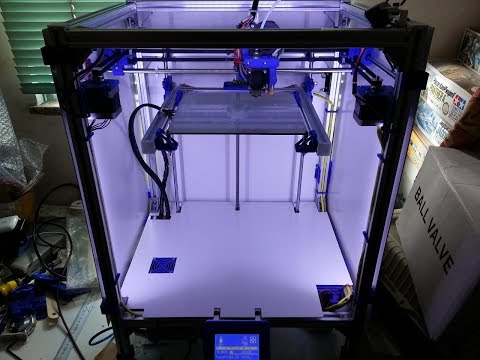
In the "Printer Settings" you need to select the "Faberant Cube" printer from the drop-down list at the top and the last Com-port in the list.
Next, click the "Connect" button (the USB cable must already be connected to the printer).
If the printer is connected correctly, then data on the temperature of the table and nozzle will appear at the bottom of the program window.
After that, you can turn on the power to the printer by switching the power button on the back of the printer to the up position.
Next, you can turn on the heating of the table and nozzle.
Preparing for Faberant Cube 9 3D Printer0062
Make sure there is at least 1 mm gap between the heating table and the nozzle. If the table is raised higher, then lower it 1 mm down with a command from the "Repetier-Host" control program.
Check that all 3 limit switches are working. Send Home X, Home Y, Home Z commands one by one. When you press the end sensor, the printer should stop and reciprocate in one place. If so, then you can continue to work.
Heat up the 3D printer bed and nozzle from the "Repetier-Host" control program.
For ABS plastics - table 100-120°C, nozzle - 230-245°C (see plastic packaging)
For PLA plastics - table 25-60°C, nozzle - 190-235°C (see plastic packaging)
Calibrate the print platform (when the printer is warmed up to operating temperature) by three points of the triangle, starting from the top and then counterclockwise 2 more points.
All points are above the three screws with springs that fasten the top of the table to the bottom
*For all horizontal movements of the nozzle, it must be at least 1 mm higher than the table.
To start calibration in the Repetier-Host program, you need to connect to the printer, heat the nozzle and table to operating temperature, and then press the round button numbered 1
This will start a sequence of automatic commands and the printer will send the nozzle to the first point above the stage, where it will descend and stay in the minimum position for a few seconds.
At this time, the user must, having placed a sheet of A4 size paper in advance, twist the appropriate handle under the table in the right direction.
It is necessary to ensure that a sheet of paper sandwiched between the glass of the table and the nozzle is slightly pressed down, but at the same time it can be removed without tearing.
If a sheet of paper is clamped or passes freely, tighten the appropriate knob.
A few seconds after stopping, the printer will continue moving to the next points, where the gap between the nozzle and the table also needs to be adjusted.
Plastic refill
To start the plastic filling procedure in the Repetier-Host program, you need to connect to the printer, heat the nozzle to the operating temperature, and then press the round button numbered 2
Plastic recovery
To start the plastic extraction procedure in the REPETIER-HOST program must be connected to the printer, heat the nozzle to the operating temperature, and then press the round button under the number 3 9000
9000 9000 9000 launch -seal
Load the Gcode print file previously prepared in the Cura program into the Repetier-Host control program and start printing.
During printing, it is possible to change the print speed from 25% to 300% of the values specified in the Gcode.
It is also possible to change the amount of plastic supplied from 50% to 150% (default 100%)
Be careful with increasing these parameters, as significantly exceeding 100% can damage the printer.
Extruder cleaning
Remove the plastic before starting the procedure. The extruder will automatically move to a comfortable position for cleaning.
Next, you need a thin needle from the 3D printer kit.
On the right side of the extruder there is a window where you can pass the needle and get it to the feed gear.
Use the tip of the needle to clean the space between the teeth, removing all excess plastic.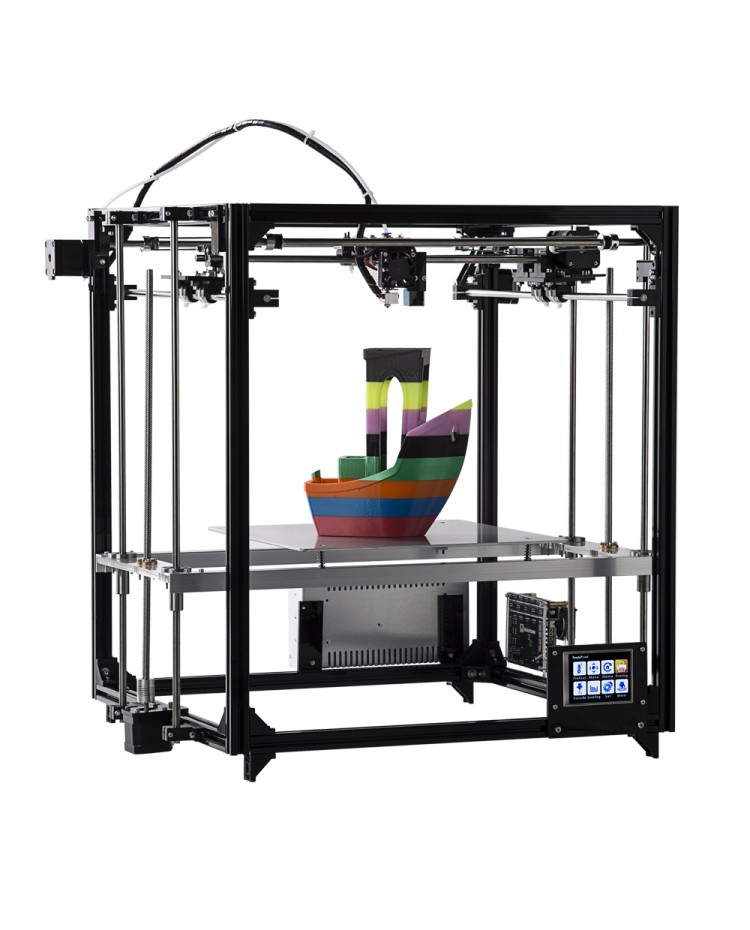
After the cleaning procedure, you can load the plastic and start printing.
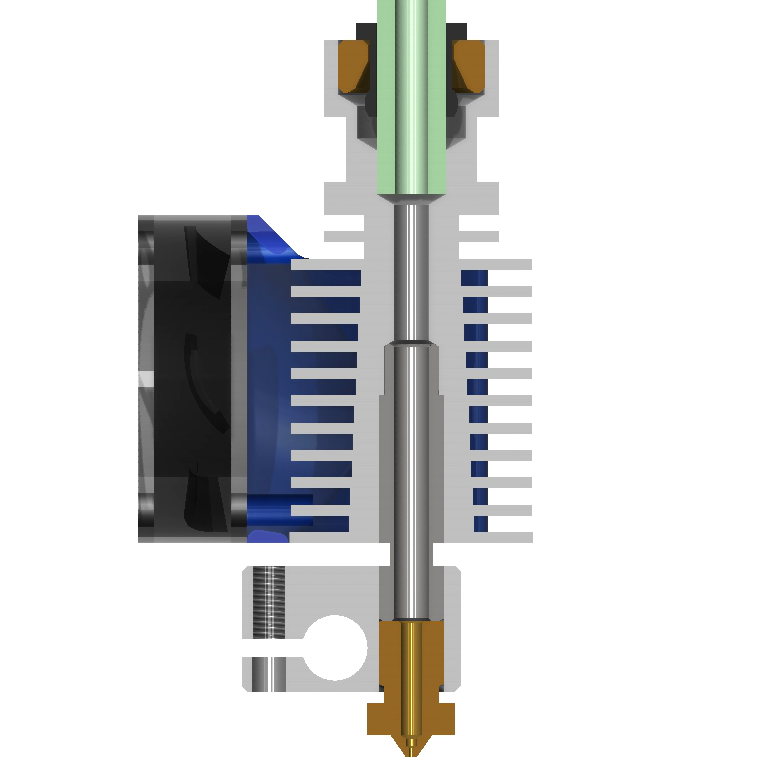
Nozzle Replacement Procedure
* All work must be done with heat protection gloves
* Be careful with the white wires on the heater - they are thin!
1. lower the table along the Z-axis down 15 cm
2. heat the extruder to 235-240C
3. carry out the procedure for extracting plastic from the extruder
4. Disconnect extruder heating wire
5. loosen the heating block together with the nozzle on the thermal barrier (on a heated extruder) with silicone gasket / gloves
6. unscrew the countersunk screw on the lower right in the radiator with a thin hexagon wrench and release the thermal barrier downwards
7. pull out the thermal barrier together with the heating block and nozzle down
8. holding the heating block, unscrew the nozzle from block
with a key of 10 9.