3D printer extruder skipping
8 Ways How to Fix a Clicking/Slipping Extruder on a 3D Printer – 3D Printerly
I’ve heard many stories of clicking and grinding noises coming from an extruder, but not many stories on getting them fixed. This is why I decided to make a simple-to-follow post on how to fix this noise.
The best way to fix a clicking/skipping sound on your 3D printer is to do a series of checks such as seeing if your nozzle is too close to the print bed, extrusion temperature is too low, printer can’t keep up with the speed, there’s a blockage in your nozzle or tube and if dust/debris is trapped in your extruder/gears.
Once you identify the issue, the fix is generally quite simple.
Clicking noises on your 3D printer usually means that it’s trying to push out filament but it can’t.
This can be due to many different reasons such as your nozzle is too close to the print bed, your stepper motor is losing steps, your extruder gears aren’t gripping the filament tightly enough, or you have issues with your bearings which hold pressure on the filament.
These are the main reasons but there are a few others which affect some people which I’ve detailed below.
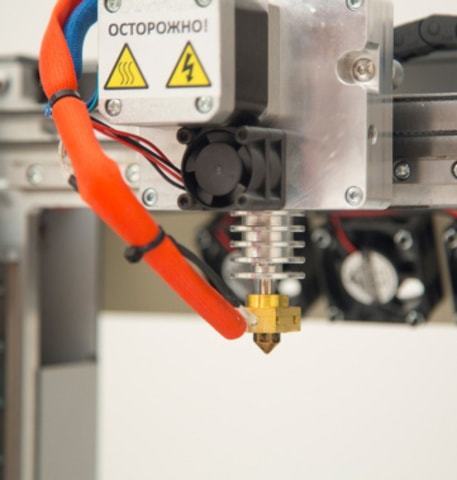
Pro Tip: Get yourself one of the best metal hotend kits to improve your extrusion flow. The Micro Swiss All-Metal Hotend is a drop-in hotend that melts filament efficiently so the pressure doesn’t build up and contribute to a clicking/slipping extruder.
If you are interested in seeing some of the best tools and accessories for your 3D printers, you can find them easily by clicking here.
1. Nozzle too Close to Print Bed
It could be from your nozzle being too close to the printer bed on the first few extruded layers.
The hard metal material of your nozzle scraping on your printing surface can easily cause a grinding noise from your 3D printer. If this is a problem you are experiencing, the fix is pretty easy.
How this causes your extruder to skip, which in turns causes the clicking sound, is by not having enough pressure build up to pass your filament through successfully.
You also want to make sure your 3D printer’s z-stop is in the correct place to prevent it from going too low on your printer.
Solution
Simply level your bed using the paper/card under the nozzle technique so there is a slight ‘give’. Once you’ve done all four corners, you’ll want to redo the four corners to make sure the levels aren’t off from the previous levelling, then also do the center to ensure your print bed level is good to go.
I wrote a useful post on How to Level Your 3D Printer Bed Properly which you can check out.
It’s a good idea to level your printer bed when it’s preheated because beds can slightly warp when heat is applied.
You can also run levelling print tests which are quick prints that show any levelling issues so you know if your extrusion is good enough or not.
The video below shows a more accurate, in-depth levelling method.
If you have a manual levelling bed, this is a lot more likely to occur.
Instead of always manually levelling your bed, you can let your 3D printer do the work for you, by implementing the popular BLTouch Auto-Bed Leveling Sensor from Amazon, which saves a bunch of time and frustration in setting up your 3D printer.
It works on any bed material and several users have described a significant increase in overall print quality and reliability. Being able to trust that your 3D printer is level every time gives you a genuine feeling of confidence in your machine, that is worth every penny.
2. Extrusion Temperature Too Low
When the clicking happens in layers past the first few extruded layers, it means your extrusion temperature is too low.
If your material isn’t melting fast enough because of a low extrusion temperature it can result in a clicking noise because your printer is having trouble advancing your filament.
Sometimes when speed settings are too fast, your extruder can find it hard to keep up.
When extrusion temperatures are too low, it can mean that your materials aren’t melting evenly. What happens in this case is the thermoplastic that is being extruded is thicker than it should be and doesn’t have good flow rates through to the nozzle.
If the cause of your extruder clicking is happening on your Ender 3, Prusa Mini, Prusa MK3s, Anet, or other FDM 3D printer the fix is fairly simple as shown below.
Solution
If this is your issue, the simple fix here is of course, to increase your printer’s temperature and things should be back to running properly.
3. Extruder Can’t Keep up with Printer Speed
If your printing speed is set too fast, your extruder can have trouble keeping up with the feed rates which can cause this clicking/slipping of the extruder. If this is your issue it’s a pretty easy fix.
Solution
Lower your print speed to 35mm/s then slowly work your way up in 5mm/s increments.
The reason this works is because in some cases, higher printer speeds works fine going at simple angles like a straight line, but when it comes to sharp turns and different degrees, your printer can have trouble extruding accurately at higher speeds.
Getting a higher quality extruder can definitely help out in this regard. I recently ordered a BMG Dual Drive Extruder from Amazon which works wonders.
Now you can either get the genuine Bontech, or the BondTech clone, you check the price difference and decide which to go for. One user who tried both did really ‘feel’ and see the difference in print quality with the more defined teeth and detail on the machined parts.
Check out my article on PLA 3D Printing Speed & Temperature.
If you experience your extruder clicking on infill, it could be to do with the print speed, as well as the nozzle temperature needing an increase.
4. A Blockage in Your Nozzle or PTFE Tubing Failure
Many times, your printer will give you this clicking noise when your nozzle is blocked. It’s because your printer isn’t printing as much plastic out as it thinks it should. When your nozzle is blocked up, the extrusion and pressure builds up which sets off your extruder to start slipping.
Another issue that’s related is the thermal break between the heater block and the heat sink, where heat works its way up to the heat sink and if not fully functional, can cause plastic to deform slightly.
This can result in the plastic forming a plug, or small blockage on the cold side and can happen at random points throughout the print.
Solution
Give your nozzle a good cleaning, maybe even a cold pull if the blockage is bad enough. I’ve done a pretty detailed post about Unclogging a Jammed Nozzle which many have found useful.
The solution for the thermal break and bad quality heat sink is to lower your temperature or get a more efficient heat sink.
A faulty PTFE tube can easily go unnoticed for a while before you realize it is messing with your prints.
For the serious 3D printer hobbyists out there, we have access to a premium PTFE tube called the Creality Capricorn PTFE Bowden Tube from Amazon. The reason this tubing is so popular is just how well it works and it’s long-term durability.
The Capricorn PTFE tube has extremely low friction so filament can travel freely. It’s more responsive, leading to more accuracy in prints along with having a lesser need for retraction settings which saves you time.
You’re getting less slippage, wear and tear on your extruder, and most beneficial is the significantly higher level of temperature resistance.
It comes with a cool tube cutter too!
Some people that experience their extruder clicking backwards found that it can be fixed by clearing out clogs.
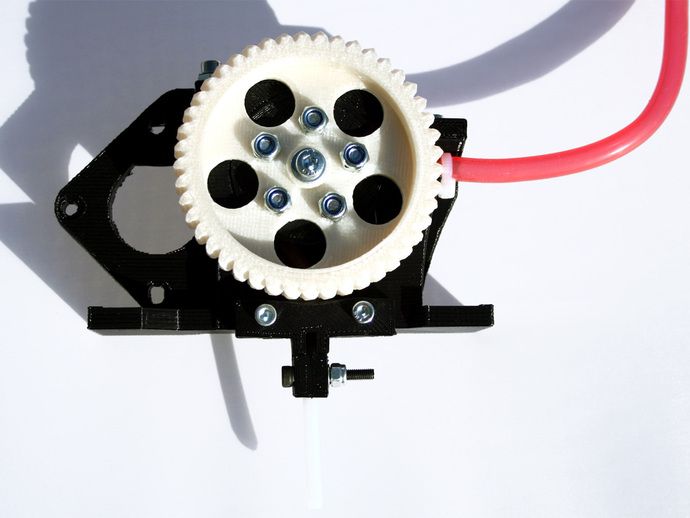
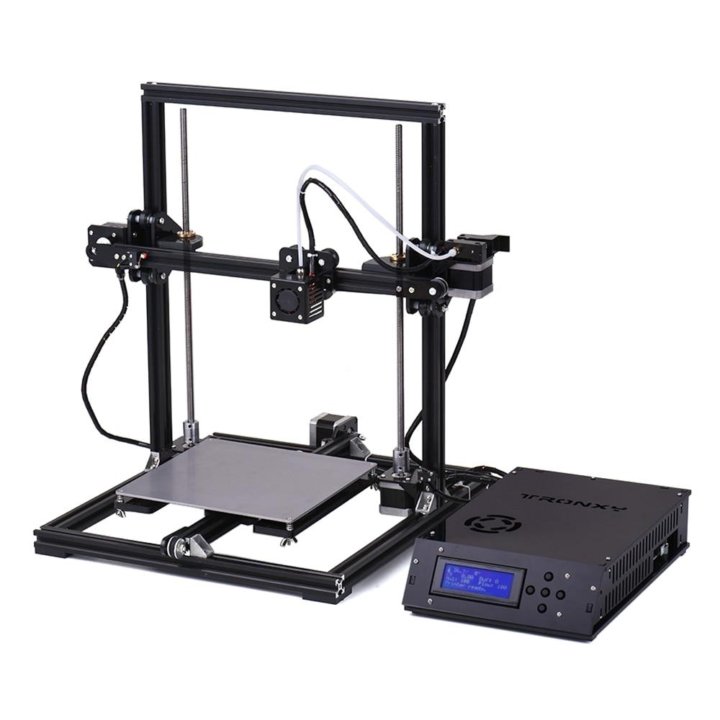
5. Dust/Debris Trapped in the Extruder and Gears
Your extruder and gears are constantly working and apply constant pressure to your filament as it gets extruded. While this is happening, your extruder and gears will be biting down on your filament which, over time, can leave dust and debris within these parts.
Solution
If you wanted to do a quick-fix, you could just give the extruder a hearty exhale and if it’s not built up too bad, should do the trick. Make sure you are not breathing in the dust though.
It might not be enough doing this or just wiping down the extruder from the outside.
Using a damp paper towel should be able to get most of the debris off without pushing it around.
The most effective solution here would be taking it apart and giving it a thorough wipe down to make sure you get the offending dust and debris trapped inside.
The simple fix here would be to:
- Switch off your printer
- Undo the screws for your extruder
- Remove the fan and feeder assembly
- Clean out the debris
- Refit the fan and feeder and it should work smoothly again.
The type and quality of your filament could also affect this, so try out a few different filament brands and see which one works best for you. Filament that tends to get brittle like PLA are more likely to result in this issue, as opposed to TPU.
6. Gear Slip Issues From Idler Axle Sliding Out of Axle Support
This issue happened to a Prusa MK3S user and it resulted in a clicking as well as the idler gear slipping. It would cause under-extrusion and be responsible for many failed prints, but he came up with a great solution.
Solution
He designed an Idle Gear Axle Stabilizer which can be found on Thingiverse and it removes the holes from the axle support so there isn’t any room for the axle to slip around.
The idle gear axle should snap firmly into place and still leave the gear free to move as it was intended. The user has now been printing for hundreds of hours over many months with this stabilizer in place and it’s working great.
7. Extruder Motor is Improperly Calibrated Or Low Stepper Voltage
This reason is more of a rare one but it’s still possible and has happened to some users out there. If you’ve tried many of the other solutions and they aren’t working, this may be your problem.
A loose or broken power connection can cause your printer’s motor to run sporadically, causing a slow feed to the print head. If you experience this issue, you could also experience this clicking noise in the printing process.
Whether it’s due to bad or weak cables it’s an issue that can be solved once you identify this issue.
Manufacturers can sometimes be at fault here by issuing power accessories that don’t get the job done as well as they should over time.
You want to double-check the wheel on your extruder is fitted well and isn’t slipping on the feeder motor.
Solution
Make sure power connections are well-fitted and don’t have snags or damage to the cables. Check that your power cable is strong enough to handle your printer and has the correct voltage to give proper power.
You can purchase a new power cable or power supply if you suspect that this is the issue.
8. Filament Feeder Issues Due to Bad Filament Spring Tension
High spring tension can grind away at your material, leaving a deformed shape and slower movement. This can result in a clicking noise, as detailed previously.
When your filament isn’t fed through properly, you’ll get uneven extrusion similar to having a printing temperature that’s too low. You can get these filament feeder issues from having an improper spring tension on your printer’s extruder.
If your printer’s spring tension is too low, the wheel that grips the material won’t be able to generate enough pressure to consistently move the material through the printer.
If your printer’s spring tension is too high, the wheel will grip your material with too much force and cause it to deform and change shape. You’re printing material has tolerances set for how wide it can be usually in the 0.02mm range for 1.75mm filament.
You can see the problem that can occur if the material is squeezed and deformed.
Printing materials will find it hard to pass through the tube and when it gets further down the printer, it won’t feed through as good as it needs to print smoothly.
Solution
Your solution here is to tighten or loosen the spring tension by adjusting the screw, or to buy a completely new feeder.
If you have a cheaper printer, I would recommend buying a new feeder, but if you have a higher quality printer that doesn’t usually have spring tension issues, you shouldn’t have to purchase a new feeder.
If you love great quality 3D prints, you’ll love the AMX3d Pro Grade 3D Printer Tool Kit from Amazon. It is a staple set of 3D printing tools that gives you everything you need to remove, clean & finish your 3D prints.
It gives you the ability to:
- Easily clean your 3D prints – 25-piece kit with 13 knife blades and 3 handles, long tweezers, needle nose pliers, and glue stick.
- Simply remove 3D prints – stop damaging your 3D prints by using one of the 3 specialized removal tools
- Perfectly finish your 3D prints – the 3-piece, 6-tool precision scraper/pick/knife blade combo can get into small crevices to get a great finish
- Become a 3D printing pro!
For people struggling with various 3D printing issues, you might want have wanted more guidance towards getting ideal 3D printing results. I created a full course that's available to purchase called Filament Printing 101: Beginner's Guide to Filament Printing that takes you through some of the best 3D printing practices early on, so you can avoid those beginner mistakes.
Ender 3 Extruder Skipping or Clicking: Here's A Quick Fix
If your Ender 3 extruder is skipping or clicking, it’s a cause for alarm. Normally, clicking, clunking, or a grinding noise is a big sign that your print is going to fail. Luckily, most causes of extruder clicking in both the Ender 3 Pro and the Ender 3 V2 are easy to find and to fix.
In most cases, Ender 3 extruder clicking or skipping is caused by extrusion problems. In most cases, that means the print temperature is too high or too low, the print speed is too fast, or something is blocking the extrusion. Depending on bed leveling, that blockage might be the bed.
Why Ender 3 Extruder is SkippingThere are many reasons for Ender 3 extruder slipping. In most cases, it has something to do with the filament feed. However, the reason the feed is having issues can vary. Extruders feed filament from the Bowden coupling or “hot tube” to the build or print bed. The filament is fed through the extruder using a gear or a hob bolt and is pushed through the Bowden tube to the nozzle, to achieve the desired shape and thickness. This allows the printer to control the flow rate and thickness of the filament. When it starts to have issues, the filament will come out intermittently, on just one side of the nozzle, or not at all. And, you’ll see issues with your print. In most cases, extruder skipping looks like corrosion on a finished print.
If your 3D printer is too hot or too cold for the filament you’re using, it might not melt properly. This can cause it to overheat and bubble or become stringy. Alternatively, it can cause it to not leave the extruder fast enough or at all. The result can be slowed or stopped filament feed.
That’s especially likely if you’ve recently changed from PLA to ABS or something else that requires a warmer temperature. If you haven’t recalibrated in between, the nozzle and the printer bed could be far too cold or too warm.
Check your temperature settings and make sure they’re appropriate for the material you’re using. If they are, consider what the filament is doing. If it’s slowly oozing out or only partially melted, increase the temperature 5 degrees and try again. If it’s bubbling or stringy, decrease the temperature 5 degrees and try again. Some filaments have a higher or lower melting point than others. That’s especially true if you buy cheap filament, which might not adhere to the same standards of material purity.
Problem 2: Print Speed Too Fast/Too SlowIn some cases, your Ender 3 extruder skipping could mean you’re printing too fast. Very rarely, it will mean you’re printing too slowly. This happens as the extruder prints too fast and the filament doesn’t have time to properly cool. You then get blockages and clicking or slipping as it creates backflow into the extruder.
Solution: Adjust the Print SpeedTry slowing the print speed if you think it’s set too fast.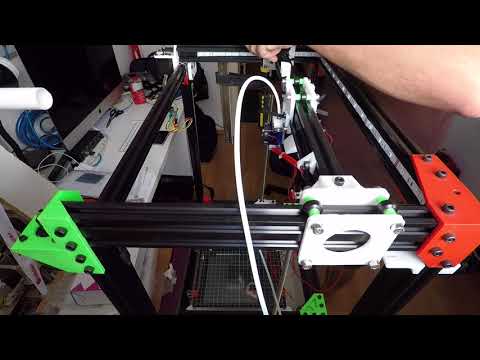 You can attempt to slow it down incrementally to see if the problem solves. However, lower print speeds almost always result in a higher quality print with better filament distribution. Therefore, it’s almost always better to take longer for the print.
Leveling the bed should be one of the first steps you take when experiencing any problem with a 3D printer. That remains true if you’re experiencing extruder issues like slipping, clunking, or clicking. Here, the extruder might be blocked by being too close to the bed. Having too little space can actually cause backflow or blockages in the extruder. In addition, you might have issues with the extruder scraping or grinding into the bed. If you hear clunking, this is the most likely issue. This is especially likely if you’ve recently added a plate or layer to increase bed adhesion.
Solution: Level the Bed/Check Z-LevelEnder 3’s don’t have an auto-leveling feature, so you’ll have to do it manually.
- Take the build plate off and thoroughly clean it with hot water and soap.
- Reattach the build plate using the clips.
- Clean the nozzle.
- Turn the Ender 3 on and use the Control knob to scroll to the “prepare” menu.
- Go to “Auto Home” and press the knob.
- Go to Prepare and “Disable Steppers”.
- Use the four leveling wheels on each side of the bed to lower the bed, turn them counterclockwise to do this.
- Get a sheet of paper.
- Position the nozzle over the bottom left adjustment screw on the bed. Adjust the leveling wheel until there’s just enough space to slide the paper between the nozzle and the bed with slight resistance.
- Repeat on the other four corners.
- Check all corners and do readjustments as necessary.
The Ender 3 has a high rate of bed spring failure. If yours is losing tension, especially on one side, it’s a good idea to replace them. Creality’s yellow compression molded springs are a good choice as they are considered much higher quality.
If you’re having problems with Ender 3 filament not coming out, it might be a blockage. This can happen because of a variety of reasons. For example, the nozzle is damaged, dirty, blocked, etc. In other cases, the nozzle might be fine and the issue might be with the PTFE tube. In either case, the filament won’t come out or won’t come out smoothly.
Solution: Clean or Replace the NozzleOld filament, dust, cleaning solution, and even the random insect can block your nozzle. Physical blockages are usually easy to clean. Here, you want to heat your extruder up and then use heat-resistant gloves such as kitchen gloves or a potholder to wipe the nozzle and edges down. Then, let it cool. Take the nozzle out and use a pipe cleaner and hot water to clean the inside. From there, let it dry and put it back.
However, the plastic feeder assembly that comes with the Ender 3 is easily replaceable. You can upgrade to an MK8 in aluminum if you want to reduce future maintenance.
Solution: Replace the PTFE Tube / Bowden TubeBowden tubes can fail. If yours is old, damaged, or clogged, you want to replace it. Ender 3 printers are compatible with any 1.75mm PFTE tube. However, it’s important to ensure your tubing is rated for the materials and temperature you intend to print with. Of course, you can also try to clean your PFTE tube out with a pipe cleaner or with cold pulling. However, most likely, the issue is caused by poorly melted filament that got stuck inside. To clean it out, you’ll have to heat the pipe enough to melt the filament and then push it out. And that can be quite difficult to do.
In addition, Bowden couplings, or the couplings holding the tube to the extruder and the hot end can fail as well. It’s almost always a good idea to replace both at once if you’re having nozzle skipping issues.
If your Ender 3 extruder is not gripping the filament, it’s likely because of gear failure. However, it may be difficult to fix this issue. For example, the most common issue is that the gear is just worn down. Here, you might get a phenomenon known as “filament grinding”. Here, the extruder will turn the hob bolt but instead of pushing the filament through, it will grind the filament. That can happen relatively quickly with machines like the Ender 3, because both the 3 and the Pro have just a single brass gear and a pulley. Brass is relatively soft, so it can damage with heavy use.
Solution: Replace the GearThe fastest real fix is to replace the gear. You can also choose to replace it with a steel gear, such as the steel CR-10 from Creality. This ensures better longevity moving forward.
Problem 7: Extruder Arm and Spring Spacer IssuesThe extruder arm applies pressure on the spring to adjust the tension on the extruder. If the spring is too loose or too tight, you can get skipping issues. In fact, one of the most common reasons for extruder clicking is a spring. If the spring is not tight enough to hold the arm against the hob bolt, it will click. That can create numerous problems with the print itself. That also holds true if the arm is damaged, however, that’s much less likely.
There are dozens of quick 3D print fixes on MakerSpace and other 3D print resources. You can normally print these shims in just a few minutes and use them to hold your spring in place. However, this will be a temporary fix at best.
Solution: Replace the Arm and SpacerBuying a new extruder, a new extruder arm, or a new spacer spring is cheap, easy, and ensures your problem is gone for good. Here, you can choose OEM Creality parts or a different brand. However, you can generally replace the spring for as little as $1. 50. On the other hand, extra extruder arms are not usually sold separately. You’ll have to buy the full extruder, in which case, the MK8 is considered the best quality available for the Ender 3.
The Stepper Driver is the driver on your motherboard that runs the motors and makes the feeder go. If it’s having issues, your machine can skip.
Solution: Recalibrate the DriversThese steps work on the Ender 3 Pro and Ender 3 V2 as well as the Ender 3 Pro V2. You’ll want to make sure you have the 30 October 2021 firmware update or later installed.
- Level your bed
- Go to Control and then Motion
- Mark 120 mm on the filament. It’s highly recommended to use a pair of digital calipers instead. You can use Pronterface or the built-in controls.
- Heat up the hot end and extrude 100mm.
- Click Prepare
- Click Move Axis
- Click Move 1mm
- Rotate the knob 100 times to achieve 100mm of extrusion
- Measure the extruded filament based on where the mark is on the filament still in the extruder.
 If it is under 100mm, it’s under extruding. If it is over 100mm, it is over extruding.
 - Measure the full length of the extruded filament
- Check existing e-steps. Write that number down.
- Use the e-steps calculation. Steps taken x 100 divided by the actual length extruded = accurate steps per mm value. Adjust the e-step value to that length.
- You can make this adjustment using the M92 command.
If recalibrating your drivers doesn’t work, you might have to replace either the motherboard or the stepper motor. However, this is difficult to tell without running a diagnostics check on the machine.
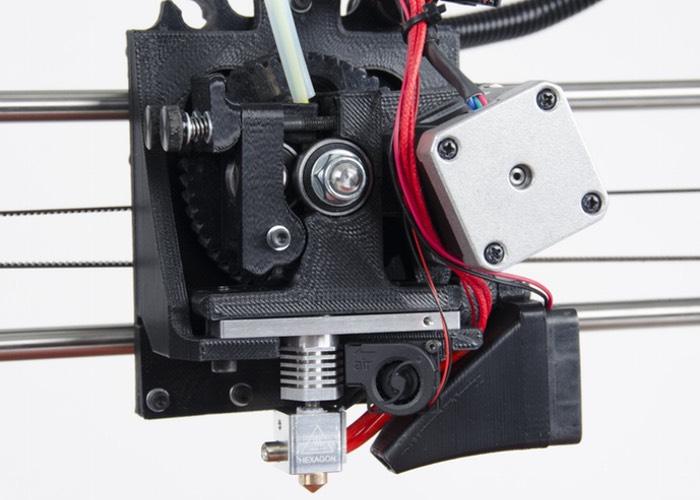
How to Replace a Faulty Ender 3 Extruder
The Ender 3 may be one of the best values for the money in the 3D print world, but its stock extruder is famously bad. Replacing the plastic extruder with a metal one is an easy way to improve the quality of your printer.
The MK8 is a good choice. However, there are plenty of knockoffs and unbranded options as well. Use the Allen wrenches or hex keys that came with the assembly. Otherwise, get a set of Allen wrenches.
- Take out the Bowden tube from the couplings by depressing the ring and pulling the tube out.
- Disconnect the extruder wiring harness from the motor. You should be able to pull it.
Note: The only thing holding the extruder motor in place is the screws in the extruder. So when you take the last screw out of the extruder, the motor will fall free. Make sure you catch it and prevent it from falling to avoid damage. - Start with the two right screws.
- Then remove the large screw that serves as the feeder arm pivot. Remove the feeder arm assembly and pivot.
- The final, recessed screw is holding the motor. So, keep a hand on the motor and gently undo the screw.
 Put the motor aside.
 - Assemble the metal extruder arm based on instructions included. Unfortunately, assembly changes depending on which model you buy.
- Use the rounded head screws to assemble the spring and arm.
- Put the flat-headed screw in the base plate and attach that to the extruder motor.
- Put the spring into position on the feeder arm and put it in place in the extruder.
- Put that into the assembly motor and screw it into place. Make sure you compress the arm to ensure the hole lines up.
- Re-attach the extruder motor wiring.
- Re-attach the Bowden tube.
Still Not Moving?
If you’ve gone into your slicer and made sure that filament extrusion is set properly, you might want to try looking at your software. For example, if you’re using tools like Octolapse, your settings might not be ideal for the Ender 3. That’s especially true if you have plugins or other changes installed or if you’ve just set up the software. For example, with the Octolapse, you have to set the XYZ to Absolute mode, which you can do by using a G90 code in the start GCode.
However, you also want to go through each line of the GCode to see what it does. You can also check the settings of your slicer – which literally just functions to convert 3D print images to GCode.
If you do have custom scripts, plugins, or are using new software, this could result in the issue. However, the appropriate steps to take depend on that software.
5 Maintenance Tips for the Ender 3 3D Printer
Most Ender 3 devices experience the same general issues. Therefore, it doesn’t matter if you have an Ender 3 V2, Ender 3 Pro, or Ender 3 Pro V2, you can use the same general maintenance. These 5 tips will get you started.
Check the Ender 3’s X and Y BeltsX and Y belt tension can affect every aspect of how the print arm moves. Make sure you regularly check the belts to make sure they’re on firmly. You also want to ensure there’s no sag. Finally, look for dust, dirt, and contaminants which could cause issues. Belts will always sag eventually. Some people choose to add belt tension devices to solve the problem. However, you can also replace them cheaply. When you do, you’ll have to run a recalibration.
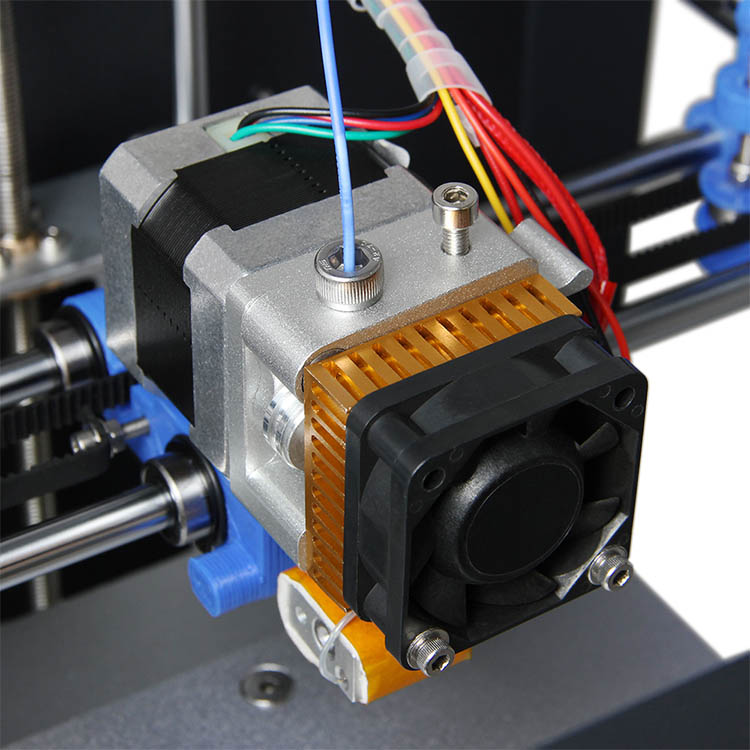
Ender 3 has four fans and most heavy users eventually actually replace the hot end fan. However, you should clean all of them. Occasionally checking the fans for dirt, dust, and buildup can help you to keep your Ender 3 in top condition for longer. Clean them using a wettened Q-tip, a can of air, or a bottlebrush.
Check for Melted Filaments Around Ender 3’s Hot EndYou should always check the hot end and nozzle between every print. If there’s still melted filament on it, try to take it off before the next print.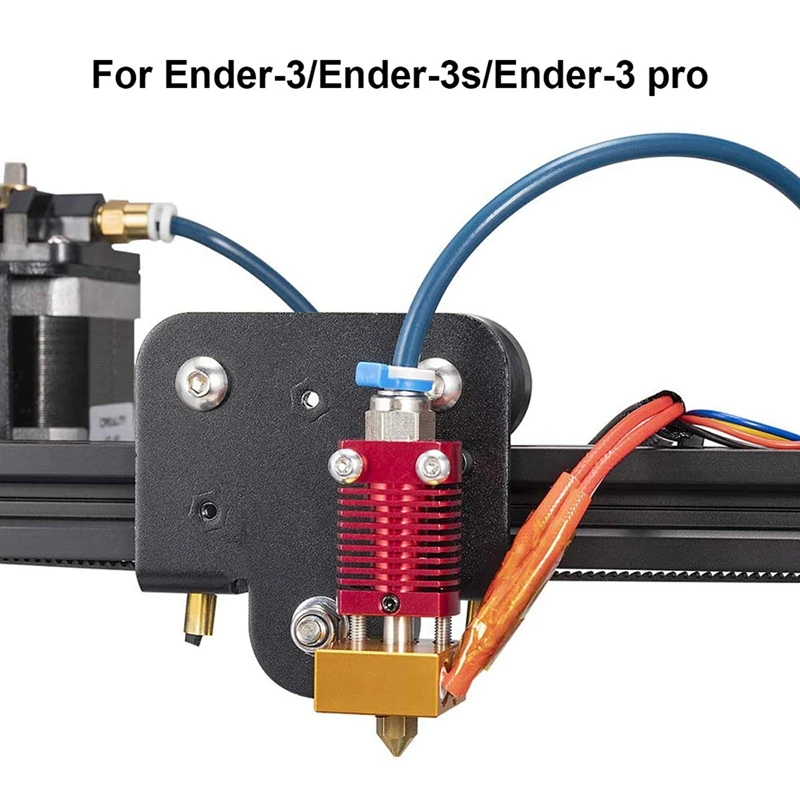 The easiest way to do this is to heat up the printer and then use a heat-resistant glove such as a kitchen glove to wipe it down.
Ender 3 comes with a brass feed gear. This gear, also known as the drive gear, is actually so prone to wear and tear that you can buy replacements in 6 packs. It’s important to check that the gear is not wearing down, that it isn’t chewing into the filament, and that it’s in good shape. Many users choose to replace the brass feed gear with a steel one. Otherwise, you will have to occasionally replace the gear. However, you’ll also want to make sure it’s clean and free from contaminants. This is especially true if you have pets, where pet hair might get into the gear and contaminate the filament.
FAQs
If you still have questions, these frequently asked questions should help.
Is an extruder upgrade worth the cost?Ender 3s plastic extruder is notoriously bad. You can easily upgrade to the aluminum Mk8 extruder for the Ender 3 or Ender 3 Pro for around $20. Some knock-off shops will sell it for as little as $8. Because you probably still have the Allen wrenches that came with the Ender 3, you won’t need any other materials. So, if you’re doing more than a few print runs, the upgrade is well worth it for most.
Creality recommends changing nozzles every 3-6 months of regular use. If you heavily use your 3D printer, you might want to inspect and change your nozzle more frequently. After a few months, the exit points may start to deform, which can cause issues with your print. Ender 3 sells nozzles in 6-8 packs.
What is a cold pull?Cold pull is the process of feeding a strand of filament through the extruder and Bowden Tube to clean clogged nozzles, tubes, and extruders. This is a great way to get bits of plastic and debris out of inside these elements.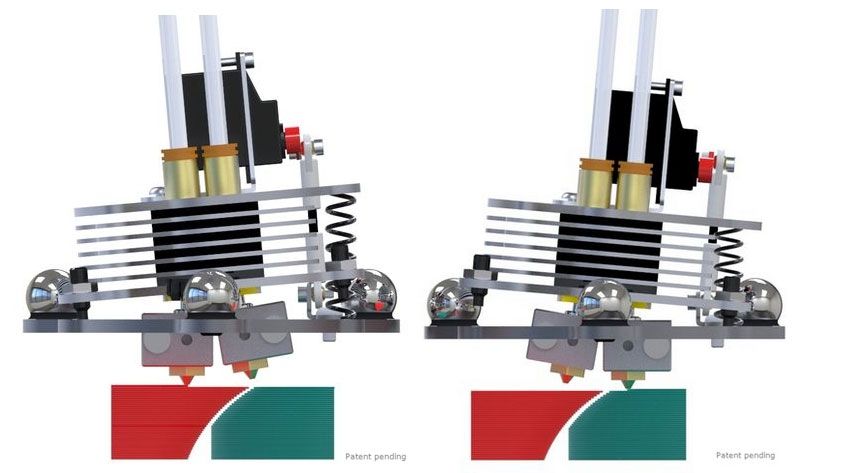 In most cases, it involves heating the end of the filament, inserting it through, sticking to anything stuck, and then pulling it out. In most cases, the best material for this purpose is nylon.
Bottom Line
If you’re experiencing extruder skipping or clicking with your Ender 3, it’s likely because filament can’t feed properly. The best course is to assess potential problems and work through them starting with the most likely issue. And, as the printer’s owner, you would best know what you’ve recently changed or adjusted, so you would best know where to start.
A small guide to fixing inconsistent extrusion in your 3D printer.
top sellers
-
Bearing 604UU U604ZZ
U-bearing U604ZZ 604UU 4*13*4
35.00 UAH
-
Thermal mat for 3D printing 200 x 200 mm
3D printing thermal pad
150.
 00 UAH
 -
Buy epo3d+ 3D printer
Epo3d+ Ukrainian FDM 3D printer on HIWIN rails. Thanks to reliable...
UAH 35,000.00
-
ABS granules
ABS granules for extrusion
400.00 UAH
-
PLA
PLA environmental plastic from Plexiwire. 100% advance payment....
UAH 375.00
-
Buy ABS plastic (ABS)
ABS plastic from Plexiwire.
 100% prepayment. Free shipping...
 UAH 220.00
-
Mini motor reducer 12v 100 rpm
high torque mini electric motor. Its size...
150.00 UAH
-
Nozzle for 3D printer 1.75 mm, for E3D and MK8 hotends
3D printer nozzle 1.75 mm 0.2/0.3/0.4/0.5
35.00 UAH
-
PETG plastic for 3D printer
PETG plastic from Plexiwire. 100% prepayment. Free...
UAH 360.00
-
SHF-20 shaft support
SHF-20 shaft support is used for CNC
60.
 00 UAH
 -
A4988 stepper motor driver
35.00 UAH
-
Buy epo3d 3D printer
Ukrainian epo3d 3D printer built on the basis of modern kinematics...
UAH 18,000.00
All best sellers
Information
A small guide to fixing inconsistent extrusion in your 3D printer.
Inconsistent Extrusion Troubleshooting Guide
In order for your 3D printer to create accurate parts, it must be able to extrude a very constant amount of plastic. If this embossing is different in different parts of your print, it will affect the final print quality. Inconsistent embossing can usually be determined by observing the printer closely as it prints. .
The causes of inconsistent extrusion in 3D printing are many and can be related to various mechanical, electrical, thermal problems. The purpose of this article is to help narrow down the causes based on tests and observations.
How to determine if you have problems with inconsistent extrusion or shifted layers when stripes are displayed on a vertical surface.
Separately print two single-layer objects: a circle and a square, at least 30 mm across.
• Don't print too small an object or you will have overheating problems.
• When using PLA, the fan must blow on the print.
• In your slicer: set perimeters to 1, no top layers, no padding.
• Alternatively, use the spiral vase mode to avoid abrupt layer changes.
• If necessary, use the layer height on the higher side so you can see the layers more clearly. A layer height of .20 mm or more is more noticeable.
• Check the box on the side facing out for reference.
Now take a close look at the inside and outside of the printed object where the streak or artifact is, and see where the streaks or artifacts start on the layer. Take a clear photo and zoom in to see more details.
If the perimeter moves sideways, you will see it pushing inward in places and outward in others. Look in which directions it is shifted and you will know:
• If it is only in the X or Y direction, then that axis is the problem.
• If it oscillates in a regular sinusoidal waveform, then the Z-Axis may cause it with a bent screw or loose guides, or something else loose.
• If shifting is random, it could be a problem with the drivers, or there is friction (wedging) or loose mounting causing play.
• If the layer height is not consistent, it may be due to the z-axis, drivers, or other mechanical issues.
To solve these problems: See Layer shifting (shifting) for possible causes and solutions.
Otherwise, if the perimeters just get wider and narrower and don't move laterally, this is caused by an inconsistent extrusion.
Reasons for inconsistent extrusion
(This will be a mesh, not yet sorted)
• Extrusion temperature too low. Choosing the best temperature depends on your thermistor and where it senses temperature, heater and filament configuration.
• Clogged extruder mechanism with filament chips.
• Extruder skips steps due to low drive current - extruder may also stall or kick.
• Extruder is skipping steps due to thermal shutdown caused by high driver current or poor cooling.
• Not enough pressure on the compression bearing
• Too much pressure on the bearing - flattened thread.
• Variable hotend temperature possible:
o PID settings;
Head heater block loose;
Thermistor incorrectly installed in the heater block, or contaminated with burned plastic0108 Thermistor is too far from the measuring point.
Cartridge heater low supply voltage to ensure adequate heating under load.
The fan blows on the hot nozzle and cools it down.
• Intermittent extrusion due to Hot End Thermal Barrier:
o Thermal barrier fan missing or not working.
Molten filament is creeping into the cold area
o The filament retraction distance is too large.
All Metal Hot-End Not Designed for Sticky PLA
• Extruder Overload:
o Extrude speed too high for maximum speed achievable at current print temperature (extruder will stall, slip or skip motor steps)
o Large nozzle pressure drops due to print speed / perimeter width / layer height between the elements - which causes the extrusion to stop.
• Excessive friction on the way of the filament to the extruder:
o Resistance/friction when pulling the filament from the spool.
• Excessive friction in the path of the filament in the tube (Bowden):
o Sharp bends in the Bowden tube, especially in certain X / Y / Z positions
o The filament is very wavy
• Electrical noise - motor wiring not shielded
• Debris in nozzle
• Faulty or overheated driver.
• Poor quality extruder motor
• Loose set screw on extruder gear. Use nail polish as a thread fixer.
• Too much retraction combined with long distances. The retracted filament will cool down.
• Hot nozzle is missing plastic when starting printing.
(There is a solution) Ender 3 pro extruder skipping steps, tried a few things
creality-ender-3 troubleshooting hotend
I've already asked this question somewhere else, but unfortunately I've had no luck.
So... my Ender 3 Pro extruder just started skipping steps as the gears (and gear) would spin but the filament wouldn't flow. It all started when I changed the PLA filament to a new roll; I thought it might be a faulty roll so I tried a reel which worked fine until 2 hours before it started. No, and this one too.
Here's what I've tried so far:
- Replaced the spare PTFE pipe with a Capricorn pipe.
- Checked that the tube is tight and has no play.
- Replaced the entire extruder system (except for the extruder motor) with a Creality metal system.
- Performed various cold drawings.
- Replaced nozzle.
- Increased extrusion temperature from 195°C to 205°C.
- Checked if there is a correct distance between table and nozzle.
- - he shouted at the printer.
- Asked my cats for advice.
None of the above worked and my cats looked at me strangely. The print settings are shown below:
- Slicer filament diameter 1.75 mm (yes, I checked).
- Temperature: 195°C, increased to 205°C.
- Print speed: from 20 mm/s for first layers to 50 mm/s for filling.
I also went back to the old PTFE tubing because I noticed that the Capricorn puts too much resistance on the filament. No, it's still jumping.
I've noticed that the extruder gear grips the filament pretty hard, so much so that when it starts to slide it actually eats the filament until it breaks. It's almost like there's a blockage somewhere, but the tube is clean, the hotend is clean (I've cleaned it and checked several times), and the nozzle is brand new.
What else can I try? Did I miss something? Apart from the changes listed above (implemented after the extruder started to skip), the printer is completely stock, firmware and everything else.
UPDATE: I changed the factory hotend unit to a brand new one, changed the PTFE tube again, making sure it is as close to the nozzle as possible (unscrew the nozzle 1/2 turn, install PTFE, screw the nozzle) but it's nothing didn't change.
The extruder is still skipping steps because it cannot push the filament out of the nozzle. Pushing it by hand feels nice and smooth until it hits the nozzle where I feel too much resistance.
UPDATE 2: I changed the following EEPROM parameters to limit filament flow:
M203 Z5.00 E25.00 M201 E1000
I also turned the temperature up to 220°C but it made no difference. What I've noticed is that after cleaning the hotend and tube, it starts skipping after 1 hour of typing, every time without fail.
UPDATE 3: I checked the input voltage from the power supply and it is 24V; The Vref for the extruder is 0.744V so everything looks as expected.
UPDATE 4: The extruder idler pulley has a compression washer to hold it in place without interfering with idle rotation; it is usually mounted in the order of idler pulley, compression washer and bolt. I noticed that the pulley wasn't spinning freely that way, so I reversed the order for the compression washer, idler pulley, and bolt. The head of the bolt is small enough not to stop the rotation of the pulley.
I also increased the pressure of the spring arm on the idler pulley so that the toothed pulley grips the filament more tightly.
In this way, I managed to improve the situation, although not to solve it. It has been typing for the last 3 and a half hours without skipping, but this is not a solution to the problem, since the gear train chews the filament too aggressively. In just one hour the extruder had a nice deposit of PLA chips and I had to blow it off, which had never happened before all this started.
@vale.maio2, 👍4
Talk
7 answers
Best answer:
▲ 1
So after a day of yelling and fighting, I figured out what the problem was. As many have suggested, I did have a problem with the tube rising from the nozzle. it was rising, so the PLA was slowly infiltrating where it shouldn't be, to the point where it created a blockage leading to a skip.
However, no amount of effort to clean and reinstall the tube did not get rid of it. I also changed the nozzles, tubes and pneumatic fittings again to better ones, but to no avail.
I was completely fed up and bought a direct drive conversion kit. One of the cheapest and reuses most of the stock hardware, including the stock extruder and gears. For me, the idea was that the mass of the extruder and the much shorter tube length meant there was no room for the tube to move and release the PLA.
It seems to work so far, I've been working on a 10 hour print for 6 hours now without any gaps. I also managed to loosen the pressure the extruder arm puts on the filament so it doesn't chew anymore and so far I don't see any PLA shavings.
, @ vale.maio2
▲ 1
Since you said you feel a problem with the nozzle pushing it by hand and since you say it disappears for a while after cleaning, you probably have somewhere molten filament, into which it should not fall, and then solidifies and wedged. Make sure the radiator cooling fan at the cold end is running and that the PTFE tubing is properly installed all the way through the thermal break and abuts the nozzle with no gaps or bumps, and that the pressure fitting holds it firmly and does not allow it to back out. If you can't find anything wrong, it's possible that something is simply faulty/corrupted inside the hotend build.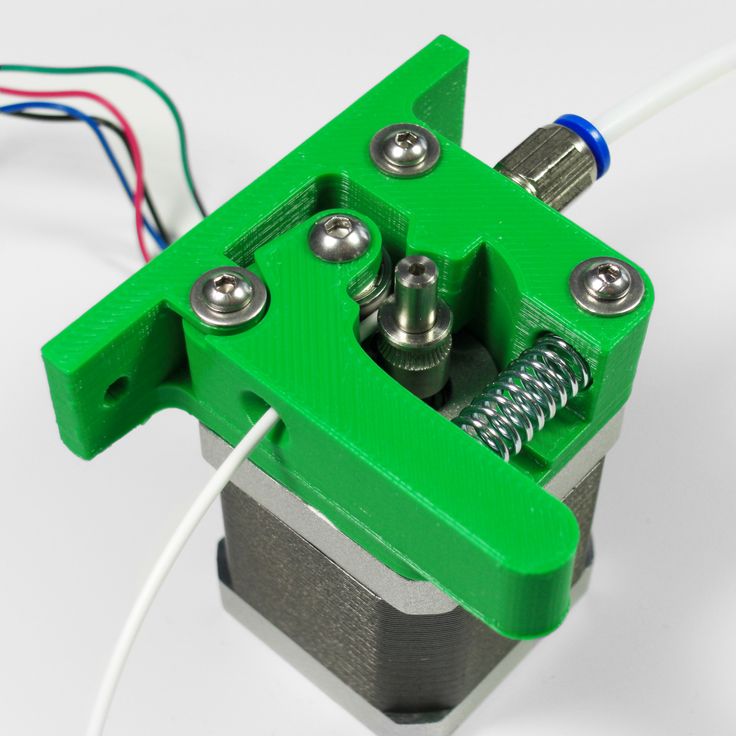
, @ R.. GitHub STOP HELPING ICE
▲ 0
I in my case helps to reduce typing speed from 100% to 80%. It looks like the filament is cooling down the node too quickly. In some large prints at the beginning (on the first layers) I reduce the speed to 60%. It looks like the background temperature is not the same at the center and at the edges.
, @ Marek Urbański
▲ 1
This behavior can be caused by many factors. First, check for knots in the coil - this can lead to a blockage of the coil. Second, check the temperature of the PLA and, if double walled (lots of material falling out), make sure the printhead isn't banging (running over) excess material due to seepage. I found that after replacing the HE print head and extruder with a new one, the root cause was that I was oozing and not using the nozzle fan.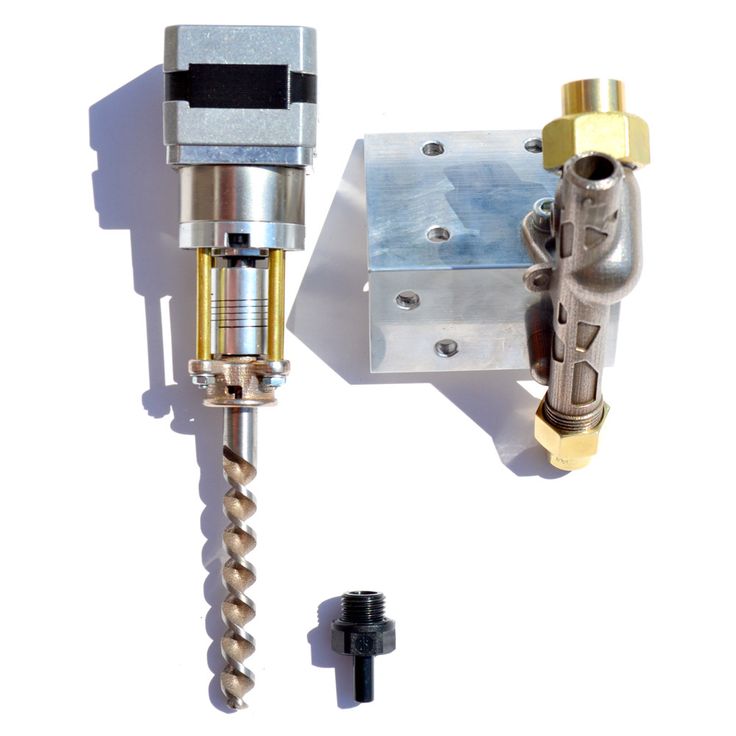 This caused the head to bump into lumps in the longitudinal runs (a thud was heard), which caused the head to gradually prop up and the reservoir in the head to refill with hot PLA. This then creates a back pressure in the Bowden tube and then up to the extruder which tries to push the material into the already filled reservoir (Head + Bowden). And... this causes the gear in the extruder to fight the pent-up flow in IT. The solution was to turn on the fan and that stopped the silt droplets. Since I decided to print a fairly heavy item, the number of walls caused excessive buildup and my extra prime setting, while good for thin wall printing, along with the 6mm draw, was not good for thick wall printing. So I could reduce the extra prime a bit, but the nozzle fan was the best and easiest option. You have to think about the whole material flow process and how the system works: in-line. If you think about it, it's just a gorgeous glue gun. Therefore, you must be aware of all parameters that can affect the material flow.
Replacing IT was actually a good idea as now I can easily prime the head by just pushing the material by hand and feeling the flow. If you have to push very hard, this means that there is a blockage: either in the head, or in the tube or reservoir. Every two months you should service the printer and make sure that the head works well. Bowden may also start to become restricted at the head, where the clamp locks onto the pipe. Heat plus constant flexing causes the tube to begin to flex. If you are getting flakes in the extruder gear, then you have a Bowden tube or HE problem. Pushing the PLA by hand will tell you this. Once a new OH is installed, you can feel the difference. The Creality 3D Pro head assembly only costs a few pounds. I would suggest keeping a spare set of maintenance parts on hand.
Flakes on the extruder can also be a sure sign that water has entered the PLA. Look for small warts or blisters on the print. If so, place the coil in the oven at 60°C for about 10-15 minutes. Then let cool. Ideally you want a dry storage room for your rolls or a proper bucket with a drying agent inside. In the summer, when heat and humidity rise, you will notice that there is more water absorption. If your printer is in the same room as the washer/dryer, you're asking for trouble. Ideally, you want a dry, cool space. Or just print a huge batch and quickly go through the spool...
, @ Rob Atkinson
▲ 0
I've experienced this a few times and just using my experience from machining I've narrowed it down to a few factors that change fixed. hot end temperature #1, axis speed #2, filament feed speed #3. playing around with these settings, I tend to find a happy environment with what I type. this requires running a few parts of the setup, but by trial and error you can find the operating point for your machine compared to the recommended settings. no two printers are ever the same, just like no two CNC centers are ever the same. a jammed extruder is typically feeding too much material into the block for its temperature, or it is clogging up at points at poor table level. If the prints still come out fine then that's too much pressure IMO.
, @ jburli66
▲ 2
I had exactly the same problem and then it suddenly disappeared.
The only thing I changed is my z-offset. I moved it away from the plate by about 0.1 mm. To confirm that this was the cause, I moved it closer to the plate and the problem returned. I think when the nozzle is too close to the plate the plastic can't flow freely and so the feeder gets pressurized and lets it through. This worked for me, everything is in stock and no changes to feeder settings or anything.
, @ Dhruv Kumar
▲ 2
In case anyone else also encounters this issue and tried all of the above, here's how you can fix it for good.