Creality ender 5 pro 3d printer review
Creality Ender 5 Pro - A Review
» Skip to the Extras
The Creality Ender 5 Pro is a great 3D printer and one I can highly recommend. This is the second 3D printer I've owned. The first was the Ultimaker 2+. The Ultimaker 2+ gets top reviews and I have found it to be a very fine 3D printer, which makes a good standard for comparison.
Living in Michigan in the summer and Florida in the winter made transporting the 3D printer between the two places inconvenient. With the higher price of the Ultimaker2+, I decided to experiment with a much cheaper 3D printer. After doing some online shopping and lots of comparisons, I settled on the Creality Ender 5 Pro.
I found an updated model with the all-metal feeder and quieter motors and electronics for $399 with a $40 discount available at the time. My choice of this model was largely influenced by its cubic structure, which appeared very solid.
The printer came well packed in soft foam. Assembly is needed, but it's fairly easy because the three main assemblies are simply screwed together with the four upright beams. This takes only a few minutes ,and the picture book instructions were quite adequate.
While installing the Z axis frame, I cranked a little too hard on one of the cap screws and it started to strip the threads in the frame. I noted that these screws didn't go all the way into the threads in the frame, so I purchased a replacement screw 5 mm longer. This took care of the problem. I believe M8x30 screws here would be a better choice.
The all-metal filament feeder is screwed into an upright with a type of T nut. Be sure the T nuts are turned horizontally to lock behind the 2040 extruded aluminum beams.
The Bowden tube and wires to heat the print head rub on the side of the frame just above the extruder. This will lead to problems and I suggest padding of some type. A different placement of the extruder would solve this problem.
The filament is changed manually.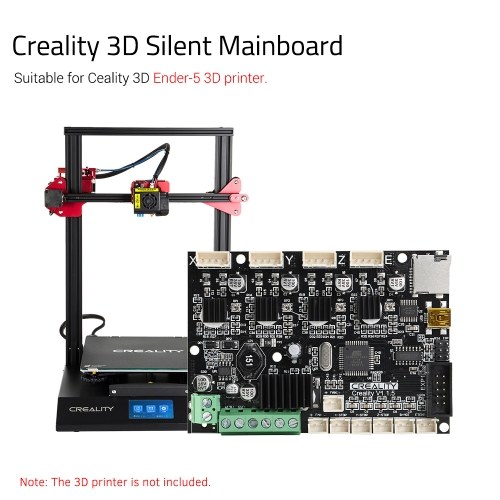 While compressing the extruder lever, filament is slid into the Bowden tube until it comes out of the preheated nozzle. The filament is simply pulled out of the Bowden tube after heating the nozzle.
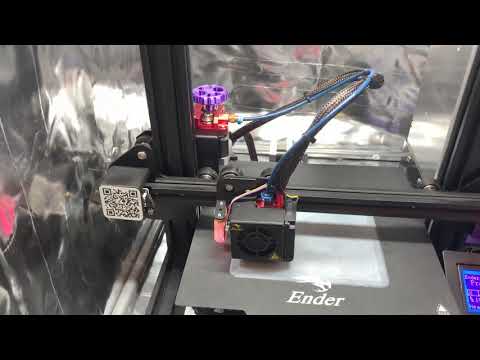
Wire management is non-existent on this model. One tie-wrap was included, but you may want to use more. With some care, the wires can be routed out of the way. You'll notice that the majority of images of this printer you find online don't show any of the wiring.
Figure 1. Wire management.
I did struggle for a time with getting the bed levelled, which is the important first step in any print job. The Ender 5 Pro has four bed levelling screws in the corners. I followed the directions and used a piece of ordinary paper from my printer. After many unsuccessful attempts at levelling, discovered the problem. The paper is soft and flexible. Referring to Figure 2, as I slid the paper back and forth, it wrapped around the nozzle. So, the nozzle pressure on the paper felt the same as I continued to turn the adjustment screw.
Figure 2. Using soft paper for bed levelling.
The solution was to use a piece of stiff paper with a polished surface that lays flat. Once I used this, I got good results. Moving to all four corners at least twice works well. Three points define a plane in space, and I prefer a three-point bed levelling system. It's easier to get one corner out of plane with four-point bed levelling.
Figure 3. Using a clamp to freeze Z motion while bed levelling.
There are online comments about the bed moving downward during the bed levelling process. I experienced this as well. It's simply solved by attaching a plastic spring clamp to the Z axis motor coupling.
The XY motors are disabled during bed levelling, so the head can be moved to the four corners. The Z motor should lock the bed in place, but evidently this doesn’t happen. While this works well enough for bed levelling, it doesn't solve the problem of bed drop after a power outage.
If the bed stays in place after a power outage, the resume function is supposed to continue with the print where it left off at the power outage. Online comments report the tension on the spring on the Z axis tensioner needs to increase.
This can be done with 3D printed clips you can download at https://www.thingiverse.com/thing:3567212. I didn't test the resume function; instead, I rely on a backup power unit. I have a small relatively inexpensive unit that gives me about two hours of backup power for the Ender 5 Pro. I have saved many a print this way.
Another annoyance is that the home position lines up with the top of the frame of the cubic structure. This makes it difficult to see the end of the nozzle in this position. This probably is a result of maximizing the print build area which is a respectable 220 x 220 x 300 mm (8.66 x 8.66 x 11.8 inches).
My first print was a small box I use for digital clock enclosures. The quality of this first print surprised me. It was very good. The surface and detail were beyond my expectations and certainly on par with what the Ultimaker 2+ can do.
While printing this box, I did notice some vibration of the print bed when the head made sudden moves, as when slewing to another place on the print. A little searching on the Internet led me to find a number of comments on this problem with the Ender 5 series. The search also found a Thingiverse article with a download of braces to print entitled “Ender 5 bed supports (The Original "Super Struts")” at https://www.thingiverse.com/thing:3479330/. These looked like a good plan to me and I downloaded the files and printed them.
Figure 4. A "Super Strut" in place.
These bed supports are long and had to be oriented diagonally across the print bed. Printing these also caused some considerable vibration in the print bed and it was necessary to slow the print speed down to 50% to stop most of the vibration. Installing these supports with #8 machine screws was simple, although a bit of a tight squeeze.![]() They have greatly reduced the vibration.
They have greatly reduced the vibration.
The filament reel mount is also attached to one of the uprights. Instead of using this, I like to place my reels at floor level and disconnected from the printer frame to avoid vibration. I created a simple spool holder from PVC pipe and find that the extra distance between the spool and the extruder helps straighten out the filament off the spool before entering the extruder.
I also opted to use a glass print bed, as that had been my previous experience and found it to work quite well. Mine was purchased from Amazon at https://www.amazon.com/gp/product/B07X3YGNFF/ref=ppx_yo_dt_b_asin_title_o03_s00?ie=UTF8&psc=1. A light coat on the glass from a glue stick works well to get the first layer to adhere.
Figure 5. Printing a large enclosure for an underwater ROV.
The display with its single selection knob with a built-in pushbutton switch worked very well. I found the various menus to be intuitive and easy to use. Settings like nozzle temperature, bed temperature, and speed can be manually adjusted while printing.
Spare parts for a 3D printer are always a concern. Eventually, you’ll need to replace something. After doing a Google search for spare parts for the Ender 5 Pro, I was pleased to find multiple hits with a wide variety of parts.
I can highly recommend the Ender 5 Pro. The only major drawback is the bed vibration, which can be solved with the add-on supports. NV
Simple Ender 5 Pro Review – Worth Buying or Not? – 3D Printerly
Creality is one of the world’s leading 3D printing manufacturing company that hails from Shenzhen, China.
It was founded in 2014 and ever since then, the company has been gradually dominating the globe with its production of tremendously capable 3D printers.
With the Ender 5, Creality has strategized to make the already very established 3D printer even more striking by releasing the Ender 5 Pro.
The Ender 5 Pro boasts a brand-spanking-new Capricorn PTFE tubing, updated Y-axis motor, a metal extruder, and other minor improvements over the basic Ender 5.
To talk about the Ender 5 Pro in general, it is a machine that brings you amazing value for your money.
It’s loaded with ergonomic features such as a magnetic self-adhesive build platform, an all-new metal extruding unit, a modular design that demands minimal assembly, and a whole lot more that we’ll get to later.
For the price, you simply cannot hope to go wrong with this bad boy. There’s a reason it has received many awards and distinctions, let alone the label of being the best 3D printer under $500.
This article will give you a detailed review of the Creality Ender 5 Pro (Amazon) in an easygoing, conversational tone so you can know everything you need to know about this great 3D printer.
Features of the Ender 5 Pro
- Enhanced Silent Mainboard
- Durable Extruder Frame
- Convenient Filament Tubing
- V-Slot Profile
- Double Y-Axis Control System
- Uncomplicated Bed Levelling
- Removable Magnetic Build Plate
- Power Recovery
- Flexible Filament Support
- Meanwell Power Supply
Check the price of the Ender 5 Pro at:
AmazonBanggoodComgrow Store
Enhanced Silent Mainboard
One of the key selling points of the Ender 5 Pro is the V1.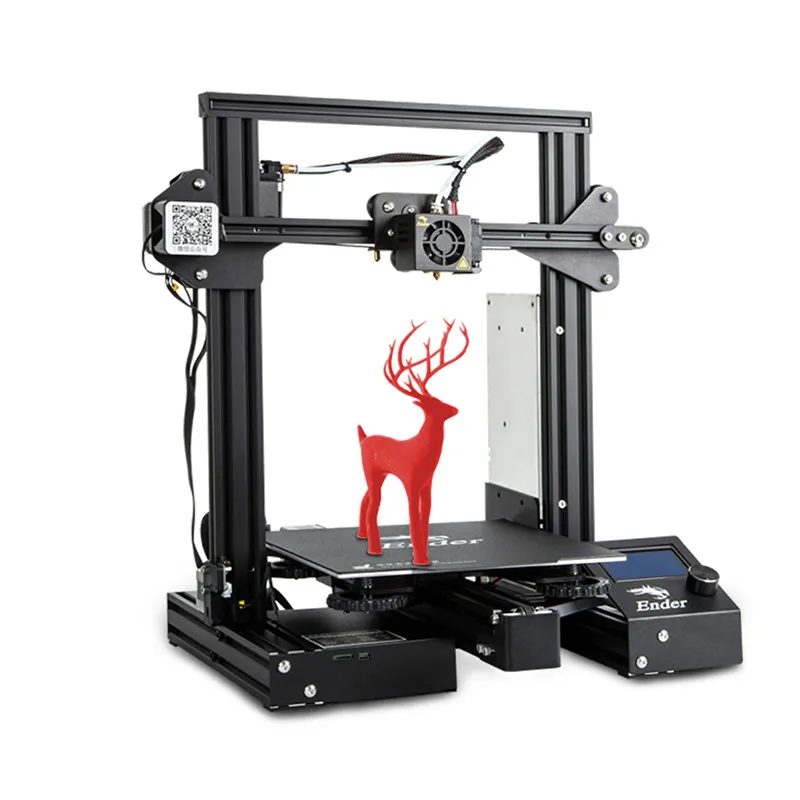 15 ultra-mute mainboard along with TMC2208 drivers ensuring that the printer stays very quiet. Users have reported to like this feature very well.
Moreover, this handy upgrade also has both Marlin 1.1.8 and Bootloader pre-installed so you can have more capabilities tweaking around with the software.
The mainboard also has thermal runaway protection enabled by default so even if your Ender 5 Pro reaches abnormally high temperatures, there’s an extra layer of protection that this problem will have to go up against.
Durable Extruder Frame
Adding more to the feature list is the metal extruder frame that’s gathered a lot of attention.
The now updated extruder frame is for building up a better amount of pressure when the filament is being pushed through to the nozzle.
This goes on to improve print performance drastically, as the manufacturer itself claims it.
However, people like to experiment with different types of filaments, and one filament may differ from the other in terms of physical properties.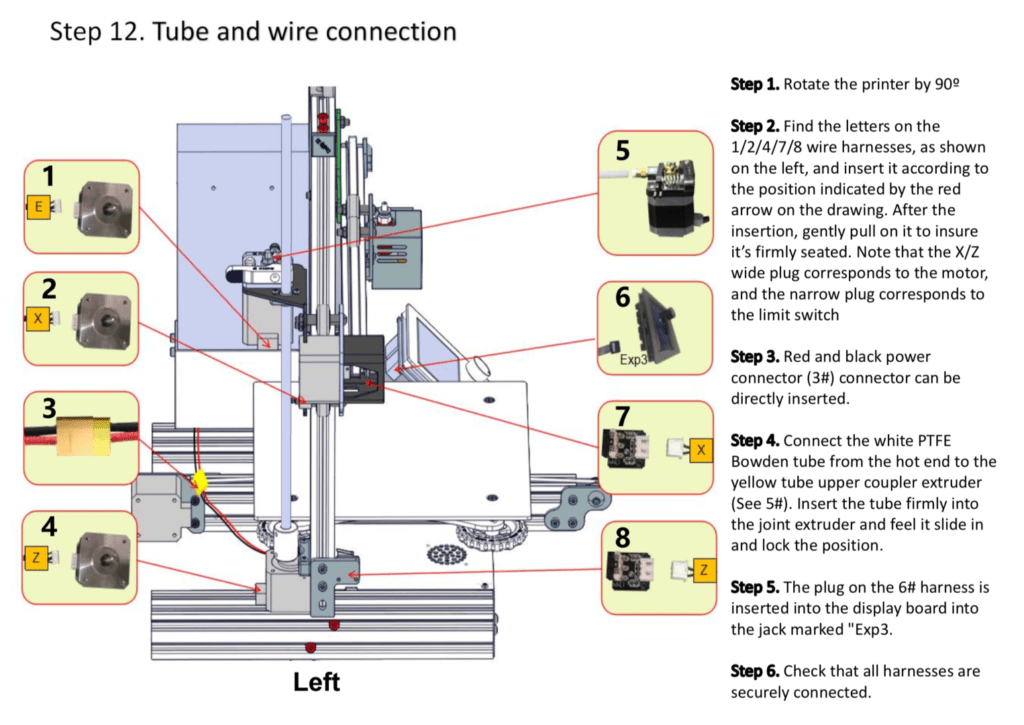
This is why Creality decided to ship an adjustable bolt in the metal extruder kit so users can optimize the pressure of the extruder gear and help their desired filament perform much better.
Convenient Filament Tubing
Quite possibly the dealmaker for the Ender 5 Pro is the Capricorn Bowden-style PTFE tubing.
You’ve probably heard of this 3D printer component before elsewhere which is why you might be wondering what’s so special about it here?
Well, this highly improved filament tubing comprises an internal diameter of 1.9 mm ± 0.05 mm that reduces any excess space, preventing filaments to bend and warp.
This is a great upgrade to the overall usability of this 3D printer while allowing you to print with flexible filaments like TPU, TPE and other exotic thermoplastic materials.
The Capricorn Bowden tube just has a really good grip over the filament especially flexible ones, and even has tighter tolerances for that matter.
In conclusion, this new and improved tubing is a purely noteworthy upgrade.
Easy Assembly
Another quality trait that makes the Ender 5 Pro (Amazon) suitable for the likes of beginners too, is its simple assembly. The 3D printer arrives as a DIY kit with pre-assembled axes.
All you have to do is fix the Z-axis to the base and get the wiring sorted. Truthfully, that’s about it as far as the initial setup is concerned.
This is why the Ender 5 Pro is definitely easy to build and assembly is not something to worry about.
All in all, setting everything up should take you right about an hour at best, so the Ender 5 Pro gets ready for action.
Double Y-Axis Control System
We assume Creality really had people looking out for this unique functionality of the Ender 5 Pro that was not present in its original counterpart.
Along with an increased print area on the Z-axis, it turns out that the Y-axis motor has been designed very efficient this time around.
There is a distinct Double Y-Axis Control System that allows the Y-axis motor to run along both sides of the gantry, thus attributing to a stable output and integrating smoother movements.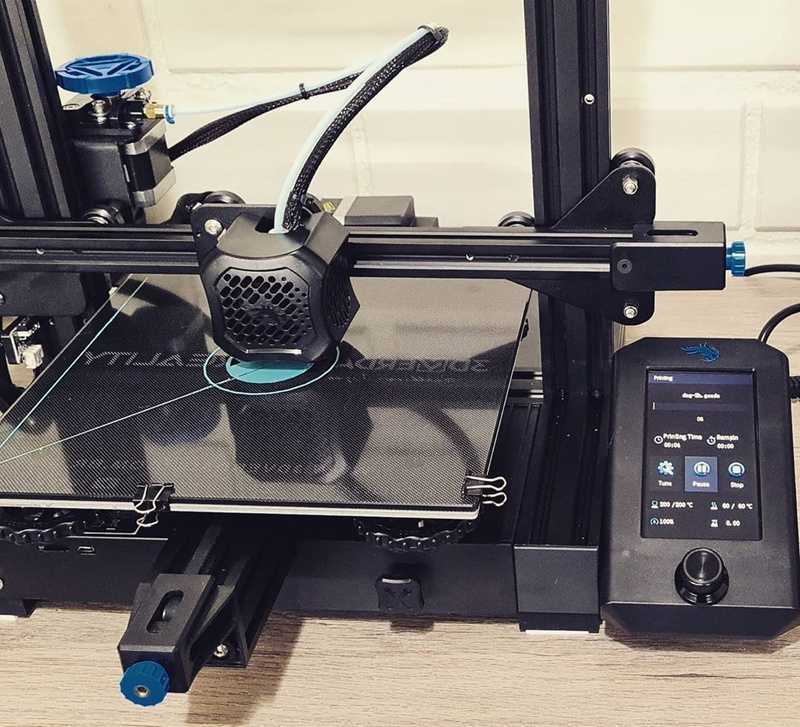
This useful new upgrade makes sure that the Ender 5 Pro is vibration-free during the performance, especially when printing for long hours.
V-Slot Profile
The Ender 5 Pro incorporates a cautiously designed, top quality V-slot profile and pulley that amounts to better stability and a highly refined printing experience.
It gives you that feel of a premium product that other 3D printers fail to.
Besides, the V-slot profile is wear-resistant, makes for quieter printing, and also prolongs the life of the Ender 5 Pro, making it hard to break down before a considerably longer period of time.
Removable Magnetic Build Plate
The Ender 5 Pro (Amazon) also features a flexible magnetic build plate that can be removed from the build platform effortlessly.
Therefore, you can easily remove your prints off of the magnetic plate and get it back on the platform, not to mention the great self-adhesive property of the Ender 5 Pro’s print bed.
This is why taking off the build plate, removing your print, and adjusting it back again is an uncomplicated process.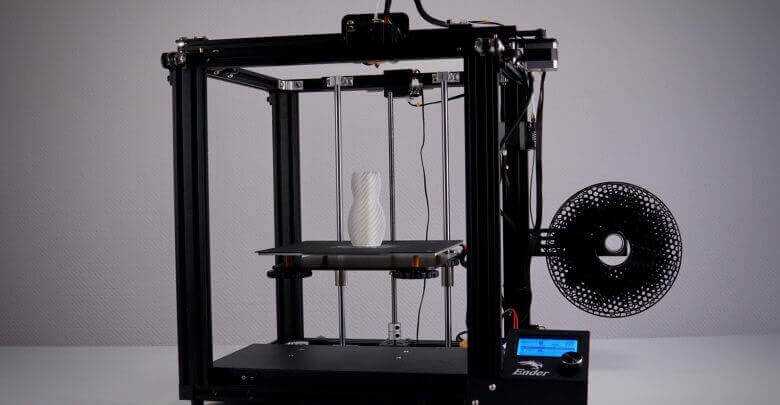 A very nice convenience for users to say the least.
Power Recovery
The Ender 5 Pro, just like the Ender 5, also has an active power recovery function that allows it to resume printing from right where it left off.
Although this is something that’s become fairly common in the 3D printers of today, seeing this feature on the Ender 5 Pro is just a sigh of relief nonetheless.
This print resuming functionality can save a 3D printed part’s life in case of a sudden power outage or an accidental shutdown of the printer itself.
Flexible Filament Support
The Ender 5 Pro is really worth the extra money and the upgrade over the Ender 5 if what you want from it is to print flexible filaments.
This is due to the courtesy of the Capricorn Bowden tubing of the printer and also the ability of the nozzle temperature to go over 250°C comfortably.
Meanwell Power Supply
The Ender 5 Pro features a Meanwell 350W / 24 V power supply that can quickly heat the print bed up to 135℃ in less than 5 minutes. Pretty neat, right?
Benefits of the Ender 5 Pro
- A sturdy, cubic build structure that delivers an appealing, solid look.
- Print quality and the amount of detail that the Ender 5 Pro produces will simply surprise you.
- A huge Creality community to draw from.
- Fast delivery from Amazon with very friendly tech support.
- Fully open-source so you can expand your Ender 5 Pro with good modifications and software enhancements.
- Nifty hackability that allows you to solve the issues of auto bed levelling with the BLTouch Sensor.
- Painless navigation with a highly interactive touchscreen.
- Provides an all-rounding printing experience with sound reliability.
- A highly recommended option at this sub $400 price range.
- A wide variety of 3D printable upgrades are available with no need to purchase anything extra.
Downsides of the Ender 5 Pro
As great as the Ender 5 Pro is, there are some aspects where it takes a significant nosedive.
For starters, this 3D printer could have really used automatic bed-levelling since many people have reported flimsiness, and how the bed isn’t really ‘set and forget’, rather you’ll have to attend to the print bed many more times than you should.
Therefore, the bed requires consistent re-levelling and isn’t very durable at all as well. It seems that you’ll soon have to replace the print bed with a glass bed, as many users have already done so.
In addition, the Ender 5 Pro also lacks a filament runout sensor. As a result, it’s hard to know when exactly you’re going to run out of filament and make changes accordingly.
The magnetic bed, although very useful, can get pretty difficult to clean after printing.
Removal is not a hassle if we’re talking about bigger prints, but when there are two or three layers of filament that need to be removed, the ease here takes a heavy, hard hit.
It can get tough to scrape off small prints, especially when they leave leftovers. The strips of the print, in particular, are tricky to get off the build plate.
Additionally, the print bed is also prone to get pushed by the Bowden tubing and hot end cable harness.
Speaking of cables, the Ender 5 Pro lacks management of wires, and there’s an ugly mess of these that you’ll have to take care of yourself.
Other than all that, the Ender 5 Pro is still a fantastic printer at the end of the day, and really outweighs its cons with a larger number of pros.
Specifications of the Ender 5 Pro
- Build Volume: 220 x 220 x 300 mm
- Minimum Layer Height: 100 microns
- Nozzle Size: 0.4 mm
- Nozzle Type: Single
- Maximum Nozzle Temperature: 260℃
- Hot Bed Temperature: 135℃
- Recommend Print Speed: 60 mm/s
- Printer Frame: Aluminum
- Bed Levelling: Manual
- Connectivity: SD Card
- Filament Diameter: 1.75mm
- Third-Party Filament Compatibility: Yes
- Filament materials: PLA, ABS, PETG, TPU
- Item Weight: 28.
 7 pounds
Customer Reviews of the Ender 5 Pro
People have been very happy with this purchase of theirs, with a plethora of them saying almost the same thing – the Ender 5 Pro is a very capable 3D printer that has met all our requirements for 3D printing.
Many first time buyers have said that they were very sceptical about their purchase at first, but when the Ender 5 Pro arrived, it was an instant delight that packed top-notch quality.
One user says that the 5 Pro’s cubic structure had them very interested, along with a set of other notable features like the silent mainboard, Capricorn Bowden tubing, metal extruder, and the decent build volume.
Another user said that they liked the packaging extremely well, and also the extra added reel of white PLA.
They went on to add that the Ender 5 Pro (Amazon) started to make prints of insane quality right out the box and truly exceeded all expectations.
Some even found the bed-levelling process to be easy which is directed with a four-point system.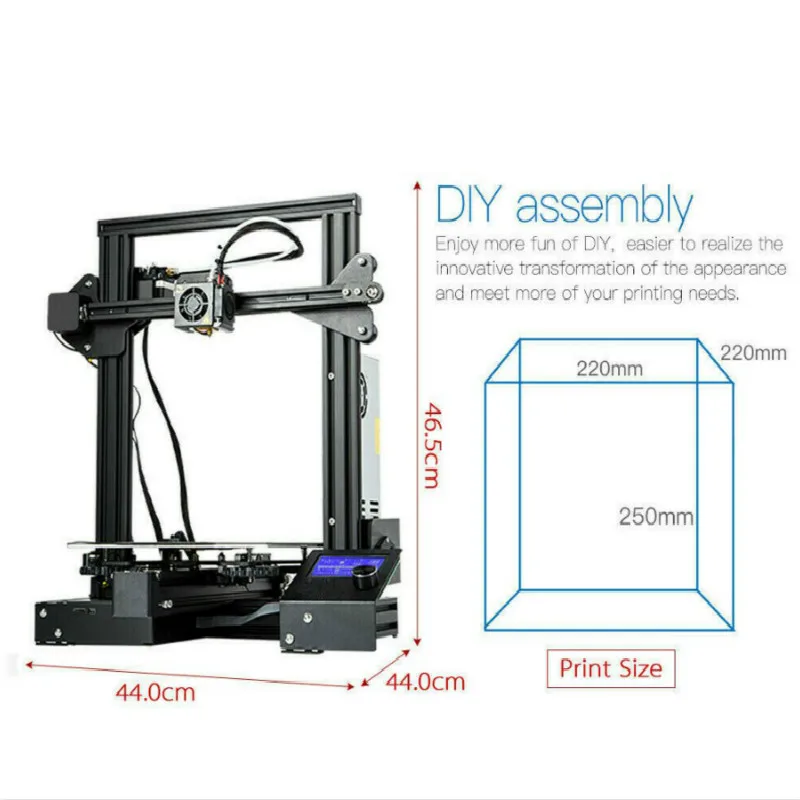 This may be subjective since many also complained about the difficulty of levelling the bed.
One more reviewer from Amazon stated that they absolutely loved the spare extruder nozzle that came with their order along with all the needed tools.
“It’s admirable how the Ender 5 Pro is solidly constructed”, they also added.
Another compared the Ender 5 Pro with their resin 3D printer and was quite shocked at how this beast from Creality delivered far better results at almost half the price.
“Worth every penny”, “Amazingly surprised”, “Very easy to use”, are just a few more things people have to say about the Ender 5 Pro. As you can see, this 3D printer hasn’t failed to impress, not at all.
Verdict – Worth Buying?
The conclusion? Absolutely worth it. As you can observe by now, the Ender 5 Pro has maintained a quality standard in delivering beyond the expectations of fellow users.
It falls weak in some areas, but when you compare those to its immense benefits, the answer is crystal clear. For a shade under $400, the Ender 5 Pro is definitely the one for you.
Check the price of the Ender 5 Pro at:
AmazonBanggoodComgrow Store
Get yourself the Ender 5 Pro today from Amazon for a very competitive price!
Creality Ender-5 Pro 3D Printer Review
Welcome to the Color World.
For the past few years, Creality has been the leader in the production of home budget FDM 3D printers. In particular, their most popular Creality Ender-3 printer.
At the moment, there are already several of its modifications. But in parallel with them there is another line of printers - Ender-5. And today we want to tell you about one of its versions. Creality Ender-5 Pro.
Unpacking
We will not delay the introduction and move on to unpacking and assembly. The printer comes in a fairly large box in a semi-disassembled state. On top is paper detailed assembly instructions and some more waste paper.
Mounted screen.
Extruder motor with feeder
Z-axis mechanism assembled.
Portal with X and Y axes, also completely finished, with a hot end and all belts.
A table with an already glued elastic magnetic substrate and a wire, at the end of which an XT60 connector is installed.
And at the very bottom of the box there are 4 vertical profiles 20x40 cm.
The lower part of the case with the control unit and all wires.
Also included is a 250g spool of white PLA plastic.
And a box with tools and fasteners.
In addition to assembly screws, a filament spool holder, and a power cable, the box contains: a bunch of zip ties, a nozzle cleaning needle, a set of hex keys, a wrench, a small screwdriver, the most common side cutters with soft blue handles, a spare nozzle, a Teflon tube fitting and several clamps for fittings. MicroSD card 8GB with card reader. And a simple metal spatula. The set is quite standard, only tweezers are missing.
Control unit
While the printer is not assembled, let's look at the control unit. It opens from the bottom, the cover is held on by 4 screws. There is also a power supply and a control board.
The power supply is quite standard for printers with such a printable area, 24 volts 350 watts in a low profile case. However, unlike the Ender-3 Pro printers, it is branded here, but not MeanWell. The logo says Lian Lida, what kind of company, we, unfortunately, do not know.
But the control board upset us a little. Despite the fact that Creality already has 32-bit boards on STM32 microcontrollers and they put them on the Ender-3. Here stands, one might say, an already outdated 8-bit board, also on a far from the most advanced Atmega1284 microcontroller.
I am glad that the drivers soldered on the board are not noisy A4988, but already quiet TMC2208, although they are also not the most modern, and also connected in the so-called Standalone mode.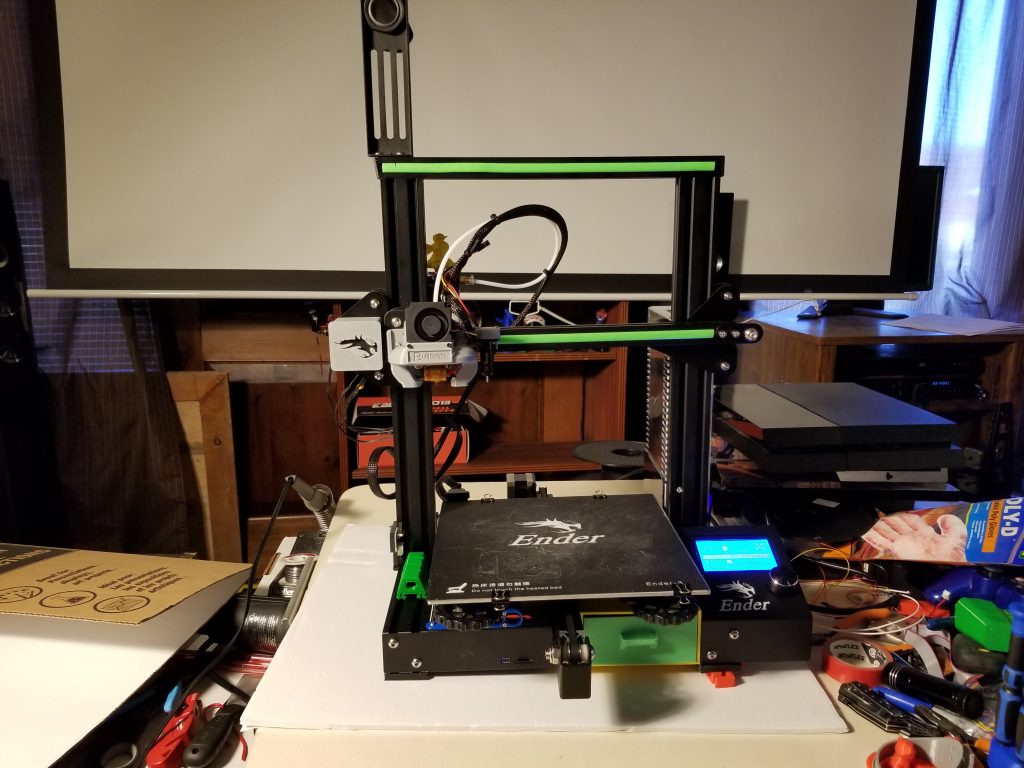 This means that it is not possible to fully use their functionality. Well, okay, at least something.
Assembly
Let's move on to assembly. It's not complicated here, especially if you follow the step-by-step instructions. We fasten 4 vertical racks to the bottom.
We install the portal from above and also fix it with screws.
We fasten the Z-axis mechanism to the back wall of the printer with 4 screws.
And already to this mechanism we attach the table itself with the frame.
On one of the vertical profiles we fix the extruder motor with a feeder on screws with T-shaped nuts.
We insert a Teflon tube into it and fix the fitting with a plastic bracket from the kit.
Install the holder for the spool of filament under the feeder
And the screen on the front of the printer.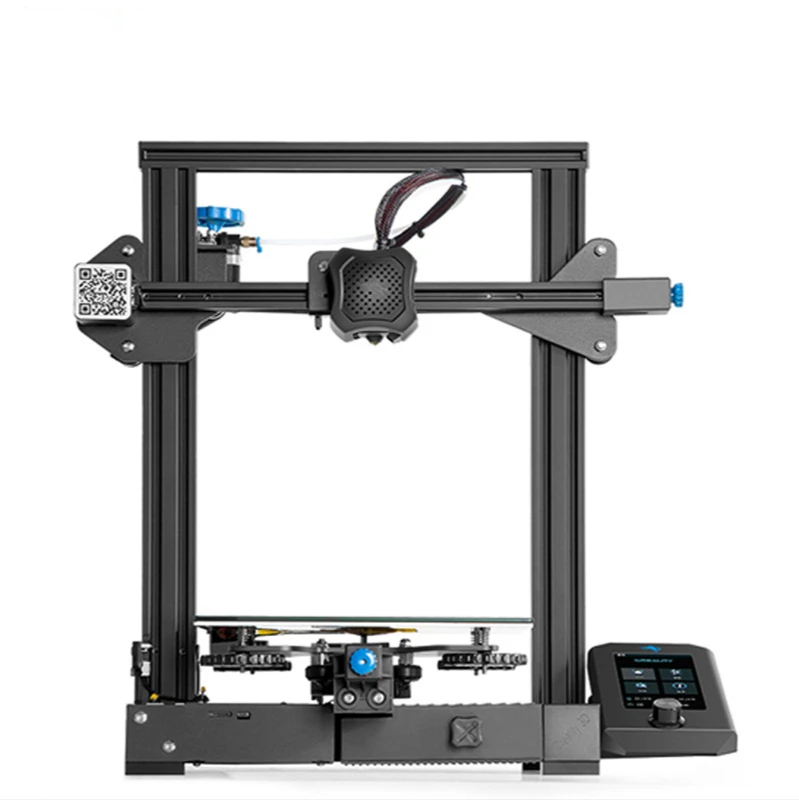
After that, it remains only to connect and run all the wires so that they do not interfere with the movement of the printer nodes. All wires are marked and there should not be any difficulties with this.
Mechanical
So, the printer is assembled. Let's look at it in more detail. We have already seen electronics and electrics, so let's move on to mechanics. The declared print area is 220 x 220 x 300 mm.
The printer uses Cartesian kinematics, commonly referred to as MakerBot after the company that first started using it.
The kinematics are simple, fairly reliable, but far from the fastest, since when the Y-axis moves, the X-axis motor moves along with the extruder and the beam.
To move the X and Y axes, the OpenBuilds system is used, that is, rollers that roll on aluminum V-shaped profiles. 4 rollers on two Y-axis carriages and 3 rollers on the X-axis carriage.
On all carriages, eccentrics are provided on one side, allowing you to adjust the pressure of the rollers.
On any printers with such a movement system, before the first start, you need to check if the rollers are set correctly and adjust them if necessary.
The rollers should be pressed so that nothing dangles, but at the same time it is not pinched. After all, this will directly affect the quality of printing and the durability of the rollers.
In our case, we only had to slightly loosen the rollers of the X-axis carriage.
It also makes sense to check the belt tension. The X axis has one, its tension is carried out by shifting the return roller on a small area.
The Y-axis has two belts, they are also tensioned, but it must be borne in mind that their tension should be as uniform as possible.
Both axles are driven by NEMA17 motors.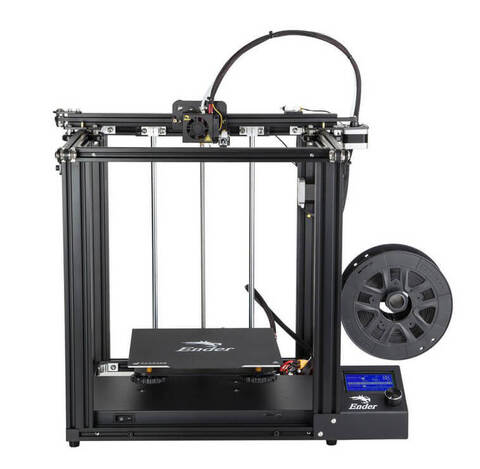 At the X axis it is normal, and on the Y with a through shaft, the motor itself is fixed in the center.
The decision is quite logical.
The Z axis is implemented differently. It runs on two 10mm shafts with linear bearings and is driven by a NEMA17 motor through an 8mm 2-way screw.
The coupling connecting the motor with the screw is rigid split.
The brass nut is ordinary, fixed on the table platform.
The platform itself is made of 4 mm aluminum sheet.
There are no stiffeners, the platform is absolutely flat. At first glance, it doesn't look very reliable.
But, looking ahead, we can say that this does not affect the quality of printing and stacking layers. However, it will not be superfluous to strengthen it.
The heated table is made in exactly the same way as the Ender-3 Pro, 3 mm aluminum sheet with a glued magnetic surface.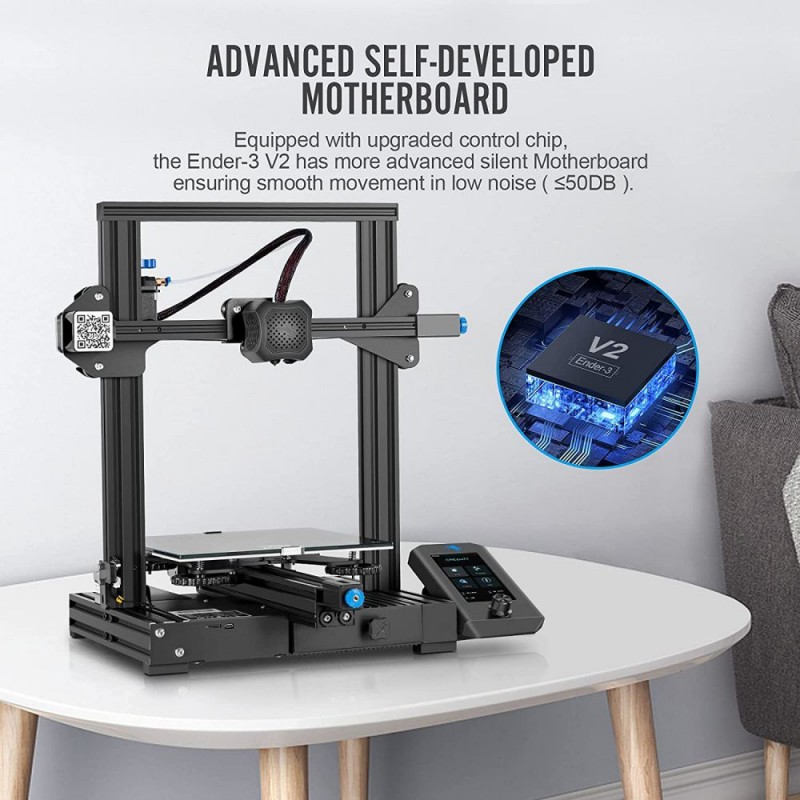 From above, a flexible substrate with an adhesive coating is “magnetized” to it.
The wires coming from the table are not fixed in any way.
Of course, with such kinematics, the table does not make constant fast movements, but it is still not safe.
Printer calibration
There is no auto-calibration of the table. We manually move the carriage around the corners and center of the table, placing a sheet of paper under the nozzle and twisting the large comfortable adjusting knobs until we achieve the same pressure over the entire surface. The leaf should move with little resistance.
In general, the standard procedure.
Construction
A bowden extruder is installed here, the feed mechanism is placed on the printer body, and the filament is fed to the hotend through a rather long Teflon tube.
The feeder can be called already outdated - aluminum MK8, most manufacturers try not to use them and have long since switched to geared feeders like Titan or BMG, not to mention more modern solutions.
MK8, of course, also works and performs its tasks, but has problems, for example, when printing with soft flex plastics. Adjustment of a pressing of the giving gear wheel to a counter roller is provided.
The hot end is the same as the Ender-3, it is called CR10.
Also not the most modern solution, however, this hotend showed itself normally on other models and, if used correctly, does not cause significant problems. The thermal barrier in the hot end is through, the Teflon tube goes straight to the nozzle.
By the way, on such hotends, before the first print, it is advisable to get a Teflon tube and check how it is cut off. The cut must be as even as possible, otherwise the tube will not be able to fit snugly against the nozzle, and plugs will occur.
Our tube was quite even, but just in case, we even trimmed it.
The top of the hot end is covered with a metal casing.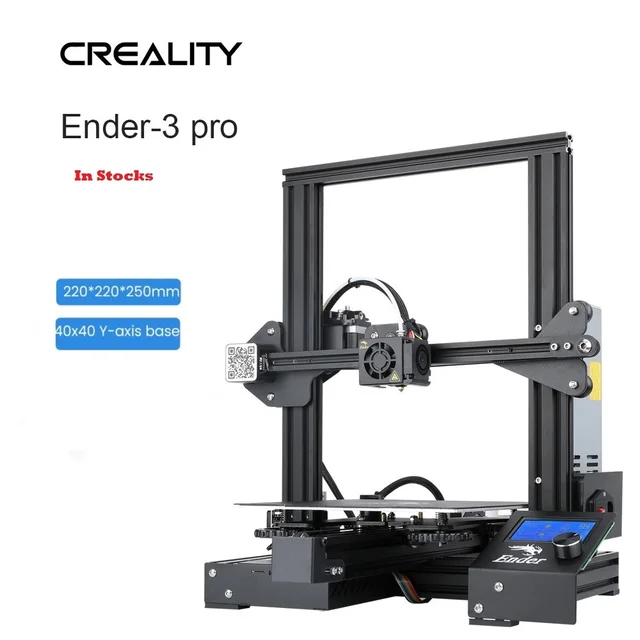
To cool the hot end radiator, a conventional 4010 axial fan is used, and a 4010 turbine fan is used to blow the model.
The casing is exactly the same as on the Ender-3. And it has a long-known minus, the radiator cooling fan blows down on the model and can cause difficulties when printing with plastics that are prone to shrinkage and do not require airflow.
On the other hand, there are many alternative Ender blowers on the internet, the only thing to consider is that the bottom bracket on the Ender-5 is longer than on the Ender-3, and many models of blowers are attached to the bottom bracket on the right.
You need to choose a model that is suitable for this particular printer.
As for the strength of the frame of the entire printer, everything is fine here. Due to the fact that a 20 x 40 mm profile is used as vertical posts, the entire frame is very strong and does not wobble at all.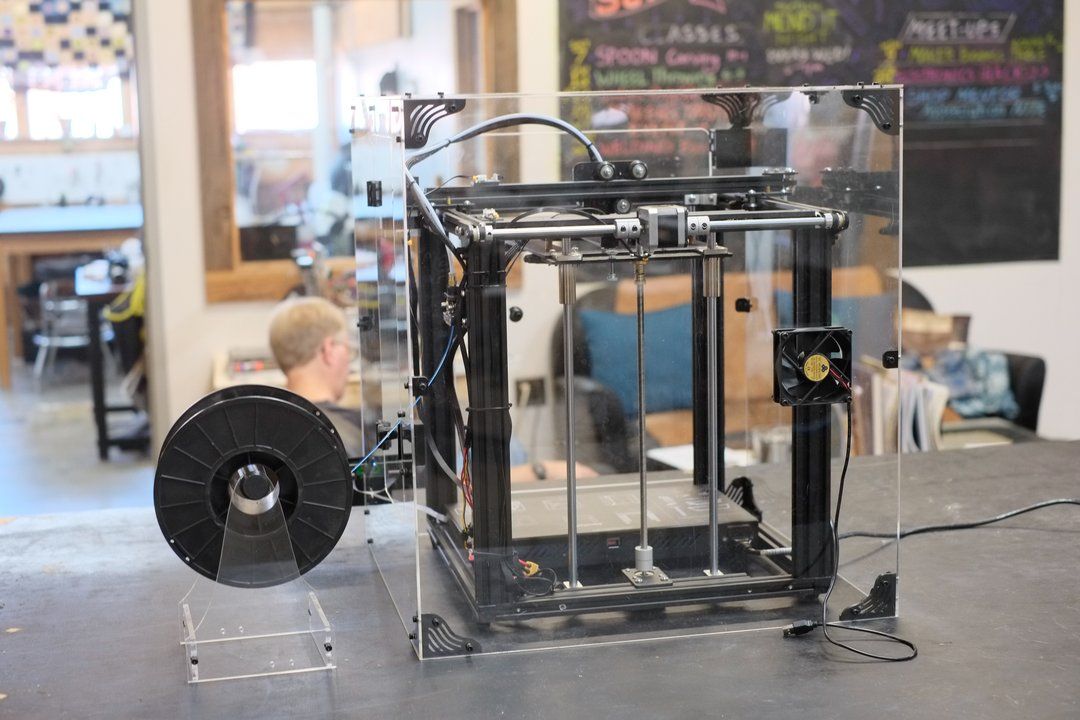
The printer is controlled using a simple non-touch screen 12864 with an encoder.
This may seem like a disadvantage to some, but practice shows that such screens work stably, do not affect printing in any way, and also have a fairly large functionality.
Seal
Turn on the printer and try to print. The power button, MicroSD card slot and MiniUSB port for connecting to a computer are located on the front side of the control unit, which is convenient.
We send all axes home and face the first oddity. The X and Y axis limit switches are on the right and rear, respectively.
In this case, clicking on them assigns zero coordinates to the axes. Zero points are usually located on the left front and all slicers are designed for this location. As a result, by exposing models in the default slicer, they will be printed backwards. A strange solution, even if it was not possible to install the limit switches in another place, it was possible to configure the firmware so that when you click on them, not the initial, but the final coordinates are assigned.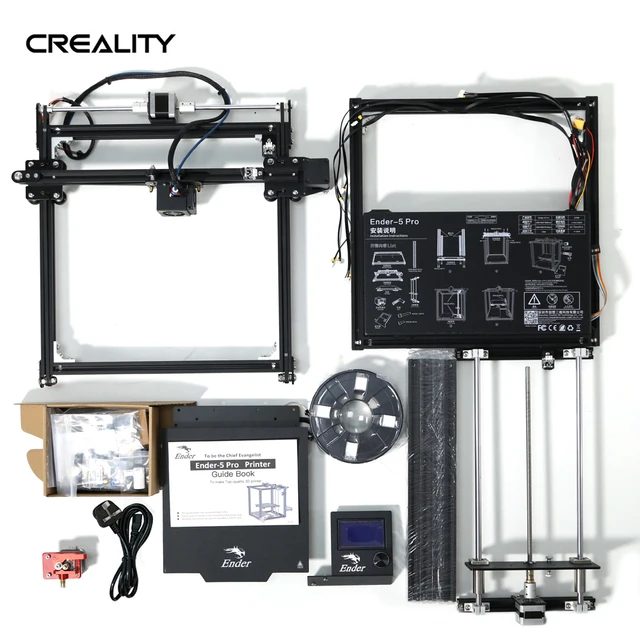 In general, not very convenient, but not critical.
Test models
We calibrated the table, refilled the Tiger3D red PLA plastic and printed some routine tests. XYZ cube, Benchy boat, low poly fox and small vase in spiral mode. The models are standard, but from them you can immediately understand how well the printer can print. The speed was set to an average of 30 mm / s for the outer contours and 60 mm / s for everything else.
The result was very worthy. The cube is even, the corners do not protrude, the layers are laid quite evenly, there is no echo, the deviations in size are insignificant within one tenth.
Everything is fine with the benchy boat. There are no strings at all. Even the airflow was enough on a strong inclination in front, although it must be borne in mind that this side of the boat was turned directly towards the fan. The windows also turned out well, there are no hints of sagging.
The fox was also printed with its muzzle turned towards the airflow, and it turned out perfectly. Everything is smooth, smooth. The seam of transitions between layers is almost invisible.
Yes, and there are no complaints about the vase, the layers are laid evenly, there is not a single flaw on all surfaces.
Printing models
Filled with gray PLA + Tiger3D and tried to print a more interesting model. This is an easter egg from blogger Makers Muse. It consists of three parts that are printed in each other and do not touch each other. And after printing, these parts should be able to rotate. True, we increased the model to 200%, therefore the gaps between the parts also increased, but in any case, this is a rather complicated model.
Most printed without any problems. From above, where strong slopes begin, difficulties appeared, the edges were bent upwards, the nozzle touched them and the thin high parts swayed a little. Because of this, bulging layers are visible in some places. However, the model was printed to the end and when removed from the table it immediately started working. All parts are free to move.
The next model is also printed assembled. It is a folding box. Printed folded and has many moving joints. All parts are interconnected by small jumpers so that nothing falls during printing. Then they are removed from the printed model. There were no problems. Some of the layers that were in difficult areas are sticking out a little. But all the mechanisms work, nothing stuck together. The box unfolds and assembles as it should.
We tried to print with PETG plastic from Esun. And then the first difficulties began. No matter how hard we tried, plastic constantly leaked from the nozzle during transfers. Neither different retract settings, nor temperatures, nor combing, nor even a change in print speed could save me. The walls of the models turned out well, but the lids were constantly underextruded, and strings formed in the holes.
Having somehow picked up the settings, we ventured to print a larger model. Here is an elephant.
This is not just a figurine, you can store cutlery in it.
Its trunk is made to hang over the sink, and water from wet forks and spoons flows through it.
The elephant is printed with supports underneath and under the ears. And also by mistake, we left supports inside the trunk. During the printing process, it was already clear that it was not perfect. When transferring, there were small streaks of plastic everywhere, especially inside. But it was possible to get rid of underextrusion on the lids.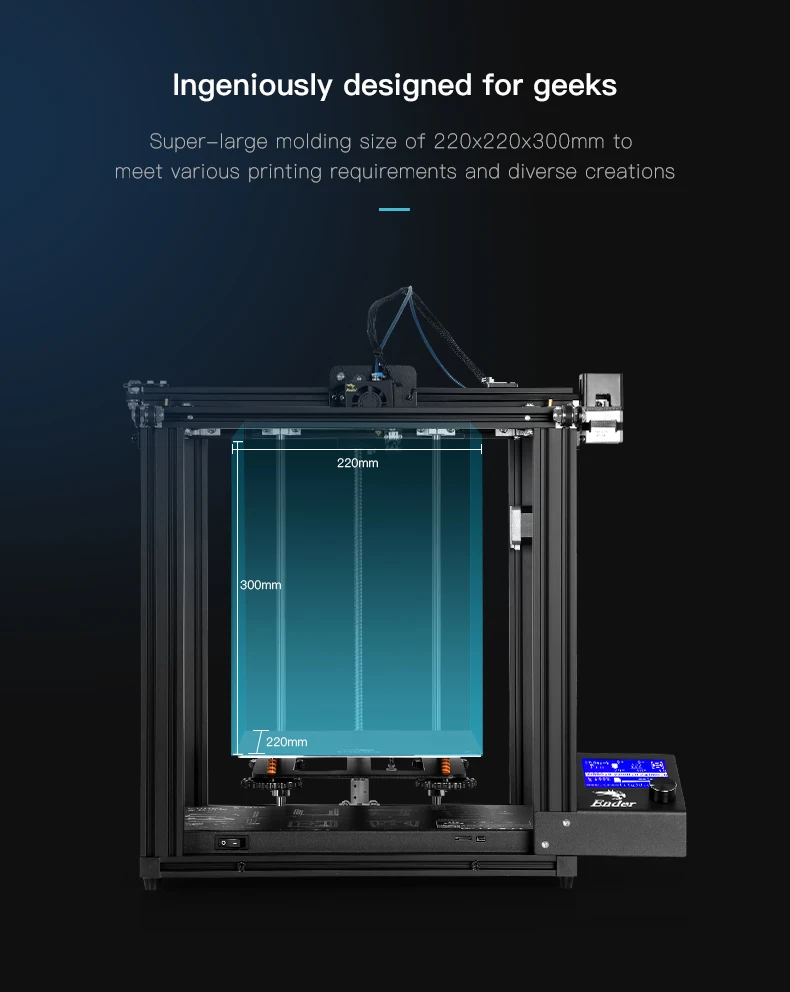
Supports from below and from the ears separated without problems. The trunk was more difficult. From below, the supports stuck quite strongly, and they had to be removed with side cutters. And it turned out to be very difficult to get support from the trunk in general. As a result, the elephant's trunk was accidentally broken and had to be glued back with super glue. I also had to remove plastic stains from the walls, although it was not difficult.
In the end, it turned out like this elephant. If you don't look closely, everything is fine with him. But on closer inspection, there are many small flaws. There are traces of sagging, the surfaces above the supports leave much to be desired. He can perform his tasks, but he looks so-so.
The next thing we wanted to test on this printer was flex plastic printing. After all, the feeder and the long Teflon tube, to put it mildly, are not very suitable for this.
They took Esun eTPU 95A, it is not the softest and there was a hope that the printer could handle it. We printed a tire for a small typewriter. In the original, it is very small, so it was doubled. The speed was greatly reduced - 10 mm / s for external contours and 20 mm / s for everything else. Combing put up everywhere to avoid unnecessary transfers. And the printer coped with this task. Moreover, the tire turned out to be very high quality. Not a single gap, the layers are laid evenly, the lids closed normally. Even the seam is almost invisible.
We decided to take a chance and doubled the print speed. And, unfortunately, the printer has not coped with this. At first, everything went fine, but soon the plastic jammed in the feeder and the printing ended there.
It's a shame, though expected.
Uploaded Tiger3D pink ABS plastic. You need to understand that on an open printer, and even with a through thermal barrier with a Teflon tube, printing with ABS plastic is not desirable and difficult.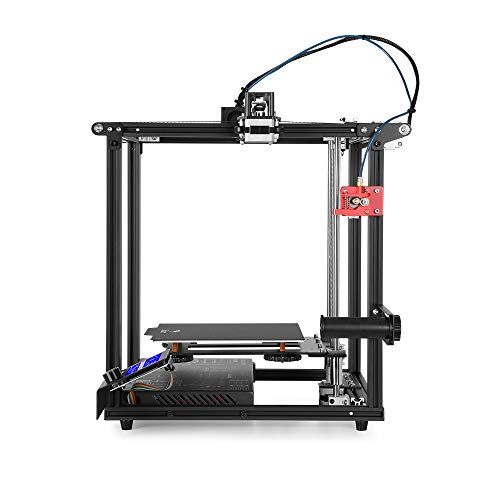 But it was necessary to try, besides, ABS from Tiger3D has a rather low print temperature, 235 degrees, like PETG. We decided to print some small modifications for the printer. The color is not very suitable, but at the moment it does not matter. The first is the mount for the table wires.
For every fireman, they printed on a raft and with supports, the airflow was turned off. The model turned out well, the support and raft separated without problems, although the surface above the raft was not beautiful.
The mount fits and holds the wires really well.
The second model is a screen cover. The modification is purely decorative. It was printed already without a raft on a clean table. The cover stuck well, and even the corners did not bend during printing.
The overall quality is very decent. Except that in some places there were small smudges of plastic during transfers, but they turned out to be easy to clean.
The cover is designed for the Ender-3 printer, and as it turns out, it does not quite fit the Ender-5 Pro. On the one hand, it protrudes a little.
The third model is unpretentious, this is a wheel for the feed mechanism, it makes it more convenient to manually push through the plastic, and during printing you can see how the feed takes place.
The wheel turned out well, fit normally, works as it should.
And the latest model is a slightly improved airflow.
It printed well, although during installation it turned out that it was a bit short and pressed against the heating block. It will work for a while, but will most likely melt quickly, especially if you print with the blower turned off.
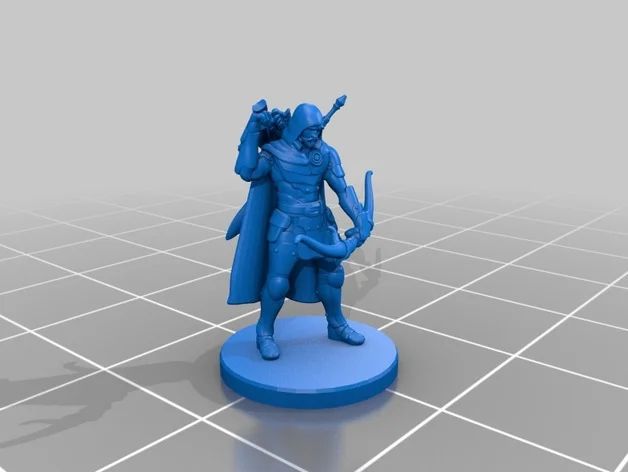
And finally, we decided to print a detailed art model, Kratos from the game God of War, perhaps one of the most beautiful plastics that we came across.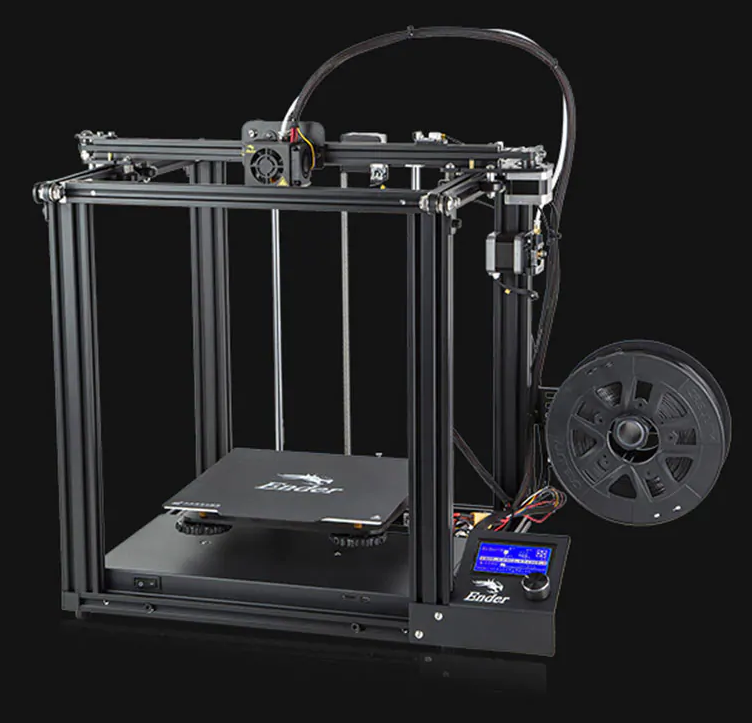 Esun eSilk copper color. The layer height was made 0.12mm. The model is printed without supports, in some places it has strong slopes, just check the effectiveness of the new airflow.
Kratos turned out just fine. On this plastic, in general, even the slightest flaws are very clearly visible due to the fact that it reflects light. And any protruding layer or gap immediately catches the eye. Here everything is smooth, the layers are almost invisible. It seems that the model is polished to a shine. The seam stands out a little, but you can't get away from it, especially with such a long Teflon tube.
Review summary
Okay, let's summarize. The printer is not perfect. Some solutions are very outdated, and the Creality Ender-5 Pro is just asking to be modified. The community of this printer is quite large and there will definitely not be a shortage of ready-made models. In addition, some models for modifications come from Ender-3.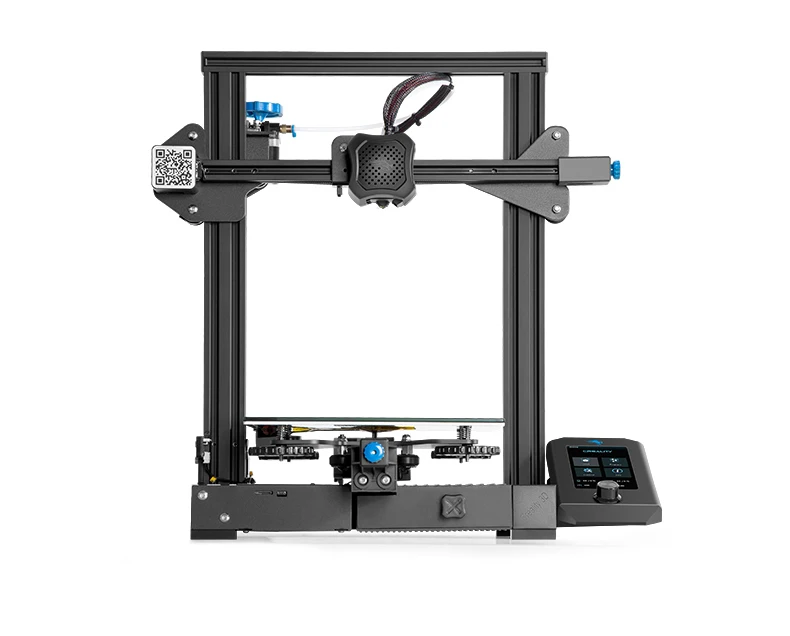 Even the control board of the printer has something to change, almost all companies producing control boards have already released versions specifically for Enders. Simply switch all the wires, install the new board in the old place and you're done.
Despite the simple extruder and feed mechanism, the Ender-5 Pro does a good job. We had difficulties only with PETG plastic. Even with medium hardness flex at low speeds, the printer can print normally.
The body of the printer is strong and durable. Any plastic is glued to the magnetic substrate without any problems, and it is easy to remove the models. The substrate itself does not peel off from the table, even when printing with ABS plastic and a temperature of 100 degrees. The printer is quite quiet thanks to the TMC2208 drivers.
In general, the Creality Ender-5 Pro did not cause any particular delight in us, but there was no complete disappointment either. The printer is like a printer. It prints quite well, although not fast.
Watch the video version of the review on our Youtube channel !
Oops.. there seems to be no such page
Apparently, you've landed on a page that either doesn't exist or was deleted long ago. Start your search first!
Request a call back
Telephone
By clicking on the button, you agree to the privacy policy of
Item added to cart
Go to cart
Product added to comparison
Compare products
Cannot compare more than 4 products
Invoice or quotation request
Organization name:
Your e-mail
Your phone
Name of contact person:
Legal address:
Comment:
By clicking on the button, you agree to the privacy policy of
Goods on the way, find out when the delivery is
Your name:
Your e-mail
Your phone
By clicking on the button, you agree to the privacy policy
Contact us
How to call
By phone +7(495)155-45-19. Your call will be answered by an answering machine. We won't call back if you don't speak up. Each request is processed, we contact clients in accordance with requests. Prepare the information you want to report, send it to the answering machine and we will call you back. We kindly request: do not be silent and do not hang up, this is just an answering machine. 🙂 Other most effective ways to get in touch:
- Write to Telegam @techno3dru
- Write to Whatsapp +74951554519
- Write Email [email protected]
Is the product in stock
On the product page, under the product name, there are 3 statuses:
- In Stock - We have this item in stock. Make a purchase with the Buy button.
- Pre-order - goods on the way, delivery soon. Find out about delivery times by clicking on 'Delivery times' or make a purchase using the Buy button.
Learn more