Ciclop 3d scanner review
[Review] Scanner 3D - He3D Ciclop 3D - 3D Print
Post Views: 1,007
The Ciclop 3D scanner has revolutionized the world of 3D scanning a little. First of all because it is completely open source, which means that the hardware and software are available to everyone. You can buy or make yourself by purchasing certain components and making the remaining 3D printing. Being a DIY kit makes it, to date, one of the cheapest scanners.
This 3D scanner is designed for anyone who likes to tinker and play with technological objects. The Ciclop purchased by me on Gearbest came after 10 days of waiting and disassembled piece by piece. It took me about an hour to mount the scaner completely. To do this I followed a video guide on the purchase page. I must say that the part of the installation was definitely the easiest. I’m going to talk about it in a little while. They recommend it for experienced users, but I am firm convinced that 3D scanning with this tool is accessible to everyone. Of course you have to be willing to tinker a bit between software, settings and adjustments.
Maximum scan size: Diameter: 20 cm Height: 20 cm
Scansion time: 10 minutes at resolution (0.45 th per displacement)
Scan accuracy: 0.5 mm
How does the Ciclop 3D scanner work?The Ciclop is a 3D scanner that works for triangulation. It has a webcam in the middle and two lasers, one on the left and one to the right of the camera. Both lasers and the camera focus on a point creating an imaginary triangle. Knowing the angles of the triangle, the distance between the lasers and the camera, the software can calculate the distance between the camera and the red point of the laser, drawing the depth.
The scaner then forms the object on the software, comparing different distances at different points of the objects, rotating them on the scanner platform. To make it faster instead of focusing on a single point, you use a vertical line, scanning many points vertically at the same time.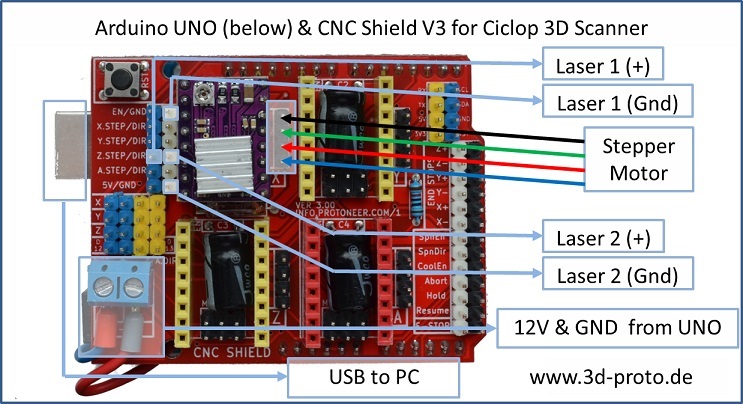
Cyclop the scanner you can build yourself
The original parts of the scanner can be made with a 3D printer. The manufacturers decided to put all the scanner’s print files on Thingiverse for free. Encouraging people to print the scanner and improve it by putting their own. This is part of the open source philosophy of trying to educate and engage everyone, as a community.
Putting the scanner Ciclop 3D into operationScanner construction:Unlock and build the scanner. This generally takes less than an hour. I recommend the demonstration videos you find on the Gearbest website.
Install drivers:This part can be more difficult than expected. USB drivers are not readily available and right away, without the correct ones it may seem not to work. The Logitech C 270 HD will be used for webcamdrivers. After these also those for the Arduino One, the brain of the scaner. Installs together with the Arduino IDE.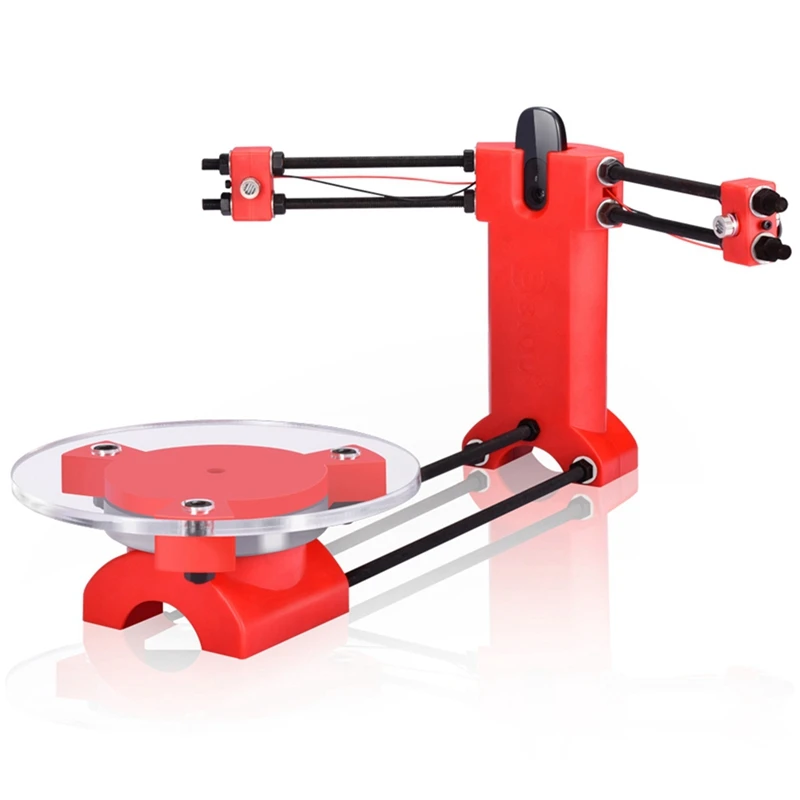
Horus is their free software. With Horus you can calibrate the scanner and get your scans in a point cloud format. Here’s the Horus download link.
Calibration of Ciclop 3D:
This step is very important for accurate scans. First you have to place the cardboard, the paper chessboard on the rotating platform as indicated by the wizard. Once finished then you have to select the calibration screen and start the advanced calibration of camera, laser and footer.
Configure settings:Configuring settings such as brightness and contrast is important for best results. There are many settings with which you can play before scanning. Optimal settings vary from scan to scan. Having good lighting is the basis for getting to have good results.
Scan with Ciclop 3D:You now place the object in the rotating platform and expect the scanning process to be complete. The scanning process typically takes about 10 minutes at maximum quality, half at medium and still half low. I do not recommend using the low resolution because a decent resolution is not reached.
Convert a file to STL:
After scanning your object, you will have a .ply file. Then you can open the .ply file with a free program like meshlab and convert it to an STL file. The reason you should turn the file into an STL format is that the 3D printer can read and print the file.
Print: Now that your scan is in STL format you are ready to print!
Factors influencing scan qualityThere are a couple of factors to take seriously before scanning that affect quality more than we imagine. The first is the light with which the platform lights up, make sure there are no shadows. Another factor may be the surface sheer of the object. If the object is shiny or reflective, it will be difficult for the camera to properly scan because the laser will be reflected on the object.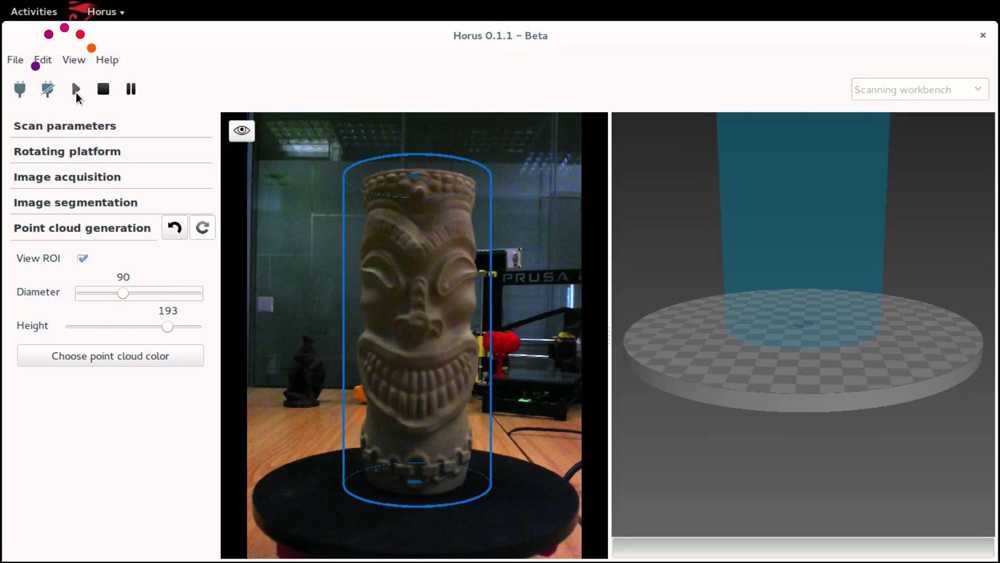
The third and last important factor is the color of the object. Red objects can cause a problem because being the same color as the laser could interfere with scanning. Mirrored objects in a very bright environment can also be a problem. Svi found in this condition and in this case you can reduce the brightness in the settings. Finally, the dark colors do not fully reflect the red laser, so it is advisable to adjust the contrast to improve the quality of the scan.
Conclusions about Ciclop 3DThis is a very practical scanner and one of the cheapest on the market. It’s a do-it-yourself kit. Because it’s an open source scanner, hardware and software are always improved by both the company and the hobbyists who contribute as they can. I would recommend it to those who like to tinker with technology. If you are tech savvy, this scanner can be very inspiring.
The scanner can be purchased for as little as USD 109. on Gearbest,the best market price.
If you have found this post useful, please LIKE on Easy 3D Home Facebook’s page to receive updates on all the news of the Blog! You can find other post about 3D Print in 3D Printing section!
Like this:
Like Loading...
BQ Ciclop 3D Scanner In-Depth Review
8.4Expert Score
BQ Ciclop
BQ Ciclop has a simplistic design and extremely affordable pricing. Available under $250, it manages to surprise users by offering extraordinary features.
Affordability
10
Quality
8
Speed
7
Capability
8
Practicality
7
User Expectations
10
PROS
- The scanner has a simple design that is easy to understand even for beginners.
- It features a dual laser setup allowing for maximum accuracy while capturing objects.
- Extremely reliable Logitech C270 HD camera captures fine details of any object and translates it into computer images that can even be manipulated for betterment.
- Being an open-source 3D scanner, its information is completely accessible to the masses online.
CONS
- The scanner is available in a DIY kit and hence would consume more time while setup. Also, it would require you to go through the stepwise documentation available online.
Table of Contents
Ciclop is a desktop 3D scanner designed in kit form by the manufacturer BQ – based in Spain. The machine’s flexibility is displayed from two of the most striking features i.e. open-source and affordable.
Its hardware and operating software are called Horus; both of them are available under a creative commons attribution and share-alike license, and general public license respectively.
The scanner allows scanning any physical object that fits on its circular rotating platform of 9.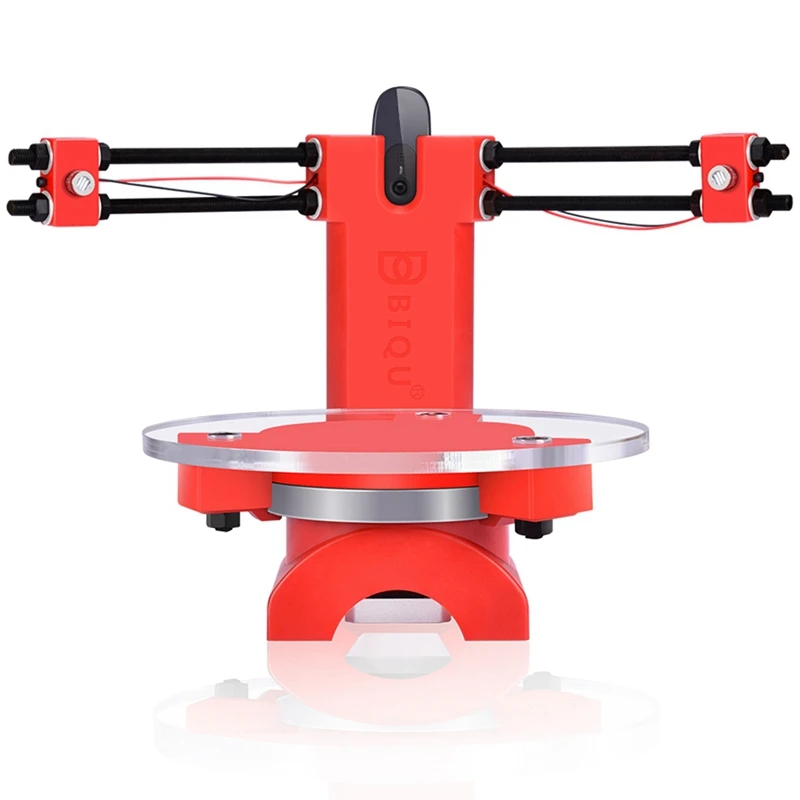 8 inches * 8 inches.
The manufacturer also allows users to manipulate objects even after they are scanned, which is a huge plus when compared to scanners falling in the same price range. But, to know whether the scanner offers value for money, let’s dive through it in-depth.
Features
Ciclop is specially designed keeping in mind easy installation. The set that’s delivered to you contains all the assembly parts with instructions necessary for building the machine. Below mentioned and explained are some of such striking features that the scanner possesses.
Dual Laser Setup
Ciclop hosts not just one but two laser sources present on each side of the rotating platform. These are class one lasers that can deliver extremely high precision while scanning parts and functional prototypes. The manufacturer claims how lasers, in combination with the camera, are able to capture details up to 500 microns.
DIY kit
To ensure all its users know the exact mechanism and function of each and every component the scanner is designed from; BQ offers it in the form of a DIY kit.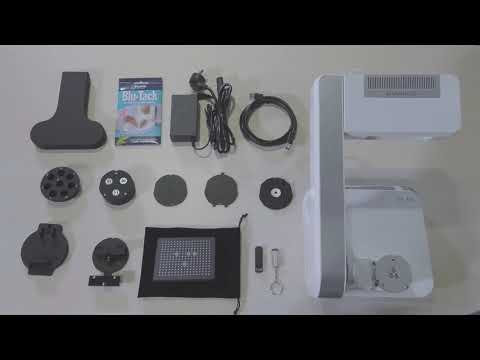
Also, the entire information about the scanner is available on open sources making it extremely accessible for the operators to follow. Moreover, by keeping it as a DIY kit, BQ allows you to do things differently. Like, simply designing your own parts that can be used on the scanner for increasing its functionality! Amazing, isn’t it?
Open-source
As mentioned above, Ciclop’s specialty is that it’s open-sourced. And this is what makes it an ideal scanner for the masses.
Open-source technology makes it accessible to anyone who wishes to get their hands on the files needed to operate the scanner easily. All the documentation related to Ciclop can be found online including important aspects such as mechanical design, algorithms, mathematics, and experiments.
So, with the files already present online, all you need is the hardware to create the structure. Meaning that after buying the scanner, you are good to go independently. How cool is that!
Proprietary Horus software
Capable of controlling, not just one, but many 3D scanners is the company-made Horus software.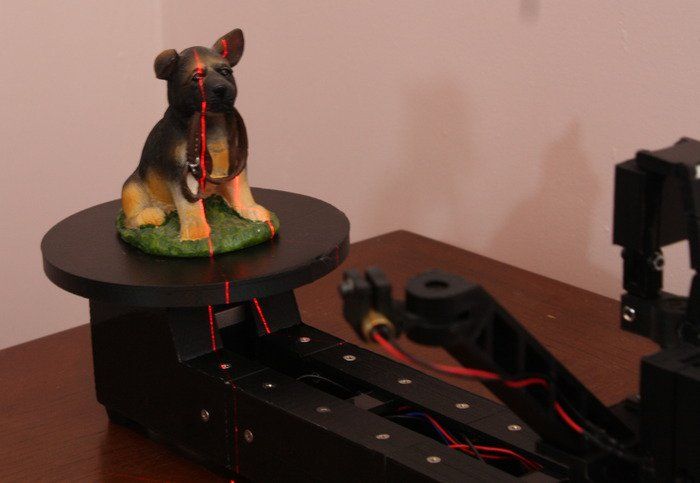 It manages the complete communication that takes place between the computer and the scanner. Not only that, its multi-purpose use extends to capturing and syncing of data, image processing, and also calibrating the scanner.
The application is completely reliable as one of the best 3D software for dealing with an open-source scanner. It can be run on Windows as well as Mac operating systems. Users can juggle up with numerous useful tools and advanced calibration capabilities. The software can also be fine-tuned for improvement via GitHub.
High definition camera
To ensure its users can capture high-quality videos with 1280 * 720 pixels and images up to 3 megapixels, BQ has put in place a Logitech C270 HD camera.
This component does an excellent job of not only capturing finer details of any object but also translating them into computer images for you so that you can manipulate them in the future.
The camera hosts a VGA image sensor that runs on Right Light Technology which enables it to capture clean and sharp images even in low natural light areas.
Simple design
Ciclop works on an easy mechanism that can be duplicated also. Its main structure consists of 3D printed parts. The rest of the hardware comprises a few M8 threaded rods and screws, with some M3 screws, nuts, and washers. And the object sits on a 9.8 inches non-slippery methacrylate platform.
Specifications
BQ Ciclop allows users to scan objects with a maximum area of 250 mm * 205 mm weighing 3 kilograms. It offers a scan precision ranging from 100 to 300 microns.
Operators can scan their objects using dual lasers that are fixed at two sides of the scanner. A Logitech C270 HD camera promises highly accurate images and videos that can be converted into models for creating detailed parts and functional prototypes.
The scanner undergoes a maximum of 1600 steps per revolution. It needs a power supply unit of 12 Volts and 1.5 Amperes. The scan speed of Ciclop ranges anywhere from 2 to 8 minutes!
Price
BQ Ciclop is available for $219.
Setup
Credit: pinimg
As BQ Ciclop is delivered in a DIY kit, you’d have to take some time out in constructing the scanner. But given the fact that the stepwise instruction manual guides you all the way through the setup, it’s entertaining.
In fact, it’s enriching in terms of learning the exact mechanism the scanner works on. So, if you have any fault during its operation, it can be corrected easily.
Scan Type
Based on Laser triangulation technology, Ciclop accurately scans an object by capturing it in millions of points. In fact, the dual laser setup takes it to the next level by projecting multiple laser lines onto the part or functional prototype you are willing to scan.
Once the capturing in points is done, its reflection is apprehended with multiple sensors that are located at a fixed distance from the source. This allows for accurate point measurements by even calculating the reflection angle of the laser light.
Scan Quality
The dual laser set up on each side of the platform and Logitech C270 HD camera ensures that each and every scanned object is of fine quality.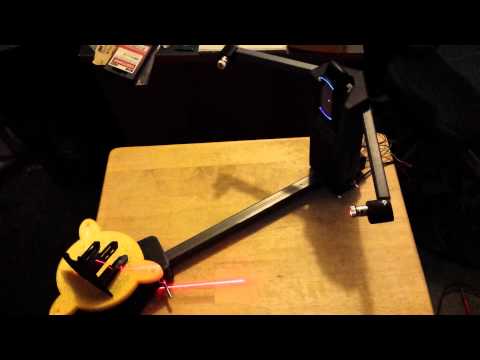
While the former is capable of capturing details up to 500 microns, the latter enables apprehension of clean and sharp images even in low light areas.
Customer Support
Answers to all your queries related to the scanner and its functioning are available online. But, if you wish to contact the technical team over the phone and by email, it’s possible.
Software
Credit: instructables
The scanner comes integrated with Horus software that is a multi-platform application capable of controlling more than one scanner at a time. It handles complete communication between the computer and the scanner.
Windows, as well as Mac operating systems, are compatible with the software and it comes with advanced calibration capabilities. Because of this, first-time users can have a run-through in the pre-scanning phase!
Parameters Influencing Buying Decision
Below mentioned is a summary of all the main points that are worth checking out before making your buying decision.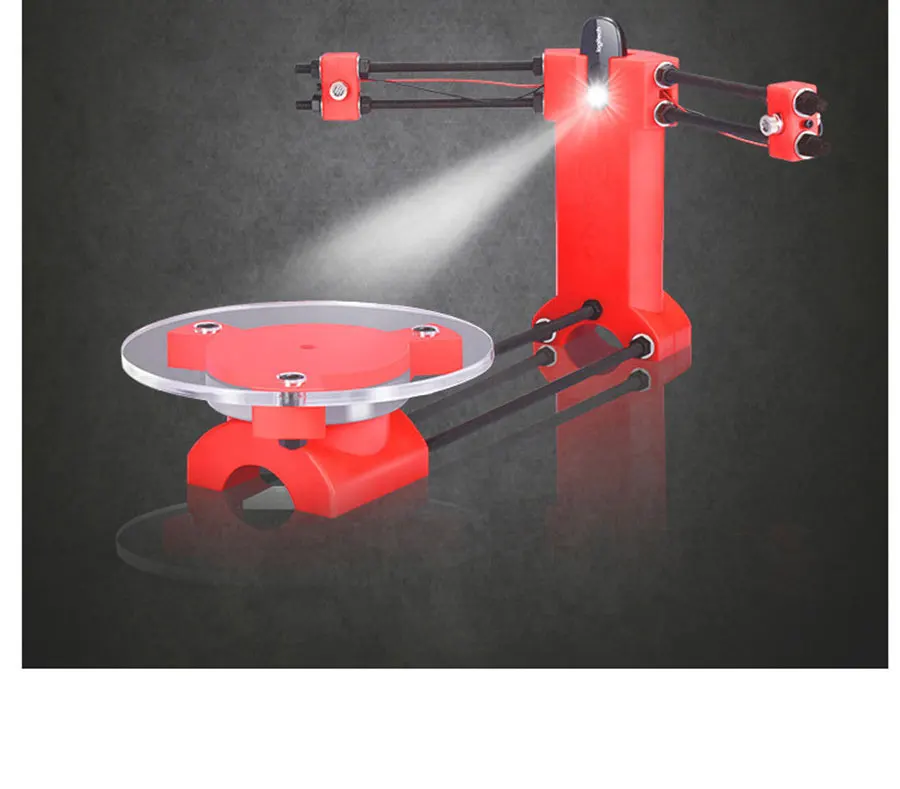
3D Scanner Cost: Considering the scan area it is capable of processing and other striking features $219 is a very affordable cost for BQ Ciclop.
3D Scan Speed: Compared to other scanners in the same price range, Ciclop’s scanning speed is commendable. It’s above the industrial average of small to mid-range scanners.
3D Scan Quality: The scanner offers a scan precision of 0.5 mm which means, each and every part that you process on Ciclop will have fine detailing.
3D Scanner Capability: Users can utilize the dual laser setup for objects with a scan area of 250 mm * 205 mm. The scanner is capable of capturing particularities up to 500 microns.
3D Scanner Printability: The scanner is designed keeping in mind the beginner-level scanner users in mind and that’s why it’s kept completely open-source. Its information can be accessed online for free.
3D Scanner User Expectations: Novice-level individuals that make use of scanners and are willing to learn how to set up a scanner from scratch will enjoy using it the most.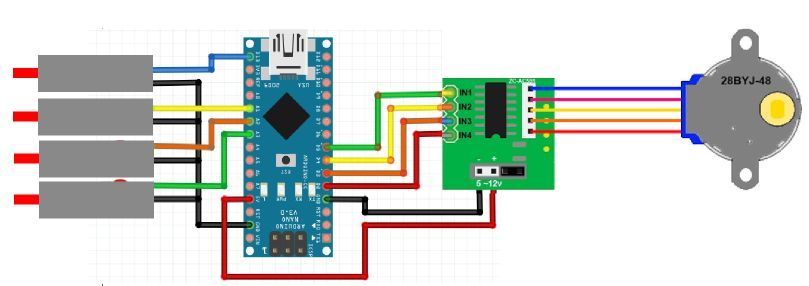
The Verdict
In a nutshell, Ciclop turns out to be great value for money. Its simplistic design and extremely affordable pricing make the scanner beginner-friendly.
Available under $250, it manages to surprise users by offering extraordinary features such as dual laser setup, extremely easy functioning software, high-definition camera, and a lot more.
Above all, its open-sourced nature lets you comfortably tweak and juggle around with this newer technology. Yes, there are a few complaints about the parts that the manufacturer supplies for its construction, but they are not a huge turn-off especially after taking into consideration the striking features that the scanner is a host to.
DIY Cyclops assembly and laser scanning software
Greetings to all. Today is a small review of the Ciclop desktop scanner.
Once again, the store offered to take something for review. Since I have long been interested in the question of using this thing for the needs of decorative 3d printing, I chose a scanner.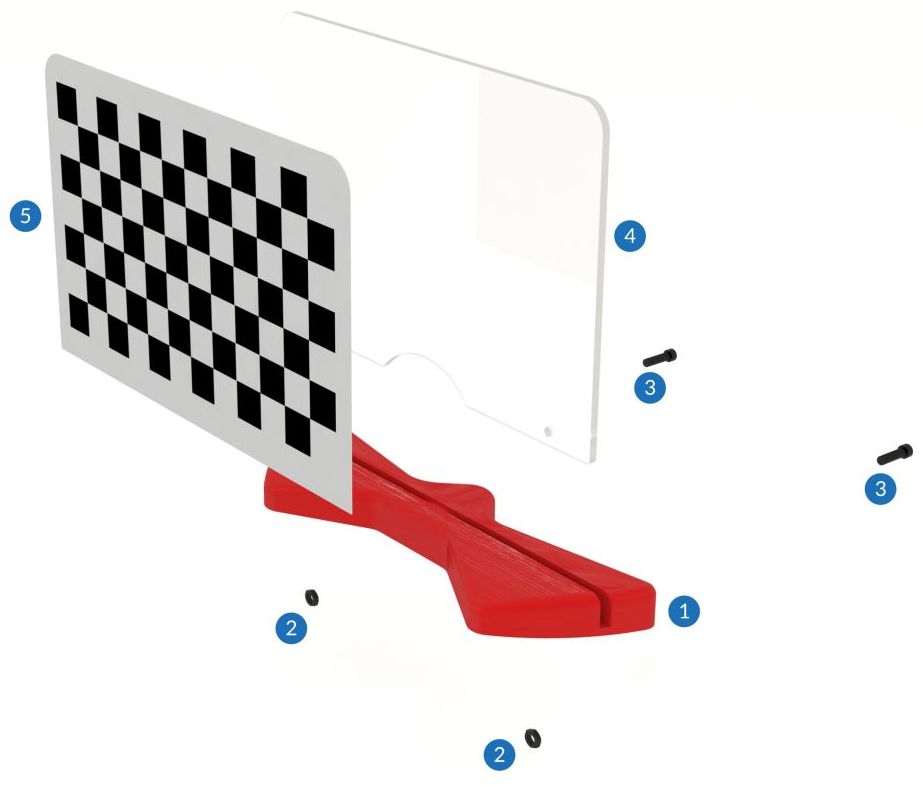
So, the scanner itself was developed by the Spanish company BQ, which has now ceased its support (supposedly due to Chinese fakes, but it is doubtful. Now the American CowTech also sells this scanner. The source codes for 3d printing of parts of the scanner are freely available at Thingiverse (there are also links to software and electronics).0003
Links to complete documentation kits:
www.cowtechengineering.com/downloads
www.bq.com/ru/support/ciclop/support-sheet
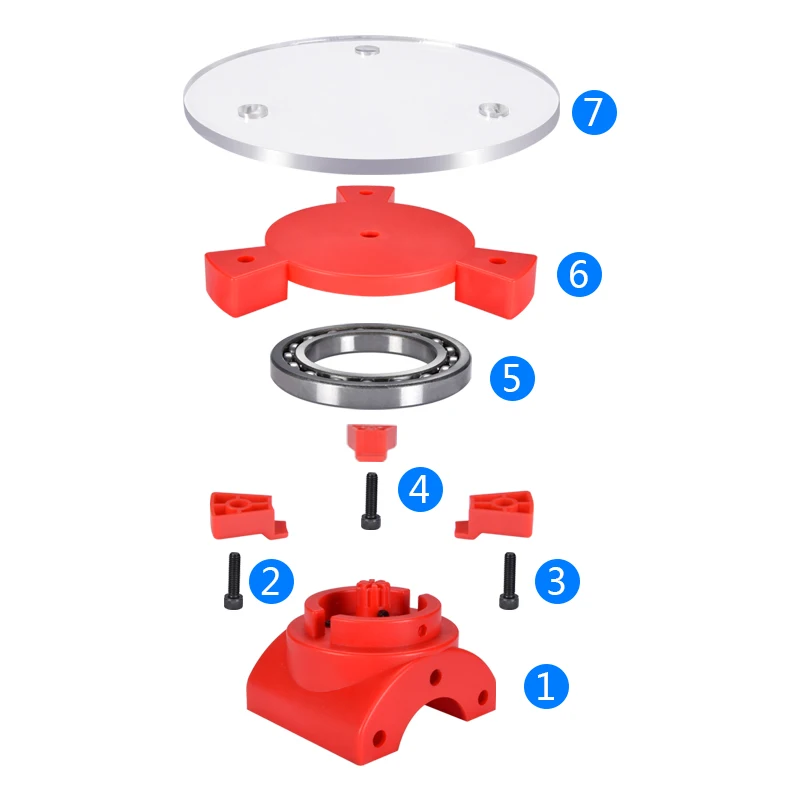
In the kit we have such a “loose”:
The assembly is simple, however there are several points:
1. It is not worth rushing to tighten all the nuts - you still have to adjust the geometric dimensions - the convergence of lasers in the center of the site, the distance to the turntable.
2. In my stand, the camera “dangled” a little, by a fraction of a millimeter - but that was enough to skew the picture. Eliminated by laying foam material.
4. The turntable was transparent and uncoated (as in the original) - I painted it with plastidip.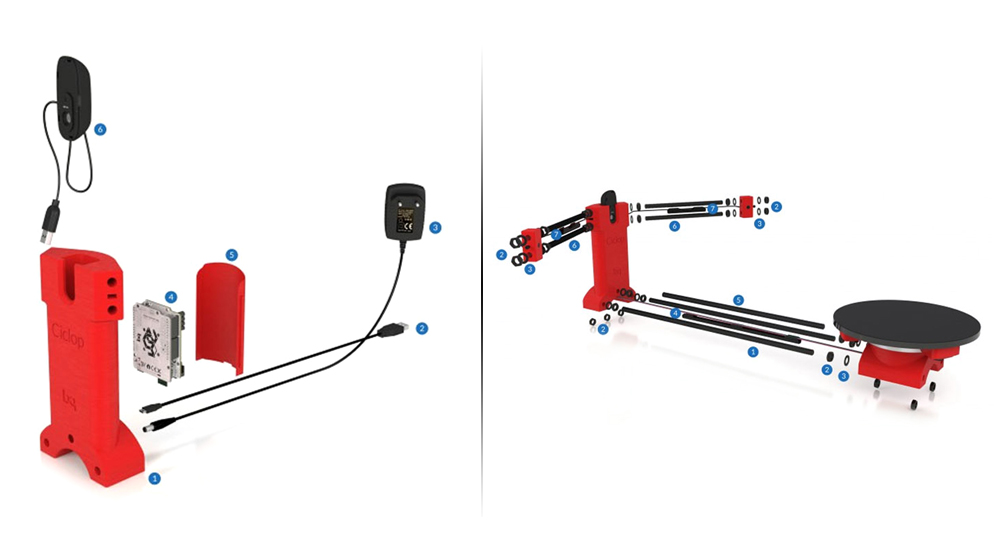
5. Check the calibration checkerboard patterns. I don’t know how they printed the one from my kit - but the proportions of the squares were violated. I took it from the Internet and reprinted it myself.
6. The focus of the camera is not adjusted to the distance to the platform. He removed the cover and twisted the focus in place.
88. The economy is managed by the "native" Horus software from BQ.
After assembly, the scanner went through calibration procedures in the native Horus software.
Since by this point I already knew that the quality of scanning is very much dependent on the quality of lighting (stability, diffuseness, color temperature), I took care of having a small lightbox in advance in order to at least provide more or less comparable conditions for samples.
Having selected the "candidates" for the samples, I got ready.
Requirements for the object are stated as follows:
1. The object must be larger than 5x5 cm but smaller than 20x20 cm
2. The object must be opaque and still
3. The object must weigh no more than 3 kg
Difficult to scan:
1. Shiny, luminous objects
2. Too dark objects
3. Objects with a blurred surface (eg soft toys)
The result of the scan is a cloud of points in PLY format (which must then be converted to a surface). Here is a guide for post-processing the cloud and preparing the STL file.
After reading the scan optimization guide, I decided to try with a simple cylindrical object.
After several attempts, I was convinced that I had a common problem - mismatches in the point clouds from the right and left lasers, and the issue with proportions.
Nothing worthwhile about this except for trying to calibrate the webcam settings (they are not calibrated when the calibration wizard is running) could not be found (a dude named Jesus from BQ support has not answered questions for a long time). To do this, you need to take several shots with different positions of the calibration table. Done. The situation has improved, but not completely.
I had to manually edit the calibration file (calibration.json in the Horus-a folder) and by trial and error, scanning a cylindrical object, to achieve the coincidence of the clouds.
And everything seems to be ok:
But no - on complex objects, cloud fragments still sometimes do not coincide, besides, many "blind" zones are formed:
impossible, at least with regular lasers.
You can, of course, continue experimenting with scanning with individual lasers and trying to combine all this economy in third-party software, and then try to bring it into a viable form for STL.
All this is reminiscent of a joke about boats in bottles.
-How do you make boats in bottles?
-I put sand, silicate glue, sticks into the bottle and shake it.
It turns out all sorts of shit, and sometimes boats.
In general, I realized that I am not an adept of such creativity, and I have a suspicion that it is easier to model objects from scratch that are easier for a scanner.
And complex ones - the scanner cannot cope with complex ones in normal mode, two lasers are not enough for it - blind spots remain. To fix this problem, you need to scan in other positions and then again suffer with the combination of clouds. No thanks.
As a result - the thing will fit only for learning the basics of laser scanning, for something more - absolutely useless. No, of course, you can get something with outlines similar to the original model, but on this (and this, taking into account all the tambourines with cloud processing), that's it. No wonder the Spaniards abandoned this case.
The store made sure - in the description it is honestly stated that the result depends on the position of the planets and the mood of Aunt Sonya from the third floor. Open source and all that, let's dance together. No thanks.
Conclusion - don't take it, but if you're into extreme hunting, assemble it yourself from the same material that your friend from the joke makes boats from.
Product for writing a review provided by the store. The review is published in accordance with clause 18 of the Site Rules.
Document center Tver, 3d printing, laser cutting, layout making, industrial design, 3d printer
- Online shop
Discount up to
20%
design bureau
Courier
delivery!
Technopolis
Document Center
Document printing
Drawing printing
Posters and photos
Advertising printing
order more!Discount up to
20%
developers
Case
for free!
Dummy
workshop
Making models of any complexity
Architectural models
Industrial and production models
Models of houses and churches
Landscape models
Models of cottage settlements 901 Order more!
3D printing
from 10 rubles/g
PLA plastic
3D printing
55 rub./cm 3
gypsum
Technopolis
3D printing center
3D scanning
3D modeling
3D printing
Order 3D printing!
Our services
Technopolis provides comprehensive solutions for 3D technologies, engineering and operational printing.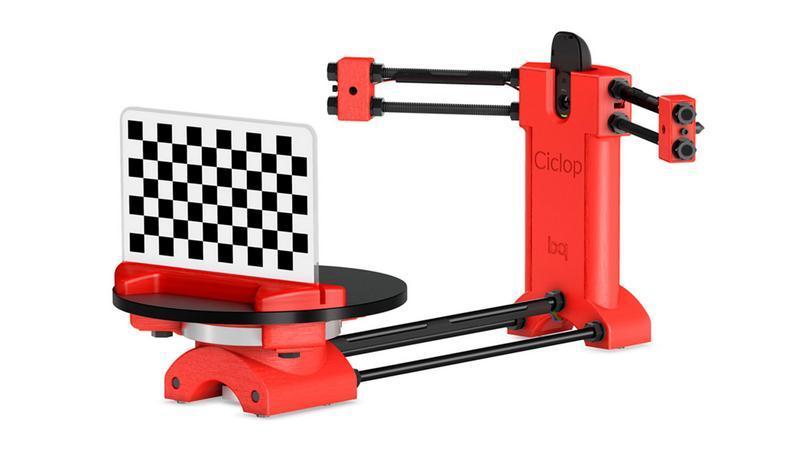 We use a new approach to the implementation of a full cycle of engineering services.
Our advantages
Technopolis is a large-scale platform where a team of specialists is engaged in rapid prototyping and manufacturing of final products.
A team of professionals
The high qualification and personal qualities of employees allow the company to consistently ensure conscientious and timely fulfillment of its contractual obligations.
Accumulated experience
Accumulated experience in creating engineering solutions of various levels of complexity.
Modern production site
Today, more than thirty units of modern equipment are concentrated at the Technopolis premises.
Press about us
Our company often becomes the object of attention of the local media. Every year Technopolis takes an active part in construction exhibitions and competitions. On the basis of our center, events are held with the participation of specialists from various fields.