Bibo 3d printer upgrades
bibo 3d printer upgrades - Buy bibo 3d printer upgrades with free shipping
bibo 3d printer upgrades - Buy bibo 3d printer upgrades with free shipping | Banggood ShoppingBrands
SEE MORE
-
Home
- "" 16 Results
Price -
OK
Ship From
Total 1 pages
Go to Page
Go
Confirm your age
You must be at least 18 years of age to enter this section.
I AM UNDER 18 I AM OVER 18
Review: BIBO Dual-Extruder 3D Printer — Does it Live Up to the Hype?
Log inSign up
Please ensure that JavaScript is enabled in your browser to view this page.
BIBO is a little-known Chinese company, but this 3D printer has great reviews on Amazon. The question is if it lives up to the hype.
There are a lot of 3D printers on the market, and the selection can be overwhelming. But once you start narrowing them down by the features you require, you end up with only a handful of options. If, like me, you want a sub-$1,000 dual-extruder 3D printer, then you may have come across the “BIBO 2 Touch Laser Dual Extruders 3D Printer.” BIBO is a little-known Chinese company that produces a range of products, but this 3D printer has overwhelmingly good reviews on Amazon. The question is if it lives up to the hype.
To find out, I purchased one for my own personal use — BIBO did not provide me with a printer for this review. I’ve been looking for a decent dual-extruder 3D printer for a while now, mostly because I want to be able to print PVA soluble supports for complex geometry. Nobody likes removing supports, which makes PVA very desirable (I’ll cover how to successfully print them in another article).
In my research, I came across the BIBO 3D printer. I had never heard of the brand, and professional reviews are scant, but it is very well-rated on Amazon. Are those reviews fake, or is this a legitimately good 3D printer being sold at a very reasonable price? I decided to find out.
Before I move on, let me address the somewhat confusing naming scheme that BIBO uses. They really only sell one 3D printer, but it is available with different options. Those include a touchscreen and a laser engraver module. So, the printer sold on Amazon as the “BIBO 3D Printer” is actually the “BIBO 2 Touch Laser Dual Extruders 3D Printer” on their website. That means it comes with the upgraded touchscreen and the laser engraver module.
This 3D printer sells for well under $1,000 on Amazon (with free Prime shipping!), which makes it one of the most affordable dual-extruder 3D printers on the market — even if you completely ignore the laser engraver module. It’s fully-enclosed and has a sturdy aluminum composite panel frame. It has a built-in WiFi module for transferring G-code files, and you can make those using whichever slicing software you prefer.
Here are the basic specifications:
- Build Size: 8.4 x 7.3 x 6.3 inches (214 x 186 x 160 mm)
- Layer Resolution: 0.05-0.3 mm
- Maximum Nozzle Temperature: 270°C
- Filament Diameter: 1.75 mm
- Overall Size: 18.4 x 14 x 14.7 inches (467 x 356 x 373 mm)
Assembly
The printer comes from Amazon double-boxed in heavy cardboard, with a solid amount of Styrofoam padding. After unpacking, you’ll find that it is already 95% assembled. The rest of the assembly process took me less than an hour.
Doggo inspecting the condition of the package
That includes mounting the extruder block to the X axis carriage, attaching the front door, assembling the red top cover, mounting the spool holders, and leveling the bed. Unfortunately, there is no automatic leveling, so you have to adjust the wingnuts manually to level the bed. That said, the leveling process is fairly quick and I haven’t had to re-level my bed yet — except after the upgrades I’ve done, which I will discuss at the end of this review.
The BIBO 3D Printer is delivered 95% assembled
Software Setup
As I mentioned before, you can use whatever slicing software you prefer. BIBO does, however, provide configuration settings for Repetier, Cura, and Simplify3D. I’ve been using Cura exclusively, and the standard settings work fairly well. You will probably want to fine-tune them to suit your needs and the filament you’re choosing to use, though.
My only complaint here is that the process for setting up wireless file transfer is convoluted. You have to connect your BIBO 3D Printer to your wireless network, install multiple utilities — one of which is in Chinese by default, and then use those clunky utilities to transfer the files. I’ve found it easier to just copy them to the included SD card, as the wireless transfer process is less convenient for me.
Touchscreen Control
The touchscreen is adequately responsive, and the interface is fairly intuitive. But there are still some quirks that are a little bit frustrating. For example, to preheat the bed or extruders, you have to go to that section of the menu and then tap the “temperature increase” button over and over again to set them to the temperature you want. It would be nice to have a preset selection of temperatures that you could jump to.
There also isn’t much configurability. You can’t, for instance, set any kind of Z axis offset. That’s not a big deal, as the bed has to be leveled manually anyway, but it would be a nice feature. Those minor complaints aside, the touchscreen is more pleasant to use than the monochrome LCDs that most budget 3D printers — and even the similarly-priced Prusa i3 MK3S — have.
Printing
Let’s get down to what’s really important: printing. This topic is always going to be subjective, as people measure print quality with different yardsticks. That said, I’ve found the quality to be on-par with most other well-reviewed consumer FFF (Fused-Filament Fabrication) 3D printers. I have noticed more shadowing then on other 3D printers, including the Prusa i3 MK3S that I owned before I purchased the BIBO 3D printer, which is likely due to the additional weight of the extra extruder.
Speaking of the second extruder, I’ve been impressed by how level the two extruders are. A common issue with dual-extruder 3D printers is one extruder nozzle being slightlylower than the other. Even a fraction of a millimeter difference will cause one nozzle to drag across your part. That can ruin your print, or at least leave ugly scars. The BIBO’s extruders were perfectly leveled out of the box, and I have not had to touch them at all.
This isn’t the fastest 3D printer on the market, and I find myself printing at between 60 and 80 mm/s for the outer layers (100 mm/s for infill). It is possible to set it higher, but the print quality deteriorates as the weighty extruder block jerks around. Some printers are faster, but these speeds are pretty average for this market segment.
The extruders themselves seem to perform well, and flow has been pretty consistent. I haven’t noticed any under-extrusion or over-extrusion that can’t be explained by flaws in the filament. I also haven’t had any problems with the gears grinding or slipping on the filament.
The Bed
My only significant complaint about the BIBO 3D Printer is the bed, which has a glass build plate. While glass build plates are still very common, they feel outdated to me. You’re forced to use fixes like painter’s tape or glue sticks to get your first layer to adhere, and then the parts become difficult to remove when you’re done. Anyone who has stabbed themselves with a scraper knows how true that is. With other manufacturers, like Prusa, using modern solutions such as spring steel build plates, being stuck with glass seems a bit like taking a technological step backwards.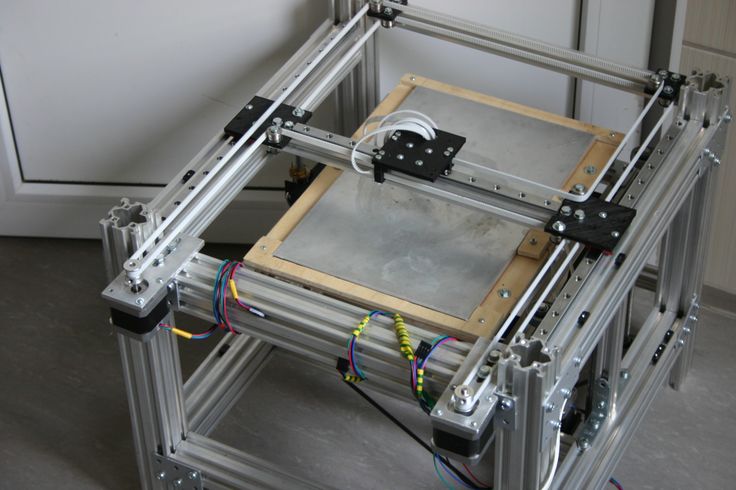
Fortunately, this is a relatively easy fix. You can upgrade your BIBO 3D printer with a better build plate, and I’ve covered a couple of options for how to do that here. If you do purchase one of these printers, I highly recommend you upgrade your build plate. It’s inexpensive and easy to do, and something that BIBO really should have done themselves.
The Conclusion
If you’re looking for a dual-extruder 3D printer under $1,000, the BIBO 3D Printer is one of the best options I’ve come across — maybe even the best. With the exception of the build plate, which can be upgraded, I don’t have any complaints that aren’t just minor nitpicks. BIBO has also proven to have extremely responsive and helpful support, which is nearly unheard of when it comes to Chinese 3D printer manufacturers.
If you’re like me and want that second extruder for printing PVA soluble supports, then stay tuned. After a lot of trial and error, I’ve finally got PVA printing reliably and will have a guide posted soon on how to achieve good results.
Cameron Coward
Writer for Hackster News. Maker, retrocomputing and 3D printing enthusiast, author of books, dog dad, motorcyclist, and nature lover.
Latest articles
Read moreRelated articles
Best Dual Extruder 3D Printers & 2022 Updates
Dual extruder 3D printers take the mono-color slumber away. 3D printing using multiple colors, multiple materials to reinforce specific areas, or using dissolvable filaments such as PVA or HIPS to achieve a smooth finish.
We've been lucky enough to try a few dual extruder 3D printers firsthand and have come up with our recommendations for the best dual extruder printers available in 2022. We also explain the differences between different types of dual extruders (IDEX, mixed color 3D printing, dual extruder upgrade) and whether you should upgrade your printer.
Contents
- What are the advantages of a dual extruder 3D printer?
- What is the best dual extruder 3D printer?
- Budget Dual Extruder 3D Printers (under $1,000)
- 1.
 Geeetech A20M / A10M - Best Budget Dual Extruder 3D Printers
 - 2. BIBO 3D Printer (Touch Laser if purchased with laser engraver) 3. Flashforge Creator Pro 2 - Affordable IDEX
- 3D Printer 4. BCN3D Sigma D25 - IDEX 9 3D Printer0010
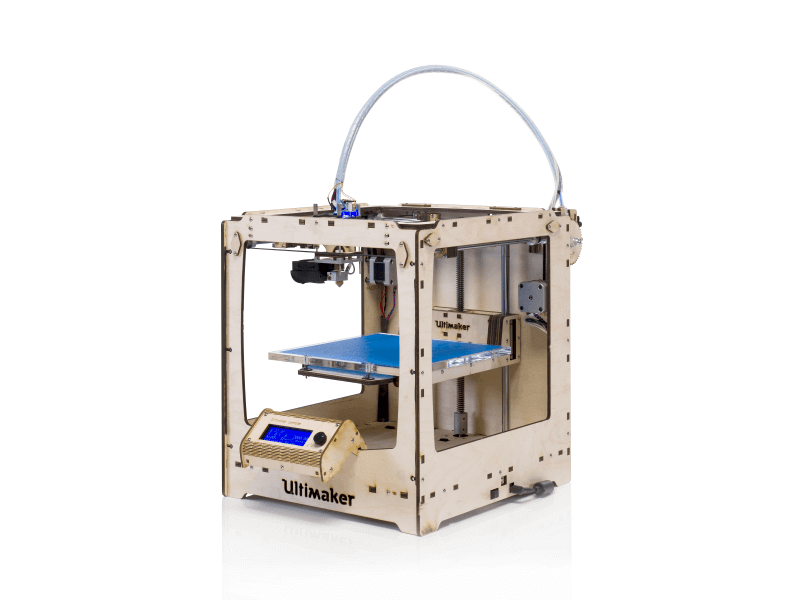
- 5. Ultimaker S3 - Highly Accurate Dual Extruder 3D Printer
- 6. Raise3D Pro2 / Pro2 Plus
- 7. Ultimaker S5
- Best Dual Extruder Upgrades
- 8. Mosaic Palette 2S / 2S Pro - Best Upgrades dual extrusion filament splicer
- 9. Prusa Multi Material Upgrade 2S - Prusa Upgrade Kit
- Dual extruder 3D printer FAQ
What are the advantages of dual extruder 3D printer?
The main advantages of a dual extruder 3D printer include:
Better for supports: one extruder prints your material of choice, such as ABS or PLA, while the second extruder prints water-soluble supports, such as PVA filament. These supports dissolve easily in water and produce smoother prints without having to manually remove them.
Multiple Colors: Dual filament 3D printers can print multiple colors of the same filament type such as PLA for stunning multi-color details.
Multiple parts at the same time (IDEX): IDEX 3D printers such as the BCN3D Sigma D25 have two extruders that work completely separately and can print different parts at the same time.
What is the best dual extruder 3D printer?
That's why we've ranked the best dual extruder 3D printers on the market. We rated these printers for value for money, reliability, build volume, ease of use, and various other features.
Budget Dual Extruder 3D Printers (under $1,000)
These amazing 3D printers break the rules of the definition of "dual extruder 3D printing". To be clear, they can be loaded with two separate filaments, such as red and yellow PLA, but they will come out of the same nozzle, mixing the two colors during the printing process. Some call it dual nozzle 3D printing.
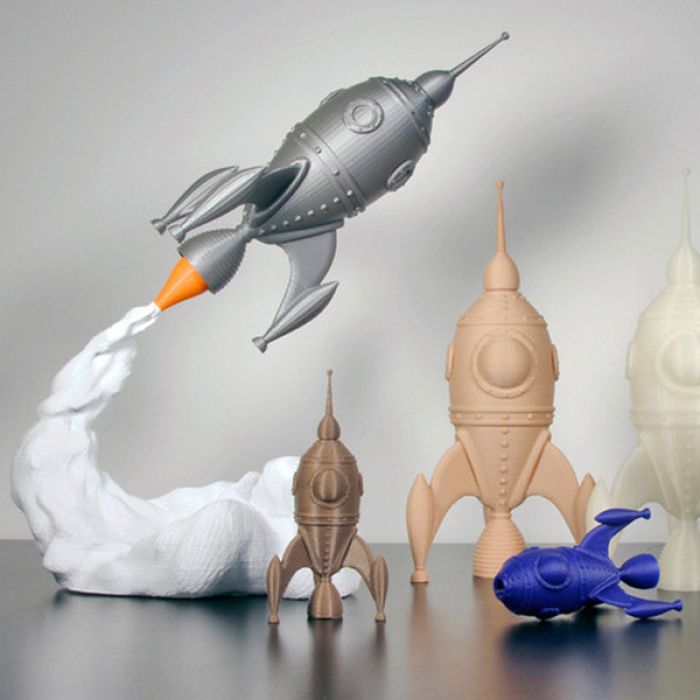
The results are amazing. Connect red, orange and yellow threads and watch your printed vase look like an exotic cocktail. The printers offer four dual 3D printing modes: single color, dual color, gradient and mixed. This provides a huge selection of print designs for such an inexpensive dual extruder 3D printer.
In terms of specifications, the A20M has a good working volume of 255 x 255 x 255 mm, while the A10M is only slightly smaller. The A20M also boasts improved stability as it is better anchored. Overall, this is an accurate (layer resolution down to 0.1 mm), interesting and inexpensive two-color 3D printer that combines colors and filaments through a single nozzle.
single nozzle geeetech a20m filament mixer.
2. BIBO 3D printer (touch laser if purchased with laser engraver)
- Dual extruder 3D printer cost: $599
- Assembly volume: 214 x 180 x 160
How do we get started with the BIBO eccentric printer? Well, the most important thing is that it also performs another function.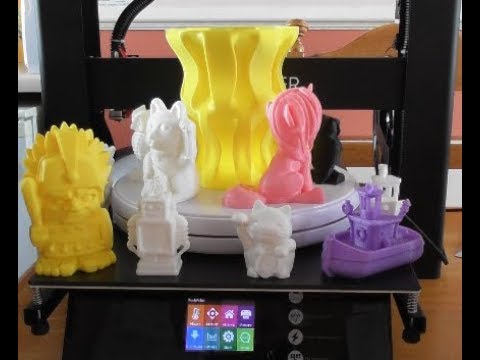 It can be used as a laser engraver! The engraver can permanently carve your favorite designs on wood, as well as cut paper or felt materials - and print in 3D!
You can purchase BIBO as a 3D printer kit or pre-assembled, with or without a laser engraver. And if he performs another function, this does not mean that he cannot succeed in both. In fact, this is a very efficient multi-extruder 3D printer with a minimum layer height of 0.05 mm and stable printing in a closed working chamber.
This is a great printer, crazy and ambitious. Even the product images on Amazon showcase the machine's character and personality. We love it.
3. Flashforge Creator Pro 2 - affordable 3D printer IDEX
- Creator Pro 2 price: $649
- Assembly volume: 200 x 148 x 150 mm
The popular and beloved Flashforge Creator Pro has started to show its age since it was released in 2016, so Flashforge followed it up with the vastly improved Creator Pro 2. assembly volume on the x-axis. It retained a minimum resolution of 100 microns and a Teflon tube extruder for 3D printing of PLA, ABS and nylon in a closed working chamber.
However, the main change that makes this printer so profitable is undoubtedly the IDEX upgrade. In the IDEX 3D printer, the nozzles work independently, unlike the dependent, attached nozzles on the original Creator Pro, with different modes such as Mirror Mode for 3D printing multiple identical models at the same time - a big time saver, trust me.
Other quality-of-life improvements include an improved touch screen interface, as well as important nozzle updates that prevent unused nozzles from oozing out and messing up the print bed or even causing errors. You won't find a more affordable IDEX printer.
4. BCN3D Sigma D25 — IDEX 3D printer
- Manufacturer: Spain
- Price: $3,995
- Assembly volume: 210 x 297 x 210 mm
Spanish 3D printer manufacturer BCN3D has made a name for itself with reliable dual extruder 3D printers. All of their printers, including the Sigma and Epsilon series, use BCN3D's IDEX (Independent Dual Extruder System) 3D printing technology, a unique and key advantage.
IDEX 3D printing allows each extruder to move completely independently, not limited to working on the same model at the same time as in other 3D printers. Two different parts can be created at the same time, cutting the time required to create several small parts in half. The Sigma D25 also features high quality E3D hot ends for quality printing on a variety of materials, including stiffer filaments, and a filament low sensor informs you when the filament has run out.
For those who need a 3D printer for rapid prototyping, being able to print multiple parts for testing at the same time is a huge advantage. The BCN3D Sigma D25 uses 2.85mm filaments instead of the standard 1.75mm so be aware of this, but is compatible with any 2.85mm filament. You can use a variety of 3D printer nozzle sizes, from 0.3mm to 1. 0mm, and a clear and easy-to-navigate touch screen interface.
Interestingly, Sigma D25 is also an open source 3D printer: printer firmware, workflow, software and other files are available on BCN3D GitHub. It works seamlessly with the Cura 3D slicer and is easy to set up and use right from the start. Overall this is a great, reliable and efficient dual extruder 3D printer. With a resolution of 50 microns, this is a high quality, high resolution 3D printer for accurate rapid prototyping.
5. Ultimaker S3 - very precise dual extruder 3D printer
- Manufacturing company Holland
- Ultimaker S3 price: $3,850
- Assembly volume: 230 x 190 x 200 mm
Ultimaker is another behemoth of desktop 3D printing, producing award-winning deposition modeling printers. With a dual extruder and incredible precision down to 20 microns, the Ultimaker S3 is a fantastic option for small businesses, manufacturers and prosumers.
For precision multi-material 3D printing, nothing beats the Ultimaker S3. It is widely used to create accurate architectural models as building design prototypes, to create accurate industrial and engineering prototypes, and in many other industries. Upon release, it won dozens of awards and is still one of the best dual extruder 3D printers.
With a print volume of 230 x 190 x 200 mm, the Ultimaker S3 can handle most printing needs. It also has a built-in camera that allows you to monitor the printing process remotely.
Connected via WiFi, Ethernet or USB stick, the Ultimaker S3 is designed to be easy to use. While the Ultimaker 3 doesn't come cheap at $3,850, it's accurate, fast, reliable, and easy to use. This makes it overall one of the best dual extruder 3D printers on the market today.
6. Raise3D Pro2 / Pro2 Plus
- Price: $3,999
- Assembly volume: 305 x 305 x 300 mm
Also featured in our overall ranking of the best 3D printers, the Raise3D Pro2 series impresses with its reliability, size and range of printable materials. In addition to standard PLA, ABS, and PETG printing, the Pro2 and Pro2 Plus 3D print with nylon, polycarbonate, carbon fiber, ASA, and metal-filled filaments on either of the two extruders.
Its big brother, the Raise3D Pro2 Plus, costs $5,999
The Raise3D Pro2 also boasts a fantastic build volume of 305 x 305 x 300mm, enough for everyday and industrial printing. The printer is also very accurate, with a minimum layer height of 0.01mm, and is equipped with a 7-inch touch screen for easy printer control. The Raise3D Pro2 costs just under $4,000 and overall is a fantastic dual-extruder printer for the price.
7. Ultimaker S5
- Price: $5,995 - Available at Dynamism Store
- Assembly volume: 330 x 240 x 300 mm
Ultimaker is highly regarded, and for good reason - the company can't go wrong. After the Ultimaker 3, the Ultimaker S5 is an updated, improved and slightly more expensive dual extruder 3D printer that will compete with the Makerbot Method.
A 330 x 250 x 300mm large-format 3D printer built for more scalable production, the Ultimaker S5 already has satisfied customers at Volkswagen, Decathlon and many more. It features a very advanced print leveling system, an improved touch screen, and can be connected to a phone via the Ultimaker app, which notifies you when a print is complete. The Ultimaker S5 is undoubtedly a great dual extruder 3D printer.
Best Dual Extruder Upgrades
8. Mosaic Palette 2S / 2S Pro - Best Upgrades for Dual Extrusion Filament Splicer
- Palette 2S Price: $599
- Palette 2S Pro Price: $799
If you want to print multiple colors without a dual extruder, consider Palette as well. Instead of 3D printing with two multi-colored filaments from separate extruders, the Palette 2S and 2S Pro fuse up to four multi-colored filaments - or different materials - together during printing to create multi-color or multi-material parts.
They work by running your model through specially designed software - CANVAS for Palette - to assign different colors to different areas of your model before printing. When a particular area needs to be printed, the Palette software splices the colored filaments to print that particular area in the material or color you choose.
This makes Palette ideal for creating architectural models for construction projects, colorful desktop models of your favorite designs or D&D models, and multicolor prototyping businesses. The standard Palette 2S model includes all of these features, while the Palette 2S Pro can also splice up to 20% faster and comes with an extended 2-year warranty and replacement parts.
Palette is compatible with hundreds of 3D printers, including almost all of the most popular options. For more information, you can check your printer's compatibility here, and as for choosing between the Palette 2S and 2S Pro: The 2S Pro cuts filament 20% faster and comes with a longer warranty - so if that's important to you, spend the extra money on 2S Pro.
9. Prusa Multi Material Upgrade 2S - Prusa Upgrade Kit
- Price: $299
While you can upgrade the palette for most 3D printers, Prusa printer owners can purchase a similar Multi Material Upgrade kit that allows you to print up to 5 different materials at the same time. Prusa printers are some of the best 3D printers under $1,000 and this upgrade turns your Prusa into a multi-color or multi-material 3D printer.
MMU2S is an improvement over the previous version of the Multi Material Upgrade Kit 2.0, key changes include a material feed sensor, buffer and a much improved overall calibration process.
The Filament Sensor goes further, checking not only for the presence of filament, but also to see if it has reached the Bondtech gears for printing. This provides much more reliable extrusion and makes filament calibration and loading easier.
The filament buffer also saves you the hassle because each of your filaments (especially if you're using all 5!) won't get tangled or tangled. Organizing and separating each filament also saves space on your desk or 3D printer table.
Q&A for Dual Extruder 3D Printers
What is a dual extruder 3D printer?
Dual extruder 3D printers have two print heads or nozzles instead of one print head like standard FDM 3D printers. Dual printing frees you from the limitations of using only one type of 3D printer filament and allows you to create multicolored parts with ease.
Dual head 3D printing improves printing with soluble supports such as HIPS and PVA and also allows multi-color parts to be printed.
Most budget dual extruder 3D printers are dual nozzle printers, meaning they have two nozzles but extrude from a single head, but we also include more advanced printers. These advanced options include IDEX 3D printers with two printheads that move completely independently for efficient and versatile printing.
What are the main types of dual extruder 3D printers?
The main types are:
1. Dependent Dual Extruder 3D Printers - Most inexpensive multi-extruder 3D printers are dependent, that is, two nozzles that extrude separate filaments are attached to one print head. They follow the same path, filling areas (such as a support or main part) in turn.
2. Dual Extruder Independent 3D Printers (IDEX 3D Printers) - IDEX extruders use two printheads independently of each other, doubling productivity when printing multiple parts at the same time.
3. Dual Extruder Printer Upgrades - These upgrade kits, such as the Palette 2S series and Prusa Multi Material Upgrade 2.0, transform a single extruder 3D printer into a printer that can print up to 5 colors at once using splicing systems and specialized software and plans for filling 3D models.
4. Mixed color 3D printers are some of the cheapest dual extruder 3D printers, and maybe not even dual extruders. They use one printhead and one nozzle, but two filaments to mix the colors while melting. You can print models in half color, or mix colors like red and blue to create a purple hue.
Can the 3D printer be upgraded with a dual extruder?
Yes, you can. Dual extruder upgrades such as Palette 2S (compatible with most popular 3D printers) and Prusa Multi Material Upgrade 2.0 (for Prusa 3D printers) will turn your standard FDM printer into a multi-color 3D printer.
However, manually modifying a 3D printer and adding a second extruder is more difficult. There are guides for turning your 3D printer into a dual extruder 3D printer like the Ender 3, but for the less tech-savvy, we recommend avoiding this.
Should I buy a 3D printer with two extruders?
If you want to print multi-color prints at home for fun or create better quality smooth surface prototypes using dissolvable supports, a dual extruder 3D printer is worth getting.
However, if you don't need multimaterial or multicolor prints, or want to print high resolution character models that are better suited to resin 3D printing, for example, then it might not be worth it.
Tools and consumables for upgrading/repairing 3D printers
Technician
Subscribe to the author
Subscribe
Don’t want to In the first part I will describe some of the tools and consumables.
It all started with a banal reaming of the inner diameter of the nozzle from 3 mm to 3.5 Then without a machine, manually. Vice, screwdriver and nozzle. Only hardcore.
Although the most hardcore was a little earlier, when I drilled out the thermal barrier from 2 mm to 2.5 - because the inner surface was worse than a file. The thermal barrier clamped in pliers, did everything on weight. Fun.......
In a recent article about the machine, I mentioned reaming the nozzle, now more civilized.
A lot of sawdust, of course. It's my job to warn... and don't forget the butter.
Instead, now 10 nozzles have been adapted to UP!.
0.8 nozzle and Craftware slicer test moment. You can see a piece (sorry, I didn’t have time to uncover the camera) of an internal triangular filling with double lines. The thickness of the lines of internal filling turned out to be 1.6 mm. The item is light but strong. Wall thickness - 2.4 mm, only 3 rounds of the perimeter.
Let's get back to repairing/upgrading printers. Electrical contacts - how many in this word.
Stripping tool - stripper.
Allows stripping wire for soldering or subsequent crimping. Forget about teeth or wire cutters - you only need to remove the insulation with a special tool.
There are usually 2 types of contacts in a 3D printer - Xh3.54 (white) and Dupont (Black). (Color differentiation for photos only)
Crimper SN-01BM is used to crimp Xh3.54.
Always remember what good quality sponges look like.
We insert the contact, make a few clicks, insert the stripped wire and tighten it:
It turns out:
It seems like Dupont is crimped with an SN-28B crimper, but I got the hang of that too.
Another crimp SN-48B took for the power terminals - to put the heaters on detachable wires or connect to the power supply from the PSU for something (make tie-ins).
Pay attention to the sponges - complete crap. Rough metal was covered with paint on top.
For these terminals:
The presence of crimps and a soldering iron at home allows you to make accurate and reliable connections to the printer's electrics. As an example - in the photo below there is a power cable for connecting two external drivers for steppers.
This story would not be complete without crimp ferrules. Clamping an uncompressed wire into a screw terminal is wrong. First, the stripped wire is crimped in the tip, then only in contact. Otherwise, the screw squeezes the wires, there is a chance that the wire will simply fall off over time.
And the cheapest crimp tool:
Works, what more can you say about it. Although temporarily you can crimp with pliers. It was like that. While the instrument was running.
Let's move on to manual additive technologies. This is a small digression for repairing small printed items or children's toys. Do not write a separate article about UV glue.
The fashion for light-curing UV adhesives has gone, all Ali is clogged with glue pens with built-in LEDs.
Heroes always go around, so we buy separately a polymer and a separate UV laser.
What it is for - in case of breakage of small figurines, toys, to smooth holes in the seal.
Today my son came - fix the headlight, and fix the headlight .... in a model.
By fiddling with stretch film and UV glue, this is what I came up with:
Cons: shallow curing and smell......
Pros: happy kids and 3D printers.
This is only part of what is required. It will be interesting - I will write what else is needed.