Build tack 3d printer
BuildTak 3D Print Surface - 220 x 220 mm | 3D Prima
Buildtak
0 Reviews
read more
Incl. VAT excl. Shipping
Wish list
Questions about the product
Questions about the product?
Expect a delivery time a few days longer than usual. We will handle your order as soon as possible, but we can't guarantee delivery date during the Christmas holidays.
Shipping charges are based on the product's total weight and shipping method chosen.
Exact shipping charge is presented at checkout when you select shipping methods and your country. No other hidden costs.
Free shipping for all EU orders above EUR 100!
Fast delivery
Our goal is that all orders placed before 12:00 are shipped out from us the same day if the products are in stock.
All items shown with “in stock” status are in stock in our own warehouse for immediate delivery.
Delivery within EU will be shipped by FedEx, UPS, International tracked mail. You choose method in the checkout.
Delivery time will be around 2 - 6 days to most European countries.
Worldwide delivery around 4 - 7 days.
You will receive and mail from us with the tracking nr of the parcel as soon as we have shipped your order.
Free shipping for all EU orders above EUR 100!
Below you can see delivery time for European countries.
| Country | Delivery Time in Days | Free Freight over EUR 100 order |
| Albania | 4 | No |
| Andorra | 3 - 5 | No |
| Armenia | 4 - 6 | No |
| Austria | 2 - 3 | Yes |
| Azerbaijan | 4 - 6 | No |
| Belarus | 4 - 6 | No |
| Belgium | 2 - 3 | Yes |
| Bosnia & Herzegovina | 3 - 4 | No |
| Bulgaria | 3 - 5 | Yes |
| Croatia | 4 - 5 | Yes |
| Cyprus | 4 - 5 | Yes |
| Czech Republic | 3 | Yes |
| Denmark | 2 | Yes |
| Estonia | 3 | Yes |
| Finland | 2 | Yes |
| France | 2 - 4 | Yes |
| Georgia | 4 - 6 | No |
| Germany | 2 | Yes |
| Greece | 3 - 4 | Yes |
| Hungary | 3 - 4 | Yes |
| Ireland | 3 - 4 | Yes |
| Italy | 2 - 4 | Yes |
| Kosovo | 3 - 4 | Yes |
| Latvia | 3 - 4 | Yes |
| Liechtenstein | 2 - 4 | Yes |
| Lithuania | 3 - 4 | Yes |
| Luxembourg | 2 - 3 | Yes |
| Macedonia | 3 - 4 | Yes |
| Malta | 4 - 5 | Yes |
| Moldova | 4 - 6 | No |
| Monaco | 3 - 4 | Yes |
| Montenegro | 4 - 5 | Yes |
| Netherlands | 2 | Yes |
| Norway | 2 | Yes |
| Poland | 3 - 4 | Yes |
| Portugal | 5 - 6 | Yes |
| Romania | 3 | Yes |
| Russia | 4 - 6 | Yes |
| San Marino | 4 | Yes |
| Serbia | 3 - 5 | Yes |
| Slovakia | 3 | Yes |
| Slovenia | 3 | Yes |
| Spain | 3 - 5 | Yes |
| Sweden | 1 | Yes |
| Switzerland | 4 | Yes |
| Turkey | 4 - 6 | No |
| Ukraine | 4 - 6 | No |
| United Kingdom | 3-6 | No |
Shipping charges are based on the product's total weight and shipping method chosen.
Exact shipping charge is presented at checkout when you select shipping methods and your country. No other hidden costs.
Free shipping for all EU orders above EUR 100!
Fast delivery
All orders placed before 12:00 are shipped out from us the same day if the products are in stock.
All items shown with “in stock” status are in stock in our own warehouse for immediate delivery.
Delivery within EU will be shipped by FedEx International Economy.
Delivery time will be around 2 - 6 days to most European countries.
Worldwide delivery around 4 - 7 days.
You will receive and mail from us with the tracking nr of the parcel as soon as we have shipped your order.
Free shipping for all EU orders above EUR 100!
Below you can see delivery time for European countries.
| Country | Delivery Time in Days | Free Freight over EUR 100 order |
| Albania | 4 | No |
| Andorra | 3 - 5 | No |
| Armenia | 4 - 6 | No |
| Austria | 2 - 3 | Yes |
| Azerbaijan | 4 - 6 | No |
| Belarus | 4 - 6 | No |
| Belgium | 2 - 3 | Yes |
| Bosnia & Herzegovina | 3 - 4 | Yes |
| Bulgaria | 3 - 5 | Yes |
| Croatia | 4 - 5 | Yes |
| Cyprus | 4 - 5 | Yes |
| Czech Republic | 3 | Yes |
| Denmark | 2 | Yes |
| Estonia | 3 | Yes |
| Finland | 2 | Yes |
| France | 2 - 4 | Yes |
| Georgia | 4 - 6 | No |
| Germany | 2 | Yes |
| Greece | 3 - 4 | Yes |
| Hungary | 3 - 4 | Yes |
| Ireland | 3 - 4 | Yes |
| Italy | 2 - 4 | Yes |
| Kosovo | 3 - 4 | Yes |
| Latvia | 3 - 4 | Yes |
| Liechtenstein | 2 - 4 | Yes |
| Lithuania | 3 - 4 | Yes |
| Luxembourg | 2 - 3 | Yes |
| Macedonia | 3 - 4 | Yes |
| Malta | 4 - 5 | Yes |
| Moldova | 4 - 6 | No |
| Monaco | 3 - 4 | Yes |
| Montenegro | 4 - 5 | Yes |
| Netherlands | 2 | Yes |
| Norway | 2 | Yes |
| Poland | 3 - 4 | Yes |
| Portugal | 5 - 6 | Yes |
| Romania | 3 | Yes |
| Russia | 4 - 6 | Yes |
| San Marino | 4 | Yes |
| Serbia | 3 - 5 | Yes |
| Slovakia | 3 | Yes |
| Slovenia | 3 | Yes |
| Spain | 3 - 5 | Yes |
| Sweden | 1 | Yes |
| Switzerland | 4 | Yes |
| Turkey | 4 - 6 | No |
| Ukraine | 4 - 6 | No |
| United Kingdom | 3-6 | No |
This item cant be delivered in the selected country. Please change the country.
Aland Islands Albania Algeria Andorra Argentina Australia Austria Bahrain Bangladesh Belgium Bermuda Bhutan Bolivia Bosnia and Herzegovina Bulgaria Canada Canary Islands Cayman Islands Chile Croatia Cyprus Czech Republic Denmark Estonia Faroe Islands Finland France Georgia Germany Gibraltar Greece Greece, Islands Greenland Guernsey Heligoland, Germany Hungary Iceland Indonesia Iran Iraq Ireland Isle Of Man Israel Italy Ivory coast (Côte d'Ivoire) Japan Jersey Jordan Kosovo Kuwait Latvia Lebanon Libya Liechtenstein Lithuania Luxembourg Macedonia Malta Martinique Mexico Moldova Monaco Montenegro Netherlands New Zealand Northern Ireland Norway Peru Poland Portugal Puerto Rico Romania San Marino Saudi Arabia Serbia Singapore Slovakia Slovenia South Africa Spain Spain, Balearic Islands Sweden Switzerland Thailand Turkey USA United Arab Emirates United Kingdom Uruguay
Best 3D Printer Build Surface – Glass Vs PEI Vs BuildTak & More – 3D Printerly
Choosing the best build surface for your 3D printer can be a confusing task at time, which took a while myself to figure out. I just wanted to know the popular options out there and why people pick them over others.
This article will aim to compare different 3D printer build surfaces so you can make a more informed choice on what to attached to your 3D printer.
There are five different types of surfaces that I will be going through in this article which are:
- Glass
- PEI
- BuildTak
- Creality
- Garolite
There are a few more options out there, but for most of our 3D printing needs, these are the main candidates that you will come across.
If you want a quick answer, I would personally recommend going for borosilicate glass ontop of your aluminum build plate for most materials. If you want to print with advanced materials, Garolte is a great option.
Although you don’t get the flex option with glass, it has amazing heat-resistance and durability for the longer term and is very easy to clean. They give your prints a lovely, glossy finish at the end which is pretty awesome to see.
They are in the medium price range when talking about build surfaces, whereas you can get some cheap picture frame glass that still gets the job done, but won’t last nearly as long.
Let’s start off with those glass build surfaces, then continue with the others!
When talking about a glass build surface there are usually four main types:
- Borosilicate Glass
- Tempered Glass
- Normal Picture Frame Type Glass
- Mirror
Printing directly on glass seems to be the main choice when it comes to people using their 3D printers because it has a few benefits that come with it. Namely, the smooth, shiny finish that gets left at the bottom of your 3D prints.
Although there are a few different types of glass out there, the main one you’ll hear people speaking about is borosilicate glass, which is a little premium compared to standard picture frame glass that some people use.
Borosilicate glass has certain properties which give it the upper hand to use in a 3D printing situation, but picture frame glass or even mirror glass does work well and is considerably cheaper.
I think all of these options are great in their own right so it’s really down to preference and availability of how you can access these parts.
Borosilicate glass can easily be found on Amazon at the perfect sizes for your 3D printer, whereas some people will buy a cheap piece of glass and get it professionally cut to size.
Check out the Dcreate Borosilicate Glass Printer Bed from Amazon.
Borosilicate glass usually has the upper hand because of its higher level of heat-resistance, durability and lower chance of breaking or chipping while trying to remove prints.
There are plenty picture frame glass or cheap glass stories where they crack, chip, or break after a short time which can aget pretty inconvenient after a while.
Cleaning the glass is a pretty easy process where you can either use some type of cleaning solution spray or even Windex, along with a scraper or razor to remove dirt. Some people use a layer of glue multiple times before it needs to be cleaned off the surface.
The presence of your print bed warping is quite common depending on what material you are using. Borosilicate glass does pretty well in this area, so you are unlikely to get leveling problems down the line by making this your choice.
There’s a reason borosilicate glass is widely used in labs for their equipment, mainly due to temperature resistance and doesn’t have characteristics within that expose it to fractures or exploding due to extreme heat.
It handles thermal shock very well, but is a higher mass so it takes longer to heat up than other types of glass. The upside here though is that it doesn’t fluctuate very much in temperature after it’s heated up.
Safety is a big factor for glass 3D printer build surfaces and you get that safety with borosilicate glass.
Tempered glass gets a mention here and there because it also works fairly well. The thing with tempered glass though is it can’t be cut due to the manufacturing method, or it will explode.
The tempering process provides mechanical strength to glass, and this isn’t really necessary for 3D printer bed surfaces.
You can find the popular Creality Ender 3 Tempered Glass Plate from Amazon.
PEI is another very popular build surface which has many features and properties that make it an ideal choice for your 3D printer build surface.
It takes little to no preparation to implement and can be easily installed by using the laminated adhesive on top of your existing flat build platforms. Many people will get a borosilicate glass print surface and actually add a PEI surface on top of that.
You will find a nice adhesive backing already applied to your PEI surface which you can quickly pull back and stick to your printer’s bed.
The long-term value of this type of bed is great because it can be reused for multiple prints and cleaned with a substance like isopropyl alcohol between your prints. You won’t have any troubles printing PLA or ABS along with tons of other materials directly onto a PEI surface.
I think one of the best things though is how you don’t need those additional adhesives such as 3D printer slurries, gluesticks, tapes and all the rest of it.
This addition to your 3D printer really makes your printing journey that little bit easier.
Making many small upgrades to your 3D printer like this really start to add up and make 3D printing a very enjoyable activity, rather than on that gets frustrating from time to time.
When it comes to a PEI surface, parts are easier to remove before the bed gets completely cold, but if you come back to a long print and a cool bed, it shouldn’t be an issue removing it.
A great PEI surface that is working for plenty of people is the Creality Removable PEI Flexible Magnetic Bed from Amazon.
The first layer of your prints should be squished a little into the bed with PEI, so the leveling process will ever so slightly change, but you’ll quickly get used to it (PETG is an exception).
If you’ve done tons of printing on your PEI sheet, you can actually lightly sand it with 600 grit sand paper to give your PEI sheet some more life.
One of the best things about PEI though is how it can easily be cut to size with a hobby knife, making it universally compatible with any 3D printer.
Many 3D printers already come with PEI film on it because manufacturers realize how well it works. Beginners love a surface like this as they can get started pretty quickly and not run into common problems of prints not sticking to the bed.
I actually wrote an article about Stopping 3D Prints Moving While Printing which you can check out.
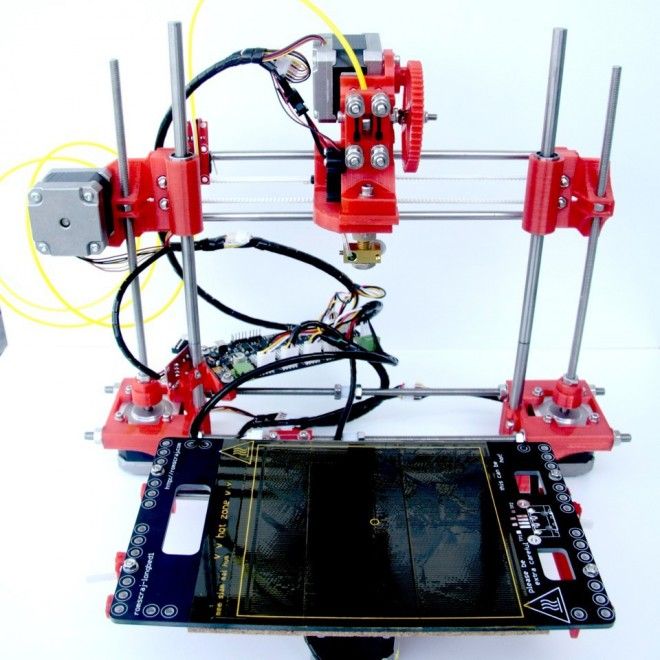
The BuildTak 3D Printing Build Surface is quite a staple build surface in the 3D printing community, working as an all-purpose sheet which has an adhesive back which can easily be peeled off and stuck to your bed.
Having easy installation is always ideal when it comes to 3D printing.
It’s compatible with all sorts of materials (PLA, ABS, TPE, PETG, HIPS, PEEK, Wood-fill etc.) so you won’t have to worry about changing surfaces back and forth. The design and manufacture of this build surface makes it very durable over a long period of 3D printing.
After your prints have finished, print removal and cleaning is very easy with this surface.
For a smooth 3D printing experience with your FDM 3D printer, get the BuildTak build surface as many other thousands of users have happily purchased for themselves.
You even have the option to add on a magnetic base on top of the existing print bed, which has an attached BuildTak sheet so it connects nicely. The two sheets can easily be slid away from the print bed and you can flex the build plate until your part pops off.
I’ve seen many people complain about prints being too strongly stuck down to the print bed, so this upgrade will solve that problem and lessen your frustrations with the 3D printing process.
PETG can be especially difficult to get to adhere to a print bed, but many users mention how it stuck very nicely to the BuildTak Build Surface without issues and without needing all the fancy adhesive substances.
People that have tried numerous 3D printing products which don’t work as well as they thought say how this part is a great upgrade. One user has been using their build sheet for over a year and it’s still going strong.
The only damage they experienced was from an incorrectly calibrated printer head which was set too low, but it still works perfectly after the fact.
You can minimize your use of rafts and still get prints to stick down, and I would recommend getting the BuildTak Build Surface if you are serious about 3D printing.
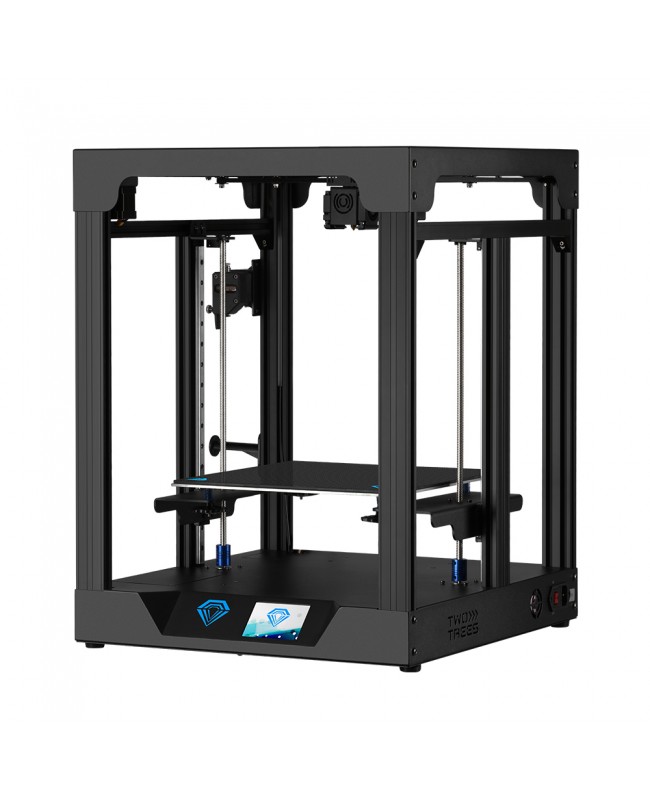
Creality Flexible Magnetic Build Surface
The Creality Magnetic Flexible Build Surface is a nice feature to add on to your Creality 3D printer, whether you have an Ender 3, Ender 5, or a 3D printer with a similar build volume.
Being able to make use of the functionality of a removable, magnetically secured build surface makes for a productive 3D printing experience.
With this behind you, you no longer have to worry about using a sharp knife, spatula or other removal tools that you are so used to.
The best thing about this build surface is being able to bend the flexible build surface and watch the finished part pop right off without damaging your bed or the part itself. It saves plenty of time and frustration when you have this on your 3D printer.
You can easily customize the size of the magnetic surface by cutting it to your desired dimensions so it can be used for all types of build sizes in your FDM 3D printers.
Simply remove the 3M adhesive backing from the magnetic build plate then place the upper magnetic build surface ontop of this sheet.
It works great for heated or non-heated 3D printer beds.
They advertise it as being mainly for PLA or PLA-based materials, and I’ve seen some examples of people trying to print with PETG and things being ripped and damaged, so I would stick with the advice.
There is a nice textured surface on the top of the upper build plate which helps overall print adhesion.
One user purchased the Creality Build Plate Surface as a replacement to his Ender 5 surface and found it very easy to install, as well as liking the efficiency it gave in the printing process.
When trying to clean this surface however, make sure not to use acetone because it can damage the print bed.
Garolite is a fiberglass/epoxy laminate material which is similar to what is used in circuit boards. It’s a surface which also doesn’t require adhesive substances or even bed heating to get it to work great.
This build surface is mainly aimed at advanced, high-temperature materials such as Nylon, Polycarbonate and PETG.
According to 3DMakerEneering, it’s “The Best Build Surface for Printing Nylon”.
You can find their Garolite 3D Printer Build Surface directly from their website.
These type of materials are more likely to warp compared to lower temperature materials, so they need a better surface to reduce the warping chances.
Many higher-end 3D printers will come with a Garolite build surface just for those more advanced materials to not warp while printing.
This build surface isn’t as popular as the others, but it really works great for its intended use. You can get a thinner sheet of Garolite and use it on a flexplate so you can take it off and easily flex it to take your parts off.
You don’t require heat with this type of build surface, but still using a little bit of heat helps out that little bit extra so your prints have a better chance of being successful.
The texture of the Garolite Build Surface does plenty to get difficult materials to stick well to it.
I hope this helps you to make a more informed decision about which 3D printer build surface to go for.
Happy printing!
Dachshund, printer, two hours.
Competition 'My 3D Printer'. Nomination 'A creative story about the use of an FDM printer'
"You may not be Kura, but you must slice a dachshund!" (С) Grivus
Action tragicomedy in two hours. (read in Volodarsky's voice)
Actors:
Printer: Creality 3D Ender – 3
Kura: CURA slicer
Filament: PLA 1.75 90riv003 I-Grus. nine0003
Dachshund.
Print settings: nozzle 0.4, layer 0.06, nozzle temperature 210, table temperature 50, speed 30.
I turn on the 3D printer,
I need to print something urgently. »
One hour.
Me : Well, Kura, here is the model, come on, give me the result. nine0003
Kura: And what to print, you should know, otherwise it will be a joint?!
Me: You what, send what they give, you are a program, stupid numbers, code. You don't care what to slice, you're not alive, you're a bot.
Kura: Not at all, it hurts me to hear this, you offended me a lot, it is very important for me to know that I am slicing! I won't be slicing for you anymore! (hangs)
Me: Well, damn, wait, I'm sorry, I was wrong, my fault.
Kura (droops): Well, crap, fuck you, hold the G-code, because, in fact, a wonderful cat!
Me: You yourself are a cat, it is a dog. Blind, right?
Kura: I will leave the question unanswered! (hangs)
Me: Printer, here you have the G-code and send it to production. nine0003
Printer: OK, I see, the preparation has begun, now I'll warm up and start printing.
Me: Great, I'll sleep for now, otherwise I'm tired, something very. Well, are you printing?
Printer: Uh-huh, the process has begun, go and sleep in peace.
Extruder: Excuse me, but will I be loaded with filament or what!? Should I try to equip the seal with air?
Printer: Fuck you!
Me: Fuck you! (I load the filament into the extruder)
Me: Is it ok now or what?
Extruder: Quite right, I went to bed too.
Me: You mean sleep? Let's push, I see the passes have gone, what kind of misfortune again?
Extruder: I have nothing to do with it, what they told me, then I shove. They said three, so the plastic climbs slowly.
Me: Which three? What are you talking about? Don't brainwash me again! I loaded one seven five into you!
Extruder: I don't know anything, I see the number three in the code, so go, sleep and don't try.
Kura: Byyyy.
Me: Soooo, wait, hang up the seal, now someone will explain to me where the plastic came from in the code, which I didn’t even want to buy in my thoughts? nine0003
Kura: So you didn't choose the thickness of the material, your problem, I didn't know.
Me: So you bastard didn't say?
Kura: I can't speak! (hangs)
Me (restarting the slicer): Come on, show me where you have secret settings stored here. (left eye twitched)
Kura: Well, listen. You poke here, and there to the right and then to the left, turn a little at an angle, back and turn your ass to the north, you will see a pointer in the middle, you follow it straight and as you rest, click on the checkbox of your material.
Me (left eye stopped twitching, right eye twitched): Let's say. I chose, come on, send the damn model!
Kura: Calm down, here, hold the G-code, mind you, it's already snowing outside.
Me: Excellent, printer, listen and pay attention, send this model for printing again.
Printer: Yes, everything is fine, I didn’t even have time to sleep, and even the table had already warmed up.
Print head (moving): I'm like a leaf in the wind, swaying from side to side!
Me: Good, mumbling, I'm very tired and my head starts to hurt.
Printer: Will not be silent, it's a fact, motors must sing when printing! nine0003
Motor X: DOOOOO!
Motor Y : REEE!
Motor Z : Miii!
Extruder: GYYYY!
Me: What GYYYY? Let's shove, or did I choose the wrong plastic again?
Extruder: Yes, it seems to be the same, but something is difficult for me, I kind of click. (click)
Printer: Wait a minute, I'm sorry, maybe I'm distracting, but how would it be worth raising the temperature on the nozzle!?
Me: Fuck you!
Extruder: Fuck you! (click)
Kura: Bgggg.
Me: Are you weird again? Are all your tricks?
Kura: No, no, it's all by itself. I myself do not know how it happened.
Me: Yes, yes, of course, I know you, it seems to me that you are weird for a reason.
Kura: Of course, for a reason, because I'm a BETA.
Printer: Byyyy.
Me: And you are proud now, I will upgrade the firmware and you will make me coffee with pepper in the morning!
Printer: Easy, I can weld it right now, just load the roasted grains into the extruder.
Extruder: Blah... (click-click)
Me:
Printer: What is the fee? I thought it was a cat, painfully the same G-code.
Kura: I told you!
Me: You already pissed me off!
Extruder: Guys, so what's there to supply plastic? nine0003
Me / Printer / Kura: PUSH NOW! ! HOW LONG CAN YOU WAIT!!!!
The second hour.
Print head (moving): I am a leaf in the wind....
Me: Shut up! What is happening there? Done, no?
Printer: Almost narrower. A little more and everything is in openwork, I'm sure that Kure will also like it.
Me: Great, show me what you can do. Wait a minute, why is she without legs?!?!? nine0003
Printer: Um, there is a saying that it seems like someone doesn’t need it, I’ll remember right now, but, the fifth leg of the dog!
Me: Let's say I agree with the fifth, but then why deprive her of all her legs, and even her tail?
Kura: Bggy
Me: What have you done here again? Some kind of disabled person was “cooked” here!
Kura: What's wrong? Support had to be put! But I can't force you. nine0003
Me: I agree, I'm a fool and a hand-ass, but now what do you want me to do?
Kura: What, what, let's peel again, I think we can do it in an hour.
Printer: Ok, I'll start warming up.
Extruder: Oh no, again, although I have nowhere to go.
Printer: Well, printing has begun, and even our extruder does not hiccup.
Extruder (afraid to hiccup): Yes, yes, everything is fine, it would be faster to finish.
Printer: No need to hurry, otherwise I will hang snot.
Me: Got a cold?
Printer: Possibly, although it looks like it just overheated.
Me: Let me turn it down, it might help.
Kura: Oh Gods, I got a hand-ass! Yes, everyone has long known that the point here is not the temperature on the nozzle. nine0003
Me: What then, tell me, if you know?
Kura: Well, yomayo, the mood is already a retreat!
Me: Retractor? How is that?
Kura: Wait a minute. So, you go here, then to the left, and then....
Me: Stop, I'll find the way myself, otherwise you'll take me into the jungle again. Again, stand to the north booty, I'd rather ask myself a question on the forum.
Kura: As you know. Just don’t be offended by me, if instead of a smooth-haired dachshund, you get a meter-long hedgehog at the exit.
Two hours later (that howrs later).
Kura: Well, did it work out?
Me: Yes, I must be afraid to look.
Printer: Come on, it's a DOG! Now, if I brewed coffee, most likely it would be kaka!
Me: I agree, it's better to melt the plastic and leave the coffee to me. Come on, park, and for now I'll go brag about what results I managed to achieve today.
Printhead (parking): I'm a leaf, like in the wind, just blow it, I'll fly again.....
End. Curtain.
Thank you for your attention!
PS : No dachshunds were harmed in the production of this article.
In Stavropol, students created a house using a giant 3D printer // Look
-
Profile
-
Favorites
3D printers and 3D printing December 2, 2022, 15:33 December 2, 2022, 16:33 December 2, 2022, 17:33 December 2, 2022, 18:33 December 2, 2022, 19:33 December 2, 2022, 20:33 December 2, 2022, 21:33 December 2, 2022, 22:33 December 2, 2022, 23:33 December 3, 2022, 00:33 December 3, 2022, 01:33
- Julia Rudy
-
Students who worked on the project will continue to work in the company that acted as an industrial partner of the innovation project.
nine0003
Photo of NCFU.
In Stavropol, students built the first one-story house using a 3D construction printer. In this they were assisted by a team of developers from among the designers of the construction equipment plant.
nine0004 Students of the Engineering Faculty of the North Caucasus Federal University (NCFU) tested the innovative technology of building a house.The 3D printer was designed by a construction equipment company. However, NCFU students were also invited to participate in the development.
"I worked on the design of the printer, creating 3D models, drawings and subsequent operation of the development," said Alexei Nosenko, a student at the NCFU Engineering Institute.
nine0680![]()
Modified fine-grained concrete was used as the printing material. "Print" is a layer-by-layer application of a building mixture according to a given three-dimensional computer model.
Construction 3D printer allows you to build houses, buildings and other structures faster. Due to the use of additive technologies (layer-by-layer building), the construction period of the building is reduced to several days. As the creators of the technology note, a house with an area of 100 square meters is built in 36 hours. nine0003
In addition, this technology generates less construction debris, and each square meter of new premises costs the developer less.
"Before starting the construction of the first one-story house, we made two uniform projects. We built one house in the classical way, and the other in an additive way, using a printer. We were convinced that the second way of working is much more profitable and faster - the savings turned out 36 %," said Dmitry Moskvitin, director of the NCFU partner company.
nine0003
The cooperation between the federal university and the construction equipment plant took two years: this is how much work on the project took in total from the idea to the first erected building.
Having received the necessary knowledge in this innovative area, many students then continued to work in the company.
At the moment, a two-story building is being built using 3D printing. Reportedly, in three working days, taking into account weather conditions, it was possible to build the entire first floor. nine0003
"Now we are directly engaged in the construction of buildings, residential premises, warehouses, which will be rented out to people and perform their direct function," said Alexey Nosenko.
In the meantime, NCFU is planning to open a new research and education center for additive technologies.
In it, students and their mentors will study and improve concrete mixtures, develop special software and industrial controllers.
![]()
Learn more