Bevel 3d laser scanner camera
Bevel 3D Scanner Review | 3D Print Start Point
We’re going to review the Bevel today. This is a 3D scanner that goes on your phone, a handheld scanner. It was a Kickstarter by Matter and Form. We’re going to share how we tested it and tried out, and what results we got from it. We’re also going to discuss some of the areas that we think could be improved, both with the product itself and from a business standpoint.
This is a review of the Bevel, which is a 3D scanner that goes on your phone, a handheld scanner. It was a Kickstarter. We have spoken to the company, which is Matter and Form, I don’t even know how long ago. His name was Drew, the CEO, and we had him as a guest on the show very early on. We decided to back the Kickstarter so we can get one of these handheld scanners. We had experienced few scanners at that point. We thought this is interesting because they are supposed to have a really great connection between the background, the photographic side of it. A little bit of combination between photogrammetry and the way that their algorithm works is what I understood it to be and scanning, the laser scanning.
Matter and Form’s Bevel 3D Scanner
We backed it and we waited a really, really long time to get the thing. Not just that, then we got it and it sat at the desk for months and months since we’ve received it. We probably received first of the year 2017 and it was a good eighteen months after we backed it and we got it. There’s actually a few really interesting things to talk about the story. Some of them have direct 3D print aspects and then there are other business aspects.
Let’s talk first about a little bit of the business aspect. Because they took eighteen months to get to us, what had changed? The phone. Now, you got a connection that’s supposed to be made to a phone’s headphone jack and there is none on the new iPhone 7. I had my iPhone 6 and I knew that I wanted to hang on to the 6 until we got the Bevel because I knew the Bevel use the headphone jack to connect. I was like, “The 7 doesn’t have a headphone jack. That’s going to make things more difficult.” I intentionally didn’t buy the 7 when it came out. I was waiting, but then something happened to my 6. My 6 ended up absolutely having tremendous hardware problems. It wasn’t un-useable at one point. The only choice I had was to get a 7.
This is classic. We learned this really early on in our careers when we were doing stylus pens for handheld computers back in the PalmPilot days. Every time you turn around, they change the form factor on you and everything would go haywire. We used to make a stylus that went inside the stylus port. All of a sudden the form factor were changed and it wouldn’t fit anymore. It would obsolete one product and you’d have to make a new one that would fit. They never gave developers enough time and enough warning and enough dimension information until you got one in your hand. You were always behind the eight ball in trying to create for this. I’m a little bit disappointed because there isn’t even anything on their website or any resolution that they’ve come to except to give you a cable. The iPhone gives you the little cable. “Use the cable, it will be fine,” but it’s not fine. You couldn’t make it work.
Not only is this really a danger and a caution to companies who base their product on a technology that they think is standard and they think is going to be there for a long time, especially one that they’re not in control of. It’s one thing if you are part of the company and it’s another thing when you’re a third-party developer. That never works. It’s tricky. I think there are concerns some people have about USB ports on computers and some of the new MacBook Airs don’t even have a USB port anymore. You have a company, you’re making a product and accessory for a computer and you think, “USB is universal. Every computer is going to have that.” Now, some computers don’t have them anymore. These are some of the considerations and obviously some of the frustrations as consumers that we may have.
I hadn’t really gotten into using the Bevel and testing it because I didn’t have a phone jack on my phone and the iPhone 7 does give you a little cable that allows you to adapt it. You plug it in to the lightning cable port and you get a headphone jack. I could actually connect the Bevel to it. The problem is the Bevel is supposed to also use the headphone jack to mount to the phone to actually have a definite proximity and orientation relative to the camera on the phone. It can’t dangle by this cable.
The Bevel is actually made for other phones that have it. I just think they didn’t consider the 7 one when they designed this thing. There’s no information on the website about adapting it. They had plenty of time. They knew the 7 was already out before they ever even delivered, so they knew this. What are we, hiding our head in the sand as a company? That’s not an okay process. You have to be able to address an issue and not say, “Too bad for you. It only works with these models,” especially in a situation where you didn’t deliver on time. This is one of those reasons why speed to market is so essential.
On Matter and Form’s website, they do have a compatibility chart and it says it’s compatible with the iPhone 7 but they don’t give you any information about mounting it. It’s really about software, I think. There is no headphone jack on it. I don’t understand how they expect you to do. There really was no information on how to do it. For me, this ended up being an issue of waiting a long time to try to even use it because I had to figure out how am I going to mount this thing. The Bevel comes with a clip. Essentially, it goes in the phone jack but part of its mount also grabs or cradles your phone. They have several that come with it. There are three different adaptors that come with it, snap on and off; different thickness of phones, so that it will orient itself. When it plugs in to the phone jack, it’s also grabbing on to the side of the phone so it won’t rotate relative to the screen of the phone. Because you’re plugging in the cable, that clip won’t work at all, you can’t because you have the extension cable on an iPhone 7. It just does not work.
You have this device that’s dangling and it can’t be dangling, you have to have a way to mount it. I ended up making a design project out of this and 3D printed myself a mount. I tried a couple of different versions and orientations. I had to experiment with it. It took me a little trial and error to figure it out. If you got caught up in this Bevel problem, we’re going to make a file available to you so you can download it as well. Keep in mind, fit issues, please listen to our episode from last week about fit problems because this is going to be one of those things where your printer won’t print like our printer and you’re going to want to try it again and make some adjustments to your print settings to make sure you get it to fit your phone.
3D printed Bevel mount
What I did with this case, it’s really a mount, it’s not a case. I didn’t make a whole case for the phone because I have a case on my iPhone 7. I like the one that comes from Apple that’s just very basic, thin skin for the outside of it and it’s got leather on the outside of it. It’s a navy blue leather. I made this mount go over that case.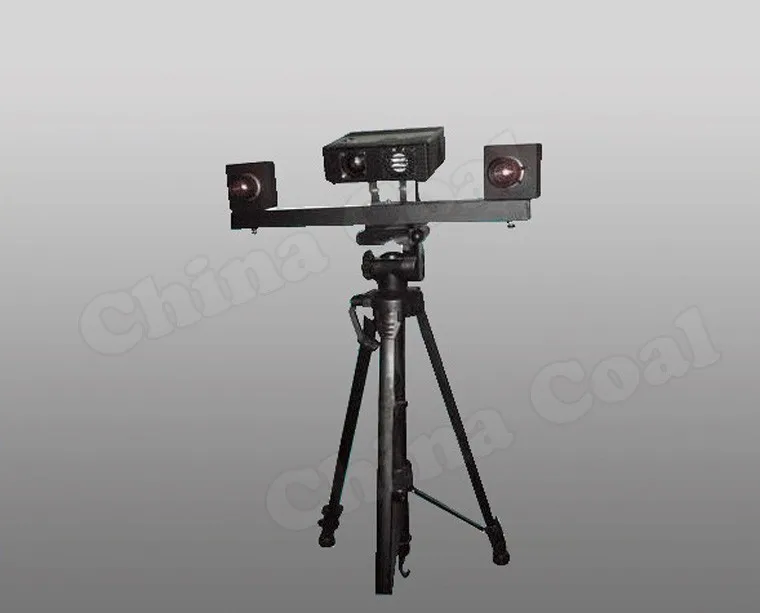 If you don’t have that same case, my model is not going to fit your device perfectly. The outer dimensions will work for you, you just need to change that inner dimension where the phone attaches. You could even just take what I’ve created and add on to it or build on to it if you know the dimensions of your phone. Or you can cut off the bottom portion of it for what holds the Bevel, then use the upper part.
I had to find a way that I’m going to mount the Bevel in the right orientation in a way that this little cable that adapts to the lightning socket or whatever you call it and gives you the phone jack, would still be able to reach. This is an incredibly tiny cable. It’s got two hard plastic ends, the phone jack on one, lightning connector on the other and about 30 millimeters or a little more than an inch of wire. It’s not much there.
Obviously, because of the way the lightning cable works and because of where this positioning is, it’s plugging into the bottom of the iPhone 7 here.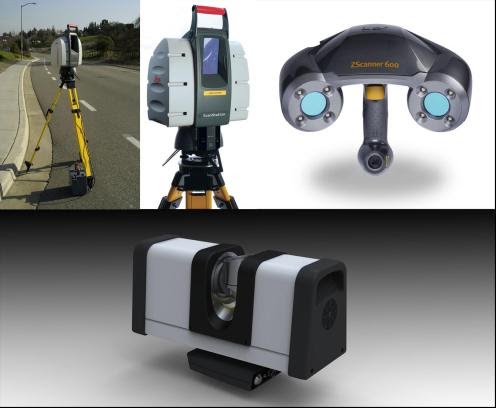 It’s coming off the bottom and that’s where this case is attaching to and that’s where the Bevel is mounted. There are some phones that will mount off the top because of where their headphone jack is. Wherever that might be, that’s where it’s going to plug in. I’m assuming some of those clips may work for Android and other devices; Samsung phones, things like that. They do work for other devices. My understanding is if you have a headphone jack on the top of your phone, the Bevel works just as well there because it has a calibration card. You have to go through this calibration process because when it scans, it uses a laser coming out of the Bevel but it’s also using the camera on your phone.
Having the Bevel separated from the camera, so if the camera is up at the top and the Bevel is at the bottom, do you think that has an effect on how well it’s reading? I definitely think it play a factor. I think personally, a phone that has the phone jack on top, which is inherently closer to the camera would work better.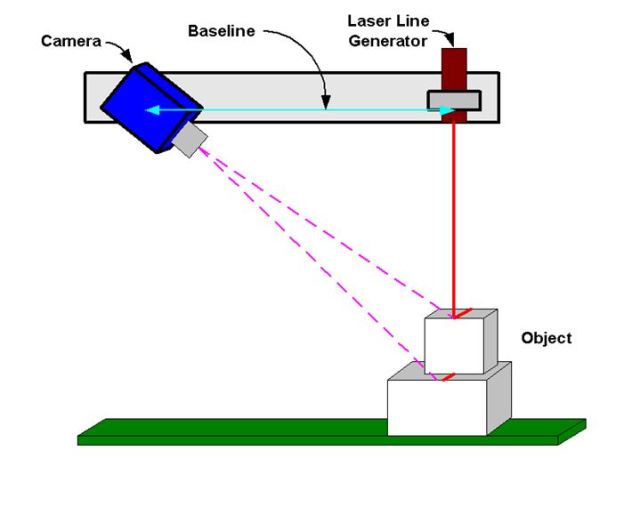 Although, I haven’t been able to test that because I don’t have a device I can do that with. It’s so far apart, the laser. I could tell when I calibrated it. The way it works is their software brings up this thing on the screen telling you to hold the calibration card in certain positions and it reads it. It’s just using the camera at first to read this calibration card, then it goes to a process with the laser in the Bevel where you have to have the laser hit a certain part of that calibration card.
I could tell because of how I had to do this with the iPhone 7 and the cable, the Bevel is even farther away from the camera at the bottom here of the iPhone than it would be on an iPhone 6, let’s say, that the headphone jack is still at the bottom. The Bevel would be about an inch or 25 or 30 millimeters closer to the camera. I could tell that during calibration, that laser was really to, I would call the outside edge of its acceptable variable areas where it could read it and calibrate. I think that may be playing a role in the quality of scans that I’m able to create.
Tracy has a Samsung Galaxy 7. That phone also has its headphone jack at the bottom of the phone. That’s why between us, we didn’t have a phone with a headphone jack at the top closer to the camera to be able to test that, which I think is pretty common nowadays. I don’t know many phones that have them up at the top anymore. The older iPhones did and I’m sure there are other phones out there on the market that do, but the vast majority do not. It still fits on the bottom as long as you take the case off, which is a big problem because I don’t like to take the case off. Actually to me, that was one advantage of building my own little mount, is that I could make it so that it goes over my case. I don’t have to take the phone out of the case every time because it’s always hard to get it out. You always end up pushing buttons or flipping switches when you remove it from the case. The laser was a little closer proximity to the camera compared to mine.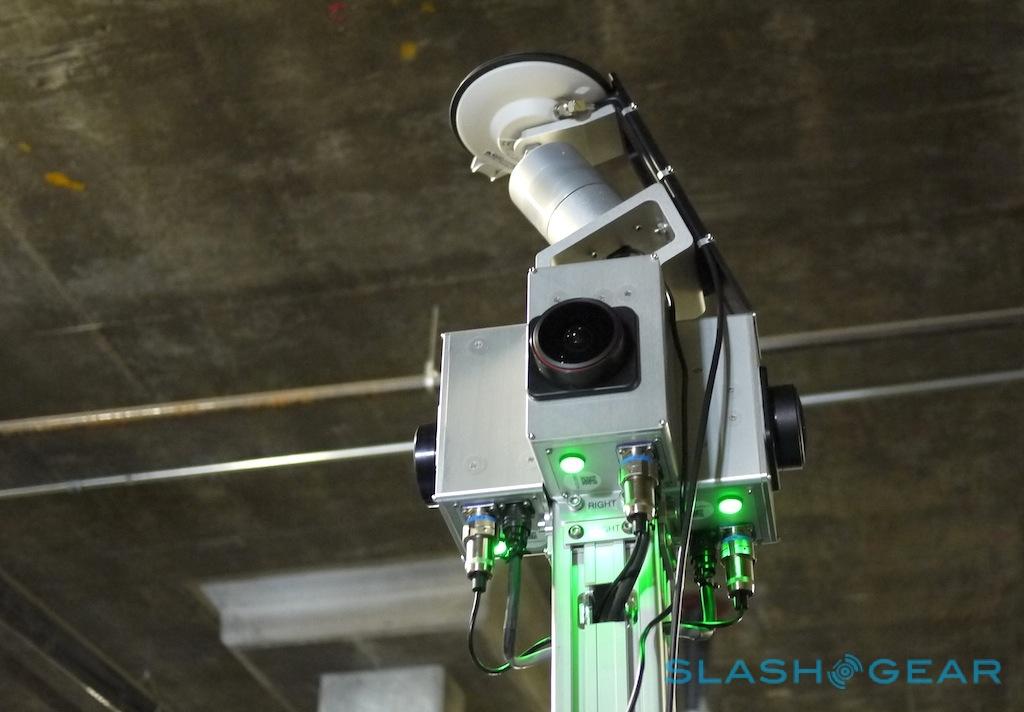
I didn’t even know if this is really going to work because there’s no information on Matter and Form’s website to tell you about this issue with the 7 and how you deal with it. I ended up decided I’m going to experiment. What I did is the first 3D printed part I made to hold the Bevel, I ended up turning the Bevel 90 degrees, like not in line with the long dimension of the camera. It turned at 90 degrees because of this little cable that exists. It put it closer but it also was less stress on the cable. I thought that was a better thing. But then I went to try and calibrate it, when it was in this 90 degree orientation, it wouldn’t calibrate. It only calibrated the photo part where you’re holding the calibration card up where the camera is reading the card. The laser being 90 degrees altered, it’s just not meant to work that way and it could not calibrate. I was like, “That was a flawed plan.”
Then I created a new one and I knew it was going to cause me stress on the cable and issues.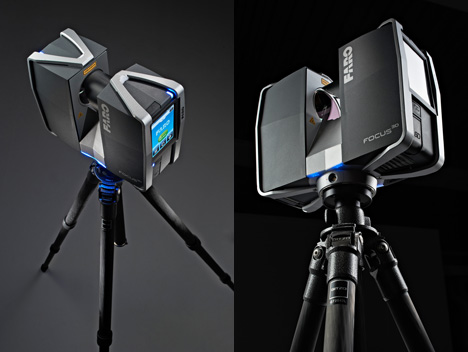 Ultimately, when I got it on the right orientation, it worked and I was able to do it. It was still a challenge. Going back to our episode last week about the difference between the size of your object in CAD and the 3D printed size, I had a lot of that experience here not only with the portions that mate with the Bevel to get it to fit right. The geometry on the outside of this Bevel is a lot of curves, it’s not a lot of flat surfaces and to get it to mate up properly, it took me three generations of prints just to get that to fit. Then there was fitting my phone case around my phone. It fit but it was too tight at first, so I opened it up a little more and made the press fit, have a little more forgiveness to it. It was easy to get on and off.
Ultimately, I was able to do it, I was able to calibrate it and I was able to use it and start taking 3D photos, selfies really of myself and another person in our family that I was testing it on. Then, ultimately, tried scanning some objects with it. Can you do it reverse though? This is what we’ve discovered from when we were plugging it in to the Samsung phone, was that it actually works better when you reverse it because the camera is better on the back. You have the camera from the backside. It’s not like you’re taking a selfie, but the reverse of that.
The camera that faces away from the screen, I think pretty much all phones these days, the camera facing away or on the opposite side of the screen is the better camera. Yes, I did create this part so that I could take it, swap it both directions. Actually, the software knows that you might want to use your selfie camera if you’re taking a scan of yourself or you may want to use the other camera if you’re scanning somebody or something else. It gives you the option and you have to flip the Bevel around and you change cameras. The first time you use the other camera, you have to calibrate that other camera too. Each camera, you have to calibrate once, then it’s ready to go.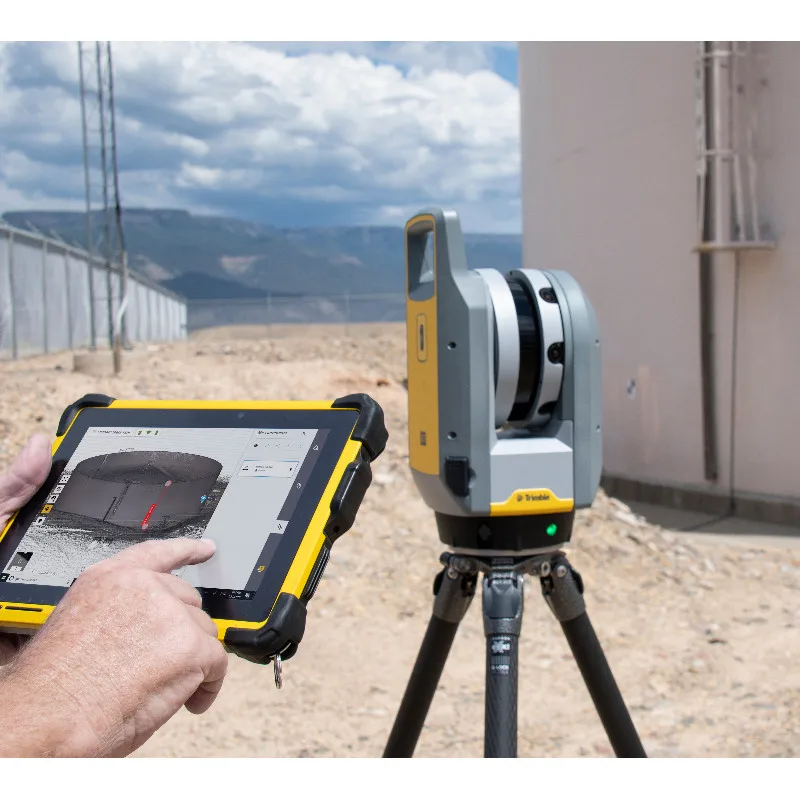 I could slide off my little mount, turn it 180 degrees, face the other direction and take 3D scans the other way. That’s pretty easy, at least. That wasn’t a bad situation. I was glad I was able to get to work with my iPhone 7.
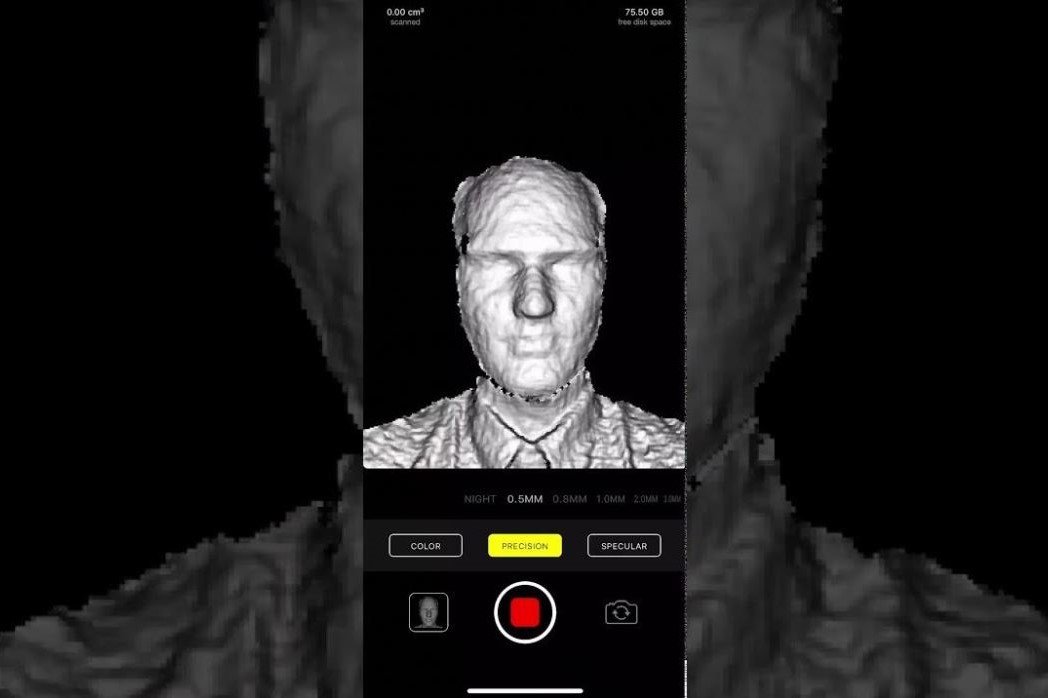
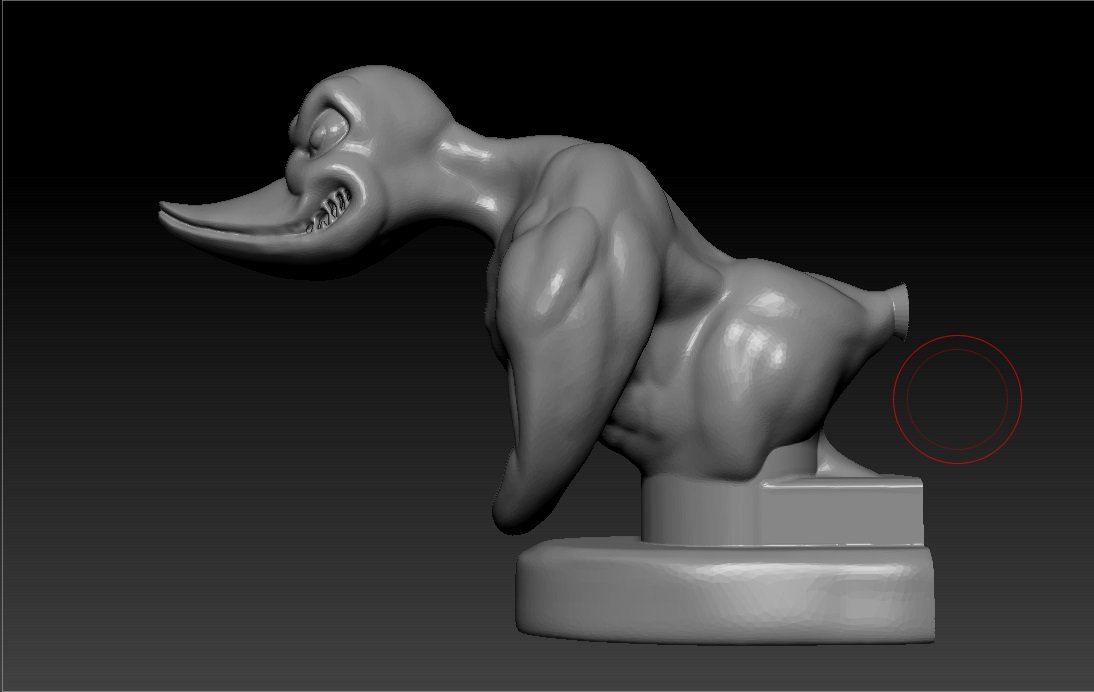
Let’s talk about the quality of the scans. We had our son-in-law, who is a photographer and a videographer. We had him try it as well. It was a little messy. I don’t know how to describe it. I am thus far a little disappointed with the quality of the “3D photos or 3D scans” that it’s producing. I think because it’s handheld. Basically, if you’re doing a selfie, you hold it out with your arm out stretched just like you would take a normal selfie photo. The difference is you turn on the laser and you tell it to start taking the scan. You pivot the camera aimed up at the top of your head then down maybe towards the middle of your torso. You don’t physically move the camera up or down. There is a tutorial video, you can actually look at through the app on your phone.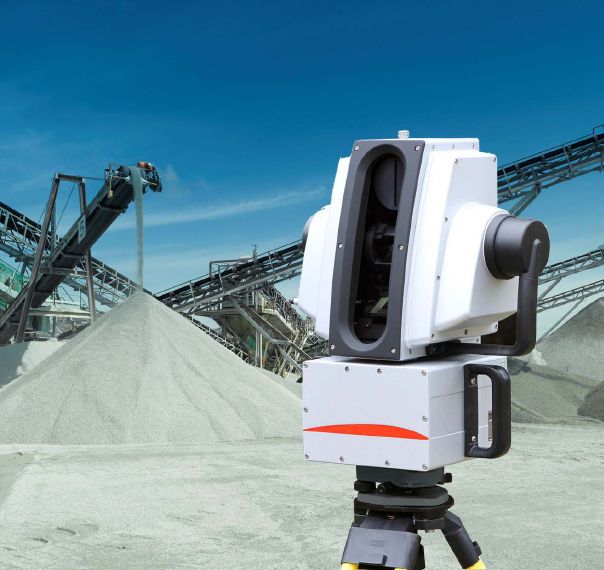 It shows somebody taking a scan of themselves. You can see how they do it.
I think there are just so many different variables in how far away your arm is from your body or your hand is as you’re tipping the camera. Then how quickly you pivot the camera, how quickly that laser scans across your face and your body, or how smoothly, is the speed changing. You can go back up and back down. I just think that the technology and the human user error, if you will, or variables that exist just from person to person and even within yourself to be able to pivot your hand at a consistent speed. There are just so many variables.
The model it produces is just not very clean. There are lots of holes in it and unreadable areas, which we found happens with any scanner when they do the handheld around your body, around your head or any of those things. They always have some holes and other problems and so it makes a model that needs a lot of clean up, which is a lot of effort to create that. This one seemed even more complicated because you have a lot of color information on it from the camera. You have this background that will just basically look blurry. I thought it was supposed to look like clear background.
That’s the other thing that’s disappointing to me. When you look at the packaging of the Bevel, it’s a graphic artist’s representation they’re trying to market and sell this thing. The representation of the scan on the packaging looks more like a complete 3D scan of an entire torso, as if you took scans from all around and pieced them together. Or as if you stood on a turntable and rotate it in 360 degrees while it scanned you, like it scanned me at CES that time at the Art Tech 3D Scanning booth.
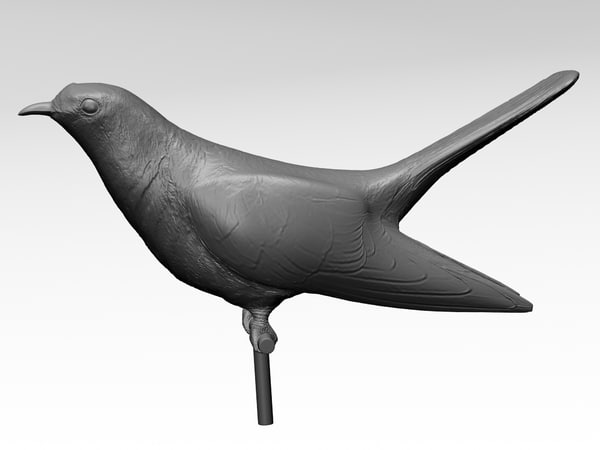
Bevel just really doesn’t do that. You take a scan of one side of an object, whether it’s you doing a selfie or some other object. It’s scanning one side of it only. The mesh that it’s creating is like a surface. It’s not even a complete solid. It’s just a single surface that’s completely open in the back. It seems that the camera that’s reading all the color information and the background around you and things like that is creating a curved plane behind you, like a backdrop. That’s the effect it has, like when you go to those photo places and they have those blurry, supposed to look like autumn leaves or something behind you. That’s the kind of effect it had. Like a really bad ‘70s light show behind you or modeled leaves.
They have examples on the Matter and Form website for Bevel and they show you some existing scans. Actually, I was impressed that some of the scans there don’t look very pretty and very clean and I think are somewhat accurate representations of what this device can create. Then there are others on there where every one of those backdrops was almost like a separate photograph that was taken and mapped on that curved plane. None of the scans I’ve taken have produced such a clear background that you could actually tell what was in the background. They’re also blurry and abstracted, you can’t see anything.
Bevel 3D scans
The other thing that I wanted to comment on was that I have a really unsteady hand. I seriously cannot take a selfie that doesn’t somewhat get blurry. I just do not have a steady hand. I’ve never had one holding the camera out. It’s never been my strong suit definitely, but Jonathan does. Our son-in-law carries around a RED camera. It’s a digital cinema quality. People, they shoot feature films on those cameras. It’s heavy. He is capable of really holding his hands steady and his images were no better than ours.
There may be some learned behaviors. I’ve only been working with this for a few days. This was my weekend project, to get this working and make a 3D printed mount and deal with all the issues around that, figuring out how I’m going to hold it. Tom has two projects that have been sitting. We have this chair that Tom likes to work and do CAD which is an Eames Lounge. If you don’t know what one is, Tom has found it to be incredibly comfortable to do CAD work and sit back in. An Eames Lounge, it has the curve lounge. It’s a classic. It has the Ottoman that goes with it. There’s this little side table and it’s a mid-century modern and it has two tiers. Tucked under one of the tiers are all these little boxes of things that we’ve been given or got from Kickstarter. There’s an Indiegogo one that hasn’t been opened yet either. Tom got through two projects this weekend.
I thought it was good material for a podcast because we did do that review of the Matter and Form desktop 3D scanner recently. I was actually much happier with that product and the results it produced than Bevel quite honestly. I see Bevel as a novelty. I guess that’s what I’ve come to. I don’t think that the 3D models it produces, the scans, even if you can export them as an STL or an OBJ, so it still has the color information. You could not 3D print anything. It is not of a quality of a model you could 3D print. You’d have to do so much work to it to add geometry and close it on the backside to print anything. To me, it would be a whole lot more trouble than it was worth.
Matter and Form’s Bevel 3D Scanner
I’m trying to refresh my memory on this. I thought when we did this, we also signed up for a website that they had, which I thought was going to relate to the Bevel and that it was supposed to help with the 3D photographs, it was Cashew 3D. Awhile ago, we got a message from Cashew saying, “The sites, we’re not doing it anymore. Your membership, nothing’s going to happen to it or something.” I think it’s gone. Maybe it just isn’t important, it’s not supported for them and it’s not as important as their Matter and Form scanner. No, there’s no information about that on their website as far as I can see.
By the way, I’ve been searching a little deeper on their website. They were showing that it was compatible with the iPhone 7 but were not saying anything about it. I had to dig deeper on a whole other part of their site in the Help. When I did that, I found they have made a clip you can 3D print yourself that’s an adaptor for using the Bevel on it. I think mine’s a whole lot better honestly. They’ve just made a little very utilitarian thing that will attach it. Basically, made a hard mount out of that adaptor cable for the phone jack, that same one I used, and then put the Bevel up against that. They make it available to download if you want to, but it’s not as comprehensive.
It still doesn’t solve the problem of it putting the laser farther away. That’s really I think the issue of where you’re getting not great scans. They’re really not talking about that at all. I think that is part of why maybe the scans aren’t quite as good a quality as what I’m seeing them showing on their site. I wonder if that has an effect on that background image. You can’t get the clarity because you’re so much farther removed between the laser positioning and the camera itself, so the camera itself isn’t focusing really well.
Or the camera would focus on what it wants to focus on anyway. It’s combining the 3D information the lasers’ are reading with the color information the camera is reading and then combining them.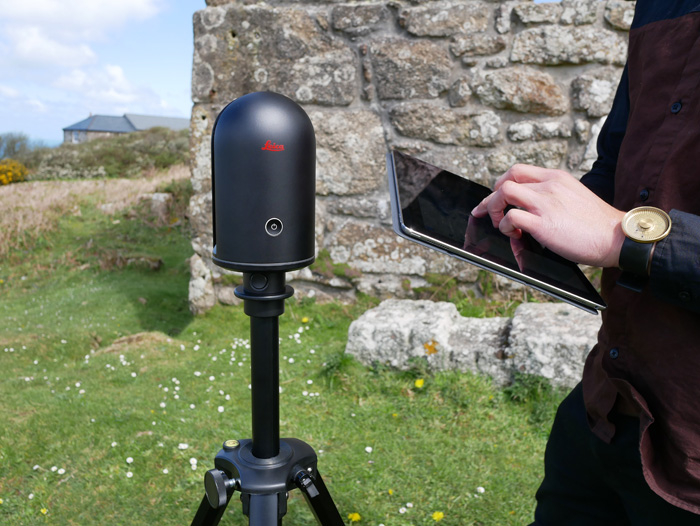 The registration I’ve seen has been okay. Maybe it takes a lot of practice, maybe it’s user learning curve. I still see it as a novelty. To me, it was fun to do it and do this project so that I could make a mount that would work and do what I needed it to and get it actually taking 3D pictures. I’ve seen some people do hacks with Kinect scanners for Xbox and actually 3D scan themselves and use those models. Our friend, Allen Wilterdink has done that. You can actually scan yourself and make a full statue of yourself and all sorts of things. I was hoping it would be to that level at least. It was inexpensive, it’s a small device, how good could it really be? But I was hoping it would be useful for doing quick scans of complete 3D objects, but it really doesn’t seem to be that. It seems to be a novelty of taking 3D pictures.
I think there are a lot of lessons here. One is speed to market. When you’re so slow to get to market, technology is going to change on you. I think that creates a higher level of dissatisfaction level to begin with from your user base.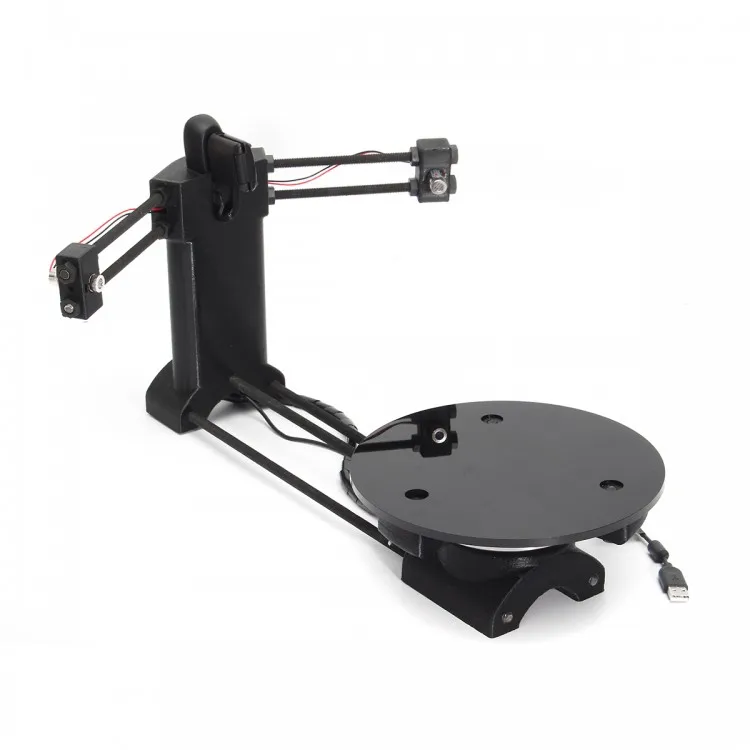 They’re less willing to be forgiving about problems that might occur. When you’re an early adaptor and you actually get it early, you’re much more willing to just be like, “Chock it up and let me give feedback,” instead of, “Wow, what a problem. Not worth it.” I think that’s a big lesson in a lot of Kickstarters and Indiegogos that we’ve seen over time. I think really the only one out of all the ones that we’ve ever backed, and we haven’t backed a ton but we’ve backed maybe half dozen, maybe ten total.
Out of all the different ones and things that we’ve backed in the time, I think the only thing that I’ve ever been completely impressed in is the SHOTBOX. That’s the only one. We should be getting our Wiivv sandals. Because I’ve seen them in person already, I expect to be impressed with the Wiivv sandals but they’re a little bit late. We’re looking forward to reviewing those. Here’s one thing also. I have to get an order in on Feetz. They have wedges finally. It’s like heels on and it’s the first one that I’ve seen 3D printed shoes that are on heels. I finally got to order one.
Here’s the thing. Early adaptors, if you’re going to be there, you better be early. You better be fast to market and that way you can really excite your audience with helping you improve it instead of disappoint your audience on all levels and make them give up. I don’t feel like it’s worth the time. I’d rather just chalk it up to a bad investment and stick it in a drawer and chalk it to an experiment really and that’s about it.
I’m probably not going to spend a whole lot more time using it or trying it out. It feels like playing with one of the very earliest digital cameras out there where it was cool that you didn’t have to have film, you didn’t have to develop it, but the resolution was so lousy, you’re still going to use your normal camera. I feel like this is a similar situation. It’s maybe not quite ready for prime time, but they’re working on it. I hope that they continue to improve it because I think I would like to take 3D selfies. A little prediction, I bet what happens is some phone company ends up building this technology right into their phone at some point when it’s a little bit more mature and you won’t need a whole separate device.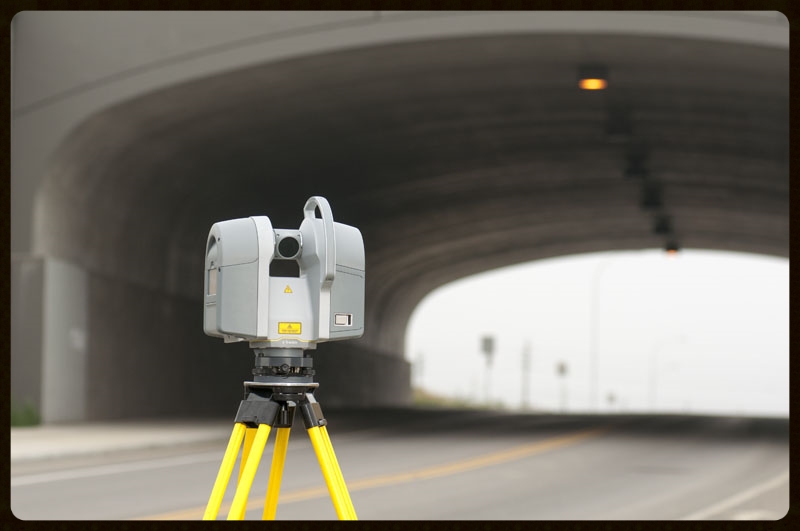 They’ll cut a company like Matter and Form right out of the process.
Anyway, we did another review. It’s an unusual one but it’s related certainly to 3D printing. I 3D printed a case for it and I will make that available if anybody out there needs it or has a Bevel and an iPhone 7. You’re welcome to use it or just to study it and play with it. It was fun doing it and it was a quick project. This isn’t tens of hours of making something. That was also a fun thing this weekend, is our three-year-old walked up to Tom and said, “Daddy, I want one of those stretchy bracelets.” We’re like, “What stretchy bracelets?” “I want you to print me a stretchy bracelet.”
We realized she was talking about the old flexible MakerBot. It was one of the test prints out of it. On their earliest machines, it was a test print that was included in the firmware. I had it so I did print her up one. I just love that she was like, “Dad will print me a bracelet. I just have to ask.” The fact that a three-year-old realizes that that’s even possible is astonishing.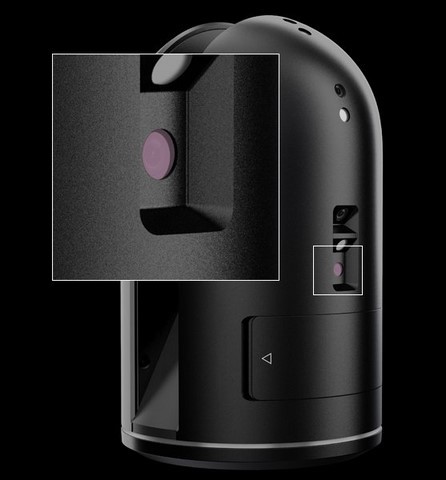 She’s like, “It will just come out of the machine. I’ll take a nap and when I wake up, it’s off the machine.” That’s exactly what happened. I totally love that. It was a highlight of the weekend for me.
You’ll see some images on social media, @3DStartPoint. Thanks for listening, everybody. We’ll be back tomorrow. This has been Tom and Tracy on the WTFFF 3D Printing Podcast.
New Matter Mod-t Review CowTech 3D Scanner Review Bevel 3D Scanner Review The $30 3D Printable Scanner Review 3D Printing Tips and Tricks Simplify3D problem Gallery of 3D Prints | Bevel 3D Scanner
Now this is a Kickstarter Campaign and I have not received the scanner yet so updates here are going to be only after it ships.... Update I unpacked and charged the Bevel, after it was fully charged I proceeded to install the Bevel app from the Google play store. You start with the front facing camera and hold the included "Checkerboard Target" at various distances and locations as instructed for the camera to see it correctly. Then the laser turns on and you repeat but this time the laser needs to fall upon the large black strip and the bottom of the target. Once this is done you get to take your first 3D selfie.The process is fairly painless and quick but on my Samsung S4 (I know it's old) the actual rendering on the photo took about 5 minutes. It does take a little practice to align the laser and scan smoothly enough to get the detail needed too fast or too slow and the results will be pretty bad or the rendering will just fail. A white wall directly behind with nothing else in the scan area produces the best results. I have not been able to get any good scans from the rear camera yet but it could be related to so many things I'll just leave it alone until a update hits the application. OK this was a Kickstarter so the app has been updated once already and some features promised appear to be unavailable.The obvious feature missing is the 360 degree option, currently it can only take a scan up/down in one pass giving you a profile picture only. The 360 degrees is listed as a work in progress so until it's Available you can't really do much with it yet! Will Update when more features are working. | |||
All of the pictures and information contained within the www.biline.ca website are the property of Jeff Mathurin please do NOT use any of the contents of this website without consent. If you would like to contact me for any reason then feel free to use the contact form by clicking Here | ||||
 Simply plug it in, and pan the person, place or thing you want to capture. Bevel creates beautiful 3D photographs that you can use in amazing ways.
 After this first 3D selfie you can repeat the calibration procedure for the rear camera and take pictures of someone else.
Leica RTC360 3D Laser Scanner | Leica Geosystems
- home
- Products/Solutions
- Laser scanners
- Scanners
- Leica RTC360 3D laser scanner
Use automatic on-site pre-registration of point cloud data for real-time quality control, increased productivity, and more informed decisions on the job site
Document and digitize your environment in 3D with the Leica RTC360 3D reality capture solution. Increase productivity on site and in the office with fast, accurate, portable and easy-to-use hardware and software. With the RTC360 3D Laser Scanner, a skilled technician can overcome any design challenge with accurate and reliable 3D models to unlock the full potential of any site.
- The compact, highly automated, intuitive and user-friendly RTC360 solution includes a high-performance 3D laser scanner, the Leica Cyclone FIELD 360 mobile app for edge computing, such as automatic registration of scanned data in real time, and Leica Cyclone REGISTER 360 software for office work , with which you can easily implement the resulting 3D model into your workflow.
- Capture scans, including stunning HDR images, in less than two minutes.
- Automatic recording of movements between survey points to pre-register scanned data in the field without manual intervention.
- Augment the collected data with informative tags with hints for optimal planning and information about the real conditions on the site, which will help your colleagues to better understand the situation.

- Upload collected data from Cyclone FIELD 360 directly to Leica TruView Cloud to quickly share design data before import and registration.
Fast
The new Leica RTC360 laser scanner captures reality in 3D at a speed never seen before. Capturing up to 2 million points per second and using advanced HDR image capture, the scanner generates colorful 3D point clouds in less than two minutes. Automated, labelless data logging in the field based on VIS technology and convenient automatic data transfer from site to office further speed up field work and increase productivity.
Adaptive
Thanks to its portable design and foldable tripod, the compact and lightweight Leica RTC360 fits into a regular backpack.
 On the object, one click of a button is enough to scan the environment without any additional settings.
Fine
Low noise in the acquired data means better image quality – you get crisp, detailed scans that are ready for a variety of industries. Combined with the Cyclone FIELD 360 automated data logging software in the field, the Leica RTC360 delivers amazing accuracy that can be verified on site.
Pre-registration in the field
The Cyclone FIELD 360 app, part of the RTC360 solution, bridges the gap between on-site 3D data collection and on-site registration of laser scan data in the office with Cyclone REGISTER 360. User can automatically capture, register, and control scan and image data on site . The easy-to-learn and user-friendly graphical interface offers visual aids for complex calculations, making it easy for even beginners to master.

Previous Next
Scanning options
The RTC360 3D Laser Scanner automatically captures movement between survey points to pre-register scanned data on the spot. Juergen Mayer spoke about the latest developments in an interview with The Reporter.
Introduction to the RTC360
The latest Leica RTC360 3D reality capture solution, unveiled at HxGN LIVE 2018, combines a high-performance laser scanner with a mobile application for capturing and pre-logging real-time scan data.
From hardware to software
Geosystems specialists optimize every link of the workflow in both software and hardware solutions to increase the efficiency and productivity of field work and data processing in the office.
Leica RTC360: 3D reality capture solution
Leica Cyclone FIELD 360 mobile-device app
Downloads
Videos
EXPERT ADVICE
Examples of using
Podcasts
Introducing the Leica RTC360 3D Laser Scanner
3D environments in a matter of minutes - an outlook on recent reality capture technology
3D reality capture - new opportunities, greater understanding
Transforming Ayacucho into a digital city
Services
myWorld Customer Portal
Active Customer Care
Customer Support Packages
Related products
Laser scanners
Leica BLK360 laser scanner
Leica ScanStation P40 / P30
Leica ScanStation P50
Software
Leica Cyclone
Leica Cyclone REGISTER
Leica Cyclone REGISTER 360
Leica CloudWorx
Leica TruView
Leica JetStream
Accessories
Accessories for 3D laser scanners 9015
contact-for-laser-scanning
As of v7. 0.1, Safari exhibits a bug in which resizing your browser horizontally causes rendering errors in the justified nav that are cleared upon refreshing.
As of v7.0.1, Safari exhibits a bug in which resizing your browser horizontally causes rendering errors in the justified nav that are cleared upon refreshing.
CONTACT US
The High-Definition Surveyor - Blog
Learn how Leica Geosystems laser scanning solutions are helping professional to shape the future of our world.
Learn how Leica Geosystems laser scanning solutions are helping professional to shape the future of our world.
Read More
Scanning power
Quality is a tradition, built deep within our DNA. We have a commitment to excellence and exceptional attention to detail.
Scanning power
Quality is a tradition, built deep within our DNA. We have a commitment to excellence and exceptional attention to detail.
WATCH NOW
Educational articles and analytics
What is 3D Reality Capture and how is it applied in your industry?
What is 3D Reality Capture and how is it applied in your industry?
learn more
Comparison table of laser scanners
Which laser scanner is right for you?
Which laser scanner is right for you?
download now
Reality Capture Newsletter
Click here to subscribe to our regular newsletter and stay up-to-date on all the latest reality capture news.
Click here to subscribe to our regular newsletter and stay up-to-date on all the latest reality capture news.
Subscribe
Online learning
Leica Geosystems has developed an online learning platform to further educate customers on how to maximize the functionality of their instruments.
Leica Geosystems has developed an online learning platform to further educate customers on how to maximize the functionality of their instruments.
3D Ground Laser Scan
Point cloud examples
Despite the fact that the first terrestrial 3D scanners appeared in the last century, there is no reason to state that 3D laser scanning technology is widely used in geodesy. The main reasons, probably, are the still high cost of such systems and the lack of information on how to use them effectively in various applications. Nevertheless, interest in this technology and its demand in the market of geodetic equipment are growing exponentially every year.
What is a 3D laser scanner?
According to the type of information received, the device is in many ways similar to a total station. Similar to the latter, the 3D scanner uses a laser range finder to calculate the distance to an object and measure vertical and horizontal angles to obtain XYZ coordinates. The difference from a total station is that daily shooting with a ground-based 3D laser scanner is tens of millions of measurements. Obtaining a similar amount of information from a total station will take more than one hundred years ...
The initial result of the 3D laser scanner is a point cloud. In the process of shooting, three coordinates (XYZ) and a numerical indicator of the intensity of the reflected signal are recorded for each of them. It is determined by the properties of the surface on which the laser beam falls. The point cloud is colored depending on the degree of intensity and after scanning looks like a three-dimensional digital photo. Most modern models of laser scanners have a built-in video or photo camera, so that the point cloud can also be painted in real colors.
In general, the operation of the device is as follows. The laser scanner is mounted opposite the object to be filmed on a tripod. The user sets the required point cloud density (resolution) and survey area, then starts the scanning process. To obtain complete data about an object, as a rule, it is necessary to perform these operations from several stations (positions).
Then the initial data received from the scanner is processed and the measurement results are prepared in the form in which they are required by the customer. This stage is no less important than field work, and is often more time-consuming and complex. Profiles and sections, flat drawings, three-dimensional models, calculations of areas and volumes of surfaces - all this, as well as other necessary information, can be obtained as the final result of working with a scanner.
Where can laser scanning be used?
Main applications of 3D scanning:
- industrial enterprises
- building and architecture
- road shooting
- mining
- monitoring of buildings and structures
- documentation of emergencies
This list is far from complete, since every year users of laser scanners perform more and more unique projects that expand the scope of technology.
Laser Scanning from Leica Geosystems - History of Laser Scanners
The history of Leica laser scanners began in the 90s of the last century. The first model 2400, then under the Cyra brand, was released in 1998. In 2001, Cyra entered Leica Geosystems into the HDS (High-Definition Surveying) division. Now, after 14 years, Leica Geosystems introduces a line of two scanning systems on the market.
As mentioned above, 3D laser scanning is used in completely different areas, and there is no universal scanner that would effectively solve all problems.
For shooting industrial facilities where a long range is not required, but the model must be very detailed (that is, an accurate high-speed device is needed), the Leica ScanStation P30 laser scanner will be optimal: range up to 120 m, speed up to 1,000,000 points per second.
Completely different requirements are imposed on the scanner when it comes to shooting opencast mines and storages of bulk materials in order to calculate volumes. Here, centimeter accuracy of the rangefinder is enough, and the shooting range and protection from weather conditions and dust come to the fore. The ideal tool for scanning in such conditions - Leica HDS8810 with a range of up to 2,000 m and IP65 dust and water resistance. In addition, this device is the only one on the market of scanning systems that operates in the temperature range from -40 to +50 degrees. That is, the HDS8810 is a laser scanner that works in all weather conditions.
The key model of Leica Geosystems' HDS division is the Leica ScanStation P40 . The famous and most popular ScanStation line in the world, whose history began in 2006, was replenished in April 2015 with the P40 scanner. The P40 inherited the accuracy and speed from the previous model, but has become more long-range, and the data quality has become even better. In terms of the range of tasks to be solved, this device is truly a leader in its segment. It is no coincidence that despite the "youth" of this model, it has already gained wide popularity in the world.
Laser Scan Data Processing Software (Point Clouds)
It is impossible not to say a few words about the software for processing data received from the scanner. Potential customers pay undeservedly little attention to this component of the 3D laser scanning system, although data processing and obtaining the final result of the work are no less important stages of the project than field work. The range of Leica HDS software is truly the widest on the laser scanning market.
The main element of the spectrum is, of course, the Cyclone complex.