3D printing platforms
Welcome to 3D Platform
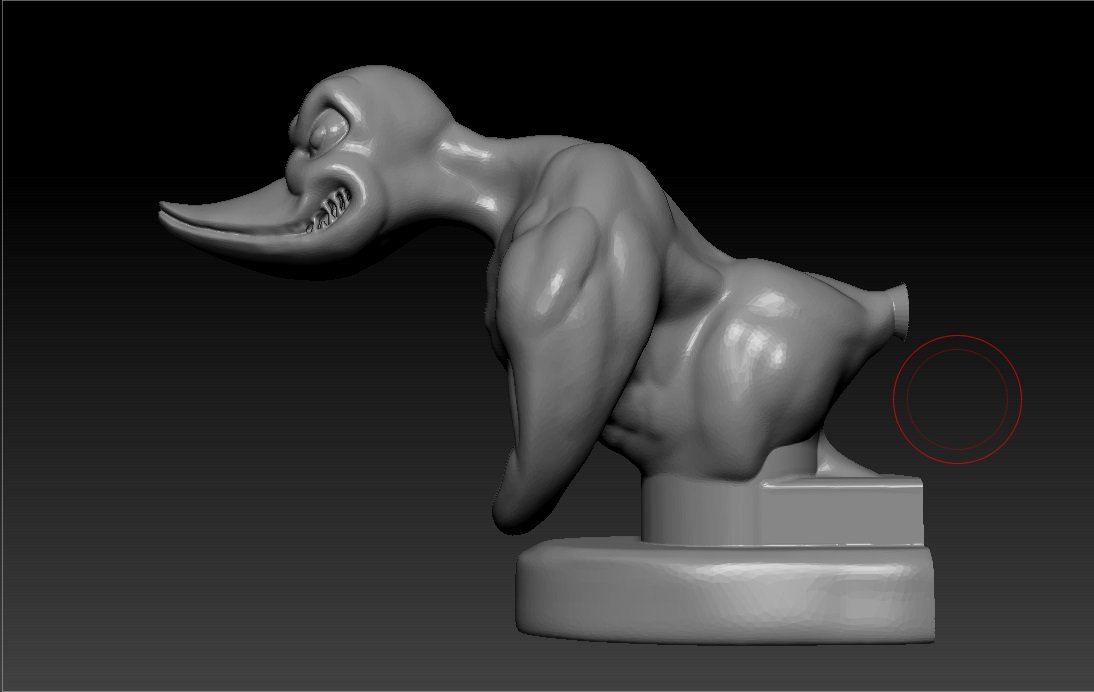
3D Printing Case Studies
Alstom and Amtrak
Alstom and Amtrak
Prototyping the train cockpit
Read More...
Highland Community College
Highland Community College
Aiding higher education, inspiring elementary students, and connecting with local organizations.
more...
Idaho Virtualization Lab: Giant Spider
Idaho Virtualization Lab: Giant Spider
IVL uses large 3D printed parts to create stunning exhibits.
more...
Idaho Virtualization Lab: Prehistoric Fish
Idaho Virtualization Lab: Prehistoric Fish
Idaho Virtualization Lab (IVL) 3D prints a giant Prehistoric Fish
more...
PBC Linear Factory Model
PBC Linear Factory Model
Using 3D printed models to diagram the new manufacturing facility
Read more...
Ridoret Group
Ridoret Group
Window prototypes and manufacturing
Read More. ..
Sunnyslope High School
Sunnyslope High School
Components for robotics competition
Read More...
C7 Cabon
C7 Cabon
Prototypes and consumer-ready car parts
Read More...
PBC Linear
PBC Linear
Ramp fixtures for shop floor
Read More...
Rapid 3D: Not So Miniature
Rapid 3D: Not So Miniature
Radio-controlled truck body
Read More...
3D Printing Tech
3D Printing Tech
Giant Coke bottle promotion
Read More...
Fox Sports Robot
Fox Sports Robot
Larger-than-life FOX Sports Robot
Read More...
Thermoform
Thermoform
Large thermoforming dies
Read More...
Progress Rail
Progress Rail
Casting and machining tool mock-ups
Read More...
Thingergy
Thingergy
Specialty item techniques
Read More.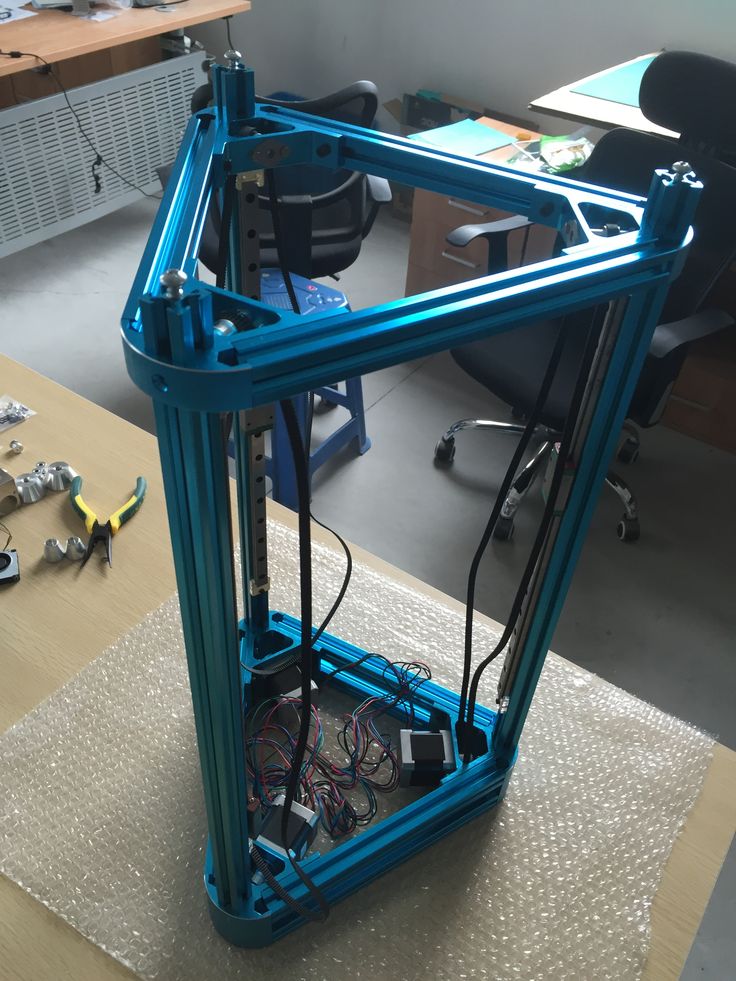 ..
..
Warwick Drone
Warwick Drone
Seven-foot drone
Read More...
Titanic Design
Titanic Design
Full sized models
Read More...
Innovative 3D
Innovative 3D
Metal parts with complex shapes
Read More...
Gonzaga University
Gonzaga University
Ankle Foot Orthosis
Read More...
XFAB Printing Lab
XFAB Printing Lab
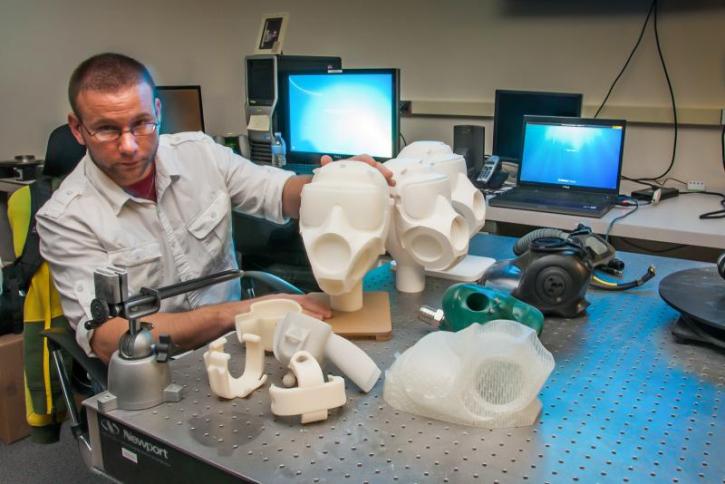
Marine Corps capitalizes on 3D Printing technology.
more...
Large build volume
3D Platform is committed to making your biggest ideas a reality. We design products that push the limits of innovation, and that’s why we are a leader in the manufacturing of large format, industrial-strength 3D printers. A widening variety of industries in manufacturing, entertainment, and academia have continued to take full advantage of these large format printers to create prototypes, mass-produce products, and build the future.
What is large? Our large build area is up to 1 meter x 1.5 meter x 0.7 meter. This offers over 200-percent more creative space than a typical desktop 3D printer, and means our customers don’t have to scale down or print multiple parts that require assembly. In addition, a large build area can incorporate rapid design iterations to vastly reduce market entry time.
Traditional desktop 3D printers are fine for prototyping parts, but can be costly in terms of volume production and time-to-market. In contrast, industrial manufacturers can customize our large format 3D printers, providing the ability to produce near-net shape parts. The result is decreased costs and reduced time-to-market.
Large format 3D printing made easy
Don’t let the words industrial strength or large format scare you! Printing with 3DP can be as easy as easy as 1 - 2 - 3D! Learn the different steps on how to successfully create a 3D print by watching our video 1-2-3D Printing.
Create your 3D model. Start with a 3D model that was either created in 3D modeling software or download from the internet. Next, save the model as an OBJ or an STL file. The 3D printer processing software best understands these file types.
Process the model in 3D printing software. Import the file and set a few standard model modifiers such as the number of top and bottom layers, perimeters, and infill. Next, increase the strength in the infill box by setting the interior fill percentage to 20 percent. If supports are needed, they can be added by clicking the “generate support material” button. Click “Ok” to accept the process settings and observe the model with its new layer slices. Finally, save the file in g-code format, which gives the printer step-by-step instructions.
Send file to printer. Heat the bed and remember to home the axes prior to each print. Next, select the g-code file. Once the target temperature for the extruder is reached, then the print will begin.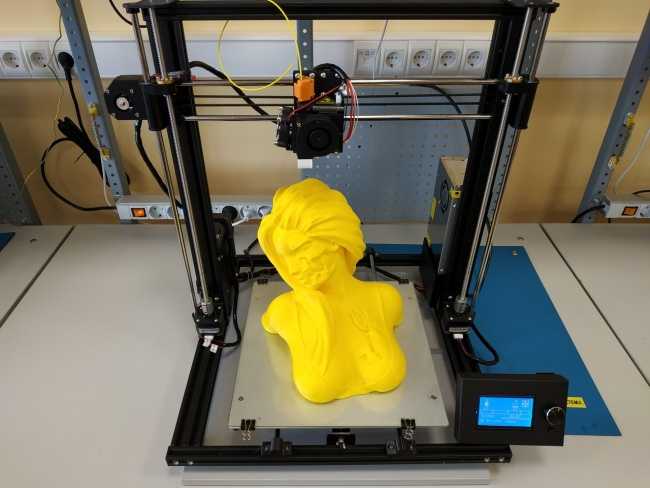 Watch the first few layers to make sure the print adheres to the build area and that the filament is flowing smoothly.
Unmatched speed with 3DP extruders
Push your additive manufacturing to new heights with 16-times the speed of competitors’ extruders. Current market extruders are limited in terms of their thermal capacity, therefore making them insufficient in their abilities to melt and dispense filament rapidly. They typically have an average throughput of 36 grams per hour. In contrast, our HFE 900 high flow extruders can provide a throughput of 1,350 grams per hour, resulting in a substantial decrease in 3D print time.
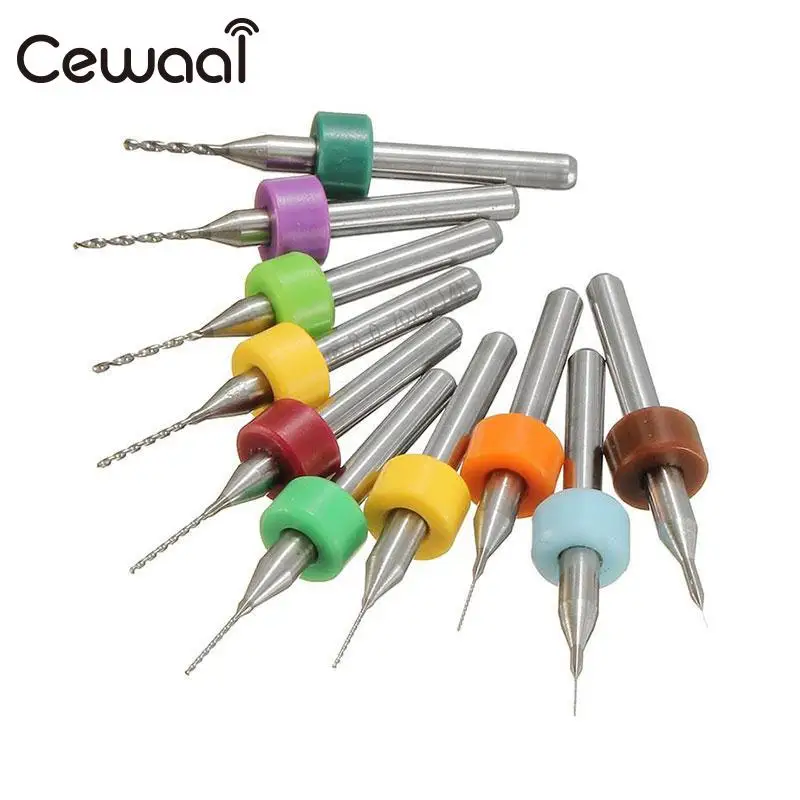
Our flexible line of extruders allows you to change nozzles depending upon your application and purpose. Use a small diameter nozzle for fine layer resolutions or go bigger with large diameter nozzles for fast printing and strong parts.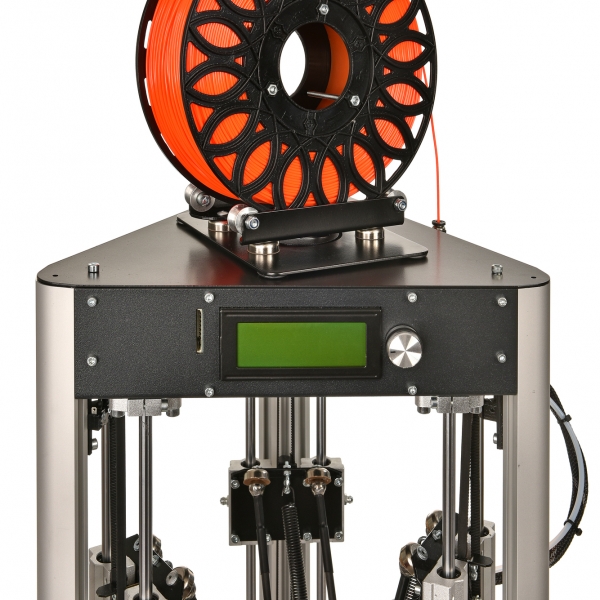 Modular designs can accommodate filament sizes from 1.75 mm to 6 mm and nozzles sizes from 0.2 mm to 5 mm. In addition, quick-swap dual extruder heads deliver high quality 3D prints while being independently controlled for speed and extruded material amounts.
Reliability with the open market advantage
Technology used for commercial-grade products won’t work for production applications. Therefore, companies need to answer the demands of reliability and performance by utilizing industry-proven mechanical and electrical components. For this reason, 3DP offers motion system technology that improves cycle time and final part quality.
3DP is harnessing the energy of a global network of material scientists by using open market solutions. Within these open markets, skilled experts blend various polymers to achieve specific end goals for certain projects. Additionally, open software markets can spark innovation by providing real-time 3D printed models that can be easily accessed and shared.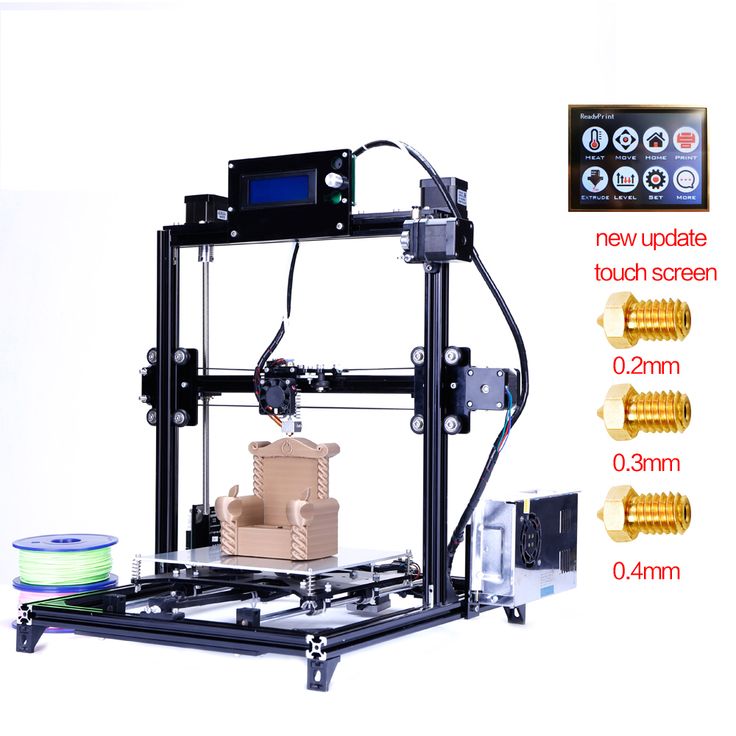 Open source and reliability are why top industry leaders look to 3D Platform to stay competitive in demanding markets.
Go big with the power of innovation
Think BIG, Print BIG, Save BIG! 3D Platform is using innovation to create large format 3D printers that are sized to meet any need. Take a look at the future of 3D printing!
WorkCenter 500 Series – This extra-large format 3D printer not only boasts a bigger build area, but it’s also affordable. The extra-large build volume of 1,400 mm x 2,800 mm x 700 mm provides affordability, but without sacrificing quality or throughput. The WorkCenter 500 is currently the only machine in the large format category to provide the option of pellet or filament extruder(s) – or both!
WorkCell – Our large format 3D printer with heated enclosure is currently in the design process! With a print volume of more than 1 cubic meter, the WorkCell’s heated enclosure will enable users to go beyond polymers that are typically printed in an open ambient environment, including commodity plastics, engineered plastics, and high-performance plastics.
Blog Posts from 3D Platform
3D Printer Configurator
Request a Sample
Large Scale 3D Printer, Commercial and Industrial Solutions
400 Series Workbench Xtreme
$49,999.00
Configure
For customized, full-scale printing capabilities that accelerate time from ideation to application at an affordable price, the WorkSeries 400 (Workbench Xtreme) is the only large scale 3D printer that has been engineered from the ground-up. Most importantly, the unique, parametric design can be easily adjusted to match the needs of our customers.
- Print Volume: 1000 mm x 1500 mm x 700 mm (1.05 m³, +2×)
- Extruder Standard Type: HFA
- Standard Max Throughput: 2×
- Extruder Option Type: HFE
- Option Max Throughput: Up to 16×
- Controller: 32-bit, 120MHz ARM Cortex M4 Processor
- Display: 7” TFT, with Wifi
- Remote Monitor & Operation: Standard
300 Series Workbench Pro
$37,999. 00
00
Configure
Our 300 Series WorkbenchPro is a Fused Filament Fabrication (FFF) additive manufacturing system with a large 1 m x 1 m x 0.7 m build area. Therefore, its industrial strength mechatronics deliver superior performance and reliability. Further, with SIMO Series actuators and Constant Force™ anti-backlash lead screws and nuts, the WorkbenchPro provides a rugged, industrial framework that won’t let you down. Additionally, the 3DP WorkbenchPro large scale 3D printer delivers 40% more build volume and up to 16x faster print rates with its unique features.
- Print Volume: 1000 mm x 1000 mm x 700 mm (0.7 m³, 1.4×)
- Extruder Standard Type: HFA
- Standard Max Throughput: 2×
- Extruder Option Type: HFE
- Option Max Throughput: Up to 16×
- Controller: 32-bit, 120MHz ARM Cortex M4 Processor
- Display: 7” TFT, with Wifi
- Remote Monitor & Operation: Standard
200 Series Workbench Classic
$28,999. 00
00
Configure
Print larger parts at faster rates with the 200 Series Workbench Classic large scale 3D printer. Overall, this classic printer features auto-mesh bed leveling, SurePrint Step-Servo hybrid motors, and duel electronics with remote operating and monitoring capabilities.
- Print Volume: 1000 mm x 1000 mm x 500 mm (0.5 m³, 1×)
- Extruder Standard Type: Volcano
- Standard Max Throughput: 1×
- Extruder Option Type: HFE
- Option Max Throughput: Up to 16×
- Controller: 32-bit, 120MHz ARM Cortex M4 Processor
- Display: 7” TFT, with Wifi
- Remote Monitor & Operation: Standard
100 Series Work Table
$17,999.00
Configure
The 100 Series WorkTable large scale 3D printer features the same build area size and mechanical features as the Workbench Classic. It is designed for smaller businesses, schools, and entry-level designers looking to implement large-format, industrial strength 3D printing into their projects.
- Print Volume: 1000 mm x 1000 mm x 500 mm (0.5 m³, 1×)
- Extruder Standard Type: Volcano
- Standard Max Throughput: 1×
- Extruder Option Type: HFA
- Option Max Throughput: 2×
- Controller: 16 MHz Processor
- Display: LED
- Remote Monitor & Operation: NA
Sigma D25 3D Printer
$3,995.00
Buy Now
The Sigma D25 from BCN3D is a new generation of our best-known 3D printer, engineered to grant maximum productivity through a hassle-free experience thanks to features like its massive print volume and full connectivity. Powered by our Independent Dual Extruder (IDEX) system, the Sigma D25 delivers quickly functional prototypes with quality and precision.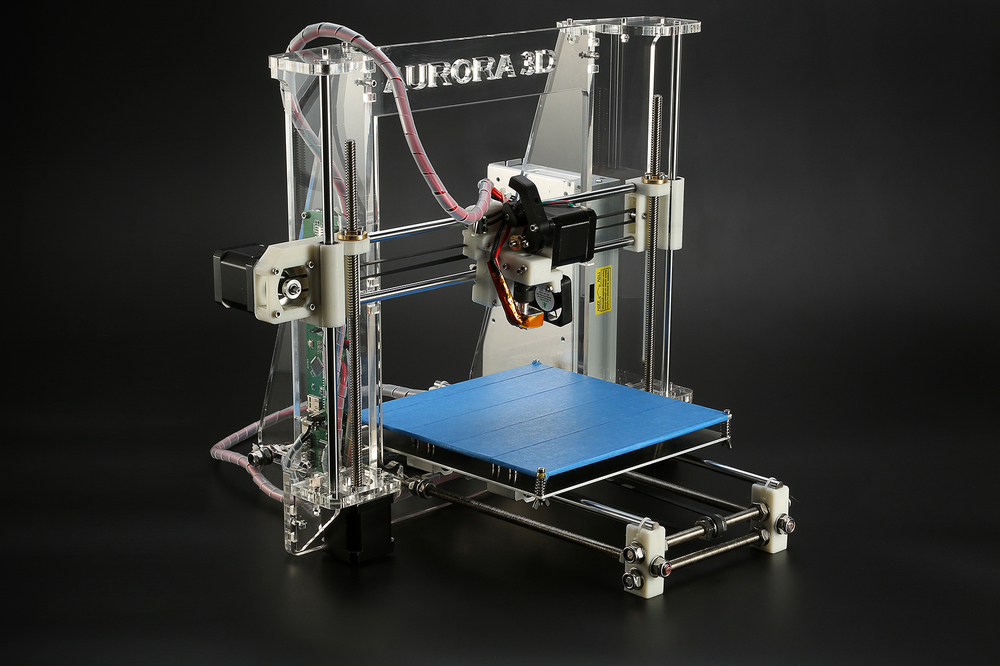
- Print Volume: 420 x 300 x 200 mm
- Printer Size: 690 mm (W) x 530 mm (D) x 550 mm* (H) (27.2” x 20.9” x 21.7”) *720mm with bowden (28.3”)
- Precision Z axis: 1.0 microns
- Precision XY axis: 1.25 microns
- Max. extruder temperature: 300ºC
- Operating temperature: 15 ºC - 30 ºC
- Max. bed temperature: 80 ºC
- Nozzle diameters: 0.4 mm / 0.8 mm
- 5 printing modes: Single, Duplication, Mirror, Multimaterial, Soluble Supports
Epsilon W27 3D Printer
$5,995.00
Buy Now
The Epsilon W27 from BCN3D is a powerful professional 3D printing solution, designed to deliver large-scale parts with industrial-grade materials. It features a passive heated chamber, full enclosure, and humidity-controlled environment. Powered by our Independent Dual Extruder (IDEX) system, the Epsilon Series delivers exceptionally strong functional parts with quality and precision.
For an all-in-one 3D printing solution, customers can opt for a Smart Cabinet Bundle. The Epsilon W27, together with the Smart Cabinet (SC) filament storage system, work seamlessly together to help boost your printer's performance and keep your materials in optimal condition for a superior 3D printing experience.
- Print Volume: 420 x 300 x 200 mm
- Printer Size: 690 mm (W) x 530 mm (D) x 750 mm* (H) (27.2” x 20.9” x 29.5”)
- Precision Z axis: 1.0 microns
- Precision XY axis: 1.25 microns
- Max. extruder temperature: 300ºC
- Operating temperature: 15 ºC - 30 ºC
- Max. bed temperature: 120 ºC
- Nozzle diameters: 0.4 mm (default) / 0.6 mm / 0.8 mm / 1.0 mm / Hotend X: 0.6 mm
- 5 printing modes: Single, Duplication, Mirror, Multimaterial, Soluble Supports
Epsilon W27 3D Printer with Smart Cabinet (SC)
$9,495.00
Buy Now
Save $500 when you bundle an Epsilon W27 3D printer with a Smart Cabinet Filament Management System from BCN3D. The Smart Cabinet (SC) completes the Epsilon ecosystem, offering seamless integration with Epsilon W27 while maximizing its uptime. Its filament humidity control boosts your printers’ performance, keeping your materials in optimal condition. In addition, its uninterruptible power supply protects your work at all times, avoiding the risk of losing your print job due to power outages.
The BCN3D Smart Cabinet is equipped with sturdy caster wheels that allow the 3D printing workstation to be moved smoothly within any environment including manufacturing, universities, or even a garage. The Smart Cabinet is also stocked with a sliding drawer to keep all the necessary 3D printing tools in one convenient location. This is the complete solution for professional 3D printing production.
Epsilon W50 3D Printer
$7,995.00
Buy Now
The W50 3D printer from BCN3D is the larger of the two Epsilon Series. It offers a powerful professional 3D printing solution, delivering large-scale parts with industrial-grade materials. It includes features such as a passive heated chamber, full enclosure, and humidity-controlled environment. The Epsilon Series is powered by an Independent Dual Extruder (IDEX) system, delivering exceptionally strong functional parts with quality and precision.
For an all-in-one 3D printing solution, customers can opt for a Smart Cabinet Bundle. The Epsilon W50, together with the Smart Cabinet (SC) filament storage system, work seamlessly together to help boost your printer's performance and keep your materials in optimal condition for a superior 3D printing experience.
- Print Volume: 420 x 300 x 400 mm
- Printer Size: 690 mm (W) x 530 mm (D) x 900 mm* (H) (27.2” x 20.9” x 35.4”)
- Precision Z axis: 1.0 microns
- Precision XY axis: 1.25 microns
- Max. extruder temperature: 300ºC
- Operating temperature: 15 ºC - 30 ºC
- Max.
 bed temperature: 120 ºC
 - Nozzle diameters: 0.4 mm (default) / 0.6 mm / 0.8 mm / 1.0 mm / Hotend X: 0.6 mm
- 5 printing modes: Single, Duplication, Mirror, Multimaterial, Soluble Supports
BCN3D Smart Cabinet (SC)
$3,995.00
Buy Now
The Smart Cabinet (SC) completes the Epsilon ecosystem, offering seamless integration with your BCN3D Epsilon printers and maximizing their uptime. Its filament humidity control boosts your printers’ performance, keeping your materials in optimal condition, and its uninterruptible power supply protects your work at all times, avoiding the risk of losing your print job due to power outages.
FEATURES
- Optimal for all materials
- Low Energy consumption: 12 W Avg / 100 W Max
- 10 storage slots for small filament spools (4 for big spools)
- Prints while in dry storage
- Humidity-controlled environment, dries without heat
- No consumable parts
SPECIFICATIONS
- Cabinet Size: 690 x 530 x 950 mm
- Weight: 85 kg
- Output: 230V / 120V / 100V
- Data connection: USB connection (Type-A to Type-B cable)
- Sensors: Internal and external humidity sensor
- Filament diameter: 2.
 85 mm
85 mm
Epsilon W50 3D Printer with Smart Cabinet (SC)
$11,495.00
Buy Now
Save $500 when you bundle an Epsilon W50 3D printer with a Smart Cabinet Filament Management System from BCN3D. The Smart Cabinet (SC) completes the Epsilon ecosystem, offering seamless integration with Epsilon W50 while maximizing its uptime. Its filament humidity control boosts your printers’ performance, keeping your materials in optimal condition. In addition, its uninterruptible power supply protects your work at all times, avoiding the risk of losing your print job due to power outages.
The BCN3D Smart Cabinet is equipped with sturdy caster wheels that allow the 3D printing workstation to be moved smoothly within any environment including manufacturing, universities, or even a garage. The Smart Cabinet is also stocked with a sliding drawer to keep all the necessary 3D printing tools in one convenient location. This is the complete solution for professional 3D printing production.
WorkCenter 500
$250,000.00
Now Available! – Starting at $250k USD, we have designed this extra large-scale 3D printer to provide affordability – without sacrificing quality or throughput. It uses a Fused Filament Fabrication (FFF) system and is currently the only machine in the large format category to provide the option of pellet or filament extruder(s) – or both!
- Print Volume: 1,400 mm x 2,800 mm x 700mm (2.7 m3 of print volume)
- Extruder Standard Type: Spool and Pellet
- Throughput Range: 1 kg/hr up to 6.8 kg/hr (15 lb/hr)
Please see our brochure for more information on the WorkCenter 500!
Introducing the WorkCell — Our large format 3D printer with heated enclosure!
Coming Soon – With a print volume of more than 1 cubic meter, the WorkCell’s heated enclosure will enable users to go beyond polymers that are typically printed in an open ambient environment, including commodity plastics, engineered plastics, and high performance plastics.
FOLLOW US
6402 E. Rockton Road
Roscoe, Illinois 61073 USA
+1.779.771.0000
© 2021 Copyright 3D Platform
About 3D Platform
Contact
Resellers
Terms & Conditions
Purchase Order Terms & Conditions
Privacy Policy
End of Life
How metal 3D printers work. Overview of SLM and DMLS technologies. additive manufacturing. 3D metal printing.
Metal 3D printing. Additive technologies.
SLM or DMLS: what's the difference?
Hello everyone, Friends! 3DTool is with you!
BLT metal 3D printer catalog
Selective laser melting ( SLM ) and direct metal laser sintering ( DMLS ) are two additive manufacturing processes that belong to the family of 3D printing using the powder layer method. The two technologies have much in common: they both use a laser to selectively melt (or melt) metal powder particles, bonding them together and creating a pattern layer by layer. In addition, the materials used in both processes are metals in granular form.
The differences between SLM and DMLS come down to the basics of the particle bonding process: SLM uses metal powders with a single melting point and completely melts the particles, while in DMLS the powder consists of materials with variable melting points.
Specifically:
SLM produces single metal parts while DMLS produces metal alloy parts.
Both SLM and DMLS technologies are used in industry to create final engineering products. In this article, we will use the term "metal 3D printing" to summarize the 2 technologies. We will also describe the main mechanisms of the manufacturing process that are necessary for engineers to understand the advantages and disadvantages of these technologies.
There are other manufacturing processes for producing dense metal parts, such as electron beam melting (EBM) and ultrasonic additive manufacturing (UAM). Their availability and distribution is rather limited, so they will not be presented in this article.
How 3D printing with SLM or DMLS metal works.
How does metal 3D printing work? The basic manufacturing process for SLM and DMLS is very similar.
1. The printing chamber is first filled with an inert gas (such as argon) to minimize the oxidation of the metal powder. It then heats up to the optimum operating temperature.
2. A layer of powder is spread over the platform, a powerful laser makes passes along a predetermined path in the program, fusing the metal particles together and creating the next layer.
3. When the sintering process is completed, the platform moves down 1 layer. Next, another thin layer of metal powder is applied. The process is repeated until the entire model is printed.
When the printing process is completed, the metal powder already has strong bonds in the structure. Unlike the SLS process, parts are attached to the platform via support structures. The support in metal 3D printing is created from the same material as the base part. This condition is necessary to reduce deformations that may occur due to high processing temperatures.
When the 3D printer's chamber cools down to room temperature, excess powder is removed manually, such as with a brush. The parts are then typically heat treated while they are still attached to the platform. This is done to relieve any residual stresses. They can then be further processed. The removal of the part from the platform occurs by means of sawing.
Scheme of operation of a 3D printer for metal.
In SLM and DMLS, almost all process parameters are set by the manufacturer.![]() The layer height used in metal 3D printing varies from 20 to 50 microns and depends on the properties of the metal powder (fluidity, particle size distribution, shape, etc.).
The layer height used in metal 3D printing varies from 20 to 50 microns and depends on the properties of the metal powder (fluidity, particle size distribution, shape, etc.).
The basic size of the print area on metal 3D printers is 200 x 150 x 150 mm, but there are also larger sizes of the working area. Printing accuracy is from 50 - 100 microns. As of 2020, metal 3D printers start at $150,000. For example, our company offers 3D metal printers from BLT.
metal 3D printers can be used for small batch production, but the 3D printing capabilities of such systems are more like those of mass production on FDM or SLA machines.
The metal powder in SLM and DMLS is recyclable: typically less than 5% is consumed. After each impression, the unused powder is collected and sieved, and then topped up with fresh material to the level required for the next production.
Waste in metal printing, are supports (support structures, without which it will not be possible to achieve a successful result). With too much support on the manufactured parts, the cost of the entire production will increase accordingly.
Adhesion between coats.
3D metal printing on BLT 3D printers
SLM and DMLS metal parts have almost isotropic mechanical and thermal properties. They are hard and have very little internal porosity (less than 0.2% in 3D printed condition and virtually non-existent after processing).
Metal printed parts have higher strength and hardness and are often more flexible than traditionally made parts. However, such metal becomes “tired” faster.
3D model support structure and part orientation on the work platform.
Support structures are always required when printing with metal, due to the very high processing temperatures. They are usually built using a lattice pattern.
Supports in metal 3D printing perform 3 functions:
• They form the basis for creating the first layer of the part.
• They secure the part to the platform and prevent it from deforming.
• They act as a heat sink, removing heat from the model.
Parts are often oriented at an angle. However, this will increase the amount of support required, the printing time, and ultimately the overall cost.
Deformation can also be minimized with laser sintering templates. This strategy prevents the accumulation of residual stresses in any particular direction and adds a characteristic surface texture to the part.
Since the cost of metal printing is very high, software simulations are often used to predict how a part will behave during processing. These topology optimization algorithms are otherwise used not only to increase mechanical performance and create lightweight parts, but also to minimize the need for supports and the likelihood of part distortion.
Hollow sections and lightweight structures.
An example of printing on a BLT 3D printer
Unlike polymer powder melt processes such as SLS, large hollow sections are not typically used in metal printing as the support would be very difficult to remove, if at all possible.
For internal channels larger than Ø 8 mm, it is recommended to use diamond or teardrop cross-sections instead of round ones, as they do not require support. More detailed recommendations on the design of SLM and DMLS can be found in other articles on this topic.
As an alternative to hollow sections, parts can be made with sheath and cores, which in turn are machined using different laser power and pass speeds, resulting in different material properties. The use of sheath and cores is very useful when making parts with a large solid section, as it greatly reduces printing time and reduces the chance of warping.
The use of a lattice structure is a common strategy in metal 3D printing to reduce part weight. Topology optimization algorithms can also help design organic lightweight shapes.
Consumables for 3D metal printing.
SLM and DMLS technologies can produce parts from a wide range of metals and metal alloys, including aluminum, stainless steel, titanium, cobalt, chromium and inconel. These materials meet the needs of most industrial applications, from aerospace to medical applications. Precious metals such as gold, platinum, palladium and silver can also be processed, but their use is of a minor nature and is mainly limited to jewelry making.
The cost of metal powder is very high. For example, a kilogram of 316 stainless steel powder costs approximately $350-$450. For this reason, minimizing part volume and the need for supports is key to maintaining optimal manufacturing cost.
The main advantage of metal 3D printing is its compatibility with high-strength materials such as nickel or cobalt-chromium superalloys, which are very difficult to machine with traditional methods. Significant cost and time savings can be achieved by using metal 3D printing to create a near-clean shape part. Subsequently, such a part can be processed to a very high surface quality.
Metal post-processing.
Various post methods. treatments are used to improve the mechanical properties, accuracy and appearance of metal printed products.
Mandatory post-processing steps include the removal of loose powder and support structures, while heat treatment (heat annealing) is typically used to relieve residual stresses and improve the mechanical properties of the part.
CNC machining can be used for critical features (such as holes or threads). Sandblasting, plating, polishing, and micro-machining can improve the surface quality and fatigue strength of a metal printed part.
Advantages and disadvantages of metal 3D printing.
Pros:
1. Metal 3D printing can be used to make complex custom parts, with geometries that traditional manufacturing methods cannot provide.
2. Metal 3D printed parts can be optimized to increase their performance with minimal weight.
3. Metal 3D printed parts have excellent physical properties, metal 3D printers can print a wide range of metals and alloys. Includes difficult-to-machine materials and metal superalloys.
Cons:
1. Manufacturing costs associated with metal 3D printing are high. The cost of consumables is from $ 500 per 1 kg.
2. The size of the working area in metal 3D printers is limited.
Conclusions.
• Metal 3D printing is most suitable for complex, one-piece parts that are difficult or very expensive to manufacture using traditional methods, such as CNC.
• Reducing the need for building supports, will significantly reduce the cost of printing with metal.
• 3D printed metal parts have excellent mechanical properties and can be made from a wide range of engineering materials, including superalloys.
And that's all we have! We hope the article was useful to you.
Catalog of 3D printers for metal BLT
You can purchase metal 3d printers, as well as any other 3d printers and CNC machines, by contacting us:
• By email: [email protected]
• By phone: 8(800)775-86-69
• Or on our website: http://3dtool.ru
Also, don't forget to subscribe to our YouTube channel:
Subscribe to our groups in social networks:
In contact with
Types of tables for 3D printer
Contents
-
- Print platform materials
- Heated table
- Non-heated table.
- Tabletop
- Types calibration
- Automatic calibration
- manual calibration
- Calibration of the 3D printer table with Cartesian kinematics
- Calibration of the Delta Printer table
- Theses
- Print platform materials
The correct calibration of the 3D printer bed, or as it is also called Hot Bed, is very important. The first layer is like a foundation for a house, if the foundation is fragile, then the house will not stand for a long time.
If the plane of the printed surface is uneven, then the model may be partially peeled off or deformed. The first layer may not stick to the printing platform at all, and the result of many hours of printing will not be a neat 3D model, but plastic noodles.
Print failure example
Therefore, it is very important to properly calibrate the table. Printing platforms can be conditionally divided into two types - adjustable and not.
The adjustable table is attached to the printer with spring-loaded screws. It is not rigidly fixed in height and with the help of screws it is possible to calibrate the plane and the gap between the 3D printer table and the nozzle.
Adjusting screw
Unregulated is a printing platform that is rigidly fixed to the printer body.
This solution is used in delta printers. Calibrate them only programmatically.
Non-adjustable delta printer table
Print platform materials
The material from which the table is made may vary depending on whether the table is heated or not.
Heated table
There are several types of heating elements for a 3D printer platform - aluminum, textolite, silicone and kapton. Each of them has its pros and cons.
Textolite heater - inexpensive, but fragile and can be strongly bent when heated.
Silicone heater - can not be used alone. Usually used in conjunction with a metal base.
An aluminum table is expensive, but it heats up more evenly and is less subject to thermal deformation than other platforms.
The Kapton heater is very expensive and cannot be used on its own. Usually glued to a metal base. Can be heated up to 200 degrees.
Types of heated printing surfaces
Most often, an aluminum heating table or a silicone heating pad is used in conjunction with an aluminum plate. Low price, ease of processing and high thermal conductivity make aluminum the most popular material for the manufacture of heated printing tables.
The main advantage of heating the printed surface is to increase the adhesion (adhesion) of the first layer of plastic. If the printer is with a closed case and a heated platform, a “passive thermal chamber” is created inside. Due to this, plastics with high shrinkage do not crack in layers during printing, the adhesion of layers (interlayer adhesion) increases, and internal stress is more evenly distributed during cooling.
But there are also disadvantages - when heated, a metal table expands a little, and since it has nowhere to expand, it begins to bend. For a printing platform up to 200x200 in size, deformation will not be very critical, but for larger tables this becomes a tangible problem.
Each manufacturer of 3D printers with a large printable area solves the problem of deformation of the metal table in its own way.
For example, in Raise 3D, the table is fixed along the entire plane with pins at 13 points.
Heated table fixing Raise 3D
Table without heating.
An unheated printable surface is often used in 3D printers designed to work only with PLA and other low temperature plastics. For example - printers for children or large printers with an open case.
An unheated printable surface is often used in 3D printers designed to work only with PLA and other low temperature plastics. For example - printers for children or large printers with an open case.
Acrylic Printer for Children
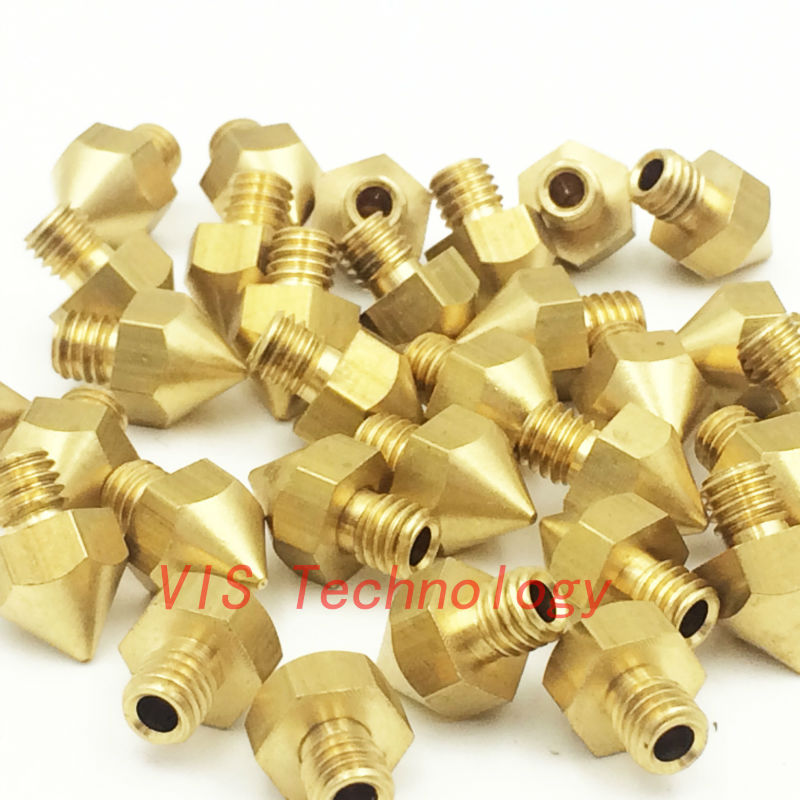
Tables without heating are made of aluminum or acrylic. If the table is aluminum, then glass or any other coating should be used on top. Aluminum is a soft metal and even a brass nozzle can scratch or damage it if not properly adjusted.
Heating table with aluminum base and mirror
Acrylic tables are often used in inexpensive 3D printers designed for kids. Acrylic is difficult to damage or break. You can print on an acrylic table without glass or other coating.
Free Shipping
Add to compare
Product added to compare Go
| Manufacturer | Raise3D |
Add to compare
Product added to compare Go
| Manufacturer | Raise3D |
Add to compare
Product added to compare Go
| Manufacturer | Raise3D |
Free shipping
Add to compare
Product added to compare Go
| Manufacturer | FlashForge |
Table top
In order for the first layer to adhere to the table tightly, different surfaces are used that increase adhesion. It is more convenient to remove the model from the removable surface. If you need to immediately start printing another model, you can simply quickly change from one removable surface to another.
The most popular table surface is the regular tempered glass or mirror. It is not expensive and available. It is believed that the accuracy class of the mirror is higher, but for small working areas (up to 200x200 mm), ordinary tempered glass is enough.
Glass itself does not hold the first layer well, so various adhesives or stickers are used to increase adhesion.
Ordinary glass can burst from a temperature difference or “crumble”, then the model comes off along with pieces of glass. Good thing it's easy to replace.
A piece of glass came off with model
Sitall glass - in fact, it is ordinary glass with the addition of boron oxide. This makes it stronger than ordinary glass and resistant to temperature changes. But the cost of such glass is much higher than ordinary or tempered glass.
Sitall glass
Perforated table - mainly used for printing ABS plastic. Thanks to the perforation, the plastic adheres firmly to the print platform. In order for the bottom of the model to turn out to be even in the slicer settings, you need to enable printing on a raft (substrate).
Perforated table used in UP printers!
Stickers - There is a huge variety of stickers for printing platforms. It can be either ordinary masking tape or a specialized surface (rough with an adhesive surface).
The finished model is easier to remove from a flexible substrate than, for example, from glass. With some substrates, the model can be easily removed after the printing platform has cooled down. For some, you need to heat the table and only then tear off the model.
Separately, you can select a variety of compositions that are applied to the surface of the printing platform to increase the adhesion of the first layers. 3D varnishes, 3D adhesives, etc. Probably every 3D maker has his own special recipe for the same composition that almost everything sticks to. It can be BF glue mixed with a solvent or alcohol, ABS diluted in acetone, kvass with sugar, glue stick, etc.
Do not spray varnish or other sprays inside the printer. Glue particles can settle on mechanisms, fans, and even get on electronics. This can lead to damage to the 3D printer. Simply remove the platen surface from the printer and apply the adhesive.
Add to compare
Product added to compare Go
| Manufacturer | Raise3D |
Add to compare
Product added to compare Go
| Manufacturer | FlashForge |
Add to Compare
Product added to comparison Go
| Manufacturer | FlashForge |
Calibrations
In addition to choosing the surface of the print platform, it is important to correctly level the plane of the table and set the correct gap between the table and the nozzle. Calibration can be automatic or manual.
Printers with large print surfaces, such as the Raise 3D Pro 2 and Pro 2 Plus, are calibrated at the factory. The user only needs to check the gap between the table and the nozzle, because it may go astray during transportation.
Automatic calibration
Automatic calibration is performed using a sensor (optical or contact), which is mounted next to the extruder. The printer checks several points on the print platform one by one and remembers the values. The first layer will be printed correct for the curvature of the table.
You can meet the calibration using a conductive substrate that is placed instead of the printed surface. This method is rare, but still has a place to be. It is commonly used to calibrate 3D printers with delta or delta robot kinematics.
Automatic calibration allows you to quickly and effortlessly level the table. It becomes especially indispensable for printers with delta or delta robot kinematics. Optical sensors "do not see" glass, so for printers with an optical sensor, it is better to use other surfaces of the print platform.
Some printer models have a menu with hints to help you properly set the platform plane and gap. It is enough to launch the “assistant” and follow the instructions on the screen. This is not exactly automatic calibration, but with such help it becomes much easier for a beginner to correctly calibrate the table.
An example of a 3D printer with automatic calibration is Raise E2. The Raise E2 extruder has a contact sensor to determine the distance between the nozzle and the printed surface. The resulting values help to correct the print height of the first layer. You can calibrate not the entire table, but only the area on which the model will be located.
Manual calibration
Manual calibration is when the user sets the plane of the table and the gap between the table and the nozzle himself. To do this, under the printing platform there are screws or winglets with which you can adjust the height of the printing platform.
Calibration screws
The standard gap between the platform and the nozzle, for most printers, should be - 0.1-0.2mm. If there is no set of probes at hand, a standard A4 sheet folded in half can replace it. Before calibration, the print surface (if it is heated) and the nozzle must be heated.
Sometimes manufacturers of 3D printers recommend a gap between the table and the nozzle - 0. Therefore, read the instructions before calibrating.
We will consider the calibration of the two most common kinematics - Cartesian and delta.
Cartesian kinematics is based on the Cartesian coordinate system and the movement of the 3D printer's head along the x, y, z axes.
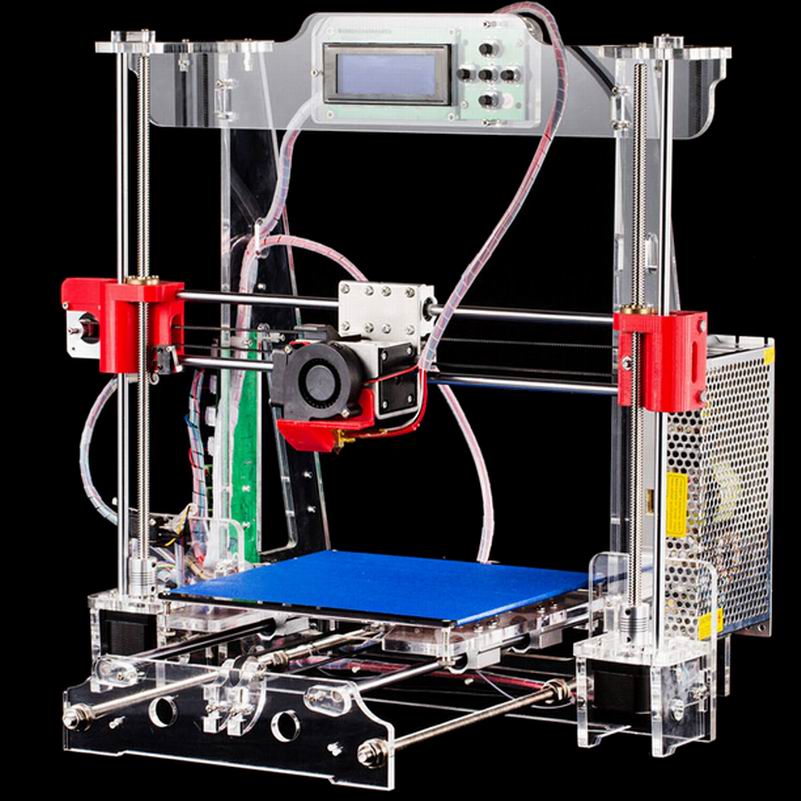
Cartesian kinematic printer example
In deltas, the extruder moves along 3 identical axes using carriages moving along vertical guides. The delta printer can be called a simplified delta robot, but these are still two different kinematics.
Example of a printer with delta kinematics
3D printer table calibration with Cartesian kinematics
Different manufacturers may have slightly different calibration instructions. We will consider here the calibration of the printer with standard kinematics.
-
Heat up the table and nozzle. When heated, the metal expands slightly, so the gap between the printing platform and the nozzle may differ between the “hot” and “cold” ones.
-
Through the printer menu, send the table and extruder to the "home" or zero position in all axes. Usually the zero point is the near left corner of the extruder and the top position of the print platform. Be sure to make sure that the 3D printer does not rest the nozzle on the table and does not damage it. If this is the first calibration, use the nuts to lower the table as low as possible.

-
Through the printer menu or manually (for this you need to turn off the motors through the menu), move the extruder so that the nozzle is above the adjusting screw.
-
Use a feeler gauge and adjusting screw to set the gap between the print bed and the nozzle.
-
Repeat all steps for all calibration screws. Usually there are 3 or 4 screws.
-
After aligning the plane above the screws, move the extruder to the center and check the gap. If the gap matches the feeler gauge, then the table plane and platform distance are correctly calibrated.
Delta printer table calibration
Calibrating a delta printer is a very large topic, so here we will only describe the general principles.
The delta printer does not have the x, y and z axes we are used to. Instead, the delta printer has 3 towers - A, B, C, on which the carriages move.
Since the delta table is static, it is calibrated programmatically.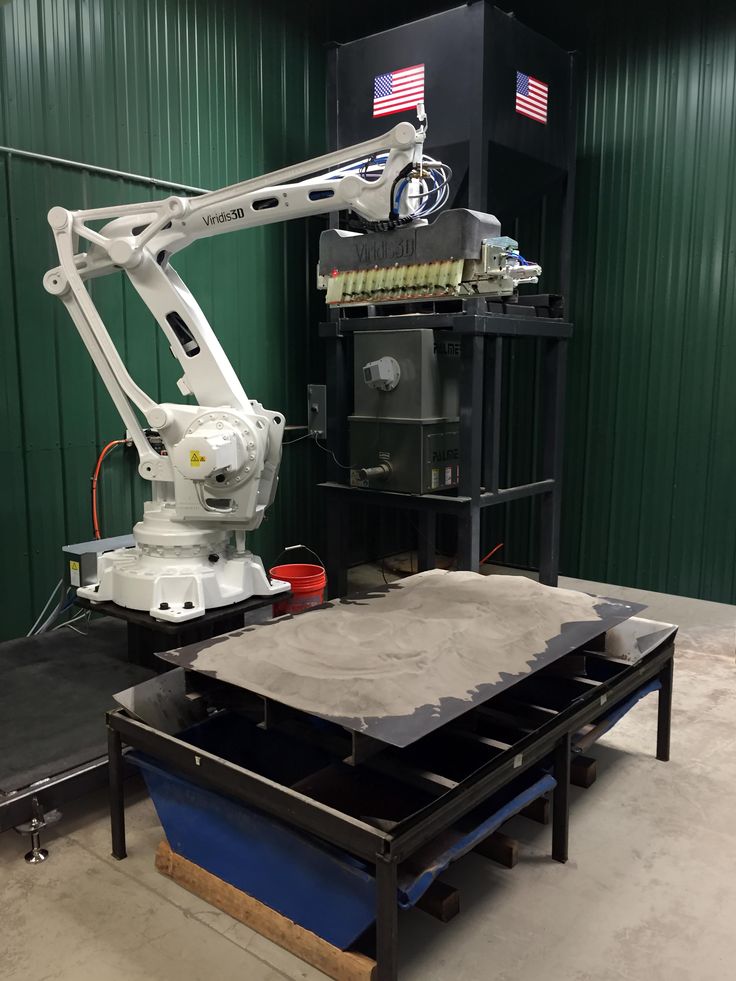 The gap is calibrated by 3 points (at the columns) and the lens (center) of the table. The lens can be concave or convex.
Before calibration, check the mechanics of the printer - the belts must be tensioned evenly, there must be no play in the carriages and the effector (the plate to which the extruder is attached). If the belts are loose or uneven, it will be problematic to calibrate the printer.
Some 3D makers check belt tension with a tuner. Evenly tensioned belts will sound the same, but the correct “note” is found empirically.
There are a huge number of programs for delta calibration, but one of two is usually used - Pronterface or Repetier-Host. Using them, you can directly access the printer using special commands and change the values in the firmware.
As auxiliary programs, you can use a virtual calculator and from there transfer the values \u200b\u200binto the firmware or download the finished GCode.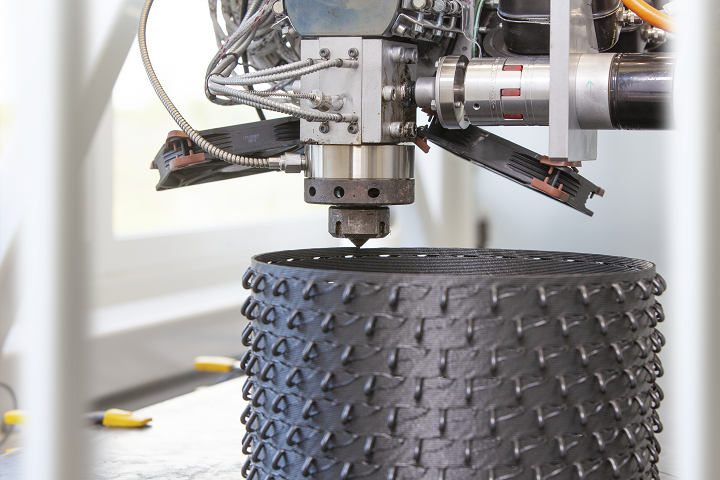 They need to specify the parameters of your printer - firmware (usually Marlin or Repetier), diagonal length, circumference, etc. These parameters can be taken from the firmware or measured with a caliper. It is important to specify all the parameters as accurately as possible, otherwise the printer will not be able to calibrate.
First, 3 points are aligned at towers A, B, C, and only then the lens in the center of the table is corrected.
Manual delta calibration is tricky, but it doesn't have to be repeated often. Typically, the printer only needs to be recalibrated after some mechanical parts, belts, or print bed cover have been replaced.
Totals
The calibration process may seem tedious and complicated, but in fact, once you do it yourself, the process will no longer seem so intimidating. In addition, most manufacturers try to help novice users and equip their printers with auto-calibration sensors or try to simplify this process as much as possible with detailed menu prompts.