3D printing 1mm nozzle
Best Settings for a 1mm Nozzle – Cura & Ender 3 – 3D Printerly
Here are the best settings for a 1mm nozzle:
- Layer Height: 0.5mm (between 0.25-0.75mm
- Line Width: 0.8-1.2mm (80-120% of nozzle diameter)
- Wall Thickness: 1mm, 2mm, or 3mm (multiple of 1mm nozzle size)
- Print Speed: 30-35mm/s
- Retraction Distance: 2mm-7mm (higher for Bowden, lower for Direct Drive
- Retraction Speed: 35-60mm/s
- Coasting: Enabled (to reduce stringing and oozing if it’s an issue)
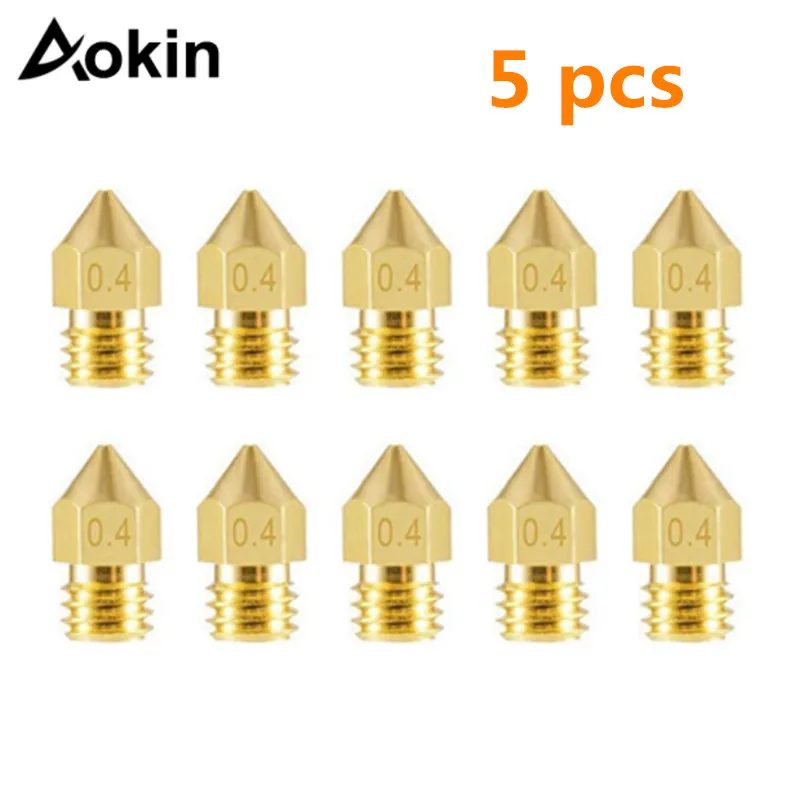
If you are looking for a good quality 1mm nozzle, I’d recommend going for the Aokin 1.0mm MK8 Extruder Nozzle. This nozzle is compatible with several 3D printers that have the M8 screw fitting such as the Ender 3, Ender 5, CR-10, Prusa i3, Anet, and many more.
Plenty of users are happy with getting it because it extrudes filament just as you would expect, being easy to install into your 3D printer.
Best Layer Height for 1mm Nozzle
For a 1mm nozzle, people consider the best layer height to be around 0.5mm. It’s exactly half of the nozzle size which means that you will have a good balance between printing speed and print quality.
The layer height is simply the height that each layer of your model will be.
Layer heights can be adjusted depending on your particular needs for the model. If you want a model to 3D print as quick as possible, you can try going for a layer height of 0.75mm, while if you want a more detailed model, a 0.25mm layer height should work well.
There is a general rule between layer heights and nozzle diameters where you can use a layer height that’s around 25-75% of the nozzle diameter.
One user who installed a 1mm nozzle said that he 3D prints with a 0.5mm layer height. Originally he used a 0.4mm nozzle but a specific model would take him 12 hours to print. After changing to a 1mm nozzle, the model only took 3.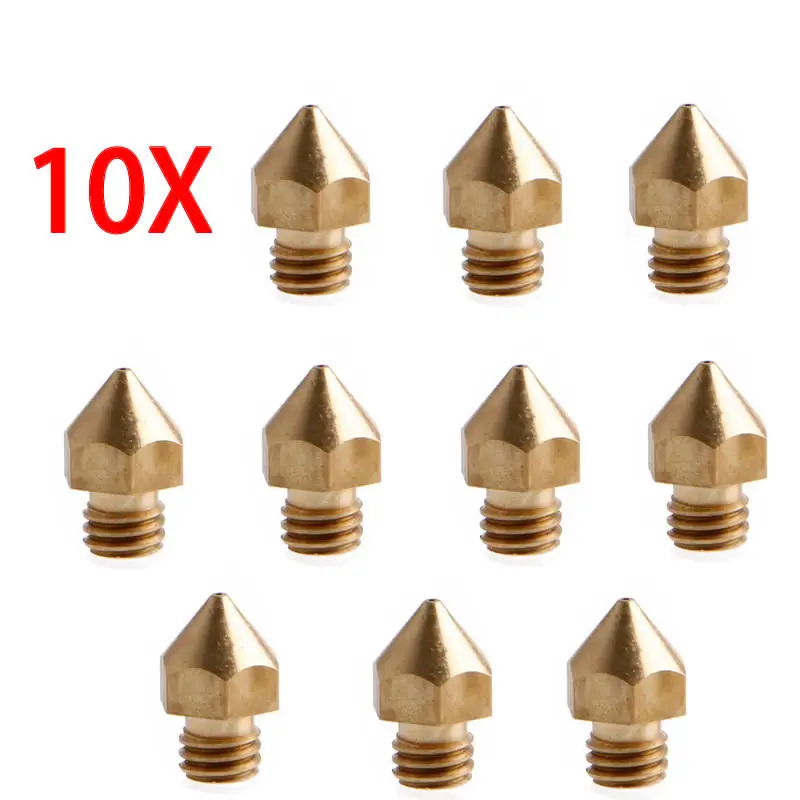 5 hours.
Another user also said he uses a 0.5mm layer height with a 1mm nozzle, which is the default in Cura for that nozzle size. It’s great for larger sized models on a filament 3D printer.
There was one person that decided to try a 0.8mm layer height but the print quality was really low. It’s hard to get enough detail when using such a large layer height so I’d recommend doing some testing and seeing what level of detail you are okay with.
Made my own 1mm nozzle, what settings do i use? This is at .8 layer height from 3Dprinting
You can start with a 0.5mm layer height and adjust it from there, going higher or lower based on what’s important for the model.
First layer pr0n. 1.0mm nozzle. Yes that is a piece of 1.75mm filament for reference! from 3Dprinting
You can learn about layer height by watching the video below from 3D Printscape.
Best Line Width for 1mm Nozzle
The best line width for a 1mm nozzle usually falls between 80-120% of your nozzle’s diameter which would be 0.8-1.2mm. I’d also recommend doing your own testing here because people get mixed results.
Staying at the same line width as your nozzle diameter usually works well, but you can try the lower and higher range to see if it produces better quality models, whether in aesthetic or strength.
The full range that you can set line width actually goes from 60-200% of your nozzle size, but the 80-120% range is said to work best.
One user who was having issues with printing a model with a 1mm nozzle ended up changing his layer height to 0.8mm and a line width of 1.2mm, which resulted in him printing a much better model.
Trying to print with a 1mm nozzle for the first time and I’m getting a bunch of weird surface problems.
Details in comments. from FixMyPrint
Another user said he uses the 1mm E3D V6 nozzle with a line width of 1.5mm.
Check out the video that shows just how large of a layer width you can 3D print with on a 0.8mm nozzle (200% or 1.6mm layer width).
Best Wall Thickness for 1mm Nozzle
The best Wall Thickness for a 1mm nozzle is usually a multiple of the nozzle diameter, so you’d use values such as 1mm, 2mm, or 3mm. The Wall Thickness of a model is one of the biggest factor in part strength, so ensure you use a larger value for models you want to be durable.
One user who had a 0.8mm nozzle wanted to 3D print 1mm thick walls but the slicer was doing these in two passes rather than one. Someone figured out that you can fix this issue by adjusting the Outer Wall Inset setting which squeezes the outer wall more towards the inside.
0.8mm nozzle and 1mm thick walls, i want just one pass thick wall but Cura 4.8.0 keeps doing 2 passes, what is the setting i’m missing to get only one wall? from Cura
It was created to improve dimensional accuracy when you are using a smaller line width than the nozzle diameter. When your outer wall is wider than your nozzle diameter, the extruded filament can flow outward more than the line width you desire.
In this case, the user would have to input an Outer Wall Inset value of 0.2mm.
Check out the video below by Technivorous 3D Printing that talks about the Wall Thickness setting in more detail.
Best Print Speed for 1mm Nozzle
The best print speed for a 1mm nozzle and a 0.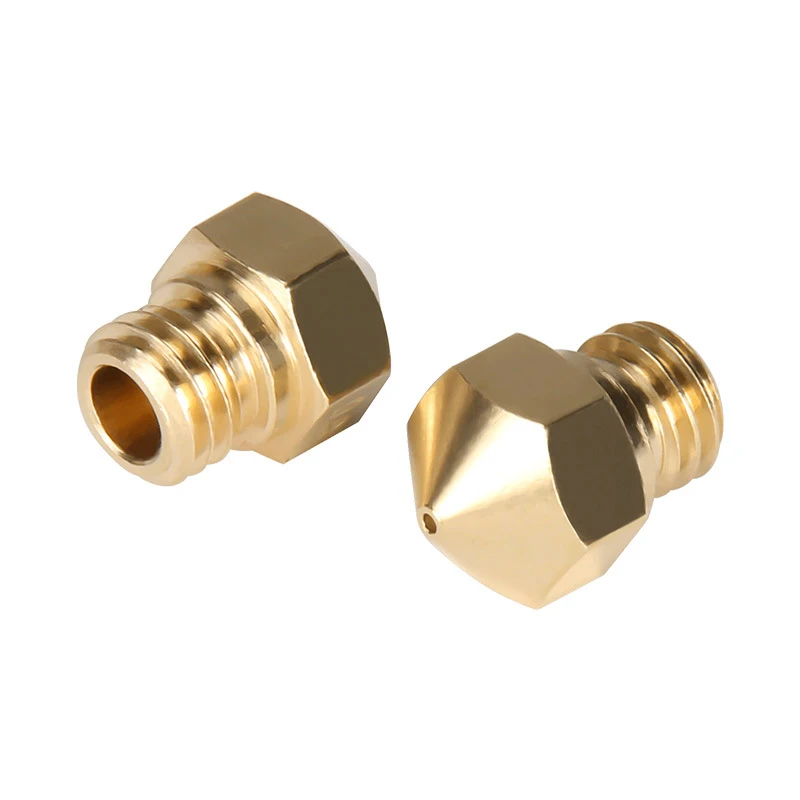 5mm layer height would be something around 35mm/s or less. Since there is more filament to melt, having a slower print speed helps that melting process since the filament stays in the heated chamber for longer.
The print speed is the maximum speed that your 3D print will reach during printing. Your 3D printer does require acceleration to get to those higher speeds so it doesn’t always reach that maximum speed.
You may be able to increase your print speed past that point if you have a high volume hotend that can handle larger flows of filament like the Dragonfly Hotend from Amazon.
It has a lengthened nozzle design which is more suitable for those higher flows and speeds that a 1mm nozzle would bring. It’s compatible with a wide range of filaments and 3D printers, and has plenty of positive reviews.
One user said that he uses a 1mm nozzle with a printing speed of just 30mm/s, along with a 0.4mm layer height and printing temperature of 235°C (240°C for initial 3 layers).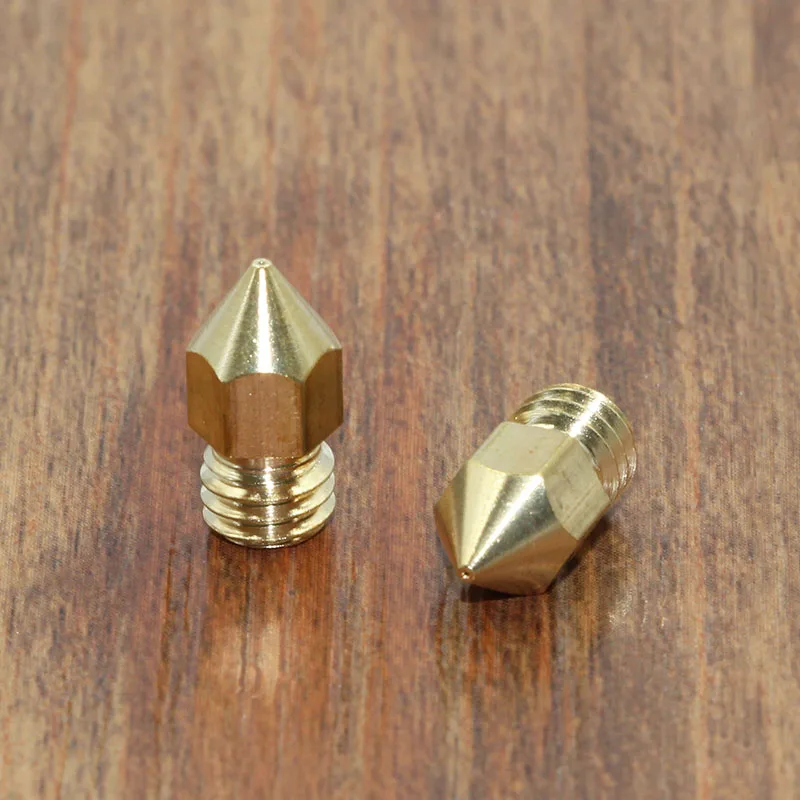
Best Retraction Distance for 1mm Nozzle
The best retraction length usually falls between 2-7mm but it does depend on whether you have a Bowden or a Direct Drive setup. Bowden setups require a higher retraction distance of 4-7mm, while Direct Drive works best with lower values of 1-4mm.
The retraction distance is simply how far your filament will retract from the extruder and hotend.
I’d recommend that you perform a retraction test by printing a retraction tower to find your optimal retraction distance for a 1mm nozzle.
One thing to keep in mind is that for certain objects, you want have very many retractions such as a box or a vase that doesn’t have a lot of big travel movements and a more constant extrusion.
Check out the video below by CHEP that walks you think how to calibrate your retraction distance.
One user also mentioned that they enable Z-hop when retracted to slightly lift the nozzle during travel movements to stop it from hitting the model accidentally during printing.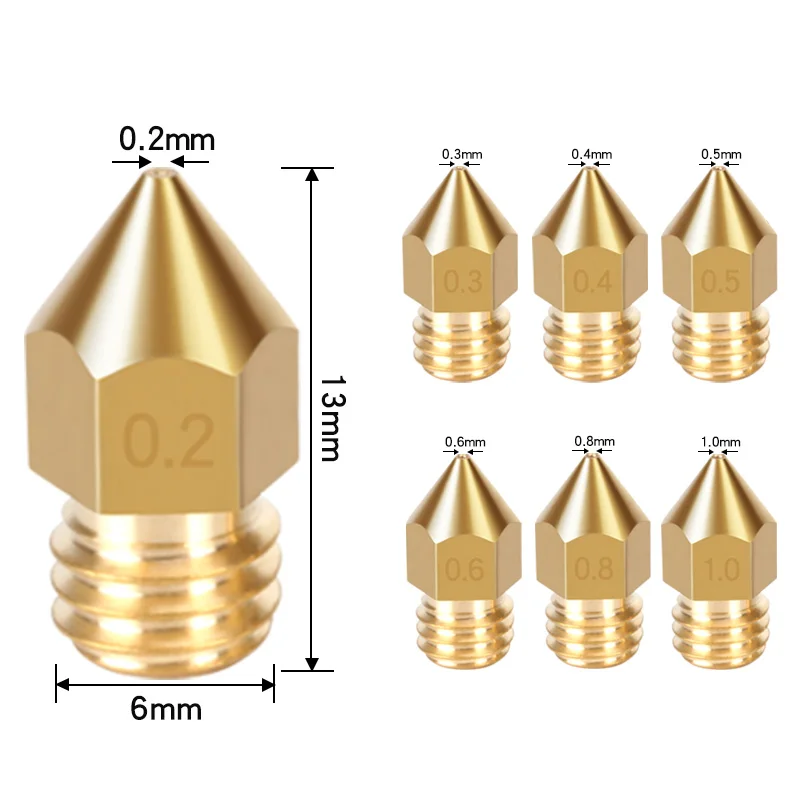
He mentioned that he used a 0.8mm nozzle with a printing temperature of 220°C and started experiencing clogging and layer shifting issues. After trying a bunch of things to resolve this on his Ender 3 machine, he changed some settings over.
He changed his retraction distance to 5mm, printing speed to 50mm/s, and nozzle temperature to 245°C. This made the filament come out a lot smoother, without clogging up the hotend.
The video below by Print Anything uses a massive 2mm nozzle to 3D print vases, so feel free to check that out.
Best Retraction Speed for 1mm Nozzle
The best retraction speed for a 1mm nozzle usually falls somewhere between 30-60mm/s.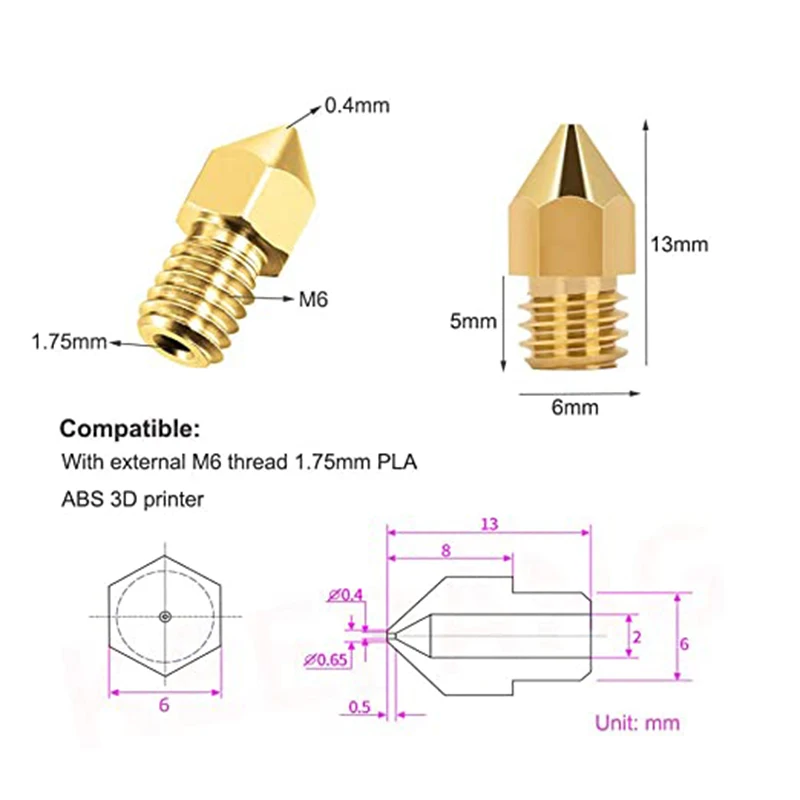 This is similar with retraction distance where you’ll want to do a test for this and see what works best for your particular setup.
Direct Drive setups are usually on the lower end of retraction speed at around 30-45mm/s, while Bowden setups fall between 40-60mm/s.
The retraction speed is how fast your filament will retract the filament from the extruder.
You don’t want to have your retraction speed too high or low because they can cause issues in itself such as stringing, clogging, oozing and more.
One user said he successfully uses a retraction speed of 55mm/s with a retraction distance of 1.2mm.
Another user said he uses a 1mm nozzle with a retraction speed of 45mm/s and an even smaller retraction 0.5mm, which has been working for him for two weeks of printing.
Best Coasting for 1mm Nozzle
The best Coasting setting for a 1mm nozzle is to enable it if you are experiencing stringing and oozing issues. Some people choose to leave it disabled and still get good results though, so it’s a matter of testing to see what works best for your particular setup.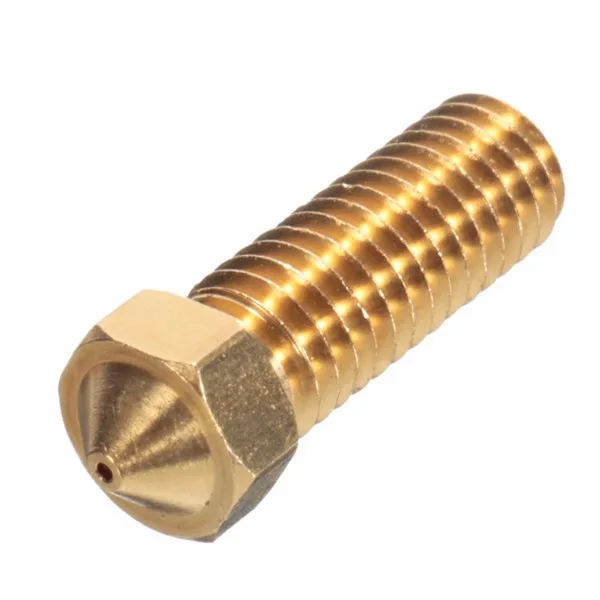
The default settings for Coasting Volume, Minimum Volume Before Coasting & Coasting Speed should work pretty well for you.
You can check out the video below by 3D Print General that goes through the benefits of enabling Coasting on your 3D prints, and a comparison of models.
How To: 3D Print With a Larger Nozzle
Whether it's time constraints or strength, a larger nozzle is an excellent addition to anyone's 3D printing toolbox. Take a look at some considerations when making this change.
Alec Richter
October 17, 2018
For a lot of people, one of the biggest hurdles with 3D printing isn’t cost or quality, it’s time. My interest in 3D printing came from the perspective that it was a tool I could use to ramp up the detail for my props and personal cosplay projects in a passive way; I was not a user with strict deadlines. If I set a “deadline” for an upcoming convention, not finishing a print in time had no real consequence other than disappointment that I didn’t finish it in time. A professional doesn’t have that luxury, and I’ve talked to plenty that use more traditional mediums like clay sculpting, carving, or “kitbashing” to make something, specifically because a 3D printed project may take a week of print time and they only have a couple days, not counting the time it would take them to finish the prints as well. Print time is directly related to nozzle size; enter the Volcano hotend.
By the numbers
Let me start off by explaining what makes a Volcano the right choice for this project, and what are some of the expected problems that can come with it. Printing a statue in pieces with a standard 0.4mm nozzle would take an incredibly long time to print, but with the 1.2mm nozzle, prints take a fraction of the time. With a 1.2mm nozzle, you can achieve 0.9mm layers, and at the scale of this project, 0.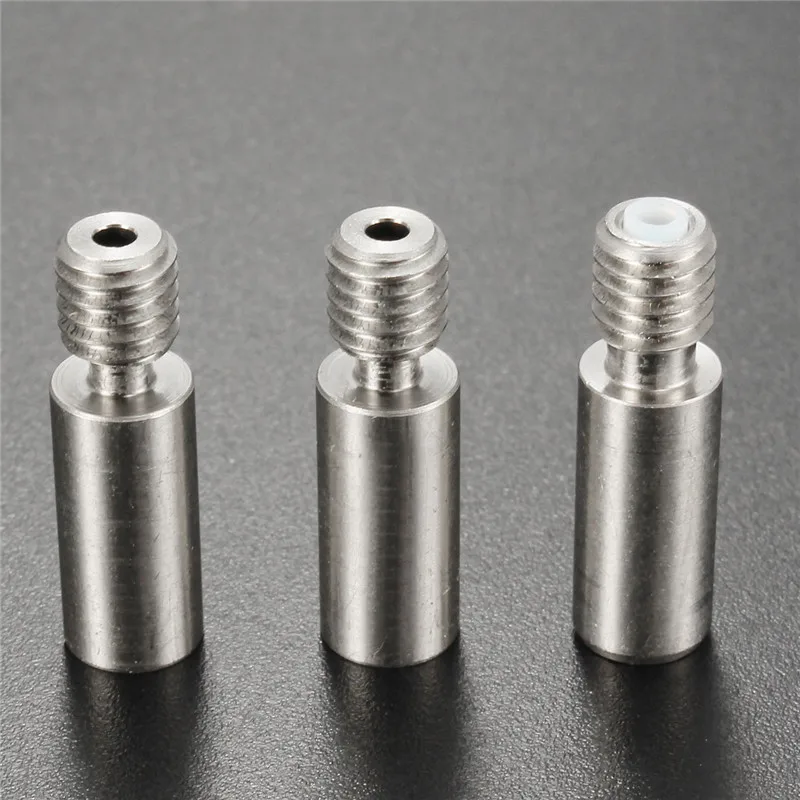 9mm layers would be the same as printing a normal sized Phil at 0.05mm layers. With a layer height that large, prints on average are printed 3 times quicker. For reference, box the full build volume of the Pulse would take 37.5 hours with the standard 0.4mm nozzle, but the Pulse HV can do the same in 12.5 hours.
Filament Consumption
Printing with a 1.2mm nozzle is not for the faint of heart; you can watch as your brand new spool of filament rapidly empties over the span of a couple hours. While printing with a larger nozzle does open up the possibility for printing large, basic parts over the course of several hours, it does mean you will go through filament at an incredible rate. That full size box I mentioned before? That was estimated to take 1.6kg of PLA, a rate of 130g/h. Consider that instead of sticking with a spool designed for a nozzle a third of the size, you should instead be moving up to larger spools to ensure you don’t run out mid print. Ten pound spools can be expected to be the new normal to keep pace with just how much material a 1. 2mm nozzle can churn through.
When would I want a bigger nozzle?
All that being said, a larger nozzle isn’t for everyone; if you need fine detail or your prints are small, a large nozzle isn’t made for that. You would be better suited using a Moai or a 0.25mm nozzle for those sort of projects. I would suggest that if you need something that has a tight deadline or takes up most of your build volume or even requires printing in sections and you intend to finish the part anyways, then try out a larger nozzle.
Are print settings any different?
With the Volcano hotend system, the nozzle is longer to give filament more time to melt and the heater cartridge is parallel to the filament path (as opposed to perpendicular like on the v6) to improve the heat transfer from the cartridge to the larger heater block. While this does give the 3D printer the ability to print thicker layers, there are some settings you will need to think about differently with a 1.2mm nozzle than with a 0.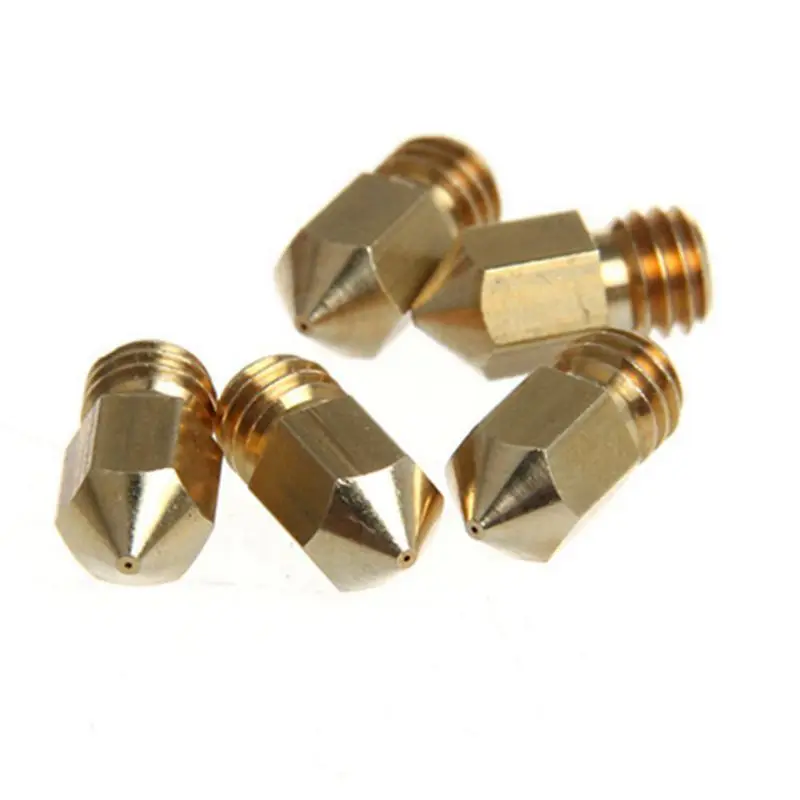 4mm nozzle:
- Printing temperature
- While the bed temperature won’t need any changes, the nozzle temperature will need to be significantly raised from your usual; usually PLA is printed at about 200°C, but I regularly print PLA at 250°C with a volcano. This is because you are melting a lot more plastic at once and need even more heat to transfer to the filament AND ensure that it sticks to the previous layer. I’ve had even had layers separate at 230°C.
- Perimeters
- You don’t need as many perimeters to achieve the same strength, but you also don’t want to have less than 2 perimeters if you can avoid it. One perimeter, while equivalent to three perimeters on a 0.4mm nozzle, you open yourself up to the possibility of gaps between the start and end of the perimeter. With two perimeters, I’ve dropped prints from chest height, had them bounce around the concrete floor, and not even crack.
- Infill
- The pattern you use isn’t as important as the density.
 I use 5% infill for most of my big prints since the walls provide most of the structure; but this does open up to some regular problems like top solid layers not having enough support to bridge over, leaving gaps in the top surface. At 5% infill, I’ve increased my top layers to 5 to be able to adequately cover each pass and that seems to work well enough. Of course, experiment with different infill percentages but I would suggest not going too high unless you want to print a cinderblock.
 - Also, be sure that your perimeter and infill overlap percentage is set to 0.6 (half of the nozzle size) or 50%
- Layer Height
- You could theoretically set the layer height to 0.05mm, but that’s kind of extreme. Normal use for a 1.2mm nozzle is between 0.3mm and 0.9mm layer height (25%-75% the nozzle size). If I’m using a 1.2mm nozzle, I’m almost always printing at 0.9mm because to me, that’s the whole point of it.
- Speed
- Speed will need to be significantly slower to make sure the filament has enough time to heat up.
 With a 0.4mm nozzle I usually keep the speeds around 45mm/s to balance speed and quality, but with a 1.2mm nozzle, 25mm/s is normal.
 - Cooling
- Printing at a temperature significantly higher than normal means that you want really good cooling to make sure that your corners aren’t curling and that subsequent layers aren’t just melting your part into one big blob.
- Support
- Even though your nozzle is bigger, you will probably want to keep the pattern spacing the same because bridging is harder to manage. 3 interface layers works well and as usual an air gap of twice the layer height works well (which means a 1.8mm gap is to be expected).
- Bed Adhesion
- Bed adhesion isn’t any different than normal, just make sure to have the proper adhesives, Z offset, and brims to keep your print secured while also being able to remove it when they’re done. Poor adhesion can lead to really big and bad problems, like the Heart of Darkness:
To put this all in perspective, I printed this Master Sword in less than twelve hours using a 0. 8mm nozzle and 0.6mm layer height. It doesn’t have a lot of detail, so I could solve the most of this with some bondo and save myself the print time it would have otherwise taken. I’ve also taken on a really big project here: Big Phil. This one part of him is more than one spool of filament, and yet it only took 8 hours to print. I wanted to start a really big evergreen project that we could proudly display at MatterHackers, and a life-size Phil seemed like the perfect idea. We will have more details about that project in the future, so stay tuned.
I hope this has given you some direction in taking a big step towards printing large and fast, but if you’ve already been using a Volcano hotend, I’d love to see what you’ve been creating, so feel free to tag us on social media with your big nozzle prints.
Thanks for reading and happy printing!
How to choose the nozzle size for a 3D printer? Pros and cons
3DPrintStory 3D printing process How to choose nozzle size for 3D printer? Pros and cons
When choosing your 3D printer, the nozzle size of your 3D printer may have been the last thing on your mind. This is a detail that is often overlooked. But depending on what you need to print, the wrong nozzle diameter can get in the way.
In this article, we'll take a look at the different 3D printer nozzle sizes and why you should consider this assembly, what materials it's made from, understand the relationship between nozzle size and layer height, and how to measure the actual nozzle diameter.
How does nozzle size affect 3D printing?
Nozzle diameter affects the extrusion width of the 3D printer line. This affects some elements of your model. If you are 3D printing for business (make a lot of orders), you need to make sure your extruder is feeding the right amount of material. If too much material is fed, then more filament is used than is actually required for successful 3D printing. Well, a smaller number can simply lead to marriage.
Or maybe you're printing different designs, some of them very detailed and intricate, and some more practical (like a replacement doorknob) that just needs to be printed quickly and with maximum durability.
In any case, you will need the correct setting to save time, material and ensure the normal quality of the 3D model.
There is no easy answer to what is the best nozzle size for a 3D printer. You need to weigh what you want to achieve and what elements of the 3D model are most important to you.
Depending on your 3D printer, the nozzle can be quite easily replaced (most of them are mounted on screws), and buying a package with different sizes will cost you a lot.
Most common 3D printer nozzle options
The most common standard nozzle size is the 0.4mm (or 0.35mm) nozzle used by most modern 3D printer manufacturers. The reason for this is that it is a rather large and yet versatile nozzle size. This means that you can print with exceptional detail in no time.
With the 0.4 mm 3D printing nozzle you can print up to a layer thickness of only 0.1 mm or up to 0.3 mm. The lower the layer height, the better the detail (on the Z axis) and the larger the layer height, the faster your 3D print will be, but with worse detail quality.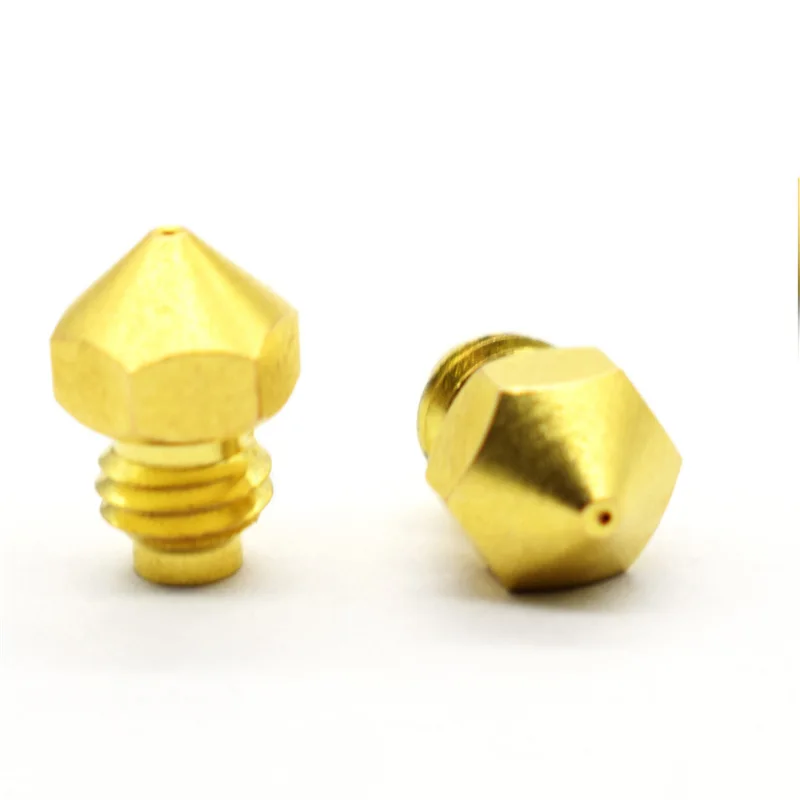
A common misconception is that if someone doesn't get good enough 3D print quality on their printer with a 0.4mm nozzle, they immediately think they need a smaller 3D print nozzle.
Another common smaller size is 0.25 mm. Some 3D printers offer 0.2mm, 0.15mm, and Mass Portal is even experimenting with 0.1mm 3D printer nozzles. And the experiments are really interesting. Thanks to this miniature nozzle, they were able to print the clock mechanism with excellent detail.
How is nozzle diameter related to 3D printer resolution?
Theoretically, smaller 3D printer nozzles allow for greater precision. But for many 3D printers, especially cheaper or older models, a smaller extruder nozzle won't necessarily make a difference if your printer doesn't support the higher resolution you need. It's like putting low-profile, high-performance tires on an old classic car - it doesn't make it go faster, and it doesn't necessarily make it better cornering.
This is also similar to how the specifications of a 3D printer on paper (eg advertised resolution) do not always result in the best print quality of the finished product. Just like Ultimaker and Zortrax have very similar resolutions on paper, but in many actual tests, Zortrax produces better models than Ultimaker 2.
smaller nozzles as resolution across the board is getting better every day.
Let's look at the pros and cons of 3D printing with smaller nozzles. Some are less obvious than others. Next, we'll look at the larger, underpriced nozzles available. I hope after reading this article you will be able to answer the question: "What nozzle size should I print?".
You probably already guessed that the smaller the nozzle size in the extruder, the more detailed model you can get as a result of 3D printing. The thin nozzle is great for complex figures, or if you need to print very thin walls for aircraft skins, or high transparency models, etc.
The photo below shows the printed skin of a model aircraft, which was made with a standard 0.4 mm diameter nozzle. If the same skin is printed with a nozzle with a diameter of 0.2 mm, then the weight (and strength) would be halved.
It is worth noting that a 3D printer with a 0.2 mm nozzle feeds half as much material as a 0.4 mm nozzle. And this actually leads to an increase in print time by the same two times. It should be noted that strength and detail are reciprocals of time. So to get high-quality 3D models using a thin nozzle and high resolution, you will have to be patient (2 times more than when printing with a standard 0.4 extruder :)). In some cases this is justified, in others it is a waste of time...
As a general rule, the smaller the nozzle size, the higher the chance of problems with the 3D printer. Especially if you are using cheap materials - they can work well with low models and thicker nozzles, but if you need detailed models that are printed using a thin nozzle, then you should also be puzzled by buying quality filaments for 3D printing.
Other factors are less obvious when 3D printing with a thin diameter nozzle - for example, protrusions can be problematic. This is because each layer has a smaller width for the next layer. Crossing bridges can also be difficult.
But there is good news too! Where overhangs form, the caliper material will be much easier to remove if printed with a thin nozzle. Due to the increased accuracy, your slicer can use a minimum amount of material between your model and supports, so they will break off more easily and have fewer damaged pads that need to be sanded.
And finally, the most annoying thing about a thin nozzle is the ease with which it clogs. If you downsize to 0.2mm or even 0.1mm, you'll need a small particle to clog the hotend. You need to be very careful about the cleanliness of your 3D printing material and regularly clean the nozzle of your 3D printer. Otherwise, you will not end up with additional unnecessary problems.
It is also worth taking the time to understand the relationship between nozzle size and layer thickness. In short, the first parameter determines the horizontal detail (along the x and y axes), and the second adjusts the resolution along the vertical or z axis.
How to measure the nozzle size of a 3D printer?
Although the actual nozzle diameter should be engraved on the side of the nozzle, it is not always possible to read this value if it is already installed in the extruder or if you have been printing with it for some time. After all, there is the concept of wear and you may not be sure that the nozzle is the same size as before.
To determine what size your nozzle really is, very slowly extrude some material into the air (high speed may change shape or size) at the lowest setting you can feed material at (approximately 1 mm/s). Once cool, use a micrometer if you have one. They are generally more accurate than digital calipers. Keep in mind that the filament will probably expand after being extruded. Poor quality material or an extruder that is too hot (especially if you extrude at 1mm/s) will cause the material to expand more, resulting in inaccurate readings.
It can also be useful to know the size to which your material expands after extrusion if you are working on getting a really nice and accurate model. So feel free to experiment with higher speeds that are a bit more like your actual 3D printing.
What is the relationship between 3D print layer height and nozzle diameter?
In simple terms, this is the thickness of each line of extruded material that makes up each layer of your model. The thinner the layer height (or layer thickness), the finer the print detail in the Z-axis (the vertical dimension of your model), but the more layers will be required. Increases print time.
These characteristics are related, but not completely. For example, you can print using a thinner, thicker nozzle if vertical resolution is less important to you. Or you can use a thicker nozzle with a very small layer height. Although in this case, do not get too carried away. To maintain adequate pressure, your layer height should be at least 20% less than your nozzle width - and in most cases, for best 3D printing results, it should be around 50%.
How to determine the correct distance from the nozzle to the desktop of a 3D printer?
With the correct setting of the distance between the table and the nozzle, the base of the finished model should have an almost perfectly smooth, glassy surface. Many people assume that you need to use a stylus to properly set the distance between the nozzle and the 3D printer bed, but in fact, even that can be too thick. So it's worth thinking in the direction of the already proven table calibration with a piece of paper. You should use thin paper. For example, check paper is a great choice. Place the receipt paper under the nozzle and gradually lower the nozzle down until the receipt paper resists a little when you try to push it out. 3D printing at this height will give the bottom of the model a great look, and in the case of tall models, the print will definitely not go astray.
What is the maximum 3D print layer height compared to the nozzle size?
You don't necessarily need a layer height calculator on your 3D printer, but typically the maximum layer height is 50% of the nozzle width. In some cases, you can go higher (perhaps 75%), but in this case, you must be aware that you can sacrifice reliability.
It's best to experiment with the parameters of your model if you understand the relationship between the 3D printer's nozzle size and the layer height you'll be using to print. So for a 0.4mm nozzle, you will need to print with a layer height of 0.2mm, or up to 0.3mm. Your minimum should be around 0.1mm. If less, then in fact you just increase the waiting time without much benefit (on the same 0.4 mm nozzle).
In most cases, it is worth printing thinner layers with smaller nozzle diameters and generally thicker layers with thicker nozzles. Just note that if you are printing with a thicker nozzle diameter and very thin layer height, you will need to lower the extrusion settings in your slicer to prevent overfeeding.
It's also worth noting that no matter the size, you should always make sure you always have a clean nozzle. One of the easiest ways to do this is to use a high quality cleaning floss. You only need to use a few grams of it each time you brush, but this will prevent carbon buildup over time.
So why should I use a 0.8mm nozzle or thicker?
Similar nozzle sizes were more common on older 3D printers but are making a comeback. It's all about using what you need and nothing more. For a large number of models, the 0.4mm headroom that your 3D printer probably comes with may be overkill in terms of detail.
If you need strength and speed, but detail is less important, then you should use a 0.8 mm or even 1.0 mm nozzle. And don't forget that models printed with a 0.8mm nozzle can be very detailed, as a lot depends on your 3D printer as well.
The only slight disadvantage may be that you use more material, but with thicker part walls you can probably compensate with less infill.
There is no single optimal nozzle size for all models, you just need to take all factors into account and decide which nozzle size is best for you.
What nozzle size should I use for composite materials?
It is worth noting that composite materials (any particulate filament such as wood filler, copper filler, carbon fiber nylon or glass reinforced nylon) will cause extrusion problems when using a thinner nozzle.
This is because these filaments contain particles which, although nanosized, can cause problems when passing through nozzles smaller than 0.4 mm. For composite materials, it is better to use nozzles of at least 0.5 mm, and for any metal, glass or carbon fiber materials, you will need a hardened nozzle. The brass nozzle that comes with your 3D printer will most likely not last long and will increase in diameter after a few hours of printing.
A 0.5 mm stainless steel or tungsten nozzle will last much longer for composite materials, but will, of course, be more expensive.
So, if you're still wondering "What size extruder nozzle to choose?", here are the results for a nozzle with a diameter smaller than the standard 0.4 mm:
- worth using for small detailed models if your 3D printer supports high resolution;
- 3D printing can take significantly longer, thicker nozzles can significantly reduce print time;
- overhangs are more difficult to print, but supports break off more easily;
- you need material from a quality proven manufacturer, otherwise the nozzle can easily become clogged.
5 Common Problems in a 3D Printing Shop
Large variety of printing materials.
Working with a lot of media means you have at least a few spools of each material in your shop. These can be coils from one or more manufacturers, coils from one or from different production batches. Unfortunately, at the moment, there are actually no standards for the production of filament for 3D printing, except, perhaps, the standard for the diameter of the rod. Temperature characteristics may vary slightly for one type of plastic from different manufacturers. This is primarily due to the fact that each manufacturer of materials for 3D printing uses different raw materials from their suppliers. Also, different manufacturers of materials can use different types of dyes for the filament, and dyes can have a rather strong effect on the physical and chemical properties of materials. But even if you work with only one manufacturer of 3D printing plastic, there is no guarantee that the print settings will always be the same, as raw materials, dyes and production parameters may change with the manufacturer over time. Therefore, when opening a new coil, it is advisable to perform at least 2 material tests: for the amount of plastic flow required (flow) and for the optimal printing temperature (temperature tower).
Differences in settings between different heads can be significant, sometimes resulting in printing defects or even damage to the print head. The situation becomes more complicated if you have not one printer, but, for example, ten, and you urgently need to place an order from a new reel, but there is no time for tests. In this case, you will have to trust your experience: try to set the optimal parameters and be ready to correct the settings during printing.
Conclusion: do not neglect testing the new spool, it will save you time and nerves and you will be able to use all the good quality material for 3D printing. Use materials from reliable manufacturers. Check the new coil yourself, empirically, because reviews on the Internet cannot always give you a complete and truthful picture.
Hot end wear.
When working with a large fleet of constantly running 3D printers, the problem of nozzle wear always comes up unexpectedly. Now on the market of raw materials for 3D printing, there are structurally rigid composite and metal-filled materials that can increase, in a short time of their use, the nozzle diameter from 0.4mm to 0.6mm.
If this is not noticed in a timely manner, it will be difficult to achieve a good quality of the printed model. Deviation from the desired diameter, although it is unpleasant, is not the worst thing. Practice shows that a slight offset from the desired nozzle diameter does not greatly affect the printing of large models with simple geometry that do not require high precision in the development of elements. It is much worse when the nozzle is ground unevenly, because of this, the incoming material lies unevenly on the layer. The printed surface may go in waves or have other defects visible to the eye. It's pretty easy to notice that a nozzle is malfunctioning: when you load plastic into the extruder, you can see how the flowing material bends and twists at the outlet of the nozzle.
Output: constantly monitor the state of your hotend. Before printing, push the plastic through the extruder, watch the flow of material coming out of the nozzle. If the material flows out unevenly, then we can say with confidence that there is a problem with the extruder, which is best solved at the start of 3D printing. 3D printer nozzles are a consumable item, stock up on replacements if you have a lot of printing to do.
Use of nozzles with different diameters on 3 D printers.
As a rule, different orders can be printed with nozzles with different outlet diameters. For example, models with fine details are best printed with nozzles with a diameter of 0.2mm, and for rough technical details with 100% plastic filling, it is much more profitable to use nozzles with diameters of 0. 6-1mm. If you have one printer, then changing one nozzle to another is not a big deal: you heat up the hot end, remove the material, unscrew the nozzle, and screw in a new one. Since most nozzles have slightly different heights (especially if the nozzles are of different types: e3d or mk8), after changing from one to another, it is usually necessary to re-calibrate the 3D printer bed.
If you use a whole fleet of 3d printers, then you will have to change nozzles for different orders often, which means you need to try to optimize this task.
Conclusion: sign on your printers the nozzle diameter that is currently set. Select printers for "coarse" and "fine" printing, where nozzles of large and small diameters will stand, respectively. Use special tools: the nozzle is much easier to remove with a socket head. Organize the storage of your working nozzles, use cash registers.
Table wear on 3 D printers.
This type of problem is a combination of two things: incorrect printhead alignment relative to the 3D printer bed, and excessive adhesion of the material to the bed. In the first case, when your 3D printer is poorly calibrated and printing starts “on the table”, glass surfaces or film coatings wear out, and the printer’s hot end may also suffer because of this, as the nozzle clings to the table surface. In this case, the table can be damaged so much that defects will form on the first layers of the models - chips and dents of the table will be imprinted on the finished part. If you need a smooth, even surface on the model, this will spoil all the work done.
The second reason for table wear is increased adhesion of parts to the table. If, for example, you print a material with high adhesion (PetG, TPU, PLA, etc.) using 3D printing glue on a heated table, then the finished part, even after complete cooling, may well pick up a piece of sticker or even glass , depending on the type of printable surface.
Conclusion: accurate table calibration and print setup of the first layer of the model is half the success of all printing and the key to a long life of the 3D printer working surface. Always take into account the characteristics of the printed material, select the correct settings for the first layer of printing.
Overlapping and jumping thread diameter.
Problems that do not depend on the settings and mechanics of your 3D printer: overlap and “jumping” bar diameter. In the case of overlapping, the matter is, as a rule, in the marriage of the winding of the filament in production. Overlapping the media can cause knots to form at a random location on the spool, causing the plastic to stop unwinding from the spool during printing and get stuck. If your printer does not have a filament motion sensor, this will most likely ruin all printing.
Bar diameter fluctuating results in uneven material flow from the nozzle, resulting in under- or over-extrusion (under- or over-flow of material).