Best paint for pla 3d prints
Your Guide to Painting PLA 3D Prints
When it comes to painting PLA 3D prints, it’s not quite as simple as removing your part from the print bed and applying paint with a brush. Of course, you could do that, but the result would be sub-optimal and the paint might be inconsistent or chip off. For the best results painting PLA, there is a bit of prep work that needs to take place, including removing supports, smoothing the print surface, and priming. In this article, we provide a step-by-step beginner-friendly guide to painting PLA parts and explain why each post-processing step is important.
Recommended reading: PLA vs ABS: Which filament should one use?
Best paints for PLA
Before getting into how to prepare your 3D print for painting, let’s first talk about what types of paint work well with thermoplastics such as PLA. Fortunately, there are different options at your disposal, both in terms of paint type and application method.
As far as thermoplastic filaments go, PLA is one of the easiest to paint. With the right preparation and priming treatment, most types of paint will adhere to the material’s surface. Acrylic paint, enamels, and lacquers can all be used to finish a PLA print. When it comes to application, you can choose to paint using brushes or using spray paint.
Despite the fact that many paints work with PLA, the most popular options for painting PLA are acrylics and enamels. Let’s take a look:
Acrylic Paint
Acrylic paint is a water-based product made up of pigment particles, acrylic polymer binder, and water. The three materials form an emulsion which can be easily applied to surfaces. When the water in the paint evaporates, the paint becomes dry and stable.[1] Acrylics are known for being easy-to-use and are quick drying. When wet, they can be cleaned easily with water, but become permanent when dry. Acrylics are also highly versatile and adhere well to a wide range of substrates, including thermoplastics like PLA. In terms of appearance, acrylic paints have a matte finish.
Acrylic paints are safe and easy to work with when painting PLA 3D prints.
Enamel paint
Enamel paint is a category of solvent-based paints (oil-based paints) characterized by their glossy finish. Enamel paints are also known for creating a thin hard and stain-resistant shell, which can give products greater durability and weather resistance.[2] Like acrylics, enamel paints are sold as liquid (to be applied by brush) or in aerosol form (to be sprayed). Enamel paints typically dry slower than acrylic and can have a stronger smell due to the solvents in them.
Step One: Support Removal
Once you’ve removed your PLA part from the 3D printer, the first step is to remove any supports. (If your 3D model doesn't require any support structures and doesn’t need any cleanup, you can skip this step and head straight to step two.)
In the FDM 3D printing process, support structures ensure that certain design features—such as overhangs over 45 degrees or bridges—can be extruded successfully without succumbing to gravity. If supports are printed from the same material as your build (i.e. they are not soluble supports), they must be manually removed. In some cases, removal is as simple as breaking or cracking supports off by hand. This is easiest if the support structures are very low in density and are not well bonded to the surface of the PLA part.
If your part has features that are at risk of breaking, however, we recommend using tools to assist in support removal, such as a knife, a pair of needle-nose pliers, or flush cutters. The aim, ultimately, is to remove the supports and leave as little trace as possible on the part surface. Working gently is the best way to remove supports while minimizing the risk of damage to the final model. You can also heat up the blade of a knife, which will soften the PLA and make it easier to pry the support away from the part surface.
We should note that build orientation and part design can greatly influence the support removal process. If turning your 3D model on its side on the print bed will reduce the number of supports required, the removal process will be significantly faster. Similarly, if you can tweak a design to remove a particularly challenging overhang, you will cut back on the amount of supports needed in the first place. Different types of support, such as tree supports, can also be easier to remove.
Gently remove supports by hand or using tools such as a knife, pliers, or flush cutters.
Recommended reading: How to Remove Supports from 3D Prints
Step Two: Smoothing
Once supports have been successfully removed from your printed model, it’s time to smooth out the part’s surface. The goal of this step is to remove any blemishes or surface defects leftover from supports as well as to flatten any prominent layer lines created by the filament extrusion process.
Sandpaper is the most popular method for smoothing PLA 3D prints: it’s cheap, safe, and is highly effective at removing surface inconsistencies. The one downside is that it can be time consuming. There are a number of different sanding mediums, including sanding blocks, sandpaper, and nail files. Sanding blocks are great for smoothing out larger parts with broader surface area; nail files are handy for smoothing out small details on PLA prints; and conventional sandpaper is pretty much suitable for everything.
When smoothing a PLA 3D print, rub the sandpaper over the part’s surface in small circular motions—against the grain of the print. This will gradually remove the top layers of plastic and smooth any blemishes. If you have different types of sandpaper at your disposal, it is recommended to use a variety of different grit levels, starting with the coarsest sandpaper (lowest grit) and moving towards the finest sandpaper (highest grit). Many makers also finish the smoothing process with wet sandpaper. This is exactly what it sounds like: simply dampen a piece of fine-grit sandpaper and rub it over the 3D printed object. This step will not remove as much material as earlier sanding stages, but will result in a very smooth, polished surface.
If time is a concern, you can use an electric sander. In this case, follow the same steps (starting with a lower grit sandpaper and moving to finer grit), but be sure not to sand one area for too long, as it can create a heat buildup that can soften and melt the PLA.[3] It is also a good idea to equip yourself with gloves and a mask when sanding PLA, and to work on an easy-to-clean surface. When sanding is complete, clean your work area and the 3D print to remove any PLA particles.
Recommended reading: Dissolving PLA: How to Melt PLA and Smooth 3D Prints
Step Three: Priming
While your 3D print should feel smooth to the touch after sanding, applying a primer will take it to the next level, evening out any remaining roughness or texture and filling in gaps. Primer also functions as a base layer and promotes better adhesion between the PLA surface and the paint. Priming is an essential step if you want your 3D print to have a professional painted finish.
There are many different primers on the market, but primer filler (such as Rust-Oleum) is among the most recommended for finishing FDM 3D prints. Primer filler is sold as a spray, making it easy to apply. It also typically has a gray coloring, which provides a good neutral base for applying color later on. You can find primer fillers at your local hardware store.
To use an aerosol primer filler, it is important to mix the contents of the primer inside the can. Shaking the can vigorously can cause unwanted bubbles, so swirl the can for a few minutes instead. If in doubt, follow the instructions on the primer filler can.
For the best coverage, suspend your 3D model in the air and spray the primer from a distance of 25-30 cm. Spray the primer in steady motions across the model, from left to right and up and down. This will ensure that the primer is being applied evenly and is covering the whole print surface. You also want to avoid spraying too much at one time, because this can cause pooling or dripping. Finally, be sure to work in a well ventilated space using the proper protective equipment.
When the first coat of primer is complete, let it dry. If needed, you can go back in with your sandpaper for any touch ups. Typically, PLA 3D prints require at least two coats of primer before painting gets underway. Before applying your first coat of paint, make sure the primer is completely dry (this can take about 40 minutes).
Step Four: Painting 3D Prints
Once your print has been sanded and primed, it is ready to be painted. In this step, you have some choices to make. For starters, you have to choose the type of paint you want to work with. As we saw earlier, some of the best paints for PLA are acrylics and enamel paints. You also have to choose which application method you will use: spray painting or hand painting.
Spray painting 3D prints results in a uniform, smooth finish.
Spray Painting
Spray painting is a good option for achieving a uniform, smooth surface finish. It is also good for parts that require tighter tolerances or good dimensional accuracy because it adds color in thin layers with less buildup than hand painting. Be sure to follow instructions on the spray paint you are using (i.e. in terms of shaking the can and storage).
For the best results spray painting your 3D print, hang your print using a thin wire in a well ventilated area. This will enable you to spray the entire print’s surface without missing any spots. Similar to applying the primer, move the spray can continuously, back and forth and up and down, with wide strokes that cover the entirety of the print. This will ensure that the paint is applied evenly and to the entire print.[4]
Once the first coat is complete, wait 15 to 20 minutes before applying a second coat. Repeat this until the desired saturation and finish is achieved. At this point, leave the painted 3D print for at least 24 hours before applying any varnish or polishing coatings. And don’t forget to wear protective equipment, like gloves, goggles, and mask when spray painting.
Hand Painting
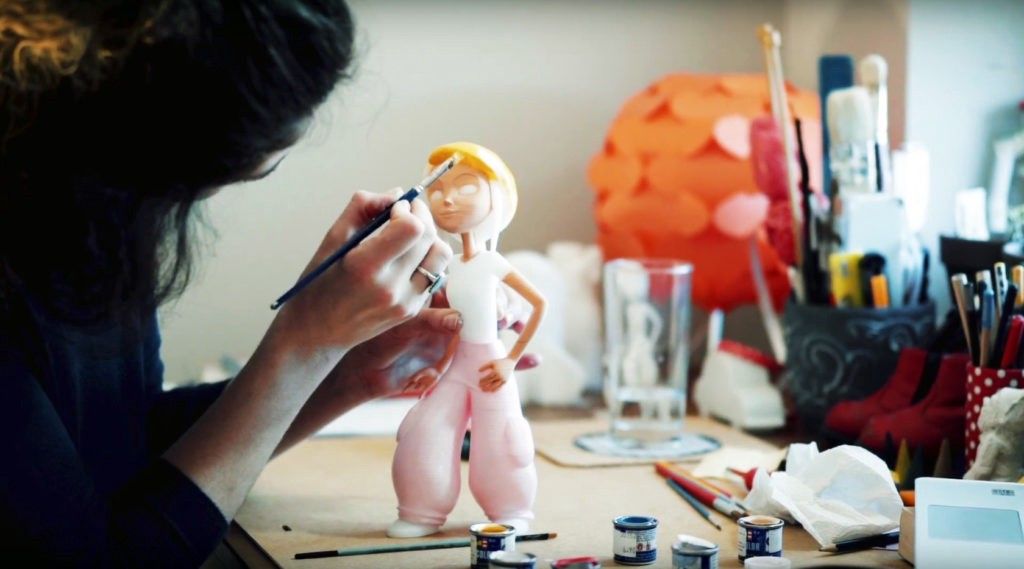
Hand painting is usually the best choice for 3D prints that require fine details, such as toys or miniature models. Use good quality brushes and paint to coat your 3D print in the colors of your choosing. When the base layers of paint are dry (it might take several even coats to get the opacity and consistency you want), go in with finer paint brushes to add detail. If possible, start by using the lightest colors and progress to using the darkest colors.
If you are painting using brushes, it is best to work with acrylic paint. This type of paint is easy to work with and is among the most affordable. Note that cheaper acrylic paints might not have the best coverage and may require more coats than a better quality paint.
Clear Coat
When you are happy with the appearance of the color paint, there is the optional step of adding a clear coat to your print. The clear coat is a transparent layer that protects the surface of the paint and can modify the finish. For example, if you have painted your print with matte acrylics, you can apply a glossy clear coat for a shinier finish. The clear coat can also be applied by brush or sprayed using the same techniques we discussed for painting.
Key Takeaways
Painting is a reliable way to make your 3D prints look more professional, whether you are making a product design prototype, a decoration for your home, or a functional part. Achieving a high-quality paint job, however, takes some time and effort. Here are some of our key takeaways for painting PLA 3D prints:
Acrylic and enamel paints are the two best options for painting PLA 3D prints.
Before painting, it is essential to remove supports and smooth the print’s surface using sandpaper.
Priming ensures that the print surface is sealed and smooth. It also helps the final coats of paint to adhere to the plastic material.
For smooth uniform coats of paint, spray paint is recommended. Hand painting is best for adding small details.
Hang or mount your 3D print to paint every angle and to ensure even coats. This will also help the paint to dry uniformly without any blotches.
When post-processing and painting PLA, make sure to work in a well-ventilated space and to use the proper protective equipment, such as mask and gloves.
References
[1] https://www.liquitex.com/us/knowledge/what-is-acrylic-paint/
[2] https://acrylgiessen.com/en/enamel-vs-acrylic/
[3] https://www.makerbot.com/professional/post-processing/sanding/
[4] https://www.makerbot.com/professional/post-processing/painting/
How to Paint PLA, ABS, PETG, Nylon – Best Paints to Use – 3D Printerly
Painting 3D prints is a great way of making your models unique and more accurate, but people get confused about how exactly they should be painting their 3D prints. I thought I’d put together an article that helps people to paint 3D prints from filaments like PLA, ABS, PETG & Nylon.
The best paints to use for 3D printed objects include Rust-Oleum’s Painter’s Touch Spray Paint and Tamiya Spray Lacquer. Before you start painting, make sure to prepare your print’s surface by sanding and priming it to achieve the best results.
I’ll go through the best techniques on how to properly paint your 3D prints, so keep reading through this article to get the useful details.
What Kind of Paint Should You Use for 3D Printing? Best Paints
The best paints to use for 3D printing are airbrush sprays if you have experience because you can get amazing detail and blending. Spray paints and acrylic sprays are also great choices for painting 3D prints. You can also use an all-in-one primer and paint combo that primes and paints the surface.
The best paints are ones that don’t form thick layers and are easy to control.
For beginners, it’s best to use canned spray paints for painting 3D printed objects which is affordable and easy to use too, as compared to an airbrush or acrylic paints.
I’ve gathered some of the best spray paints that work well with plastic and can be used for 3D printing below.
- Rust-Oleum Painter’s Touch Spray Paint
- Tamiya Spray Lacquer
- Krylon Fusion All-In-One Spray Paint
Rust-Oleum Painter’s Touch Spray Paint
The Rust-Oleum Painter’s Touch Spray Paint on Amazon is a high-quality product that actively adheres to popular filaments like PLA and ABS and gives you a premium-grade finish.
Rust-Oleum is a well-respected brand that the 3D printing community has great admiration for. It’s known for its wide array of acrylic, enamel, and oil-based spray paints that work like a charm for 3D printed objects.
One of the best parts about the Painter’s Touch Spray Paint is that it’s a 2-in-1 product, mixing the primer and paint together and getting rid of extra steps required to paint your model.
People who regularly use this product say that there’s no better quality spray paint out there that packs this much value for money. According to some experienced 3D printer users, this Rust-Oleum spray paint creates thin coatings and makes your models look very detailed.
One customer has said that the Painter’s Touch Spray Paint has excellent coverage and is very easy to use. They were able to paint dozens of miniatures using this spray paint and all with amazing results.
It’s available in a variety of colors, such as Gloss Black, Modern Mint, Semi-Gloss Clear, and Deep Blue. A 12 oz can of Rust-Oleum Spray Paint costs somewhere around $4, so it’s also priced very competitively.
At the time of writing this article, the product has an “Amazon’s Choice” label attached to it with a fantastic 4.8/5.0 overall rating. 87% of the people who bought the Painter’s Touch Spray Paint have left a 5-star review.
It’s definitely one of the best spray paints out there that you should use for 3D printing. Coatings of this paint provide you with long-lasting protection, low odor, and a quick drying time of 20 minutes.
Tamiya Spray Lacquer
The Tamiya Spray Lacquer is another awesome spray paint that although isn’t acrylic but many 3D printer users still recommend for its effectiveness and affordability. You can find it for a great price on Amazon.
A bottle of 100ml of Tamiya spray paint costs somewhere around $5. However, you will need to apply a primer to your model’s surface before using this spray paint because it is not an all-in-one solution, unlike the Rust-Oleum Painter’s Touch Spray Paint.
One of the best features of the Tamiya Spray Lacquer is its quick curing time. Many people say that their models dried completely within 20 minutes.
At the time of writing this article, this product has a 4.8/5.0 overall rating with 89% of the people leaving a 5-star review lauded with praise.
The Tamiya Spray Lacquer isn’t affected by enamel or acrylic paints, so you’re free to apply more coatings of paint to your print if you want to add details or remove some.
One user says that this spray paint has turned out to be ideal for their ABS models, but you can use it for other filaments as well. The finishing looks amazing and one can is enough for 2-3 19cm long objects.
Krylon Fusion All-In-One Spray Paint
The Krylon Fusion All-In-One Spray Paint (Amazon) is a staple product in the 3D printing industry. Thousands of people use it to effectively post-process their 3D printed objects, and some even call it the best paint for PLA.
This spray paint offers top-of-the-line adhesion and durability for your prints. It also protects the object from rust and can be applied to surfaces without having to sand or prime them beforehand.
With fast drying times, your 3D printed model can become ready to touch in less than 20 minutes. You can also spray painlessly in all directions, even upside down.
A customer has mentioned that the paint job turned out just as expected with their 3D printed PCL plastic with a high-quality finish and a picture-perfect result.
One more user has said that this spray paint also boasts UV resistance and is very durable as well. It has been specially formulated to bond with plastics to make the finishing look spectacular and strong too.
This is a great plus point if you’re looking to make mechanical parts with added durability and strength. Applying 2-3 coats of this paint will definitely make your print more professional, as many people have expressed.
At the time of writing, the Krylon Fusion All-In-One Spray Paint boasts a 4.6/5.0 overall rating on Amazon. It has gathered more than 14,000 ratings on the marketplace where 79% of them are thoroughly 5-star.
One person who picked this item up says that it’s very easy to use with the big button spray tip. Another user has mentioned that this spray is also aquarium safe once dried.
All in all, this fantastic Krylon product is one of the best spray paints for you to use with 3D printing. It costs about $5 and guarantees great value for money.
Can I Use an Airbrush for Painting 3D Prints?
Yes, you can use an airbrush for painting 3D prints for a great control on color blending and precision. Many people successfully use an airbrush for painting their 3D prints, usually suited to people with more experience since it can be difficult for beginners. It can require special equipment like a compressor.
It is definitely a more advanced technique than canned spray paints that you can use for effectively painting your parts.
If you’re a beginner, I highly recommend the Master Airbrush G233 Pro on Amazon that falls within the budget-friendly range and packs top quality on a consistent basis.
It comes with 3 nozzle sets (0.2, 0.3 & 0.5 mm needles) for extra detailed sprays and consists of a 1/3 oz gravity fluid cup. The G233 is loaded with features not found on other airbrushes that cost twice as much.
There is a quick disconnect coupler and plug that includes an in-built valve for controlling airflow. In addition, it also has a cutaway handle that makes it easy to flush and clear air passages.
One person who frequently uses this airbrush for painting their 3D printed parts says that once you get the hang of this device, it’s only smooth sailing with easy, effortless painting.
Another customer says that they tried their luck with this airbrush as it was their first time buying one, and it turned out to be great. They needed to paint some 3D prints and were easily able to get it done on time.
Many 3D printer users are using this airbrush consistently to paint their models, all because of how precise and easy to control it really is.
At the time of writing, the Master Airbrush G233 Pro enjoys a solid reputation on Amazon with a 4.3/5.0 overall rating, and 66% of the people who bought it have left a 5-star review.
It comes for about $40 and works great for those who aren’t well-versed with painting. Customers call it the ideal airbrush for their 3D prints that makes the job a lot easier.
How to Paint PLA, ABS, PETG & Nylon 3D Prints
To paint PLA, ABS, and PETG, you first need to smooth the surface of the print by sanding and using a primer. Once done, applying light, even coats of a high-quality spray paint is the best way to paint your prints. For Nylon, dyeing is considered to be a far better option than painting.
Painting 3D prints belongs to the post-processing stage of 3D printing. Before you can paint your models and expect a professional finish, you first have to go through a bunch of post-processing steps to achieve the best results.
Let’s break the whole process down so you can have an easier time understanding the phenomenon of painting.
- Support Removal & Cleanup
- Sanding
- Priming
- Painting
Support Removal & Cleanup
The first stage of post-processing is the removal of support structures and small blemishes from your model. This can be easily done if the material can be removed by hand, but you might require a tool like flush cutters or a knife in other cases.
Support removal should be done with great care and detail because tips of the support structures can often leave undesirable marks on the surface of your print.
Most people use something like the X-Acto Precision Knife on Amazon for making fine cuts with ease and agility. This is a very affordable product that costs just about $5 and works like a charm for 3D prints.
If you’ve removed your supports carefully, but there are still some unsightly marks on your print, don’t worry because this is where the next step of post-processing comes in.
Sanding
Sanding is the simple process of smoothing your 3D printed parts with the help of a sandpaper. In the beginning, you want to use a low-grit sandpaper, such as 60-200 grit, and work your way up to higher grit sandpapers.
This is because the higher the grit number, the finer your sandpaper will be. You can initially use 60-200 grit sandpaper to remove any support marks and then proceed with finer sandpapers to smooth the entire model as per your liking.
You can go with the Austor 102 Pcs Wet & Dry Sandpaper Assortment (60-3,000 Grit) from Amazon.
It’s advised to sand the model in circular motions and be gentle overall. When you move up to higher grit sandpaper, like 400 or 600 grits, you can choose to also wet sand the model for a smoother and finer finish.
After sanding your model, make sure that there’s no dust on it before moving on to priming and painting. You can use a brush and some water to wipe your model clean and then use paper towels afterward to dry it.
When your model is all dry, the next step is to either hang it somewhere dust-free and well-ventilated using a cord or drill a hole into a hidden spot of the model and mount it on a dowel, so you could prime and paint it with ease.
Priming
Now that we’ve smoothed the surface of the model and it’s ready for its first coat of primer, it’s time to grab a high-quality primer like the Rust-Oleum Painter’s Touch 2X Primer on Amazon and get to spraying your model.
For priming, it’s recommended to hold your model 8-12 inches away from the spray of the primer.
In addition, you want to prime your part quickly in rapid strokes and avoid spraying at one area for too long, since this can cause the primer to accumulate and start dripping, which is something you definitely don’t want.
You also want to rotate the part while you’re spraying the primer, so the coat is spread out evenly throughout. Keep in mind to make light coats because applying thick coats can hide the fine details of your model.
When you’re done with the first coat, let the model dry for 30-40 minutes or according to the instructions of your primer. When it has dried, inspect your model to see if any more sanding is required. It’s common for primers to leave rough textures on your model.
If you see that you have to sand, use a higher grit sandpaper like 600-grit so you can smooth out the sharper details, and be sure to clean off the dust after sanding before moving on.
Once done, it’s time to apply another coat of primer to your model using the same technique as the first coat. You want to make your sprays are quick and swift and that you’re rotating the part while priming it.
Usually, two coats of the primer are enough for a clean surface finish, but you can add more layers if you want. When you’re all finished with priming, it’s time to paint your model.
Painting
To paint your model, you’ll have to use a plastic-compatible spray paint that works as intended and doesn’t create thick layers on your part’s surface.
For this purpose, it’s wise to use any of the spray paints that were talked about earlier since all of them are highly admired by the 3D printing community and work great.
Begin by shaking your can of spray paint for as long as the manufacturer recommends. This will mix up the paint inside, which will allow your parts to get a better finish
Once done, begin spray-painting your model with quick strokes while your model is rotating. Make sure to keep the coats thin.
It’s a good idea to paint at least 2-3 coats, so the surface finish looks as good as possible. Keep in mind that you need to wait 10-20 minutes between each coating of paint for the best results.
After you’ve applied the final coat, wait for your model to dry and reap the benefits of your hard work.
Post-processing can get very confusing at times, so it’ll be very helpful to watch an informative tutorial video on this topic. The following is a great visual guide on painting your 3D printed objects.
While Nylon can also be painted with spray paints and acrylics, we can use its hygroscopic nature to our advantage and dye it instead, which is a much easier method of making your Nylon prints impressively colorful.
Nylon tends to absorb moisture more readily than most other filaments. Therefore, dyes can be applied easily to it and bring you amazing results. You can also paint PETG prints this way, as many enthusiasts have said.
However, it’s recommended to use specific dyes made for synthetic fiber like Nylon, such as the Rit All-Purpose Liquid Dye on Amazon that’s specially formulated for polyester fabrics.
This product has more than 34,000 ratings on the marketplace with a 4.5/5.0 overall rating at the time of writing. It costs somewhere about $7 and packs great value for your money, so definitely one of the best choices to go with for dyeing Nylon.
The method of dyeing Nylon is pretty straightforward. You can watch the highly descriptive video given below by MatterHackers on this topic and also check out my ultimate guide on printing Nylon for a step-by-step tutorial.
Can You Paint 3D Prints Without Primer?
Yes, you can paint 3D prints without a primer, but the paint usually won’t adhere properly to the surface of the model. A primer is used so the paint can easily stick to your 3D prints rather than coming off easily afterward. I’d recommend that you either use a primer then paint your model, or use a 2-in-1 primer.
ABS and TPU are known to be quite challenging to paint without using a primer due to the surface properties.
By researching around in forums, I’ve found people saying that if you use acrylic paints for painting your 3D prints, there’s a good chance that you won’t need to prepare the surface with a primer beforehand.
You can probably get away without using a primer for painting 3D prints but bear in mind that the best results usually follow when you prime your models.
That is because primers fill up your print lines, and prevent the paint from settling in them as the paint has a tendency of dripping down to the lowest point of the surface of the part before it hardens.
This is why it’s pretty important to prime your models first before painting to achieve a high-quality look.
That said, I’ve come across a YouTube video by Paul’s Garage that goes over a unique method of painting 3D printed objects without a primer.
This is done using oil-based pens that do not warrant sanding or priming prior to painting. This is a relatively new way of making your 3D prints colorful and full of life.
You can get the Oil-Based Markers by Sharpie on Amazon for somewhere around $15. This product is currently decorated with the “Amazon’s Choice” label and also has an admirable 4.6/5.0 overall rating.
People who picked up this highly rated product say that the markers have a quick drying time and a medium point that conceals visible layer lines.
The markers are also made resistant to fading, smearing, and water – making the product the perfect choice for long-term paint projects.
Many people have said that these markers have proved to be excellent for custom paint jobs on their 3D prints. Plus, since there’s no added hassle of post-processing the prints now, you can quickly finish your models.
Can You Use Acrylic Paint on 3D Printed Objects?
Yes, you can successfully use acrylic paints on 3D printed objects for a great surface finish. They are cheap and can be applied to models easily, although there’s a bit more effort involved as compared to regular spray paints.
I’ve mentioned earlier that spray paints are best for beginners, but using acrylic paints has its own set of benefits as well. For instance, acrylic paints dry faster and can be cleaned with water.
However, it can get hard to get a perfectly even coat of paint with acrylic paints. Still, if you’re very new to the field of 3D printing and you’d like to better your post-processing, acrylic paints are actually a great way to start.
You can find high-quality acrylic paints near where you live in local stores or online. The Apple Barrel PROMOABI Acrylic Craft Paint Set (Amazon) is a top-rated product that’s priced affordably and includes 18 bottles, with each of them being 2 oz in quantity.
At the time of writing, the Apple Barrel Acrylic Craft Paint Set has more than 28,000 ratings on Amazon and an awesome 4.8/5.0 overall rating. Moreover, 86% of customers have left a 5-star review at time of writing.
People who bought this acrylic paint set for painting 3D printed parts say that the colors look fantastic and the adhesion of the paint is just right.
One user has said that they didn’t even feel the need to sand or prime the model before painting.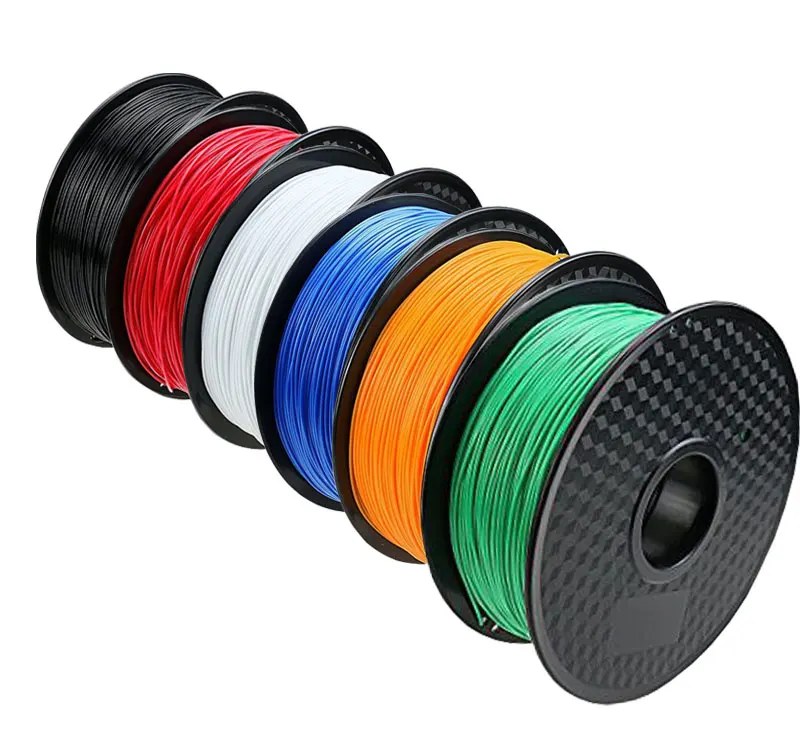 They jumped right in with these paints and a few extra coats got the job done perfectly.
Another user who mentions their zero experience with painting says that this acrylic paint set is very easy to use, and the colors have a lot of variety to them.
It’s recommended that you apply acrylic paints to your model after priming. One person mentions that after post-processing their part and then painting the model, they were able to get rid of the print lines and create a high-quality part.
It’s worth watching the following video to get an idea of how to print 3D prints with acrylics.
Best Primer for SLA Resin Prints
The best primer for SLA resin prints is the Tamiya Surface Primer that’s priced competitively and is simply unmatched for preparing high-quality models and SLA prints. When sprayed correctly, you may not even have to do extra sanding because the quality is great.
You can buy the Tamiya Surface Primer easily on Amazon. It is currently labeled as the “Amazon’s Choice” and boasts a 4.7/5.0 overall rating. In addition, 84% of the people who bought it have left a 5-star review for this product at time of writing.
One customer in their review has said that this Tamiya primer goes evenly on models and is very easy to apply. It makes sure that the follow-up paint will stick nicely to your model thereby producing a terrific finish.
It’s recommended to use the primer and paint from the same brand for the best results. Thousands of people have chosen Tamiya as their choice and they have not been disappointed.
Luckily, Amazon has a whole host of plastic-compatible Tamiya paints, so you should have no trouble finding one for your SLA resin prints.
You can see how 3D Printed Props uses a Tamiya surface primer to create a stunning model in the video below.
Painting advice for 3D models (PLA, ABS, PETG, NYLON)
3DPrintStory Reviews Recommendations for painting 3D models (PLA, ABS, PETG, NYLON)
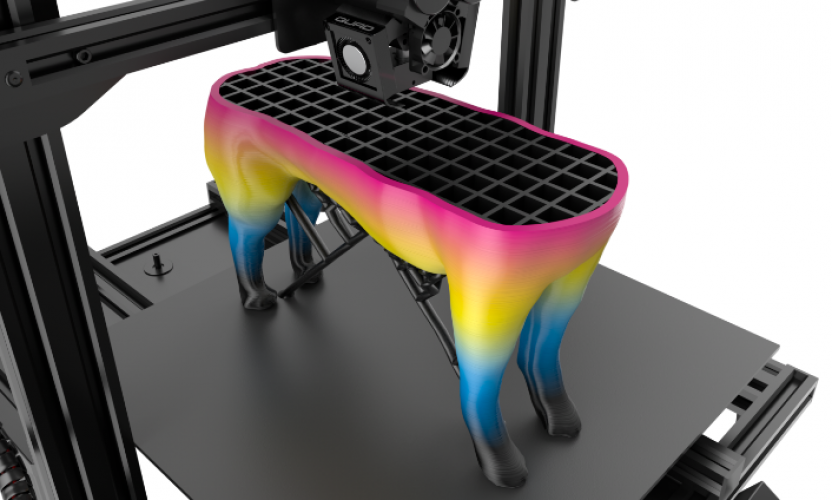
Despite multi-material extruders and a stunning variety of 3D printable plastic colors, you'll still want to paint some of your 3D models sooner or later. The most common reason is to improve the external 3D model, especially if you are printing on an FDM 3D printer where the model is built up by layering material over time. It is FDM 3D printers that form a model with feature lines along the Z axis.
When finishing a 3D model, small cavities between layers are sanded, filled, or both. The result is a smoother surface. Painting can also help protect the model from the environment.
This article is divided into two parts: the first will introduce you to the different techniques for painting a 3D model, and the second will (hopefully) answer all your little questions about painting techniques and how best to do it. Read on to find out how to enhance your 3D models with paint!
Primer is paint's best friend
Priming a printed model improves ink adhesion. With any painting method (other than nylon dyeing), using a primer is a good idea. Spray primer is said to be the easiest way to get good results. The process for using the primer is very simple:
- Clean and sand your 3D model.
- Apply the primer in thin, even coats.
- Sand after the first and last coats until the surface is smooth.
- Let each coat dry according to the instructions supplied with the primer.
Method 1: Paint with a brush
Best for: PLA, ABS, PETG plastics.
If you paint a 3D printed model with a brush, you will definitely achieve a unique "handmade" effect.
Try a few brushes first because it's easier to get good results with a comfortable brush. As a rule, it is enough to use only 1 or 2 different flat brushes.
Brush
- Choose a quality brush that is hard enough to handle the viscosity of the paint you are working on.
- Experiment with different bristle types and handle shapes to find the one that works for you.
- Stop painting to clean the brush as soon as the paint starts to dry. Naturally, the brush must be cleaned after each use. Do not leave drying paint on the brush bristles.
- The brush must be stored on the handle after cleaning and not on the bristles.
Paint
When it comes to brush painting, you're better off using acrylic paints.
Painting process
- Clean and sand your 3D printed model.
- Apply the paint in thin, even coats.
- Let the individual layers dry.
Method 2: Spray painting
Best for: PLA, ABS, PETG plastics.
If you want to paint a 3D printed model uniformly using one color, then using an aerosol will give the best result.
Spray can
Some brands offer nozzles with different specifications.
Shake can according to manufacturer's recommendations before use. Allows the paint to come out more evenly.
Keep the nozzle clean. This is usually achieved by spraying the inverted can slightly at the end of each session.
Keep can away from open flame and store in a cool place. Don't forget that this is a high pressure container!
Paint
When looking for spray paint, you will find that there are many varieties. If you want to use a specific shade, please read the RAL, CMYK and RGB values on the can carefully.
Painting process
- Clean and sand your 3D printed model.
- Start spraying by aiming the jet a little beyond the edge of the object you want to paint.
- Apply the paint by spraying on the surface you want to paint in slow, even strokes.
- Stop spraying by directing the jet a little beyond the object you want to paint.
- Let the paint dry.
Method 3 Liquid Color (nylon only)
Best for: NYLON plastics.
Instead of trying to get paint to adhere to the surface of your 3D printed nylon model, we recommend using liquid dye instead. Note that this will not work with other materials. Although PLA is hygroscopic and absorbs some water from the environment, it cannot be dyed by absorbing dye. ABS and PETG are also not suitable for this technique.
In order for the ink to give a good pronounced color after absorption, it is better to use a translucent or white nylon material when 3D printing. Darker nylon fibers can also be dyed, but the color will be much less pronounced.
Colorant
There are many brands of colorant to choose from, but MatterHackers recommends Rit DyeMore for example. But in general, if the dye is intended for synthetic fabric, then everything will be in order.
Staining process
Since nylon is very hygroscopic, it absorbs water even outdoors. This is why you should always dry your nylon material before 3D printing. We recommend painting the finished model, not unprinted.
How to use
Read the manufacturer's instructions for your colorant. In short, using a dye is a pretty simple method:
- Clean up your 3D model. When sanding, remember that painting will not cover scratches and marks on the surface of your model. Everything will be visible even after staining.
- Mix the dye with water and heat in a saucepan.
- Use a thermometer to monitor the dye temperature. Follow the manufacturer's instructions, but keep the temperature below the thermal deflection temperature of the filaments.

- Attach the weight to the 3D print and dip it into the paint pot.
- After coloring, rinse well in a bath of cool water.
- To make sure you get the expected color, it's worth doing a few test coats.
How to tell if a paint will set with a 3D model
Probably the most important factor in causing the paint or liquid of your choice to stick to a solid surface is the difference in surface energy between the liquid and the solid. The one with the most surface tension always wins (surface tension has its own unit called dynamos, or dynamos per square centimeter).
The general rule is that the surface tension of the paint must be at least 10 units lower than the solid material for good adhesion. This means that we have a liquid with a high wetting ability on a solid, and we need wetting.
To get an idea of how well the surface to be painted is wetted, look at the shape of the drop of liquid on the solid surface:
- Apply a drop of paint or liquid to the surface of the 3D model you want to process.
- If the liquid forms a ball, it has too much surface tension to effectively wet the object, and the solid cannot "pull" the liquid onto itself.
- If the liquid spreads over the surface, forming something like a lens, wetting is better.
Is it possible to paint a 3D model from any material?
Painting 3D models from PLA and ABS plastics is a fairly simple task.
PETG can have paint durability issues, but the same techniques apply as for PLA and ABS. But if you really need a rich, vibrant color, then it's best to print your 3D PETG model in the desired color and leave it as it is.
When it comes to nylon, which is used for 3D printing, we must remember that the paint does not set well. In general, it is possible to paint with acrylics and nylons, but this will require some heat treatment to maximize the surface tension and allow the paint to wet. Often this is done with an open flame or plasma... In general, this does not look easy at home, so it is better to use dyes.
Planning before 3D printing
In order to facilitate the process of finishing and painting, before 3D printing your model, we recommend that you consider the following:
- Lower 3D printing resolution saves printing time, but increases processing time.
- Consider the geometry of your model. Your tools should reach where you want to sand or paint.
- Do the smallest details need sanding, priming or both? If so, can they handle it without breaking?
- If dimensional accuracy is important for some parts of your 3D model, you may need to take this into account when modeling. Add material to be sanded to size, or reduce size to make room for primer and paint.
- Primer and paint add thickness and can completely hide the fine details of your model.
- Sanding removes material and makes your 3D model less durable.
Items to improve paint adhesion
And finally, a few simple steps to improve paint adhesion:
- When working with a 3D printed model, wear clean gloves to protect the skin from chemicals and the surface of the model from sebum.
- Remove dirt before sanding, you don't want dirt to get into your model. Often, isopropyl alcohol (rubbing alcohol) on a soft, lint-free cloth works well.
- Use a regular vacuum cleaner with a soft and clean brush to remove sanding particles.
- Sand off any roughness added during the primer.
- Always test chemicals such as paint, cleaning solvents, sanding, or other materials and finishes before moving on to the final model you want to refine.
painting 3d models, which one is better to paint
How to Paint ABS, PETG, PLA and Flex Figures
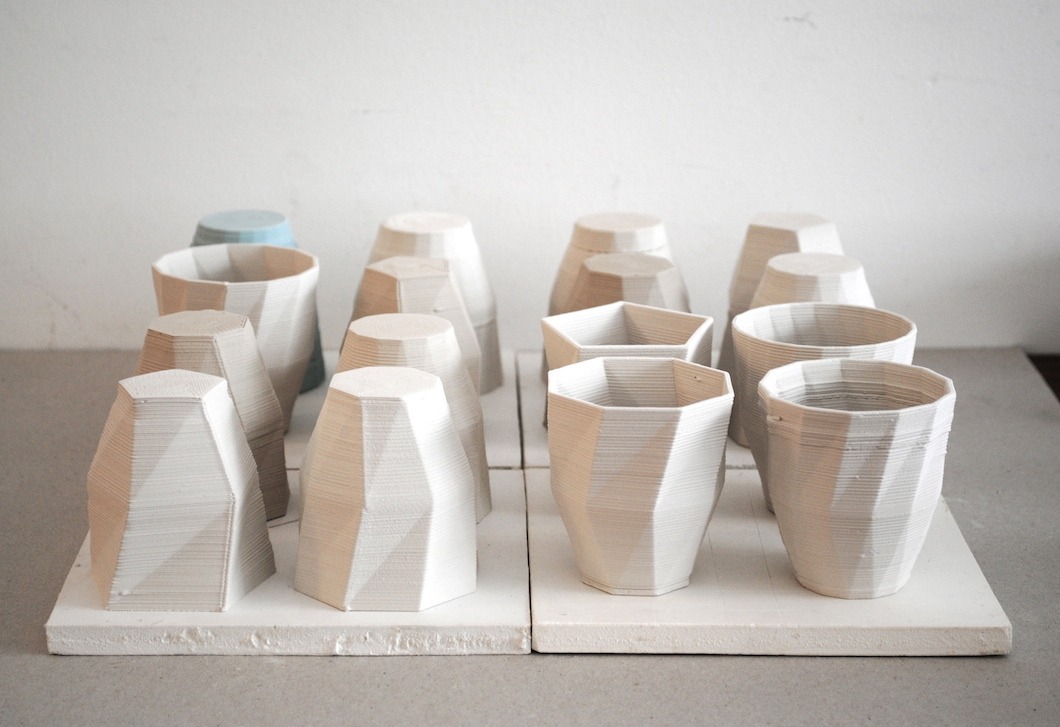
Painting is the final step in working with a 3D printed model. With seeming simplicity, coloring plastic figures can be difficult. So that the end result does not disappoint, you need to know how to prepare the surface for applying paint, what materials to choose for each type of plastic.
Painting 3D models
3D-printed parts are painted for two purposes:
- smooth the surface, removing visible boundaries between layers and small irregularities;
- complete the model.

Depending on the type of material, different processing and coloring methods are used.
How to dye PLA, ABS, FLEX and PETG plastic: which dye is best?
The chemical composition of thermoplastic polymers determines the choice of coating materials (LKM):
- PLA is resistant to most solvents and prints have a smooth and hard surface that is difficult to machine. The adhesion of paint to plastic is weak. The best result is obtained using acrylic pigments and epoxy resin based formulations. To increase the adhesion of paintwork materials to the model, PVA glue is added to the coloring composition. Cellulose dyes performed well.
- ABS is a plastic that reacts with acetone and similar solvents. For toning, you can not use paint based on them. Epoxy and acrylic dyes adhere well to the surface, effectively hide cracks and layer boundaries.
- Flexible colorants are recommended for FLEX products: suspension in water, acrylic copolymer and mixtures thereof.
 These coatings qualitatively mask small irregularities and do not crack.
 - PETG only reacts with dichloromethane, so you can cover products made of this plastic with any paints, including those based on various solvents. Acrylic is recommended, since nitro enamels and alkyd pigments have a pungent odor that does not fade for a long time. The adhesion of acrylic compounds to the surface of the model is worse than other dyes. To increase the durability of the painting, it is allowed to spray a layer of varnish on top.
Automotive spray, paint cans for brushing or airbrushing are suitable for work. Polyacrylate water-soluble enamel is considered universal, suitable for processing almost any type of filament. On the label you need to find instructions: “for plastic” or “for plastic”.
Important! Since the surface must be primed before painting, the primer is chosen in the same way as the paint, so that its base solvents do not spoil the model.
It must be remembered that nitro enamels, paintwork materials and alkyd-based primers are not suitable for ABS.
How to paint plastic: a step-by-step guide
The result of painting work depends to a large extent on how carefully the surface of the part has been processed. Often the preparatory stage requires more labor and time than the process of applying paint.
Preparing the plastic before painting
Careful inspection of the model will reveal printing flaws - deep gouges and cracks that cannot be removed during the sanding and priming process. Such defects are eliminated with epoxy resin. Small dots and visible boundaries of the layers will be hidden during processing with abrasive materials and filled with soil.
- Sanding. It is carried out with sandpaper or an abrasive sponge. For roughing, material with a grain size of P180 is taken, fine-tuning is performed with P400 sandpaper. Using a finer abrasive is impractical - a primer will not stick to a glossy surface.
 In the process of grinding, small errors made during printing are removed, the surface is matted for better adhesion with paintwork materials.
 - For sanding ABS and PETG, choose a waterproof abrasive and sand with water. With intense movements, the surface of the part heats up, and the fluidity of the plastic, especially PLA, increases. You need to be patient and work slowly.
Important! Even if the part is treated with a solvent to smooth out defects, it must be sanded to remove the gloss.
- Cleaning and degreasing. The model is washed in soapy water and dried. Soap surfactants work as degreasers. It is recommended to additionally treat with an antistatic agent so that the electrified surface does not attract dust.
Primer
Primer is a type of paint that forms a uniform surface and increases its adhesive properties. Available in aerosol cans and brush containers.
- The primer is applied in two or three layers with a mandatory delay for the drying of the layers indicated in the instructions for the composition.
- Re-sanding. Sanding a primed part is needed to maximize the surface quality. For grinding, it is recommended to take sandpaper with a grit of P600 or higher. Since the adhesion of the paint to the ground is quite high, you can not be afraid that the pigment will not grab the glossy surface.
Important! The priming and polishing cycle can be repeated if the preparation result is not completely satisfactory.
- Re-cleaning. The model is washed again with soap to remove sanding dust and degrease. Soap solution is best prepared from dishwashing detergent.
When working with an aerosol, the composition is sprayed in a circular motion from a distance of about 20 cm in a thin layer to prevent streaks.
What do you need for painting?
- Workspace organization. A place for applying primer and paint must be prepared - to create an impromptu box that will protect interior items from flying pigment particles.
- Materials. Paints to choose from: aerosol, in jars. Varnish.
- Tools. Brushes - art or manicure, airbrush, abrasive materials for grinding.
Reference. To get the handmade effect, you need to use brushes. The airbrush is a tool for professionals, it is quite difficult to work with it.
Painting plastic
In the process of painting, it is important to follow the main rule - to apply the pigment as thinly as possible. It is better to make several translucent layers than one thick one. This will help to avoid drips, which can be difficult to get rid of.
The main tone is formed with spray paint, the details are highlighted with thin brushes. During spraying, the can is kept at a distance of 10-30 cm: the distance from the surface to be painted affects the density of the layer.
Warning ! The temperature in the room must be within the limits specified in the recommendations for the use of coatings.
During drying, the product must be protected from dust. Until the final polymerization of the paint, the surface must be protected from mechanical influences and high humidity.
Washing
Washing technique is used to emphasize the relief, highlight recesses and protruding fragments, create shadows. It is carried out using liquid paint: the pigment is diluted in a ratio of 1: 1 with a solvent, for acrylic paint it is water. The technology consists in the abundant application of a liquid wash to an already painted model, the tone of which is much darker than the main one.
The paint fills all the depressions and stays in them. So visually emphasize wrinkles, joints between bricks, bolt heads and other small details. After treatment with a wash, the model looks most natural. For the best spreading of paint, the figure is pre-coated with a glossy varnish.
Finishing
Varnishing is the final stage of painting. Transparent varnish will give completeness to the appearance, protect the paint, increase its durability. To create a transparent layer, different varnishes are offered - matte and glossy. Not every model needs a glossy finish. To avoid excessive “toylike”, it is better to use a matte varnish for the finishing coat, for example, the walls of buildings, clothing items, animal figures.
Help. Lacquer is selected according to the composition identical to the paint. For acrylic pigments, water-dispersion acrylic varnish is suitable. Sold in cans and bottles.
Plastic coloring mistakes and how to avoid them
Coloring defects are the result of banal miscalculations:
- Crater-like spots appear on the model. Reason: traces of fat remained on the surface. Careful degreasing of the figurine is necessary before painting.
- Glossy areas interspersed with matte areas. The primer was applied unevenly, matte areas occur where the primer layer is thinnest and the porous surface absorbs the pigment. Sand the part again and repeat the priming process.
- Blisters or wrinkles appear on the surface. This is how the effect of the reaction of incompatible paints is manifested. You will have to remove all the paint, sand the model and repeat the entire processing cycle from priming to painting.
Attention! The entire palette of paint and varnish materials - from primer and paints to finish varnish - is selected according to the base solvent.
- Paint streaks on vertical surfaces, bubbles and pebbles on horizontal surfaces. The defect appears when applying too thick a layer of pigment or spraying an aerosol from too close a distance. Painting vertical surfaces requires special attention: the thinner the layer, the lower the risk of paint running off.
By following these simple recommendations, you can avoid mistakes when painting models:
- do not mix different types of coatings;
- paint should be applied thinly;
- you must follow the paint manufacturer's instructions: maintain the desired temperature, the drying time of the layers;
- surface must be clean and dry.