Best cheap 3d resin printer
Elegoo Saturn 3D Printer Review: Large Volume, High Quality, Great Value
Tom's Hardware Verdict
The Elegoo Saturn impressed us with its high-quality output, impressive attention to detail with regards to machine design, and large build volume.
Pros
- +
+ Native integration with ChituBox slicer
- +
+ Exceptionally large build-volume-to-price ratio
- +
+ Rigid dual-Z linear rail system
- +
+ Leveling process is simple
Today's best Elegoo Saturn deals
$307.78
View
$415.99
$379.99
View
Reduced Price
The larger counterpart to the Elegoo Mars series of printers, the Elegoo Saturn is a large-volume resin MSLA 3D printer that has found a way to offer increased build volume without sacrificing part quality. By increasing both the size and the resolution of the masking Mono LCD, the Elegoo Saturn is able to offer the same XY resolution of the Mars 2 Pro while increasing the total build volume.
One of the best 3D printers, the Saturn impressed me with how easy it was to set up and use but the scarce availability of the typically $500 printer may be a source of frustration when searching for one to buy.
Elegoo Saturn Specifications
| Machine Footprint | 11.02" x 9.44" x 17.55" (28cm x 24cm x 44.6cm) |
| Build Volume | 7.55" x 4.72" x 7.87" (192mm x 120mm x 200mm) |
| Resin | DLP Photopolymer Resin |
| UV Light | 405nm UV LED Matrix |
| Masking LCD Resolution | 3840 x 2400 |
| Masking LCD Size | 8.9-inch |
| Interface | 3.5-inch LCD Touchscreen |
| XY Axis Resolution | .05mm |
Included in the Box of Elegoo Saturn
(Image credit: Tom's Hardware)The Elegoo Saturn ships in a well-packed box and includes all of the accessories you need to start printing as soon as the printer is out of the box. Included in the accessories box is a metal scraper (for removing parts from the build platform), a plastic scraper (for removing parts from the FEP sheet and stirring the resin), some paper funnels with a wire mesh (for filtering resin), wire cutters (for removing support material), latex gloves, and a healthy number of spare bolts, Allen keys, and other easy-to-lose parts. The included USB stick comes pre-loaded with a test print, the Chitubox slicer app, a digital copy of the user manual, and a few files from the 3D model repository site MyMiniFactory.
Elegoo shipped this Saturn with a ‘tomshardware.com’ sticker applied to the UV-resistant lid, which was a nice touch for a review unit. As far as I can tell, this is the only difference between this unit and a typical retail unit, so my experience with this printer should be similar to yours if you purchase it directly from Elegoo.
(Image credit: Tom's Hardware)The Saturn is a typical resin MSLA 3D printer which utilizes a vat of resin, a masking LCD, a UV light source, and a single axis of movement. It took me under five minutes to assemble this printer, and most of that time was removing foam and packaging from the box. The printer doesn’t require any mechanical or electrical assembly, and only needs to be calibrated before printing. The calibration process is almost effortless (more on that later), and the out-of-the-box experience felt quick and easy.
Image 1 of 2
(Image credit: Tom's Hardware)(Image credit: Tom's Hardware)The Saturn uses an 8.9-inch masking LCD with a resolution of 3840 x 2400, which gives it an effective XY resolution of .05mm. The masking LCD ships with a pair of protective stickers on it during shipping, and I had no problem removing them before printing. The black protective tape around the masking LCD needs to be left on the machine, and the manual makes sure to mention this first so a new user doesn’t accidentally remove it while removing the rest of the stickers.
Image 1 of 2
(Image credit: Tom's Hardware)(Image credit: Tom's Hardware)The resin vat on the Saturn uses four bolts that protrude from the bottom as locating posts which makes locking the vat into place a fast and repeatable process. One of the biggest problems I have when cleaning resin vats is that they typically sit with the delicate FEP film flush against the surface they are laid down on, so even a small bump in a table can possibly dent or deform them. The four posts on the corners of the Saturn’s vat keep the FEP film slightly elevated during cleaning, which is a small feature but a welcome change in design.
The resin vat also has a max fill line printed right on it which takes away the stress from potentially over-filling and spilling resin. This feature, along with the spout that is molded into the vat, indicates that Elegoo has put some thought into the needs of users who are frequently changing vats or draining and replacing resin.
Image 1 of 2
(Image credit: Tom's Hardware)(Image credit: Tom's Hardware)Unlike most resin MSLA 3D printers which use a single linear rail for the Z axis, the Saturn uses a threaded leadscrew and a pair of linear rails for added stability. The Saturn features a larger build volume than most MSLA 3D printers, which means more weight is suspended from the cantilevered build platform. Between these two rails and the solid machined bracket for the build platform, the Saturn is able to print without bending the build platform bracket during lift moves, and I was impressed with the rigidity of the system.
The Saturn uses a USB stick for transferring files to the printer, as well as an Ethernet connection for adding the machine to a network. If you’re interested in using the Saturn as part of a high volume print farm, the ability to network the machine means you can transfer files without the need for an external drive. The two fans on the back of the unit provide airflow for the controller board and UV LED light source, but don’t provide air filtration like the fan in the Elegoo Mars 2 Pro. Despite the lack of air filtration, the Saturn didn’t seem to emit an odor any worse than the Mars 2 Pro during printing, but if you’re concerned about air quality you’ll want to take this into account.
Leveling the Build Platform on Elegoo Saturn
(Image credit: Tom's Hardware)When printing on an MSLA resin 3D printer, you want the build platform to be perfectly level with the FEP film so the resin cures evenly across each layer. This leveling process can be a challenge for beginners and it can be frustrating to have failed prints due to poor bed leveling. Elegoo has addressed this problem by using a unique leveling process that is fast, simple, and easy to complete. The Elegoo Saturn uses a build platform held rigid by two bolts and includes simple step-by-step instructions for the leveling process.
Image 1 of 2
(Image credit: Tom's Hardware)(Image credit: Tom's Hardware)After loosening the two bolts on the build platform and placing the included piece of leveling paper over the masking LCD, I dropped the Z axis to the home position and watched as the build platform self-leveled and sat perfectly flush. Once the axis had come to a rest, I simply tightened the two screws in the order indicated and lifted the build platform up. Compared to the leveling process on a printer like the Longer Orange 10 that uses four screws that need to be tightened in a star pattern and tend to shift during tightening, the Saturn feels almost effortless to set up.
Printing Safety with Elegoo Saturn
(Image credit: Tom's Hardware)The Elegoo Saturn uses 405nm UV resin, a material that you need to handle safely when in an uncured state to avoid injury. The resin can be harmful when making contact with skin, so make sure to wear gloves when pouring, cleaning up, or handling uncured resin. I also make sure I’m wearing gloves when removing the build platform after a print, as the resin tends to pool on top of the platform and can drip off while the platform is being removed.
Make sure you use the Saturn in a well-ventilated room to minimize the danger from inhaling fumes. Any spills or uncured resin stuck to a surface should be cleaned using 99% Isopropyl Alcohol and the container for the resin should be kept closed and secured when not actively pouring material.
(Image credit: Tom's Hardware)The build platform on the Saturn is designed with a trapezoidal shape that allows uncured resin to drip off and prevents it from pooling on the top of platform during printing. Despite this shape, I noticed that resin had a tendency to collect at the very edge of the platform, and I couldn’t help but wonder if a more aggressive angle or a chamfered edge would help to allow more resin to drip back into the vat during printing. This is a relatively minor point, as the majority of resin will drip downwards during printing and cleaning the edge of the build platform doesn’t require much effort.
Printing the Included Test Prints on the Elegoo Saturn
Most 3D printers include a prepared test print as an opportunity for the manufacturer to demonstrate the strengths of their machine. Despite this relatively simple premise, I’ve found that test prints can be a source of frustration for first time users as they have a tendency to have issues that most first-time users won’t be expecting.
Image 1 of 2
(Image credit: Tom's Hardware)(Image credit: Tom's Hardware)Unfortunately, the Elegoo Saturn falls short in this category and my experience with the included test print was really the only major disappointment I had while writing this review. The Saturn includes a test print on the included USB drive called “_Rook_SATURN.ctb” that consists of two chess pieces with fine details on the interior and exterior of the model. This test print completes in a very reasonable 3 hours and 49 minutes, and I was impressed with the fine detail on the models once the print had completed. Unfortunately, this is where things took a bit of a turn.
The build platform on the Saturn has a sandblasted textured finish which helps cured resin adhere during printing and prevents parts from delaminating. When removing a part, a thin raft can be bent (as seen in the picture above), which allows the part to easily detach from the build platform without too much trouble. This is a delicate balance; too thin and the part won’t adhere to the plate, too thick and the part can’t be easily removed. I had no trouble with any of the parts I sliced in Chitubox, but as you’ll see below, the included test print was significantly more difficult to remove.
Once printed, the detail on the rooks was impressive, but the solid base of the model printed directly on to the build plate didn’t present an intuitive method of removal. After using the included metal scraper and attempting to gently pry the parts off, I wondered if this was a common problem or if the Elegoo Water Washable Ceramic Grey resin I was using simply wasn’t compatible with the settings provided. A quick Google search for “Elegoo Saturn Test Part Stuck To Plate” shows that this is not an uncommon problem, with some users resorting to using a rubber mallet to remove the parts from the build plate.
(Image credit: Tom's Hardware)I was eventually able to remove the prints from the bed, but it required significantly more effort than I was comfortable with and resulted in both parts being chipped along the bottom layer. This could have been avoided with a demo model that was suspended from a support structure or simply used a sacrificial raft during printing to prevent such a wide and thick model being printed directly on the build plate. It’s worth noting this was the only time I experienced this issue during this review. The rest of the parts I prepared using Chitubox for printing were easily removed and didn’t require excessive force to remove from the plate.
Preparing Files for Printing with Chitubox
(Image credit: Chitubox)The Elegoo Saturn uses Chitubox for slicing, preparing, and exporting files for 3D printing. Chitubox is a feature-rich program which reduces the need for secondary programs to generate supports, hollow models, or make other changes that would typically require a longer workflow. The general process for preparing a 3D model for resin 3D printing goes like this:
- Import 3D model
- Angle model for printing (avoiding wide per-layer cross-sections)
- Hollow model
- 4Add drain holes
- Generate support material
- Slicer
- Delete islands
- Export printable file
Chitubox makes this easy, as each step can be accomplished within the software without the need to export the file to various third-party softwares. Chitubox also includes a built-in profile for the Elegoo Saturn which gives good quality results without any tweaking or modifications. I’ve been a fan of Chitubox since I started using it, and the ease-of-use and native support for the Saturn makes it a logical choice.
The profile for the Saturn that is included with Chitubox is what I would consider a good starting point for base settings. The Z resolution of .05mm is high enough to give a good quality print, but not so high as to cause an excessively long print time. The per-layer cure time of 2.5 seconds makes the Saturn a speedy printer when compared to machines with 9 second per-layer cure times like the Creality LD-002R.
(Image credit: Tom's Hardware)For a first test, I used the Ancient Statue model from Loot Studios and prepared it using the default settings in Chitubox without making any modifications. For resin, I used the Elegoo Water Washable Ceramic Grey , which has worked very well for me in the past on the Elegoo Mars 2 Pro. This model used about 28 grams of resin and printed out in just under 4 hours, which seems in line with what I would expect from a Mono LCD 3D printer.
Image 1 of 2
(Image credit: Tom's Hardware)(Image credit: Tom's Hardware)The Water Washable Ceramic Grey resin looked great after printing, and the support structure removal process is simplified by not requiring any isopropyl alcohol or other chemicals to remove the excess resin. A quick soak in a small tub of hot water dissolved the excess resin from the surface of the printer and also softened the support structure. After removing the support structure, I cured the model for a total of two minutes in 30 second increments to prevent it from warping.
(Image credit: Tom's Hardware)It’s worth taking a moment to reflect on the printing process so far before we really look at this model. The steps to create this model are all simple and straight-forward, and a beginner could easily follow along to calibrate the bed, fill the resin vat, and process the file for printing. The resulting print looks sharp and detailed, and even small details like the cracks in the stone of the statue resolve and don’t require any touch-up work. Putting aside the large format nature of the Elegoo Saturn, it’s easy to understand why this machine is in such demand; it’s easy to use, gives good quality results, and the native software doesn’t require tinkering or tweaking.
Print Size Comparison of the Elegoo Mars 2 Pro vs. Elegoo Saturn
Image 1 of 2
(Image credit: Tom's Hardware)(Image credit: Tom's Hardware)The Elegoo Saturn shares many design similarities with the Elegoo Mars 2 Pro, so it makes sense to compare the two 3D printers directly. The Saturn uses a higher resolution masking LCD, but the increased size of the LCD means the XY resolution (pixel size) is .05mm on both machines. This means a part printed on the Mars 2 Pro and Saturn, using the same settings, will result in two parts that should be indistinguishable from one another.
| Elegoo Mars 2 Pro | Elegoo Saturn | |
|---|---|---|
| Masking LCD Resolution | 1620 x 2560 | 3840 x 2400 |
| XY Resolution | . 05mm 05mm | .05mm |
| Build Dimensions | 5.08 x 3.15 x 6.3 inches | 7.55 x 4.72 x 7.87 inches |
| Build Volume | 100.81 cubic inches | 280.46 cubic inches |
| Printer Dimensions | 7.87 x 7.87 x 16.14 inches | 11.02 x 9.44 x 17.55 inches |
| Printer Volume | 999.66 cubic inches | 1825.70 cubic inches |
| Build / Footprint Ratio (higher is better) | 10.0% | 15.4% |
With a retail price of $500, the Saturn offers nearly 3 times the total build volume (280 cubic inches vs. 100 cubic inches) of the Mars 2 Pro, which retails for $330. If you’re interested in throughput and high-volume printing ability, the Saturn is able to produce a large batch of parts at the same resolution as Mars 2 Pro. However, if you’re looking for a higher resolution finished part and aren’t interested in a large build size, a 4K LCD printer like the Phrozen Sonic Mini 4K would be a better choice.
Image 1 of 2
(Image credit: Tom's Hardware)(Image credit: Tom's Hardware)Printing a Large Assembly on the Elegoo Saturn
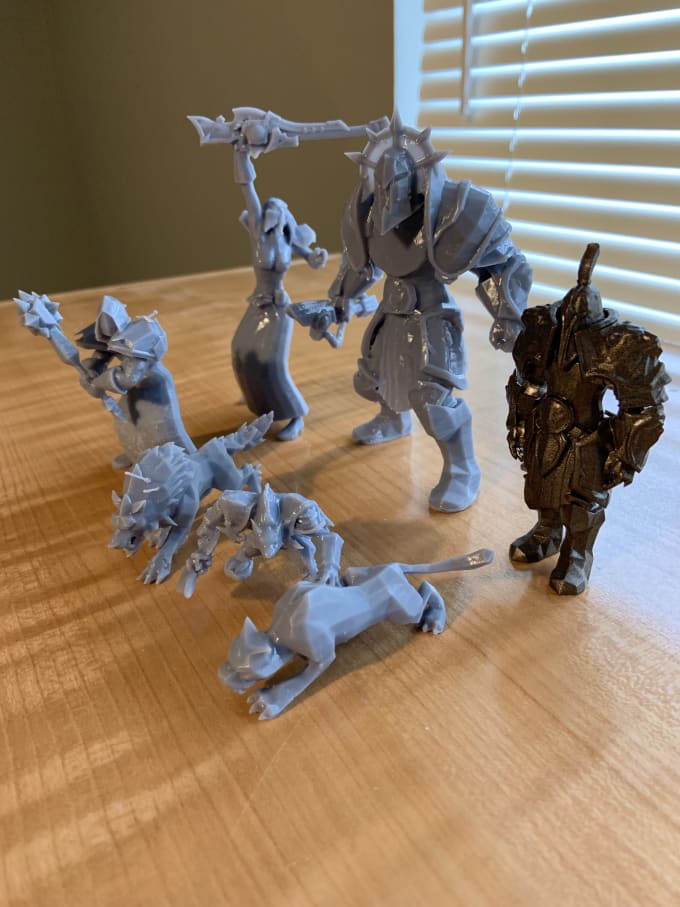
(Image credit: Tom's Hardware)The large build volume and fast per-layer print time of the Elegoo Saturn make it ideal for printing models that would ordinarily be too large or time-consuming to print on a smaller MSLA resin printer like the Longer Orange 10. To test out the ability of the Saturn to print large models in multiple pieces simultaneously, I loaded up the Olympus Rider model from Loot Studios. This model of a winged Pegasus complete with rider armed with a spear prints in six individual pieces and a single large base.
(Image credit: Chitubox)Unfortunately, the auto-placement feature in Chitubox wasn’t able to automatically place all of these parts on the build platform in order to print them in a single piece. After manually rotating the parts myself, I was able to get everything except the base of the model onto a single tray. This would be an ambitious print under the best of circumstances, as it covered a large portion of the surface area of the build platform and would create a large amount of suction when moving the platform up and down. After slicing, Chitubox generated an estimated build time of 7 hours and 10 minutes as well as a material usage of 128 ml. I wasn’t sure if the Saturn could handle a print this ambitious, but I was eager to see if this hard-to-find machine could live up to its reputation.
Image 1 of 2
(Image credit: Tom's Hardware)(Image credit: Tom's Hardware)The Saturn printed every single part on the build platform without any defects, and I was genuinely surprised and impressed with how easily the Saturn could handle a large and complex build like this. The Elegoo Water Washable resin created a support structure that was easily removed and left minimal pockmarks on the finished model.
(Image credit: Tom's Hardware)After a rinse and cure in the Elegoo Mercury Plus Cure/Wash station, I laid out the parts and assembled the model using DAP RapidFuse CA glue, a favorite of mine for making strong bonds on resin prints like this one. The final result is a finely-detailed print that measures nine inches wide and six and a half inches tall, and it is one of the largest resin MSLA prints I’ve ever made. The 3D model to 3D print process was seamless and easy, and this model earned the Saturn a permanent place on my personal list of all-time favorite 3D printers.
Image 1 of 2
(Image credit: Tom's Hardware)(Image credit: Tom's Hardware)Printing Multiple Miniatures Simultaneously on the Elegoo Saturn
(Image credit: Tom's Hardware)One of the key abilities of a large build volume resin MSLA 3D printer like the Elegoo Saturn is the ability to print multiple parts simultaneously. The Saturn is a popular printer for users interested in tabletop gaming, and the large build volume is ideal for printing out multiple miniatures in a single print. Because the print speed is dictated by the number of layers and not the number of miniatures, printing a single miniature or a full build platform full of them takes the same amount of time.
As a test of the printer’s performance, I filled the build platform with some of the enemies from the Loot Studios Ghostly Odyssey release which features a mix of detailed creatures and human 32mm miniatures.
Image 1 of 2
(Image credit: Chitubox)(Image credit: Chitubox)After importing the models into Chitubox, I manually laid them out to prevent the support structure rafts from touching to reduce the overall total surface area of the bottom cross-section. Chitubox handled the slicing of this large tray without breaking a sweat, and I was easily able to fit a mix of models and bases for a total of 12 parts printing simultaneously. Chitubox gave an estimate of 3 hours and 51 minutes, which is an attractive print speed for such a large yield of parts.
The models have a support structure already generated, so after slicing all I had to do was detect and remove the islands (small, unconnected pixels that can cause floating bits of resin) and scroll through the layer view to check for any missing geometry. This is a quick and largely-automated process made possible by the Chitubox app, which I am grateful that Elegoo has internally decided to endorse as opposed to attempting to make their own slicer app which may lack some of this functionality.
As I expected, the print was completed without incident. Because of the large number of support structures, the first hour or so of the print is just hundreds of tiny cylinders (as seen in the Chitubox preview above). Every time the build platform lifted, it sounded like a Velcro strap being removed as each of the tiny support structures delaminated from the FEP sheet with a tiny pop sound. I couldn’t decide whether the sound was reassuring or not, but in the end, I’m grateful for each pop because it meant the printer was working correctly.
(Image credit: Tom's Hardware)The support structures were easy to remove after a quick soak in hot water, and the models all felt like they had been cured enough to be solid. In particular, the swords and wings on the smaller models were easy to free from the support structure, and I wasn’t concerned with them breaking off or shattering during the cleaning.
Image 1 of 2
(Image credit: Tom's Hardware)(Image credit: Tom's Hardware)Even on these 32mm miniatures, the details were crisp and features like the individual feathers on the harpy model resolved well and could be easily distinguished. If you’ve used a printer like the Anycubic Photon Mono or the Elegoo Mars Pro, this level of resolution (.05mm) is directly comparable with what you’re used to, so the big benefit of the Saturn is being able to increase your output without sacrificing quality.
The Elegoo Saturn is about as hard to find as a PlayStation 5 right now, and it tends to sell out immediately after each restock at Amazon and the Elegoo official store. After using it for this review, it’s clear to me why the printer is in such high demand: it’s fast, relatively inexpensive, and offers a build volume ideal for printing multiple parts simultaneously. The Saturn regularly sells for over $700 on second-hand sites like eBay, so finding one may prove to be a challenge for the foreseeable future.
I asked Elegoo to comment on the relative scarcity of the Saturn, and they indicated a combination of high demand and rigorous quality control were to blame for the shortages.
These two printers are too hot sale, so they always sold out. In fact, we have arranged more products for Amazon every week, but it sold out when available. In addition, our company will test the machine before selling, so it costs some time.
Elegoo
The high-yield nature of the Saturn makes it ideal for printing multiple miniatures simultaneously, so there’s no doubt this printer will be a hit among hobbyists who are interested in printing custom miniatures. The large build volume also offers the ability to print large parts in a single print, something that smaller machines like the Creality LD-002R aren’t able to accomplish.
The overall trouble-free printing experience of the Saturn makes it appealing to beginners as well as more advanced users, but the $500 retail price (if you can even find it for that) might be a little high for a first printer. If you’re interested in a lower cost alternative, the Elegoo Mars Pro or the Anycubic Photon Mono both offer a similar printing experience at a lower price point.
(Image credit: Tom's Hardware)Andrew Sink first used a 3D printer in 2012, and has been enthusiastically involved in the 3D printing industry ever since. Having printed everything from a scan of his own brain to a peanut butter and jelly sandwich, he continues to dive ever more deeply into the endless applications of additive technology. He is always working on new experiments, designs, and reviews and sharing his results on Tom's Hardware, YouTube, and more.
Creality Halot-One Plus 3D Printer Review: 4K Resolution, Sub-$400 Price
Tom's Hardware Verdict
Offering high resolution and an above-average build volume, the Creality Halot-One Plus is an impressive machine with a set of hardware features not typically seen at this price.
Pros
- +
4K+ resolution provides sharp detail and consistent surfaces
- +
Large 5-inch LCD interface is bright, fast, and responsive
- +
Halot Box slicer software is simple and easy to use
- +
Built-in Wi-Fi connectivity and remote print monitoring
- +
Integrated air filtration unit
Cons
- -
Z endstop placement at the top of the Z axis is a strange choice
- -
Creality Cloud platform appears to host many unauthorized models
- -
Four bolt build platform leveling can be messy
The Creality Halot-One Plus is the flagship printer in the Halot line of MSLA printers, offering 4K resolution, a 7.9-inch mono LCD with a 3 second exposure time, and other high-end features in a package that retails for just under $400. The Halot-One Plus appears to have been designed for the prosumer market, with features like Wi-Fi connectivity, air filtration, and other features that don’t typically appear in printers in this price range.
During testing, this printer proved to be a logical next-step in resin 3D printing, showing how these features can be successfully implemented at a lower price point while still maintaining functionality. We had issues with the Creality Cloud platform and the lack of attribution on published models, but the printer hardware itself places this among the best resin 3D printers.
Creality Halot-One Plus Specifications
| Machine Footprint | 9.29" x 9.57" x 16.46" (23.6cm x 24.3cm x 41.8cm) |
| Build Volume | 6.77" x 4.02" x 6.30" (172mm x 102mm x 160mm) |
| Resin | MSLA Photopolymer Resin |
| UV Light | 4,500 uw/m2 Integral Light Source |
| Masking LCD Resolution | 4320 x 2560 |
| Masking LCD Size | 7.9-inch |
| XY Axis Resolution | .04mm |
| Interface | 5-inch LCD Touchscreen |
Included in the Box of Creality Halot-One Plus
(Image credit: Tom's Hardware)The Creality Halot-One Plus ships with everything you need to get started printing, including a set of Allen keys, plastic and metal scrapers to remove parts from the printer, a printed user guide, and a power cable, and some paper funnels for pouring resin back into the bottle from the vat. The printer itself is well-packed and protected, with a protective plastic covering over the UV-resistant lid.
- Creality Halot-One Plus (Blue) at Walmart for $399.99
Unlike with many other resin printers, including the Elegoo Mars 3, the Halot-One Plus does not include any consumables such as gloves, masks, or other cleaning supplies. This isn’t a large omission, but it means first time users will want to make sure they have all the proper supplies before they start printing.
One of the first features I noticed on the Creality Halot-One Plus was the large LCD screen. The 5-inch screen is bright, responsive, and feels like the type of capacitive screen you’d expect to see on a tablet or mobile phone. This screen is easy to read and use, and immediately sets the Halot-One Plus apart from similarly priced machines that use smaller screens. The Halot-One Plus also includes an onboard ARM Cortex-M4 quad-core 64 bit processor, which gives it more processing power than other similarly priced machines.
Image 1 of 2
(Image credit: Tom's Hardware)(Image credit: Tom's Hardware)The Halot-One Plus has a dark blue UV-resistant lid, something that stands out from the typical red, orange, or yellow used on similar printers. This lid is close to opaque, and I can’t easily see through it during printing. The QR code printed on the top of the lid leads to the Creality Cloud site where users can purchase models, 3D printers, consumables, as well as a social platform for sharing prints.
(Image credit: Tom's Hardware)The Halot-One Plus features an integrated 100W power supply, so there’s no need for an external power brick. The build size, printer size, and other information is printed on a sticker on the back of the printer, as well as a QR code that appears to contain information specific to the printer. The base of the Halot-One Plus is heavy and dense, and feels very sturdy despite the plastic shell.
(Image credit: Tom's Hardware)The integrated air filtration system on the Halot-One Plus is a welcome addition and worked very well throughout our testing. The resin used in the MSLA printing process can have an odor during printing, and the integrated air filtration system significantly reduces the amount of odor from the Halot-One Plus. The air intake is located directly behind the resin vat, and runs automatically throughout the duration of printing.
The Z axis on the Halot-One Plus uses a threaded rod with a captive nut for travel, and the dual linear rails allow for smooth and consistent movement. Most small format MSLA resin 3D printers use a single linear rail for travel, with dual rail systems being more common on larger machines like the Elegoo Saturn or the Anycubic Mono X. The build platform is suspended from a lightweight metal arm and doesn’t deflect, even when printing large and heavy parts.
(Image credit: Tom's Hardware)The Halot-One Plus has the Z endstop located at the top of the Z axis, an unusual design choice for an MSLA resin 3D printer. Typically, the leveling process involves dropping the platform to Z0 (the bottom of the Z axis) and ensuring the platform is planar with the LCD screen. The Halot-One Plus requires the entire platform be brought to the top of the printer to define Z0, and then lowered to the LCD screen and leveled. It’s hard to say if this is a less accurate process, but it’s definitely a more time-consuming one.
The resin vat on the Halot-One Plus is smooth and easy to clean, with printed labels that indicate 250mL, 450mL, and 650mL fill levels. The vat also has a spout molded into the front right and back left corners, which makes pouring resin out of the vat and back into the bottle a simple and mess-free process. One of the screws that secures the vat to the frame had some flashing on the molded thumbscrew, and this meant the screw couldn’t actually fit into the mating hole without being trimmed. Not a major issue, but definitely a QC issue that should have been caught before the printer was packed and left the factory.
Image 1 of 3
(Image credit: Tom's Hardware)(Image credit: Tom's Hardware)(Image credit: Tom's Hardware)The light source of the Halot-One Plus is what Creality calls the “Integral Light Source”, which is a high-powered 4,500 uw/cm2 LED array that is projected through the masking LCD via an angled mirror in the base of the printer. This light source generates a substantial amount of heat during printing, which causes the onboard fan to run continuously during printing.
The 7.9-inch masking LCD has a resolution of 4320 x 2560, a resolution that is slightly above the typical 4K resolution (4098 x 2560) used on similar resin 3D printers like the Elegoo Mars 3. This 4K resolution translates to an XY pixel size of .04mm (40 microns), which is high enough to capture fine details and texture when printing.
Image: Creality
(Image credit: Creality)Build Platform on Creality Halot-One Plus
The Creality Halot-One Plus uses a four bolt leveling system to ensure a planar relationship between the build platform and the masking LCD. Because the Z endstop is located at the very top of the printer, this process involves loosening the build platform connecting bolts, sending the built platform to the top of the printer to trigger the endstop, then reversing direction and sending the platform to the bottom of the Z axis. Once the platform is sitting flush on the masking LCD, the four bolts are tightened and the platform is leveled.
The Halot-One Plus has four upward-facing bolts that secure the build platform to the gantry arm, and these bolts tend to fill with resin during printing. This is a poor design choice, as resin tends to pool inside the bolt cap heads, in the knurling, and around the bolts, which is very difficult to clean and remove. Elegoo has solved this on their Mars 2 Pro and Mars 3 printers by using a simple captive ball joint that can be leveled with only two screws. Those platforms are easy to level and clean without additional effort.
(Image credit: Tom's Hardware)Printing Safety with Halot-One Plus
(Image credit: Tom's Hardware)The Creality Halot-One Plus uses 405nm UV resin, a material that you need to handle safely when in an uncured state to avoid injury. The resin can be harmful when making contact with skin, so make sure to wear gloves when pouring, cleaning up, or handling uncured resin. I also make sure I’m wearing gloves when removing the build platform after a print, as the resin tends to pool on top of the platform and can drip off while the platform is being removed.
Make sure you use the Halot-One Plus in a well-ventilated room to minimize the danger from inhaling fumes. Any spills or uncured resin stuck to a surface should be cleaned using 99% isopropyl alcohol and the container for the resin should be kept closed and secured when not actively pouring material.
Printing the Included Test Print on the Creality Halot-One Plus
The test print included with the Creality Halot-One Plus is one of the best demonstration prints I have ever seen. The 8 hour print is titled “Kholek Suneater”, and it fills nearly the entire build area of the Halot-One Plus from corner to corner. This model comes pre-sliced using the same settings as in Halot Box (.05mm layer height, 3 second layer exposure time, 40 second base layer exposure time, etc.), and is ready to print directly from the USB thumb drive.
Creality has apparently identified one of the common applications of resin 3D printing (tabletop gaming and miniatures) and has embraced this by including a detailed miniature model with the Halot-One Plus. My previous experience with Creality’s test prints was poor; the Creality LD-002R (a budget MSLA resin 3D printer) included a test model that took over 19 hours to print and was not particularly impressive.
Image 1 of 3
(Image credit: Tom's Hardware)(Image credit: Tom's Hardware)(Image credit: Tom's Hardware)This model has a very dense support structure, which is required to support all the various fine features including a long hammer and tail. The support structure was removed easily and left minimal marks on the printed model. Unfortunately, I broke the hammer during washing, but was able to glue it back on without much effort. The spikes on the armor, the thin tail, and the other details present on this model are sharp and in focus, and I believe that anyone who purchased this printer to make miniatures would be immediately delighted to see such a high-quality model come out of the printer without any additional preparation.
Preparing Files for Printing with Creality Halot Box
(Image credit: Creality)While resin 3D printers tend to be much more mechanically simple than filament FDM 3D printers, the software typically requires more setup work and the part preparation is a very important part of the process. Creality includes a copy of Halot Box with the Creality Halot-One Plus, which is the slicer design for the Halot series of printers.
Halot Box offers two separate menus for slicing parts: Basic Options and Advanced Options. As expected, Basic Options contains parameters like layer thickness, exposure time, build platform raise height, and more which users will likely adjust the most often. These options are pre-populated with parameters that are more focused on success as opposed to speed, with a 3-second layer exposure and a 40 second initial layers exposure. Advanced Options contains more complicated parameters, such as shrinkage compensation for X, Y, and Z axes, anti-aliasing, and other parameters.
Halot Box is a fully featured slicer and is capable of importing models, hollowing them for resin printing, adding support structures, and even more advanced features like adding text, slicing a model into pieces, and measuring between two points. These features make Halot Box just as feature-rich as ChituBox and Lychee slicer, both of which are also compatible with the Halot-One Plus.
(Image credit: Tom's Hardware)I prepared this model of a dragon using the default Halot Box settings, including a 5mm shell after hollowing, medium support settings, and default slicer settings. Sliced with a .05mm layer height and a 3 second exposure time, this print took just over 12 hours to print out using Anycubic Water Washable Aqua Grey resin. The process of importing a model, hollowing, adding drain holes, adding support, and slicing took about 5 minutes and was intuitive and easy.
Image 1 of 3
(Image credit: Tom's Hardware)(Image credit: Tom's Hardware)(Image credit: Tom's Hardware)Comparison of the Creality Halot-One Plus vs.
 Elegoo Mars 3(Image credit: Tom's Hardware)
The 4K resolution mono LCD on the Creality Halot-One Plus makes it a natural competitor to smaller resin printers like the Elegoo Mars 3, but the larger build volume and Wi-Fi capabilities help it to edge out most competition. Instead of focusing on Z height, the Halot-One Plus has a large surface area on the build platform, providing additional space for printing multiple parts.
| Creality Halot-One Plus | Elegoo Mars 3 | |
|---|---|---|
| Masking LCD Resolution | 4320 x 2560 | 4098 x 2560 |
| Masking LCD Size | 7.9 inches | 6.7 inches |
| XY Resolution | .04mm | .035mm |
| Build Dimensions | 6.77 x 4.01 x 6.29 inches | 5.64 x 3.52 x 6.89 inches |
| (172mm x 102mm x 160mm) | (143mm × 89mm × 175mm) | |
| Build Volume | 170.76 cubic inches | 136.79 cubic inches |
| Printer Dimensions | 9. 29 x 9.57 x 16.46 inches 29 x 9.57 x 16.46 inches | 8.93 x 8.93 x 17.28 inches |
| (23.6cm x 24.3cm x 41.8cm) | (22.7cm x 22.7cm x 43.85cm) | |
| Printer Volume | 1463 cubic inches | 1378 cubic inches |
| Build / Footprint Ratio | 11.70% | 9.90% |
| (higher is better) | ||
| Price | $399 | $299 |
The Halot-One Plus has a somewhat squat appearance in contrast with the taller and narrower Mars 3, and the large LCD screen on the front gives it an appearance that is closer to an appliance than a 3D printer. The build volume is somewhere between the Elegoo Mars 3 and the Elegoo Saturn, and the price also sits between the two.
(Image credit: Tom's Hardware)The Halot-One Plus is slightly larger in size than the Mars 3, but the differences in build volume and X/Y area are clear when comparing the two. In addition, the built-in air filtration system, large LCD, and dual Z axis linear rails give the Halot-One Plus a more industrial appearance. The front-facing USB port makes swapping out USB drives easy on both printers, but the power button on the Halot-One Plus is located on the back of the machine as opposed to the front-mounted power button on the Mars 3.
The build platform of the Halot-One Plus has a lightly textured surface, which gives printed parts a more complex surface to bond to during printing. Placing the platform of the Halot-One Plus and the Mars 3 side-by-side highlights the difference in build area, with the Halot-One Plus being a full inch longer in the X axis and just under half an inch wider in the Y axis. The difference in build area is complemented by an increase in pixel resolution, which makes the Halot-One Plus XY pixel size .04mm, a 5 micron difference from the .035mm resolution of the Mars 3.
(Image credit: Tom's Hardware)Printing a Large Model on Creality Halot-One Plus
(Image credit: Creality)The build platform on the Creality Halot-One Plus is large enough to fit busts from Loot Studio, so I printed the bust of Korut The Mechappilian.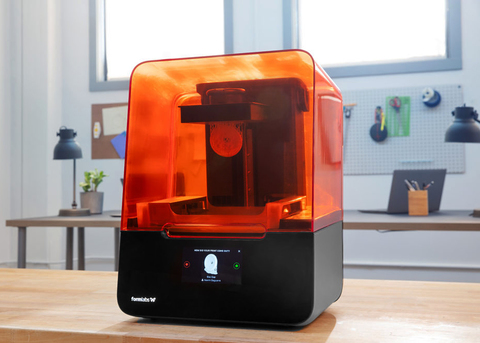 The model prints in 5 pieces: the bust, left arm, right arm, base, and minigun. I was able to fit the bust and both arms onto a single build platform, and printed the minigun and base separately. Processing these files in Halot Box was easy, and just involved dragging the models into the window, clicking “slice”, and exporting. No additional steps were needed, and I used Anycubic Grey Craftsman Resin and the default exposure settings.
The first filled build platform printed flawlessly, and the level of detail was incredible. The lizard-like texture on the model looked realistic, and the smooth armor components had a consistent and even appearance. The 3-second exposure time seemed like a perfect fit for this resin as the support material snapped off easily and without leaving major pockmarks on the model.
Image 1 of 3
(Image credit: Tom's Hardware)(Image credit: Tom's Hardware)(Image credit: Tom's Hardware)After washing and curing the model, the general surface quality was still very impressive. The smooth surfaces have an even appearance and there are virtually no layer lines present, owing to the .05mm layer height and the .04mm X/Y resolution. The nubs left by the support structure detach easily, and can be removed by simply running a pair of tweezers over them.
The final assembled bust looks more like a resin collectible than a 3D print, and the general quality was as good as any resin 3D printer under $2,500 that I have used. The joints fit together with simple peg and hole locating features, and they were a perfect friction fit. You can clearly make out the lizard skin texture on the model, and the fine detailing on the armor is easy to see without magnification.
Printing Models from Creality Cloud
(Image credit: Creality)Creality has implemented Creality Cloud into its Halot Box software, which allows users to download models directly from the internet into their slicer. This feature has come under scrutiny due to the widespread abuse enabled by the ability to mass upload models, regardless of their copyright or designer intent. YouTuber Bryan Vines made an excellent video discussing this topic, which shows how the platform was intended to be used versus the current usage.
For example, on the front page of the Creality Cloud, I saw the chainmail model by Agustin “Flowalistik” Arroyo. This model is currently available with a Creative Commons Attribution license, which means attribution is required when sharing the model or derivatives. The model on Creality Cloud has been uploaded by “user3265593031”, and features the picture from Printables as well as filenames with “flowalistik” in them, further proving they were uploaded by someone other than the creator.
(Image credit: Creality)The chainmail model was easily downloaded, sliced, and sent to the printer without any additional steps required through Halot Box. While this does make searching for and downloading models a simple process, it’s troubling to see that the original creator has no effective recourse for limiting this type of piracy. In this case, I was aware of the original creator but it would be completely understandable that most users may not, and may even think the model was being provided by Creality directly.
The Halot-One Plus is also able to download models from Creality Cloud directly from the printer interface without using Halot Box or any other slicer software. While this is a convenient feature, it is still subject to the same issues as downloading models from Creality Cloud via Halot Box. For instance, I downloaded this Minion file from the printer interface, but have no easy way to determine who the original designer was, what copyright license they used, and their intent for the printed model. In addition, the model printed completely solid and used significantly more resin than I was expecting for such a small print.
Image 1 of 3
(Image credit: Tom's Hardware)(Image credit: Tom's Hardware)(Image credit: Tom's Hardware)(Image credit: Tom's Hardware)The Creality Halot-One Plus is a sleek, smart, and well-performing printer that worked well during our testing and left me impressed with the quality of prints made with minimal to no adjusting of the default settings when using the Halot Box slicer. The 172mm x 102mm x 160mm build volume is larger than other similarly priced printers, and the 4K resolution of the masking LCD provides sharp detail and fine features.
The Halot-One Plus sits in the awkward spot between small and large format resin 3D printers, and it’s hard to see if there is a place in the market for this machine. The large onboard LCD and built-in Wi-Fi connectivity are something you would expect on a more expensive printer like the Prusa SL1S, but are users currently looking for these features over build volume and print speed? That’s a hard question to answer, and only time will tell if the Halot-One Plus becomes a popular model.
If resolution isn’t your primary concern and you’re looking for the most build volume for your dollar, the Elegoo Saturn (on sale on Amazon for $369) and Elegoo Saturn 2 (available as a pre-order for $550) provide larger build volumes for a similar price tag. If you want to go in the other direction and find a printer with a higher resolution and aren’t worried about the price, the Phrozen Sonic Mini 8K provides an eye-watering . 022mm XY resolution at an $899 price tag.
Andrew Sink first used a 3D printer in 2012, and has been enthusiastically involved in the 3D printing industry ever since. Having printed everything from a scan of his own brain to a peanut butter and jelly sandwich, he continues to dive ever more deeply into the endless applications of additive technology. He is always working on new experiments, designs, and reviews and sharing his results on Tom's Hardware, YouTube, and more.
Top 10 Resin 3D Printers of 2022 (each price range)
Resin 3D printers use SLA, DLP, or LCD technology to cure liquid resin, producing sharp, high-resolution prints at high speed. You'd be surprised how many industries use these machines, from jewelry to dentistry.
That's why we've ranked the best resin printers in every price range, from $150 to $5,000+, so you can find the perfect machine for your hobby projects or business.
Contents
- Best cheap resin 3D printers (under a thousand dollars)
- Anycubic Photon Mono is a great low cost resin 3D printer
- ELEGOO Mars Pro / Mars 2 Pro is the best cheap resin 3D printer
- Anycubic Photon Mono 4K
- Phrozen Sonic Mini 4K
- Elegoo Mars 3
- Elegoo Saturn
- Phrozen Sonic Mighty 4K
- Anycubic Mono X is a great budget photopolymer 3D printer
- Curing and Cleaning Stations
- Anycubic Wash & Cure.

- Elegoo Mercury Plus
- Prusa SL1S Speed
- Peopoly Phenom mSLA Printer - large photoresin 3D printer with huge build volume
- Buyer's Guide - What to Consider When Buying a
- RGB vs. LCD Photopolymer 3D Printer - Differences, Advantages/Disadvantages
- Post-processing equipment
- How does a photopolymer 3D printer work?
- Resin 3D printing technologies
- SLA
- DLP
- MSLA/LCD
- LFS
- DLS
- How much does a resin 3D printer cost?
- Resin 3D Printer Applications
- Resin 3D Printing vs. Filament (FDM)
- Resin 3D Printing vs Selective Laser Sintering (SLS)
- FAQ
Best cheap resin 3D printers (under a thousand dollars)
Anycubic Photon Mono is a great low cost resin 3D printer
- Price: $249
- Assembly volume: 120 x 80 x 165 mm
- Screen resolution: 2560 x 1620 pixels
- Screen size: 6″ 2K monochrome LCD
- XY resolution: 51 microns
- Speed: 50 mm/h
- Cleaning/Cure: Anycubic Washing and Curing Station
The new Anycubic Photon Mono printer adds to Anycubic's reputation as a premium manufacturer of affordable LCD 3D printers. Where you used to pay thousands for an entry-level SLA printer, now printers like the Mono offer great resolution at lower than ever prices. The Photon Mono is a new upgrade from previous models, including greatly increased resin printing speed and other accuracy improvements.
It is equipped with a high quality 2K LCD screen, which is more than enough for most resin projects. But for higher resolution and better quality for really complex figurines or miniatures, we recommend getting the Anycubic Mono X with its 4K LCD screen, which we'll cover in more detail later in this article.
Perhaps the most notable upgrade is speed - up to a maximum of 50mm/h from previous levels of around 20mm/h on older Photon models. Anycubic has also upgraded the Z axis for more stable printing and better surface finish with a new dual linear motion system.
Overall, we rate the Anycubic Photon Mono, as well as its competitors in the Sonic Mini and Elegoo Mars lineups, as the best cheap photopolymer 3D printers. But if you have a few hundred dollars to spare and need a better resolution, go for Mono X.0099 anycubic photon mono cheap photopolymer 3d printer.
ELEGOO Mars Pro / Mars 2 Pro - Best Cheap Resin 3D Printer
- Price: $250 / $280 - Available on Amazon here
- Print volume: 129 x 80 x 160 mm
- Screen resolution: 2560 x 1620 pixels
- Screen size: 6.08″ 2K monochrome LCD
- XY resolution: 50 microns
- Speed: 30-50 mm/h
- Cleaning/Cure: Elegoo Mercury Plus/X 9 Wash and Curing Station0010 The
Elegoo Mars is another cheap resin 3D printer, like the Anycubic Photon, which shocked manufacturers with how good it really is. As LCD 3D printing becomes more affordable, accurate and fast, Elegoo is taking advantage of this advantage to create a low cost resin printer that delivers quality and consistency.
An upgraded version of the Mars Pro printer is more precise with an updated Z-axis linear guide system that smoothes layers and makes each individual layer line less obvious, improving surface quality. There are also a number of safety improvements, such as a silicone seal that prevents resin from leaking on the 3D printer cover.
The printer is equipped with a 2K LCD projector and the minimum layer height is only 0.01mm. The Elegoo Mars Pro comes with its own 3D resin slicer called CHITUBOX and has a nice max build volume of 115 x 65 x 150mm. It's also fast enough for a budget photopolymer 3D printer.
Elegoo also sells some of the cheapest resins on the market. You can buy them here.
Anycubic Photon Mono 4K
- Price: $289
- Print volume: 165 x 132 x 80 mm
- Screen resolution: 3840 x 2400
- Screen size: 6.23" 4K monochrome LCD
- XY resolution: 35 microns
- Speed: 50 mm/h
- Cleaning/Cure: Anycubic Washing and Curing Station
Equipped with a 6.23″ 4K high-resolution monochrome LCD, the Anycubic Photon Mono 4K is an affordable, performance-oriented 3D printer for the discerning but budget-friendly resin maker.
The construction volume of 165 x 132 x 80 mm is small by FDM standards. Although, as befits resin 3D printers, its volume is slightly larger than most, and it certainly makes up for it with exceptional precision and detail thanks to its 35 micron XY resolution.
In testing, Anycubic Photon Mono 4K proved to be ready to work with any highly detailed models and decorative elements, even quite large ones. Articulated parts, board game figures and even articulated miniatures, the Mono 4K does it all.
Cast on a few copies of a small part and the Anycubic Photon Mono 4K is ready, making it suitable for small businesses and hobbyists alike. The print speed is up to 50mm/h and the printer easily prints layers in less than 2 seconds.
From a usability standpoint, we'd like to see desirable features such as resume printing and Wi-Fi connectivity. Anycubic's Photon Workshop slicing software is a functional, if unremarkable, slicer. Fortunately, the Anycubic Photon Mono 4K's compatibility with third-party software such as Lychee and ChiTuBox means you don't have to be tied to Anycubic's slicing software.
If you're after impressive 4K screen fidelity, the Anycubic Photon Mono 4K's delivers hassle-free, high-resolution printing at a great price.
Phrozen Sonic Mini 4K
- Price: $349 - Available at Phrozen official store here / Available on Amazon here
- Print volume: 134 x 75 x 130 mm
- Screen resolution: 3840 x 2160 pixels
- Screen size: 6.1″ 4K monochrome LCD
- XY resolution: 35 microns
- Speed: 80 mm/h
- Cleaning/Cure: Phrozen Cure and Phrozen Ultra-Sonic Cleaner
At an affordable price, the Phrozen Sonic Mini features a powerful 4K 6.1-inch LCD screen that delivers 35µm quality and two-second layering speed.
This is a powerful, inexpensive photoresin 3D printer with everything you need to print, and while if you need more print volume you can go for the Sonic Mighty 4K (more on that later!), if size isn't a big deal, the Sonic Mini 4K is more than fit.
Phrozen claims the Sonic Mini 4K is ideal for resin mold printers, as well as miniatures and desktop models.
Elegoo Mars 3
- Price: $349
- Print volume: 143 x 90 x 165 mm
- Screen resolution: 4098 x 2560 pixels
- Screen size: 6.6″ 4K monochrome LCD
- XY resolution: 35 microns
- Speed: 1.5-3 seconds per layer
- Cleaning/Cure: Elegoo Mercury Plus/X 9 Wash and Curing Station0010
Featuring an Ultra 4K resolution LCD screen and Elegoo's latest mSLA technology, Elegoo Mars now has 30% more accurate XY (35µm) resolution than Mars 2, as well as a 37% larger build volume. For an extra $100, this is a very attractive deal for those looking to get higher-end resin 3D printing.
Other features include an improved light source for more uniform resin curing - even over a larger build area. Built-in 36 high-power LED lamps and a new lens provide higher accuracy, as well as an improved heat sink and cooling fan, which extends the life of the printer and enhances its durability.
Elegoo Saturn
- Price: $499
- Print volume: 192 x 120 x 200 mm
- Screen resolution: 3840 x 2400 pixels
- Screen size: 8.
 9″ 4K monochrome LCD
 - XY resolution: 50 microns
- Speed: 30-40 mm/h
- Cleaning/Cure: Elegoo Mercury Plus/X Cleaning and Curing Station
Featuring an 8.9" 4K monochrome LCD screen for fast layer curing, the Elegoo Saturn greatly outperforms the standard models by printing 60% faster than the Elegoo Mars Pro, printing a layer every 2-3 seconds.
You get a number of other key improvements for your money, the most notable of which is a larger build area that turns the Elegoo Saturn into a 3D printer for printing large hard resin models, as well as the ability to print multiple small models at the same time in one batch.
Improved precision with the Saturn's double linear Z-axis guide makes the Saturn printer more stable than ever, ensuring accurate and even printing. And in case you're a fan, the Elegoo Saturn also has an Ethernet port on the back to keep things fast and efficient.
Phrozen Sonic Mighty 4K
- Price: $549
- Printing area: 200 x 125 x 220 mm
- Screen resolution: 3840 x 2400 pixels
- Screen size: 9.
 3″ 4K monochrome LCD
 - XY resolution: 52 microns
- Print speed: 80 mm/h
- Cleaning/Cure: Phrozen Cure and Phrozen Ultra-Sonic Cleaner
If you're looking for a low cost photoresin 3D printer with a large enough footprint for mass production of models or large photoresin prototypes, the Phrozen Sonic Mighty 4K even outsizes the Elegoo Saturn.
With a strong and reliable Z-axis that delivers print accuracy up to a maximum print height of 22 cm, it offers good print quality, especially with the 4K resolution LCD screen. It also prints fast, with two-second layer printing.
While Phrozen recommends using proprietary 3D printer resins, the Sonic Mighty 4K is compatible with most third-party resins (but check first). So if you have spare resins left over from a previous 3D printer, you should be fine.
Anycubic Mono X is a great budget photopolymer 3D printer
- Price: $599
- Printable area: 192 x 120 x 245 mm
- Screen resolution: 3840 x 2400 pixels
- Screen size: 8.
 9″ 4K monochrome LCD
 - XY resolution: 50 microns
- Speed: 60 mm/h
- Cleaning/Cure: Anycubic Wash & Cure Statio
Anycubic's original budget Photon 3D resin 3D printer is still one of the most popular 3D printers in the world, and now the Mono X proves that the company can compete with higher-end machines. Mono X can print 3 times faster than standard photopolymer printers at speeds up to 60mm/h, and thanks to the 4K LCD screen, it can create very precise and sharp details.
In addition, the upgraded Z-axis of the Mono X improves stability and makes the surface smooth, unaffected by external factors such as vibrations. The result is jewelry models and miniatures where the layer lines are barely visible.
Another big benefit is WiFi printing, so you don't have to constantly unplug your SD or USB card when printing multiple designs throughout the day. The large 3.5" touch screen makes it easy to navigate, and with a larger build volume, you can print multiple jewelry models or desktop miniatures at the same time. Overall, this is one of the best budget photopolymer 3D printers out there.
Curing and Cleaning Stations
Since washing and curing is an inevitable part of resin 3D printing, we have compiled some of the best washing and curing stations to include in your printing system to save you the hassle and mess of subsequent printing. processing.
Anycubic Wash & Cure.
Anycubic Wash & Cure is a versatile station compatible with the vast majority of photoresin printers. Thanks to Anycubic's recent price cut, Wash & Cure is under $100.
The flush mode has adjustable flush cycles including 2, 4 and 6 minutes. Curing mode uses a broad spectrum UV light of 356 nm and 405 nm mounted on a 360° rotating platform to ensure uniform curing of any and all prints 115 x 65 x 165 mm or smaller.
Anycubic has simplified the entire rinsing and curing process with a “set it and forget it” design—select rinsing or curing on the touch button interface and you're done. Station blocks 99.95% UV radiation and has an auto-pause feature if the cap is accidentally knocked off. The station has an adjustable bracket that can be fixed on the Anycubic platform if you are working with a Photon Mono series printer.
Elegoo Mercury Plus
Another all-in-one station, but this time from Elegeoo, the Elegoo Mercury Plus is an easy-to-use option for hands-free finishing.
The allowed maximum print size is 125 x 85 x 160 mm for washing and 140 x 165 mm for curing. You can either use the included cleaning basket or install the Elegoo build plate with models still attached, making it compatible with most if not all photopolymer 3D printers, not just Elegoo machines.
385nm and 405nm UV lamps and a 360-degree rotatable curing turntable do all the curing work with the ability to enter and control cure times up to 30 minutes on a TFT touch screen. Safety is provided by an anti-UV cap that blocks 99.95% of UV rays and a pause function if the cap comes off during curing.
Anycubic station will cost more, but at around $120 you will complete your 3D printing rig with a quality resin 3D printing station with no mess.
Best desktop resin 3D printers ($1,000 to $3,000)
Prusa SL1S Speed
- Price: $1,999 - available at Prusa store here
- Print volume: 120 x 68 x 150 mm
- Screen resolution: 2560 x 1620 pixels
- Screen size: 5.96″ 2K monochrome LCD
- XY resolution: 47 microns
- Print speed: 50 mm/h
- Cleaning/curing: Original Prusa CW1S
Prusa printers are known for being the best RepRap 3D printers. They are so good that over 150,000 printers have been sold, and company founder Josef Prusa has opened his own printer factories to print parts for more printers! Prusa-ception.
Prusa has now moved into the SLA 3D printing sector with the launch of the Prusa SL1 printer based on mSLA technology: using LCD and LED panels to cure photosensitive resin layers. As mentioned earlier, this has the advantage of scalability—multiple parts can be created at the same time without additional time—as well as high accuracy.
In addition to the printer, Prusa sells a wash and cure machine that helps wash and cure prints, maximizing the surface finish. The Prusa SL1 has a heavy aluminum chassis designed to anchor the printer to the ground and make it more stable for more accurate printing. It seems to me that the phrase “of course, this is good, this is Prusa” is appropriate here.
Peopoly Phenom mSLA Printer - large photopolymer 3D printer with huge build volume
- Price: $1,999 - Available from Matterhackers here
- Print volume: 276 x 155 x 400 mm
- Screen resolution: 3840 x 2160 pixels
- Screen size: 12.5″ 4K LCD
- XY resolution: 72 microns
- Print speed: 75 mm/h
- Cleaning/Cure: Peopoly Curing Box
We already included the Peopoly Moai 130 in our list, a fantastic DIY SLA 3D printer kit. Now Peopoly is back with the Phenom, a large photopolymer 3D printer that combines LCD and LED technology.
Peopoly Moai has a huge print volume for a photopolymer 3D printer - 276 x 155 x 400 mm, as well as 72-micron resolution. This is practically unheard of as photopolymer printers typically have a much lower build volume than FDM 3D printers. Peopoly recommends using their own resins for 3D printing, which they sell for about $70 per litre.
Overall, this is an impressive and accurate large format resin 3D printer.
Professional Resin 3D Printers ($3,000+)
Formlabs Form 3 - Best Resin 3D Printer
- Price: $3,499
- Assembly volume: 145 x 145 x 185 mm
- XY resolution: 25 microns
- Print speed: 70 mm/h
- Clean/Cure: Formlabs Form Wash & Cure
Formlabs has made a name for itself in the 3D printing industry since its initial Kickstarter campaign in 2012. An American 3D printer company was selling a Form 3 SLA 3D printer for 3 49$9 and has since become very popular in the dental and jewelry industries.
Formlabs resins available here.
TheForm 3 comes with a ton of new features. It features the new benefits of LFS technology as well as a new Light Processing Unit (LPU) to improve the surface finish of resin parts as well as better layer registration. The Form 2 was already fantastic, and these additional features take the Form 3 to a whole new level in desktop SLA printers.
In addition, the Formlabs Form 3 has an automated resin supply system and uses smart cartridges that automatically fill the resin reservoir, along with many other advanced features. In addition, it is equipped with a resin tray scanning system after each layer and automatically adjusts according to the type of resin used. In addition, the printer has a fantastic touch screen and can be controlled remotely via a WiFi connection.
This UV resin 3D printer has a very good print volume of 145 x 145 x 185mm and is extremely accurate with 25 micron XY resolution. The Formlabs Form 3 is compatible with a wide range of resins, from ceramics, flexible resins, to cast resins, although Formlabs also sells its own high quality resins.
For those looking for 3rd party resins compatible with Formlabs printers, here's a great place to start.
Formlabs has established itself as a leader in stereolithography with the Form 3 printer. It has received rave reviews and is widely used in dentistry. Formlabs also sells a 3D printer for SLS, the Fuse 1.
Buyer's Guide - What to Consider When Buying a Resin 3D Printer
RGB vs. LCD Screens - Differences, Advantages/Disadvantages
earlier models.
This change is only to the benefit of manufacturers, since monochrome screens have many advantages over RGB. Although they are more expensive, they are more efficient, less energy intensive, and print faster due to shorter polymerization times.
Unless you choose an old used model, you will most likely buy a printer with a default monochrome LCD screen.
LCD Resolution - 2K, 4K, 6K
Like computer monitors and TVs, LCD resolution determines the level of pixels and detail.
Higher resolution translates into better XY resolution and lower layer height, which is a critical factor for the fine detail and precision we expect from resin printers.
You'll find 2K, 4K and even 8K resolution printers for those who want the ultimate level of detail and intricate detail in their prints.
However, the print quality of the 2K LCD is far superior to that of FDM printers, so it is more than adequate for most applications.
Build Volume
Photopolymer printers typically have a smaller build volume than more common FDM machines, so manufacturers and professionals use them to create small, intricate parts with high precision.
If you need extra space to print duplicate parts or large figures and models, look to larger format resin printers such as the Peopoly Phenom and Phrozen Sonic Mighty 4K.
Post-Processing Equipment
Resin 3D printing is a messy business and post-processing is a major part of the printing process. Post-processing consists of two parts - washing and polymerization.
Flushing involves removing uncured resin residue from the print with isopropanol.
Polymerization uses additional UV light to complete the polymerization process to improve the finish and overall rigidity of the part.
Do-it-yourself, hands-on processing is one option, but manufacturers now offer versatile wash and curing stations that eliminate many of the hassles associated with this process.
How does a photopolymer 3D printer work?
Each type of resin 3D printing technology cures UV resin, they just differ in how they do it.
Stereolithography (SLA) was the first additive manufacturing technology invented, with patents granted to 3D Systems back in 1986. SLA printing works by using an ultraviolet laser and mirrors (called galvanometers) to selectively cure the resin.
DLP 3D printing was pioneered by EnvisionTEC and uses a projector similar to a movie theater projector. LCD printing uses an LCD screen with individual LEDs that turn on and off to selectively cure specific areas of the resin to form the final object. LCDs are sometimes referred to as MSLA (masked SLA), as in Prusa and Peopoly resin printers.
Resin 3D Printing Technologies
SLA
Using mirrors, also called galvanometers, an SLA or stereolithography printer directs a UV laser beam at photopolymer liquid resin in cross sections to cure or print layer by layer.
DLP
DLP, or Digital Light Processing, is very similar to the SLA machine and involves emitting digital light (LED in most printers) through an array of micromirrors onto a light-sensitive liquid resin for flash, or in other words, curing the entire image layer at a time in so-called voxels - rectangles that look like pixels.
MSLA/LCD
Like DLP machines, MSLA or stereolithography (often referred to as LCD) printers use a digital light source (usually hundreds of LEDs) to flash an entire layer at once. Unlike DLP, the MSLA printer uses the LCD as a "mask", directing and illuminating a photosensitive liquid resin rather than mirrors. The mask allows the printer to expose only those areas that need to be cured to the light source.
LFS
LFS or Low Force Stereolithography is Formlabs patented pot polymerization technology. LFS overhauls the standard SLA process using a custom-designed Closed Light Processing Unit (LPU) that passes a UV laser beam through a spatial filter and an array of mirrors to polymerize the photosensitive liquid resin cross-section layer by layer.
DLS
Another patented technology from Carbon 3D, DLS, or Digital Light Synthesis, uses an oxygen permeable window to cure a photosensitive liquid resin in what is known as continuous liquid interface manufacturing (CLIP). Light from a special LED engine illuminates ultraviolet rays to match the shape and details of the part's cross-section onto an ultra-thin resin layer supported by an oxygen window known as the "dead zone". The resin in the "dead zone" is then cured to create precise, detail-rich layers.
How much does a photopolymer 3D printer cost?
Good cheap photopolymer 3D printers start at around $200. Even ten years ago, resin printers cost thousands of dollars, but with great advancement - mainly in the field of LCD printing - the prices have come down!
However, these budget photoresin 3D printers can't compete with more professional high resolution printers like the Form 3 ($3,499) or the Peopoly Phenom (1 9$99). They can still produce accurate models, for example for miniatures and other fun projects, but as a photopolymer 3D printer for business, they may not be effective.
Photopolymer 3D printer applications
Budget photopolymer 3D printers are commonly used by hobbyists to produce precise figurines and miniatures in detail that FDM printers simply cannot match. They are commonly used for 28mm miniatures, D&D figurines and other similar desktop model projects.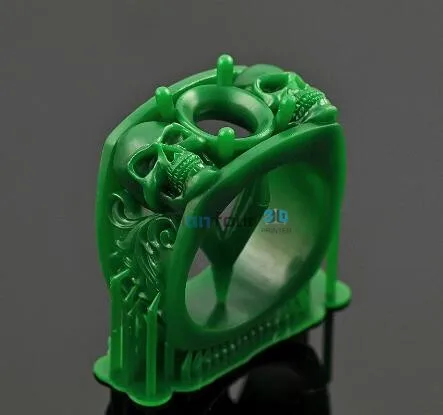
However, these inexpensive options can sometimes be used to create wax molds for casting jewelry. However, for higher quality precious metal casting, it is recommended to use a more professional resin 3D printer capable of better resolution and accuracy.
photopolymer printers are widely used in dentistry, audiology, jewelry and medical industries. For example, in dentistry, photopolymer 3D printers can print orthodontic models and implants, and in audiology, almost 100% of custom-made hearing aids are now 3D printed.
3D resin versus filament (FDM)
Hobbyists usually turn to resin 3D printing when they want higher precision, smoother surfaces and sharper details on small prints such as figurines or miniatures. While FDM is simpler, it cannot achieve these levels of precision and smoothness.
However, the trade-off between FDM and resin is that in terms of filament to resin ratio, filaments are cheaper, easier to use and reuse, come in more materials, colors and types, and tend to be stiffer.
Resins tend to be more expensive (although LCD resins are now much cheaper) and harder to use. They require thorough rinsing and post-processing, and extra care must be taken when printing and during post-processing with a resin 3D printer, including wearing protective gear, as the materials can be corrosive.
Thus, resin and thread are used for different purposes, and are not in direct competition for the same use. For the unrivaled precision of cheap 3D printers, as well as the rapid production of dental, jewelry and medical models, resin 3D printers are the way to go. But for more complex - perhaps with multiple colors - basic prototypes, deposition modeling is best suited.
3D printing with resin against selective laser sintering (SLS)
The trade-off between SLA and selective laser sintering is similar: SLS-printed parts are more rigid, with excellent mechanical properties (and make excellent functional prototypes), although parts printed SLA are characterized by a smoother surface and faster printing.
SLS is also great if you're not a fan of additional support structures and don't like post-processing, as the parts printed in the resin powder chamber don't move or deform during printing. SLS offers better material properties than SLA - for example, it is not as susceptible to UV or sun damage. But they are less affordable—even the cheapest printers start at $5,000.
FAQ
Is resin more durable than PLA?
In general, conventional resin produces brittle, brittle parts that are less resistant to stress and weather than traditional 3D printing materials such as PLA. Therefore, we cannot recommend a resin for making load-bearing, functional, impact-resistant or exterior parts where PLA and ABS work much better, so manufacturers prefer the resin for fragile decorative parts filled with precise detail and a smooth finish.
Increasingly, however, 3D printing media manufacturers are offering "tough" resins such as Formlabs Tough 2000 Resin, which offer superior tear strength and even outperform ABS in some cases. Real world applications in orthopedics (such as splints and braces) and dentistry (aligners and crowns) demonstrate how people are increasingly turning to tough resins to make strong, wear-resistant parts.
Is 3D printer resin expensive?
When viewed in the context of 3D printing and compared to other popular materials and filament types, resin is not particularly expensive. A 1 liter bottle of standard resin costs between $20 and $50 depending on the brand, which is more or less the price of ABS and PLA raw materials.
The number and size of prints you can make from a standard 1 liter bottle can vary, with costs skyrocketing for the most prolific producers.
Is the resin print dirty?
While the resin printing process itself isn't messy, post-processing of the finished print is invariably an annoying, sloppy mess, not to mention a potentially dangerous mess of dripping resin and harsh isopropanol.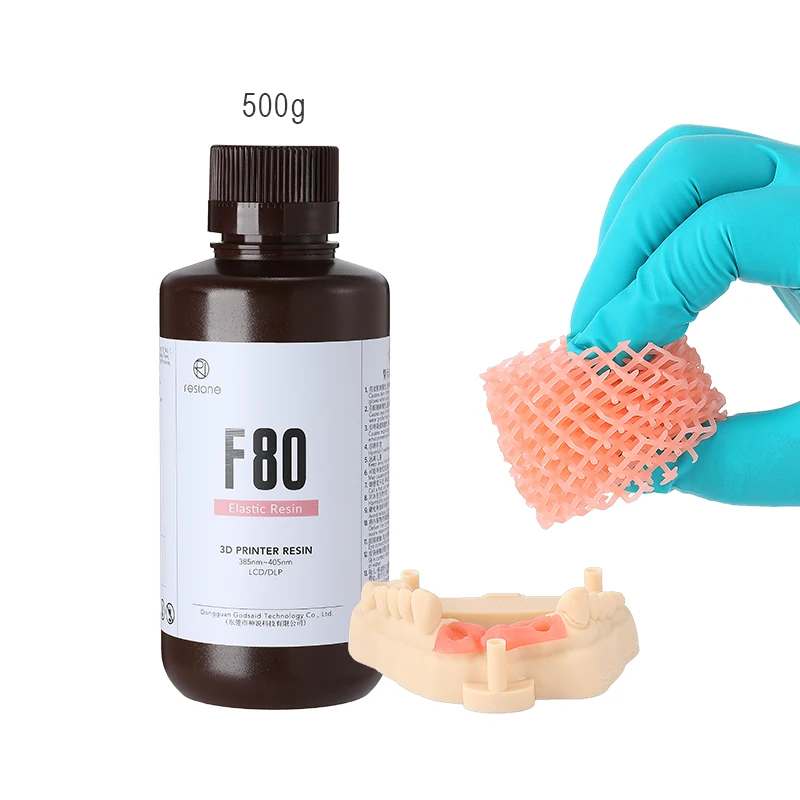 This is not for the faint of heart and not for those who are afraid to get involved in this matter.
Luckily, curing and cleaning stations help keep resin processing messy, so you don't get your hands dirty by smearing prints in a vat of isopropanol.
Do resin prints need to be rinsed and cured?
Yes. The resin printing process leaves uncured resin residue on the finished part. Washing off excess resin ensures that all the details and finish of the print remain accurate when you move on to the polymerization process. It's also a safety issue: washing the resin prints removes potentially toxic, uncured liquid resin, allowing the part to be handled safely.
Curing is an equally important part of the process. When the printer has finished printing the part, the resin is in a transitional state: it is hard enough to retain the desired shape and detail, but lacks overall rigidity, making it prone to scratches, scarring, and imperfections. Curing the print with UV, or even sunlight if you have time, allows you to reach the optimal, finished resin state.
the choice of a professional and a beginner / Selections from Aliexpress and not only / iXBT Live
So, I continue the topic of 3D printers, this time we will talk about budget and affordable photopolymer devices. Photopolymer 3D printing is becoming cheaper and cheaper and is becoming available not only to professionals, but also to novice printers-makers-designers. The cost of a number of models has dropped significantly in recent years, especially budget startups in SLA printing, making affordable office models of compact printers such as Sparkmaker and Longer. Almost all models are available in a warehouse in the Moscow region, they are delivered quickly, it makes sense to add to the basket and compare, choose the best one for yourself in terms of cost and printing parameters.
Easy Printer for Beginners - Sparkmaker SLA
Sparkmaker SLA Printer
Sparkmaker SLA is the most affordable printer for beginners. One of the very first available models, the price is less than $200. At the moment, a number of upgrades are available, a lot of spare parts, ready-made models for printing. Print resolution: 845 x 480 dots, working area dimensions: 98 x 55 x 125 mm. Virtually no noise, works autonomously, height calibration is provided. Printers and resin available in Moscow.
Professional photopolymer printer Longer ORANGE
Longer Orange 30 Longer Orange 10
One of the few 3D printers that I have appreciated. The Orange 10 and Orange 30 printers work literally out of the box and, unlike expensive models, are not capricious at all. It is easy to operate, if necessary, you can set the print height. A detailed review of the Longer Orange 30 model. All models and Longer Resin photopolymer are available in Moscow. Orange 10 has a print resolution: 854 x 480 dots, working area dimensions: 98 x 55 x 140 mm. Orange 30 has a print resolution: 2560 x 1440 dots, working area dimensions: 120 x 68 x 170 mm. Virtually no noise, works autonomously, height calibration is provided. Printers and resin available in Moscow.
Anycubic PHOTON excellent resin printer
Anycubic PHOTON Anycubic PHOTON-S
Anycubic's well-deserved large resin 3D printer. Two models are sold at the same time: PHOTON and PHOTON-S. The latter is slightly more expensive, has design changes, but both print perfectly. Of the features, I will highlight the patented hinged mechanism for attaching the table, which facilitates alignment. Both PHOTON models have a print resolution: 2560 x 1440 dots, working area dimensions: 115 x 65 x 155 mm. All models are available in Moscow, at the same time do not forget to buy a fast Anycubic photopolymer - one of the cheapest.
Photopolymer printer Anet N4 LCD
3D printer Anet N4
An interesting model from Anet is a photopolymer printer of the “N4” model with a print resolution of 2560 x 1440 dots and a working area of 120 x 65 x 138 mm. But the price pleases - this is one of the most budget printers with 2K resolution. The minimum "pixel" size is 40 microns. Don't forget to bring Anet photopolymer resin for testing.
Interesting photopolymer 3D printer Nova
Printer Nova3D
An unusual 3D printer was released by Nova3D, a stylish office compact printer for photopolymer printing. Of the features - an accurate T-rail rail was used, the table has an inclination adjustment for easy adjustment. The size of the print area is 130 x 70 x 150 mm. Print resolution 2K (2560 x 1440 dots). Attention: offline printing (from USB Drive) is provided, as well as connection via LAN and WiFi. Printers are available in Russia.
Wanhao Professional Printers
Wanhao Duplicator D11 CGR Wanhao Duplicator D8
One of the most thoughtful and best selling 3D printers from Wanhao. Two models of photopolymer printers are now available in the store - Duplicator D11 CGR (updated model) and Duplicator D8 (2019 model). Both models are deservedly considered the best for photopolymer printing, as for the new D8, I will single out a large print area (192 x 120 x 180 mm). Of the "chips" - WiFi connection.
Kelant 9 Large Resin 3D Printer0075
Kelant S400
Well, one of the inexpensive large-format office models is Kelant S400. The size of the print area is 192 x 120 x 200 mm, the high power of the UV matrix (total power consumption is about 140 W) - all this makes it possible to print quickly and efficiently. The printer is available when ordering from Moscow, IML delivery (courier).
So, the selection includes the most popular, inexpensive and popular models of SLA printers. A number of models were left out of the article, I think I will make a continuation in the near future to cover everything, plus I will add photopolymer resin to the recommendations. By the way, most stores specializing in 3D printing, both on Aliexpress and locally, offer their own options for photopolymer, and there are inexpensive and good options. When choosing, consider the current store coupons, and also choose local delivery (from Russia / RU).
News
Publications
In Soviet times, most motorists did not use winter tires, and all four seasons they drove on all-season tires. Despite such unsuitable "shoes", Soviet drivers in road accidents...
In the 2000s. Germany made a strong-willed decision - a complete rejection of nuclear energy and the termination of the operation of nuclear power plants. Most of the power units were de-energized. The remaining 3 are planning...
There are many situations when normal water supply becomes unavailable. For example, long trips rest "savage", shutdown of the heating network for prevention for a couple of weeks, lack of plumbing...
Key messages The UK has the lowest level of interest in cryptocurrencies in a year, it has decreased by 82% compared to last year On the other hand...
ID-Cooling has found its "golden ratio" in the production of tower coolers in the ID-Cooling SE-207 model.