Anycubic kossel delta 3d printer
3D Printer Review: Anycubic Kossel Plus
Hello there and welcome to Top 3D Shop blog – a place where you can learn everything about 3D printing technologies, related equipment, and the latest breakthroughs in the industry. The subject of today’s review is Anycubic Kossel Plus, an FDM 3D printer that is definitely much discussed these days. So, let’s find out what this 3D printing machine has to offer.
To begin with, it is a delta printer produced by a popular Chinese manufacturer that made its name thanks to the production of inexpensive, yet high-quality equipment for 3D printing. Watch this video and continue reading to know more about the Anycubic Kossel Plus 3D printer.
Video
Technical specifications
- Input: 110/220W, 50/60Hz
- Extruder type: Single
- Layer thickness: 100 microns
- Print accuracy: X/Y - 12.
5 microns, Z - 2.5 microns
- Build volume: 230x300 mm
- Print speed: 60 mm/s
- Extruder temp: up to 260˚C
- Bed temp: up to 100˚C
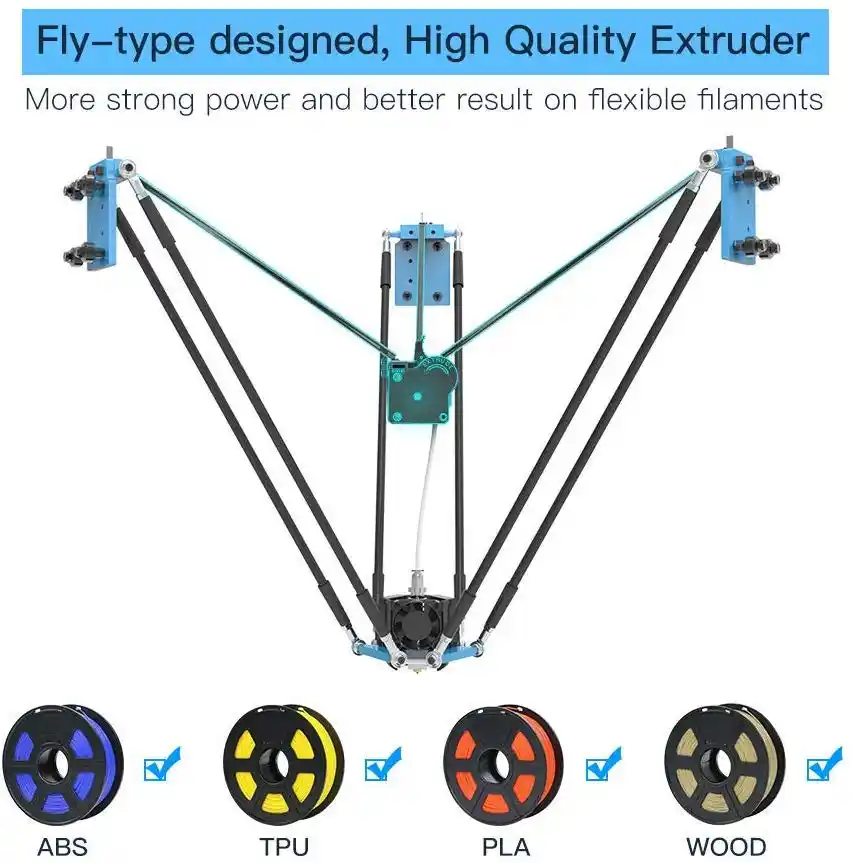
- Materials: PLA, ABS, HIPS, Wood
- Filament diameter: 1.75 mm
- Connectivity: SD, USB
- OS: Windows, Mac OS
- Dimensions: 380х680 mm
- Weight: 7 kg
Description
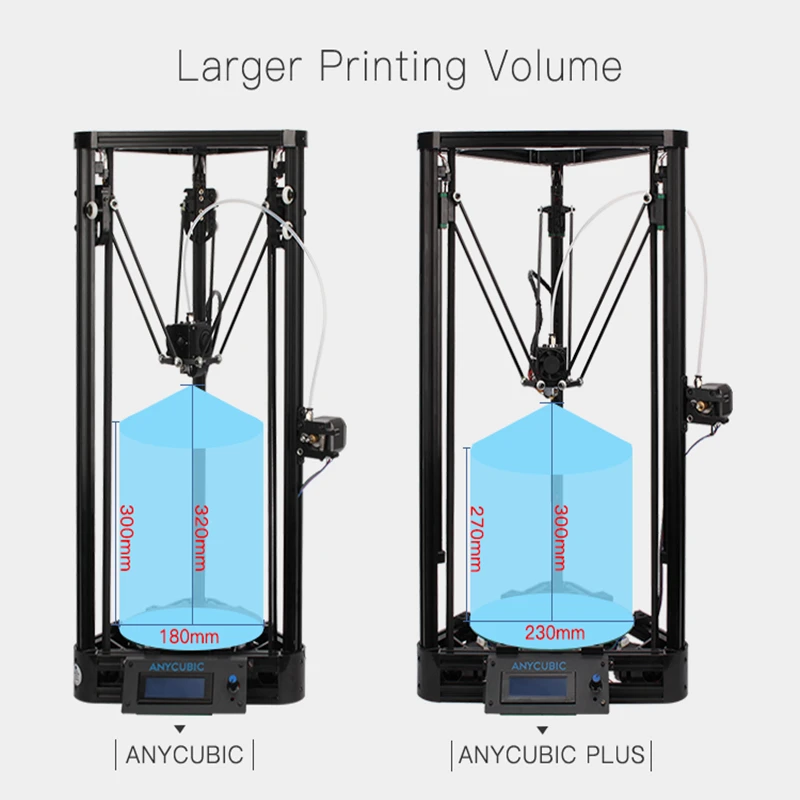
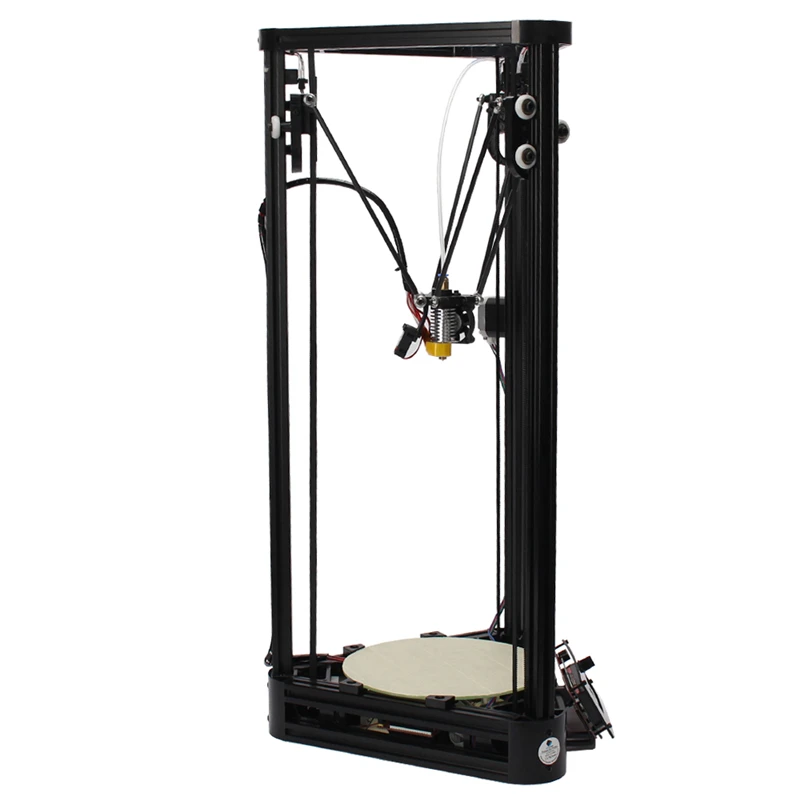
Kossel Plus is an upgraded version of the Kossel Pulley printer. The main differences of the new model – the pulleys were replaced with linear guide rails and the volume of the printable area was increased.
Device
The structural design of the printer with delta kinematics was swiped by Anycubic engineers from the Kossel model that, in turn, was created in 2012 by Johan Roholl as part of the RepRap project. The process of remaking the concept led to the creation of the Kossel Pulley 3D printer, in which levers were moving along the guides on pulleys.
Setting-up procedures
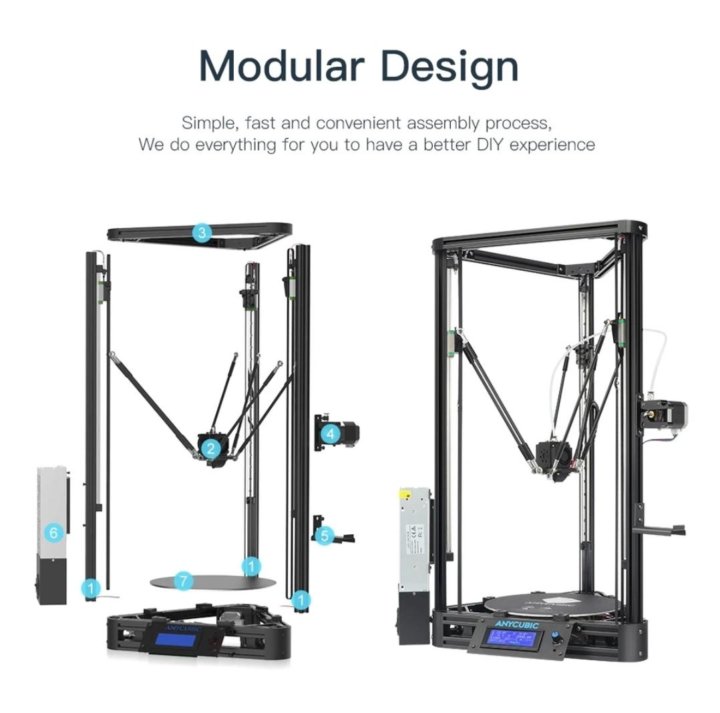
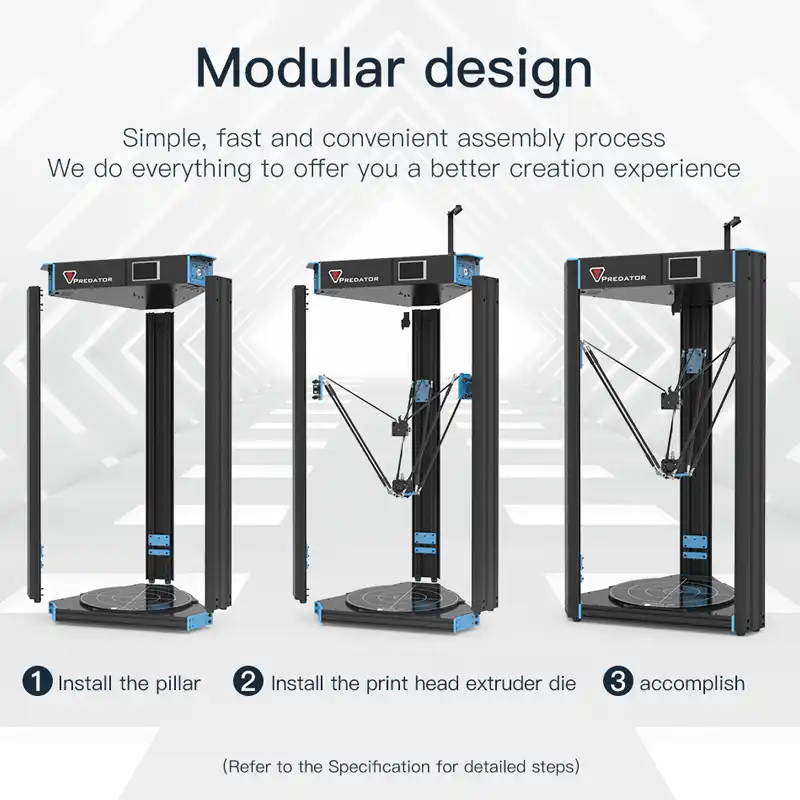
This delta printer is shipped unassembled. The main components are carefully packed in the box and include triangular parts of the frame, guide rails, a control unit, an extruder with fixed levers, a feeder mechanism, a print bed and a power supply unit.
For experienced enthusiasts and professional 3D makers, the whole process of assembling and preparing Kossel Plus for work will not take longer than 2-3 hours.
Prior to actual 3D printing, it is necessary to perform a bed leveling. To start the calibration, it is necessary to install a special nozzle with a magnetic mount on the extruder.
Once the calibration procedure is launched, the extruder with the nozzle passes through 69 points on the platform surface. The measured deviations will be considered by the machine when printing. Along with automatic calibration, there is also the manual process available.
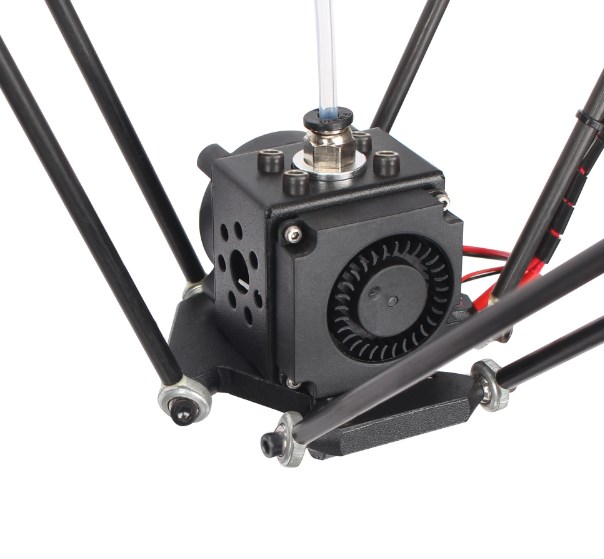
The spool holder is located on the right side of the printer.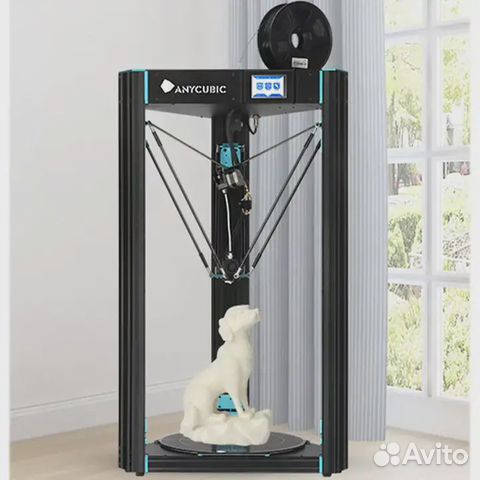 The filament passes through the feeder, and then through the Bowden tube and finally, gets inside the extruder.
Printing
Generally, Anycubic 3D printers come with the Cura slicer. Users, however, can use any other available software of their choice.
The finished g-code can be exported to the printer either via direct USB connection or through the use of an SD card (the latter is, however, more convenient).
The use of linear rails and the substitution of pulleys significantly enhanced the stability and repeatability of the printing process compared to the previous model.
As the manufacturer claims, such a solution allows you to maintain high printing accuracy under high loads: it helps to reduce wear and tear, and saves a user from a necessity to perform tuning and maintenance chores very often.
It is believed that such a structural design increases the noise level when 3D printing. Indeed, it makes sense to install Kossel Plus in workshops rather than in living or recreation areas.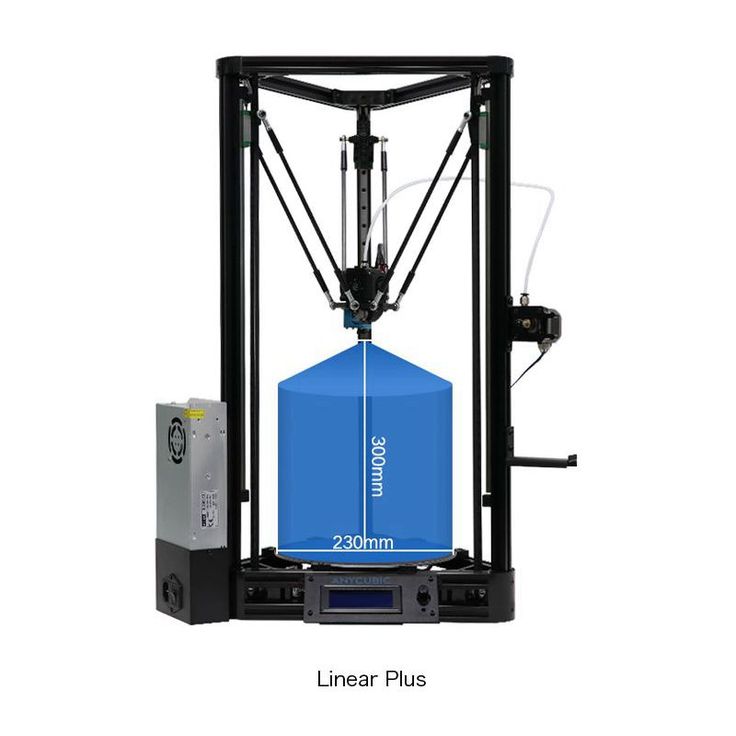
The printing bed is rigidly fixed and heats up to 100 degrees. Unlike in the previous version of the printer, Anycubic Kossel Plus got an increased diameter that now amounts to 50 millimeters.
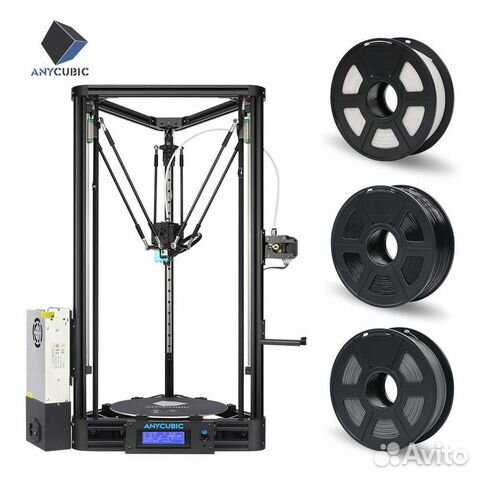
Besides the printer itself, the package contains: a filament spool, a tool kit, grease for guide rails, an SD card, a card reader, a USB cable, gloves.
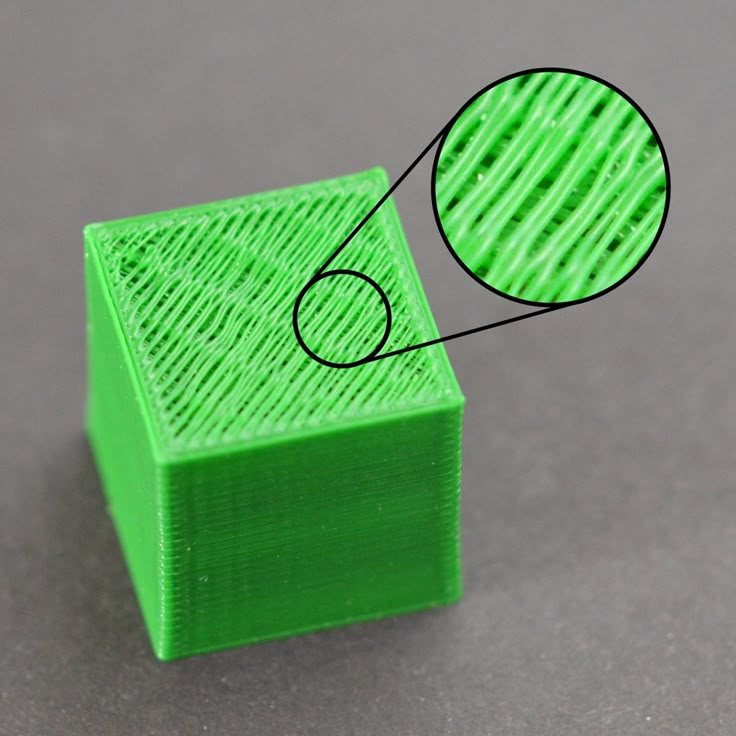
Sample print
Takeaways
On the Anycubic website, the manufacturer notes that almost 80% of the build work for the printer is already complete. It's true, but potential buyers and users need to consider that delta printers can be a bit more complicated to assemble and configure than classic solutions with Cartesian design.
On the whole, Anycubic Kossel Plus is a great solution for experienced makers who need high accuracy and printing stability with good performance and relatively small size of the 3D printing machine.
You can buy Anycubic Kossel Plus at Top 3D Shop.
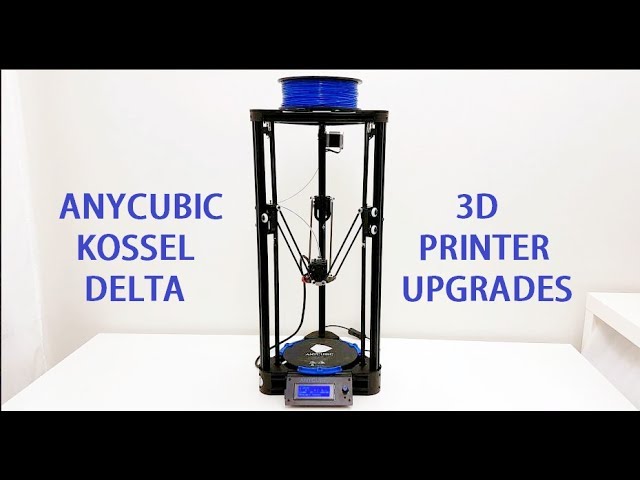
Anycubic Kossel Upgrades - Lukas Pomykal
I have owned this awesome Anycubic Kossel Linear Plus aka KLP 3D printer since 2017.
Story of this page begins at the time I have started looking for upgrades on the internet and became flustrated. It was very difficult to find any page containing tutorials or explanations about particular upgrade and searching for an answer in a FB groups is a madness.
My goal is to present you some of the best upgrades and guides how to install them.
For an additional help, visit the link at the bottom of this page which will direct you to Facebook groups dedicated to this printer.
Firmware guides and upgrades
Marlin informations So what is that Marlin? Marlin is an open source printer firmware developed by a 3D printer enthusiastic community. What firmware does my printer use? Anycubic Kossel comes with Marlin FW from factory. Upgrading it to a newer and better version is a good and a costless upgrade. Where can I find more information? That is easy, visit official
Read More »
Why should I do it? Is it worth it? You can finally print with higher speeds without any FW limitation. I personally print with PLA and 120-140mm/s even with original V5 hot end. For anyone wondering why should they buy a Raspberry and use a Klipper FW instead of SKR and Marlin, here is why: Controlling printer via web inferface
Read More »
Requirements You will need to buy a Raspberry and get a USB cable to make it work.I recommend buying this set, because it has all you need. ALIEXPRESS CLICK HERE Or you can order just a board and get the ramaining parts elsewhere. ALIEXPRESS CLICK HERE ALIEXPRESS CLICK HERE 1. Download Octoprint First step is installing OctoPi which is a
Read More »
Hardware upgrades
I have prepared this article for anyone willing to spend some time upgrading their Anycubic Kossel printer to E3D V6 hotend from original V5 J-Head. Main reason for this upgrade was to use all metal heat break for printing Nylon, ASA and achieve better printing results. Choosing the right E3D V6 version I have chosen this awesome Trianglelab E3D V6 kit
Read More »
Tired of loudy fans on your printer, do you want a better cooling?Continue reading… Power supply fan Charasteristics:Voltage: 18VCurrent: 0.12A Kossel PSU fan disassembly 1) Loose two screws holding the power supply on Kossel.2) Loose two screws holding black plastic part of PSU3) Remove the plastic part by pulling it out4) Loose screws under that were covered by the plastic
Read More »
Introduction The goal was to create an adjustible extruder mount Original mount tends to break brittle filaments Extruder mount in the pictures is var4, I recommend printing newer version – var5 version. ExtruderHolder-var5: Angle annotation 40 min print time 9 g of PLA filament you will need longer M4 bolt (plus 4 – 6mm), M4 nut ExtruderHolder-var4 ExtruderHolder-var4 35 min
Read More »
Why should I do that? I have been tired of the noise. After hundrends of printing hours Kossel became very noisy a I couldn’t sleep at the same room so I have choosed new fans with sufficient air flow [CFM] and low noise [dB] and started working on this article. Power supply fan It was difficult to find a good
Read More »
Stock Anycubic Kossel frame tends to bend during acceleration and deceleration.These handy corner reinforcements help a lot and significaly improve printing quality. 1. Buy T nuts and screws If you want to use all 6 possible corner reinforcements with the biggest amount of fixing points, you will need at least 60 T nuts and 60 M4 screws.So order them in
Read More »
1. Introduction I could’t find any decent Kossel Raspberry camera mount, so I have designed this one.It can be printed easily without any bridges or supports.All you need to do is print stl files and buy a few M3 screws and M3 nuts.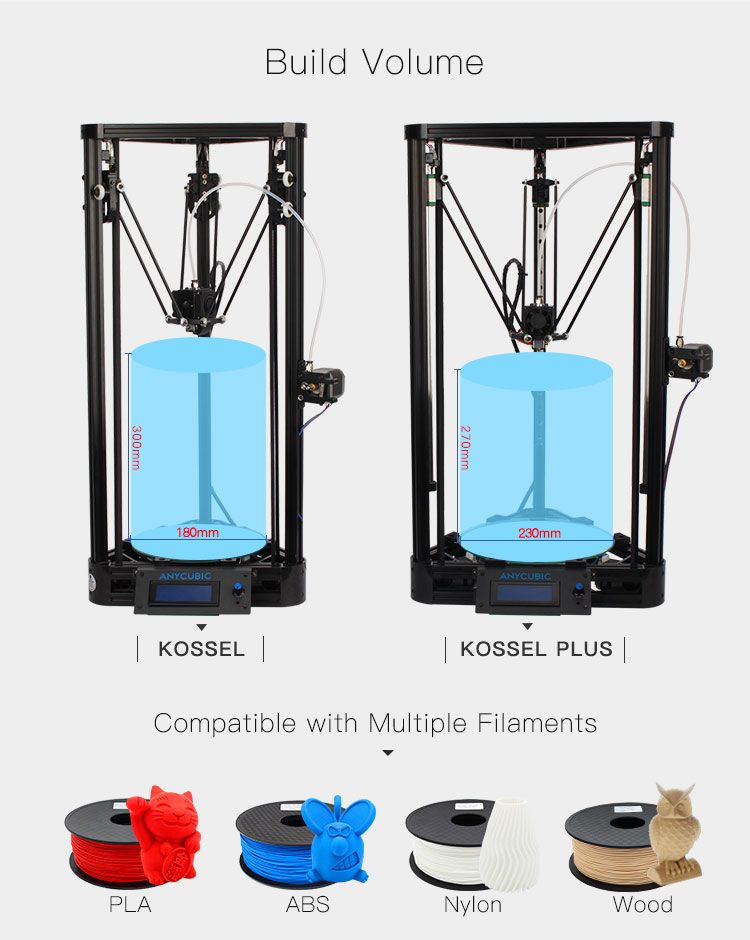 2. Download stl models Version 1 – 4DOFDesigned for a simple use.Click on the picture to download
Read More »
Original heated bed with a sticker Anycubic Kossel Linear Plus comes with a 240 mm round heated bed and a 230 mm printable area. Why only 230 mm?For safety and because the bed is usually not straight at the edges. I have decided to add only Ultrabase nad PEI Flexplate upgrades in this guide, because I do not like using
Read More »
After seeing many posts on Facebook suport groups asking for replacement parts, I decided to write down my recommendations. Most of the reccomended parts are from Triangle lab which sells top quality products and are tested by thousands of people. Spring steel PEI flexplate This is a better alternative to Ultrabase. Even 100k$ Stratasys 3D printers use a PEI sheet.The
Read More »
Hot end silicone sock is on of the best and cheapest upgrades you can do to your 3D printer. This article applies to all 3D printers with a V5 J-Head, such as Kossel Pulley, Kossel Linear Plus, i3 Mega and so on… As you can see in the picture below, the cooling fan affects nozzle (hot end) temperature. On the left
Read More »
Upgrading your stock A4988 drivers to TMC2208 will bring you comfort and the only thing you will hear will be the fans. You do not need to buy SKR, you can use original Trigorilla board with TMC drivers and UART mode You can use TMC2208 in a standalone mode (DIY in this article), but I do not recommend it. It
Read More »
Kossel SKR 1.3 TMC UART is one of the best upgrades you can do.Before ordering anything decide if you want to change your board and use Marlin or you want to try Klipper and keep the original Trigorilla board. SKR provides much higher computing power which is so needed for fast printing with our delta printers.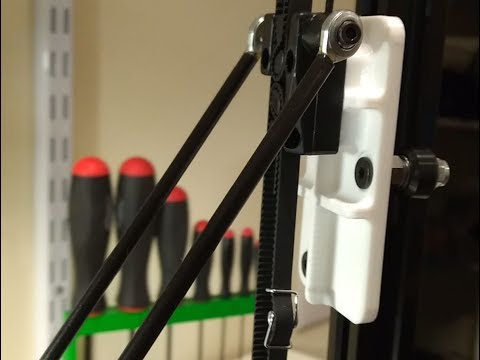 It also uses very
Read More »
Anycubic Z probe accuracy test. I could not find any informations about accuracy of this original probe which was being sold with Anycubic Kossel Linear Plus so I used Klipper and PROBE_ACCURACY to measure it. WHERE TO BUY 1. Accuracy testing with multiple attaching and removing This routine was tested because we need to attach the probe before every bed
Read More »
This is the best E3D V6 upgrade for Anycubic Kossel you can find on the internet.The printed effector is much lighter than the original one which helps with ghosting and other problems. This effector also uses original leveling probe, so auto leveling will still work.5015 fan with dual cooling duct solves problems with cooling and V6 hot end is capable
Read More »
This is a complete guide for an Anycubic Kossel Volcano Upgrade.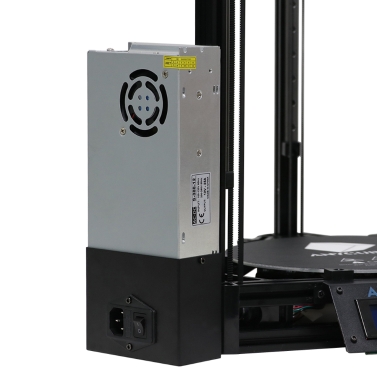 You can print this upgraded effector with ABS/ASA and install new parts in about 1-2 hours.Support Robert Schmiedt who designed this awesome effector. This effector uses original leveling probe, so auto leveling will still work.5015 fan with dual cooling duct solves problems with cooling and volcano hot end is capable
Read More »
This Anycubic Kossel BMG Upgrade guide will help you to install BMG extruder. This is a dual extruder that really helps with underextrusion problems. It comes with a smaller motor (optional), because it is geared 3:1 instead of 1:1. Step 1: Order a BMG Dual Driver Extruder If you want to save up a few bucks, order a BMG without
Read More »
If you really want to get rid of the ghosting, new lighter effector and lighter, more precise rods are the way to go. Original rod with joints weights about 21 grams. This upgrade rod weights only 9 grams even with the joints.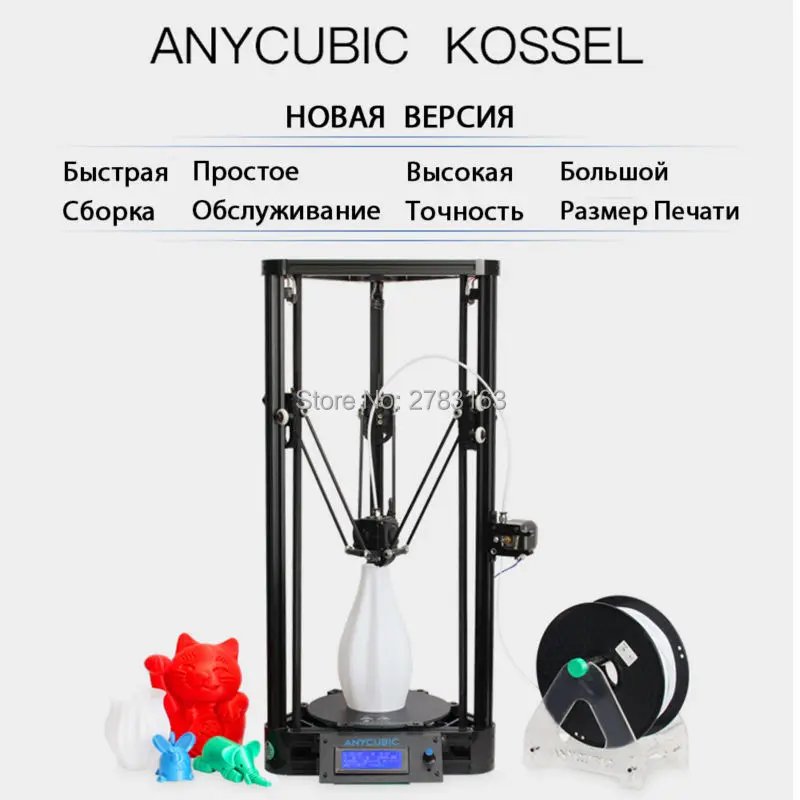 Step 1: Order new upgrade parts We have chosen 6×4 mm rods as a compromise between the stiffness
Read More »
Calibration guides
What is retraction? Retraction is an extruder movement when the filament is pulled out of the nozzle and pushed back when needed. Retraction works simply – when the nozzle moves between printing areas, extruder takes the filament out of the nozzle and pushes it back when the nozzle is in the next printing area. You can tune retraction distance, speed,
Read More »
What is a combing mode? Combing is a Cura’s feature that recalculates nozzle travel to eliminate any surface artifacts such as blobbing. The difference between combing off and combing all is clearly visible in the picture below. 1. Combing Mode OFF This mode completely disables Cura combing feature. Nozzle travels through the empty areas almost every layer. This leads to too
Read More »
Klipper pressure advance is a feature that helps with corner overshots.It uses extra extruder retractions while moving to eliminate problems with over extruding at corners. Let me say thank you to all Klipper developers for this awesome feature and great faq pages on their GIT. Those graphs below were downloaded from official Klipper GIT. How does it work? Extruder retraction
Read More »
Anycubic Z probe accuracy test. I could not find any informations about accuracy of this original probe which was being sold with Anycubic Kossel Linear Plus so I used Klipper and PROBE_ACCURACY to measure it. WHERE TO BUY 1. Accuracy testing with multiple attaching and removing This routine was tested because we need to attach the probe before every bed
Read More »
After a succesful delta calibration it is time to do an enhanced delta calibration. This calibration solves problems with XY dimension problems such as a 19 mm Y side instead of 20 mm. More about Klipper delta calibration 1. Download and print calibration model I have used the same file as in Klipper Delta Calibration guide and added excel table for calculating average
Read More »
After flashing Klipper, it is necessary to perform a delta calibration.Delta calibration will probe multiple points on bed and calculate rod length, tower angle, z height and other delta variables. 1. Attach and connect Z probe 2. Open OctoPrint Open OctoPrint and connect to printer. 3. Delta calibration Open Terminal and send home command:G28Send this command after the printer homes:DELTA_CALIBRATE
Read More »
1. Check extruder name First start with opening your printer.cfg configuration file and checking etruder name. It is usually extruder, because most of the people use only one extruder, so there is no reason to change it.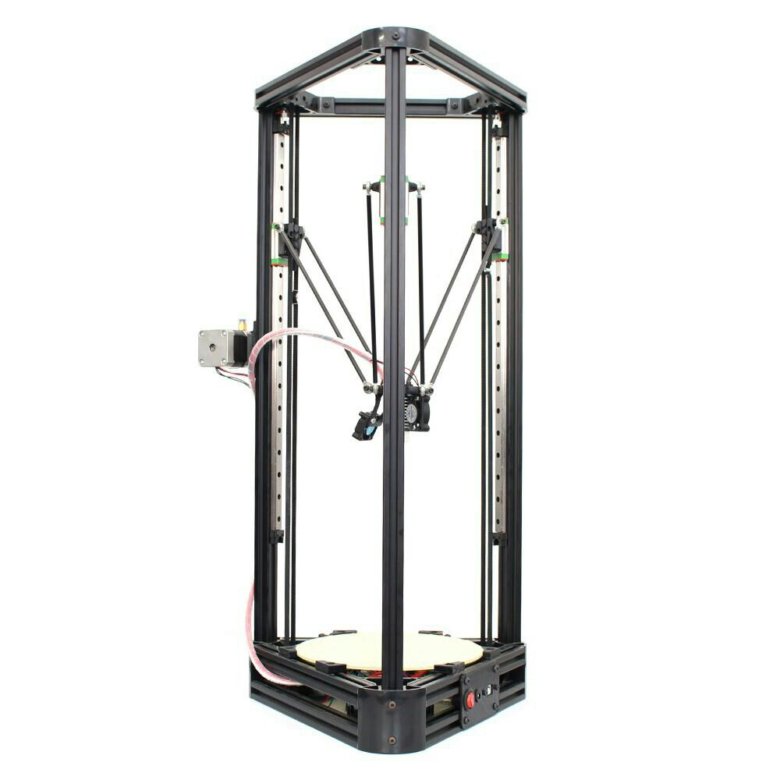 2. Move effector close to the bed You normally do not print in the air. Move printing head to the bed to make
Read More »
After extruder calibration you should calibrate material flow.It is possible that without flow calibration you printer will be over extruding and your print quality will be bad.You can easily modify it in your slicer, such as Cura. 1. Download cube stl file Click on the picture and download a 25*25*25 mm cube. 2. Slice it with a vase mode on
Read More »
1. Preparation 1.1. Heat up the nozzle Start by heating up the nozzle to your printing temperature PLA 190°C, PETG 230°C, ABS/ASA 250°C 1.2. Retract filament Push the extruder calipers and retract filament from bowden with the other hand 1.3. Bowden removal Press the bowden coupler and remove the bowden 1.5. Insert filament Cut the end of filament with pliers
Read More »
1. What is it good for? PID regulation is necessary for consistent 3D printing.Bad PID values can cause thermal runaway problems or at least inconstintent flow.If you have upgraded extruder fan, extruder head, heater or hot end, you defininitely should perform PID calibration. This guide will onstruct you how to perform a extuder PID calibration. 2. Connect printer to computer
Read More »
Facebook groups:Visit these facebook groups for more informations, help and ideas how to make your printer better
Anycubic Kossel 3D Printers
Anycubic Kossel 3D – SKR Upgrade
Anycubic Kossel upgrades World Wide
Anycubic International – 3D Printers Support Group
Donate
I hope that this webpage and guides have helped you with your 3D printer and saved your precious time.
You can support this page by a donation:
Answers to questions about kossel
For questions about the Kossel family of printers in particular. Questions about Delta printers in general have their own tag.
This tag is for questions specifically about the Kossel family of printers. Questions about delta 3D printers usually have their own tag.
Kossel 3D printer is a parametric delta printer based on Rostock 3D printer. From RepRapWiki - Kossel:
Kossel is a delta robot parametric 3D printer built in 2012 by Johann in Seattle, USA, based on his Rostock prototype.
It is named after Albrecht Kossel, a German biochemist and pioneer in the study of genetics. He was awarded the Nobel Prize for Physiology or Medicine in 1910 for his work on the definition chemical composition of nucleic acids, genetic substance biological cells.
The original printer has spawned a number of derivatives that differ mainly in their size, but which and basically have the same design. Again, from RepRapWiki - Kossel:
History
There are several printers in the Kossel family.

Kossel Heritage
- Spectrum line instead of timing belt.
- 623 bearings running directly on a 15 x 15mm vertical aluminum extrusion such as OpenBeam, 6 bearings per bottom bracket.
- Extruder PG35L directly on the end effector (moving platform).
- This design has been deprecated, but the source files are still available.
OpenBeam Kossel Pro
- Designed by Terence Tam for mass production.
- Successfully funded on Kickstarter.
- Stamped and injection molded parts instead of 3D printing.
Mini Kossel
- This is the latest and stable version of Johann.
- The rest of this page describes the details of the Mini Kossel.
There are other (usually larger) projects from other authors, namely from Terence and David Crocker , among others.
The original goals of this particular delta style printer design, as opposed to the more traditional cartesian style designs that exist, are as follows:
Design Objectives
- Zero backlash.
- Type: Delta Printer
- Speed: 320 mm/s in all 3 directions.
- Resolution: 100 steps/mm in all 3 directions.
- Repeatability: greater than 0.03 mm (30 microns)
- Assembly volume: cylindrical, diameter 170 mm, height 240 mm.
- Size: triangle, width 300 mm (240 mm open beam + printed corners).
- Frame height: 600 mm.
- Print surface: unheated round glass, does not move.
- Mass of end effector with hotend: less than 50 grams.
- Simplicity: less than 200 parts.
- Hardware cost: less than $600.
- Fully automatic print surface level calibration (auto leveling).
(Source: RepRapWiki - Kossel)
- Printing half size after replacing board I recently burned one of the MOSFETs on my RAMPS 1.4 board on my Sintron Kossel clone so I upgraded to RAMPS 1.6. Now my printer only prints 50% of the intended size...
- How do I align the kossel endpoints? My printer is kossel (delta 3d printer).
 I have the probe far from the nozzle (offset -x45 y17), every time I run G29, the result is unacceptable, the distance z between the dots is greater than 0.5mm,…
 - Anycubic Kossel Delta switch from Trigorilla to MKS Gen L 1.0 I have an Anycubic Kossel Delta 3D printer. The original Trigorilla motherboard died and I decided to buy it but only found a Makerboard MKS Gen L 1.0 which is said to be compatible with… Kossel. It has a Trigorilla motherboard. My motherboard is dead and replacing it with another Trigorilla motherboard is very expensive or almost...
- Marlin: Switch Y to E1 I have an Anycubic Kossel with a Trigorilla motherboard, Mega2560+RAMPS1.4. I am using Marlin 2_0_bugfix My Y connector is no longer working so I would like to use the E1 connector in…
- Looking for files for printed parts for my Kossel XL kit from Builda3Dprinter.eu A couple of years ago I got a Kossel XL kit from builda3dprinter.
 eu as a a gift, but I stopped building it because several parts were missing, including printed ones. Now that I'm building...
 - Partial underextrusion in walls I am experiencing strange underextrusion "pillars" on the outer walls of my XYZ test cube. In the pictures below I have printed PLA test cubes with a 0.4mm nozzle, 0.2mm height and temperature... I am quite new to 3d printing. I have this issue with the print head rising too high during printing as it gets close to the edge of the table. It's not a problem with…
- LV8729 about kossel problems with print sizes (steps) I installed an LV8729 on a kossel configured with SKR 1.3 and marlin 2.0 with all jumpers configured the same for 16 microsteps in X Y Z. Everything seems fine, printer…
- Getting wrong measurements on my Kossel Linear Plus after installing SKR 1.3 with Marlin 2.0 So I replaced the Trigorilla board in the printer with SKR 1.3 with TMC2208 drivers and installed the latest Marlin 2.
 0 with a configuration based on this . You can find config.h here…
 - How to build an extruder motor holder for the Kossel Mini I am building a mini Kossel and I am stuck on the extruder motor holder. My Kossel came without instructions, I was given a set of instructions by a friend ("Kossel Assembly Guide" by Blomker industries). I…
- XY plane distortion calibration in Repetier I built a delta 3d printer (eg mini Kossel) and am now trying to calibrate it. I made all the horizontal and vertical rods out of wood myself and bought the gussets (between the rods)…
- What are the changes in this Kossel? (This question is sort of a self-answer. I know who made this printer, he explained the modifications and I thought it might be of interest to others as well. I asked him to answer this…
- Kossel clone print quality for models Print in Place My first printer is a Delta style Kossel clone and I'm having no luck with Print In Place (PIP) models especially with loops I suspect my printer just can't achieve low enough tolerances,…
- Delta printer offset on the first few layers On the first few layers, each layer has an offset in the -X/-Y direction on the previous layer.
 But above ~2 mm it is vertical. I checked the printer assembly that there is no noticeable error in the towers. Tried…
 - How to draw delta kossel angle in fusion 360? I want to draw a delta kossel angle in fusion 360 for 2040 aluminum extrusion like the picture below but can't find a way to actually start, I draw 3 side polygons and a rectangle…
- Pronterface not connecting to Anycubic Kossel Linear Plus For Anycubic Kossel Linear Plus I have to upload data to the 3D printer from a software called Arduino and then close it. Then I open Pronterface and insert the correct port and…
- Complete list of fasteners for Sintron Kossel TL;DR I need a complete list of fasteners (bolts, nuts and washers) for Sintron Kossel. Has anyone bought this kit and knows the answer, or knows where it's documented? Full list…
- Kossel accumulates error along the Z axis I have a mini Kossel and I am calibrating.
 I can go home and find a paper table - a test getting some Z value with M114 . Then I run the effector almost all the way...
 - The table leveling method doesn't work with Repetier 0.92.9 firmware? I built a delta 3D printer (e.g. Kossel mini) with a Z probe next to a hotend with manual deployment and a RAMPS 1.4 board: I set up the Repetier firmware with an online tool; All my…
- How long are Traveling Kossel carbon rods? TL; DR - For a given Kossel frame size (taking into account the vertical and horizontal lengths of the aluminum extrusion frame), what would be the length of the carbon fiber bars? As an example from...
- Delta Kossel 3D Printer Heatsink Problems I feel stupid asking, but can this cause problems if the heatsink/heat block/extruder tip can rotate freely in the Kossel Delta 3D printer? The other day I went…
- What is the life expectancy of Kossel? I'm thinking about buying this package, Kossel, as my first 3D printer.
 It's not the cheapest model, but it seems to have high resolution and stable performance, which is what I need. …
Homemade Delta based on Anycubic Kossel. Part 1 Hi all! Just want to introduce myself, my name is Dmitry. And I’ll tell you a little about myself and how I came to the world of 3D printing (we’ll write everything in bulk). I am relatively new to 3D printing, I learned about this business a couple of years ago when I was in college. It was there that I first had a chance to work with 3D printers and generally find out what exists. Then it was all within the framework of the WorldSkills competition in the 'Prototyping' skill. They put me out because I had experience in 3D modeling (albeit in the direction of the gaming industry, but still). For all the time that I was familiar with printers, they seemed to me something unbridled and complex. I started learning 3D printing on Wanhao Duplicator 4, according to my memories - a terrible thing.
 ..
.. At the end of my studies, for my thesis, I needed to print a couple of parts on a 3D printer, and then for the first time I saw how my curator assembled his Delta. I saw a ready-made version, and I was very interested in its kinematics and dimensions. At that moment, I was wedged - 'Maybe I should buy / assemble some kind of printer at home?'. Since I only worked with Wanhao, in terms of size and practicality, it is, to put it mildly, not very good ... But the delta, due to its small overall dimensions and a fairly large print area, I liked it a lot. Drygostol I did not want from the word at all, because I also managed to see enough of them in college.
In February of this year, I gathered my strength, money and determination and ordered Anicubic Delta from the Gearbest website, I took the simplest one, on rollers. The delta of the old version came to me, without a limit switch for auto-calibration and completely disassembled, but I was never upset by this, at first. Collected for a long time and dreary, several times reassembling the base. Since I had no experience in assembling, I spent almost 3 days for 2-4 hours. During this time, I managed to regret three times that I bought a delta, but I did not quit this business. I spent another week to calibrate it and so that it would start typing at the very least. From the usual button for Arduino and using the same printer, I was able to print a small manual calibrator, at the very least it was possible to print.
My printer during and after assembly.
In the course of operation, a heated table, TMC2208 drivers, and an external PSU were attached to the printer. But here I am faced with the idea that this is not enough for me ... And that the delta itself is small ... Then, as luck would have it, literally after a few months of unhurried printing (2-2.5 kg of plastic was gone), a huge backlash appeared in the tie rod ends, which is very strong affected the print quality at high speeds, I did not really like it.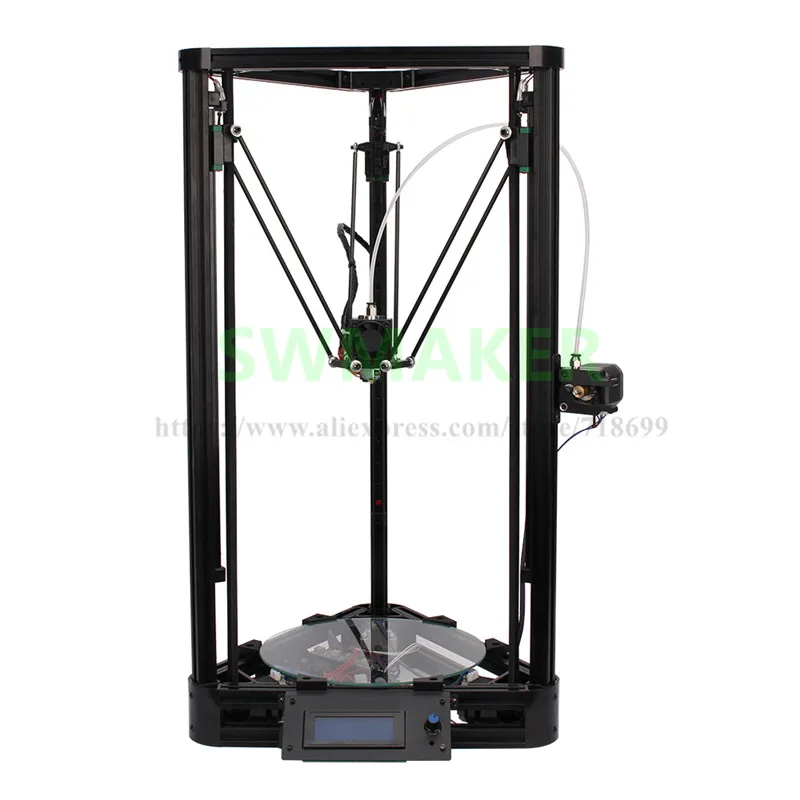 In addition to this, the wear of the fluoroplastic 'wheels' began, and I remember how my curator assembled the printer himself.
Taking into account all my experience in assembling and working with printers, I began to dig into the topic of assembling printers, how and from what to assemble it. At first, it took a long time to decide what to choose - rails or shafts, but settled on the first option. The structural profile 2020 served as the basis. Having opened the 3D modeling package, I began to design the printer ... The design tasks were simple - to design a large in terms of printed area, but quite a 'compact' Delta printer. Another condition for me was the rigidity of the structure, so I decided to sculpt a rectangular base, to this it also falls that I want to completely close it in a casing, and this is easiest to do in a rectangular case, in my opinion.
I designed for a long time, even during the assembly process I had to change some nodes, redo something and give up something.