Best 3d printer for lithophane
Best Filament to Use for 3D Printed Lithophanes – 3D Printerly
3D printed lithophanes have been gaining a lot of popularity and many different filaments are used for them. I’ve been wondering which filament is actually best to use for the perfect lithophane picture.
The best filament for 3D printing lithophanes is ERYONE White PLA, with many proven lithophanes to show. Lithophanes show up best when they are a very light color and PLA is a very easy filament to print with. Many people have used this filament with great results.
There are some other important things to know when 3D printing lithophanes, such as ideal print settings and some cool tips to create great lithophanes. Keep reading to find out these details.
If you are interested in seeing some of the best tools and accessories for your 3D printers, you can find them easily by clicking here (Amazon).
Which is the Best Filament for Lithophanes?
Lithophanes are fairly difficult to make because you have to take many things into account. Other than getting precise print settings, your filament plays a big role in it.
You definitely want white filament for lithophanes that show up the best. Now there are several brands of filament which produce white PLA filament, so which is the best out there?
When we are talking about the premium brands of filament, you won’t find an extraordinary amount of difference between them. For the most part, they will work similarly as well so you have to look at which filament manufacturers have a long-standing reputation of high quality.
This category has a few options but one stands out for me.
If you are after a premium option, then it’s a good idea to go for that premium brand.
A great premium white PLA to use for lithophanes that I recommend is ERYONE PLA (1KG) from Amazon.
It’s specially designed so you won’t have tangle issues or nozzle jams while in the middle of a long print. Sometimes you just have to pay extra for that top quality, and this is one of those time, especially for a great lithophane.
If you aren’t too caught up on the absolute best quality, a budget white PLA should work just fine for a lithophane.
A good budget white PLA to use for a lithophane that I recommend is eSUN White PLA+ from Amazon.
Out of the many 3D printer filaments out there, it makes amazingly high quality lithophanes, as widely described in Amazon reviews. The dimensional accuracy of this filament being 0.05mm, ensures you won’t have under extrusion issues from bad filament diameter.
You can also 3D print lithophanes with other materials such as PETG, but PLA is hands down the easiest filament to print with. Unless you are planning to keep your lithophane outside or in a hot area, PLA should hold up just fine.
How Do I Create Lithophanes?
Creating a lithophane might seem like a complex task, which I can imagine it used to be, but things have been made a lot easier.
There is great software out there which allows you to generate lithophanes from any photo. It takes all the main technical work out of creating a lithophane into an easy-to-use app that you simply insert your picture into.
It breaks down your photos into levels of color to make light and dark areas show up more or less, creating a beautiful picture. I’ve seen some very high quality lithophanes from these software.
After you have your lithophane image and settings done, you can download it from the browser-based software and import the STL file straight to your slicer.
The Best Lithophane Software To Use
Lithophane Maker
Lithophane Maker is a more modern software which gives you more choices to make changes to your pictures, but it does get pretty complicated, especially if you want a quick, simple lithophane.
This is a better option if you have already made a few lithophanes and are looking for more options. For the sake of this article, we will focus on a more simplistic option.
It does have some pretty awesome options though:
- Lithophane Lamp Maker
- Heart Lithophane Maker
- Night Light Lithophane Maker
- Lithophane Globe Maker
- Ceiling Fan Lithophane Maker
3DP Rocks
This is one that anyone can easily get the hang of, with its very short learning curve. The makers of this software realized that sometimes, simple is better and you get a feel for this as soon as you use 3DP Rocks.
If you want a simple solution for making a great lithophane, I recommend using 3DP Rocks.
What Lithophane Settings Should I Use?
- Infill should be at 100%
- Layer height should be 0.2mm at most, but the lower the better (0.15mm is a good height)
- No support or a heated bed is needed, but use your usual heated bed setting.
- Cooling at around 70%-80% works just fine.
Outline/perimeter shells has a wide range, with the middle being around 5, but some people go up to 10 or more. Even 1 perimeter shell works so don’t worry about this too much. It depends on the thickness of your lithophane.
You don’t want your nozzle accidentally leaving residue on the outside of your perimeter while travelling. There is a setting for that in Cura called ‘Combing Mode’ which keeps the nozzle in already printed areas. Turn this to ‘All’.
In Simplify3D, this setting is called ‘Avoid crossing outline for travel movements’ which you can simply check.
Tips for Creating a Great Lithophane
There are many orientations for create lithophanes such as the shape of it. I find that the ‘Outer Curve’ model on 3DP Rocks works pretty well in terms of quality and it can stand up by itself due to the shape.
You should print your lithophanes vertically because it gives better results than laying it flat usually.
There is a lithophane setting you’ll find in 3DP Rocks called ‘Thickness (mm)’ and the higher it is, the better the quality.
What it does is process your picture more finely, so more levels of gray are shown off. A 3mm thickness for your lithophane thickness should be just fine.
It does however take longer to print out a lithophane with a bigger thickness. You should also keep in mind that the thicker your lithophane, the stronger the light behind it is required to properly display the picture.
A border is a good idea to use just to give your picture some contrast. 3mm for your border is a pretty good size. You can use a raft when printing your lithophanes to protect your corners from warping and give it stability while printing.
You don’t want to 3D print your lithophane too fast because quality is very important.
Check out my article about 3D Print Speed vs Quality or ways to Speed up your 3D Prints Without Losing Quality.
It’s all about letting your 3D printer take it’s time and slowly create a highly detailed object. A good printing speed for lithophanes ranges from 30-40mm/s.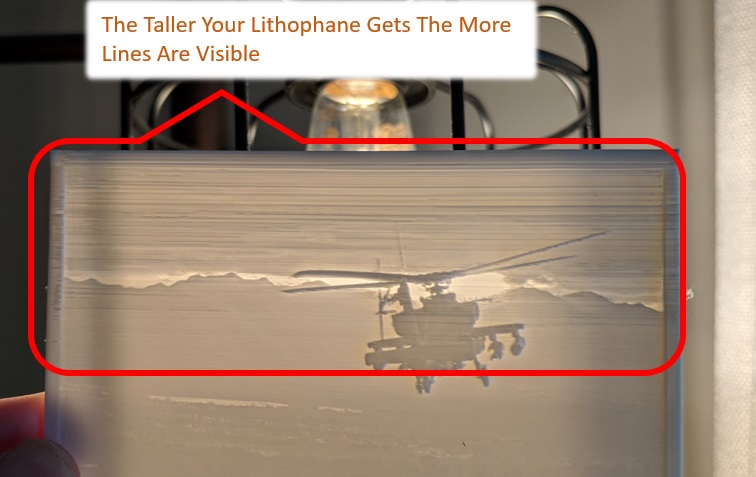
You don’t need an amazingly premium 3D printer to create great lithophanes. They work just well on Ender 3s and other budget printers.
Some people put their lithophane image in a photo editor and play around with different picture effects. It can help smooth out the rough transitions which make the overall print better.
Do Lithophanes Have to Be White?
Lithophanes don’t have to be white but light passes through white filament a lot better, so it produces higher quality lithophanes. It’s definitely possible to 3D print lithophanes in different colors, but they don’t work as great as white lithophanes.
The reason behind this is the way lithophanes work. It’s mainly about light passing through the object to showcases the different levels of depth and levels from a picture.
Using colored filaments doesn’t allow the light to pass through in the same way as white filament, rather more in an unbalanced fashion.
You even find that some white filament has different tones to it, which definitely show up in your lithophanes. Many people find that even using natural color filament is pretty translucent and is hard to get the contrast out of it.
Some people have definitely 3D printed some cool looking lithophanes, but if you are after details, white works out the best.
The blue kitty lithophane does admittedly look kinda cool.
If you love great quality 3D prints, you’ll love the AMX3d Pro Grade 3D Printer Tool Kit from Amazon. It is a staple set of 3D printing tools that gives you everything you need to remove, clean & finish your 3D prints.
It gives you the ability to:
- Easily clean your 3D prints – 25-piece kit with 13 knife blades and 3 handles, long tweezers, needle nose pliers, and glue stick.
- Simply remove 3D prints – stop damaging your 3D prints by using one of the 3 specialized removal tools.
- Perfectly finish your 3D prints – the 3-piece, 6-tool precision scraper/pick/knife blade combo can get into small crevices to get a great finish.

- Become a 3D printing pro!
Best PLA Filament for Lithophanes (2022)
Looking for the best PLA filament for lithophanes? Read our guide to learn of 3 filaments that we recommend for 3D printing lithophanes.
Recently, we decided to get into the trend of 3D printing lithophanes. Our goal was to find out the filament that would produce the perfect lithophane pictures.
If you want to print 3D printed lithophanes, there are a number of important things you should know. After reading this guide, you will know things such as the ideal print settings as well as other information that will help you to successfully print your first lithophanes.
In this Guide
Which is the Best Filament for Lithophanes?
Printing lithophanes can be quite tricky. You want to get the right print settings as well as use the ideal filament.
It is possible to print 3D lithophanes using PETG and other materials. However, from our tests, PLA is the best filament to you.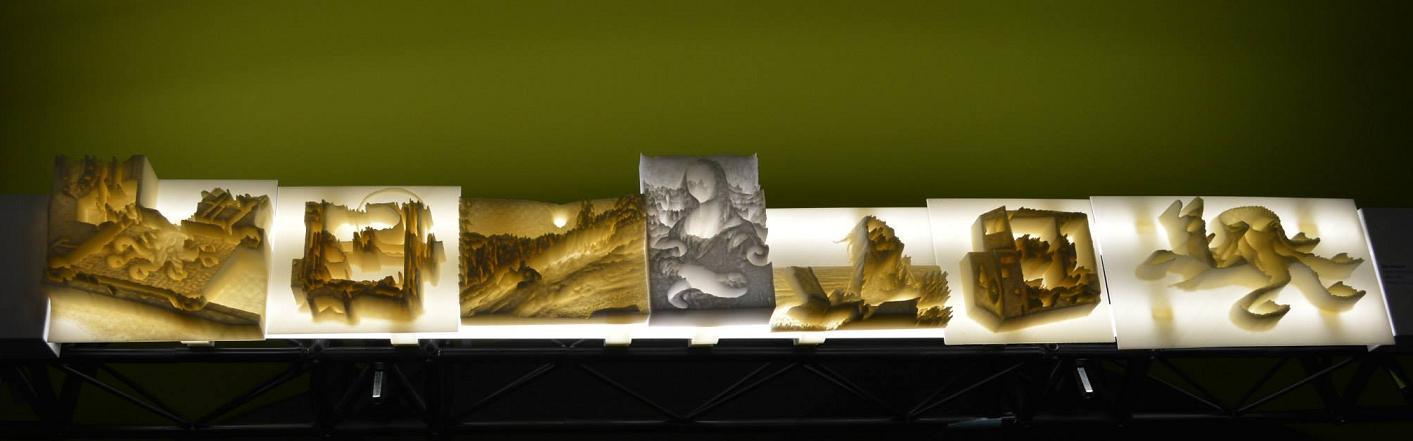 The only time we would recommend using any material apart from PLA is if you are planning to keep your lithophane outside or in a hot area.
In terms of quality, there is no really big difference between the lithophanes printed with PLA or PETG. However, the setup process of the two filaments is quite different. With PETG, you’ll have to tweak your 3D printer’s settings more to get it working.
The best filaments for lithophanes are white PLA ones. You won’t miss a white filament from the best filament brands on the market. For the most part, these filaments work similarly. Therefore, you may want to go with one that has given you great results in the past with your printer.
3 Best PLA Filament for Lithophanes
-
1. ERYONE PLA
For our experiment, we used the ERYONE PLA, which is available on Amazon.
BUY ON AMAZON
The filament does not tangle nor jam the nozzles during a print. This is a great quality PLA filament for lithophane.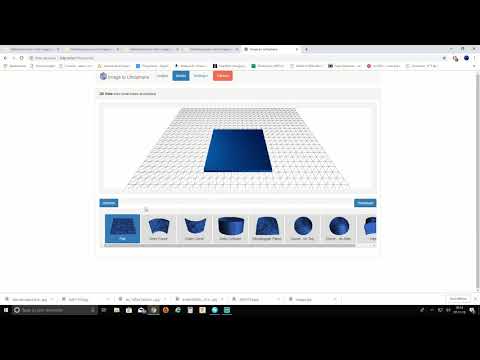
The 3D Solutech White PLA has an orange tint to it. Depending on what you would like to printer, the filament may be right for you. For example, if you want your lithophane to have a sunset effect, this filament would be great.
BUY ON AMAZON
-
3. eSUN White PLA+
If you are on a budget, you might want to try a cheaper white PLA filament, such as the eSUN White PLA+
BUY ON AMAZON
The eSUN White PLA+ has raving reviews from customers on Amazon. This filament has a dimensional accuracy of 0.05mm. Therefore, you won’t have to deal with under extrusion issues.
How to Create Lithophanes
Creating lithophanes is quite easy. You can use a software like 3DP Rocks to generate lithophanes from any photo. The software eliminates the difficult work of creating lithophanes on your own.
The software breaks down your photos into levels of colors to expose dark and light areas. The result? A very beautiful picture.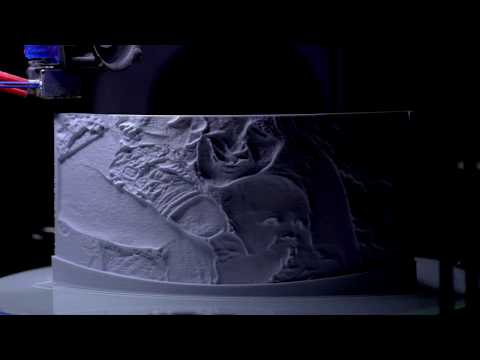
When your lithophane image is ready, you can download it and import the STL file into your slicer.
Best Lithophane Software
We’ve tried a couple of lithophane software and were particularly impressed with the following:
Lithophane Maker
Lithophane Maker is modern software offers you more choices in terms of editing your picture. However, the software has many settings and you can quickly get overwhelmed if you were just looking for a simple lithophane.
If you have already made a few lithophanes and are looking for more options, this is a great software.
Here are some of the options you’ll find in the software:
- Ceiling Fan Lithophane Maker
- Lithophane Globe Maker
- Night Light Lithophane Maker
- Heart Lithophane Maker
- Lithophane Lamp Maker
3DP Rocks
3DP Rocks is an easy software to use. The software has a short learning curve and is, therefore, a great option if you are looking to quickly get started with printing lithophanes.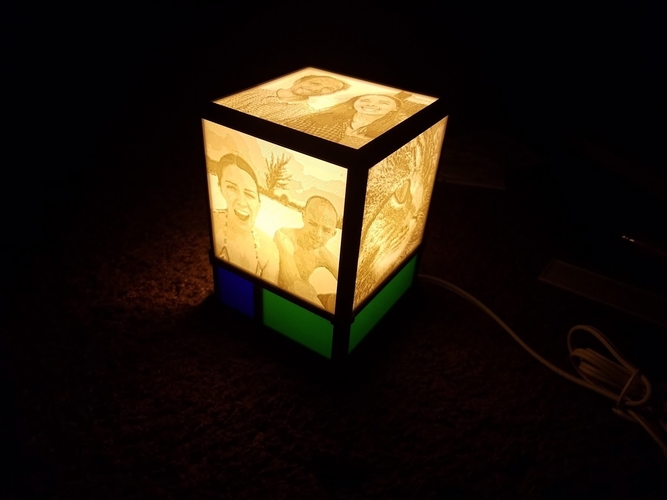
Which Are the Best Lithophane Settings?
- Set the cooling at around 70 percent to 80 percent
- No support or heated bed is needed. You only need to use the usual heated bed setting
- The layer height should be 0.2mm. However, the lower the better. We used 0.15 mm height
- Set the infill at 100%
The perimeter/outline shell has a wide range. The middle is around 5 but you can go up to 10 or more. Even a 1 perimeter shell works. Therefore, you shouldn’t really worry much about this.
To ensure that the nozzle does not accidentally leave residue on the outside of the perimeter when traveling, set the ‘Combing Mode’ in Cura to ‘All’. If you are using Simplify3D, the setting is called ‘Avoid Crossing Outline for Travel Movements’. Make sure the setting is checked.
Tips for Printing a Great Lithophane
There are different orientations for creating lithophanes. We typically use the ‘Outer Curve’ model on 3DP Rocks. This option works pretty well in terms of quality and can stand up by itself due to the shape.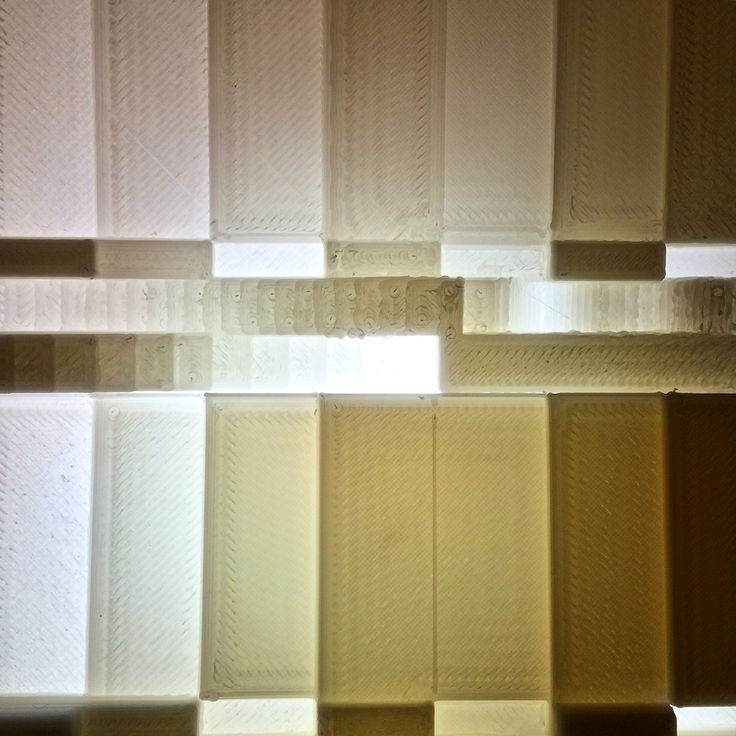
For better results, you should 3D printer lithophanes vertically rather than laying them flat.
In 3DP Rocks, there is a ‘Thickness (mm)’ setting that you can play around with. The higher you set the setting, the better the quality of print you will get.
When you set the Thickness (mm) setting higher, it processes your picture more finely. Therefore, any gray levels will be shown off. We’ve found that a 3mm lithophane thickness works fine most of the time.
However, with the Thickness setting up, your lithophane will take longer to print. Also, the thicker the lithophane, the stronger the light that will be required behind I to properly display the picture.
You can use a border to give your picture some contract. 3mm will work fine for most borders. You can also use a raft when printing your lithophanes to improve stability during printing and protect the corners from warping.
When printing lithophanes, you want all the details to be captured. Therefore, you should not print them too fast.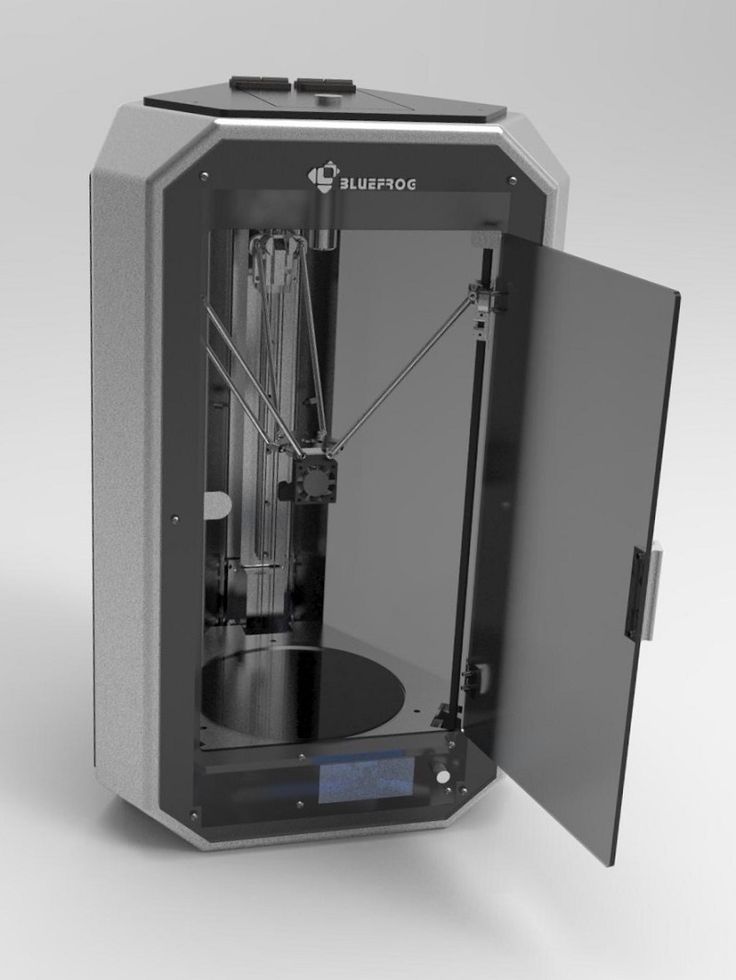 Keep the printing speed at 30 – 40 mm/s.
You can print lithophanes on any budget printer, such as the Ender 3 or Creality CR-10s. However, if you have a premium printer, this is even better.
If you wish, you can put the lithophane image in a photo editor and apply different picture effects. This can help to smooth out the rough transitions and make the overall print better.
Best Filament Color for Lithophanes
The best filament color for lithophanes is white. Light passes through white filaments a lot better. This is why white lithophanes tend to be of higher quality than those made of other colors.
However, you don’t have to print lithophanes in white. If you wish, you can print lithophanes with colored filaments. However, with these lithophanes, light won’t pass through them in the same way as in white filament.
Use some white filament with different tones to print lithophanes. If you use natural white PLA filament, the lithophane may not get the contrast you want.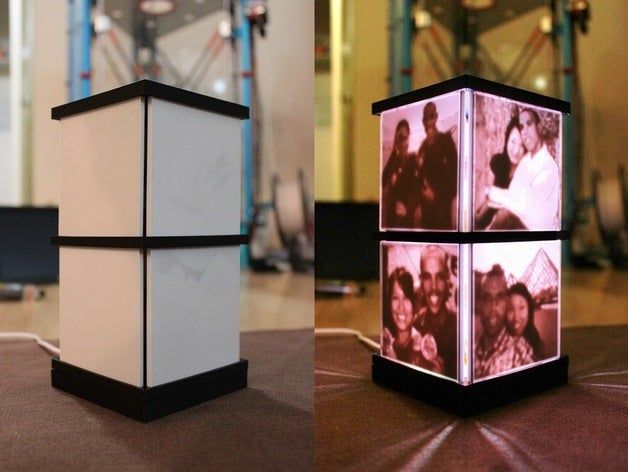
You can print lithophanes in any color (see image below).
However, for the best details, you want to stay with white PLA filaments.
Conclusion
From our tests, the best PLA filament for lithophanes is ERYONE White PLA. Lithophanes come out best when they are printed in very light color. We found PLA the easiest filament to use for lithophanes.
Other people have also had success with the LABIST PLA filaments.
GUIDES: Best PLA Filaments for Lithophanes | Types of PLA Filaments | Best PLA Filament for Ender 3 | Best PLA Filaments | What is PLA Filament Made Of?
print your photos in 3D! - qbed
| Detailed instructions for 3D printing of lithophanes |
|---|
3D printed lithophane from kraftly.com
Modern 3D printers allow you to create many original and unique things, and one of them is 3D photo-lithophanes, which are gaining more and more popularity as a customized gift for loved ones or just an original product for sale. Let's take a look at what linophane is and how to print it.
Article content:
What is lithophane?
Designing a lithophane
Selecting a photo
Converting a photo into a 3D model
Creating and printing a 3D model of a lithophane in Photoshop
How to slice a lithophane?
Seal of lithophane
What is lithophane?
Classic lithophane is a three-dimensional image on thin translucent porcelain that can only be seen when illuminated from behind by a bright light source (such as the sun or an ordinary light bulb). The image will appear in gray tones. Traditionally, lithophanes were created in several stages: first, the image was cut out of wax, then, based on the wax model, a mold was created from plaster, into which porcelain was cast, after which the image was fired.
German lithophane of the 19th century, on the left - without illumination, on the right - with illumination. Photo — Diego Verger
The first lithophanes appeared almost simultaneously in several cities of Europe — France, Germany, Prussia and England — at the end of 1820s and their three-dimensionality was strikingly different from the two-dimensional engravings popular at that time and daguerreotypes . The fact is that the quality and quantity of light interacting with lithophane significantly changes the characteristics of the image itself - such dynamism arouses great interest in the viewer. For example, lithophane inserts in windows change their appearance throughout the day depending on the quality and intensity of the sun's rays.
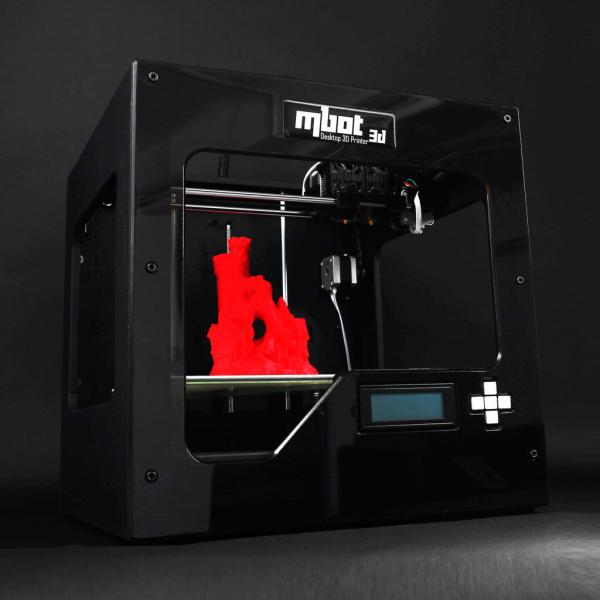
Modern 3D printers allow you to print lithophane from any high contrast photo. How? Varying the thickness of different sections of the 3D model to render different shades of gray when the lithophane is backlit: thin sections let in more light and look brighter, while dense parts of the print let in little light and create dark details in the image.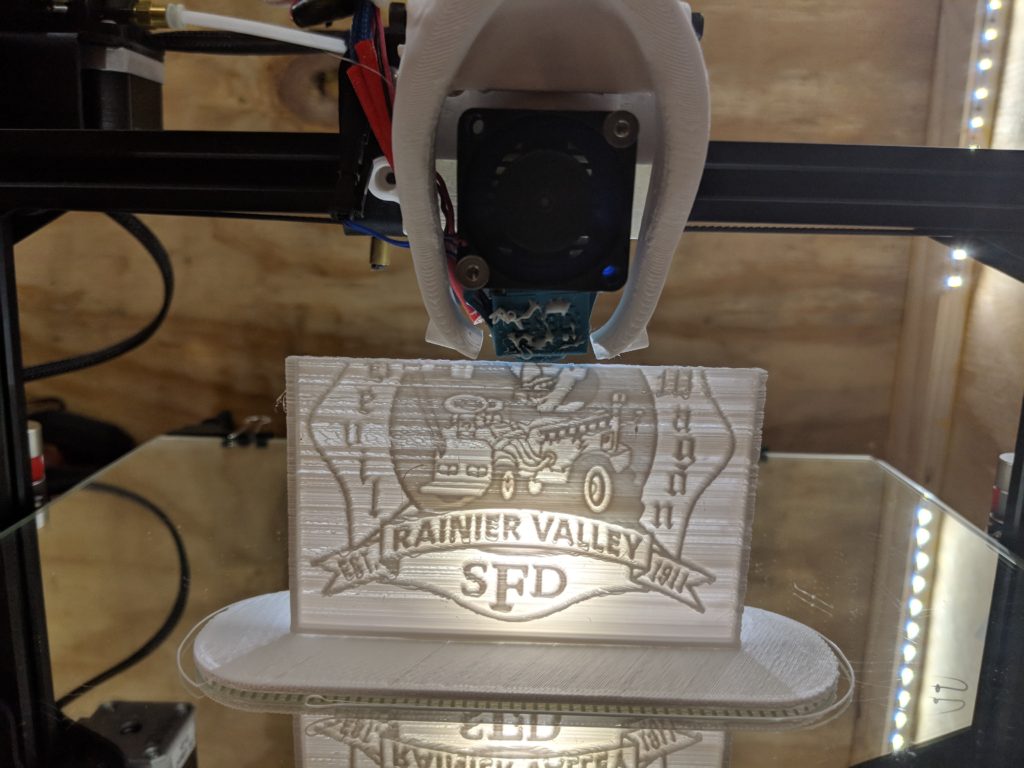 Don't panic, you don't have to manually calculate the thickness of various sections of the digital model - there are many programs that create 3D models for lithophanes automatically and for free! Let's get down to business!
Back to Contents
Designing the Litophane
First we need to create a digital model of the lithophane.
Choosing a photo
The first step to a great printout is choosing a suitable photo , because not all images will look good in the form of a lithophane.
-
Firstly, the finished lithophane will be displayed in grayscale, so images where color plays an important role or where there is a lot of color detail will not work. You can try converting the photo to black and white in Photoshop or any other program to make sure that you like the picture even if there are no colors.
-
Secondly, it is better to give preference to contrasting photos - so the printed linofan will look more interesting (unlike the image, where adjacent details will merge due to lack of contrast).
 Again, you can add contrast to the selected photo in Photoshop or any other program.
An example of a low-contrast image, not quite suitable for lithophane printing. Photo — Christina Ryumina
-
Thirdly, avoid photos consisting only of small details , it can be difficult for the printer to print them. For lithophanes, images with large contrasting details, such as portraits, are more suitable. Images with a single-color background without details are also good, for example, portraits against a backdrop or against a clear sky. You can clean up the background or create a color fill instead of an existing background in Photoshop or any other program.
Contrast photo on a plain background is ideal for printing lithophane. You can further clean up the background and add photo contrast in any post-processing program. Photo — Christina Ryumina
An example of a photo with many details is not the best choice for creating a lithophane. Photo — Christina Ryumina
Of course, you don't have to follow these tips. If you print on a high-quality printer with high resolution, then you can handle any details! For example, SLA printers allow you to print smaller details than their FDM counterparts (read more about 3D printing methods here), so a photo for printing on an SLA printer may contain small elements.
Convert photo to 3D model
0011
-
You can convert photo with free online Image to Litophane converter.
-
Models for lithophanes can be created in Photoshop CC by downloading a special Operation (Action) from the official website (read detailed instructions below), or in Blender: these programs have more options to edit the model.
 It is worth considering that a subscription to Photoshop CC is paid.
-
Cura software (version 13.11 and higher) from Ultimaker will also work. The program is easy to use and allows you to smooth the model, but it does not have the ability to edit the image and create a frame around it.
-
You can use the Customizable Lithopane from printer manufacturer MakerBot on Thingeverse. Here you can add a hole in the frame of the lithophane so you can hang your masterpiece, but in this application your photo resolution will be compressed to 100x100 pixels. Another disadvantage: the application can be quite slow, because the Thingeverse website Customizer creates a model and STL file instead of your computer.
-
There is also a free 2D to STL converter for Windows. There are options for smoothing the model, but no way to edit the image.
-
You can create a model for lithophane in a paid Photo to Stereolithographic file converter.
 This program allows you to create lithophanes on spheres, cubes and other shapes, but the interface here is not the most understandable.
-
There is a nice free Portuguese converter where the language can be changed to English after installation by going to the Iniciar menu, then Idioma and finally selecting English. Here is a link to download the program. In this converter, you can create a frame for the image, edit it before creating a 3D model, and also enlarge / reduce the image. The converter generates models quite quickly, so you can experiment with 3D model settings until you are completely satisfied with the result.
The list of programs, of course, is not exhaustive. You can use any converters of 2D files to 3D models that support export to STL. In this article, we will be using Photoshop CC to create a 3D model from a photo.
Create and print a 3D model of Lithophan in Photoshop
Attention! The operation only works if the interface language in your Photoshop CC is English.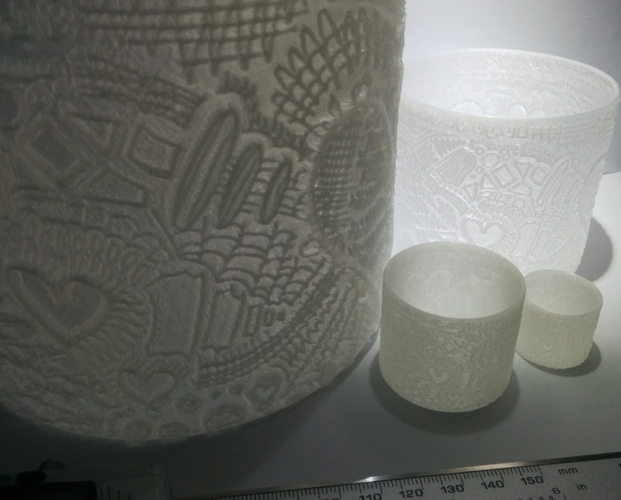 You can change the language by going to menu Photoshop CC → Preferences → Interface.
To add an action in Photoshop, go to the program, go to the top menu in Window → Actions or click the icon Play in the side menu (see screenshot below).
Going into the Actions panel in Photoshop
Opening the operations panel, click on the menu icon (see screenshot below) and select the command "Load Actions..." . We go to the location where your downloaded Lithophane folder and the operation itself "Make Lithophane.atn" are located and select it. The operation is now available in your Photoshop.
Loading the operation "Make Lithophane.atn"
Operation "Make Lithophane.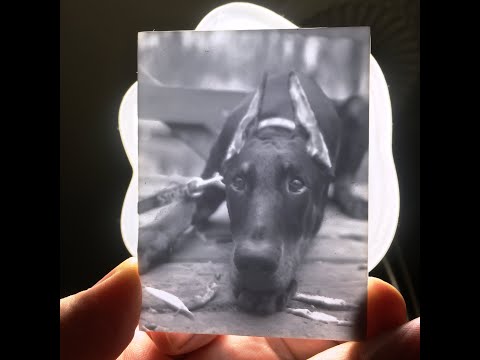 atn" is ready to go
Open the image you are about to print. You can convert it to black and white, add contrast and make any changes, then print the visible layers into one by pressing Ctrl + Shift + Alt + E (English), or simply merge the layers through the menu Layers (in any case , you will be prompted to merge layers when starting the operation). In the layers panel (marked in blue in the screenshot below), select the layer with the final version of your image and name it Background (or select the Background itself directly if you haven't changed anything). Then open the "Make Lithophane" operation folder, select "Make 100mm x 6.25mm Lithophane" (marked in red in the screenshot), press Play (marked in green in the screenshot). The operation automatically converts the 2D image into a 3D printable object: Photoshop converts the image to Grayscale, inverts the tones, creates a 3D depth map, as well as a frame and a flat surface on the back of the image.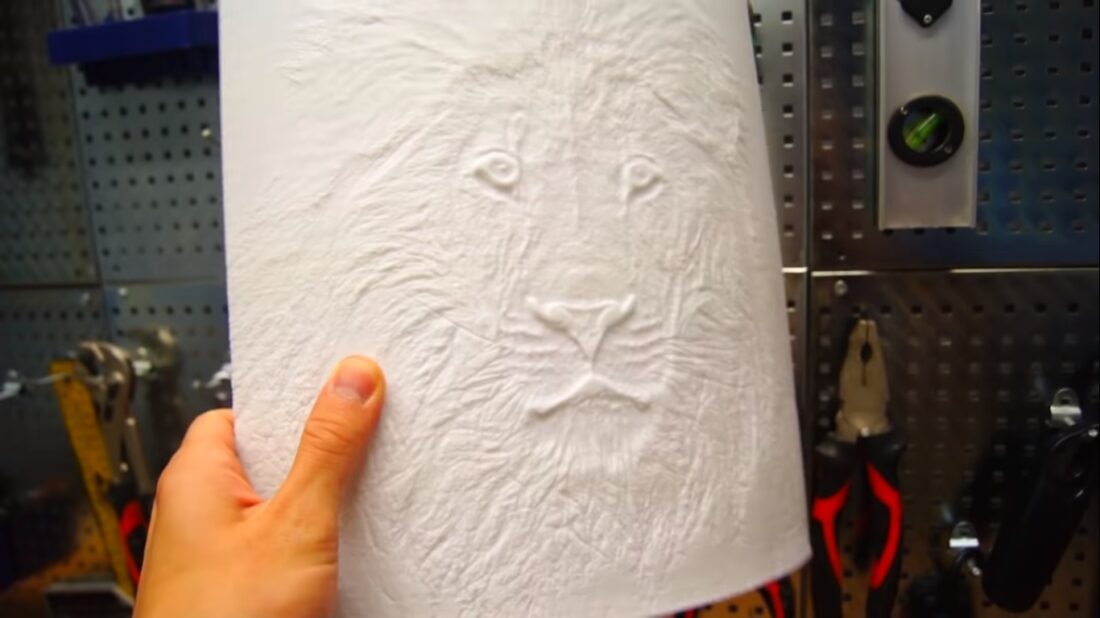
Starting the operation of creating a digital model of lithophane
Litophane in Photoshop CC
To print a 3D object, click on the top menu 3D → 3D Print (marked in red in the screenshot below) or click on the print icon (marked in pink). Next, you will see the 3D printing settings panel (see screenshot below). Select a printer (or specify Printer: STL File if you want to export the model as STL), set Printer Units , Detail Level . Determine the size of the model by setting the X / Y / Z values. Option Scale to Print Volume will create the largest printout that will fit in your printer's camera.
Click on the icon marked in green in the screenshot below to have Photoshop prepare your model for printing. Photoshop will analyze the object and show you a print preview with supports in a new window (supports are turned on and off by ticking Scaffolding ).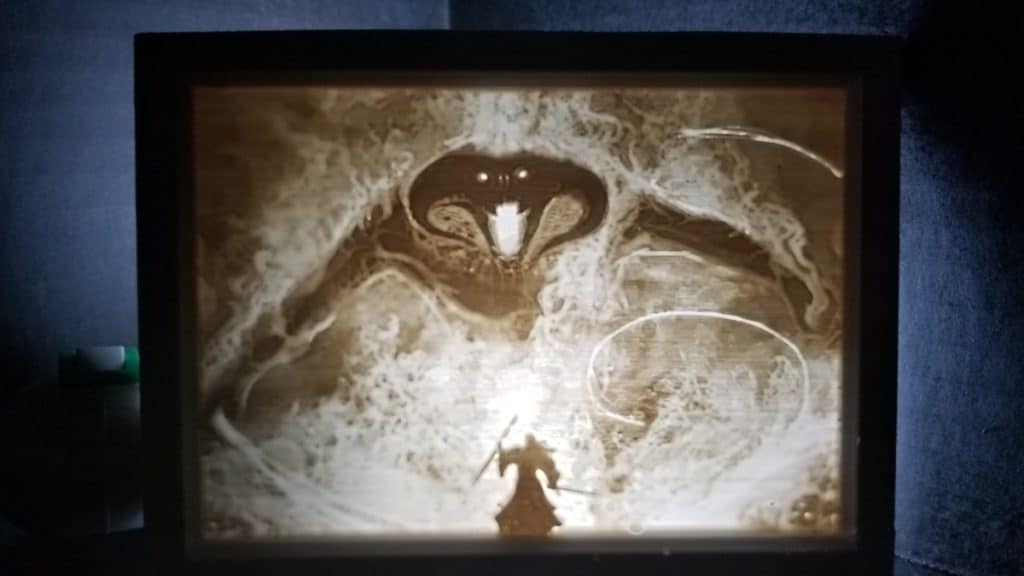 From the same window, we can print or export the model.
Preparing the model for printing/exporting
Model
print/export window
Do not forget that the size and thickness of the lithophane, as well as the amount of detail in the photo and model, affect the printing time. Depending on these settings, it may take 30 minutes or 5 hours to print.
How to slice lithophane?
The slicer will help convert our model into a printer-friendly G-code (read more here). To open a 3D model in a slicer, you need to export it as a STL file. To do this, in the Photoshop 3D printing settings panel, select Printer: STL File , export the model as described above, and open it in your slicer to set up the location of the model on the platform and set other parameters. You can also export photos to STL from any of the other converters mentioned above and then open the file in a slicer.
To achieve optimal printing results, it is recommended to slice lithophanes as follows:
-
Set straight infill to 100% at an angle of 30-35°. 100% infill will provide the best quality lithophane, as there will be no honeycomb inside the layers, which will spoil the tones in the printout.
-
Set the minimum layer height that your printer supports. This way you will ensure high resolution details and the maximum number of shades of gray in your lithophane.
-
Print as slowly as possible. Speaking of FDM, slow printing will help you avoid retraction problems, because most of the print is created with little extrusion, which can provoke a huge amount of retraction. To prevent your printer from smearing your printouts with unwanted material smudges and your extruder from clogging due to fast retractions, it is best to print as slowly as possible.
-
Select the optimal lithophane slicing parameters available in your slicer. Different slicers provide different options. Choose the slicer you like, however, be aware that some slicers take longer to layer the model than others, for example, Cura usually slices faster than Slic3r. Experiment!
-
Do not scale the model in the slicer. The model should be scaled in Photoshop or other converters mentioned so as not to lose resolution when printing.
Litophane Printing
Now it's to load our STL file into the printer via USB or SD card (or whatever methods are available on your printer). The faster the connection, the better, since lithophanes can contain a lot of detail, and some types of connection may not be fast enough to send the entire G-code to the printer, and the printer will begin to slow down and smear material on the printout.
Make sure your printer platform is in good condition to avoid warping your printout.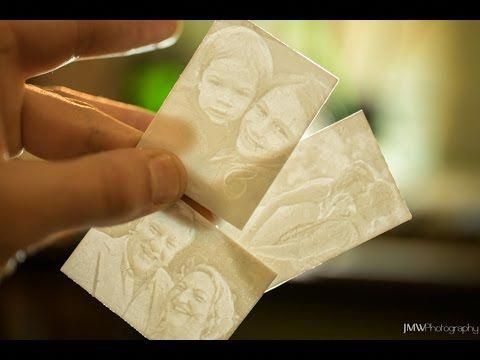 Be sure to check the printer calibration and set the correct print temperature to match the melting temperature of the selected material.
It is best to use white material for printing, as colored materials will not give the same strong lithophane effect. Printing lithophane is best with ABS or HIPS, avoiding PLA : If you are going to put lithophane on a window, then PLA can melt in the sun.
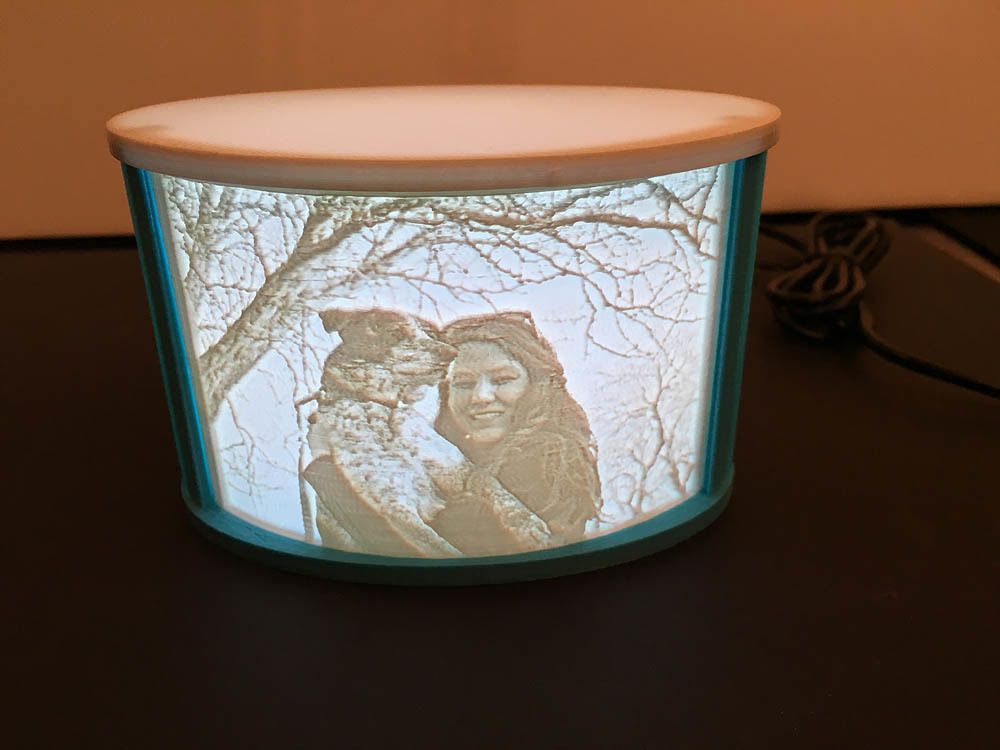
Soft light is ideal for illuminating lithophane. Lithophanes make excellent lamps and even lanterns.
Lithophane lamp. Original photo here
Lantern-lithophane. Original photo here
Back to Contents
Back to All Articles
GalleryWhat 3D Printing Can Do
WATCH
Glossary3D Modeling and Additive Manufacturing Terms
WATCH
DIYK.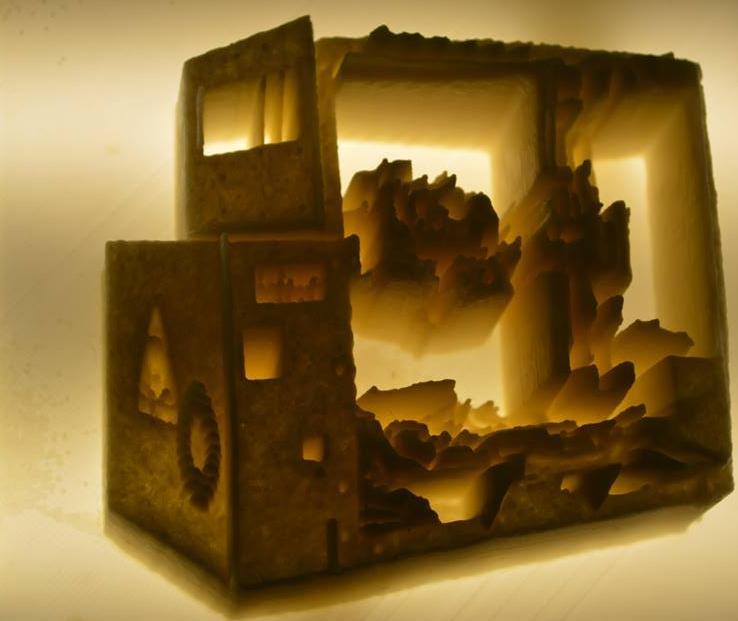 10 Comments
Best Ways to 3D Print Your Own Litophane Model
Litophane is a 3D image. It changes depending on the intensity and quality of the light falling on it. Light areas are very thin, allowing more light to pass through, while thicker areas appear darker.
Litophane is also a piece of art engraved or engraved on very thin translucent porcelain that can only be clearly seen when backlit by a light source. Litofan gives a 3D picture Completely different from 2D inscriptions and Dagorian patterns, which are usually "flat".
Lithophanes date back to the XNUMXth century, when they were traditionally carved from wax, molded into plaster and then fired into porcelain. In the meantime, it has been invented. Photographer An easier way to capture the most beautiful moments, but now 3D printing allows you to experience the best of both worlds.
Lithophane plates are pieces of engraved paper that look normal but contain an image that can only be clearly seen when illuminated behind them.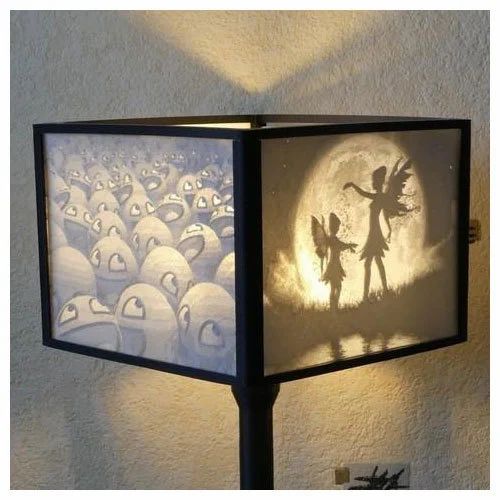 If you have a XNUMXD printer, you can print all kinds of lithophane. In this article, I will tell you about all the easy ways to make a lithophane board in a few simple steps. We are using an Ender 3 Pro 3D printer here. However, any 3D printer should work. Let's start.
Litophane is usually created using CNC machines and cutting materials such as ceramic sheets or plastic, but if you have a decent 3D printer, you can create your own lithophane with little effort. You may need a 3D printer to make your own lithophane panels, but if you want to avoid the hassle and order one, a simple Google search will give you plenty of places to have custom lithophane panels delivered right to your doorstep.
It will be very helpful if you have a 3D printer and basic knowledge of how to Split STL files with slicing apps.
1. 3DP.Rocks
This online tool is the easiest way to create a lithophane STL file.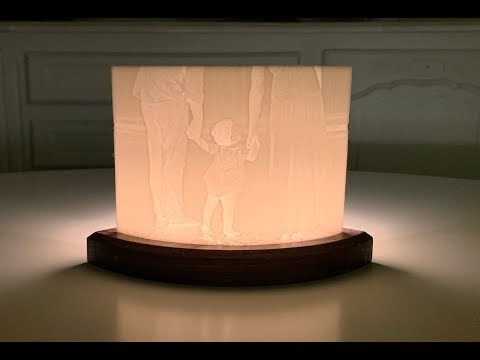 Just upload an image and it will instantly show you what the litophane will look like.
start opening 3DP.Rocks website And click صور button on the web page to upload the image you want to use. After uploading the image, the lithophane model will be created. You can make several different options for lithophane, such as a picture frame, a lampshade and a heart. I just printed out a small picture frame to check the quality of the print.
You can adjust the size of the lithophane model on the settings page. This ensures that the print size will match your preferences.
Once you're satisfied with the design, click Refresh and click Download . This will create an STL file and start downloading to your computer.
Open the STL files in a shredder (I used IdeaMaker) and create a G-code. Just make sure the printer is upright and not tilted for better accuracy. If you want a sharper image, slow down the print speed of the model while slicing.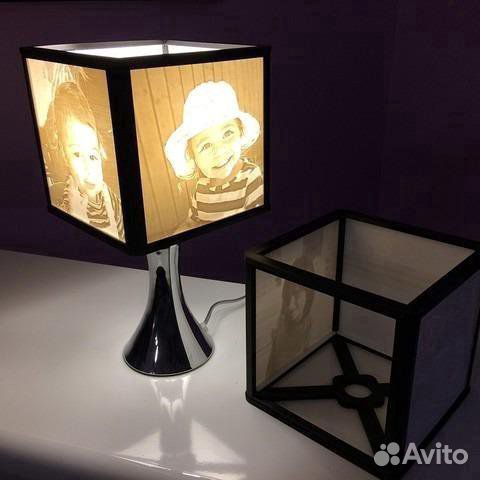
I printed out a photo of the Mona Lisa, and as you can see, it looks like nothing until the background is lit. Fairytale, isn't it?
2. This is Litho
The previous tool was great for making simple lithophane models that can replace an existing photo frame or lampshade. However, if you're looking to take lithophane to the next level, you'll probably want to give this tool a try. You can create a lithophane in the form of a plane, a sphere, a cylinder, an arc, a vase, or even a pumpkin. Open the Tool in a web browser By clicking on this link and downloading the image.
After you upload an image, you can edit it to look like a lithophane. You need to adjust the slider and the changes will be shown to you in real time. Once the image suits you, start creating the form.
Now you can change all settings of the lithophane model to create your own model. Start by choosing a lithophane shape, adjusting the size, zooming in or out on details, and including themes.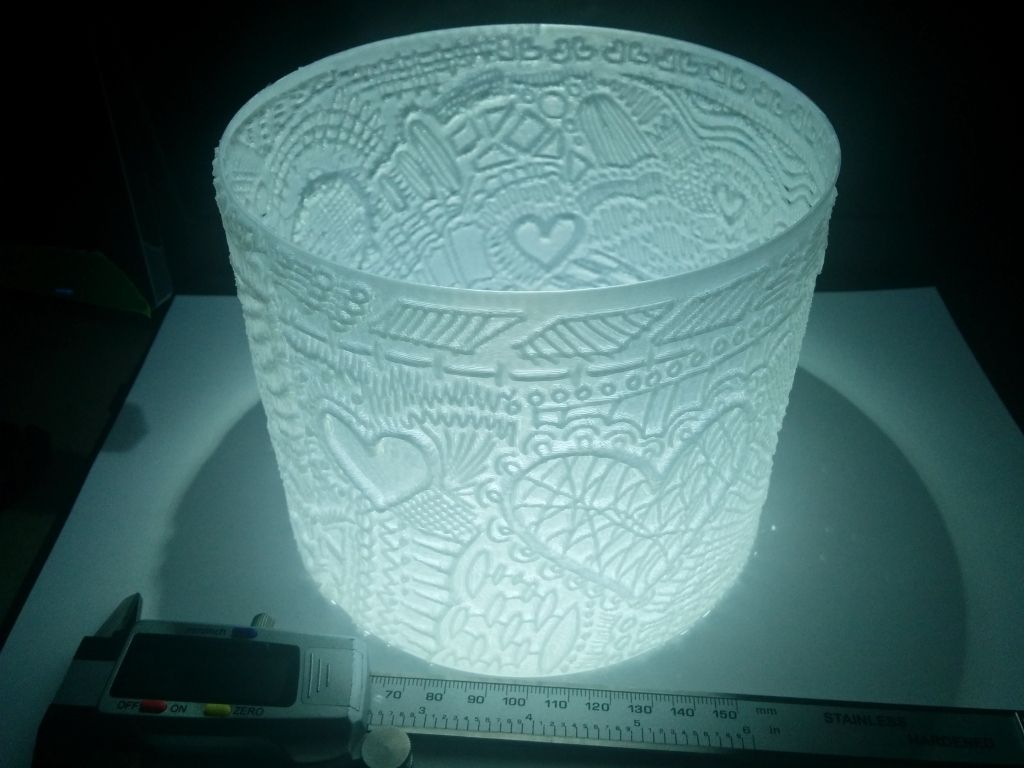 Then press button Download Save the form as STL and you are ready to print.
Once you have the 3D anatomy model in the slicer, start printing the model and the image should appear in detail under the light.
3. Lithophanemaker.com
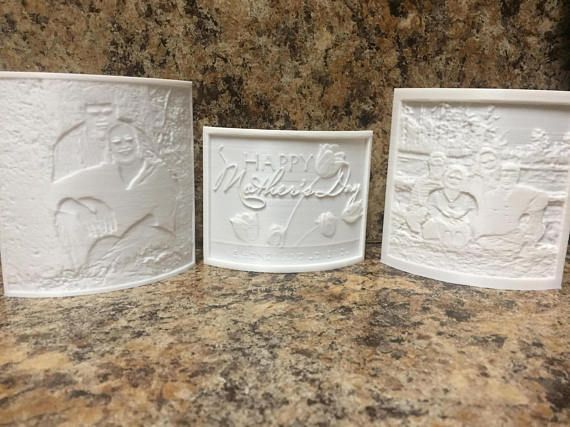
I use this tool because you can make a Lithophane box with 4 different images and use it as a night light. Although you can print 10 different types of lithophane models such as a ball, night light, ceiling light, Christmas lights, etc., I chose a light box for variety. Go to "Company website" Constructor from lithophane and select Litophane LightBox Maker .
The interface is not as easy to use as the other tools, but it is still quite simple and gives relatively good results. Start by uploading images to the page and adjusting the size of your lightbox template. You can even customize the bulb diameter, just measure the bulb socket size and enter the value on this page.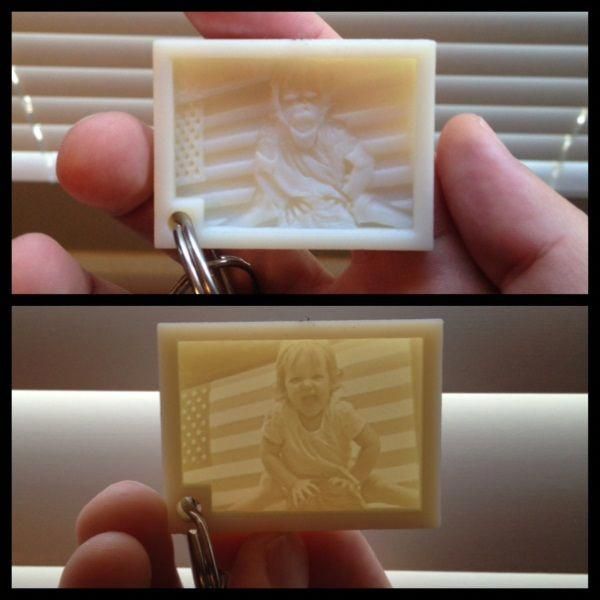
After adding all the images, you will see a preview of how they will appear in the field. Adjust the position of the images and upload the STL files.
I opened the box and it took about 22 hours, but the result was worth it.
This is another corner of the light box with a bulb inside.
4. Create your own litophane with Photoshop.
Probably Photoshop The hardest option for making lithophane models, but it's also highly customizable and you can control every aspect of the model and create whatever you want (only if you know what you're doing).
Download this action file on your computer and add it to Photoshop. Open the image in Photoshop.
Run this action from the menu « الإجراءات . It will be called Make Litophane . If you don't see the play button in the right pane, you can open it manually in Window -> Actions . It may take a few seconds to create a 3D model of your image, so please be patient.