Asus xtion 3d scanner
3ders.org - How to upgrade your Asus Xtion into a handheld 3D scanner
Jan.3, 2014
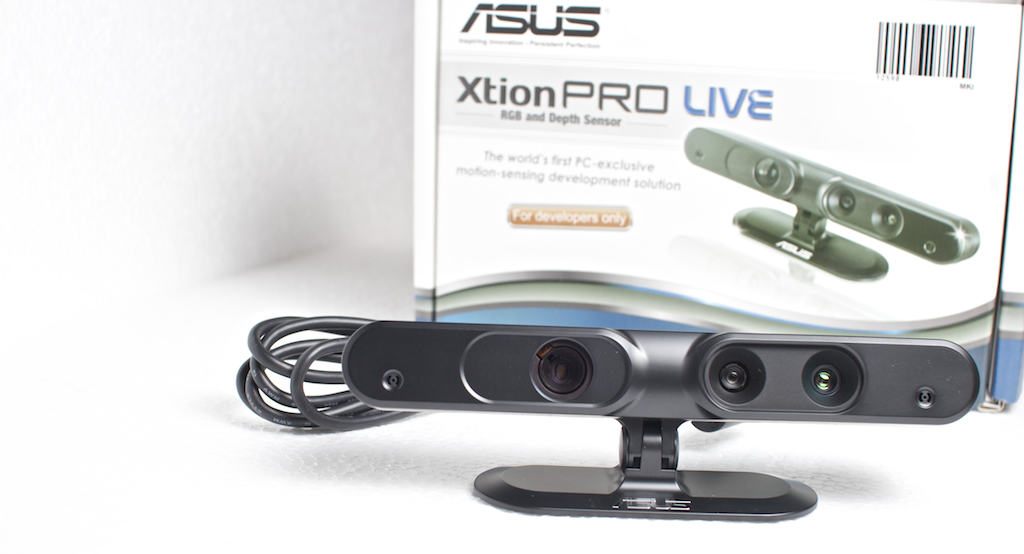
3D scanners give you the power to "scan your world" and rapidly creates 3D maps of objects, complete with colors and textures. At le FabShop in Paris, makers have been using the Asus Xtion or Kinect and software package Skanect for capturing full colour 3D scans. However none of these objects is ergonomic. Instead of just creating another handle for the Xtion, le FabShop decided to transform it into a professional looking tool.
le FabShop's handle is designed to be comfortable, while solving a few other problems. It has following features:
- It keeps a 45 degrees axis for the scan to be oriented easy
- The USB cable is hidden inside the handle, so it isn't in the way
- The base is large enough, so the scanner can balance on itself
- The base is copying the shape of manfrotto's classic plate for entry level tripods.
- If you own a different type of tripod, you can still screw your plate in the handle by using the hole at the bottom
- It also includes a lense protector that clips around the sensor, for safe transportation.
"We found the Kinect a little bit annoying to carry with us on events and presentations. We were also quite disappointed by the performance of the Sense from 3D System, which isn't bad, but just not better than what we already had." says Samuel Bernier, industrial designer and Creative Director at le FabShop.
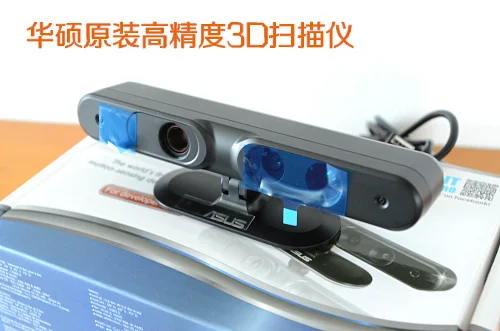
"Combined with Skanect, the ASUS Xtion is a great scanning tool. Be careful of one detail. If you want color on your 3D file, you got to purchase the Xtion pro LIVE, not just the Xtion pro. Only the LIVE version has the camera that captures the colors. In total, expect to pay 300 dollars for tour DIY 3D scanner.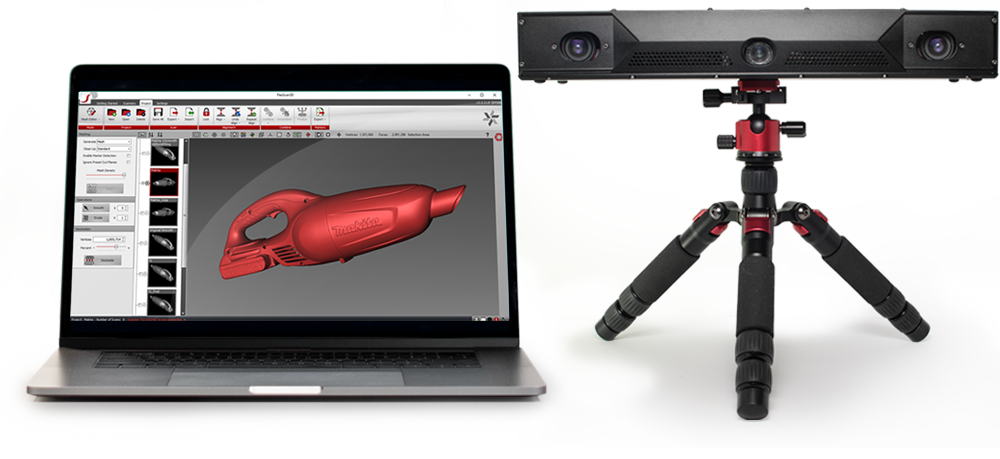 "
"
You can see some results of their scans here. The 3D design files for le FabShop's handle are available for download on Thingiverse. If you are in Europe, you can also order the Xtion on the FabStore here.
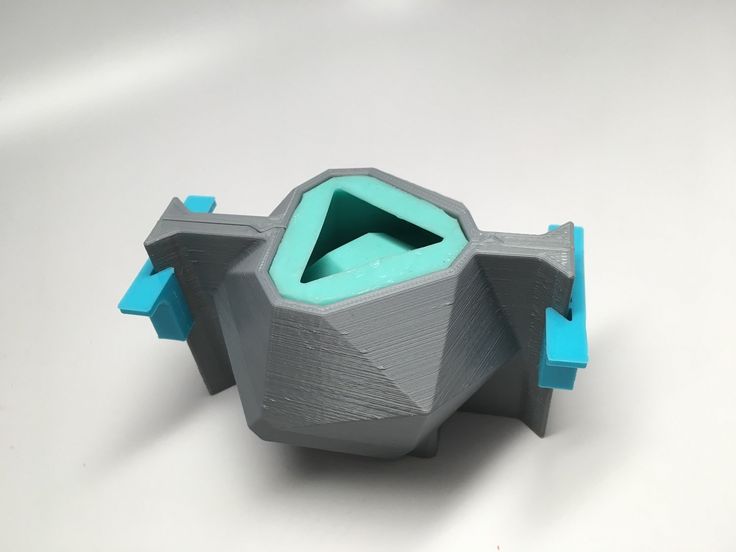
3D printable grip and lens cover from CreativeTools
le FabShop is not the only one who wanted to make 3D scanning much easier and the device more comfortable to use. CreativeTools from Sweden has made another 3D printable grip for ASUS XTION handheld 3D scanner with different design.
It has the following features/advantages:
- The lens cap protects the optics when the XTION is stowed away
- The lens cap can be snapped to the back of the XTION while 3D scanning. This keeps it always together with the device so it is not lost.
- The XTION can stand upright on the flat base surface of the grip.

- The holes on the base make it easy to attach the device to a table top, wall, camera stand, etc.
- The grip has a dedicated pocket for the ferrite core of the USB cable, thus making the design slim.
- The USB cable resides inside the grip and comes out on the back part of the base. This keeps it out of the way while 3D scanning and lets the XTION stand on flat surfaces.
- The cable is held in place by inserting short pieces of 1.75 mm 3D print filament. No glue or screws required.
- The four legs of the lens cover and flat base makes it easy to wrap the USB cable and keep it tidy when the XTION is stowed away.
CreativeTools has uploaded the original Rhino surface CAD file and a STEP version, as well as STL file of the handle and the lens cover on Thingiverse. Watch the video below, or check out the the basic steps on how to 3D scan a human body and finalise the mesh in Autodesk MeshMixer on Instructables.
Posted in 3D Scanning
Maybe you also like:
- 3D scanning turns a metro journey into an abstracted virtual trip
- Rembrandt prints in 3D: for research on painting process
- MakerBot shows off Digitizer 3D Scanner, optimized for 3D Printing
- Aussie scientists create first detailed 3D scan of the Tower of Pisa
- Structure Sensor turns your iPad into a 3D Scanner
- Artec 3D scans the original battle field of Borodino
- With $2.8M Series A-1 funding, 3-D Scanner Co. Matterport prepares for rollout
- $199 Rubicon 3D scanner on indiegogo
- MakerBot launches the MakerBot Digitizer 3D Scanner
Toto wrote at 9/1/2015 6:36:09 PM:
I say use the software of http://www. 3duniversum.com/
Asus Xtion | Hackaday
March 22, 2015 by Theodora Fabio
[Aldric Negrier] wanted to make 3D-scanning a person streamlined and simple. To that end, he created this voice-controlled 3D-scanning rig.
[Aldric] used a variety of hacking skills to make this project, and his thorough Instructable illustrates this nicely. Everything from CNC milling to Arduino programming to 3D-printing was incorporated into the making of this rig. Plywood was used to construct the base and the large toothed gear. A 12″ Lazy Susan bearing was attached to this gear to allow smooth rotation. In order to automate the rig, a 12V DC geared motor was attached to a smaller 3D-printed gear and positioned on the base. When the motor is on, the smaller gear’s teeth take the larger gear for a spin. He used a custom dual H-bridge motor driver made by a friend, which is connected to an Arduino Nano. The Nano is also connected to a Bluetooth module and an ultrasonic range finder. When an object within 1-35cm is detected on the rig for 3 seconds, the motor starts to spin, stopping when the object is no longer detected. A typical scan takes about 60 seconds.
This alone would have been a great project, but [Aldric] did not stop there. He wanted to be able to step on the rig and issue commands while being scanned. It makes sense if you want to scan yourself – get on the rig, assume the desired position, and then initiate the scan. He used the Windows speech recognition SDK to develop an application that issues commands via Bluetooth to Skanect, a 3D-scanning software. The commands are as simple as saying “Start Skanect.” You can also tell the motor to switch on or off and change its speed or direction without breaking form. [Aldric] used an Asus Xtion for a 3D-scanner, but a Kinect will also work. Afterwards, he smoothed his scans using MeshMixer, a program featured in previous hacks.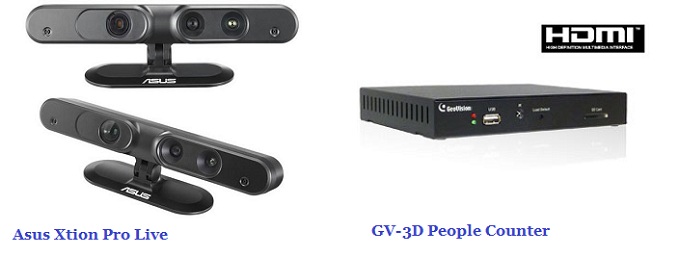
Check out the videos of the rig after the break. Voice commands are difficult to hear due to the background music in one of the videos, but if you listen carefully, you can hear them. You can also see more of [Aldric’s] projects here or on this YouTube channel.
Continue reading “Take A Spin On This Voice-Controlled 3D Scanning Rig” →
Posted in 3d Printer hacks, Arduino HacksTagged 3d scanner, arduino nano, asus xtion, CNC machine, Kinect, meshmixer, skanect, ultrasonic rangefinderNovember 10, 2014 by Brian Benchoff
The Oculus Rift and all the other 3D video goggle solutions out there are great if you want to explore virtual worlds with stereoscopic vision, but until now we haven’t seen anyone exploring real life with digital stereoscopic viewers. [pabr] combined the Kinect-like sensor in an ASUS Xtion with a smartphone in a Google Cardboard-like setup for 3D views the human eye can’t naturally experience like a third-person view, a radar-like display, and seeing what the world would look like with your eyes 20 inches apart.
[pabr] is using an ASUS Xtion depth sensor connected to a Galaxy SIII via the USB OTG port. With a little bit of code, the output from the depth sensor can be pushed to the phone’s display. The hardware setup consists of a VR-Spective, a rather expensive bit of plastic, but with the right mechanical considerations, a piece of cardboard or some foam board and hot glue would do quite nicely.
[pabr] put together a video demo of his build, along with a few examples of what this project can do. It’s rather odd, and surprisingly not a superfluous way to see in 3D. You can check out that video below.
Continue reading “Seeing The World Through Depth Sensing Cameras” →
Posted in Virtual RealityTagged asus xtion, depth sensor, Kinect, Oculus, oculus rift, smartphone, virtual realityMay 29, 2013 by Brian Benchoff
Charlotte’s chassis comes from as a kit, but the stock electronics are based on an Arduino – not something for a robot that needs to run computer vision apps. [Kevin] ended up using a Raspi for the controller and gave Charlotte eyes with an Asus XTION. Edit: or a PrimeSense sensor These sensors are structured light depth cameras just like the kinect, only about smaller, lighter, and have a better color output.
Hardware is only one half of the equation, so [Kevin] tossed the Arduino-based stock electronics and replaced them with a Raspberry Pi. This allowed him to hone his C++ skills and add one very cool peripheral – the XTION depth camera.
To the surprise of many, we’re sure, [Kevin] is running OpenNI on his Raspberry Pi, allowing Charlotte to take readings from her depth camera and keep from colliding into any objects. The Raspberry Pi is overclocked, of course, and the CPU usage is hovering around 90%, but if you’re looking for a project that uses a depth sensor with a Pi, there you go.
Continue reading “Charlotte, The Hexapod With 3D Vision” →
Posted in Raspberry Pi, Robots HacksTagged asus xtion, depth sensor, hexapod, KinectInstallation and First Steps - Documentation Artec Studio 11
System Requirements
To use with Artec 3D scanners, your computer must meet the system requirements.
Note
Third party scanners only available in Artec Studio Ultimate!
Also note the following:
- Real-time Merge Mode
-
(Real-time Fusion Scan): Make sure your graphics card has at least 1 GB VRAM or your Intel HD Graphics 4600 series chipset or higher (see the FAQ article for details).
- Using the Intel RealSense Camera
-
implies that your computer is running Windows 8 (Windows 10 for SR300) with at least 4th generation Intel Core processor and USB3.0 port
- Using Kinect ver. 2
-
requires a computer running Windows 8, a 3.1 GHz or faster processor (two physical cores: yes logical cores per physical) and a USB3.0 port (Intel or Renesas chipset)
- Using multiple scanners
-
(Multi-Camera) - Your workstation must have as many independent USB 2.0 controllers as you plan to connect.
 You can get the required number of USB controllers by installing PCI/PCI-Express USB 2.0 cards.
 - Stereo mode in Artec Studio:
-
To view models in 3D on stereoscopic monitors, you will need an NVIDIA Quadro professional graphics card that supports OpenGL Stereo. See also article.
User account
To install Artec Studio and receive timely updates, register a free account at my.artec3d . Registration is also required to activate the Artec 3D scanner. In addition, the site allows you to track your 3D scanners and software.
The my.artec3d account is valid for all Artec sites and services (including viewshape.com ).
Fig. 14 Start screen my.artec3d
To register, follow these steps:
-
Go to the site my.artec3d and click Sign up
-
Fill in all fields in the registration form and click Create account
-
Receive a registration email containing a confirmation link.

-
Click on the link or copy it to your browser to confirm your registration. Go directly to your account at my.artec3d .
Activating the scanner
Before using the Artec scanner, it must be activated and associated with an account on my.artec3d . These operations are performed using the Artec Installation Center, a separate utility available for download from my.artec3d . If you are a new user and you do not have Artec Installation Center installed yet, please read below How to start Artec Installation Center. Otherwise, go to Activating the 3D Scanner using the Artec Installation Center.
Warning
Do not connect your scanner to the USB port until the Artec Installation Center is complete.
Launching Artec Installation Center
Make sure your computer is connected to the Internet before using Artec Installation Center. Any computer with a USB2.0 or USB3.0 port will do. If necessary, you can install and activate Artec Studio on another computer. Also make sure you have an account at my.artec3d ; if not, go to User account.
-
Log in with your account at my.artec3d and download the Artec Installation Center. A link to download the installer executable file can be found on the home page of the site.
-
When the download is complete, open the folder containing the installer executable file, run it, and follow the instructions on the screen. Once Artec Installation Center is installed, a window will open with a username and password form. For authorization, use your account details on my.artec3d as shown in Fig. 15.
Fig. 15 Authentication with Artec Installation Center
Activating the 3D scanner using Artec Installation Center
To activate the 3D scanner with Artec Installation Center, make sure that the application is installed on your computer and that it is connected to the Internet.
-
Start the Artec Installation Center (via the Start menu: click Start → All Programs → Artec Group → Artec Installation Center ), a window will open as shown in Fig.
 17.
17. -
Connect your Artec 3D scanner to your computer and wait while Windows detects the device and installs the necessary drivers. A message similar to the one shown in Fig. 16.
-
Go to the Artec Installation Center window, click the Update button and wait until the new scanner appears in the Scanners section (see Figure 17). To activate your 3D scanner, click the Activate button (to the right of the scanner's serial number). The scanner status will be changed to Activated as shown in Fig. 18.
Fig. Figure 16 Windows message about device installation
17 Activate button for 3D scanner
18 3D scanner activated
Installing Artec Studio
There are two ways to download and install Artec Studio:
-
Using the Artec Installation Center (either during installation or by clicking the Install button in the application, as shown in Fig. 19 )
-
From the site my.
 artec3d : log in to the site, go to the page My applications and download the executable file (see Fig. 20)
Fig. 19 Artec Installation Center is ready to install Artec Studio
Pic. 20 Part of page My applications on my.artec3d
If you downloaded the executable, run it to start the installation; otherwise, click the Install button in Artec Installation Center. To continue the installation, click Next, the License Agreement will open (see Fig. 21). After reading its text, confirm your consent to the installation by clicking on the Yes button.
Fig. 21 License agreement
fig. Fig. 22 Installation location
23 Selection of installed components
fig. 24 Dialog for installing drivers for third-party 3D sensors
Pic. 25 Artec Installation Center with activation window Artec Studio
26 Completing the installation
Specify the path to the installation directory (it is recommended to use the default one), as shown in Fig. 22. Then go to the window for selecting installed components (see Fig. 23):
| Desktop shortcut: | |
|---|---|
| - creates an icon on the desktop | |
| Start-menu shortcut: | |
| - adds a shortcut to the Start menu and Quick Launch | |
| English manual: | - installs user manual in English |
| Install Artec Scanner Drivers: | |
| - installs drivers for Artec 3D scanners | |
| PrimeSense Carmine / Asus Xtion drivers: | |
| - installs drivers for PrimeSense/Asus 3D sensors | |
By default, the application creates all the shortcuts listed above and installs the user manual and drivers for Artec 3D scanners. Click Next to continue with the installation.
If you are just starting the installation of Artec Installation Center, an authorization window will appear, as in Fig. 15. If you are not connected to the Internet, see Offline Activation for a description of the Artec Studio offline activation process.
If you have not previously associated your account with the computer on which you are installing Artec Studio, an activation confirmation dialog will open (see Figure 25).
Once the installation is complete (see Figure 26), the installer will prompt you to launch Artec Studio.
Offline activation
If the computer on which you are installing Artec Studio is not connected to the Internet due to security or other reasons, you can use the offline activation mechanism to activate the program.
Note
Artec Studio copies activated offline cannot be subsequently deactivated. Therefore, offline activation is recommended to be used only in case of emergency.
Note
Before performing offline activation, you need to make sure that the scanner (see Scanner Activation) and Artec Studio are linked to your account on my.artec3d .
Offline activation requires the following:
-
Another computer connected to the Internet
-
Artec Studio installation file (preferably downloaded from my.artec3d )
-
Flash drive or other storage device for transferring files from a computer with an Internet connection to a computer where Artec Studio 9 will run0005
Fig. Fig. 27 Authentication window in Artec Installation Center
28 Offline activation window
Installation and activation process:
-
Start the Artec Studio
installation process -
During installation, the registration data entry window will open, as shown in Fig. 27. Click the Activate offline button
-
In the offline activation window (Fig.
28), click Save... and save the file with the activation ID to a flash drive or other media.
-
On a computer connected to the Internet, log in to your account at my.artec3d and open the section My applications .
-
Find Artec Studio and click on the appropriate link. A new page will appear as shown in Fig. 29.
-
Go to the link Activate application offline , then click the Select file button and specify the path to the file with the activation ID. Next, click Activate.
-
A new window will open where you can download the offline activation file. Save it to a flash drive.
-
Go back to the computer where Artec Studio is being installed, click the Activate and continue button and specify the path to the offline activation file.
Note
As soon as you create an offline activation file, my.artec3d will decrease the number of activations available to you by one.
Upon completion of all the above steps, a copy of Artec Studio will be activated and all Artec 3D scanners will be installed on a computer not connected to the Internet.
Fig. 29 Offline activation on my.artec3d .
Note
If you purchase another Artec 3D scanner in the future, you will need to reinstall the application and go through the offline activation procedure again, as described above, in order to copy all the data files of the new scanner to your computer.
Deactivation
It is important to note that the deactivation procedure is only available for computers on which you have activated Artec Studio online, as described in Installing Artec Studio. Unable to deactivate Artec Studio application activated offline.
Note
The number of possible deactivations can be limited, so deactivate Artec Studio only if you really need to transfer the application from one computer to another.
Fig. 30 Deactivating Artec Studio
To deactivate the license on your computer, do the following:
-
Make sure your computer is connected to the Internet.
-
Go to Control Panel → Remove programs and select Artec Studio. The uninstall process will start.
-
A dialog will open as shown in Fig. 30. Check the box I understand. Deactivate Artec Studio on this computer.
-
Click Next to complete the removal process.
Managing Artec 3D scanners and products
Artec Installation Center is used to manage applications and scanners assigned to your account.
This is a multifunctional application for Artec Studio that supports connection with my.artec3d and helps you install new applications, download updates, and manage your 3D scanners. To launch Artec Studio for the first time, you need to log in to my.artec3d . After this one-time authentication, you won't have to enter your username and password every time you launch the app.
When Artec Studio is launched on the Artec Installation Center server, it checks for updates, and if it is available for any of the installed products, a message similar to Figure 1 is displayed. 31.
31.
Fig. 31 Artec Studio update available for download
After authorization, Artec Installation Center will display information about your products.
Fig. 32 Artec Installation Center.
Section Applications Artec Installation Center provides information about all your software products:
-
List of available applications
-
Activation status of each application (activated or not)
-
Number of activations available and enabled
-
Activate, Install or Update buttons for the actions currently available to you:
-
Install - displayed if the program is not installed on the computer (usually installation means activation)
-
Activate - displayed if the program is not currently activated on the computer. Activation reduces the number of available licenses by one per computer.
-
Update - shown if a new version of the installed program is available for download
-
Section Scanners contains a list of 3D scanners that you own or have connected to your computer. In the first case, the status Activated or the Activate button will be displayed, in the second case, the status Rented or the Rent button will be displayed.
At the bottom of the Artec Installation Center window there are a number of buttons:
- Update
-
- Updates the information displayed by Artec Installation Center
- Close
-
- Exit Artec Installation Center
Getting started with Artec Studio
Main window
You can start Artec Studio in the following ways:
After launching Artec Studio, the main window will open, allowing you to perform all operations on scans and models. The main application window is divided into several areas (see Fig. 33): window 3D view , Sidebar , left panel (shown in the figure Commands panel open), panel Workspace and History window , as well as the menu bar and status bar (not marked in the figure). Other windows may open during operation.
Fig. 33 Main window Artec Studio
All 3D data is displayed in window 3D view . You will constantly use this window. When you start the application, a coordinate grid and coordinate axes appear in the center of the window. This global coordinate system will contain your scans and models.
to the left of the window 3D type is the side panel with icons of various operating modes of the application, such as: shooting , Autopilot , Editor , teams , Assembly , Territory , measurements , measurements Multi , Texture , Viewshape . All modes of operation are mutually exclusive, that is, at any given time, the application can only work in one of the modes, except for Autopilot . Some modes block the panel Workspace . The main operating modes are: Survey , Autopilot , Editor , Commands and Assembly .
At the top of the window 3D view there is a context-sensitive toolbar 3D Tool , which includes the following commands:0058 , Color , Render mode , Back side . In editor , additional tools appear: through selection , Positioning , to move/rotate/scaling , The smoothing brush , E Lastik , Removal Brush and Brush recovery .
Panel Workspace is used to display and manage all the data loaded into the application. Here you can find your scans, as well as project management commands such as save, delete, move, rename. hidden panel Workspace can be opened again using the button in the upper right corner of window 3D view (see Fig. 34).
Fig. 34 Button for displaying the panel Workspace
At the bottom of the application window there is a panel Log . The log is a report of the program about the executed commands, indicating the time of the operation and additional information. The log displays error messages and diagnostic messages issued by the algorithms.
The status bar contains information about the amount of free RAM and the currently used Artec Studio. The status bar also displays information about the progress of the current active task, such as the operation of algorithms, export of models and scans, and any other.
Basic settings
In order to get to the application settings dialog, select the item Settings... ( Settings... ) in the menu File ( File ). The settings window has several tabs with different groups of application settings. Switching between tabs is done by clicking on the icons at the top of the dialog box. A more detailed description of the settings can be found in Settings.
Fig. 35 Language selection in the Settings dialog
On the tab Resources you can set the maximum number of changes that the program will save, or specify the maximum amount of saved history (in megabytes).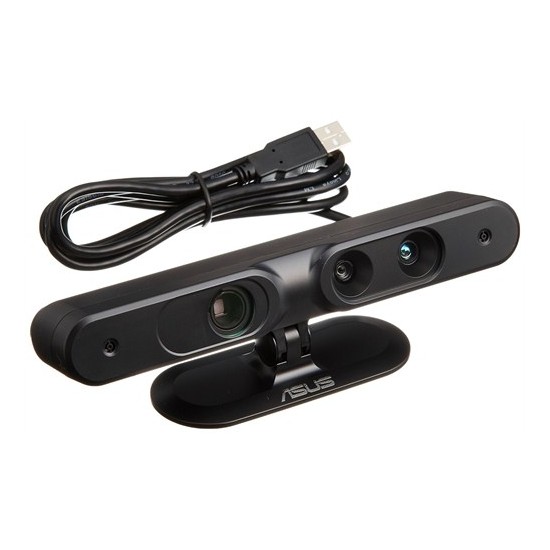 Slider Data Compression Level allows you to adjust the compression level when saving project data to disk.
To change the language, select the tab Miscellaneous (Fig. 35), then the desired language from the list and click OK. The program will ask you to confirm the language change and prompt you to restart. If the answer is positive, Artec Studio will automatically use the selected interface language. However, you will lose any unsaved data. If you choose not to restart, the changes will take effect the next time you launch the app.
Texel Portal MX - Texel
Pass demo
- Description
- Exploitation
- ON
- Work results
- Contents of delivery
Texel Portal MX is a compact 3D scanner for color human scanning. Looks impressive, scans quickly and prepares a 3D digital model in just 90 seconds.
It takes only 30 seconds for Texel Portal MX to analyze a person standing on the platform. It takes one minute to assemble a realistic 3D model using sensor data, process it in the cloud and display it on the screen.
Texel Portal MX does everything for you. After registering in the system, the client stands on the rotating platform, and the operator starts scanning in one click. The rest of the work is done by electronics: it launches sensors and collects a point cloud, processes them in the Texel Portal application, builds a digital 3D model and prepares it for printing or integration into other services.
Lightweight, mobile and compact, the Texel Portal MX fits in the trunk of a car and takes only 15 minutes to assemble and set up. You don't need any special skills - just connect the power and connect the column to the 3D scanner podium. The set includes a powerful computer, a tablet for registration and a set of wires.
No complex and bulky metal structures in the scanner. The central element is a small platform (podium). Nearby is a column with sensors. It is they who move along the column and collect data while the person is standing on the platform. As soon as the scanning process is completed, a three-dimensional digital model is built based on the data collected by the sensors.
With Portal MX, you can receive thousands of unique 3D models every month. Install it where it will bring maximum benefit to your business. We recommend choosing a place with high traffic for this place: mall halls, thematic exhibitions and any events with a large number of participants and spectators. By controlling the illumination of the 3D scanner, you will increase the wow effect and attract even more interested customers.
We are proud of the science-intensive Texel Cloud software, which was developed by our team of talented computer vision scientists (and this is confirmed by 6 thematic scientific publications). Our software combines several million points into a coherent high-precision 3D model, and you get scan results quickly and spend a minimum of resources.