Anycubic mega pro 3d printer
AnyCubic Mega Pro review | TechRadar
Skip to main contentTechRadar is supported by its audience. When you purchase through links on our site, we may earn an affiliate commission. Here’s why you can trust us.
A 3D printer and laser engraver in one unit
(Image: © Ali Jennings)
TechRadar Verdict
Impressive from the outset, the AnyCubic Mega Pro is a dual function machine that offers both 3D printing and laser engraving. The laser engraving tool's attachment head onto the 3D print head is ingenious, and it takes less than a minute to swap functions. Once in place, the laser engraving features work well, adding this already excellent 3D printer's depth and function.
TODAY'S BEST DEALS
Why you can trust TechRadar Our expert reviewers spend hours testing and comparing products and services so you can choose the best for you. Find out more about how we test.
AnyCubic makes decent yet well priced 3D printers , and with each release, the functions and features of their machines take a leap forward. This has made AnyCubic and their Mega series one of the most popular printer ranges out there.
Not only are they good, but they're highly updatable, with many guides online showing how to push these sub $350 printers to compete with the industry's best.
The AnyCubic Mega Pro features an ultra-sturdy metal frame, upgraded extruder, hotend, ultra-quiet motor drivers and advanced features that pitch this printer well beyond its price point.
Not only do the 3D print specifications look good, but AnyCubic has devised an ingenious laser engraving option that piggybacks onto the print head, and this comes as standard.
(Image credit: Ali Jennings)The Mega Pro follows the usual three-axis 3D printer design, with the print base moving back and forth along the Y-axis and the print head sliding across the x and rising through the Z-axis.
This gives the printer a relatively slim front profile that makes it easy to position on a desk or work surface.
A growing design theme for 3D printers are the enclosed electronics that keeps wires, motors and control boards all tucked neatly.
The Mega Pro also shows the evolution of 3D printer functionality with a convenient touch screen on the front, making it easy to navigate and understand.
The printer's design has been well thought through with the robust metal frame keeping everything solid.
(Image credit: Ali Jennings)Filament reel position and mains power seem to have been carefully considered, even if the SD card slot and USB port are a bit fiddly to access.
There are also several design updates that I've seen on other printers recently that help with maintenance and adjustment. Foremost of these is the large bed adjustment dials under the print bed that assist with easy bed levelling.
(Image credit: Ali Jennings)Features
The Mega Pro is packed with features that make it stand out; the big robust metal frame is designed to ensure minimal vibration and wobble as the model prints.
The touch screen on the front, a feature that is just starting to appear on machines of this price range is reactive and works well.
One feature that I really like are the new larger adjustment knobs for initial bed levelling - they just make the process really easy. These manual adjustments to the print bed are joined by a plug-in bed levelling module which is ingenious, I'll come to that in the performance section.
There's also the inclusion of filament detection, so the printer will stop automatically if it runs out of material Another fail-safe is the resume print that enables you to recover from power loss.
One feature that's becoming increasingly common is the ability to start and stop printing so you can swap colour filaments mid Print. It's a bit of a faff but a great feature.
Finally worth a note is the print platform, this is one of a few printers now arriving with textured glass platforms. These give incredible grip while printing but release the Print easily once cooled.
(Image credit: Ali Jennings)Finally, if the 3D print features don't grip you, you have the added feature of that laser engraver.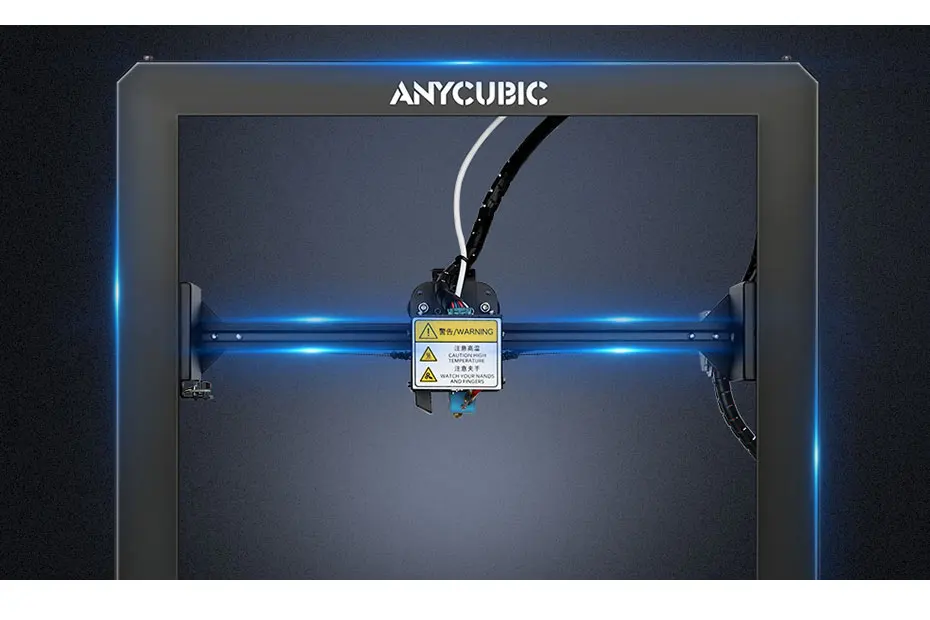 Installing this takes around five minutes and due to the piggyback design is quick and easy to set up.
Once installed onto the machine, the laser engraver can be controlled through dedicated engraving software such as LightBurn. Setup takes a bit of working out, and the process could be better documented, but the end result is a 3D printer and laser engraver in one.
Performance
AnyCubic, like almost all manufacturers, recommend using Cura as the slicer software for the machine. Although there isn't yet a profile for the Mega Pro built-in, AnyCubic is well represented in Cura's list of machine options. In the AnyCubic manual, there are full details on the options and settings.
Initial setup is again straight forward, and there are two approaches. The first sees the print head move around the print bed and the height can be adjusted manually using the large height dials under the bed.
The second way is to plug in the levelling module that is fitted over the hotend.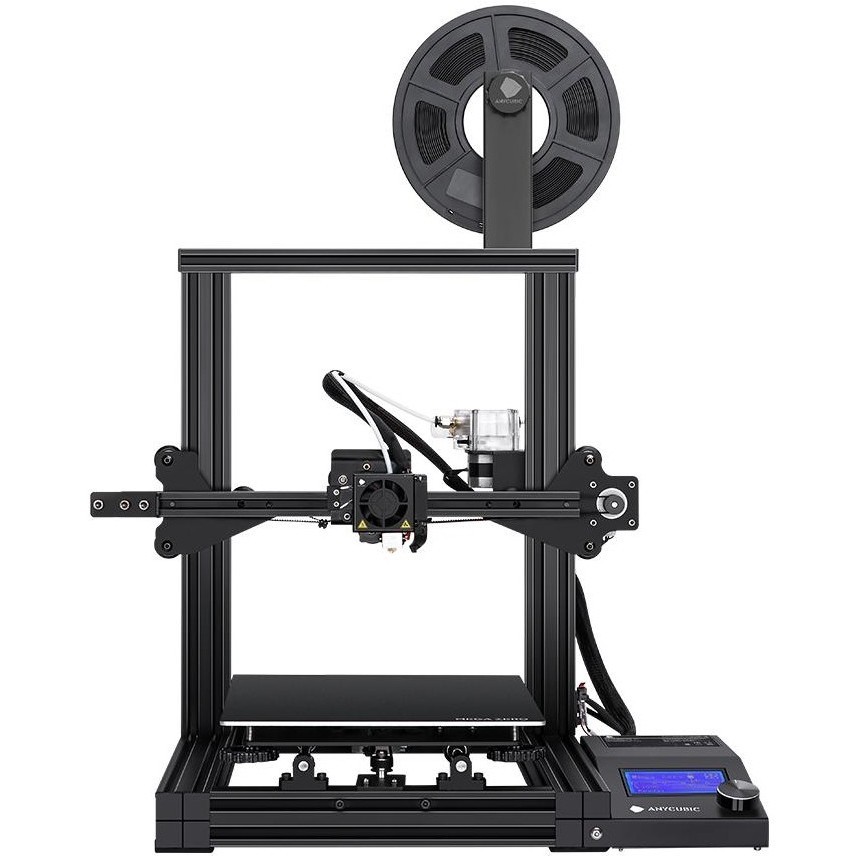 The same levelling process is carried out, but this time an alarm sounds each time the bed level is correct. This makes bed levelling extremely easy.
One levelled and you're ready to print the first print. AnyCubic has supplied a few on the SD card that arrives in the box.
As the first layer is extruded you start to get a taste of how accurate this printer is.
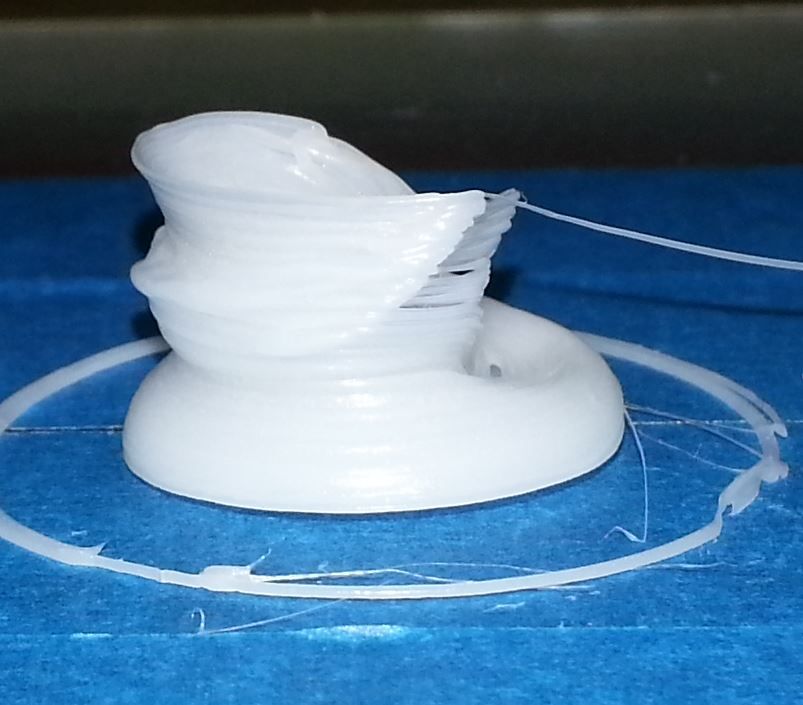
Over the test, the print quality was consistent, and after the first few prints a tweak to the retraction settings helped to stop any signs of stringing. The only weakness in the print quality was in the overhangs. However, the quality of the bridging was excellent and in real world prints the overhangs seem to print well.
Checking the quality of self-made prints and the overall quality was outstanding.
Aside from the print quality, it's worth mentioning the noise, or lack of from the machine, you can hear the fans, but it's far quieter than many printers in this price range.
(Image credit: Ali Jennings)The other features that are noteworthy are the touch screen interface, while it looks slightly dated in design it works exceptionally well. It's also nice to see the filament detector, which helps prevent filament from running out by stopping the machine if you get to the end of a reel or the filament snaps. This helps to prevent machine damage.
The other major part of this machine is laser engraver. Once fitted the laser is rated at 1500w, this is a mid powered head that enables the engraving of materials rather than cutting.
It works exceptionally well, and although the machine laser engraving features are basic, there's plenty of scope for creativity.
The quality of the engravings on the wood supplied was good, and are a great addition for hobbyists and crafters.
(Image credit: Ali Jennings)Print quality
As ever when it comes to the 3D print features I ran the machine through the usual tests. Overall the results were good with the only area that didn't fare so well being the overhangs.
Dimensional accuracy - score of 5
- Target 25 = X: 24.85mm / 0.
 15mm Error | Y: 24.80mm / 0.20mm Error
 - Target 20 = X: 19.95mm / 0.05mm Error | Y: 19.98mm / 0.02mm Error
- Target 15 = X: 14.99mm / 0.01mm Error | Y: 14.92mm / 0.08mm Error
- Target 10 = X: 10mm / 0mm Error | Y: 10mm / 0mm Error
- Target 5 = X: 4.98mm / 0.02mm Error | Y: 4.85mm / 0.15mm Error
X Error Average = 0.05
Y Error Average = 0.09
X&Y Error Average = 0.07
Fine Flow Control - score of 2.5
Fine Negative Features - score of 5
Overhangs - score of 1
Bridging - score of 5
XY resonance - score of 2.5
Z-axis alignment - score of 2.5
Adding up the totals gives a final score of 23.5 out of 30.
That's a good result for a machine that costs less than $350 and doubles as a laser engraver.
Final verdict
It's easy to see why this machine has become so popular so quickly. The price makes it instantly appealing, but it's the attention to detail that makes it stand out.
The build and construction are solid, and there are plenty of options to tinker and upgrade if you want.
Print quality is excellent, and with a little tinkering of the settings that quality only gets better. While the machine excelled in almost all areas of print quality, it does struggle with overhangs.
However, when it came to dimensional accuracy, the Mega Pro proved to be one of the most accurate 3D printers on the market.
The 3D print function is just part of the story with the Mega Pro, enabling you to attach the laser engraving head.
This is easy to install, and once you've worked out the software settings, it's straightforward to use. The laser is low power making it an ideal for engraving materials rather than cutting.
The AnyCubic Mega Pro is a well-rounded machine that should find wide appeal.
- We've also highlighted the best 3D printers
AnyCubic Mega Pro: Price Comparison
No price information
Check Amazon
powered by
Imaging Lab Manager
Ali Jennings is the imaging lab manager for Future Publishing's Photography portfolio.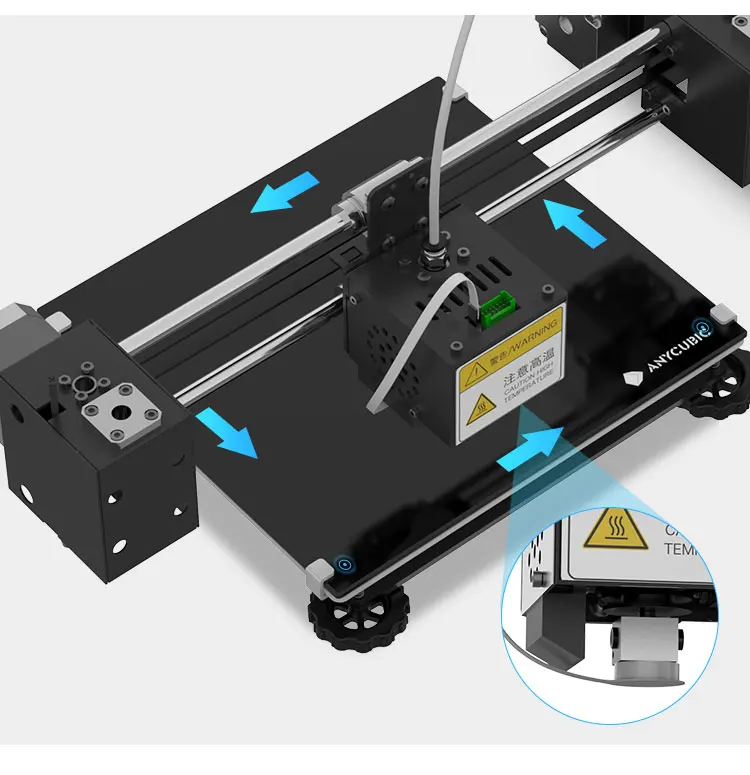 Using Imatest Master and DxO Analyser he produces the image quality tests for all new cameras and lenses review in TechRadar's cameras channel. Ali has been shooting digital since the early nineties and joined Future's Photography portfolio back in 2003.
TechRadar is part of Future US Inc, an international media group and leading digital publisher. Visit our corporate site .
© Future US, Inc. Full 7th Floor, 130 West 42nd Street, New York, NY 10036.
Anycubic Mega S & SE vs Mega Pro & Mega X & Chiron [Compared]
With the launch of Kobra in 2022, Anycubic has cemented its position as one of the best purveyors of entry-level FDM printers, confidently rubbing shoulders with the likes of Creality and Voxelab.
While the Kobra certainly leads the charge, Anycubic’s back catalog holds a wealth of fantastic low-cost machines that are well worth a gander if you’re in the market for a new FDM printer. If anything, the fact they aren’t the fresh-faced debutantes they once were means you can snap one up at a bargain price.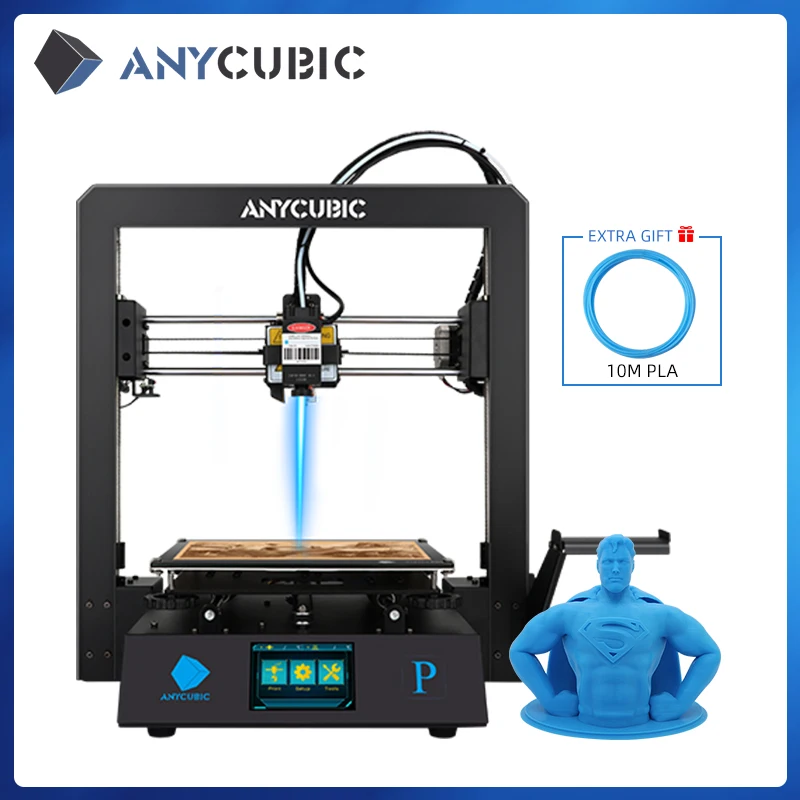
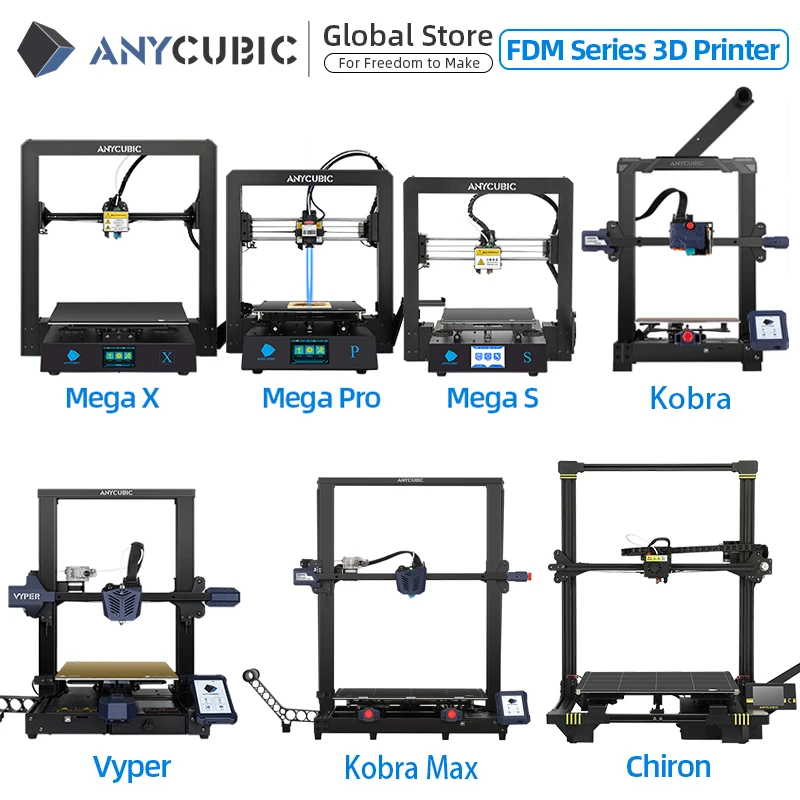
Among them, we have the litter of Mega printers – the Anycubic Mega S, Mega SE, Mega Pro, and Mega X – and the large-format Anycubic Chiron. With only a handful of letters and a nod to Greek mythology to distinguish them, we’ve pieced together a comparison guide to help you find the best printer suited to you.
We have been lucky to test Anycubic’s more recent 3D printer releases, including the Anycubic Kobra and Vyper, but in this article, we’ll compare Anycubic’s older releases.
Table Of Contents
- Anycubic Mega S
- Anycubic Mega SE
- Anycubic Mega Pro
- Anycubic Mega X
- Anycubic Chiron
- Anycubic Mega S vs SE vs Mega Pro vs Mega X vs Chiron – 3D Printers Compared Summary
3DSourced is reader-supported. When you buy through links on our site, we may earn an affiliate commission. Learn more
Anycubic Mega S
- Price: Check latest price at Anycubic here / Amazon here
- Printing technology: FDM
- Build volume: 210 x 210 x 205 mm
- Filament compatibility: PLA, ABS, PETG, TPU
- Layer height: 100-400 microns
- Max nozzle temp: 275° C
- Max bed temp: 100°C
- Connectivity: USB, Micro SD Card
Building on the success of the original Mega, the Anycubic Mega S welcomes first-time makers with open arms, and not just because of its enticingly affordable price tag.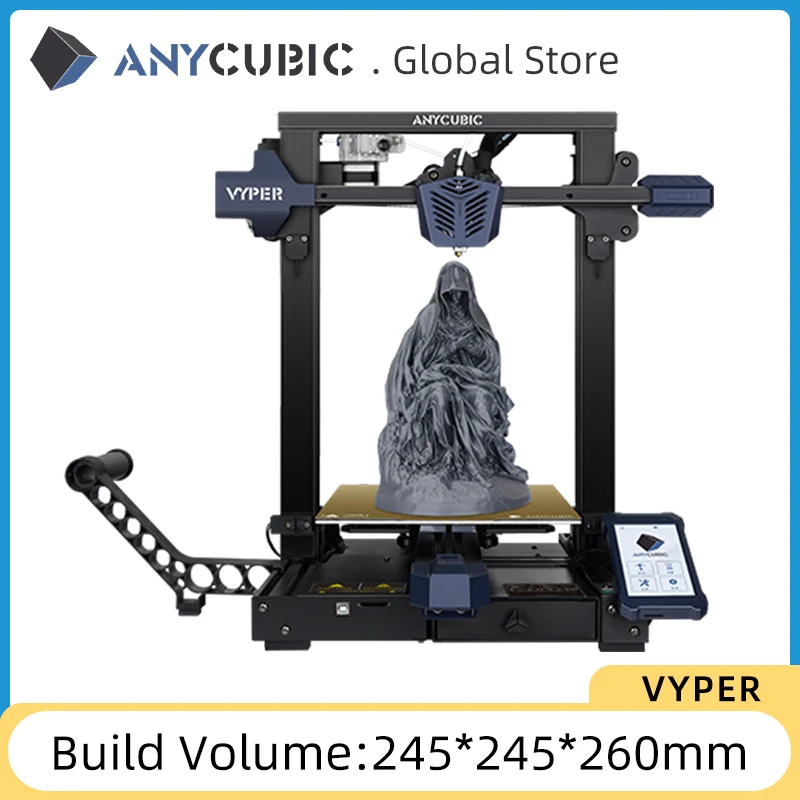
A chunky, sturdy metal frame gives the Mega S a bit more heft than we typically find on the ultra-budget printers, namely the Ender 3, which helps reduce vibrations and wobble issues as the print head climbs up to the build volume’s upper reaches.
And, with a 210 x 210 x 205 mm build capacity, the Mega S accommodates all those beginner favorites, from small household parts to models of everyone’s favorite pop-cultural icons.
While many low-cost printers list compatibility with flexibles, performance doesn’t always match the marketing. However, the Mega S bucks the trend, handily printing ABS, PLA, PETG, and TPU thanks to an extruder up to the task and good implementation of its Bowden setup.
Printed miniature owls on Anycubic Mega S. Source: RedditRegardless of material, there’s a sense the Mega S punches well above its price with impressive print quality with minimal tuning.
Other notable features include one of Anycubic’s Ultrabase build plates, designed for hassle-free first-layer adhesion and easy print removal.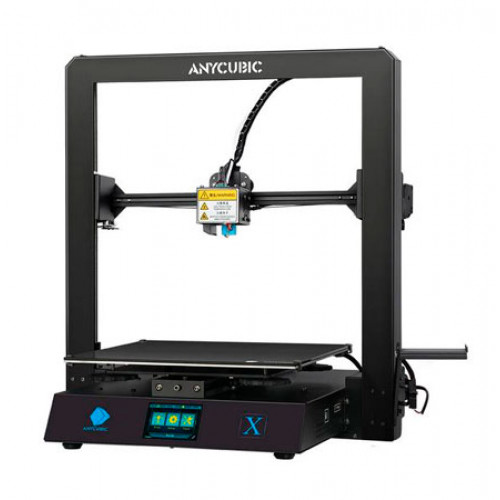 A filament run-out sensor, resume power, side-mounted spool holder, and one of the better examples of a touchscreen on a budget printer – responsive controls and good-sized LCD – round off what the Mega S offers.
If you’re looking for a cheap and easy start in 3D printing, the Anycubic Mega S is a perfect package. Easy to assemble and enjoyable to use, it’s a more than viable alternative to the likes of the Ender 3 or Voxelab Aquila. Experienced makers already possessing a printer or two may find the Anycubic Mega S a little too restrictive, especially the build volume.
Anycubic Mega SE
- Price: Check latest price at Anycubic here
- Printing technology: FDM
- Build volume: 220 x 220 x 250 mm
- Filament compatibility: PLA, ABS, PETG, TPU
- Layer height: 50-300 microns
- Max nozzle temp: 255°
- Max bed temp: 100°
- Connectivity: USB, Micro SD Card
With the Mega SE, Anycubic decided to take a different route, swapping out the tried and tested chunky frame design for a more classic, presumably Ender 3-inspired, design. That said, the result is much the same – a sturdy frame and dead simple assembly, albeit with a less striking design.
The redesign allowed Anycubic to increase the build volume to a more generous 210 x 210 x 205 mm, which opens the door to slightly larger prints, a great feature if the Mega S’ capacity is likely to limit your creativity. Fortunately, the excellent Ultrabase build platform returns.
Anycubic also opted to do away with the Mega’s solid, convenient touch screen interface for a dial knob alternative mounted to the side of the printer. While personal preference has a part to play, the old-style display feels like a step backward – most modern printers have done away with those tedious, dual-tone displays.
Where the SE does chart new ground compared to its predecessor is with the inclusion of a double gear extrusion mechanism, bonafide Capricon Bowden tubing, and a faster heating bed.
The Anycubic Mega SE bears some curious design choices for all its affordability. For example, the placement of the spool holder above the gantry; something that makes sense on a direct drive extruder but isn’t optimal for Bowden systems where the filament enters the extruder from the side.
Overall, the Anycubic Mega SE feels like a half-baked attempt to try something new, which is likely why Anycubic has discontinued the printer. The slight build volume increase and a spattering of improvements don’t amount to enough to see us recommend the SE over the Mega S.
Anycubic Mega Pro
- Price: Check latest price at Anycubic here / Amazon here
- Printing technology: FDM
- Build volume: 210 x 210 x 205 mm
- Filament compatibility: PLA, ABS, PETG, TPU
- Layer height: 50-300 microns
- Max nozzle temp: 260°C
- Max bed temp: 100°C
- Connectivity: USB, Micro SD Card
The Anycubic Mega Pro tilts towards being far more than a well-priced FDM printer thanks to a clever little twist that makes it stand out not just among its Mega peers but competing machines, too.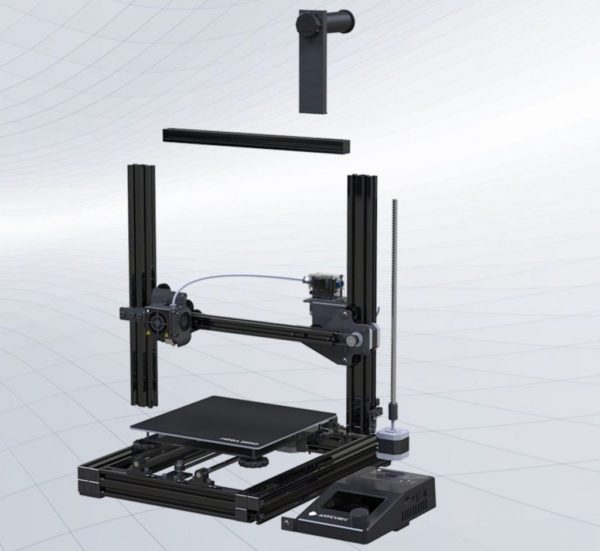 It’s a 2-in-1 machine with a hot-swappable laser engraving attachment.
This addition could easily be passed off as a gimmick, but, in this case, the engraving head is comparable to what you’d find on similar budget standalone laser engravers. The printer pumps out good quality engravings on got-to woods like basswood, though it’s not quite powerful enough for cutting. You wouldn’t want the laser scarring the build platform, so this is hardly a negative.LOTR wood plaque laser engraving on Anycubic Mega Pro. Source: Reddit
If that doesn’t take your fancy, the Anycubic Mega Pro is still a potent printer that channels previous Mega machines. The same blocky frame makes a welcome return after the Mega SE experiment, as does the side-mounted spool holder.
In many ways, it bears all the same features as the Mega S, including build volume, dual gear extruder, and Ultrabase print bed. But, it also throws in a few extra comforts, such as a print pause feature, a smart auxiliary leveling module, a more precise 50-micron minimum layer height, and chunkier leveling knobs for a more complete printing experience.
In action, the Anycubic Mega Pro delivers consistent and impressive print quality for the price. There’s very little it can’t do with some software tuning.
It’s usually priced at $349.00, but given the arrival of newer Anycubic printers, you’ll often find it available for as low as $250. That’s a serious bargain if you were getting the printer alone. Throw in the laser engraving, and it’s frankly a steal. An entry-level engraver typically sets you back at $200 to $300.
Anycubic Mega X
- Price: Check latest price at Anycubic here / Amazon here
- Printing technology: FDM
- Build volume: 300 x 300 305 mm
- Filament compatibility: PLA, ABS, PETG, TPU
- Layer height: 50-300 microns
- Max nozzle temp: 250°C
- Max bed temp: 90°C
- Connectivity: USB, Micro SD Card
At the top of the Mega pricing ladder, we have the giant Anycubic Mega X.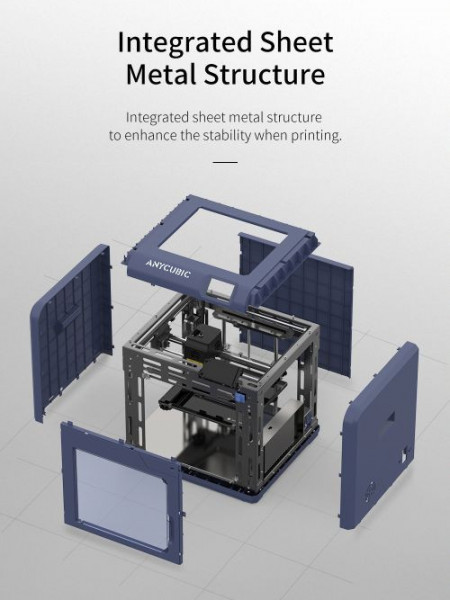 Anycubic appears to have taken all the best improvements seen in previous models and condensed them into the same, albeit larger, chunky metal frame and sturdy chassis.
The headline is the larger build volume, which stretches to a sizable 300 x 300 305 mm, delivering more capacity versatility than the comparatively dingy Mega S. We’re nearing large-format 3D printer territory, but with a price tag that remains just about affordable, especially as sales shaving the price down to $260 or so are common.
The Ultrabase build plate, dual-gear extruder, and larger leveling knobs make a welcome return, sided by a few Mega X-specific enhancements. There’s a dual screw rod, a more powerful power supply, and a dual-rail design on the Y-axis, all to support the larger build volume, keep unwanted movement and wobble to a minimum, and continue the Mega’s tradition of solid quality prints.
Dragonite printed on Anycubic Mega X with rainbow filament. Source: RedditElsewhere, the Mega X specifications match the Mega S, except for a few tweaks to extruder and bed temperature, a consequence of the larger build volume. Much like the Mega S, it’s easy to set up, and it’s one of the more visually appealing printers on the market today, courtesy of sleek paneling and everything-housed-inside design choice on Anycubic’s part.
The Anycubic Mega X is an affordable alternative to the Mega S for makers who want to tackle those bigger projects.
Anycubic Chiron
- Price: Check latest price at Anycubic here / Amazon here
- Printing technology: FDM
- Build volume: 400 x 400 x 450 mm
- Filament compatibility: PLA, ABS, PETG, TPU
- Layer height: 50-300 microns
- Max nozzle temp: 260°
- Max bed temp: 100°
- Connectivity: USB, Micro SD Card
The Anycubic Chiron’s launch was a messy affair. Bad reviews and delivery of consumer models dripping quality control woes saw Anycubic shelve the printer shortly after that. It returned better than ever and slowly went about ingratiating itself to scorned makers, finally delivering on the promise of rivaling the beastly CR-10.
Now-ironed out Issues aside, the Anycubic Chiron has lots to offer makers looking for a printer to bring their most ambitious projects to life. A hulking 400 x 400 x 450 mm build volume delivers enough capacity to print complete helmets in one piece, cosplay props, busts, tabletop gaming terrain, and decorative figurines up to 45 cm in height.
Elsewhere, the Anycubic Chiron broadly boasts a superb Ultrabase Pro glass build plate with the company’s signature ultra-adhesive microporous coating. The platform is designed to latch onto all supported materials with little fuss when hot but releases them just as easily when cool. It’s a best of both worlds solution that removes the need to wrestle with glue to get a print to stick.
For all its big print merits, the Anycubic Chiron isn’t without its downsides. First and foremost, the touted automatic bed leveling is anything but, instead, a glorified manual bed leveling setup. Though it probes 25 different points on the bed, it fails to incorporate these into the printing process.
Worse, the Chiron can’t print with the probe attached to the printer. In practice, using the probe ends up being more hassle than manually leveling the bed from the get-go, which you’ll have to do with the bed anyway.
The Anycubic Chiron is also starting to show its age, lacking many of the comforts we’ve come to expect from similarly affordable large-format printers in subsequent years, including the excellent Mega X.Hulk printed in 200 hours on Anycubic Chiron. Credit: Breaks’n’Makes
Furthermore, though the Anycubic Chiron is capable of good quality prints, it doesn’t make it easy to achieve them. Involved slicer setting experimentation and constant bed tweaks don’t make it as user-friendly as some of Anycubic’s Mega bunch.
Nevertheless, it’s often heavily discounted (as low as $350 at times). If you’re an experienced tinkerer with an appetite for a massive build volume and don’t mind tweaking your way to good quality prints, then the Anycubic Chiron is worth buying.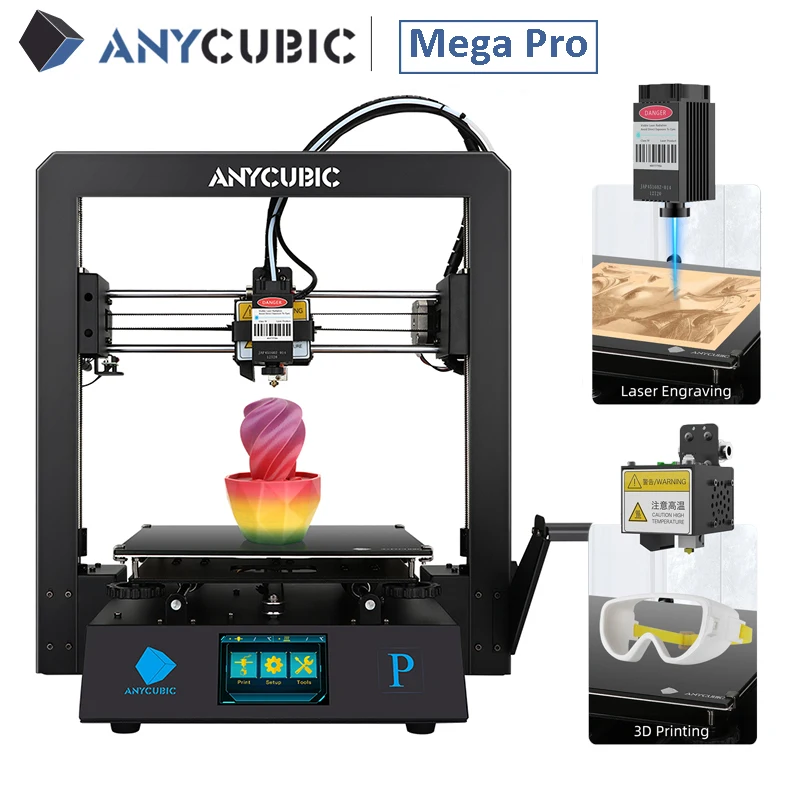 It’s especially appealing if the Mega X’s 300 x 300 305 mm doesn’t quite hit the capacity you need for the largest projects.
Anycubic Mega S vs SE vs Mega Pro vs Mega X vs Chiron – 3D Printers Compared Summary
Although the Anycubic Kobra outclasses the Anycubic Mega S in virtually every way, this compact, well-built printer can still be a potent starter printer. The company regularly drops the price as low as $170, which is excellent value given the print quality and features.
- Mega S: Available here
We suggest avoiding the Mega SE entirely. The pivot to a different frame design abandons one of the Mega lineup’s best features – a sturdy frame and chassis – for a printer that isn’t quite up to par. We recommend sticking with the Mega S for the better design and lower cost.
The same goes for the Anycubic Chiron: the massive build volume doesn’t make up for the aging tech, poor bed leveling, and a tinker-heavy experience. There are plenty of large format printer alternatives out there that have the modern comforts that Chiron doesn’t such as the freshly-launched Anycubic Kobra Plus and Max.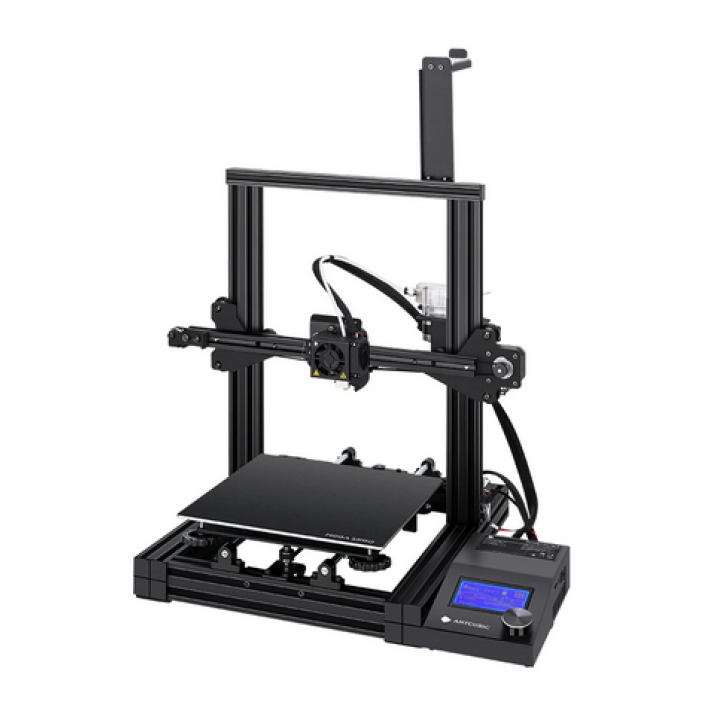
As for the Mega Pro, the question is whether the laser engrave add-on will prove useful. If so, then it’s a solid printer that delivers everything we like about the Mega range and a solid engraving experience alongside.
- Mega Pro: Available here
Last but not least, The Anycubic Mega X should suit beginners looking for a user-friendly, super-sized intro to 3D printers just as well as experienced hobbyists looking to replace a smaller printer with a reliable workhorse without breaking the bank.
- Mega X: Available here
Related articles:
- Best Anycubic 3D Printers
- Anycubic Photon Mono vs Mono X vs 4K vs 6K
- Anycubic Photon M3 vs M3 Plus vs M3 Max
- Anycubic Resins Guide
- Anycubic Kobra vs Kobra Plus vs Kobra Max
- Anycubic Kobra Review
Techno Print 3D Company
This is our first review of the most popular and inexpensive 3D printers for 2020. The list will include the best-selling devices in two price ranges (up to 30 tr and up to 60 tr). Printers working with both plastic filament (FDM) and photopolymers (LCD/DLP) will be presented. This list will always be up to date, as it is periodically updated and supplemented. Read more→
The Chinese company Dazz3D announces the launch of the project on KickStarter and accepts pre-orders for Dazz3D Basic and Dazz3D Pro 3D printers. These revolutionary new devices are aimed at both the professional and amateur markets. Read more→
We all know that precise calibration of the 3D printer desktop is the foundation and the key to successful printing on any FDM printer. In this article we will talk about the main and most popular ways to level the "bed". So, as mentioned above, 3D printing without desktop calibration is impossible. We face this process Read more→
It's hard to go through a day today without hearing about 3D printing technology, which is bursting into our lives at an incredible speed. More and more people around the world are becoming addicted to 3D printing technology as it becomes more accessible and cheaper every day. Now almost anyone can afford to buy a 3D printer, and with the help of Read more→
The FormLabs Form 2 and Ultimaker 3 are perhaps the most popular 3D printers today, capable of high quality printing with incredible surface detail. Moreover, these two devices use completely different technologies, and therefore, there are a lot of differences between them. Many will say that it is wrong to compare them or Read more→
XYZprinting, best known for its daVinci line of desktop 3D printers, is bringing five new devices to the professional and industrial environment. One will use laser sintering technology, the second full color inkjet printing and three DLP machines. First of all, the novelties will be of interest to dentists and jewelers. Read more→
Cleaning the nozzle of a 3D printer is a fairly common process that any user of such a device has to deal with.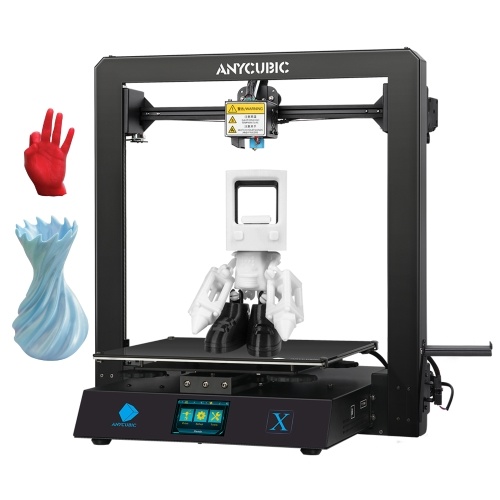 This is not at all a complicated procedure that anyone can handle. You can complete this task in 15 minutes, using only handy tools and accessories. Read more→
Acetone steam polishing of ABS plastic is a process for smoothing the surface of 3D printed models. The result of this treatment makes your printed products look as if they were made by a professional mold casting method. If you want to understand how this is done correctly, then read this article. Aceto Read more→ 9Ol000 ) High precision ensures excellent print quality 1. 2 in 1 multi-functionality - FDM 3d printing and laser engraving. Features to help you unleash your creativity.
2. Laser engraving A high-precision laser engraver will inspire you with new ideas. (It is able to engrave on wood, paper, leather, etc.) * Decoration * Customized * Artistic design 3.TMC2208 quiet drive Greatly reduced printing noise. 4. Double feed mechanism Optimized extrusion torque and feed direction. Compatible with flexible threads such as TPU and FLEX. 5. Pause at the desired height Possibility to pause at a certain layer, print the same model in different colors (with the same nozzle) Multi-color printing with Smart Pause has become easier and more efficient, which gives excellent results. * Pause up to 6 times 6. High-quality power supply for increased performance and safety Received multiple certifications including UL certification, CE marking and FCC certification. 7. All-rigid metal frame and modular design The solid construction increases the stability, which in turn improves the print quality of the model. The modular design is assembled in just a few minutes. 8. Smart Auxiliary Leveling Helps you quickly calibrate the level of the table to the nozzle. 9. Improved platform leveling knobs Large, ergonomically designed leveling knobs make manual calibration easy. Less effort when calibrating. Diameter is 2 times larger than the previous version 10. Large platform size for limitless creativity Printing volume: 210 210 205mm and sup3, Engraving size: 220 140mm 11.
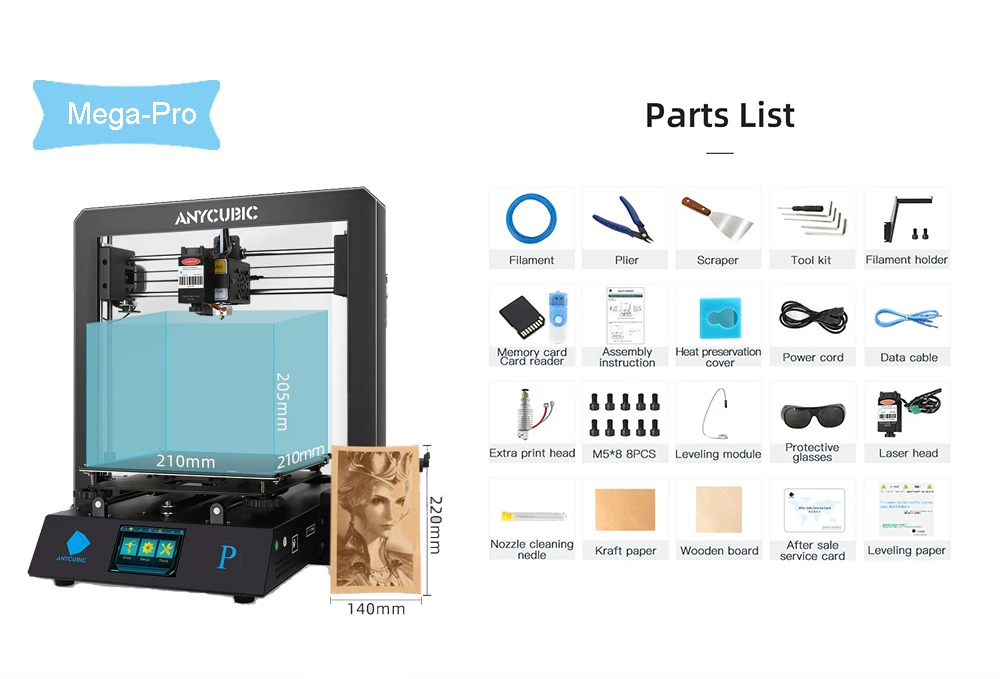 Automatic recovery from power loss Easy to continue printing from power failure or pause, saves time and plastic. * Loss of power * Continue printing
- Laser engraver 1500 W: 1 pc.
- 3D printer: 1 pc.
- SD card: 1 pc
- Card reader (for SD card): 1 pc
- Reel holder: 1 pc
- Screw kit
- Tool kit (screwdriver, 4 hex keys): 1 pc
- Spatula: 1 pc.
- Pliers: 1 pc.
- Spare extruder: 1 pc.
- Tweezers: 1 pc.0030
- Power cable: 1 pc
- TECOME SHAPTER 1 pc
- Needle for cutting nozzle 1 pcs
- Spring for belt 1 pcs
- Warranty coupon
- Print technology FDM
- Staff of extruders 1
- Build (mm) 210x210x205
- Minimum layer thickness 50 microns
- Filament thickness 1.75 mm
- Media ABS, PLA, PETg, HIPS, NYLON, WOOD, COOPER, SBS, FLEX
- Platform with heating
- The maximum temperature of the extruder 260
- Closed housing is absent
- required assembly DES
- Auto-URIVE DESSENTION 1 year
- COMPLY
- Diameter of nozzle 0.
Learn more