Pixelio 3d scanner
[Updated 2017] Bevel 3D (Reviewed), eroa3D (Soon), Pixelio (Bankrupt?)
This post was originally published on August 3, 2016 but has been revised on June 19, 2017 to reflect updates on the mentioned products.
Apparently crowdfunding affordable 3D scanners is hard, since the Bevel came out almost a year later than expected, the eora 3D is delayed (but still expected) and the manufacturer behind Pixelio seems to have gone bankrupt.
The market for 3D scanning is changing and is no longer limited to industrial measuring purposes. Now that services such as Sketchfab make it easy to share 3D models through the (Mobile) Web and in Virtual Reality, both consumers and (creative) professionals are starting to see the benefits of presenting their physical work, products or finds in 3D. This group is also realizing that they don’t have to spent thousands of dollars on a industrial-grade 3D scanner, but can instead capture 3D with their Smartphone—with the help of Free Photogrammetry Apps.
Manufacturers are noticing this and are creating trying hard (or have tried hard) to create a completely new, innovative breed of affordable devices that make 3D scanning faster, more precise—and simply more fun! But can these benefits make them worth their price?
Bevel
Update June 19, 2017
The Bevel 3D Scanner is now officially available and naturally I put it to the test!
Read my Comprehensive Review of Bevel 3D
I’ve hidden the original post content below but it’s still available for completeness sake.
Show Original Post Text
The Bevel is produced by Matter and Form that also makes a $520 turntable-style 3D scanner that works directly on a computer. The Bevel, however, is the company’s first handheld scanner. It functions like the eora 3D by projecting an eye-safe laser light onto the subject and capturing both the line and the color textures with the smartphone camera. The Bevel uses a red laser light for this, which might be a little less visible than green for smartphone cameras. I’m also curious to the brightness of the laser, because it’s battery powered.
The main difference with the eora 3D is that the Bevel is a very compact, portable clip-on-style smartphone accessory, that connects to iOS and Android devices through the headphone jack. This makes it compatible with almost every iOS and Android phone at the time of writing, but it’s good to realize that Apple (and thus probably a lot more smartphone manufacturers) will (probably) not include a 3.5mm headphone port on the upcoming iPhone 7. So future compatibility might be a problem. The 3.5 mm headphone jack also can’t power the Bevel, so you must keep its battery charged with a micro-USB cable. This also means that if you have an iPhone or Android smartphone with USB-C port (like my Nexus 5X) you’ll have to carry around an extra cable (and possible charger) if you want to travel with the Bevel.
I couldn’t find any results from the Bevel on Sketchfab, but Matter and Form recently launched their own platform 3D models—conveniently called BevelPix—that also let’s you share and embed on websites. Here’s a sample scan of a person:
At 87.879 the scan is good in terms of polycount, especially when you consider it’s only a the front half of a human bust. If you put the embed above in Wireframe mode (through the eye icon in the top left corner) you’ll see that the geometry of the face is pretty detailed. The texture looks good, too. The Bevel can apparently also make full 360° scans, but most of the current examples are all partial scans so I’m not sure about the ease-of-use of the 360° workflow. And most samples are scans of people, which makes me curious to how well it can scan (small) objects.
Update August 5th 2016: Matter and Form just posted this example on Bevel’s Instagram account, so they’re clearly working hard on improving 360° scanning and textures.
eora 3D
Scanner: $349 (pre-order price $289) | Turntable Bundle: $419 (pre-order price $319)
Website Kickstarter (750% funded) Indiegogo (current pre-sales)
This product is an Apple-ish looking, anodized aluminum cilinder that can hold an iOS or Android Smartphone. It comes with a dedicated mobile app. To automate capturing completely, it can also be combined with a small Bluetooth turntable.
Apart from its great looks (the current version is even more compact than the photos above) the main USP of the eora 3D is its (rather cool) green laser light. It has no dedicated camera, so the deformation of the green line (cameras are most sensitive to green) is captured by the smartphone’s camera. This is a very precise way (eora claims “sub 100 micron accuracy”) of detecting geometric details and it works in many lighting conditions. Laser scanning also takes away some guesswork and a lot of computing power required by solutions that use photogrammetry—a solution that relies on just photos and calculates the geometry through algorithms.
Here’s the result of the dino head scan above:
360 Degree Dino Mesh by eora 3D on Sketchfab
The result is a mesh with 426.000 faces and if you set the Rendering of Sketchfab embed above to MatCap (using the gear icon in the bottom right corner) you can see that the geometry is very detailled. I’m, however, not really impressed by the texture quality of the examples on eora’s Sketchfab account. But the examples are more than 9 months old, so texture capturing might have been improved.
The maximum scan volume is 1 x 1 m (3 x 3 ft). Using the Bluetooth Turntable naturally limits this to what it can hold. Face and Partial Body Scanning seem possible, but I haven’t seen enough examples to be convinced that the eora 3D is the perfect devices for this purpose. Although the green—Class 2M, 520nm—laser is eye-safe, the company advises to keep your eyes closed while making face scans.
You’re also more or less limited to 3D scanning indoors, as both the main device and the turntable need to be plugged into a wall socket for power. You can of course use an extension cord to use it outside. The laser seems bright enough to scan on an overcast day, which could improve texture quality compared to scanning indoors without a (softboxed) light setup.
Update: Developments of the eora3D have been delayed but I still expect this product to ship in 2017, hopefully summer. The Indiegogo page still states July 2017.
Pixelio
Update June 19, 2017
The Pixelio seemed ready for shipping in September 2016:
This is such an important milestone for us: Pixelio multiscanners have been shipped this week to the Kickstarter and…
Posted by Pixelio by Smart 3D on Donnerstag, 29. September 2016
I have been in contact with the company in the months before that and everything seemed fine. But after the post above, they seem to have disappeared from the world completely!
I never received the promised review model but some Kickstarter backers seem to have received the product. Unfortunately, the Reviews on Pixelio’s Facebook Page show that many products arrived in a defective state — or not at all.
The manufacturer did post an update on Kickstarter March 27, 2017:
Due to unforeseen tragic production cost in China and extra payments we had to do, Pixelios we have shipped are still in customs in Hamburg waiting for the clearance.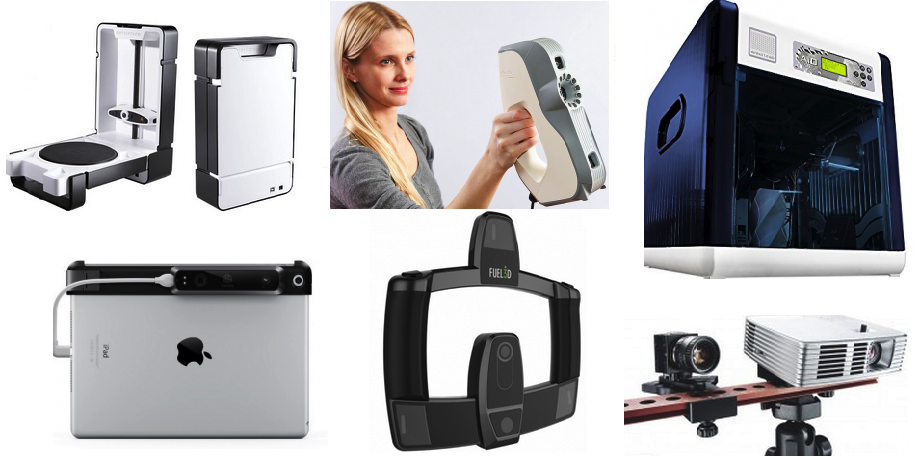
At this point we have drained our finances to get to this point. We are in talks to receive more financing to bring this campaign to an end and to fulfil the commitment to our backers.
It’s now mid-June and there hasn’t been an new update. Also the product website is gone. So I’ve hidden the original post content below under the assumption that Smart 3D, the company behind Pixelio has gone bankrupt or something similar and that the product will never be released publicly.
I’ll update this post when things have changed.
Show Original Post Content
$299 (pre-order price $199) | current super promo price: $169
Website Kickstarter (145% funded) Indiegogo (current pre-sales)
Created by manufacturer Smart 3D, the Pixelio also uses a Smartphone, but differs from the eora 3D in may ways. First of all, instead of using a turntable to rotate the object, it rotates the smartphone around it. Secondly, it doesn’t use any special laser or infra-red light for geometry capture.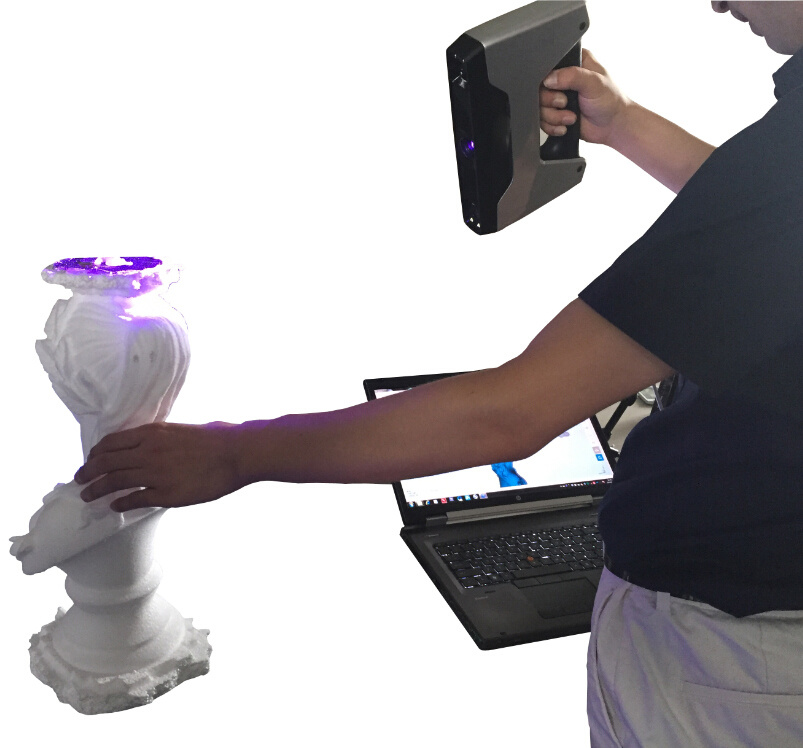 It’s designed to automate your photogrammetry workflow and works with existing camera apps and Free Photogrammetry Apps. It can trigger the capture button on these apps through Bluetooth or—interestingly—by using a patented “Virtual Finger” technology to simulate touch screen taps.
The device looks solid and has a few buttons and a small display to set the amount of stops in a full rotation—more usually means better photogrammetry results. It’s also versatile beyond 3D scanning, because it also let’s you take regular 360° photographs—both facing the device or facing outwards—so you can make panoramas automatically. For panoramas inside of buildings, however, I think the turning circle is a bit large. Ideally, panoramic images are shot by rotating a camera around the sensor’s axis.
Looking at the images, you can apparently connect your smartphone—or a GoPro camera—at two distances from the center plate for smaller and larger objects. However it doesn’t seem to allow changing the angle, which will make it hard to capture the top of taller objects—photogrammetry ideally requires two or more 360° sets of overlapping photos at different heights.
The versatility of the Pixelio goes even further: it contains a battery—which can apparently also be used as a power bank to (wirelessly) charge your phone—so you can take it outside. Doing such on a overcast day will save the hassle of setting up lights indoors. If you do want to use it indoors, the rotating camera forces you to light your object evenly from every angle (as opposed to the eora 3D’s fixed camera position, where one or two small softboxes will be enough) so putting the Pixelio in a special photography lighting tent will greatly improve the quality.
Apart from lighting, the scan quality of the Pixelio also depends on the quality of your smartphone camera (or GoPro) and the third-party photogrammetry software you use. I’ve recently reviewed Autodesk’s mobile 123D Catch app (iOS, Android and more) and web-based ReCap 360 solution and both can distill an impressive amount of detail from simple photographs. I will review more photogrammetry solutions soon!
Here’s the result of the cupcake scan above. I’m not sure which software was used, but I’m guessing 123D Catch because it’s mentioned a lot on the Pixelio website.
Creamy Cupcake by Pixelio on Sketchfab
Subscribe to my Monthly Newsletter
Get great contents delivered straight to your inbox everyday, just a click away, Sign Up Now.
Email address
A Closer Look at PIXELIO for 3D Scanning
0Shares
A couple of weeks ago, I had the privilege to acquaint the readers of 3D Printing Industry to Smart 3D, a British startup developing a unique device that turns any smartphone into a 3D scanner, relying on photogrammetric apps, and allows for the perfectly stable capturing of three-dimensional images of objects that can be later used on auction sites like eBay. My previous article was met with so much interest from 3DPI readers, that I decided to explore this subject a little bit more and try to find out how exactly the PIXELIO can be used in everyday life? I also found it interesting because, in a matter of days, this device will go live on Kickstarter. Is it really worth the hype?
The PIXELIO Kickstarter campaign will start on October 29th, with the device shipped at an early bird price of just $119. It’s cheap and it’s multi-functional, but how do you use it and what do you do with it? Here are some examples…
As you probably noticed, people around the world expect that all independent devices will be able to be replaced by applications on smartphones, in order to make every technology capability immediately on hand, at a low price. Everyone uses their smartphones as such tools as a flashlight, a leveling tool, a camera, and a camcorder, among many others. It is no longer a trend but a straight and simple requirement. There are plenty such applications, but most of them, despite the perfection of the software involved, base their quality on the imperfect precision of the human hand. That is why the PIXELIO created.
The first functionality of this device is for 3D printing – or, rather, 3D scanning. Overall, there is a shortage of 3D scanners on the market, and most of them are very expensive for average users. One of the best and cheapest solutions is Autodesk 123D Catch. Unfortunately, it has one weakness: the users themselves, or, to be more specific, the users’ shaking hands. This causes the smartphone not to be held in a horizontal line, resulting in snapping pictures with uneven spacing between photos, etc. In turn, this creates artifacts that have an impact on the quality of the 3D scan and, consequently, 3D printed models.
To use PIXELIO, the user just has to insert a smartphone into the planetary arm and start the app by clicking enter. The arm connects with the smartphone and starts the tour around the object in a perfectly-level and evenly-spaced fashion. Autodesk didn’t foresee the need for releasing the shutter of the camera wirelessly in 123D Catch, only through the use of a human finger. For this purpose, the creators of the PIXELIO arm developed and patented a solution that imitates a human finger with very similar capacity resistiveness, so the shutter is released and the whole 3D scanning action is simple. To create such a feature, PIXELIO implements the now-famous graphene material, though their imitation finger is made up of only 0.3% graphene.
In addition to photogrammetric 3D scanning, the PIXELIO can be used to quickly and efficiently snap photos of items to be sold on eBay. To sell well on eBay these days, you have to have something innovative to attract a buyer. Assuming that you will sell the same product at the same time as a thousands of other sellers, you have to present your product in a different and more eye-catching way.
With PIXELIO and the Arquspin app, users can make an omni-directional movie at home, which one can freely zoom in or out of, or even rotate on each side. Users don’t need to take dozens of pictures, but just one simple and easy-to-use device, a dedicated application, and a smartphone! This solution can also be applied successfully by bloggers to illustrate different items on their blogs in unique and innovative ways. On a blog about cooking, for instance, the blogger can show his or her readers dishes in a three-dimensional way. The last (but not least!) application of such a technique is the capturing of seamless, high-quality panorama photos, of a landscape or, say, an apartment that a user wants to put up for sale.
Users can use PIXELIO to shoot a timelapse from a certain angle, e.g., a shot showing the movement of the sun. To do so, just set the PIXELIO on a tripod, set the “Timelapse” function, select one of the device’s dedicated settings or create your own. Then, set the angle of rotation of the arm, the duration of its movement, the time between taking pictures, the number of steps it will make, and, finally, its start time. The PIXELIO will activate for a given time and start your GoPro or smartphone. In order to photograph the Sun moving East or West, you do not need to be on site for the exact time and do everything manually. The device automates the entire process.
At the end of the day, you can connect the PIXELIO to a power supply, put a smartfon on it, and the device will wirelessly transfer energy to it, so, the next day, everyone will be 100% charged and ready for new challenges.
Pawel Ślusarczyk
Founder of CD3D - the biggest site related to 3D printing in Poland, as well as a leading consulting agency and training company in this area. An expert in the market and business sides of 3D printing industry, he is well known as the main source of information and knowledge in this respect in Poland. He knows everyone and everyone knows him. Pawel has also a decade of experience in various areas of IT, marketing, and advertising and has had the privilege to work for such brands as Intel, EA, Lenovo, Asus, Olympus, and AIG/Lincoln, among others.
Inexpensive high-resolution 3D scanner: a review of peel 2 CAD-S
3D scanners
Reverse engineering
Author: Aleksey Chekhovich
Author: Aleksey Chekhovich
Setting up and using the 3D scanner for the first time | Scanning process | conclusions
The peel 2 CAD-S 3D scanner is a welcome addition to the peel 3d line. Compared to its predecessor, the peel 2, the device boasts higher detail when scanning small objects.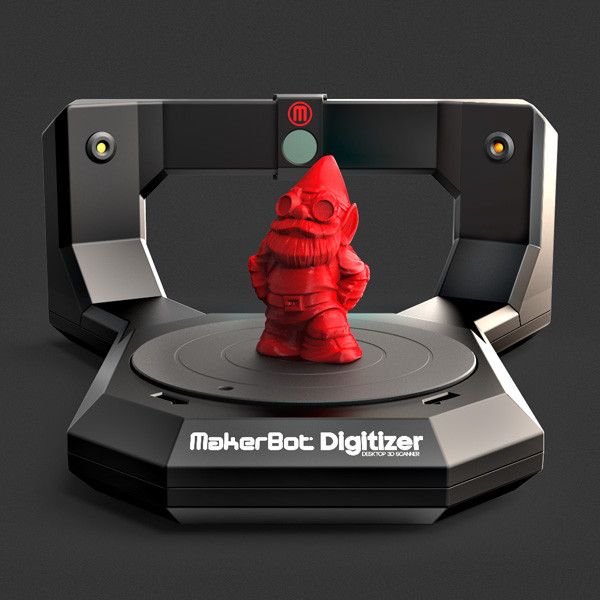
Peel 3d is a trademark of Ametek/Creaform. All of the parent company's knowledge and know-how in 3D scanning and reverse engineering has been invested in making peel 3d products more accessible to reach a different target audience.
The peel 2 scanner proved to be very capable and useful in many applications, but it lacked the ability to capture the finer details of objects. Consider the new peel 2 CAD-S model to evaluate the changes that have taken place.
Explore the entire peel 3d line for faster and easier reverse engineering projects. Send an online application and our experts will advise you and find the best solution.
peel 2 CAD-S uses the same structured white illumination technology as the previous model, but with higher resolution and therefore better suited for working with smaller elements. The recommended part size is less than 0.5 m (for comparison, for peel 2 - from 0.3 to 3 m).
In practice, this means that when using the same sensors and cameras, the scan area is reduced from 380 × 380 mm to 142 × 108 mm. Essentially, you get the same number of pixels in a much smaller space, so the peel 2 CAD-S can capture 3D shapes at 0.1mm grid resolution – in other words, five times more accurate than peel 2.
Setting up and using the
3D scanner for the first time The setup process is pretty much the same as with all other 3D scanning devices. The whole set comes in a regular case with a foam insert: a scanning device, software and a license key on a USB stick, as well as a switch. The cables are designed for power (from a standard power supply) and data transfer (via Hi-Speed USB 2.0). The installation process is simple: insert the flash drive into your computer, run the installation and follow the suggested steps.
In terms of hardware requirements, you'll need a modern workstation or laptop with an Nvidia GPU and at least 2GB of VRAM. Processor - the faster the better, but because the system is geared towards small parts, the chances of overloading a modern processor are minimal.
After installation, you need to calibrate. Calibration of this type of device is not difficult, and the general recommendation is that it should be done fairly regularly, especially as the conditions in which the scanner is used change. This may be due to light (for example, moving to another office, to another area of \u200b\u200bthe shop or workshop) or temperature. After the calibration is completed, the device is ready for use.
When the peel 3d software is launched for the first time, the user is presented with two main options. You can follow the help guide that will guide you through the entire 3D scanning process, determining how to capture the object, what resolution and positioning methods to use (geometry, texture, or position labels), and help you with your work. Another option is to do the setup yourself.
The peel 2 CAD-S scanner is compact, well balanced and ideal for processing miniature parts
First you need to determine the resolution of the scan. The default is 1.0 mm, but values from 0.1 mm to 2.0 mm are possible. The lower the value and the sharper the resolution, the better the scan and the larger the dataset. Given that peel 2 CAD-S is designed for small objects with fine detail, a good GPU can easily handle even 0.1mm resolution.
The next step is to set up how the system will track the movement of the 3D scanner around the object. As with other similar devices, there are three options: texture, geometry, and labels. Structured light scanners equipped with texture capture can use the surface texture to track the movement of the scanner/object. peel 2 CAD-S can also use object geometry. Both of these methods work well for organic shapes and textured objects.
iQB Technologies experts recommend the article 3D scanning of a part: 9 easy steps with peel 3d
For products of regular shape with uniform surfaces (most often this applies to mechanical parts), the use of position marks may be required.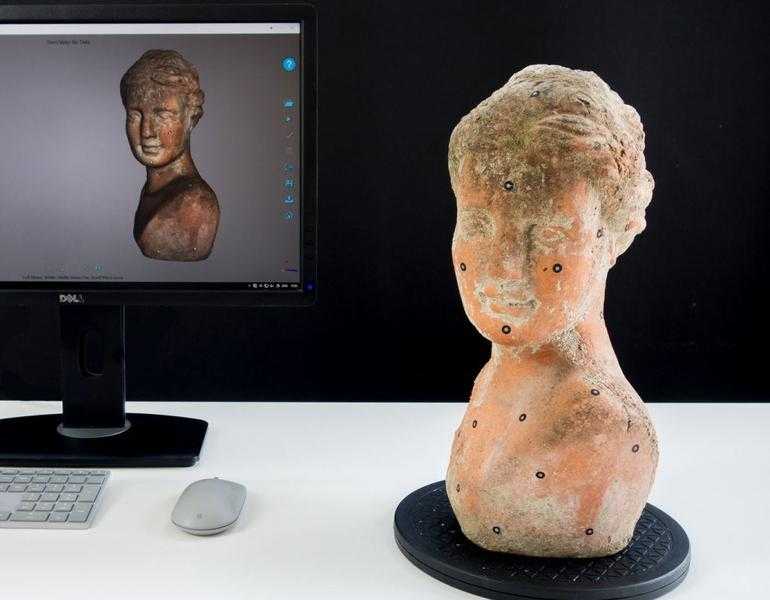
These are small reflective markers of a predetermined size that can be stuck on or around an object. They are used to determine the position of the scanner in relation to the object using triangulation methods. As long as there are three marks in the field of view of the 3D scanner at the same time, this method usually gives a good result and ensures correct tracking of the scanner.
The peel 2 CAD-S comes with a set of small plastic jigs with three marks that can be placed around the object for quick adjustments. These devices are very useful considering that the device is focused on digitizing small details with high detail, and sticking several 4mm marks on them is not a very practical solution.
peel 2 CAD-S is designed to scan physical objects at high resolution, and many of its features are based on proven Creaform designs
Scan process
3D scanning typically involves collecting as much data as possible in one position. The device is quite light and well balanced, which many competitors' products cannot boast of. The function of determining the distance to the object (ideally 300 mm) with color indication on the screen and on the device itself allows you to scan very quickly.
It is worth noting that the peel 3d software provides a very rough preview. Since the scanner usually collects a huge amount of data, it makes sense to gradually filter it out as you work.
As you get used to the operation of the device and develop the skill of quickly moving the scanner around the object (or quickly rotating the part on the turntable), you will understand how to maintain continuous tracking. At any time, you can take your finger off the shutter, pause the scan and review the data, and then return to digitizing the missing areas.
After the initial scan, there are two paths. If there is enough data, then you can start the cleaning process and remove excess data. There are a number of tools available for this and the procedure is quite simple - this is one area where all the investment in Creaform know-how is worth it. Then the meshing and further cleaning is performed.
Otherwise, especially for complex parts, a more thorough rescan may be required. This repeats the same process, resulting in two or more data sets that need to be matched. Once again, Creaform's knowledge and technology comes into play, allowing you to use common dots (you must select three common dots between two or more images) to combine multiple scans.
After the scan (or set of scans) is ready, the next step is to prepare for data post-processing. You may just need to create a mesh, fill holes, and export the data to OBJ or STL format. In this case, the available tools will help smooth surfaces, remove noise and fill in all holes to ensure reliable export.
In addition, analytical surfaces may need to be built from point/mesh data, either to obtain a point of reference for mesh reuse in CAD (surfaces allow alignment and reassembly of the model) or to create reference geometry to build a more complete model.
The peel 3d software is not really designed to build a fully sealed solid model. Its purpose is to help build a set of reference surfaces that are consistent with point and grid data. This view of the scanned data can be imported into a full-featured 3D design system and the 3D model can be completed.
After mastering the best methods for capturing a physical object with peel 2 CAD-S, the results will speak for themselves.
While this may seem a little complicated, in fact, in most cases, other surfaces (such as cylinders, spheres, planes, etc.) can be added almost instantly to a prismatic model.
These surfaces and points can then be loaded into CAD. This usually requires two exports: first a mesh data file in STL or OBJ format, then a surface data file in STEP or IGES format (for example). The result should be a set of two types of geometry that can be used to build the required model.
Conclusions
At first glance, the peel 2 3D scanner makes a strong impression.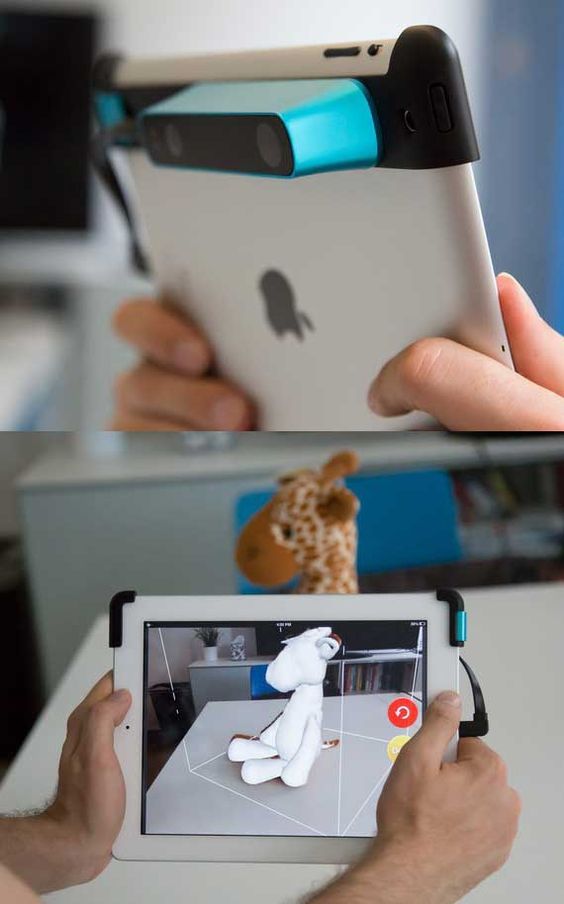 Relatively low price, excellent build quality and, last but not least, reliable and simple software. The main problem was that it is not suitable for those who require higher resolution scans.
peel 2 CAD-S takes the same approach as its predecessor but focuses (both literally and figuratively) on smaller objects and capturing finer details while maintaining the same ease of use when paired with software from Creaform .
The resulting scans are of excellent detail, and by mastering the art of multiple scans, stitching and alignment, as well as the practicalities of working with reflective surfaces, you can achieve impressive results.
peel 2 CAD-S and peel 2 complement each other optimally, and it makes sense to have both scanners at the workplace. In practice, this option is very common. If you are interested in 3D scanning solutions, the peel 3d line deserves a deeper look.
Source: develop3d.com
Article published on 10/05/2021, updated on 11/21/2022
3D laser scanning - definition, characteristics
Your city: Moscow
Right?
× Choose the city closest to you:
Moscow St. Petersburg Vladivostok Novosibirsk Yekaterinburg Kazan Nizhny Novgorod Chelyabinsk Omsk Rostov-on-Don Samara Krasnoyarsk Voronezh Perm
Volgograd Krasnodar Saratov Tyumen Tolyatti Izhevsk Barnaul Ulyanovsk Irkutsk Khabarovsk Makhachkala Yaroslavl
▼ Show more
Deselect
3D scanning is a technique used to capture the shape of an object with a 3D scanner. The result is a 3D object file that can be saved, edited, and even printed in 3D. Some 3D scanners can collect shape and color data at the same time. 3D scanning is compatible with computer-aided design (CAD) software, as well as 3D printing after a little training in the relevant programs.
3D scanning technologies:
- Photogrammetry - 3D modeling from photographs. The principle of photogrammetry is to analyze several photographs of a static object taken from different viewpoints and automatically detect pixels corresponding to the same physical point.
 The input required from the user is camera parameters such as focal length and lens distortion. Photogrammetric technology is also capable of reconstructing objects of various scales photographed from the ground or from the air. The main advantages of 3D photogrammetry scanning technology are its accuracy and speed of data collection.
 - Structured Light 3D Scan - Structured Light 3D Scan technology works by projecting a series of linear patterns onto an object. The system is then able to examine the edges of each line in the pattern and calculate the distance from the scanner to the surface of the object. The structured light used for 3D scanning can be white or blue and is generated by numerous types of projectors such as digital light processing (DLP) technology. The projected pattern is usually a series of light rays, but can also be a random dot matrix. The main advantages of structured light technology for 3D scanning are speed, resolution and the ability to 3D scan people.

- 3D Laser Triangulation Scanning Technology – Laser triangulation based 3D scanners use either a laser line or a single laser dot to scan an object. Using this method, digitization begins with the emission of a rectilinear laser beam, which deforms upon contact with the object. Using a camera, the 3D scanner analyzes the deformation of the line emitted by the laser on the reliefs of the object in order to determine its position in space using trigonometric calculations. The angle formed between the camera and the laser beam, the distance from the camera to the object, and the distance from the laser source to the object (known from the calculation of the time it takes the laser to go around) are parameters. which allow you to determine the spatial coordinates of the object. The advantages of laser triangulation technology for 3D scanning are resolution and accuracy.
- Laser Pulse 3D Scanning Technology is a 3D scanning technology that calculates the time it takes a laser to reach the surface and return.
 Each measurement made by a 3D scanner reports a point on a surface, and the operation must be performed hundreds of thousands of times over the entire surface. This 3D scanning technology includes laser pulsed 3D scanners and phase shift 3D scanners. They, in addition to modulating the amplitude of the laser beam used for 3D scanning, also modulate its phase. These systems offer superior performance by combining the two types of modulation. Advantages of pulsed laser 3D scanners: the ability to scan large objects and the environment.
 - 3D Contact Scan uses contact between a probe and an object to reveal surface information measured by probe deformation. This is done using a touch probe, also called a probe or probe, connected to a 3D scanner. The probe is usually connected to a structure (for example, a robotic arm) capable of registering its deformations. The main advantages of contact technology for 3D scanning are its accuracy and the ability to 3D scan transparent or reflective surfaces.

Learn more