Anet a2 diy 3d printer
Anet A2 DIY Metal 3D Printer Kit
Detailed Overview
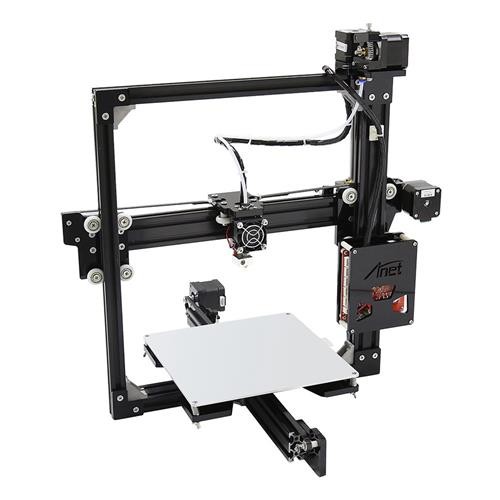
Anet's latest addition, the A2 DIY metal 3D printer features a well-established design. Its metal frame offers increased durability and rigidity, leading to improved prints with higher precision. The A2's tried and true electronics system is robust, reliable, and capable. Though a bit pricier than the A8, the A2's aluminum frame and V-slot design makes it very appealing to the 3D enthusiast. As with the Anet A8. the A2 boasts a large print area and very capable NEMA17 motors to navigate the print-space. The A2 comes stock with a versatile extruder and heated bed, which makes it capable of printing a diverse selection of filaments. The printer was designed with the user in mind. Part placement is intuitive and straightforward, and the board comes pre-labelled with all you’ll need to know. The firmware provides an interface that is easy to navigate. As always, this printer can be controlled using Repetier-Host or independently using a GCODE file and a micro-USB card
Technical Specifications
- Frame Material: Aluminum
- XY Axis Accuracy: 0.
012mm
- Z Axis Accuracy: 0.004mm
- # Extruders: 1
- Extruder Diameter: 0.4mm
- Max Print Speed: 100mm/s
- Max Print Size: 220x220x220mm
- Nozzle Temp.: Adjustable, Maximum 260C
- Hot Bed Temperature: 50-90C
- Heating Plate Material: Aluminum
- Printable Materials: PLA, ABS, HIPS, etc.
- Filament Diameter: 1.75mm
- Data Input: microSD or USB
Price match guarantee:
We work very hard to ensure that we offer the absolute best prices online for all of our printers including Tevo 3D printer kits. If you find another online store that offers a lower price than us on Tevo 3D printers for sale, please let us know and we will refund your original payment for the difference. Read More
30 day price assurance guarantee:
We want you to feel confident that you are getting the absolute best price for the product.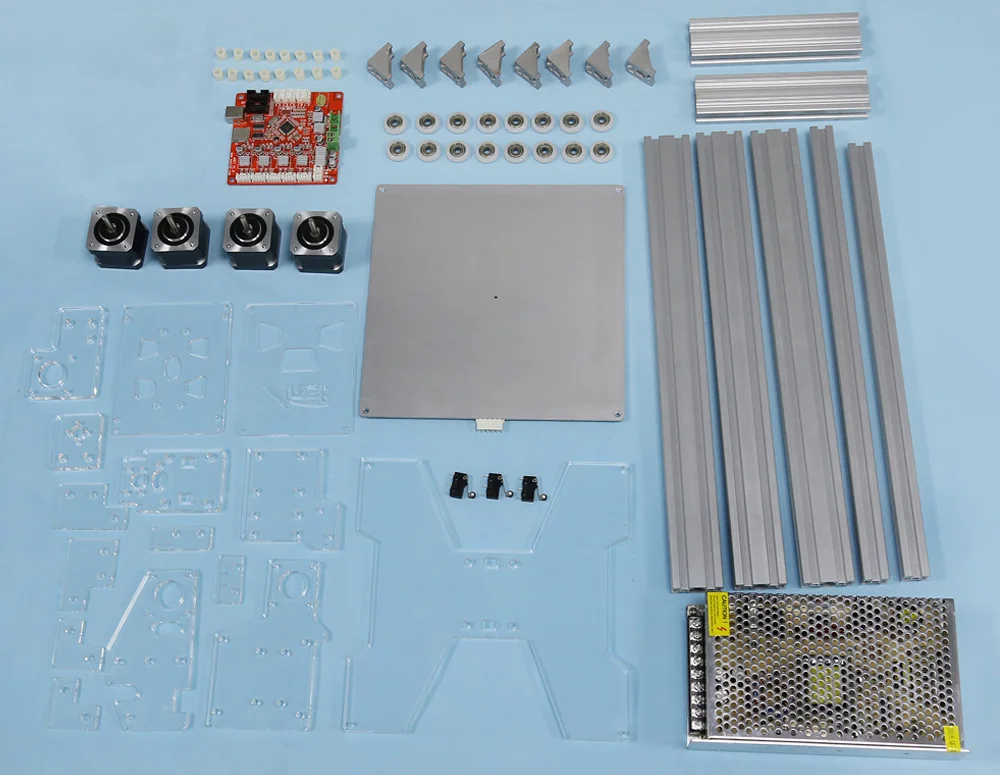 If you find that our own website has a lower price for the same item you have ordered within 30 days of your purchase date, we will refund the difference! Read More
Full manufacturer direct warranty:
We are an authorized dealer for all our products and comes with the full manufacturer warranty.
Tax free (except California and Nevada):
The price you see is the price you pay but because we operate in California and Nevada we must charge tax in California and Nevada.
Safe & secure online ordering:
We are certified Level 1 PCI DSS compliant. What this means is that we meet all the requirements defined by the Payment Card Industry Security Standards Council. For additional information on PCI Compliance, visit the PCI Compliance Guide website. We also accept payment via Pay Pal, a leader in secure online payment processing.
Best customer service:
We strive to offer the best customer service we can.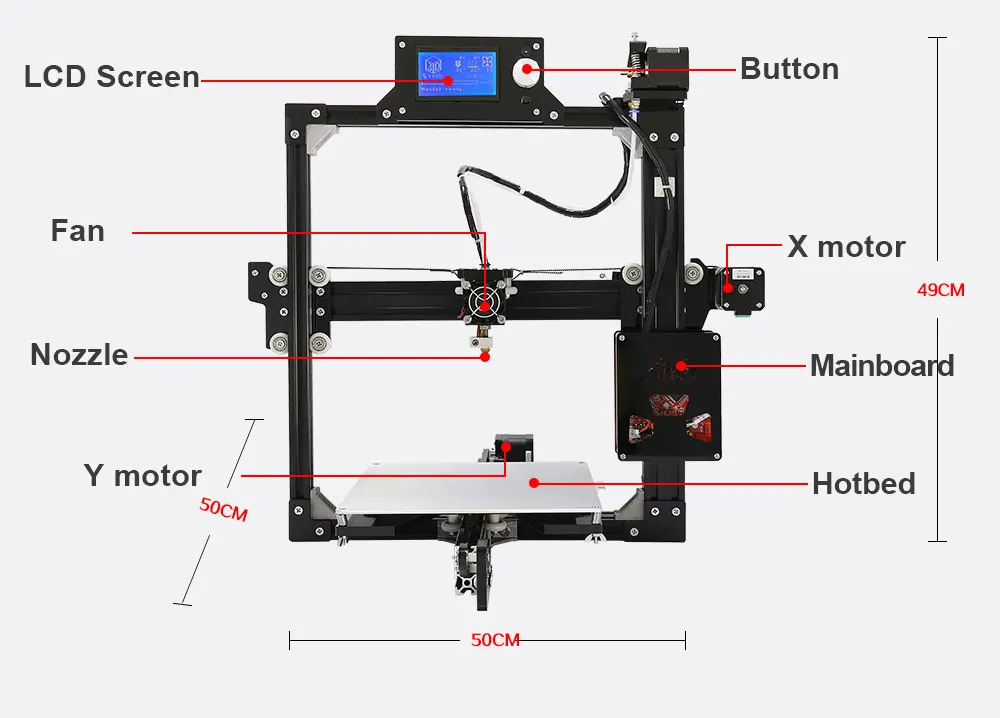 If you have any questions please let us know by phone or email.
Exclusive deals:
We appreciate each and every customer that comes to our store. We know you have a lot of choices when it comes to your 3D printing purchase. That's why we'd like to show our appreciation by periodically sending out exclusive coupons and deals to our past customers!
Order Confirmation:
As soon as you place your order you will receive an order confirmation e-mail. This means that we have received your order in our system and pre-authorized your credit card for the purchase. As soon as we receive your order we automatically reach out to our suppliers to confirm that it is in stock and available for immediate shipment. If your item is on backorder or unavailable we will void the pre-authorization and reach out to you via e-mail. If your item(s) are available for immediate shipment (within 5 business days) we will process the charges and submit the order for shipment.
Order Shipment:
If your order is in stock and we process the charges to your credit card, it will ship within five business days from the date of your order. We will send you tracking information within 24 hours of your order leaving the warehouse to the e-mail address you provide when checking out. If you do not receive tracking information from us within six business days of your order feel free to follow up with us at [email protected]
Domestic Shipping:
We do not ship to P.O. Box.
International Shipping:
Please contact us for international shipping rates
We work very hard to ensure that we offer the absolute best prices online for all of our printers including Tevo 3D printer kits. If you find another online store that offers a lower price than us on Tevo 3D printers for sale, please let us know. We want you to feel confident when you buy a Tevo 3D printer or any of our other printers that you are getting the absolute best price for the product.
To request your partial refund simply e-mail us a link to the same product on our website, or on our competitors’ website and we will process the credit accordingly.
Our 100% Price Guarantee has some limitations:
- You must purchase the item from our website before requesting your Price Match Guarantee
- Promotions such as rebates and buy one, get one free offers are not eligible
- The item must be in stock on the competitors website
- The competitor must be an online store, they may not have a retail location
- The item must ship from the same country.
- The website cannot be a discounter or auction website (ie; eBay, overstock, etc..)
- The competitor must be an Authorized Retailer for the product in question
- The Price Match Guarantee includes the item price and the shipping charges, it excludes sales tax or any customs and duties
Anet 3D Anet A2 3D Printer
Properties
| Build Volume | 220 x 220 x 220 mm (8. 7 x 8.7 x 8.7 in.) 7 x 8.7 x 8.7 in.) |
| Layer Resolution Low | 300 micron (0.011 in.) |
| Layer Resolution High | 100 micron (0.004 in.) |
Documents
- A2 3D Printer Installation Instructions-1.1.pdf
| Brand | Anet 3D |
| Machine type | 3D Printer |
| Technology | FDM (Fused Deposition Modeling) |
| Materials | PVA, PLA, ABS, HIPS, PET, FLEX (Elastic TPE), PETG |
| Website | http://www.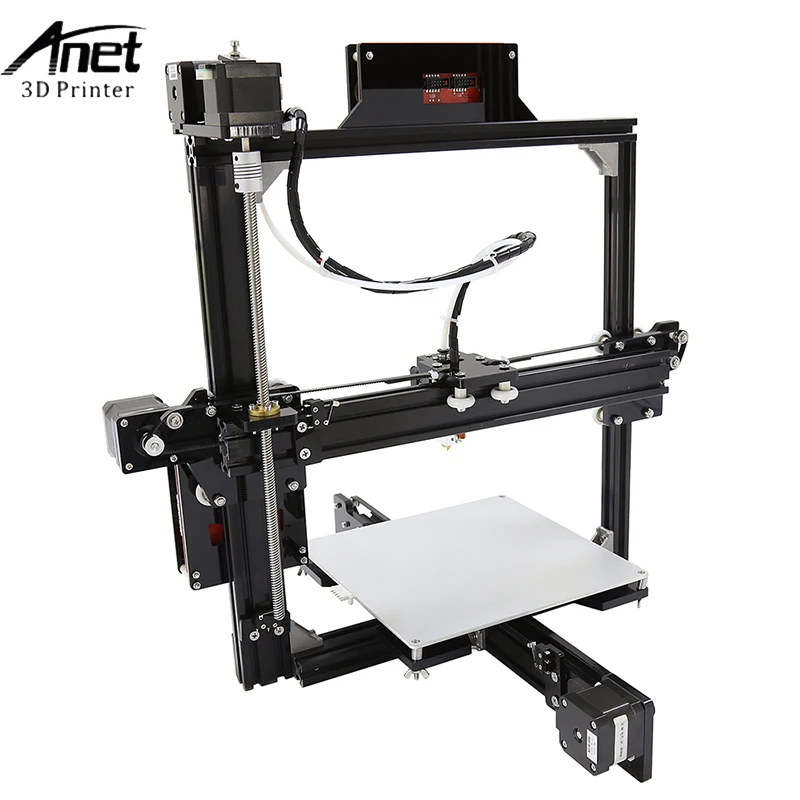 anet3d.com anet3d.com |
| Average Price | $199.00 |
This 3D printer adopts the high-end configuration with stable performance, and the compact body ensures the portability. It is unassembled DIY kit, which provides you an unforgettable step-by-step learning experience of 3D printer from scratch. As long as you have a passion for creativity, you can not afford to miss this product! It is suitable for a wide range of customers, young or old, professional or amateur. What are you waiting for? Just choose it!
Features:
- Made from aluminum profile to maintain the garage-built feel and the handmade charm
- Multiple 3D printing filament supportable, support ABS / PLA / HIPS, etc.
- 220 x 220 x 220mm printing volume, just right for you
- With automatic model generation support
- High printing precision, aluminium rail rods, gears, bearings and connectors for smoother movement
- Operating system: Windows / Mac
- Software language: English, French, Chinese and so on
- Host computer software: Cura
- Positioning accuracy: Z 0.
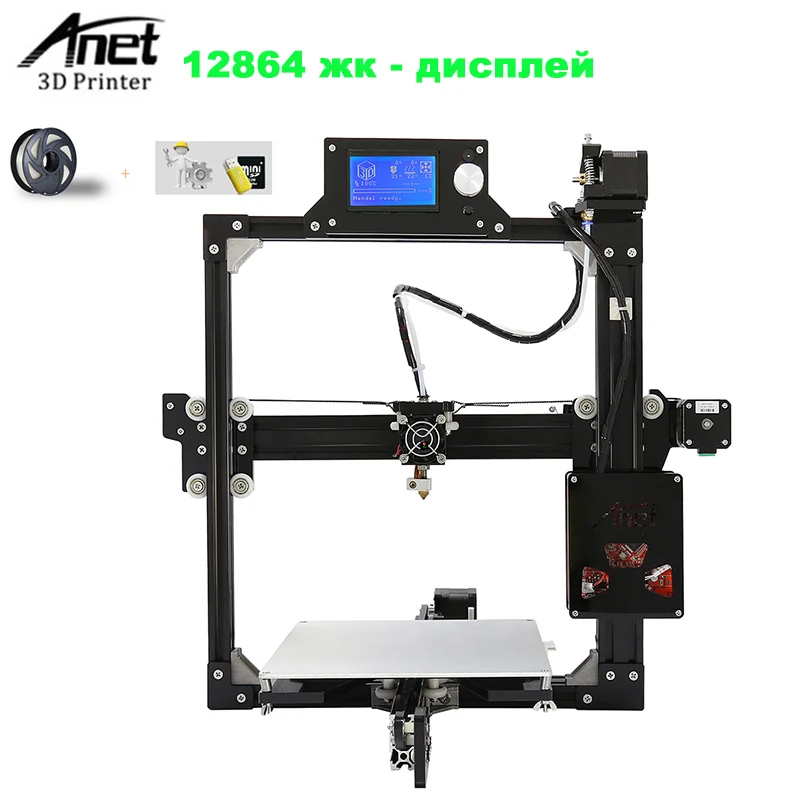 004mm / XY 0.012mm
 - Supports TF card off-line printing, especially convenient when without the computer
- Enhanced stability and reliability: heated aluminum plate ensures more stable printing
- Heating plate temperature: 50 - 90 Deg.C
- Extruder temperature: 260 Deg.C
- Working environment:
- Temperature: 10 to 40 Deg.C
- Humidity: 20 to 50 Deg.C
Specification:
Steel frame 3D printer Anet A8 / Sudo Null IT News
Despite the low price, Anet A8, even without modifications, allows you to print models of good quality.
An example of 3D printing without modifications on Anet A8 (model from the network)
But, there is no limit to perfection, the owners add belt tensioners, change linear bearings and increase the rigidity of the frame by fixing it on a chipboard / plywood sheet and installing spacers.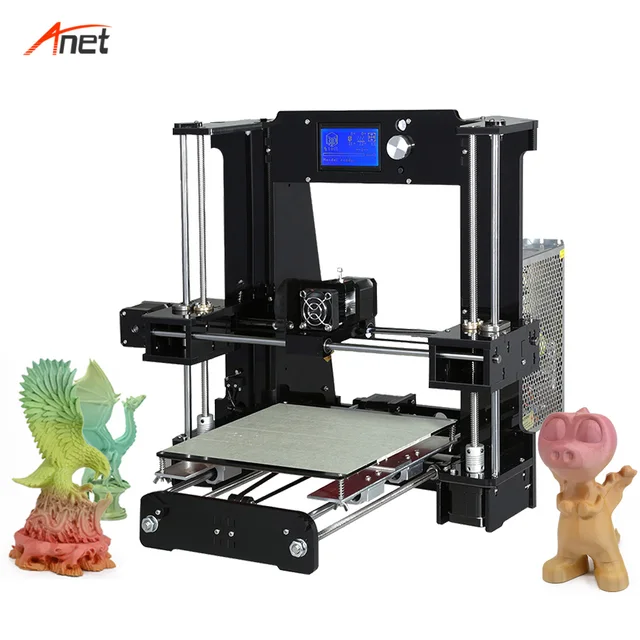
In this article I will describe the nuances that I encountered in the process of moving from an acrylic frame to a steel one.
A little background
On the advice of experts from the network, I assembled my Anet A8 using a thread lock, blue, from the nearest auto shop. Unfortunately, the fixative compound reacted with the acrylic and caused cracks. Because I fixed the printer on a sheet of chipboard, this did not cause serious consequences. Nevertheless, perfectionism haunted me, and at some point I could not resist and ordered a steel body / chassis / frame.
Equipment
The kit came with cut, painted sheet steel remotely similar to the original acrylic and a set of screws, nuts, washers.
The manufacturer of the body thinks that we need to buy more for the upgrade:
* Polished shaft L=396 mm long x 2pcs (I got out without it, details below)
* Linear bearing lm8uu x 4pcs
* Timing belt GT2 - 1 meter x 1pc
* Bearing 608zz x 2pcs (for example, from a spinner)
I would add
to this * nylon straps
* self-locking nuts "with grover", hole 3mm
* plastic insert for mounting the Y-axis motor
Assembly
Sufficiently detailed instructions are available on the case manufacturer's website.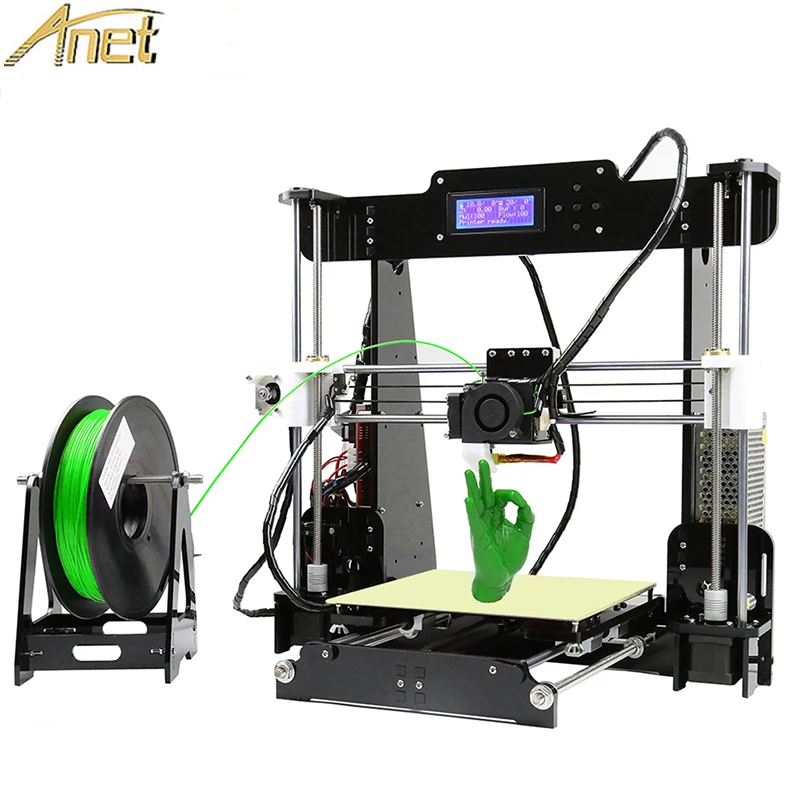 I will describe the difficulties that I personally encountered.
The nut holes in the steel frame are larger than in the acrylic frame and can accommodate self-locking nuts without any problem. So I didn't have to use threadlocker. On the other hand, the nuts with a grover have an external size smaller than the original ones, and to tighten them, I had to hold them with a cobra wrench. I was very lucky to have linear and conventional bearings available, and also a belt. But the polished shaft for the Y-axis (printer table) from the original kit turned out to be one centimeter shorter. I built up the shaft with M8 bolts, nuts and washers (the old shaft rests against the nut), and grinded off the protruding part that prevents the table from moving with a file.
The plastic motor mount insert was not included. Ideally, it should be printed in advance. I used a brass post instead of the insert.
I also had to tinker with the limit switches, according to the instructions, they are supposed to be combined with a small board and the Y-axis limit switch should be located on the racks. In my case, the limit switches went without boards, for the Y axis, g, I had to tinker. I cut off the old limit switch holder and fixed it on the M4 screw.
Also, the X-axis limit switch is on the right in the steel case assembly instructions, although it is on the left in the acrylic case. Without changing the firmware, homing will not work. I increased the limit switch wire and placed it on the left.
A couple more photos of printer elements
General impressions
The main goal is achieved, the frame is very strong. Rigidity is more than sufficient. Convenient "shelf" for coils with plastic. The X axis is well balanced, the drive motor is offset to the other side as opposed to the extruder. Linear bearings are offset as close as possible to the vertical guides. Increased maximum print height by lowering the table (linear bearings can be attached directly to the table without using bearing holders).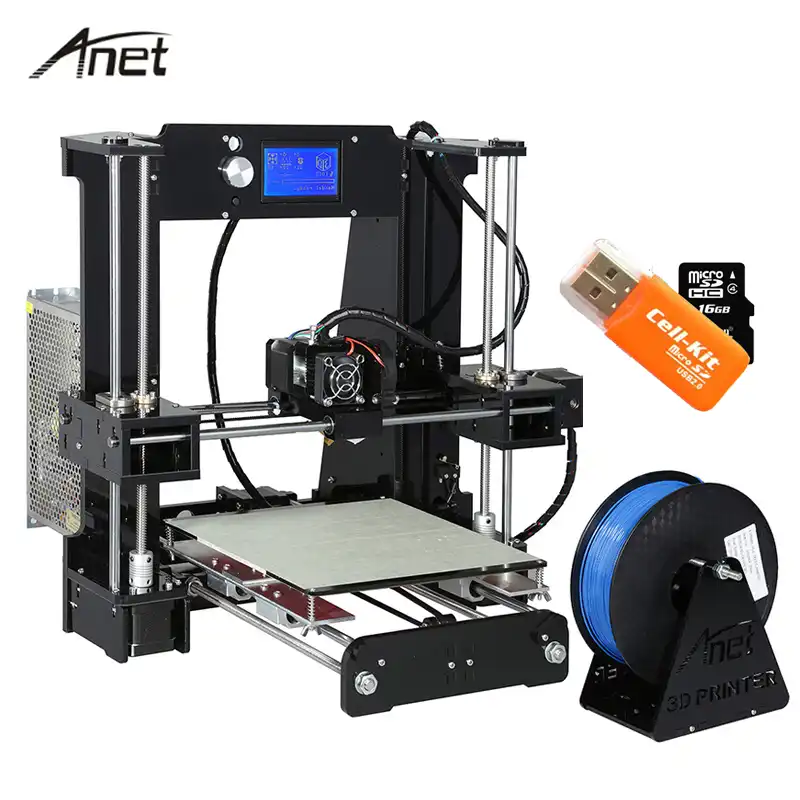 The backlash of the extruder carriage is practically “gone”.
But not without a fly in the ointment.
For me, the number one problem is the need to purchase additional shafts and bearings (see the section on accessories). On a lesser note, the X-axis belt is slipping off the tensioner to the right, I had to fence the washer structure to combat this effect.
There is no x-axis belt tensioner.
If you don't have Anet A8, then instead of a bunch of Anet A8 + steel case, it's better to look at other models immediately in a metal case.
I consider the purchase of a steel chassis reasonable for those owners of Anet A8 who are not satisfied with:
* structural rigidity (including after modification)
* appearance / aesthetic component
* does not scare the price
2020-04-01 UPDATE:
The y-axis engine is not in the correct position, you need to turn it over. And put the trailer on the other side. (It didn't bother me, I used it as is.-kupit-v-soin-store.ru-4.png) )
)
You can change direction and parameters in marlin. The following parameters work for me (the Y-axis engine as it should, the body to the left, the limit switch in front).
marling advanced h
Decreased the Y-axis accelerations to avoid gaps on the Y-axis due to curvature of the shafts. I ordered new ones, I'm waiting.
(only changed parameters)
//#define CUSTOM_MACHINE_NAME "ANET A8" // #define USE_YMIN_PLUG #define USE_YMAX_PLUG #define Y_MAX_ENDSTOP_INVERTING true // set to true to invert the logic of the endstop. // #define ENDSTOP_INTERRUPTS_FEATURE #define DEFAULT_MAX_ACCELERATION { 2000, 1200, 100, 10000 } #define DEFAULT_ACCELERATION 280 // X, Y, Z and E acceleration for printing moves #define DEFAULT_RETRACT_ACCELERATION 1000 // E acceleration for retracts #define DEFAULT_TRAVEL_ACCELERATION 280 // X, Y, Z acceleration for travel (non printing) moves #define DEFAULT_YJERK 6. 0 #define Y_HOME_DIR 1 #define X_BED_SIZE 200 #define Y_BED_SIZE 200 // Travel limits (mm) after homing, corresponding to endstop positions. #define X_MIN_POS -20 #define INDIVIDUAL_AXIS_HOMING_MENU
 assembly instructions and drawings, table calibration, board connection, revisions and improvements, extruder carriage troubleshooting and
I have been dreaming about buying a 3D printer for a long time. Since then, when the first articles about self-assembly printers began to appear on gyktimes (then Habré). But somehow I did not dare to start self-collection. There was a lack of necessary knowledge and skills.
Later, the Chinese began mass production of printers. And it seems that here it is, take it. But here the price has already affected.
Recently, gearbest and banggood stores have become more or less normal prices for printers. And I, having saved up the necessary amount of money, and waiting for the sale, bought myself Anet A8.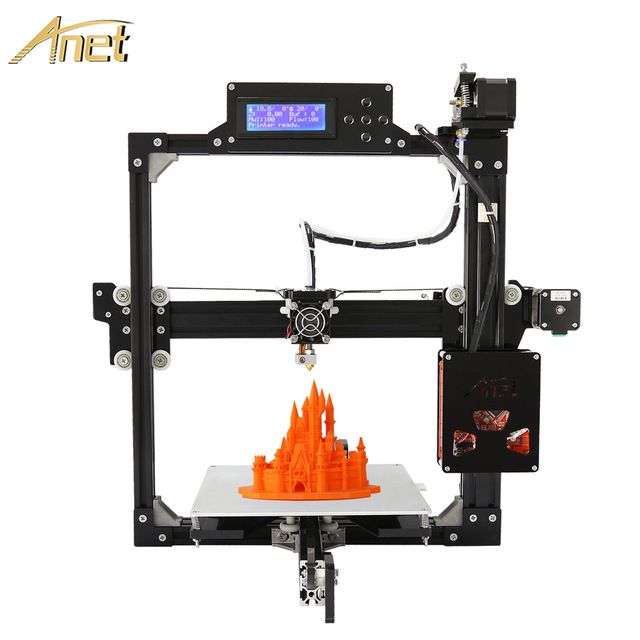 Why was this particular model purchased? Probably because of the price.
At the time of purchase, I already knew what this printer was capable of. Knew about his sores, solutions and improvements. But having decided that it would suit me for entering the world of 3D printing, I boldly ordered it.
In short, this is a good option for beginners. Based on which it will already be possible to understand whether you need it or not. And, accordingly, abandon the printer, or already modify it, or even switch to more expensive models.
And if you need details. I have them, as always, and a lot. Be careful, there will be a really large number of photos.
Since I am not a professional techie, the reviews are written by me purely from a consumer attitude. I know that I will not be able to reflect all the necessary things in the review, and perhaps somewhere I even make mistakes. You can write to me in a PM, I will definitely fix it, and you can also ask a question in the comments to the review, and I will answer it to the best of my ability and knowledge.
Initially, I had a question about buying a laser engraver and a 3D printer. I bought an engraver first. Already reviewed it. The second was a 3D printer, as it has a different application.
I ordered on banggood due to the fact that the price was lower. Only 160 dollars already with delivery to Kazakhstan. In herbest, printer prices are lower, but delivery is usually at least $ 140. Which is not beneficial at all.
The printer was delivered to me very quickly. In just 2 weeks.
At the post office I received a parcel weighing as much as 8 kg.
There were a lot of details inside. And the complete absence of any instructions:
Each group of parts was in a box in its own foam compartment:
They are sorted not just like that, but according to the assembly instructions.
I downloaded the instruction itself, along with the drivers, as well as the Cura 14/07 printing program, here. (total size 303mb)
Now show my build process is .-kupit-v-soin-store.ru-1.png) There will be many photos. I will comment in part:
There will be many photos. I will comment in part:
The total time for assembly and the first launch took me about 10 hours of unhurried fuss, with breaks, cursing, alterations and clarification of incomprehensible points. If it is possible to assemble with an assistant, the time will be reduced by at least half. ( unless, of course, consumed with an assistant during the assembly of strong drinks )
The first thing with which the assembly of the printer begins is the frame. It is made of acrylic:
An hour of total assembly time was spent peeling all the paper off these parts:
In order to assemble the frame, there are a large number of bolts and nuts. They are conveniently sorted into bags and signed:
(after assembly, I still have a large supply of bolts)
The process went on:
(in this photo, as it turned out, the top bar for the display was not installed correctly. Later, I rearranged it again on an unassembled printer, because I put it on the wrong side again)
Bottom frame:
(mounted Y-axis motor and limit switch)
On frame:
Y Belt Bearings:
studs for Y-axis:
Installed in place:
I continue to collect
Belt fastener on heating table:
Y axis assembled:
I tighten the belt:
I put a heated aluminum table:
(Then after the complete assembly, I took off this table again, turned the connector back.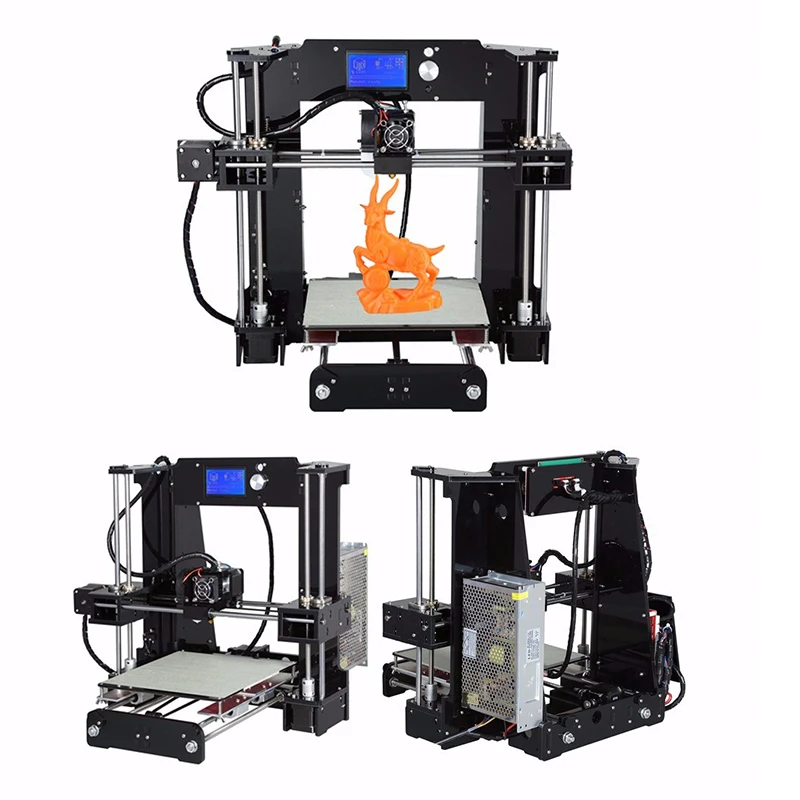 And then I took it off again and adjusted it for a uniform level)
Now I turn to the assembly of the Z axis:
The z-axis uses two stepper motors:
I put everything in its place. I'm cursing. I put everything in its place, but it's already correct:
Now it's time to prepare the extruder:
My model uses an MK8 extruder. It is inexpensive, works, but has some sores. Maybe in the future I will change.
At this point I got carried away and forgot to take pictures. As a result, with the extruder and axis, we have the following:
Now I turn to the installation of the display :
On Frame:
Power Supply Installation:
And on frame:
Control board:
I got Anet A8 Mainboard V1-5. At the time of assembly, I could not even find information about this board. People mostly have Anet A8 Mainboard V1.0
Frame mounted:
Now I turn to connecting everything to the control board:
The wires included in the kit are signed and have the desired length. Therefore, there are no connection problems:
We connect such a mess:
( later I reconnected everything already neatly laid. The cable management also took about two hours. )
Already in the process of connecting the printer to the computer, under the usb cable, I found a card reader and an 8gb flash drive:
The flash drive contained all the same programs, drivers and instructions that I downloaded.
Also included with the printer is a holder for spools of filament. I have already assembled it:
To check and test the print, the kit comes with 10 meters of white PLA plastic:
This is quite enough for setting up and testing the print. But if you print something larger, you naturally need to order more.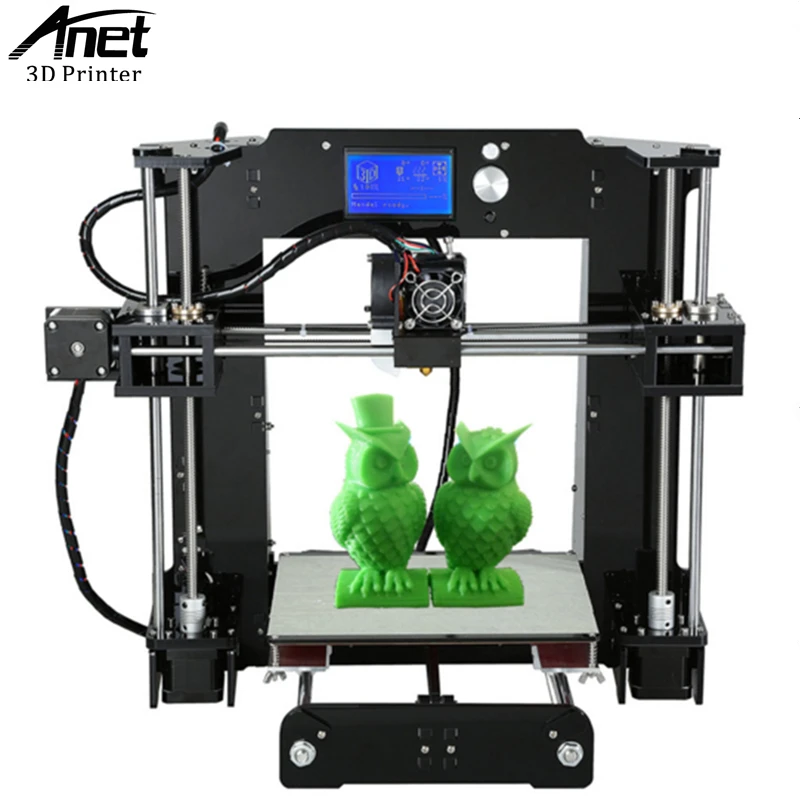
After laying the wires, my printer stood on the floor at work in the corner:
The printer itself started up after assembly without any dancing with a tambourine.
You can print via USB cable from a computer or from a flash drive. In both cases, Cura is used for printing:
The printing process itself is quite simple. Set up the program according to the instructions that came with the printer. We take a 3D model that we want to print. I first used the models that came with the printer, and first I tried to print a box, as the simplest object. Reduced the size, sent to print. The output is this:
Yeah. Something is wrong. I read the instructions again.
The problem is in the table. Incorrectly calibrated, too large distance between the table and the nozzle. I reduce. I am stamping:
My first 3D printed crap. HURRAH! He works!
Oh, so I need to print more. I decided that the joke would be relevant: Buy a 3D printer, print a 3D printer, sell a 3D printer
But I will print just improvements. Signing up to thingiverse.com as it is the largest catalog of 3d printable models. I drive in the search Anet A8 and see hundreds of models. Many add-ons, upgrades, parts, and more can be printed to the printer.
I choose a button for pressing the extruder, when filling the filament and a side holder for hexagons: Download, send to print:
An hour later I get:
Install:
There is less and less filament left. I'm looking for something to print small, but necessary. I find plugs-fasteners for studs. In the original design, they are not attached to the top of the frame from above. I'm typing. I receive:
Immediately install on the frame:
On this I have very little filament left. And the printer is left alone while waiting.
Since I knew that I would need plastic for printing, I took care of this issue in advance. I read the reviews and decided to start my acquaintance with the world of 3D plastic printing from BestFilament.-kupit-v-soin-store.ru-6.png)
In order to somehow save on shipping, I order 8 kg of plastic at once:
Delivery sdek.
Two weeks later I receive two parcels, with a total weight of almost 11 kg:
Since I am not a magician yet, but just learning, I start my experiments with cheap PLA transition plastic:
Liked the blue color.
I can not help but note the quality packaging of the spool with filament. Thick polyethylene. Silica gel bag.
I install it on a stand. I load the rod into the extruder.
To check the plastic and in general to improve the printer, I send for printing a modified belt clip responsible for moving the carriage with the extruder:
at some point, the middle part falls off the table. I remove it and print the rest:
Snot in the photo, this is what should have been on the part in the middle.
I receive:
After I printed the details of the stretch, it is necessary to reprint the part that came off.
I put it on print and see that something is wrong with the printer. It does not lower the extruder down. On the contrary, it raises every time.
Breakdown!
Dances with a tambourine begin. I read the Internet, I dig forums. I even create a question on the profile site 3dtoday.ru:
Glitch caught some
I press on the printer (in the menu) home all
The x-axis and y-axis return to the house, rest against the limit switch and norms
And the Z-axis raises its head half a millimeter and sends it to the edge of the table. It's like it's already hit the trailer.
I press home all again, everything repeats.
Roughly speaking, if I press home all 50 times, the printer will raise the extruder to the ceiling of the frame. Doesn't go down.
Where to dig?
Where the glitch came from is unclear. In the morning, I normally printed out the rest of the plastic on the plastic guide ring, after that the extruder, as it was raised, went to the side and that's it.
I loaded a new plastic, I turn on the print, but it does not lower the extruder.
I received the printer just a few days ago.
The Pronterface program for the M119 command shows the following result:
That is, the limit switch, as it were, is always clamped.
And I tried to press, squeeze, turn off, connect another limit switch. Every time I see Z_min:H
The switch itself is definitely working. Checked with a tester.
Connoisseurs can not say anything sensible. But a little later found the same problem on thingiverse.com
True, there is a problem with the Y axis, but I have the same with the Z axis.
Therefore, I do the following:
The essence of the problem is that there is a defective capacitor on the motherboard. Marriage vylaziit not immediately, but after a few hours of operation of the printer.
As described in the bourgeois article, to check, you need to go through the capacitors with the numbers C43, C44, C45, C46, C47 with a multimeter. (each corresponds to its own axis)
I just showed 1.2v on the Z axis. And on all the rest 9.5v. (I didn’t understand a little about this, since on anet V1 boards there should be only 5V. I have Anet 3D V1-5)
After I soldered the capacitor, I connected the board in place.
To be honest, I was already ready to hear the "bang" and watch the blue smoke. But to my happiness, the problem really turned out to be in this piece of iron and silicon:
Bottom line: the printer is working again.
I hope my answer will help other Anet A8 owners who are facing a similar problem.
After solving the problem, I decided to print some toys for my daughter. At the same time, check the capabilities of the printer:
Print boat:
Ghost:
Skeleton fish that can bend:
(it took 2 hours to print this fish)
Plastic from bestfilament fits perfectly. The layers do not shrink, hold firmly on the table and are well glued together.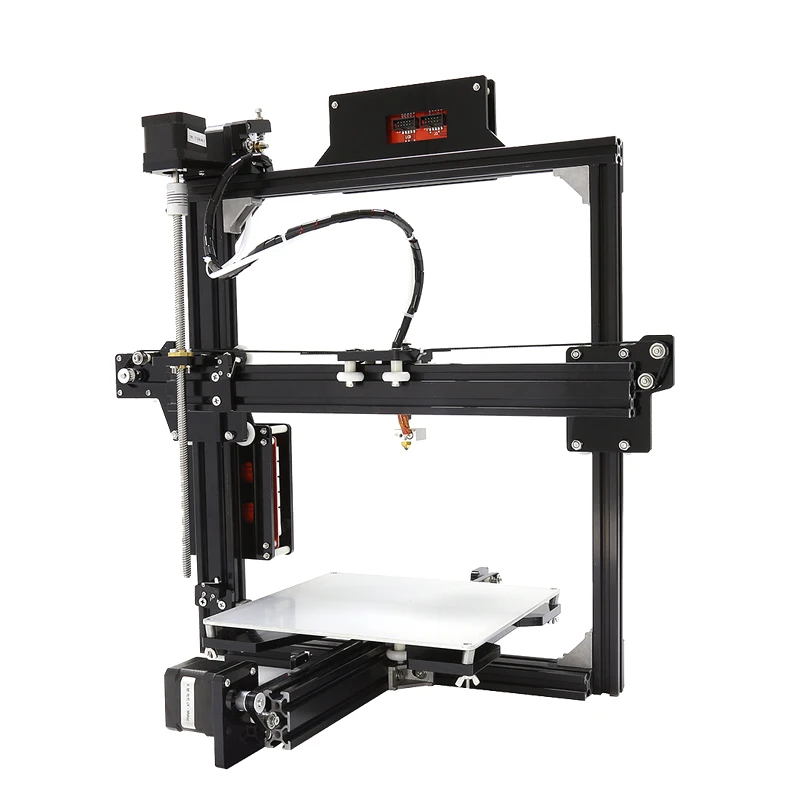 Layering can only be removed by switching from belts to rails and strengthening the frame. But that's another story.
I have not yet used other types of plastic I ordered, since I need to slightly tighten the rigidity of the printer. Plus, I don’t print much, and I don’t want to open all the coils in a row. Since they lose quality during storage (collect dust, absorb moisture, etc.)
So far, this is all that I have printed in two weeks of owning a printer.
At the moment I'm reading 3dtoday on issues of improving print quality, learning how to work in blender, and looking at what's interesting there on thingiverse.
As you can see from the models, the print quality is more or less normal. There are layers, but this is a feature of the model. Judging by the communication with people who have been 3D printing for a long time, the print quality from a printer at this price is even better than it usually is. It certainly pleases me.
The printer can be used for printing toys, for printing car parts, models, parts, household items, etc.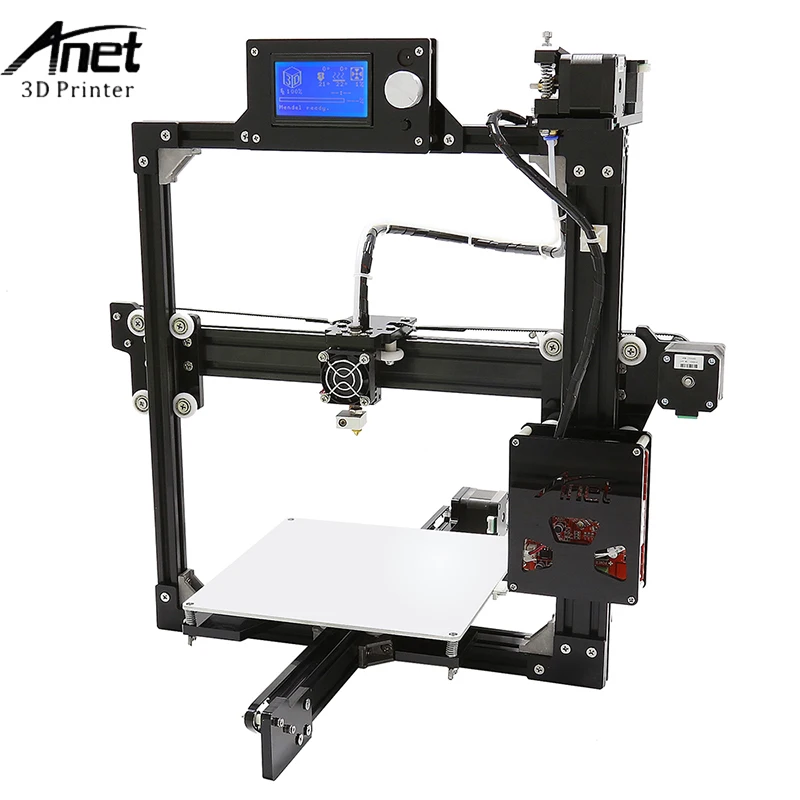
For the most part, I bought a printer for a hobby, to get acquainted with 3D printing, to satisfy my interest. And in the end I was very pleased.
Pins:
The Anet A8 is a great printer for beginners. Suitable for familiarization, for obtaining basic knowledge. On the advice of knowledgeable people, it is preferable to take the Anet A6 model. There is a more rigid frame. But the price is slightly higher.
I am personally very pleased with the purchase. Despite some issues, I had a lot of fun tinkering with this printer. And it is also interesting now to look for something, to print, to try. There are several ideas for the practical application of the printer. But this is in the future, and not for review.
Also, the purchase of a 3D printer will be useful for people with growing children, to attract and involve them in working with a 3D printer. My 4-year-old daughter is very interested in the printer, and I see that such a purchase can positively affect the development of analytical thinking and fantasy.