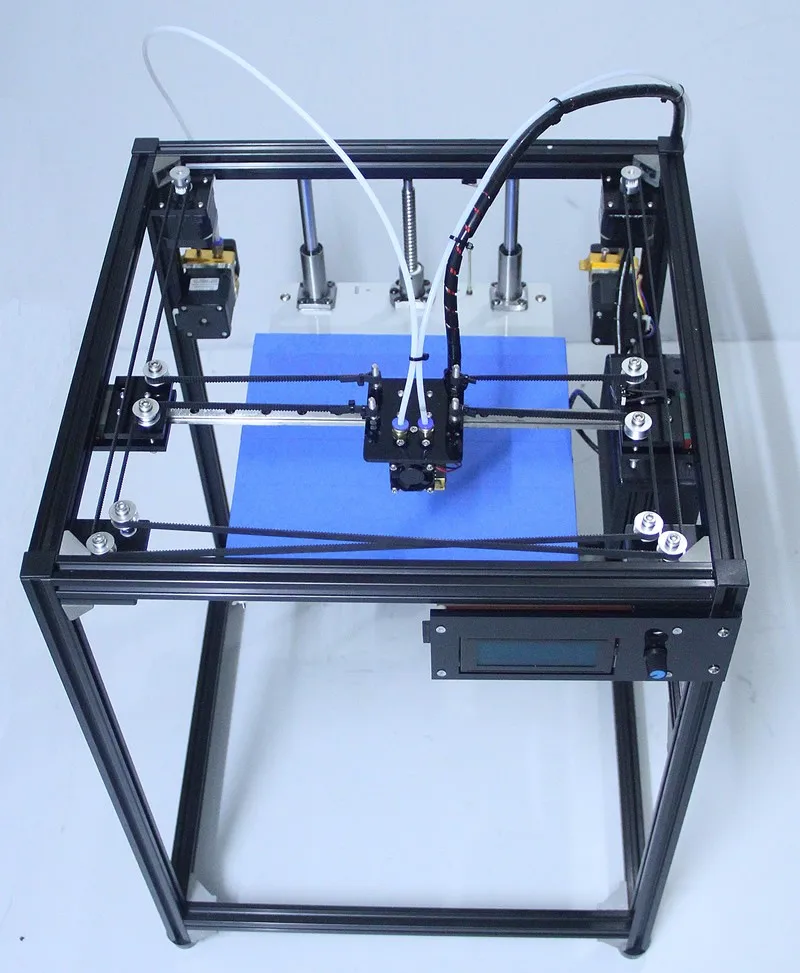
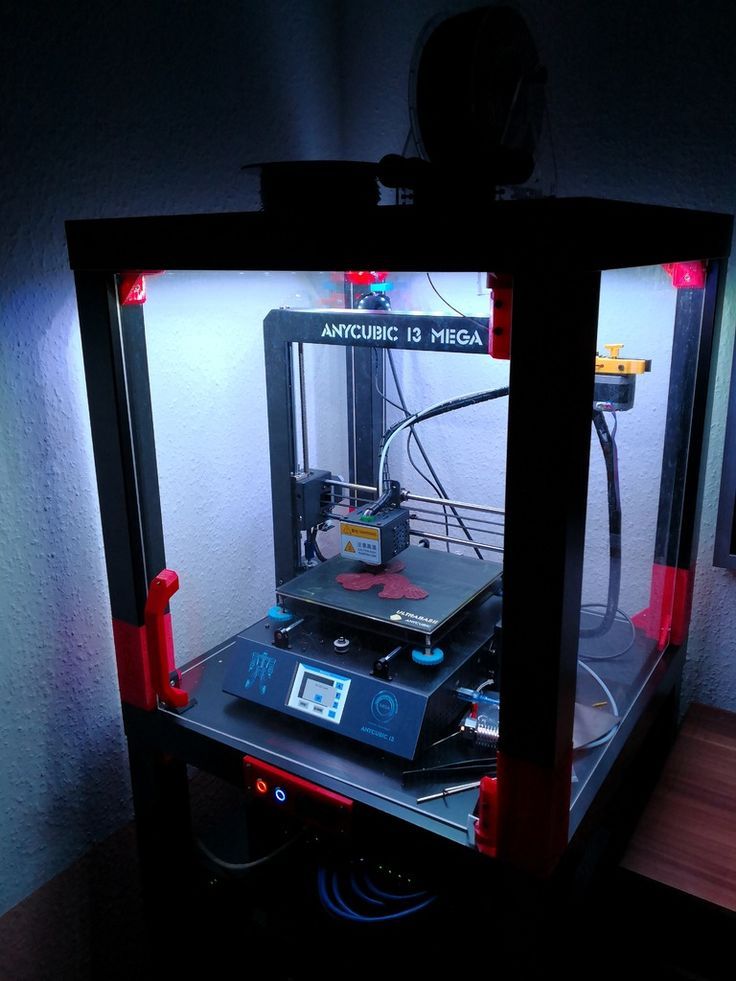
Add weight to 3d print
How to Add Weight to 3D Prints (Fill) – PLA & More – 3D Printerly
Many people wonder how they can add weight to 3D prints, so they are sturdy and have better durability, but they aren’t sure what the best way to do it is. This article will take you through some techniques that 3D printer hobbyists use to add weight to 3D prints.
Keep on reading through this article to learn how to get this done.
How to Add Weight to 3D Prints
There are three main methods to add weight to 3D prints:
- Sand
- Expandable foam
- Plaster
Let’s go through each method below.
How to Fill 3D Prints With Sand
You should look for sand that has been washed, dried, and cleaned.
The basic idea of using sand as fill material is to make a 3D print with an opening, fill it with sand, and then close it by completing the print.
Things you need:
- A pack of clean sand
- Water (optional)
- Eyeglasses
- Clothing for safety
Here’s how to fill 3D prints with sand:
- Begin your 3D print
- Halfway through your model printing, pause it and fill it up with sand
- Resume the print for it to seal the model up.
Sand infill from 3Dprinting
It’s important to keep in mind that there are fans and electronics on a 3D printer. The fans can actually blow sand around which can be an issue, especially if the sand reaches your electronics. Some electronics are placed underneath the build plate so check for this beforehand.#
You can try to cover the electronics while applying the sand.
One user suggested putting a little water on the sand to make it less likely to blow away. Make sure you protect your eyes with goggles or glasses while applying the sand.
There is a good chance your 3D print will have air gaps since the sand usually won’t be filled up to the brim.
Pros
- It’s an inexpensive filler
- Sand that has been washed and dried won’t stain your 3D print.
Cons
- Won’t fill up the whole space, so there will be air gaps.
- When you shake a 3D print filled with sand, it always makes a rattling sound because the sand particles are not packed together tightly.
- Since sand grains aren’t very heavy, the fan in the printer may blow them around. This could affect the way your 3D printer works if the sand gets to its electronics.
Check out the video below to see the process visually.
How to Fill 3D Prints with Expandable Foam
Expandable foam is a good choice for filling larger 3D prints.
One good thing about this foam is that it grows to fill the empty space. It might be hard to use at first, but you’d learn how to do it over time. Because of this, it is a good idea to have a demo to test it before you use it on your real project.
Things you need:
- A drill
- Some cans of expandable foam
- Paper towel to clean up the mess
- Acetone
- Plastic putty knife
- Hand gloves
- Eyeglasses
- Long sleeve clothing for safety
Here’s how you fill 3D prints with expandable foam:
- Make a hole in your 3D prints with a drill
- Fill the 3D print with foam
- Cut away extra foam and clean it up
1.
 Make a Hole in your 3D Print with a Drill
The hole is needed so you can inject the 3D print with foam. It shouldn’t be too large and you need to be careful while drilling so you don’t break the model. You want to drill at a fairly slow pace. Make sure the hole is big enough to fit the nozzle from the expandable foam.
Check out the video below to see how to effectively drill holes in 3D prints.
A simple one like the Avid Power 20V Cordless Drill Set from Amazon should get the job done.
2. Fill the 3D Print with Foam
Now we can fill the 3D print up with foam. It’s a good idea to read the safety instructions of the foam before using it. Use the correct safety equipment such as gloves, safety goggles and wear long sleeve clothing.
Put the straw or nozzle into the hole you drilled then press the trigger of the can to squirt foam into the model. It’s advised to apply pressure slowly and occasionally take the foam container out and shake the can.
Make sure you don’t fill it up all the way because the foam expands during the drying process. I’ve heard you can fill it to about three quarters to get the object to fill.
After that, leave the model to dry but check on it every so often to clean up excess expanding foam.
I’d recommend going with the Great Stuff Pro Gaps & Cracks Insulating Foam from Amazon. It has many positive reviews and was used by Uncle Jessy in the video below with success.
Check out the video below to see how Uncle Jessy adding expanding foam to his 3D print.
3.
 Cut Away Extra Foam and Clean it Up
The foam may have grown in places you don’t want it to or may have gotten on the surface, so you’d have to do a little cleaning to keep your model looking good.
A solvent can be used to get rid of soft, wet, expanding foam that hasn’t been set yet. In fact, if you try to clean up expanding foam residue that hasn’t set yet with a solution that doesn’t contain a solvent, you might end up setting it instead of cleaning it.
- Use a plastic putty knife and a dry, soft cloth to remove as much of the leftover expanding foam as you can.
- Use acetone to wet a second dry cloth
- Lightly rub the acetone into the expanding foam residue, and then, if necessary, press down on the surface and rub it in a circular motion. Acetone can be used as needed to re-wet the cloth.
- Wipe away the acetone with a soft cloth that has been dampened with water. Remove all of the leftover expanding foam before you put the water on.
Pros
- Expands, so it can quickly and easily fill up a big space
- The foam can’t be squashed, so it gives your 3D print good stiffness
- Hard to predict how much the foam will expand
- If you don’t handle it carefully, it can get messy
- The foam doesn’t weigh much
- Not good for filling small 3D prints
How to Fill 3D Prints with Plaster
Plaster is another material you can use to add weight to your 3D prints. I will take you through how you can successfully fill your 3D prints with plaster.
Things you’ll need:
- A syringe with extra needles or get a few syringes
- A drill
- Tissue paper
- A container with water for mixing plaster
- A fill and mix tool, like a spoon.
1. Make a Hole in Your 3D Print with a Drill
- Drill a hole in your 3D model – it should be slightly larger than what you need, usually around 1.2mm
Make sure you use a medium/low drill speed. Some people recommend drilling two holes so one can be used to inject plastic and the other to relieve air pressure.
2. Mix the Plaster with Water to Form a Paste
- Now you simply create the plaster mixture by adding water to it to form a paste
- Follow the instructions of your specific plaster, and make enough for the size of your model
Make sure to use a separate container and not put water into the plaster bag. You can add the dry plaster little by little as you stir until it forms a paste, making sure to sir well.
The final form of the mixed plaster should be somewhere between a liquid and a paste, not being too thick since it won’t be able to go through the syringe needle and would dry out quicker.
3. Insert the Paste into the Model
- Here is where you use the syringe to insert the plaster paste into the model, through the drill hole.
- Carefully suck the plaster paste through the syringe needle
- Place the needle through the hole and eject the plaster into the model
- As you do this, lightly tap the 3D print each syringe release so the plaster can flow evenly and fill the spaces
You can let the plaster spill over from the model to make sure it’s filled correctly, then you wipe off the excess with tissue while it’s still wet. Let the model dry, which can take up to a day depending on how thick the mixture is and how humid the area is.
Taping the hole afterwards is a recommended step to keep the plaster from flowing out.
If your model gets stained during this, you can wipe up the plastic with a damp tissue before it dries. Make sure you clean your syringe needle out so it doesn’t clog up.
For 3D prints that aren’t hollow, you’ll have to drill multiple holes in key spots to let the plaster fill up the spaces in the model.
Check out the video below for more details on this.
Pros
- Gives the model a good amount of weight
- Completely fills the object and doesn’t make any noise when shaken.
- Makes the 3D print feel strong
- Works best for 3D prints that are small or medium.
Cons
- Can get messy
- Care must be taken when using needles
- Too heavy for big 3D prints, and you would use up a lot of material.
How to Add Weight to Chess Pieces
Have you ever felt that your chess piece is light and would have been better with a little reinforcement while playing? This section is for you. We will show you how to add weight to your chess pieces.
Here are some things you’ll need:
- A low-shrinkage filler
- A piece of wood to spread the filler with
- Some water to make things smoother
- Some paper towels to keep your work and the area where you work clean
- A pair of scissors that cut well
- A small piece of wood like a toothpick to spread the glue
- Glue (Craft PVA water-based adhesive)
- Matching felt material
- A variety of weights like M12 hex nuts and lead fishing weights
Different pieces have different-sized holes at the bottom, so you can use different-sized weights. For example, since the king’s cavity is bigger than that of the pawn, it would naturally hold more weight.
Add Weight & Filler to Chess Pieces
- Remove any felt from the bottom of your chess pieces
- Add some filler to the bottom of the hole to hold the weights in place
- Add your desired amount of weight to the chess piece while adding more filler to hold it
- Fill the rest of the chess piece with filler up to the brim
- Wipe up the edges of the chess piece with a paper towel and stick to make it level
- Dip a flat stick in water and use it to smooth over the filler
- Repeat this process for each chess piece.
- Leave it to dry for a day or two
- Sand the filler so it’s smooth and level
The video below suggested using lead shots to weight down chess pieces instead. You flip your piece over, fill it with lead shots, put glue on it to hold it in place, and then file it to get rid of any protrusions, so it’s ready to be felted.
Now let’s move on to felting the chess pieces.
Add Felting to the Bottom of the Chess Pieces
- Get some felt from a fabric store or online
- Cut out a rough size from the felt that is slightly bigger than the base of the piece.
- Add lines of PVA glue over the filler and spread it evenly around and on the edges with a toothpick or small piece of wood.
- Stick the chess piece to the felt that you cut out, pressing it firmly all around
- Set it aside and give it about an hour to dry
- Cut the felt with some good scissors, going around the chess piece
- Continue cutting the edges of the felt so there isn’t any sticking out
Check out the video below to see the whole process.
How To Make 3D Prints Heavier? 4 Methods – Printing It 3D
3D Printing is a complex and versatile activity in which you can customize almost anything about an object, including its weight. However, it might be challenging to figure out how to make a print lighter or heavier without making too many changes to your design or affecting your print’s quality. Don’t worry, though — it’s easy to add a bit of weight to your objects.
There are several ways to do this, namely:
- Make a solid print, not a hollow one.
- Increase the infill density.
- Fill hollow spaces with heavy materials.
- Print with dense materials.

Let’s go through these methods for adding gravity to your 3D printed objects and talk more about when each one might be more appropriate than another. I’ll give you all the details and help ensure that your prints come out just how you want them to.
1.
Make a Solid Print, Not a Hollow One3D Printing a hollow print is less time-consuming, uses less material and is cheaper than creating a solid object.
However, if weight and density are what you’re after, producing solid prints instead of hollow ones is a good option.
If you opt for this route, ensure that your printer’s nozzle extrudes enough filament. Under extrusion happens when the nozzle isn’t releasing enough filament onto the bed or if the filament isn’t hot enough to bond with the rest of the layers. Your solid print may become brittle and break under pressure if this occurs.
You should also ensure that your first layer is thick enough. A thin first layer can lead to gaps in the infill, rendering your print not solid.
Keep in mind that printing a solid 3D model is an extremely lengthy process. Setting your printer too fast to shorten the process can lead to gaps in the print.
There are many factors to consider when committing to a solid print, so make sure you know your stuff beforehand. This video explains the process of Fused Deposition Modeling (FDM), the most common kind of 3D printing.
2. Increase the Infill DensityIf you feel that a solid print takes too long, uses too much material, or isn’t as strong as you’d like, you should consider increasing the infill.
Since the infill makes up your model’s internal structure, you will not be able to see it after you pull your object off of the bed. So, making your infill denser, more complicated, and thicker is a covert way to add more weight to a light print.
Adding denser infill means that, although your print won’t be completely solid, it will have a thicker and more complex internal structure, adding to the overall weight.
Different infill patterns influence the strength and flexibility of a build, but they can also affect the weight.
Commonly used infill patterns are:
- Lines: Lines essentially print one direction across the build. It’s the fastest option but doesn’t add much weight.
- Grid: These are just lines printed in a criss-cross formation. It’s a more substantial option than lines while still being minimal effort and lightweight.
- Triangles: Triangles are the most durable infill shape, and they are also one of the heaviest.
- Tri-hexagon: Hexagons are sturdy in shape and avoid bowing due to their shorter connecting lines.
 Hexagons are a suitable option for adding more weight to your model.
 - Cubic or cubic subdivision: Cubic infill consists of a stacked cube pattern that uses minimal material.
- Octet: The stacked pyramid shapes are aesthetically appealing and a sign of strength and additional weight.
- Honeycomb: This is a practical option. It uses minimal material while ensuring adequate strength and flexibility. However, it won’t make your model too much heavier.
- Gyroid: Gyroid infill is the balance between density, print time, and materials used.
- Concentric: This infill mimics the pattern of the build’s external walls and is an excellent solution to the density issue without using too much material.
To make your prints heavier, you’ll want to use the infill patterns that use the most material and set your object for a high infill density.
3. Fill Hollow Spaces With Heavy Materials
You may feel that printing a solid model or even a model with a denser or more complex infill is too time-consuming and expensive. If this is the case, you should consider filling your prints with other materials post-print to increase their weight.
The way to do this is by printing the outer walls of your model and creating a hollow print or one with cavities. Typically, you would fill these cavities during the printing process with more of whatever material you use to print.
However, in this case, you will leave these cavities open to fill them with a material of your choice. Once you have filled them, you place the model back onto the printer bed and cover the holes with a final layer. If that sounds too complicated, you can also glue your print together.
Here are some materials you can use to add density and weight to your 3D prints:
- Sand: Sand is widely available and easily accessible. Filling your print with sand will add weight, but never get the sand wet before putting it inside the model. Damp sand will work as an abrasive and might damage your object, while dry sand will not do any harm.

- Clay: Relatively inexpensive, simple to work with, and sufficiently weighted, clay is an excellent choice to fill gaps in a print.
- Lead or other metals: Inserting metal into your print is exceedingly simple. For the simple method, you can use metal marbles, coins, scrap metal, nails, coiled wire, or anything else you have to fill in the model.
- Plaster: This material is cheap and easy to find. All you have to do is follow the instructions on your plaster container, fill your model, and let it dry.
- Resin: Resin is a bit tricky to work with, and potentially filling your print with it is a messy job. Additionally, it can become quite expensive, depending on the resin you use.
If you choose to experiment with other materials, it would be best to research how each material may react with your printing medium beforehand to avoid damaging equipment or ruining your objects.
To better understand how reactions can make or break a model, read up on the chemical and temperature-related factors that influence a polymer print.
4. Print With Dense Materials
If you want a heavier print, the simplest solution might be to use a denser material rather than fill a lighter one with other stuff later.
Poly Lactic Acid (PLA) is the most commonly used 3D printing filament, but it’s also lightweight. Denser materials that could yield a heftier print are nylon, semi-flexible plastic (FPE), resin, or even metal.
Still, your printer will limit the materials that you can print with. Most printers can only print a handful of filaments due to the limited maximum temperature range for a printer’s parts.
Final Thoughts
The main things you can do to increase the weight of a print are to:
- Experiment with different infill patterns and percentages. You may even consider printing a solid model.
- Choose a material that you feel is dense or heavy enough to fill cavities in your prints.
- Research how different materials react with each other and get creative!
Model optimization for 3D printing using Blender software as an example / Sudo Null IT News
Good afternoon!
3Dtool is with you.
Today we will not talk about any model of 3D printer, and not about the 3D printing process. We would like to talk about how to make the process of preparing a model before 3D printing more efficient.
We all know that a large working field is good. But what to do when we start trying to create control programs for a huge part and the program goes into eternal waiting at the stage of cutting layers or exporting code to a file. There were cases when the program was prepared for more than a day. To understand what is happening, you need to delve a little into the algorithm of the process that takes place inside the “Black Box” of the slicer. Not much, because it is enough to know that the most difficult and costly thing in the process of preparing a program is cutting the model into layers and forming trajectories along these sections. nine0003
All the complexity in quality.
as a model.
As a printed part.
In optimum quality.
in the desired quality.
Sometimes it's a very loose concept... and so on. But we don't have a moment of philosophy.
Let's get down to specifics. An example from life.
As a result of 3D scanning, inaccurate, illegal and uneconomical modeling, various transformations and conversion, there are cases when the model mesh becomes proportionally dense, with a large number of extra polygons. This greatly increases the "weight" stl file. The document begins to take up a lot of memory and increases the time it takes to generate the control program code, causing the slicer to freeze and go to the bottom of the list of operating system processes. In such cases, the model must be optimized, i.e., the mesh density must be reduced without losing the quality of the geometry and the quality of the details.
Ammunition
Control program preparation software - heavy, complex, inconvenient, but in our opinion terribly effective, Slic3r .
Optimization software - absolutely free, open source Blender , supported by almost all operating systems (https:// www.blender.org/download/)
To the point
Install and run Blender . To import a model, go to File –> Import –> stl , select the required model.
To optimize the model, use the modifier Decimate . This modifier allows you to reduce the number of polygons in the model mesh with minimal geometry changes.
Switch to Object Mode (1), in the panel Editing (2) Select the Modifiers (3) tab, add ADD Modifier -> Decimate (4) 9000 9000 9002 (4) 9000 9002 (4) 9000 9000 9002 (4) 9000 9000 9002 (4) 9000 9000 9002 (4) 9000 9000 9002 (
Ratio . Factor from 0.0 to 1.0 . Part ratio before and after optimization. 0.0 (0%) - All faces removed. 1.0 (100%) - All faces remain unchanged. As the coefficient changes from 1 to 0, the number of polygons in the mesh decreases. nine0003
Quality
In order to evaluate the level of detail to which the model will be simplified without loss of quality (visually printed part corresponds to a mathematical 3D model). If you really go into details, then you need to take into account the ratio of the physical size of the printed model, the diameter of the nozzle and the height of the layer. Below, quantitatively, it is shown what such optimization procedures lead to.
How not to do it
Now let's go from the other side. Too low a factor reduces the quality of detail: Ratio 0.05 – 0.03 . For a small model (20-30 mm), Ratio 0.05-0.03 is suitable, since the layer height and nozzle diameter will not physically allow printing the necessary detail, which is preserved at higher ratios. And we all remember that the diameter of the nozzle is 0.3mm , and the plastic thread at the exit is a little more. And this means that all sharp edges will have a radius of at least 0.15mm .
And in the finale, a few shots of what excessive enthusiasm for the cherished parameter 9 can lead to0012 Ratio .
Ratio: 0.015. Too low coefficient
In general, you understand.
Desires and hopes.
We sincerely believe that this material will be useful to you, you will start / continue to effectively use the capabilities of your 3D printer.
Efficient 3D printers for Hercules business and production (always in stock at our 3Dtool company) - 3dtool.ru/category/3d-printery/filter/topmanufactorer-is-imprintahercules
Video review of Hercules Strong 17 3D printer on our Youtube channel.
3D printing cost calculation
Although I posted the link in the discussion of the parallel topic of comrade 3D_MPL (Cost of 3D printing. Calculator for calculating from 3D-MPL), I thought it would be better to make a separate post to get feedback.
So please make constructive (!) suggestions. I will answer any questions on the topic.
.
So. nine0003
Again and again the question arises of how to calculate the payment of your labor as correctly as possible. Although some of the details seem simple, they often require a lot of brain effort, which MUST be paid. Well, the time spent too.
.
Some people think that it is enough to take into account the weight of the part - I think this method is simply fundamentally wrong, because, for example, printing a vase / box with a 1mm nozzle and a 0.6mm layer will be faster than printing some highly detailed bracket in a car or a souvenir with a 0.2mm nozzle and a 0.05mm layer. So, with the same weight, the time can be many times (tens of times) longer! Yes, and draw a different bracket, you must be able to! nine0003
Moreover, we want our many hours of work to be adequately paid.
A typical example from my practice is a kettle handle.
The detail is shapeless, you don't know how to approach it in order to draw it. The result - 7 hours of modeling, 4 hours of printing, an hour of post-processing, 57 (total!) Grams of plastic. And now, imagine, a customer comes to you, 'Why is it so expensive??? It's only 57 grams!!!'. And you lost a whole day (work shift).
.
So, I think that the main resource that should be paid for is time! nine0003
.
And here, in fact, is the table.
Link to Yandex Disk: https://yadi.sk/i/oy1r3v_dA-8E1w
.
By the way, I update the table from time to time! I recently discovered an inaccuracy in the calculation of the cost of the material, corrected it. So follow the link and check it out.
.
Some characteristics:
Time is written conveniently - in hours and minutes.
Modeling and post-processing cost per hour.
Separately, the weight and cost of the coil are written - no need to calculate the cost of a kilogram (for lazy people). nine0003
The so-called 'difficulty factor' is missing from the table. The complexity itself will be formed from: modeling time (mostly), printing time (necessary detailing), post-processing time (picking out supports from hard-to-reach places, painting, etc.).
Substitute the values that are convenient for you. I don't insist on these. Columns 'Prices' and 'Costs'.
The white numbers in the 'Total' column are reference numbers, just for convenience.
Depreciation is calculated from the time of direct operation of the printer (more work - more wear). I take half a dollar. nine0003
The price of the first part differs from the subsequent ones only by taking into account the simulation time.
Printer power is taken to the maximum - pennies still come out.
Currency - rubles. You can change to yours.
When you write the price for a reel, you must also take into account the cost of delivery! (In our outback, the delivery of one coil is 500 rubles!) I can add the 'delivery' item for convenience, if you want.