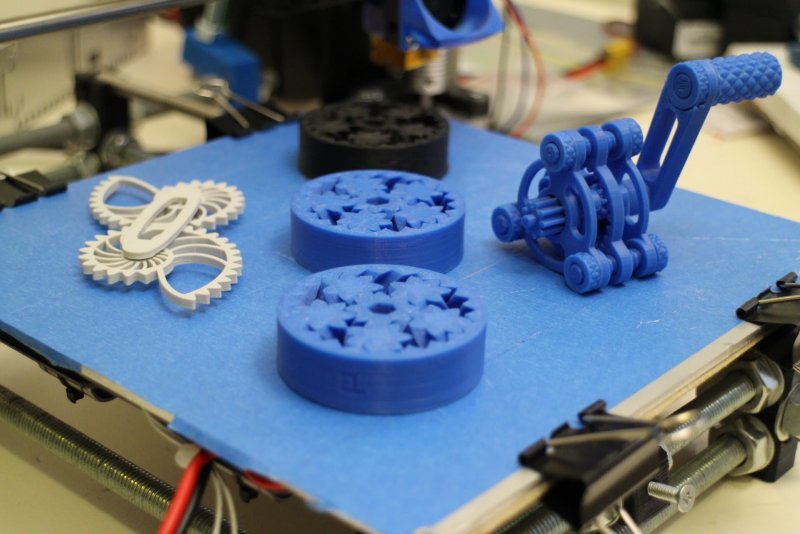
3D print materials cost
How Much Does 3D Printing Cost? Cost to 3D Print Objects – 3D Printerly
When it comes to 3D printing, many people wonder how much it costs to 3D print an object, whether that is a small item like a miniature figure, or a larger item like a helmet or mask that they can wear.
There are quite a few costs associated with it which can get a little confusing, so I decided to write an article about how much it costs to 3D print an object in filament or resin.
If you already have a 3D printer, your cost is just the filament and electricity for the most part. To 3D print an object that uses 100 grams of filament, it will cost around $2.50 using a price of $25 per KG of filament. The same 3D print in resin will cost around $4.50 using a price of $45 per KG of resin.
Costs don’t fluctuate too much due to a fairly constant price of materials, though you’ll want to do basic maintenance and maybe some post-processing afterwards.
Let’s go through the basic costs of 3D printing so you have a better understanding of how much it costs to 3D print an object. Keep reading for a more detailed answer.
How Much Does A 3D Printer Cost?
In order to 3D print an object, we’ll need to look at the biggest initial cost which is the 3D printer. Luckily for normal consumers, 3D printers have drastically decreased in price as time has gone on.
The materials that are required for creating 3D printers are increasing in supply, as well as the number of manufacturers that are competing in the space. For a standard FDM filament 3D printer like the Ender 3 (Amazon), you can get this for around $200.
The other type of 3D printer which is growing in popularity is the SLA resin 3D printer. A budget SLA resin 3D printer like the Elegoo Mars 2 Mono is currently around $230, which is a lot cheaper than what they used to be.
Previously, you would have been looking at least $1,000 for a basic version of these 3D printers, so it’s something a lot more manageable for us average users.
These are great for entry-level hobbyists, though if you want more practical features, you’ll want to spend more.
The Artillery Sidewinder X1 V4 (Amazon) is around $450 and is a great option for a filament 3D printer.
It comes 95% pre-assembled, so a beginner can put it together very easily, and comes with a much larger build volume than the Ender 3 at 300 x 300 x 400mm.
It has a touch screen operation display, as well as a direct drive extruder which makes printing some materials a lot easier.
The design is a lot cleaner, compact, and professional looking, and since it’s a long-term machine, makes sense to invest a good amount into it.
The Anycubic Photon Mono X (Amazon) is around $700 and is a great option for a resin 3D printer. It also comes mostly pre-assembled, just requiring you to place a few parts in the right places, and put in the power supply. The bed leveling process is very quick.
The main upside of the Photon Mono X over the Elegoo Mars 2 Mono is the build volume of 192 x 120 x 245 against 129 x 80 x 150mm. This is large for a resin 3D printer and with the 8. 9” 4K resolution screen, it significantly increases printing speed (up to 3x).
Another key benefit is how the LCD screen in the base of the printer is designed to last about 4 times longer than the outdated RGB screens for 2,000 hours of printing. The screen is what produces the light to harden the liquid resin into plastic.
Now that we have the 3D printers out of the way, let’s look directly at the materials so we can accurately figure out how much it costs to 3D print an object.
How Much Do 3D Printing Materials Cost?
There are two main types of materials when it comes to 3D printing – filament and resin. Filament starts at around $20 per KG, while resin starts at around $35 per KG.
Filament is packaged up as a round spool of plastic which usually sits on top of the 3D printer with a spool holder for FDM printers.
Resin comes in a dark bottle with UV protection and is full of the photopolymer liquid resin that you pour into the resin vat of your SLA resin 3D printer. It has to be stored this way because the liquid hardens to UV light.
How Much Does 3D Printing Filament Cost?
A standard spool of filament will cost you anywhere from $20-$30 per KG, but there are many types of filaments that you can get.
PLA – Hatchbox PLA on Amazon goes for around $25 per KG.
ABS – Hatchbox ABS on Amazon goes for around $22 per KG.
PETG – Overture PETG on Amazon costs around $21 for 1KG.
TPU – Ninjaflex NinjaTex TPU costs around $33 for just 500g, or you can get Hatchbox TPU for around $31 for 1KG.
ASA – Overture ASA filament costs around $32 per KG on Amazon. Polymaker Polylite ASA is another popular brand of filament that costs around the same price.
Nylon – Overture Nylon filament costs around $35 per KG on Amazon.
How Much Does 3D Printing Resin Cost?
The two most popular brands of resin are the Elegoo Rapid Resin and the Anycubic UV-Curing Resin which cost around $35 per KG. These are great quality resins that can definitely produce high quality models.
They cure/harden fairly quickly, have fairly good levels of toughness and rigidity, as well as having excellent fluidity so it can be easily cured into complex and detailed shapes.
You can get more premium resins that offer characteristics such as higher durability and strength, more flexibility, mechanical-grade tough resins and even professional-grade dentistry resin.
Elegoo Water Washable Resin costs around $40-$45 per KG and it allows you to wash your resin models with just water rather than isopropyl alcohol.
Siraya Tech Tenacious Flexible & Impact-Resistant Resin costs around $65 per KG and provides users with a premium resin that works very well.
The great thing about this resin is how it can actually be mixed with other resins to increase their strength, flexibility, and even detail. One user even tested a piece printed with this resin by running over it with his truck without the 3D print breaking.
Formlabs Model Resin costs around $150 per KG and is a specialized resin that is high-precision and high accuracy. It’s specifically used in the dental field but can still be used to create high detailed models.
This is only compatible with Formlabs 3D printers such as the Form 3, Form 3L and Form 3BL.
Just to complete the knowledge with 3D printing materials, I’ll briefly mention metal powers for metal 3D printers.
A popular metal power like Aluminum Alsi7mg can cost between $24-$26 per KG, though the 3D printer itself can set you back $50,000 – $1,000,000, so this isn’t too relevant for individuals like us – rather industrial companies.
How Much Does 3D Printing Cost? Other Materials
When it comes to 3D printing, after you have your 3D printer and filament, there are other costs associated that is worth paying for.
You have the option to be as cost-effective as possible, but if you want the best 3D printing experience, I’d recommend getting some extra items.
Elmer’s Disappearing Glue
Elmer’s disappearing glue is one of the best glues to use when it comes to 3D printing purposes. It is called disappearing glue because it is usually purple when you apply it but turns clear once it dries.
This glue has been manufactured using an acid-free formula which makes its adhesive properties spectacular. You can glue different parts of your model without worrying about them coming off.
It is also non-toxic, which makes it suitable for use when 3D printing at home, school or in a workplace.
One user found it particularly useful because it helped his prints stick to the hot bed until the print job was completed.
Check out Elmer’s Disappearing Glue on Amazon.
Sandpaper Assortment
Austor sandpaper is made from silicon carbide which provides a wet or dry sanding experience. One package of this Sandpaper assortment comes with 102 pieces of assorted abrasive sheets in different grits ranging from 60 to 3,000.
This sandpaper has been specially manufactured to be efficient with automotive sanding, and wood furnishing, but works very well with 3D prints. It is one of the toughest sandpaper out there offering high quality natural abrasion.
This makes it suitable for sanding and polishing 3D models after printing. One user said that he used it when working on his resin print and it helped him achieve an almost glass finish.
Check out the Austor Sandpaper Assortment on Amazon.
Primer/Spray Paint
Rust-Oleum primer is a water-based primer designed for exterior use in a wide range of products like furniture, laminate, PVC, railings, galvanized steel and thermoplastics.
This primer has a low odor which makes it favorable to use on 3D models before painting. It is also dries in 30 minutes. You can also spray it in humid environments and it should still work great.
One user said that she sprayed this primer to on his prints before sanding and finishing and it worked fantastically.
You can find a can of Rust-Oleum 2-In-One Filler & Primer Spray from Amazon.
Paint & Paintbrushes
Painting finished models improves their aesthetic value and enables you to add a personal touch to them. You want to use the right type of paint that works well for 3D printer objects and miniatures.
I’d recommend going with the Caliart Acrylic Paint Set with 24 Vivid Colors from Amazon.
Acyrlic paints and paint brushes are the perfect tools for coloring your printed models. They are bright and can be used on a variety of surfaces e.g. ABS, PLA, PETG and wood.
In terms of paint brushes, I’d recommend going with the Soucolor Acrylic Paint Brushes Set 20 Pcs from Amazon. They come with many fine brushes that can paint some great detail on miniature 3D prints and other 3D printed objects.
Store paints from the hardware can be too thick and even end up clumping and forming unpleasant layers. Acrylic paints are used since they cover a greater surface and are easy to use.
These aren’t necessary for 3D printing, but it will definitely give you a better overall experience with the kind of quality you can get from your models.
3D Print Cleaning Kit
Having a 3D print tool kit/cleaning kit is a great set of parts that you’ll want when you start 3D printing.
A great set is the Rustark 42-Piece 3D Print Tool Kit from Amazon.
It has several parts for 3D printing, including:
- 14-Piece Knife Set
- Scraper
- Flat File
- Pliers
- Flush Cutters
- Electronic Digital Calipers
- Cutting Mat
- Deburring Tool
- 6-Piece Deburring Blades
- 3-Piece Cleaning Brushes Set
- Glue Stick
- 10-Piece Cleaning Needles
- Zipper Bag
This set of tools helps anyone involved with 3D printing with cleaning up 3D prints to make them look closer to that professional quality. It helps with maintaining the 3D printer also with the cleaning brushes that can be used to clean up the nozzle.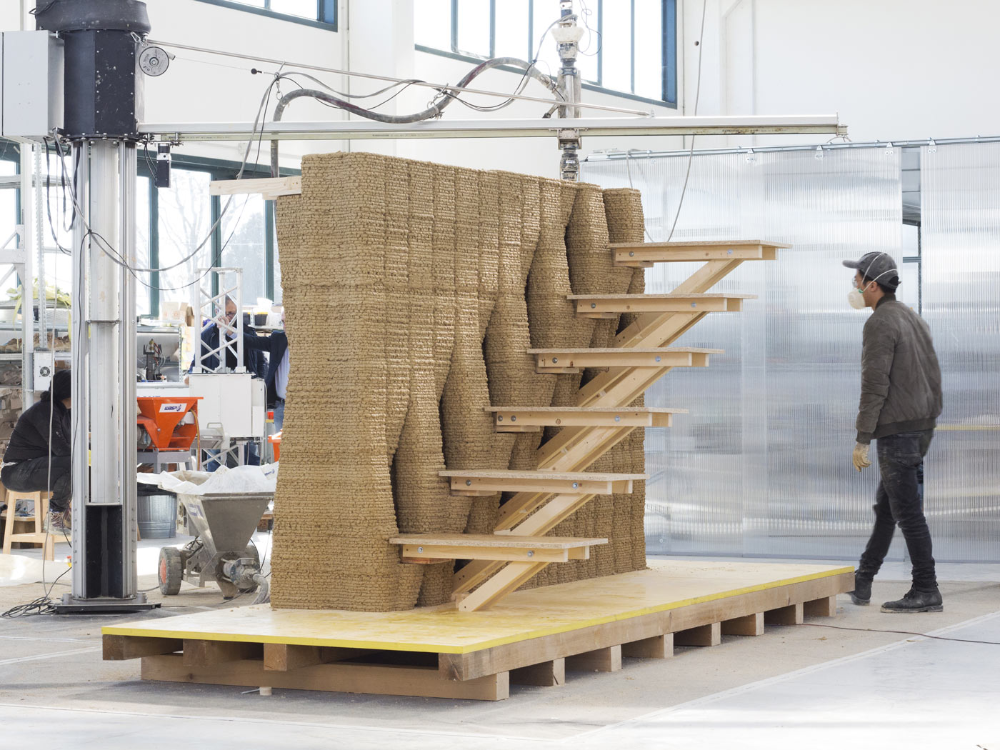
You also have the cleaning needles to help with clearing out the nozzle, as well as the pliers and flush cutters to get rid of excess support material.
One user said that she had been using it for her 3D printer for close to a month now and so far, they were holding up well.
Oils & Lubricants – PTFE 3-In-One
The 3-In-One Multipurpose PTFE lubricant is designed for usage in high temperature environments to reduce friction and protect parts from wear and tear.
This lubricant can work well in temperatures ranging from -50°F to 500°F. It can be used on the Z-axis threaded rod, X-Y guide-rails, lead screws, and bearings to help parts that are in contact to move smoothly.
One user purchased it to lubricate the rails and rods on his printer and it coated better than many oils he found on the market. The only minor issue that he had with it was that the twist close cap would sometimes leak from under the cap while he was applying it.
You can find the 3-In-One Multipurpose PTFE Lubricant on Amazon today.
Cleaning Wipes & Rubbing Alcohol
When it comes to cleaning printer beds and removing dust from 3D printing machines, you want to make sure you do this on a regular basis with the right products.
You can get some pretty bad bed adhesion when you have grease and marks from handling your print bed, so you want to avoid this for more successful prints.
Most 3D printer users have either a bottle of isopropyl alcohol with paper towels, or simply some sterile alcohol wipes. I’d recommend going with Dynarex Alcohol Prep Pads (200 Count) from Amazon for your cleaning needs.
One customer said that the Dynarex alcohol pads were very helpful in dissolving residue on his glass print bed and restoring its surface.
You can also get yourself a bottle of Solimo 99% Isopropyl Alcohol from Amazon. It’s another great cleaning solution for your print bed, and can be used with paper towels or a washcloth.
Replacement Parts
A lot of FDM printer’s parts will need to be replaced after being used for some time. The nozzles last for long when printing with PLA and ABS.
- Brass nozzles
- Hardened steel nozzles
- Stiff bed springs
- PTFE tubing
- Timing belt
Brass & Hardened Nozzles
In terms of brass nozzles, they can be used for a fairly long time when you print simple materials like PLA and ABS, but they’ll need replacement at some point. You can go with the Creality 10 Pcs Brass Nozzles Set from Amazon.
It includes 8 brass nozzles ranging from 0.2mm up to 0.6mm, along with 2 0.4mm hardened steel nozzles.
Compression Springs
A great upgrade that many 3D printer users implement with their machine are those yellow compression springs that go underneath your bed for leveling. The stock springs are usually quite weak and require regular leveling.
When you get something like the 8mm Yellow Compression Springs (20 Pcs) from Amazon, you won’t need to level your 3D printer very often. Some people have leveled it properly once and have not had to level it for months.
This upgrade is likely to save you plenty of time and frustration by giving you consistent and successful 3D prints.
PTFE Tubing
The stock PTFE tube can work fairly well on 3D printers, but after a while they can start to deteriorate. You’ll be better off upgrading it to Creality Capricorn Bowden PTFE Tubing from Amazon.
It has a much higher heat resistance and less friction to give you better successes with your 3D prints.
Timing Belt
The belts on your FDM 3D printer are one of the main moving parts, making them susceptible to wear and tear over time. These can last a good while of printing but after some time, you may need to replace these.
I’d recommend going with the Befenybay 2GT Timing Belts from Amazon when you do need to replace it.
It has a nice copper buckle that has been pre-pressed in order to lock in the belt on your 3D printer.
Although you may think there are many costs with 3D printing and maintenance, when you regularly maintain your 3D printer, it can actually decrease your overall costs because you won’t have to replace parts so often.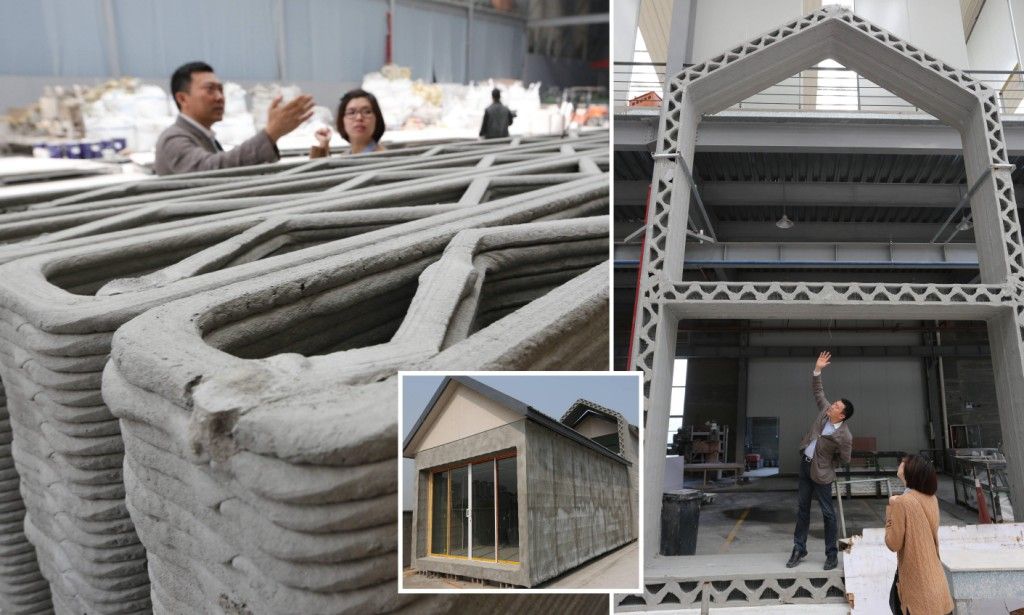
Beginners are more likely to have failures due to incorrect bed leveling, incorrect slicer settings, tangled filament or not adding support material. This can significantly drive up the cost of producing prints.
This cost will decrease as you gain more experience from 3D printing regularly.
How Much Does 3D Printing Cost Per Hour to Run?
With a standard flow rate of filament from a 0.4mm nozzle, a 0.2mm layer height, along with standard electricity and maintenance costs, 3D printing costs around $0.40 per hour. Filament costs around $0.24 per hour, electricity costs around $0.09 per hour, and maintenance costs around $0.07 per hour.
The main costs when it comes to 3D printing is the filament which goes for around $25 per KG of plastic. After doing some calculations with some standard settings, you can figure out how much filament is extruded on an hourly basis.
With the Spider-Man model below, 182g of filament gets extruded in 18 hours and 51 minutes. To calculate this on an hour basis, we take 182g / 18.85 (18 hours and 51 minutes) = 9.655g of filament extruded every hour for this specific print.
To figure out how much this is, we can take $25 per KG of plastic which is 1000g, then divide it by 1,000 to get the price per gram – $25 / 1,000 = $0.025 per gram.
Now we do 9.655 grams * $0.025 = $0.2413 or $0.24 rounded down.
Next up we got the electricity costs.
I already did an article called “How Much Electric Power Does a 3D Printer Use?” where I figured out that a standard 3D printer uses around $0.09 in electricity every hour by seeing readings of electricity use for an hour and getting an average cost in the US of electricity for a kWh.
Last but not least we have the maintenance costs. This can vary from printer to printer, but generally speaking, 3D printers don’t need a lot of maintenance if you have the right parts. You may have to replace thermistors, cooling fans, belts etc.
Once you install some durable parts and have a process, you may have to spend $30-$50 per year on items. If we take an average 3D printer user and say they use their 3D print for an average of 2 hours every day, that would be 730 hours of printing every year.
Let’s take the upper estimate of $50 per year on maintenance, then divide that by 730 hours, and we get an hour maintenance cost of $0.07.
How Much Does it Cost to 3D Print Objects?
By going to Thingiverse.com, you can download a model you like and print it. Using an average cost of $25 per KG below are the approximate prices of some common objects that people 3D print.
How Much Does it Cost to 3D Print A Miniature?
A standard tabletop miniature costs around $0.12 like the Elf Ranger (28mm scale) and uses only 5g of filament. Some miniatures may use more or less filament so you adjust the cost based on the amount of filament you use.
How Much Does it Cost to 3D Print A Phone Case?
A 3D printed phone case for an iPhone 6 Case (Halo Themed) costs around $0. 58 and uses roughly 23g of filament. It measures at 70 x 9 x 140mm and is based on using PLA plastic which costs around $25 per KG.
How Much Does it Cost to 3D Print A Helmet (Stormtrooper Helmet)?
A Stormtrooper Helmet uses around 1.5KG of filament which would cost around $37.50 for a full-sized model. It can be printed in around 45 hours with 17 individual prints, or you have the choice to print the whole model in one if you have a big enough 3D printer.
How Much Does it Cost to 3D Print A Mask?
A Loki Mask from “The Mask” movie uses around 180g of filament and would cost $4.50 in PLA at $25/KG. Its dimensions are 165 x 87 x 220mm but can easily be scaled up or down as you desire. There are many other masks out there that can use a lot less filament which would be cheaper.
A Covid-19 Mask V2 from Thingiverse uses around 40g of filament which would cost around $1.00.
How Much Does it Cost to 3D Print A Car?
A company called XEV started the production of a $7,500 dollar electric car in 2019, which weighs 450KG. The Strati which was designed by Michele Anoé and made 3D printable by Local Motors is another 3D printed car which costs around $24,000, though not highway worthy as it doesn’t meet requirements.
One popular story about a 3D printed car is by Sterling Backus who 3D printed a Lamborghini at home with his son, costing just $20,000.
He used a Creality CR-10 to print different parts before joining them together.
Check out the full video below.
The Strati is another well-known 3D printed car that has got plenty of traction and was first printed in just 44 hours in 2014, but with a goal to get that down to just 10 hours per vehicle.
It hasn’t really have much news recently that I could see, so they could have moved onto other projects now, but it’s still a great project and insight into the potential for 3D printed cars.
How Much Does it Cost to 3D Print An Organ?
A bioprinter can reportedly create a 3D printed organ for as little as $10,000 which is likely to decrease in price as technology improves. Researchers are trying to 3D print many organs such as a pancreas, bioprinted skin, corneas, a heart, kidneys, and even bioprinted ovaries.
To 3D print an Anatomical Heart in PLA, it would cost around $3. 65 and use 146g in filament.
How Much Does it Cost to 3D Print A Prototype?
For a simple prototype that requires 100g of filament to print, it would only cost $2.50. For a more complex part that requires professional designers, the cost can range in the hundreds to thousands of dollars depending on the complexity of your prototype. The main cost would be in the design.
A full Nintendo Headrest Prototype measuring 94.7 x 87.6 x 121.8mm will cost you $0.98 when using PLA filament. It was fully designed in Fusion 360 which made the locking mechanism a lot easier to use.
A prototype can be a small object which would only require 15 grams of material or a large object that consumes several KGs of material.
A prototype can cost anywhere from $30 to upwards of $30,000 without including the post-processing costs. Well, all this depends on how big the design is and its complexity.
How Much Does it Cost to 3D Print A Shoe?
A 3D printed shoe called the Pigalle Pump Shoe uses around 114g of filament and would cost $2.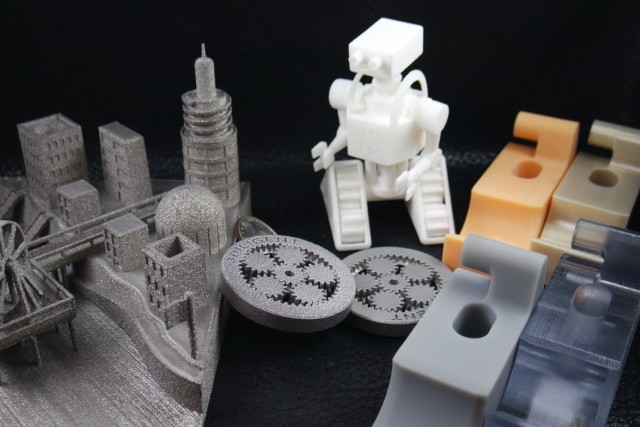 85 to create. Another popular footwear that is 3D printed is the Recreus Sandals which you would want to print out of TPU. It similarly uses around 115g of filament and would cost around $2.90 .
How Much Does it Cost to 3D Print A Mug?
This 3D printed Fish Mug uses 156g of material and would cost $3.90 in PLA filament. You would want to coat this in a food safe epoxy to be able to be used safely.
How Much Does it Cost to 3D Print An Iron Man Suit?
A Full MK6 Iron Man Suit would require about 20kg of filament when using the CR-10. It would also cost about $360 when using PLA and a 15% infill rate. This is much cheaper compared to a professional Mark 43 Basic Armor Package which can cost upwards of $1,300.
How Much Does it Cost to 3D Print An FPV Drone?
The Nanolongrange V2 GPS FPV Drone is a modern and very light drone which only uses 7.5g in filament for the frame, which is $0.18. It requires other parts like a flight controller, a motor, 4 blade propellers, a GPS antenna module, an FPV camera, M2 screws and rubber bands, all costing around $110.
The cost of these parts were gathered from going on Banggood (product site) on the Thingiverse page, and adding up the relevant costs. This is a very minimal drone, only having a flight time of 20 minutes and 4.65km distance.
For a more capable drone, you’re probably looking at a much higher price, but that is due to parts rather than the 3D printing aspect of things.
How Much Does it Cost to 3D Print A Real House?
A 3D printed house can cost as low as $4,000 and only take around 24 hours to complete. SQ4D are at the forefront of the 3D printed home industry, being able to create a 1,900 SQ FT. home in just 48 hours and used less than $6,000 in materials. Costs are decreasing as times move forward.
Homes are being built for low-income families in Mexico, as well as throughout the US.
Large industrial grade printers extrude cement in layers to form walls. Fittings such as windows and doors are placed after the main structure is completed.
3D printing homes is still at its infancy, so we can expect to see more 3D printed homes in the market in the near future.
How Much Does a 3D Printer Cost?
In-house 3D printing is a versatile solution for a wide range of applications, from high-resolution models to rapid prototyping, rapid tooling for traditional production processes, manufacturing aids, and even end-use parts in manufacturing.
When you consider investing in a 3D printer, however, viability typically boils down to a simple question: does it make economic sense for your business? How much does a 3D printer cost and how much time and cost can you actually save with it for your business?
3D printer prices range from about $200 to $500,000+ depending on the printing process, materials, and the level of sophistication of the 3D printing solution.
In this guide, we’ll walk you through the 3D printing costs for different technologies, compare outsourcing with in-house production, lay out the various factors you should account for to calculate cost per part, and look at considerations beyond cost when comparing various 3D printing solutions and other production methods.
Interactive
Try our interactive ROI tool to see how much time and cost you can save when 3D printing on Formlabs 3D printers.
Calculate Your Savings
The three most established plastic 3D printing processes today are fused deposition modeling (FDM), stereolithography (SLA), and selective laser sintering (SLS).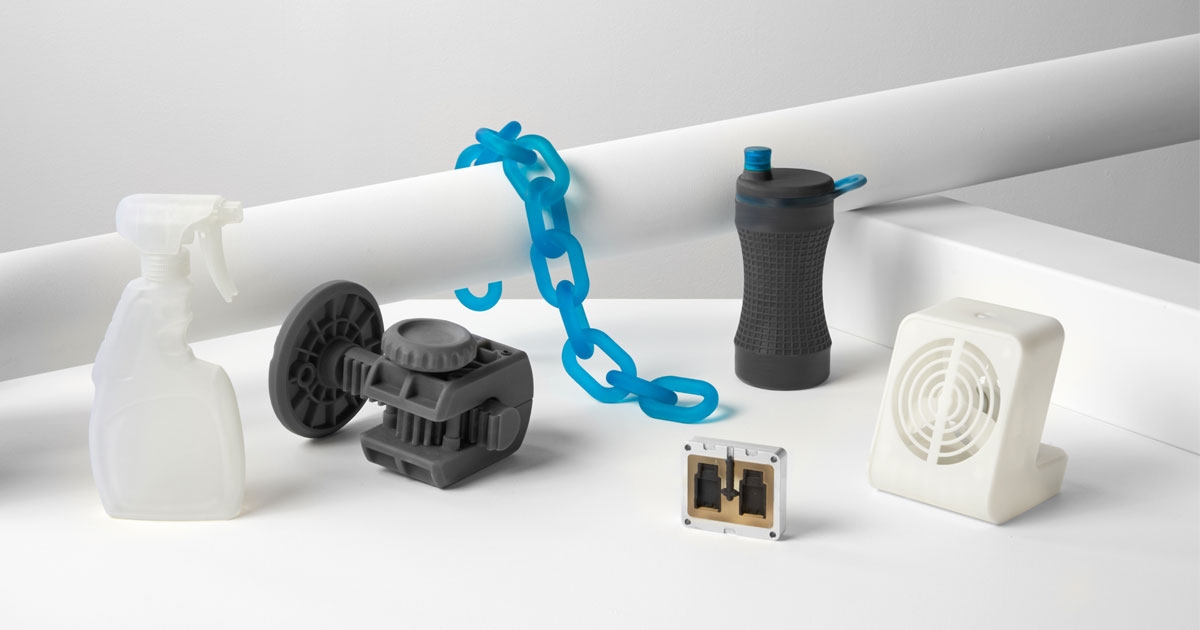
Each 3D printing technology has its pros and cons—here's an infographic for a quick comparison:
Download the high-resolution version of this infographic here. Would you like to learn more about FDM, SLA, and SLS 3D printing technologies? Check out our in-depth guide.
3D printer prices have dropped significantly in recent years, and today, all three technologies are available in compact, affordable systems.
As a rule of thumb, FDM 3D printers will create the cheapest parts if you’re printing only relatively simple prototypes in limited numbers. SLA resin 3D printers offer higher resolution, better quality, and a wide variety of 3D printing materials at a slight premium, but the difference quickly diminishes when you print complex designs or larger batches due to the less labor-intensive post-processing. Lastly, SLS 3D printing is the most cost-effective process for producing medium to large volumes of high-quality functional parts.
Comparing the overall cost of different 3D printers goes beyond sticker prices -- these won’t tell you the full story of how much a 3D printer costs and how much your printed part will cost. 3D printing material and labor costs have a significant influence on cost per part, depending on the application and your production needs.
Let’s look at all the different factors and costs for each process.
FDM, also known as fused filament fabrication (FFF), is a printing method that builds parts by melting and extruding thermoplastic filament, which a printer nozzle deposits layer by layer in the build area.
FDM is the most widely used form of 3D printing at the consumer level, fueled by the emergence of hobbyist 3D printers. Professional and industrial FDM printers are, however, also popular with professionals.
The lowest cost 3D printers are almost exclusively FDM printers. Prices for the cheapest entry-level DIY FDM 3D printer kits start at around $200. However, most of these models are more like toys or DIY projects themselves that require you to spend a considerable amount of time assembling, tweaking, and calibrating the printer. Print quality is highly dependent on the success of these steps and still, these machines will require you to do repairs and regular maintenance to keep them running, so they are only recommended for anyone with an (in progress) engineering degree and lots of time and patience.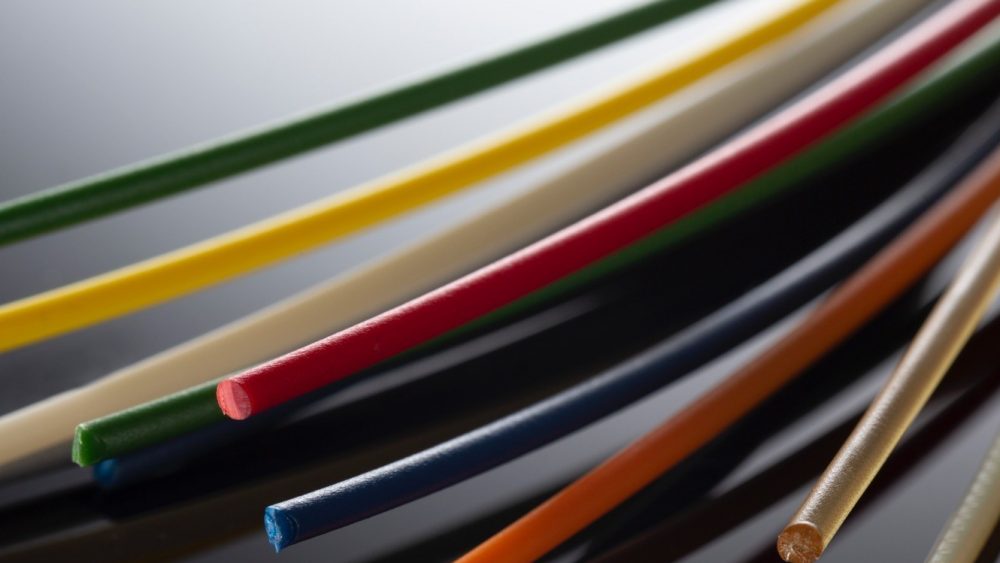
Hobbyist FDM 3D printers which cost around $500-$1,500 might come as a kit or assembled, require slightly less tweaking, but they still share much of the same disadvantages as the lowest-cost 3D printers. Some models closer to the top of this range will offer bigger build volumes and also more material options beyond low-temperature materials like PLA.
Professional FDM 3D printers start around $2,500, and large-format professional FDM printers start around $4,000, while the most advanced industrial FDM printers can easily cost more than $10,000. Most of these printers will come assembled and calibrated out of the box, or they can auto-calibrate themselves. Printers in this category offer better print quality, a wider range of materials, larger build volumes, better reliability, and are easier to use and maintain. Unlike lower-cost printers, manufacturers of professional 3D printers also offer customer support to troubleshoot issues.
Regarding materials, FDM 3D printing material costs range from around $50 to $150/kg for most standard and engineering filaments and $100-200/kg for support materials.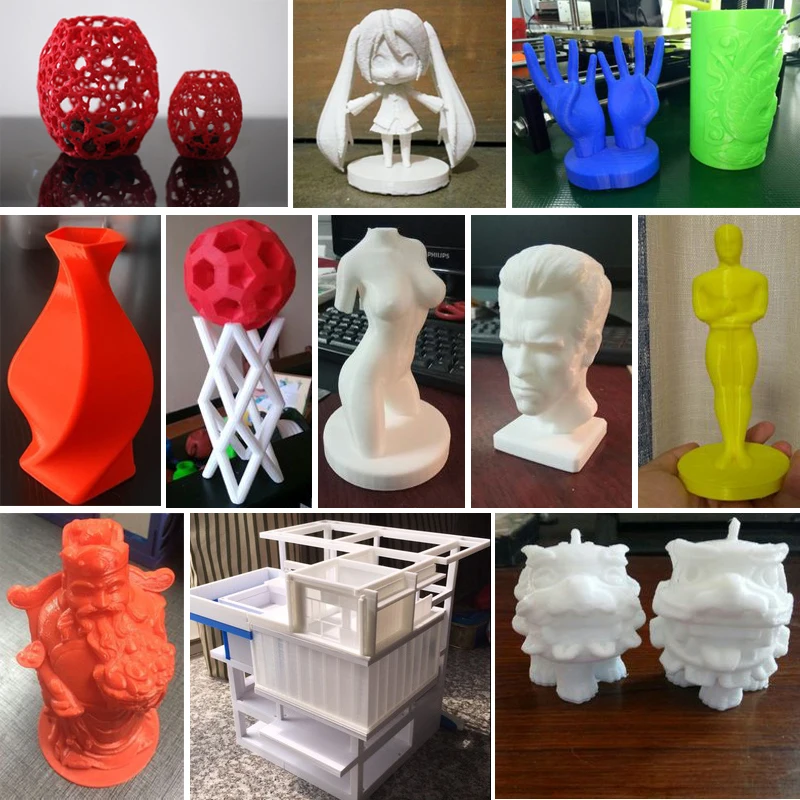 Cheaper alternatives might be available, but once again, with a trade-off in terms of quality.
Lastly, FDM printing can be highly labor-intensive. Many designs, especially complex models, require support structures for successful printing, which need to be removed manually or by dissolving the structures in case of soluble supports. To obtain a high-quality finish and remove layer lines, parts require lengthy manual post-processing, such as sanding.
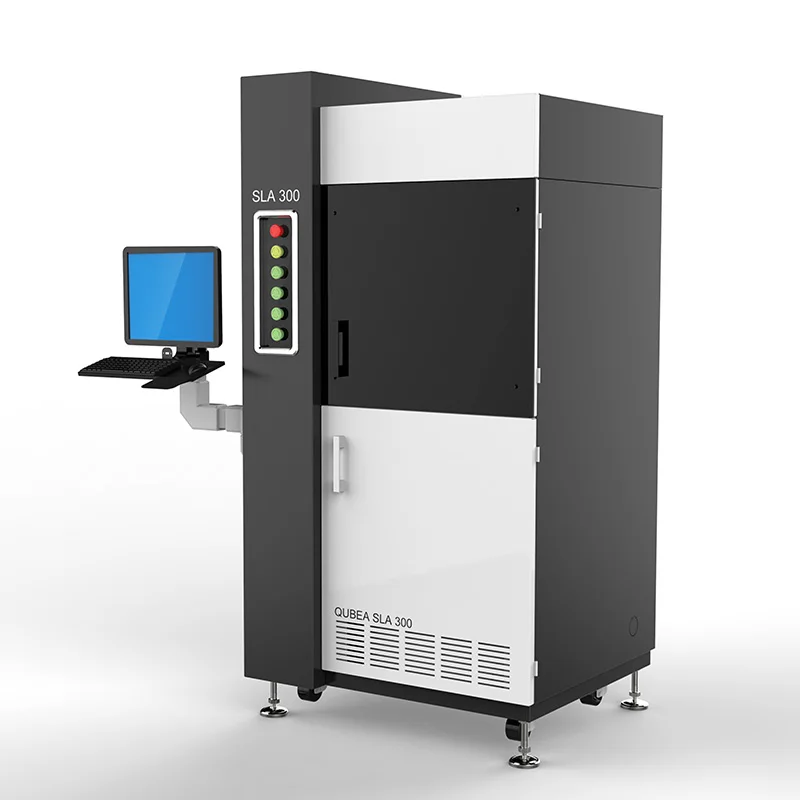
SLA 3D printers use a laser to cure liquid resin into hardened plastic in a process called photopolymerization. SLA is one of the most popular processes among professionals due to its high resolution, precision, and material versatility.
SLA parts have the highest accuracy, the clearest details, and the smoothest surface finish of all plastic 3D printing technologies, but the main benefit of SLA lies in its versatility. SLA resin formulations offer a wide range of optical, mechanical, and thermal properties to match those of standard, engineering, and industrial thermoplastics.
SLA 3D printing offers a wide range of materials for a variety of applications.
While SLA technology used to be available only in large, complex industrial 3D printers that cost more than $200,000, the process has become much more accessible. With the Formlabs Form 3+ printer, businesses now have access to industrial-quality SLA for just $3,750. Large-format SLA with the Form 3L starts at just $11,000.
SLA 3D printers will come assembled and calibrated out of the box. They’re professional tools that are reliable also for production and require barely any maintenance. Customer support is also readily available to troubleshoot issues in the unlikely event that something goes wrong.
In terms of material costs, SLA resins cost around $149-$200/L for most standard and engineering resins.
SLA printers are easy to use and many steps of the workflow like washing and post-curing can be mostly automated to reduce labor needs. Printed parts have a high-quality finish right off the printer and require only simple post-processing to remove support marks.
White Paper
In this free report, we look at how in-house large-format 3D printing with the Form 3L stacks up against other methods of production, chiefly outsourcing and using FDM printers. We also compare costs between methods, and review when it would be best to bring the Form 3L in-house.
Download Now
SLS 3D printers use a high-powered laser to fuse small particles of polymer powder. The unfused powder supports the part during printing and eliminates the need for dedicated support structures, which makes SLS ideal for complex geometries, including interior features, undercuts, thin walls, and negative features.
Parts produced with SLS printing have excellent mechanical characteristics, with strength resembling that of injection-molded parts. As a result, SLS is the most common plastic 3D printing process for industrial applications.
SLS nylon parts are ideal for a range of functional applications, from engineering consumer products to healthcare.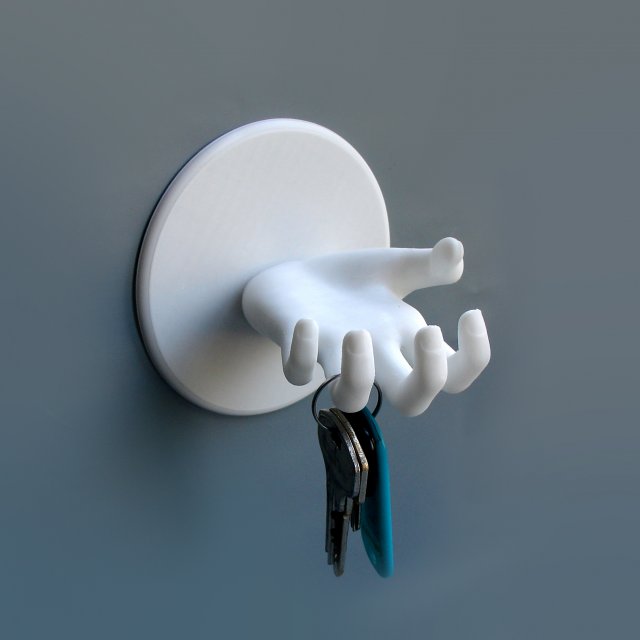
Just like SLA, SLS used to be only available in large-format, complex 3D printing systems starting at about $200,000. With Formlabs’s Fuse 1 SLS printer, businesses can now access industrial SLS starting from $18,500, and $29,743 for a complete setup that includes a post-processing and powder recovery system.
Also similar to SLA printers, SLS printers will come assembled and calibrated out of the box. They are reliable and developed for 24/7 production, and come with advanced training and fast customer support.
Nylon materials for SLS printing cost around $100/kg. SLS requires no support structures, and unfused powder can be reused, which lowers material costs.
SLS is the least labor-intensive plastic 3D printing process in a production setting as parts have great quality right out of the printer and require only simple cleaning to remove excess powder.
Beyond plastics, there are multiple 3D printing processes available for metal 3D printing.
-
Metal FDM
Metal FDM printers work similarly to traditional FDM printers, but extrude metal rods held together by polymer binders.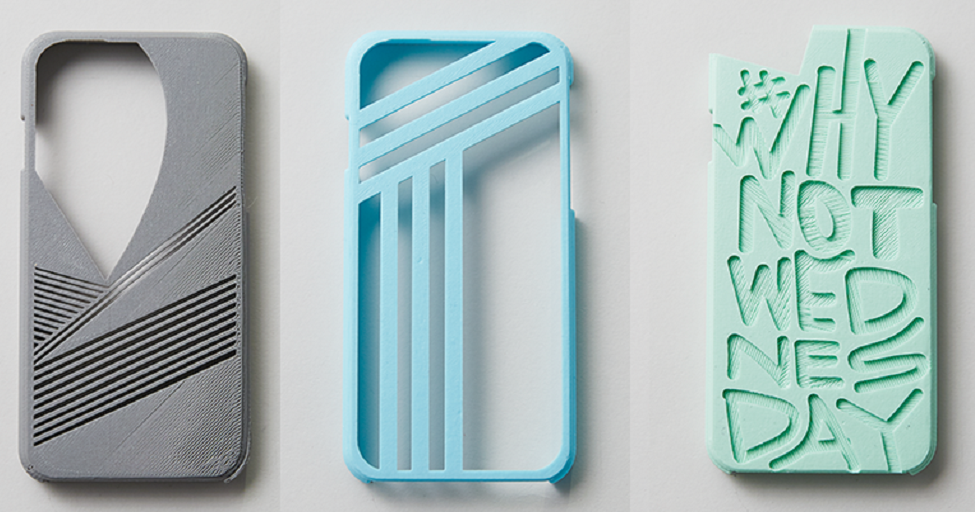 The finished “green” parts are then sintered in a furnace to remove the binder.
SLM and DMLS printers work similarly to SLS printers, but fuse metal powder particles together layer by layer using a laser instead of polymers. SLM and DMLS 3D printers can create strong, accurate, and complex metal products, making this process ideal for aerospace, automotive, and medical applications.
While metal 3D printer prices have also begun to decrease, with costs ranging from $100,000 to $1 million, these systems are still not accessible to most businesses.
Alternatively, SLA 3D printing is well-suited for casting workflows that produce metal parts at a lower cost, with greater design freedom, and in less time than traditional methods.
White Paper
Get design guidelines for creating 3D printed patterns, walk through the step-by-step direct investment casting process, and explore guidelines for indirect investment casting and sand casting.
Download the White Paper
The various plastic and metal 3D printing processes have unique qualities that make them suitable for different applications. Here's a quick breakdown.
| Fused Deposition Modeling (FDM) | Stereolithography (SLA) | Selective Laser Sintering (SLS) | Metal FDM | Selective Laser Melting (SLM) and Direct Metal Laser Sintering (DMLS) | |
|---|---|---|---|---|---|
| Resolution | ★★☆☆☆ | ★★★★★ | ★★★★☆ | ★★☆☆☆ | ★★★★☆ |
| Accuracy | ★★★★☆ | ★★★★★ | ★★★★★ | ★★★☆☆ | ★★★★★ |
| Surface Finish | ★★☆☆☆ | ★★★★★ | ★★★★☆ | ★★☆☆☆ | ★★★★☆ |
| Throughput | ★★★★☆ | ★★★★☆ | ★★★★★ | ★★★☆☆ | ★★★★☆ |
| Complex Designs | ★★★☆☆ | ★★★★☆ | ★★★★★ | ★★★☆☆ | ★★★★★ |
| Ease of Use | ★★★★★ | ★★★★★ | ★★★★☆ | ★★★★☆ | ★☆☆☆☆ |
| Build Volume | Up to 300 x 300 x 600 mm (desktop and benchtop 3D printers) | Up to 300 x 335 x 200 mm (desktop and benchtop 3D printers) | Up to 165 x 165 x 300 mm (benchtop industrial 3D printers) | Up to 300 x 200 x 200mm | Up to 400 x 400 x 400 mm |
| Price Range | DIY printers 3D printer kits start around $200, hobbyist printers range from $500-$1,500. Professional FDM 3D printers start around $2,500, and large-format professional FDM printers start around $4,000. Professional FDM 3D printers start around $2,500, and large-format professional FDM printers start around $4,000. | Professional desktop printers start at $3,750, large-format benchtop printers offer a bigger build volume for $11,000. | Benchtop industrial SLS systems start at $18,500, and traditional industrial printers are available from $100,000. | Metal FDM printers start from $100,000, but the full solution that includes a furnace goes well beyond that. | DMLS/SLM solutions start around $200,000. These printers also come with stringent facility requirements which may increase the costs further. |
| Material Costs | $50-$150/kg for most standard and engineering filaments, and $100-200/kg for support materials. | $149-$200/L for most standard and engineering resins. | $100/kg for nylon. SLS requires no support structures, and unfused powder can be reused, which lowers material costs. | Depends on the material and the technology.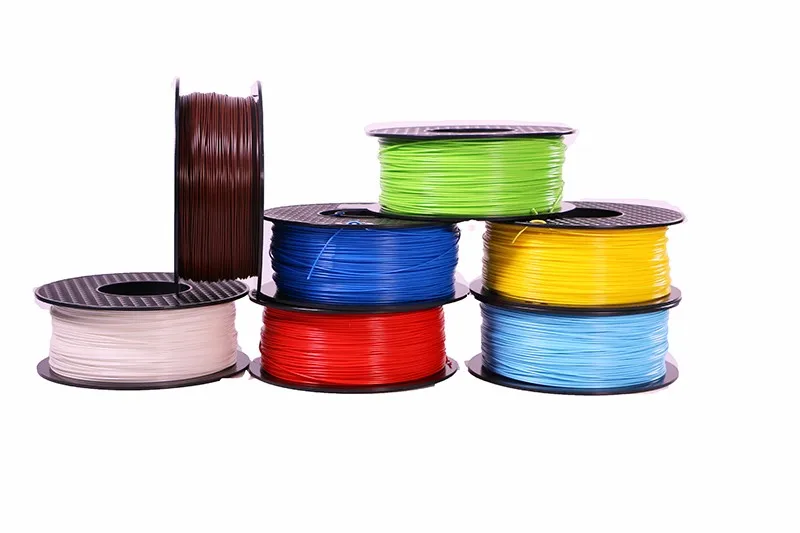 Significantly higher than plastics. Significantly higher than plastics. | Depends on the material and the technology. Significantly higher than plastics. |
| Labor Needs | Manual support removal (can be simplified in some cases with soluble supports). Lengthy post-processing is required for a high-quality finish. | Washing and post-curing (both can be mostly automated). Simple post-processing to remove support marks. | Simple cleaning to remove excess powder. | Washing and sintering (both can be mostly automated). Optionally machining and other surface treatments. | Stress relief, support removal, heat treatment, as well as machining, and other surface treatments. |
| Materials | Standard thermoplastics, such as ABS, PLA, and their various blends. | Varieties of resin (thermosetting plastics). Standard, engineering (ABS-like, PP-like, silicone-like, flexible, heat-resistant, rigid), castable, dental, and medical (biocompatible). | Engineering thermoplastics, typically nylon and its composites (nylon 12 is biocompatible + compatible with sterilization). | Stainless steel, tool steel, inconel, copper, titanium. | Stainless steel, tool steel, titanium, cobalt chrome, copper, aluminum, nickel alloys. |
| Ideal applications | Basic proof-of-concept models, low-cost prototyping of simple parts. | Highly detailed prototypes requiring tight tolerances and smooth surfaces, molds, tooling, patterns, medical models, and functional parts. | Complex geometries, functional prototypes, short-run or bridge manufacturing. | Strong and durable parts, tooling, and manufacturing aids. | Strong, durable parts with complex geometries; ideal for aerospace, automotive, and medical applications. |
Calculating cost per part requires accounting for the costs of equipment ownership, material, and labor. It’s helpful to understand the factors that influence each of these cost components, and the questions to ask to evaluate alternative production methods and uncover hidden costs.
Fixed costs, such as the 3D printer cost, service contracts, installation, and maintenance, together make up the equipment ownership cost. These expenses occur regardless of whether your 3D printer stands idle or produces dozens of parts a week.
Distribute equipment ownership costs over individual parts by adding up all of the forecasted fixed costs over the lifetime of the machine and divide the sum by the number of parts that it is expected to produce. As a rule of thumb, the higher the productivity and utilization of your 3D printer, the lower the equipment ownership cost on a per-part basis.
Desktop 3D printers have achieved tremendous progress in recent years in lowering equipment ownership costs. With a price point 10-100 times lower than traditional industrial 3D printers and the capability to produce thousands of parts over their lifetime, the equipment ownership cost can become negligible.
Questions to ask:
-
Are there installation, training, or further initial expenses beside the cost of the machine?
-
Is there a (mandatory) service contract? What does it include?
-
Beyond the machine, what accessories and tools are required to create final parts?
-
What are the maintenance needs of the machine within the normal range of activity? What’s the expected annual cost of maintenance? How does it change if production levels rise?
Raw 3D printing materials and other consumables required to create parts are variable costs. These costs are highly dependent on the number of parts you’re producing.
Measure material cost by calculating the amount of 3D printing material that’s required to create a single part, and multiply it by the cost of the material. Calculate in waste and any other consumables that are needed. While equipment ownership costs decrease as production grows, material costs for 3D printing tend to flatten out quickly.
Make sure to clarify what materials you’ll need to create the given parts, as the cost of consumables for 3D printing varies. Also note that some 3D printers only work with proprietary materials, and thus limit your third-party material options.
Questions to ask:
-
What is the cost of each type of 3D printing material?
-
How much material is required to create a given part, including waste?
-
What’s the shelf life of the materials?
-
Are there other consumables required to create the parts?
-
Can the machine work with third-party materials?
While 3D printing can replace the complex workflows of traditional manufacturing methods and lead to substantial time savings, depending on the 3D printing technology, it can still be a fairly labor-intensive process.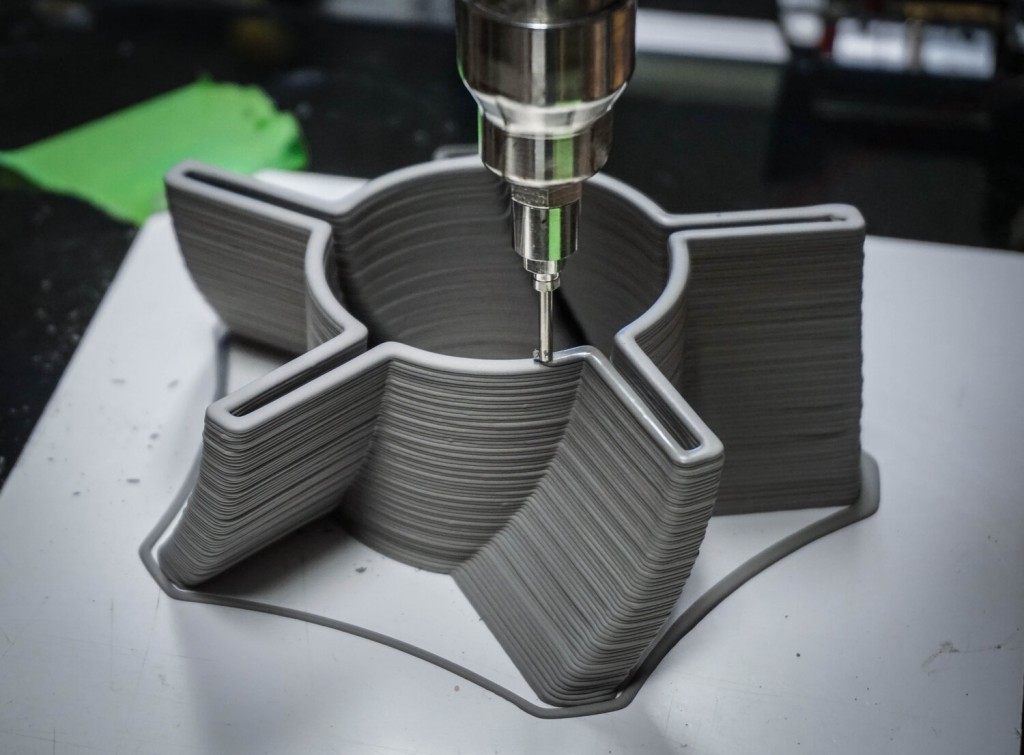
Professional desktop 3D printers are generally optimized for ease of use. DIY 3D printers and hobbyist printers often require more tinkering to get the settings dialed in, whereas regular maintenance or changing materials on traditional industrial machines can involve time-consuming tasks that require a skilled operator.
Post-processing workflows vary by 3D printing process, but in most cases include cleaning parts and removing supports or excess material. There are solutions to automate some of these tasks; for example, Formlabs Form Wash and Form Cure simplify the washing and post-curing workflow for Formlabs SLA 3D printers, and Fuse Sift offers a turnkey post-processing and powder recovery system for the Fuse 1 SLS printer.
To achieve high-quality parts, more advanced processes like SLA and SLS don’t require time-consuming steps, but FDM parts will need lengthy manual post-processing to improve the quality and remove layer lines.
Questions to ask:
-
What is the entire workflow for producing parts? What are the specific steps required to set up a print, change materials, and post-process parts?
-
How much time does it take to post-process a given part?
-
Are there any tools or devices available to automate some of these tasks?
Outsourcing production to service bureaus or labs is recommended when you require 3D printing only occasionally, and for parts that are large or call for non-standard materials. Bureaus generally have several 3D printing processes in-house such as SLA, SLS, FDM, and metal 3D printers. They can also provide advice on various materials and offer value-added services such as design or advanced finishing.
The main downsides of outsourcing are cost and lead time. One of the greatest benefits of 3D printing is its speed compared to traditional manufacturing methods, which quickly diminishes when an outsourced part takes multiple days or even weeks to arrive. With growing demand and production, outsourcing also rapidly becomes expensive.
Desktop 3D printers are great when you need parts quickly. Depending on the number of parts and printing volume, investment into a professional 3D printer can break even within months.With desktop and benchtop machines, you can pay for just as much capacity as your business needs, and scale production by adding extra units as demand grows without making a significant investment in a large-format 3D printer. By using multiple 3D printers, you also get the flexibility to print parts in different materials simultaneously. Service bureaus can still supplement this flexible workflow for larger parts or unconventional materials.
Try our interactive 3D printing ROI calculator to see how much time and cost you can save when 3D printing on Formlabs 3D printers compared to outsourcing.
Investment, materials, and labor costs are relatively easy to calculate. But what about indirect costs and factors that are hard to quantify, but still influence your business? Let’s look at some of the key considerations when comparing desktop 3D printing to outsourcing or other production methods.
Time savings: What if you could bring products to market months faster? Or cut the lead time for your products by days or weeks? 3D printing simplifies traditional prototyping and production workflows, helping you to save time and outpace the competition.
Better results: 3D printing allows you to create more iterations, fail faster, and achieve better end products. Finding and fixing design flaws early also helps to avoid costly design revisions and tooling changes in production.
Communication: Having high-quality prototypes and parts allows you to better communicate with customers, clients, suppliers, and other stakeholders. Avoid confusion and costly mistakes.
IP protection: Do you work with sensitive information? Creating parts in-house means you won’t have to give away intellectual property (IP) to third parties, reducing the risks of leaks or IP theft.
Calculating cost per part, lead time, and comparing alternatives to figure out if a solution makes sense for your business would normally be the strenuous task of creating an elaborate spreadsheet and trying to gather all of the—often hidden—information from a manufacturer.
To skip this hassle, try our simple, interactive 3D printing cost calculator to calculate 3D printing cost and lead time on Formlabs 3D printers, and to compare time and cost savings to other production methods.![]()
Calculate Cost and Time Savings
How to calculate the cost of printing on a 3D printer
For some ideas, 3D printing is the fastest and easiest solution. In some situations, purchasing your own 3D printer can be a good solution, but sometimes it is much more profitable and faster to order the necessary product from a company specializing in 3D printing. Yes, and many owners of a 3D printer are thinking about how to “monetize” their hobby, but how to correctly calculate their costs?
Despite the fact that it is customary to indicate the price per gram of working material, simply multiplying the weight of the model by the cost of 1 gram will be wrong. In addition to the cost of consumables, many more, at first glance, non-obvious costs are added to the price of the product. nine0003
Each 3D printing technology uses its own consumables. Let's analyze the most popular and affordable of them.
Available technologies and key differences
Currently, a huge number of 3D devices have appeared, from small desktop ones that fit on the desktop to huge industrial machines. Among the most affordable, 2 technologies can be distinguished - FDM and photopolymer printers (LCD / DLP / SLA).
FDM 3D printing
Today, the most affordable 3D printing technology is FDM. A variety of materials and 3D printers allow FDM to be applied to a wide range of applications.
Schematic operation of FDM printer
A large selection makes it easy to choose a 3D printer for a specific task or find a universal device.
The material for printing is a plastic thread - filament. On the market you can find filament for various tasks, for every “taste” and budget. These can be very inexpensive ABS and PLA plastics or specific ones - conductive, burnable, etc. nine0003
Pros:
Cons:
Despite the fact that FDM allows you to print a wide range of plastics with different properties, the technology has some limitations. For example, it is impossible to obtain a perfectly smooth surface, to produce miniature and very thin elements, or to produce parts with very complex internal geometry with high accuracy.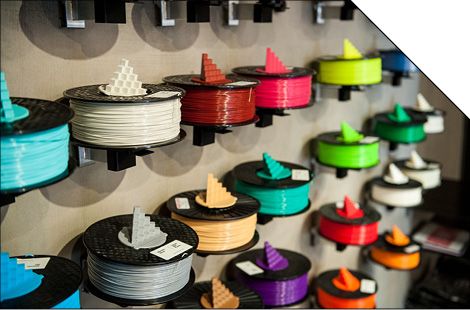
Photopolymer printing
Photopolymer printers can work on one of 3 technologies - SLA, DLP or LCD. These devices will come to the rescue if you need to make a small but very detailed model with many small details. nine0003
How photopolymer printers work
As a consumable material, a photopolymer resin hardened by UV radiation is used. Now there is a wide variety of photopolymer resins for every taste. From particularly strong and precise engineering or jewelry resins to soft flexes.
Pros:
-
High print precision
nine0060 -
Good surface quality
-
A wide variety of printers and consumables
Minuses:
Photopolymer printers have shown themselves well in a variety of industries that require a perfectly smooth surface and high accuracy. They are used in dentistry, the jewelry industry, for making miniature master models for casting, and much more.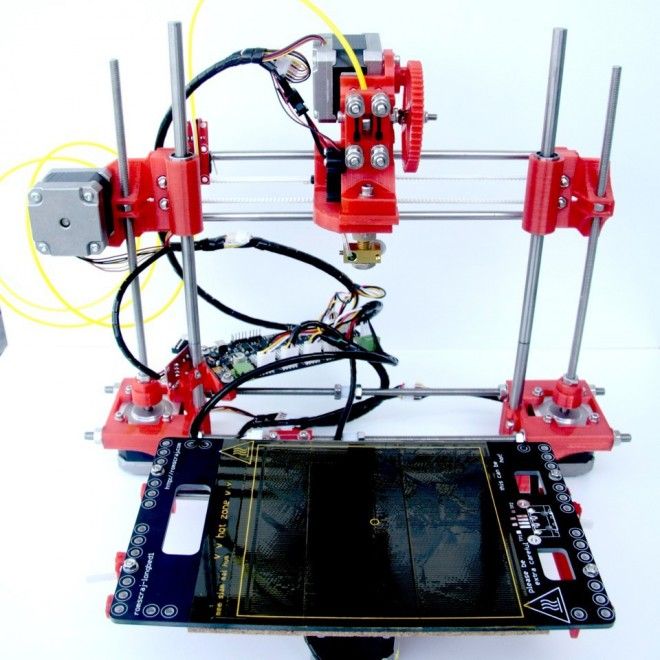 nine0003
Industrial printers
These are already industrial machines, which require a separate room and sometimes certain requirements for ventilation, etc. In this article, we will not analyze these devices in detail, but briefly consider the most popular technologies.
FDM
In addition to desktop devices using FDM technology, industrial printers that work on the same principle are common.
This category includes devices with a large print area (from 30x30x30 cm and more). For example, Raise Pro2 with a print area of 30x30x30 cm.
Raise Pro2
Or machines designed for printing with refractory materials (eg PEEK). Such 3D printers usually have an active thermal chamber, and the extruder can be heated above 400 degrees.
nine0021 CreatBot F160-PEEK designed to work with refractory plastics
Photopolymer printers
Industrial photopolymer devices usually have a much larger working area, compared to their "home" brothers.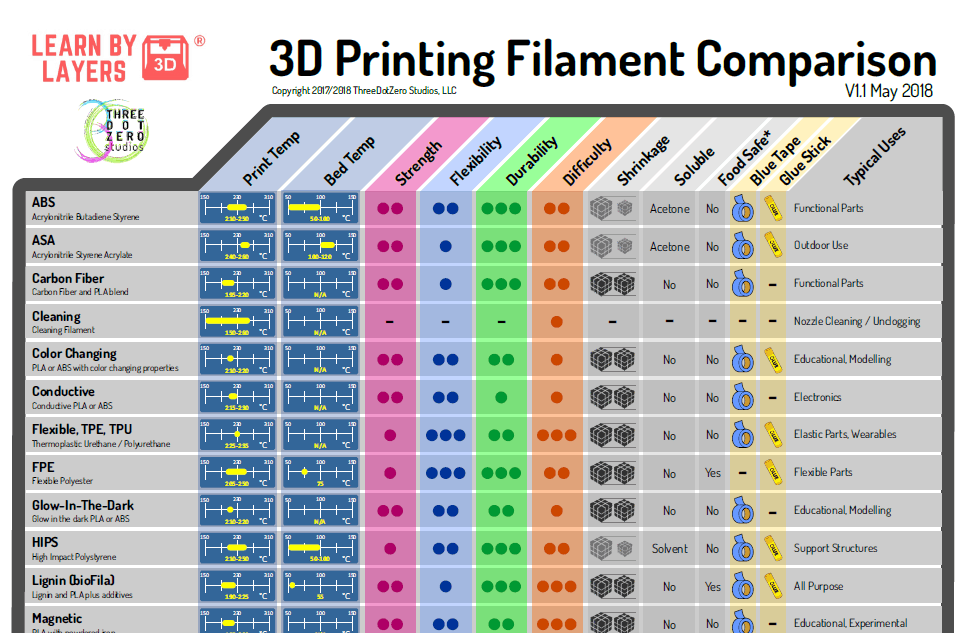 In addition, many processes have been optimized and automated for faster operation. On such printers, you can quickly and accurately produce a small batch of models, a large prototype or a master model. nine0003
Prismlab Large Area Industrial Resin Printer Family
3DP
3DP - Three-Dimensional Printing (translated as three-dimensional printing) is a logical continuation of conventional two-dimensional printers. Printing is done using nozzles that selectively apply a binder to the material (usually gypsum). A dye can be added to the binder and the model will be colored. nine0003
Colored plaster model
Since the plaster model is fragile, a similar principle is used for printing with metals. Only the finished product needs to be treated in an oven to remove the binder and improve strength. But despite the processing, such metal prints will still be inferior in strength to cast products.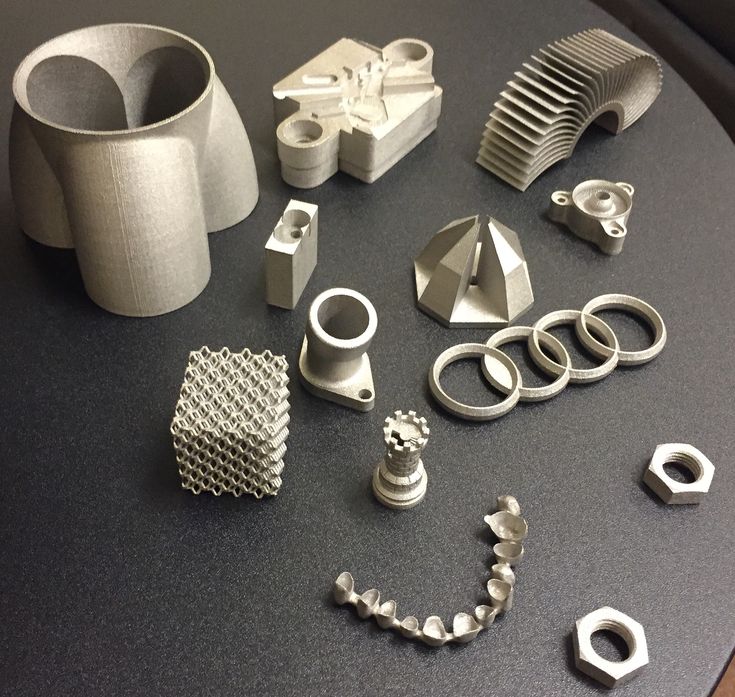
MJM
This is a proprietary technology of 3D Systems. MJM is a mix of FDM, 3DP and sometimes SLA (depending on material chosen). Printing is done using a variety of small nozzles (from 96 to 488) located on the head of the machine. The accuracy and quality of the surface of models made in this way is in no way inferior to photopolymer printers.
Models made with MJM technology
Such devices can work with photopolymer resins, wax or thermoplastics. You can combine several materials at once - for example, for complex models, you can use wax as a support. nine0003
SLM
SLM is the layer-by-layer sintering of metal powder using a powerful laser. There are several similar technologies - SHS/SLS. The principle of operation is the same, only a thermal print head is used instead of a laser beam.
SLM Turbine
As a material for printing, you can use powders of various metals - gold, stainless steel, aluminum, various alloys, etc. nine0003
During printing, the working chamber is filled with an inert gas to prevent oxidation of metals. This allows printing even with titanium powder.
Models made by this method are in no way inferior, and sometimes even superior, to cast products. SLM allows you to produce models with complex internal geometry that cannot be produced by another method (casting or milling).
Cost of 3D printing
The cost of a model usually consists of several factors.
-
Equipment depreciation. The printer, like any machine, requires maintenance and periodic replacement of some parts. During operation, belts gradually stretch, bushings or linear bearings wear out. For example, when bushings or linear bearings are worn; shafts may wear out and need to be replaced.
Cost of materials
The main cost item for a 3D printer is, of course, the printed material.;
FDM (plastic filament)
Since FDM technology is by far the most common, the choice of filaments is very diverse.
-
Engineering plastics are usually nylon with various fillers added to improve the physical characteristics of the finished model. Special cost. plastics starts from 2000r per coil and above. It all depends on the manufacturer and filler (carbon fiber, fiberglass, etc.). nine0003
-
Decorative plastics are used to imitate various materials. Plastic can simply be unusually colored (luminous, transparent plastics) or a special filler is added to it (plastics with metal powder). The cost of decorative plastics starts from 1500 rubles per coil and more, depending on the filler.
A big advantage of FDM is the diverse choice of materials to work with. This allows, having one printer, to produce almost any product - from a child's toy to a complex engineering prototype. nine0003
Photopolymers (resin)
Photopolymer resin printing technology is becoming more and more accessible. There are many different resins.![]()
-
The cost of ordinary colored resin starts from 2500 rubles per 0.5 kg (volume +/- 0.5 l). You can find a smaller volume of resin (250 gr) on sale. You can buy several different resins in small containers and find out in practice which one is best for a particular model. nine0003
-
Engineering resins are resins with increased strength. They can be used not only for printing decorative items, but also for making functional prototypes and models. The cost for 0.5 kg starts from 5900r and above.
-
Special resins - burnable, dental, soft flexes, etc. Depending on the resin, the price for 0.5 kg can start from 4800 rubles and more. It all depends on the characteristics of the resin. nine0003
Photopolymer resins have not yet reached such a variety as FDM filaments, but they are surely catching up. Although due to the fact that a liter of resin costs significantly more than a spool of filament, the cost of the product is much higher.
Print examples
FDM
Mag Pull (quick release loop) for G3 magazines.
The model was downloaded for free from an open source (the file can be downloaded here). Printing with engineering carbon-filled plastic (price per spool from 4700 rubles). The weight of the model with support is about 25 grams. Post-processing was not needed. The cost of the finished model is 250 rubles. nine0015
Plastic fastener
The file was downloaded from an open source (can be downloaded here). Plastic - carbon-filled nylon (price per coil from 4700r). The weight of the finished product is about 20 grams. Print without post-processing. The total cost is 200 rubles.
Model watch
The model is modeled to order (the cost of modeling is from 1000 rubles). The product is printed on an industrial printer using soluble support. Print without post-processing. The cost of the finished product - from 700 rubles per piece (depends on the number of required products). nine0003
Traction prosthesis
The model is taken from an open source (you can download the modified version of the prosthesis here). The weight of the used material is about 600 gr, printed with ABS plastic (the cost of the coil is from 800 r). After printing, post-processing and assembly took place. The total cost of the product - from 3000 r (depends on the print material, support material, filling, etc.).
nine0003
Pedal layout
Production of a 3D model according to the drawing (from 1000 r). The weight of the finished model is about 200 gr. The product was printed with engineering carbon-filled plastic (the cost of the coil is from 4700 r). Post-processing was not needed. The cost of the finished product is about 3000 rubles.
Photopolymer printers
Model jaws for crowns
Files for printing were obtained using a 3D scanner and finalized in a 3D editor (the cost of scanning is from 3000 r, the cost of manual revision is from 1000 r). Printing on an industrial photopolymer printer. Post-processing is not needed. The cost of the finished product is from 80 r per gram.
Burnout resin rings
The model is made to order. Printing on a desktop SLA printer with a burnable polymer. Post-processing is not needed. The cost of the finished product is 200 rubles per product. nine0003
Miniatures
The models were bought on the myminifactory website (the cost of the model is from $2). Made with a desktop DLP printer. Post-processing was not required. The cost of the finished figurine is from 70 r per gram.
Custom 3D printing
Many owners of 3D printers are thinking about monetizing their hobby. But you should understand that the price of 3D printing “for yourself” and the price of commercial printing are very different. nine0003
When starting to print to order, it is better to have several printers working on different technologies.

Cost of commercial 3D printing
In addition to the cost of the model, to the commercial production of products, you can add:
-
Modeling. Often the client needs not only to make a part, but to pre-model it. It can be a simple cogwheel that doesn't take long to model, or it can be a complex sculpture that takes more time to model than it does to make. nine0003
-
Model post-processing. This can be simply the removal of supports, with cleaning of the place of their contact with the product, or a complete processing cycle (puttying, surface grinding, painting, etc.).
It should be borne in mind that it is not always possible to print the model the first time. Sometimes it may take several attempts. And these are additional costs.
nine0167What is unprofitable to print
Despite the wide possibilities of 3D printing, there are models that are unprofitable to make on a 3D printer.
For such models, it is better to use other manufacturing methods.
Commercial print examples
Jewelry for further casting
Manufacture of promotional items and souvenirs
Piece miniatures or master model for further casting
3D printed model
Profitable to print on a 3D printer:
If the item is only sold as an assembly. For example, a small gear broke in the mechanism, but the mechanism is sold only “assembly”. It is much cheaper to make the desired gear on a 3D printer than to buy the entire mechanism. nine0003
A small batch of parts. Small batches, especially models with complex geometry, are more profitable to produce on a 3D printer than by casting or other methods.
Totals
If you need several models or a small project, sometimes it will be more expedient to outsource manufacturing.
After all, in addition to buying equipment and materials, you will have to understand the nuances of the settings and the characteristics of various materials. nine0003
Buying a 3D printer for commercial use is justified if you can fully load it with work or then it can be used for other purposes.
To print to order, you need to have several printers working on different technologies. It is better to get several devices with a smaller print area than to buy just one printer, albeit with a large working area.
3D printing cost calculation
Although I posted the link in the discussion of the parallel topic of comrade 3D_MPL (Cost of 3D printing. Calculator for calculating from 3D-MPL), I thought it would be better to make a separate post to get feedback. nine0003
So please make constructive (!) suggestions. I will answer any questions on the topic.
.
So.
Again and again the question arises of how to calculate the payment of your labor as correctly as possible.
Although some of the details seem simple, they often require a lot of brain effort, which MUST be paid. Well, the time spent too.
.
Some people think that it is enough to take into account the weight of the part - I think this method is simply fundamentally wrong, because, for example, printing a vase / box with a 1mm nozzle and a 0.6mm layer will be faster than printing some highly detailed bracket in a car or a souvenir with a 0.2mm nozzle and a 0.05mm layer. So, with the same weight, the time can be many times (tens of times) longer! Yes, and draw a different bracket, you must be able to! nine0003
Moreover, we want our many hours of work to be adequately paid.
A typical example from my practice is a kettle handle.
The detail is shapeless, you don't know how to approach it in order to draw it. The result - 7 hours of modeling, 4 hours of printing, an hour of post-processing, 57 (total!) Grams of plastic. And now, imagine, a customer comes to you, 'Why is it so expensive??? It's only 57 grams!!!'.
And you lost a whole day (work shift).
.
So, I think that the main resource that should be paid for is time! nine0003
.
And here is the table itself.
Link to Yandex Disk: https://yadi.sk/i/oy1r3v_dA-8E1w
.
By the way, I update the table from time to time! I recently discovered an inaccuracy in the calculation of the cost of the material, corrected it. So follow the link and check it out.
.
Some characteristics:
Time is written conveniently - in hours and minutes.
Modeling and post-processing cost per hour.
The weight and cost of the coil are written separately - no need to calculate the cost of a kilogram (for lazy people). nine0003
The so-called 'difficulty factor' is missing from the table. The complexity itself will be formed from: modeling time (mostly), printing time (necessary detailing), post-processing time (picking out supports from hard-to-reach places, painting, etc.
).
Substitute the values that are convenient for you. I don't insist on these. Columns 'Prices' and 'Costs'.
The white numbers in the 'Total' column are reference numbers, just for convenience.
Depreciation is calculated from the time of direct operation of the printer (more work - more wear). I take half a dollar. nine0003
The price of the first part differs from the subsequent ones only by taking into account the simulation time.
The maximum printer power is taken - still pennies come out.
Currency - rubles. You can change to yours.
When you write the price for the reel, you must also take into account the cost of delivery! (In our outback, the delivery of one coil is 500 rubles!) I can add the 'delivery' item for convenience, if you want.
.
I advise you not to show this table to the client. Unless if he thinks that it is too expensive, it must be recalled that he would not agree to work for 100 rubles / hour (or how much you put).

Learn more