Activate sense 3d scanner
How do I activate the 3D sense scanner? – idswater.com
How do I activate the 3D sense scanner?
Let’s activate your scanner by clicking on the Sense 3D scanner and selecting the Activate tab . Enter your serial number; you will find it on the bottom of your scanner . Click Activate, a 4-digit activation pin code will display and also, sent to you in an email .
What is 3D Systems sense?
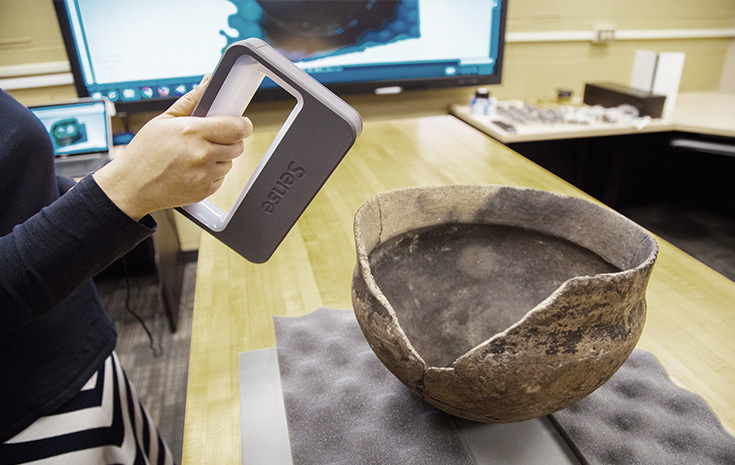
The Sense 3D Scanner from 3D Systems is a portable, full color, three-dimensional scanner for quickly and easily creating 3D models of real-world objects. It has a wide scan volume from small 8 x 8 x 8″ items up to 118 x 118 x 118″ objects. The Sense also has a convenient working distance of 15 to 60″. More Details.
What sensors do 3D scanners use?
Laser pulse-based 3D scanning technology Instead, it uses the speed of light and sensors to measure surface geometry. Millions of pulses are sent from the laser to the object’s surface, which are then reflected back to the sensor.
Which is non contact type 3D scanner system?
Non-contact 3D measurement technologies, as the name suggests, provide a means to collect 3D data without touching objects. They include 3D laser scanners, structured light scanners, photogrammetry solutions and optical CMM scanners. 3D measurement solutions can be further broken down based on acquisition type.
What is the purpose of a 3D scanner?
In other words, 3D laser scanning is a way to capture a physical object’s exact size and shape into the computer world as a digital 3-dimensional representation. 3D laser scanners measure fine details and capture free-form shapes to quickly generate highly accurate point clouds.
What is the last step in 3D scanning process?
The Process
- Step 1: Discuss the application. Contact Aeroscan to discuss your project.
- Step 2: Define articles/ subjects to scan.
- Step 3: 3D Laser Scanning.
- Step 4: Post-Processing.
- Step 5: CAD Modeling.
- Step 6a: 3D Printing.
- Step 6: Fabrication.
How is 3D scanning done?
The 3D Scanning Process: Specialized software drives the laser probe above the surface of the object. The laser probe projects a line of laser light onto the surface while 2 sensor cameras continuously record the changing distance and shape of the laser line in three dimensions (XYZ) as it sweeps along the object.
How much does a 3D scan cost?
3D scanning a part can cost anywhere from $100 to $1,000 or more. Our rates are between $100 and $200 per hour, depending on the 3D scanning technology being used. The cost is ultimately dependent on the size and complexity of the part being 3D scanned.
Why to use 3D scanners?
Advantages of 3D scanning: Fast data capture. Some objects can be scanned in under a minute. Cost-efficient. Avoid costly mistakes and reduce those expensive man-hours. Easy to use. Even a complete novice can use most 3D scanners. Realistic textures and vivid colors of your watertight 3D model. Portability. Create quality 3D scans on the go wherever your application takes you.
What can you do with 3D scanning software?
What can you do with 3D scanning software? Aerospace. In almost every aspect of aerospace manufacturing, accuracy is critical. Automotive. The same can be said for cars, especially if you’re restoring a classic car – whether that be a vintage McLaren or a Reliant Robin. Arts and sculptures. Medicine. Animation and film. Tool and part making. Product design and product development.
What is a 3D scanner used for?
3D scanners can be used to analyze a real-world object or environment in order to collect data on its shape and its appearance, and to expedite its recreation in a 3D printer.
What is the use of 3D scanning?
3D scanning is your key to success.

3D Systems Sense 3D Scanner In-Depth Review
ADVERTISEMENT
8.1Expert Score
3D Systems Sense
The 3D scanning process of 3D Systems Sense is extremely smooth and easy. It produces attractive 3D objects that can not only be easy but also quickly 3D printed.
Affordability
9
Quality
8
Speed
8
Capability
7
Practicality
7
User Expectations
10
PROS
- Relatively affordable.

- User-friendly software.
- Huge scanning area.
- Easy to operate.
- Capable of scanning large objects.
CONS
- Tethered by a cord.
- Can be operated with a PC only.
- Doesn’t work up to the mark with small objects.
- USB cable too short.
Table of Contents
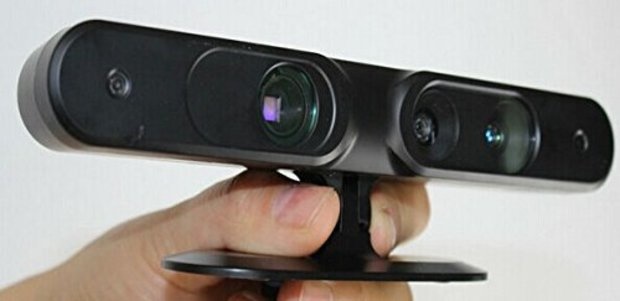
The Sense 3D scanner is very light in weight. It looks like a ray gun at some sci-fi convention. The scanner can be held in your hand and moved around the object.
The machine emits an infrared patterned beam onto the object present in front of it from its bottom. The beam gets affected by the middle webcam.
A normal webcam is present at the top of Sense which is utilized by the software to translate the images that it captures into the surface colors of the object.
Features
Below mentioned and explained are the striking features of the Sense scanner.
Simple scanning process
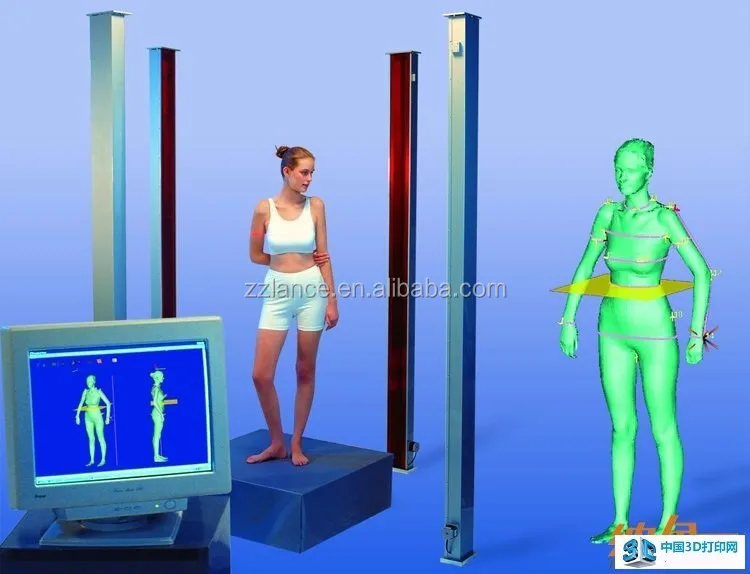
Sense’s scanning process is very simple. It starts with the software choosing the size of the object, either from the options provided for a person’s head, shoulders, or full-body or from a size range either small as at least 8 inches to as large as up to 3 meters.
As hinted by the software, users need to point the machine at the object, hit the space, and walk around it by following a series of on-screen prompts meant to keep you at the perfect distance from the object and track it while you move. Note that, in case you are too far away from the object, it loses the track of it.
When the scan is in progress, the software creates a rough model of the object painted in as it detects the shape.
ADVERTISEMENT
Ideal for medium-sized objects
Sense 3D works best with medium size parts and functional prototypes. The scanner is claimed to provide a resolution of 0.9 mm.
While the smallest scannable object on it is a cube measuring 0. 2 meters on each side. Going to the other end of the scale, Sense is capable of scanning objects as large as 3 meters on each side.
The entire system of Sense lets users rotate the object, letting you do head and shoulders scans on a rotating chair.
Editable result
The end-scan provided to you by Sense is editable. You can cut out the bits that you do not need and smoothen the object.
All of this process is fairly intuitive. This is because even when you are not satisfied with the end-scan, you still hold the power to change it according to your imagination. So that nothing gets reflected while making a model.
Good quality scan results
The simple scanning process of Sense produces decent results not only with medium-sized objects but also with larger ones. Generally, well-lit objects don’t get overlapped elements in their scans or large holes in them.
Sense does an interesting job with head and shoulders scans as well as full-person scans. Also, it does fantastic work of building a 3D mesh and then creating a simple final object from the collected data.
ADVERTISEMENT
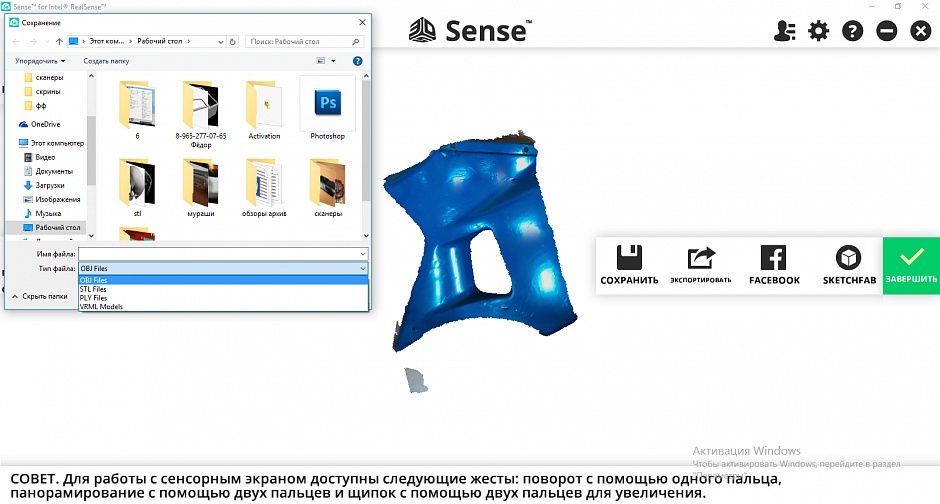
Multiple file formats
The final scan can be exported in STL, PLY, or OBJ file formats. So, you do not need to worry whether the resulting scan would be compatible with most of the 3D modeling software or not.
Mostly STL files are used the most. But when it comes to delivering the color information of the object, that’s when PLY and OBJ file formats come into play.
Moreover, Sense’s software is directly linked to the 3D system’s Cubify object service which gives you the facility of ordering the 3D print that can be shipped to you. Other than that, it also lets you sell the 3D scan or a 3D printed model in different sizes and materials.
Specifications
| Technology | structured light technology |
| Price | 359 $ |
| Depth Image Size | 240 x 320 pixels |
| Depth Resolution | 39. |
| Image Size | Color: 240 x 320 pixels |
| Dimensions | 7.0 x 5.1 x 1.3″ (17.8 x 12.9 x 3.3 cm) |
| Supported Operating Systems | Windows 8 (32/64-bit) and 7 (32/64-bit) Mac OS X 10.8 or later |
 4 mil (1 mm) at 1.6′ (0.5 m)
The minimum scan volume that Sense can scan is 0.2 m * 0.2 m * 0.2 mm whereas the maximum stretch is up to 3 m * 3 m * 3 m. It has an operating range starting from 0.35 m and ending at 3 m.
The field of view of this scanner is 45 degrees * 57.5 degrees * 69 degrees. Its depth image size is 240 * 320 pixels and its depth resolution is 1 mm per 0.5 meters.
The machine’s dimensions are 17.8 cm * 12.9 cm * 3.3 cm. It can be connected using a USB cable and needs a consumption of around 2.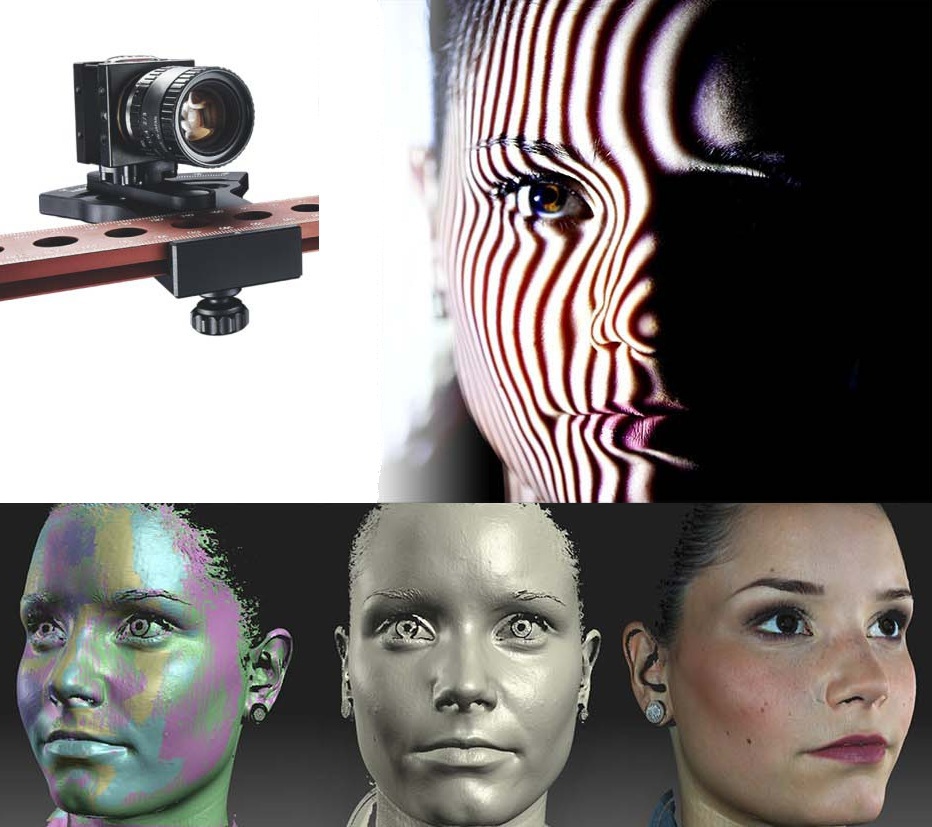 25 Watts.
ADVERTISEMENT
Price
Sense is available for $359.
First Impression
An Apple-ish flat white box carries the scanner to your place. A quick start guide and the device are present in it.
Designed to be handheld vertically, The Sense can be put on a tripod as well. Its front displays the 3D Systems logo, beneath which there is a window. An infrared laser pattern is projected from it helps to scan the object.
Setup
After unpacking your scanner you need to create an account on Cubify which is easy. It asks for general details, after giving which the account is created. Then, you need to download the sense software on your computer.
Once that is done, activate your Sense scanner in three simple steps:
- Plugging your scanner’s USB connector into the USB port present on the computer and clicking on the Sense icon to open the software.
- Choose one from the two available options of whether you have your activation code or not.
- Click on activate the scanner.
After that, you can start scanning the first object on the scanner.
Scan Type
Credit: 3dscanexpertSense uses structured light technology for processing objects of varying geometries. The process is fairly simple, it utilizes a UV light source, camera, and software for creating an end-scan file.
ADVERTISEMENT
Scan Quality
Credit: 3dscanexpertSense manages to produce decent-quality prints of objects as well as human body parts. It is able to deliver detailed scan files that are capable of producing dimensionally accurate parts.
Software
Credit: 3dscanexpertSense’s software can be downloaded for both Mac as well as PC from the 3D System’s website where you can register the serial number of the device and retrieve an activation code. Both versions of the software are similar in function. They are easy to use and generally ask the user if you wish to scan a person or object.
There are several settings present on the software settings screen that allow you to use it either in Landscape mode or portrait mode. The resolution setting present in the application relates to the density of the 3D data captured, not the color information. If you adjust it to a lower number, it makes usual scanning happen at a faster rate.
Note that, if you are willing to scan very large objects, you would not need extremely dense mesh. But, experts recommend using high settings for smaller objects. The frame rate option exhibits the real-time frame rate on which Sense does the capturing. This tool makes it easier for you to know how much your computer can handle!
ADVERTISEMENT
Customer Support
3D Systems is known worldwide for its support. There are many ways of reaching out to its technical team, the most common one being via phone or email. Also, there is much material available online which you can also refer to, for solving your doubts.
Parameters Influencing Buying Decision
Below mentioned are some of the most important factors that are good to know before buying Sense.
3D Scanner Cost: Considering the amazing list of features the scanner can provide, $359 is a very reasonable and affordable cost that the manufacturer seeks.
3D Scanner Speed: Because the process is fairly simple, it doesn’t take much time to get the end scan.
3D Scan Quality: Scan qualities of objects and human body parts processed on Sense are superb. It’s rare to find a 3D scanner that’s able to deliver this quality in the same price range.
3D Scanner Capability: Sense is capable of scanning objects of varied geometries, shapes, and sizes. Thanks to its high-quality camera and UV LED source, the complete coordination of its components leads to an optimum level of efficiency that users can utilize for producing scans that are capable of creating precise parts.
3D Scanner Practicality: The scanner can be used in various fields such as education, reverse engineering, and 3D printing.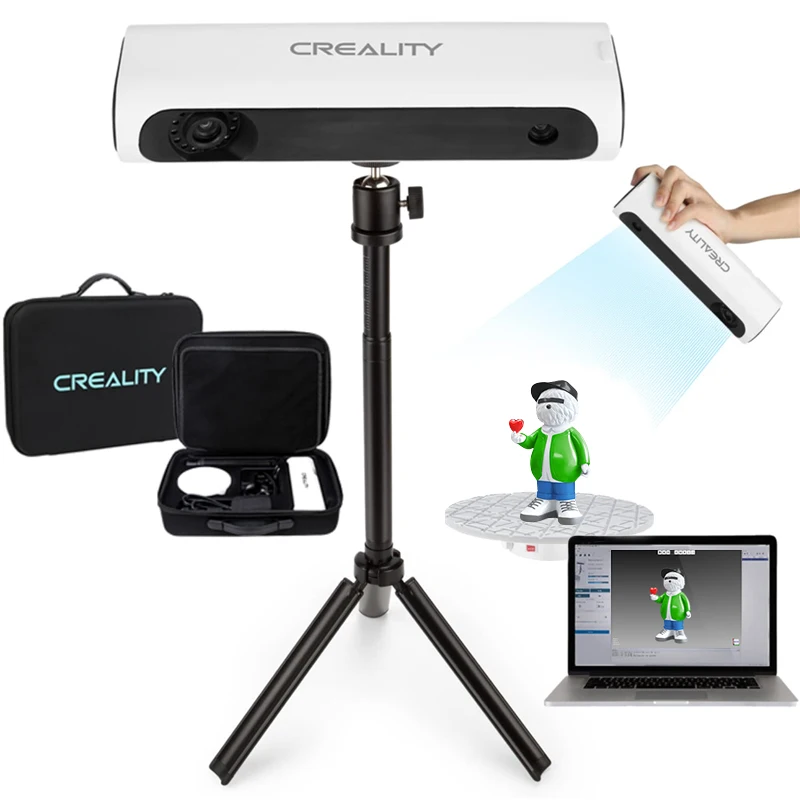
3D Scanner User Expectations: Sense is a gift for all beginners in the field of 3D scanning. Because of the device they can get access to various features that aren’t accessible otherwise.
The Verdict
The most important highlight of Sense is the Prime Sensor that it uses for ensuring the resulting scan is of decent resolution.
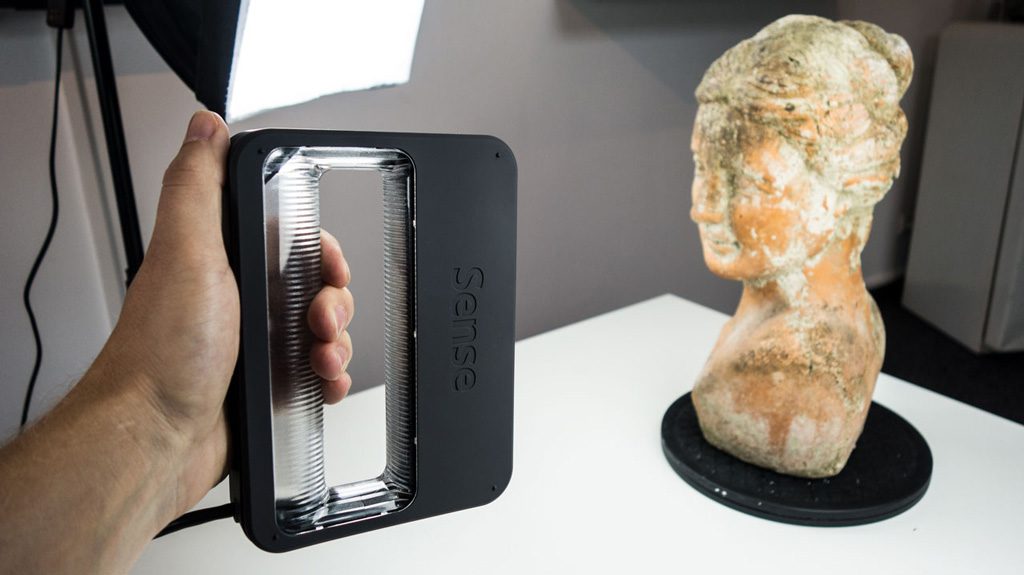
Note that the component is capable of delivering fine detail like MakerBot Digitizer or the David SLS-1. The scanner is best suited for scanning subjects like people and statues in particular.
The end-scans are worthy of creating a 3D model out of them. Also, the 3D scanning process is extremely smooth and easy. It produces attractive 3D objects that can not only be easy but also quickly 3D printed.
3DSystems Sense 3D Scanner Review: Specifications, Reviews,
The 3DSystems Sense 3D Scanner is an inexpensive handheld model with outstanding performance. It is no coincidence that we chose her in order to prepare a new interesting review with bright informative photos, because her popularity is growing exponentially. It is ideal for teaching and hobby, design and architecture, and color scanning of large objects, including the human body. According to professionals, this is a productive device that creates high-quality scans. According to beginners, it is an easy-to-understand model with unified characteristics.
Features of the scanning module 3DSystems Sense
In the segment of manual equipment, the 3D scanner 3Systems Sense can rightly be considered unique. It runs on intuitive software and is equipped with excellent stuffing. Light-sensitive optics capture the slightest changes in the geometry of any object that you work with, while the device does not need direct contact with it.
Design and exterior
It's a paradox, but from a distance this device can be confused with a large stapler, its body is so compact and simple in appearance. Dimension is only 129x128x330 mm, it is comfortable to hold in your hand also due to the minimum weight of 700 g. This is important when scanning large objects with complex reliefs and textures, which this kid captures with enviable accuracy.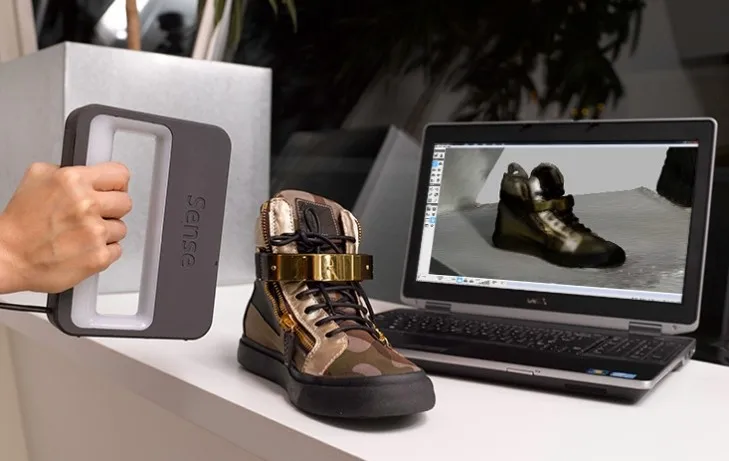
Only one cable is used to connect to a laptop, but due to its short length, the PC must be held almost all the time. At the same time, if Windows 10 is installed on any compatible tablet, the problem is automatically fixed.
Key features
An overview of all the performance features of 3DSystems Sense can be found on our 3DMall website, but we cannot ignore the most basic of them:
- objects with a complex surface (saturated black, shiny, etc.) are best scanned almost closely;
- within a second the device makes and processes 30 frames;
- scanning area is from 200x200x200 to 2000x2000x2000 mm with an accuracy of 1 mm;
- texture capture rate - 1920x1080 pixels.
Equipment
Equipment 3Systems Sens is concise and standard for models of this class. It includes the scanning module itself, software, a cable for connecting to a laptop or PC, as well as a user manual. The packaging is a simple light-colored box with functional holes to accommodate the scanner and cord.
Setting operating parameters
At the very first stage, you should install the software, which is expected to have the same name as the scanner itself - 3DSystems Sense. The first launch implies the need to activate the device for security purposes after pre-registration on the official website of the brand. Please note that the equipment is bound to the PC that was used to activate the module; only specialists from the manufacturer can remove it.
Immediately after starting the program offers to choose one of 3 operating modes:
- object scanning;
- human body scan;
- face scan.
In the first mode, it is imperative that the object is stationary, this is the only way to achieve maximum accuracy of prints. In the process of work, a small problem may arise - additional points may not be added in real time when creating each next frame. In this case, you can try to mount the device on a tripod and save images frame by frame - the scanning speed will decrease slightly, but the quality will be incomparably higher.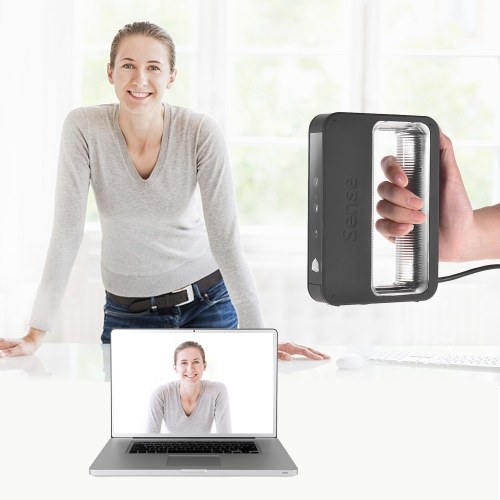
When scanning a face, frames are stitched in real time, while the program signals you how to improve the quality of the process - slow down or stop completely. Body scanning implies the ability to quickly stitch together large scans made from a sufficiently large distance.
Texture can be applied automatically or during scan processing, tools such as square, brush and line are provided for editing the model.
Installation and First Steps - Documentation Artec Studio 12
System Requirements
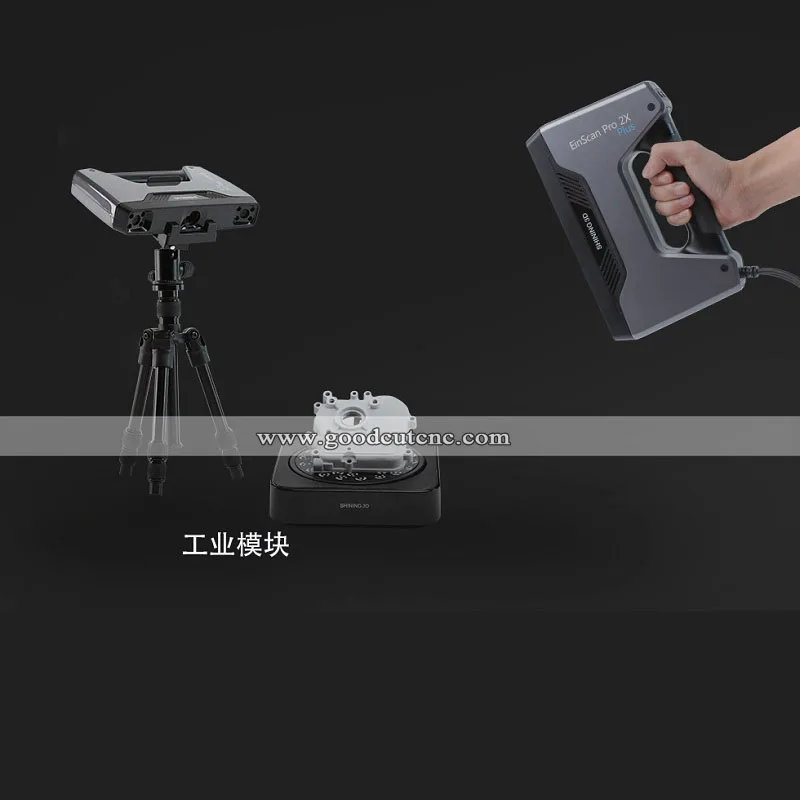
To be used with Artec 3D scanners, your computer must meet the system requirements.
Note
Third party scanners only available in Artec Studio Ultimate!
Also note the following:
- Real-time Merge Mode
-
(Real-time Fusion Scan): Make sure your graphics card has at least 1 GB VRAM or your Intel HD Graphics 4600 series chipset or higher (see the FAQ article for details).
- Using the Intel RealSense Camera
-
implies that your computer is running Windows 8 (Windows 10 for SR300) with at least 4th generation Intel Core processor and USB3.0 port
- Using Kinect ver. 2
-
requires a computer running Windows 8, a 3.1 GHz or faster processor (two physical cores: yes logical cores per physical) and a USB3.0 port (Intel or Renesas chipset)
- Using multiple scanners
-
(Multi-Camera) - Your workstation must have as many independent USB controllers as there are scanning devices. You can get the required number of USB controllers by installing PCI/PCI-Express USB cards.
User account
To install Artec Studio and receive timely updates, register a free account on my.artec3d . Registration is also required to activate the Artec 3D scanner. In addition, the site allows you to track your 3D scanners and software.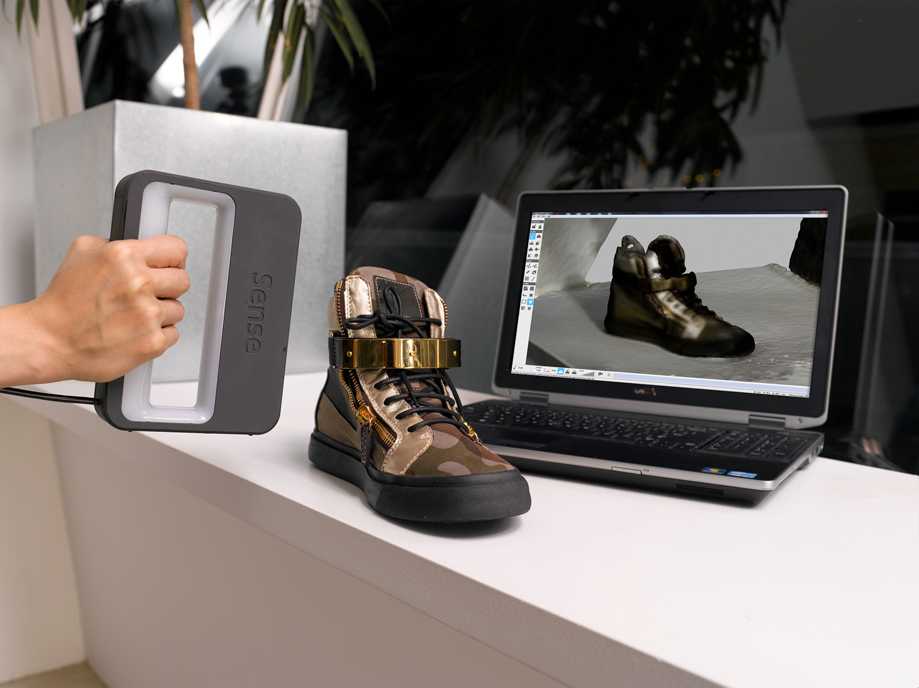
The my.artec3d account is valid for all Artec sites and services (including viewshape.com ).
Fig. 21 Start screen my.artec3d
To register, follow these steps:
-
Go to the site my.artec3d and click Sign up
-
Fill in all fields in the registration form and click Create account
-
Receive an enrollment email containing a confirmation link.
-
Click on the link or copy it to your browser to confirm your registration. Go directly to your account at my.artec3d .
Activating the scanner
Before using the Artec scanner, it must be activated and linked to an account on my.artec3d . These operations are performed using the Artec Installation Center, a separate utility available for download from my.artec3d . If you are a new user and you do not have Artec Installation Center installed yet, please read below How to start Artec Installation Center.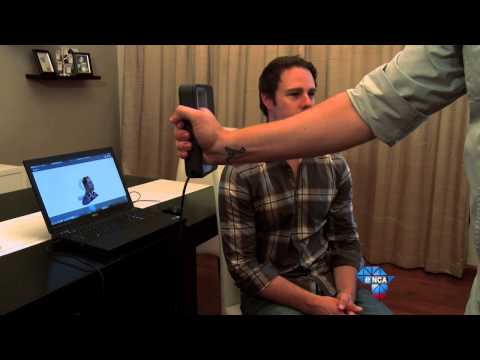 Otherwise, go to Activating the 3D Scanner using the Artec Installation Center.
Warning
Do not connect your scanner to the USB port until the Artec Installation Center is complete.
Starting Artec Installation Center
Make sure your computer is connected to the Internet before using Artec Installation Center. Any computer with a USB2.0 or USB3.0 port will do. If necessary, you can install and activate Artec Studio on another computer. Also make sure you have an account at my.artec3d ; if not, go to User account.
-
Log in with your account on my.artec3d and download Artec Installation Center. A link to download the installer executable file can be found on the home page of the site.
-
When the download is complete, open the folder containing the installer executable, run it, and follow the instructions on the screen. Once Artec Installation Center is installed, a window will open asking for your email address and password.
 For authorization, use your account details on my.artec3d , as shown in Fig. 22.
Fig. 22 Artec Installation Center authentication
Activating the 3D scanner using Artec Installation Center
To activate the 3D scanner using Artec Installation Center, make sure that the application is installed on your computer and that it is connected to the Internet.
-
Launch Artec Installation Center (via the Start menu: click Start → All Programs → Artec Group → Artec Installation Center ), a window will open as shown in Fig. 24.
-
Connect your Artec 3D scanner to your computer and wait while Windows detects the device and installs the necessary drivers. A message similar to the one shown in Fig. 23.
-
Go to the Artec Installation Center window, click the Update button and wait until the new scanner appears in the Scanners section (see Figure 24). To activate your 3D scanner, click the Activate button (to the right of the scanner's serial number).
 The scanner status will be changed to Activated as shown in Fig. 25.
Fig. Figure 23 Windows message about device installation
24 Activate button for 3D scanner
25 3D scanner activated
Installing Artec Studio
There are two ways to download and install Artec Studio:
-
Via Artec Installation Center (either during installation or by clicking the Install button in the application, as shown in Fig. 26 )
-
From the site my.artec3d : log in to the site, go to the page My applications and download the executable file (see Fig. 27)
Fig. 26 Artec Installation Center is ready to install Artec Studio
Pic. 27 Part of page My applications on my.artec3d
If you downloaded the executable, run it to start the installation; otherwise, click the Install button in Artec Installation Center. To continue the installation, click Next, the License Agreement will open (see Fig. 28). After reading its text, confirm your consent to the installation by clicking on the Yes button.
Fig. 28 License agreement
Pic. 29 Installation location
Fig. 30 Selection of installed components
31 Dialog for installing drivers for third-party 3D sensors
Pic. 32 Artec Installation Center with activation window Artec Studio
33 Completing the installation
Specify the path to the installation directory (it is recommended to use the default one), as shown in Fig. 29. Then go to the window for selecting installed components (see Fig. 30):
| Desktop shortcut: | |
|---|---|
| creates an icon on the desktop | |
| Start-menu shortcut: | |
| adds a shortcut to the Start menu and Quick Launch | |
| English manual: | installs English user manual |
| Install Artec Scanner Drivers: | |
|
| |
| PrimeSense Carmine / Asus Xtion drivers: | |
| installs drivers for PrimeSense/Asus 3D sensors | |
| Intel RealSense Runtime: | |
| installs drivers for Intel RealSense cameras | |
By default, the application creates all the shortcuts listed above and installs the user manual and drivers for Artec 3D scanners. Click Next to continue with the installation.
If you are just starting the installation of Artec Installation Center, an authorization window will appear, as in Fig. 22. If you are not connected to the Internet, see Offline Activation for a description of the Artec Studio offline activation process.
If you have not previously associated your account with the computer on which you are installing Artec Studio, an activation confirmation dialog will open (see Figure 32).
Once the installation is complete (see Figure 33), the installer will prompt you to launch Artec Studio.
Offline activation
If the computer on which you are installing Artec Studio is not connected to the Internet due to security or other reasons, you can use the offline activation mechanism to activate the program.
Note
Artec Studio copies activated offline cannot be subsequently deactivated. Therefore, offline activation is recommended to be used only in case of emergency.
Note
Before performing offline activation, you need to make sure that the scanner (see Scanner Activation) and Artec Studio are linked to your account on my.artec3d .
Offline activation requires the following:
-
Another computer connected to the Internet
-
Artec Studio installation file (preferably downloaded from my.artec3d )
-
Flash drive or other storage device for transferring files from a computer with an Internet connection to a computer where Artec Studio
will run
Fig. Fig. 34 Authentication window in Artec Installation Center
35 Offline activation window
Installation and activation process:
-
Start Artec Studio 9 installation process0003
-
During installation, the registration data entry window will open, as shown in Fig. 34. Click Continue Offline...
-
In the offline activation window (Fig.
 35), click Save... and save the file with the activation ID to a flash drive or other media.
 -
On a computer connected to the Internet, log in to your account at my.artec3d and open the section My applications .
-
Find Artec Studio and click on the appropriate link. A new page will appear as shown in Fig. 36.
-
Go to the link Activate application offline , then click the Select file button and specify the path to the file with the activation ID. Next, click Activate.
-
A new window will open where you can download the offline activation file. Save it to a flash drive.
-
Return to the computer on which Artec Studio is being installed, click the Activate and continue button and specify the path to the offline activation file.
Note
As soon as you create an offline activation file, my.artec3d will decrease the number of activations available to you by one.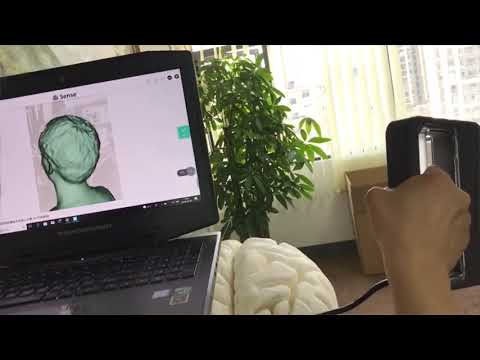
Upon completion of all the above steps, a copy of Artec Studio will be activated and all Artec 3D scanners will be installed on a computer that is not connected to the Internet.
Fig. 36 Offline activation on my.artec3d .
Note
If you purchase another Artec 3D scanner in the future, you will need to reinstall the application and go through the offline activation procedure again, as described above, in order to copy all the data files of the new scanner to your computer.
Deactivation
It is important to note that the deactivation procedure is only available for computers on which you have activated Artec Studio online, as described in Installing Artec Studio. Unable to deactivate Artec Studio application activated offline.
Note
The number of possible deactivations may be limited, so deactivate Artec Studio only if you really need to transfer the application from one computer to another.
Fig. 37 Deactivating Artec Studio
To deactivate the license on your computer, do the following:
-
Make sure your computer is connected to the Internet.

-
Go to Control Panel → Uninstall programs and select Artec Studio. The uninstall process will start.
-
A dialog will open as shown in Fig. 37. Check the box I understand. Deactivate Artec Studio on this computer.
-
Click Next to complete the removal process.
Managing Artec 3D scanners and products
Artec Installation Center is used to manage applications and scanners assigned to your account.
This is a feature rich application for Artec Studio that connects to my.artec3d and helps you install new applications, download updates, and manage your 3D scanners. To launch Artec Studio for the first time, you need to log in with my.artec3d . After this one-time authentication, you won't have to enter your email address and password every time you launch the app.
When Artec Studio is launched on the Artec Installation Center server, it checks for updates, and if it is available for any of the installed products, a message similar to Figure 1 is displayed.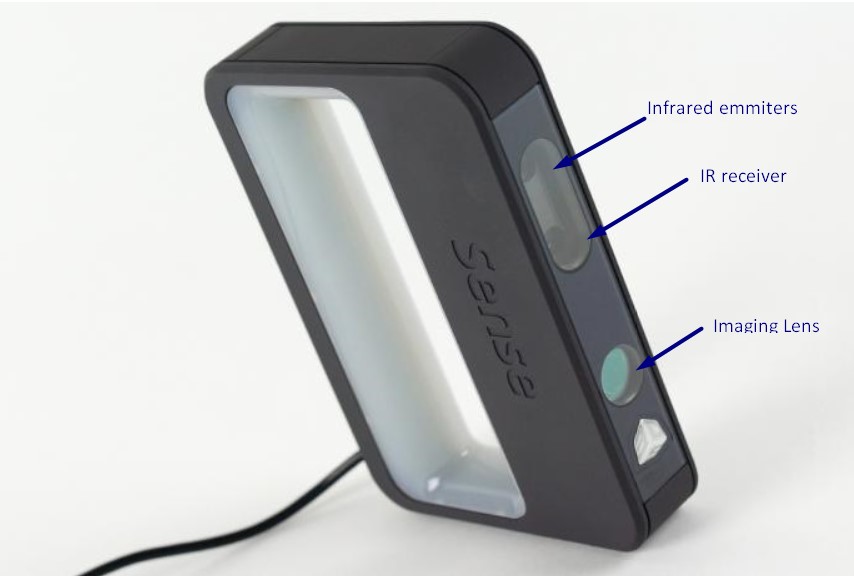 38.
38.
Fig. 38 Artec Studio update available for download
After authorization, Artec Installation Center will display information about your products.
Fig. 39 Artec Installation Center.
Section Applications Artec Installation Center provides information about all your software products:
-
List of available applications
-
Activation status of each application (activated or not)
-
Number of available and active activations
-
Activate, Install or Update buttons for the actions currently available to you:
-
Install - displayed if the program is not installed on the computer (usually installation means activation)
-
Activate - displayed if the program is not currently activated on the computer. Activation reduces the number of available licenses by one per computer.
-
Update - displayed if a new version of the installed program is available for download
-
Section Scanners contains a list of 3D scanners that you own or have connected to your computer.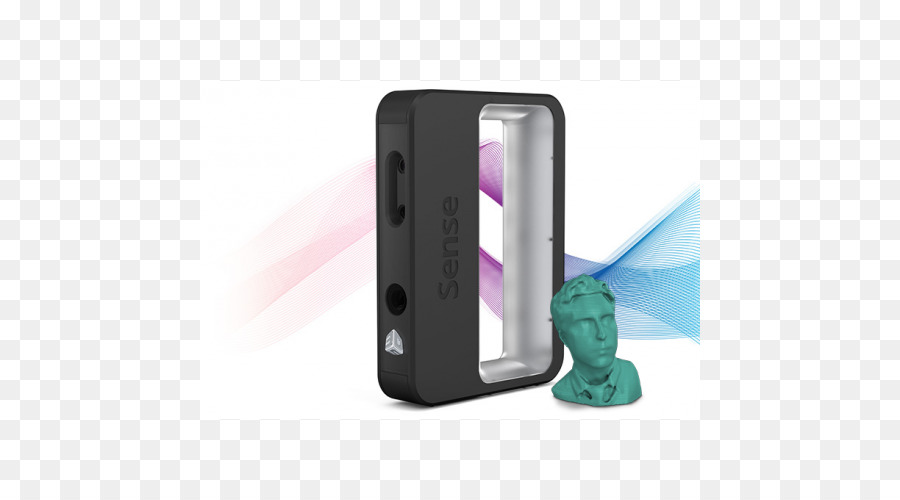 In the first case, the status Activated or the Activate button will be displayed, in the second case, the status Rented or the Rent button will be displayed.
At the bottom of the Artec Installation Center window there is a row of buttons:
- Update
-
- Updates the information displayed by Artec Installation Center
- Close
-
- Exit Artec Installation Center
Getting Started with Artec Studio
Main Window
You can launch Artec Studio in the following ways:
After launching Artec Studio, the main window will open, allowing you to perform all operations on scans and models. The main application window is divided into several areas (see Fig. 40): window 3D view , Side panel , left pane (pictured shows Commands pane open ), Workspace pane and Log window , and menu bar and status bar (not marked in the picture). Other windows may open during operation.
Fig. 40 Main window Artec Studio
All 3D data is displayed in window 3D view . You will constantly use this window. When you start the application, a coordinate grid and coordinate axes appear in the center of the window. This global coordinate system will contain your scans and models.
to the left of the window 3D type is the side panel with icons of various operating modes of the application, such as: shooting , Autopilot , Editor , Team , Distribution of holes , Distribute , Multi , Texture , Viewshape . All modes of operation are mutually exclusive, that is, at any given time, the application can only work in one of the modes, except for Autopilot . Some modes block the panel Workspace . The main operating modes are: Survey , Autopilot , Editor , Commands and Assembly .
At the top of the window 3D view there is a context-sensitive toolbar 3D Tool , which includes the following commands:0104 , Color , Render Mode , Reverse . In the mode, the editor appears additional tools: through selection , Positioning , Move/rotate/scaling , The smoothing brush , Lastik , Restoration brush and brush and brush and brush and brush and brush and brush and .
Panel Workspace is used to display and manage all the data loaded into the application. Here you can find your scans, as well as project management commands such as save, delete, move, rename. hidden panel Workspace can be opened again using the button in the upper right corner of window 3D view (see Fig. 41).
Fig. 41 Button for displaying the panel Workspace
At the bottom of the application window there is a panel Log . The log is a report of the program about the executed commands, indicating the time of the operation and additional information. The log displays error messages and diagnostic messages issued by the algorithms.
The status bar contains information about the amount of free RAM and currently used by Artec Studio. The status bar also displays information about the progress of the current active task, such as the operation of algorithms, export of models and scans, and any other.
Basic settings
In order to get into the application settings dialog, select the item Settings... ( Settings... ) in the menu File ( File ). The settings window has several tabs with different groups of application settings. Switching between tabs is done by clicking on the icons at the top of the dialog box. A more detailed description of the settings can be found in Settings.
Fig. 42 Language selection in the Settings dialog
On the tab Resources you can set the maximum number of changes that the program will save, or specify the maximum amount of saved history (in megabytes).