3D printer mesh bed leveling
Mesh bed leveling | Prusa Knowledge Base
Relevant for
:
MK2.5MK2.5SMK2SMK3MK3SMK3S+MMU1MMU2S
Last updated
12 days ago
This article is also available in following languages:
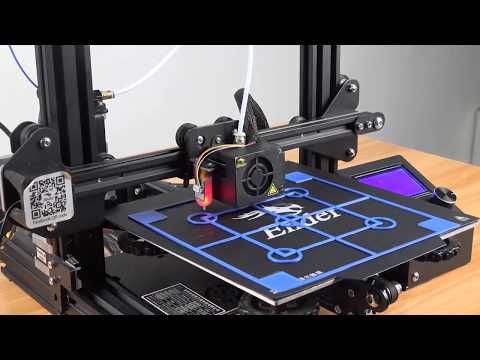
The P.I.N.D.A. or SuperPINDA sensor will go through a number of points, in a grid pattern, spread across the build-plate (whether it is a powder-coated or smooth PEI sheet does not matter), and measures the distance to the sheet. These points are interpolated and used to create a virtual mesh of the bed. During printing, if the bed is slightly warped, the sensor will still precisely follow the surface according to its measured mesh. This procedure is performed before every print. It is also the same procedure that happens in the second round of XYZ-calibration.
You can initiate the Mesh bed leveling independently from Calibration -> Mesh bed leveling, on the LCD menu.
The StallGuard for the Z-axis is active during the mesh bed leveling. In case the nozzle crashes into the bed before the PINDA sensor triggers, the calibration process is interrupted and the user is asked to check the nozzle for any kind of debris.
Mesh bed leveling settings
This feature is available starting from firmware 3.7.0.
The Mesh bed leveling settings can be found within Settings - Mesh bed Leveling, on the LCD menu. There you have the following options:
- Mesh (3x3 - 7x7)
- Z-probe nr. (1 - 3 - 5)
- Magnet comp. (ON / OFF)
Mesh: The default grid density is 3x3 (9 points). However, if you still experience uneven first layer adhesion, you can increase the density in Settings - Mesh bed leveling - Mesh to 7x7 (49 points).
Z-probe nr.: Changing the Z-sensor nr. you change how many times will each point be measured. We suggest either 3 or 5 measurements per point since the final value is calculated as an average value. Changing these settings affects how long will the Mesh bed leveling procedure takes to complete.
Magnet comp.: With 7x7 Mesh bed leveling, you can choose whether or not to use Magnets compensation. 11 of the 49 points are so close to magnets, that the reading can be off by as much as 80μm (microns). Magnet compensation ignores readings from these 11 points and calculates them from the surrounding points. We suggest leaving this function on.
Enforcing the Z-calibration
If the mesh bed leveling is interrupted during the procedure, before a print, a message will appear on the screen stating "Enforcing the Z-calibration" and the printer will re-home and run through the procedure again. This can occur if there is debris on the nozzle, pushing the bed down when probing or if you touch and press the bed while it is probing. This will bring the deviance above a certain threshold and it will simply make another attempt to run the Mesh Bed Leveling. This is to avoid starting it from the menu again if the problem was simply an accident. If the problem remains, it will repeat this procedure three times before canceling the print.
Troubleshooting
Please see our dedicated article P.I.N.D.A./SuperPINDA Sensor testing to resolve any issue.
Automatic Bed Leveling | Marlin Firmware
Automatic Bed Leveling (ABL) helps improve the quality of printing and bed adhesion by taking several measurements of the bed surface and then adjusting all movement to follow the tilt or contours of the bed. Most beds appear quite flat and even, but even when the bed is flat, there may be irregularities due to tape or other matter on the surface. Or there may be irregularities in the bed or nozzle height due to mechanical flaws. ABL is able to compensate for all these kinds of height irregularities.
ABL requires a Bed Probe to automatically measure the bed height at various points. Fortunately, probes come in many varieties, so there’s a probe for every kind of printer. One popular solution is to use a mechanical switch mounted on a servo arm. The popular BLTouch probe emulates a servo but uses a retractable pin. There are infrared and inductive probes that trigger at some known distance from the bed. The nozzle itself may be used by mounting it on a spring-loaded carriage that presses a switch, or on a floating carriage that opens a contact.
Note that Marlin now includes a PROBE_MANUALLY option (described below) so if you don’t have an electronic probe you can still use all forms of ABL.
- Three-Point: Probe the bed at 3 arbitrary points and apply a matrix to the bed’s overall tilt.
- Planar Grid: Probe the bed in a grid and (like three-point) apply a matrix to the bed’s overall tilt.
- Bilinear Grid: Probe the bed in a grid and apply mesh-based compensation. Best for an irregular bed.
- Enable one of the automatic bed leveling options:
AUTO_BED_LEVELING_3POINTAUTO_BED_LEVELING_LINEARAUTO_BED_LEVELING_BILINEAR
Unless you know you have a very flat bed, you should always use AUTO_BED_LEVELING_BILINEAR. And if you have an LCD and enough program memory, you should also enable
 LCD_BED_LEVELING to add a Bed Leveling sub-menu to the LCD.
-
Configure the points (for 3-point leveling) or boundaries (for the others) where probing will occur. For the grid-based leveling options specify how many points to probe in X and Y. These may be set to different values, but for a square bed they should be equal.
-
For testing, enable
DEBUG_LEVELING_FEATURE. With this option enabled, useM111 S32to turn on detailed logging of homing and bed leveling. This will causeG28andG29to report everything they do, step-by-step, and can be indispensible for troubleshooting when things go wrong. -
Upload Marlin to the board and get ready for that first test. As always, do
M502followed byM500to ensure that the configured “default” settings are stored in the EEPROM. Otherwise, older saved settings might be loaded and used.
Begin with M111 S247 for maximum logging. Before leveling the bed the machine must be homed with G28. This establishes the current position and makes sure that the carriage won’t try to move outside the physical limits.
Begin Automatic Bed Leveling with a plain G29 command. This will use the settings as configured. Stay close to the power switch in case the machine tries to move out of bounds. For the intial test we just want to determine whether probing works.
If all goes well, move the nozzle down close to the bed and use a piece of paper to test the nozzle height. The paper should slide with a little bit of catch, but not too much. Now move the nozzle to different points on the bed with G1 and re-test the height with the paper at each point. The feel should be close to the same at all points. If you find that the leveling isn’t very accurate, use M48 to test the accuracy of the bed probe.
After a G29 the leveling data is only stored in RAM. You have to use M500 to save the bed leveling data to EEPROM, otherwise the data will be lost when you restart (or reconnect) the printer. Use M502 to reset the bed leveling data (and other settings to defaults). Use M501 to reload your last-saved bed leveling from EEPROM. This is done automatically on reboot.
After a G29 bed leveling is automatically enabled, but in all other situations you must use M420 S1 to enable bed leveling. It is essential to include the command M420 S1 in the “Start G-code” in your slicer settings. If you have no bed leveling, or if there is no leveling data, then this command is simply ignored.
Marlin now includes a PROBE_MANUALLY option as a kind of faux probe. With this option enabled you send G29 repeatedly, once for each point, until all points have been measured. In-between points you must manually adjust the Z axis with G1 or your host software, feeling under the nozzle with a piece of paper or feeler gauge. Once the height feels right, send
 G29 to move to the next point. This may take a while! When all points are done, be sure to save the results with M500.
The LCD_BED_LEVELING option makes manual leveling a lot faster and easier by providing a guided procedure and direct Z adjustment.
For even more exciting details about ABL, see:
G29ABL (3-Point)G29ABL (Linear)G29ABL (Bilinear)
Free 3D file Ender3 v2 - manual leveling of mesh bed 5x5
The best files for 3D printers in the Tools category
MP3 Bike Horn
Free
SPIDERMAN - COOKIE CUTTER
1,45 €
Christmas Antlers
Free
Tarot Motor Mount
Free
Nixie Clock "Sputnik" GPS
Free
Door Opener Covid-19
Free
Zenmuse gimbal mount
Free
Pingpong ball wall holder
Free
Bestsellers in the Tools category
Business card embossing system
3 €
ENDER 3 S1/PRO SPRITE, V3 AIR DUCT 5015 OR 4020
€2. -fifteen% 2.12 €  50
50
Printer boxes for Ikea Lack Table
1,99 €
PRECISE DIAL INDICATOR 3D PRINT DIY
1.91 €
PRECISION CALIPER 3D PRINT DIY
3,12 €
Armadillo - flexible wire conduit
€1.73 -fifty% 0.86 €
3D printed wave transmission (harmonic drive)
€4.99
well designed: Hemera fan duct
2.50 €
Filament shielding
2.80 €
telephone ring holder
0,90 €
Fire hydrant storage container
1. 93 €
93 €
Paint stand with scissors
5.33 €
UNIVERSAL BED LEVELING INDICATOR FOR VERY ALL PRINTERS
2,89 €
SUPERBOX
1,50 €
PET-Machine, make your own plastic bottle filament at home!
50 € -70% 15 €
INDICATOR FOR BETTER BED LEVELING FOR ENDER 3 PRO
2.89 €
Do you want to support Cults?
Do you like Cults and want to help us continue our journey on our own ? Please note that we are a small team of 3 people , so support us at maintaining the activities of and creating future developments of is very simple. Here are 4 solutions available to everyone:
-
AD: Disable AdBlock banner blocker and click on our banner ads.
-
AFFILIATION: Shop online with our affiliate links here Amazon.
-
DONATIONS: If you want, you can donate via PayPal here.
-
* INVITE FRIENDS: * Invite your friends, discover the platform and great 3D files shared by the community!
Best Files for 3D Printing 3d Printing Tests・Cults
print precision
free
Sample Card 2 - BLUE
Free
Sample Card 2 - SKY BLUE
Free
Tower ASA Tem - 240° - 265°
Free
Bend test
Free
Thread_Print_Test v2
Free
Settings and firmware TwoTrees Sapphire S Cura4.
 1 S3D LerdgeX
 Free
Calibration Wafer
Free
1 to 4 wall flow test (0.4 to 1.6 mm)
Free
Ender 3 Level simple 0.28 initial layer simple test
Free
temperature tower
free
Beveled bed skirt
Free
ASA - Fiberlogy Temp Tower (255°-270°)
Free
Sparkmaker v4 resin tower test
Free
Minecraft Calibration Cubes
Free
Dart Replicator
Free
Define print resolution in design
Free
Kiwi3D Individual Temperature Calibration Tower
Free
Concentric Ring Fit Test
Free
Double Head Calibration Plate - Control Board
Free
Bridge and canopy testing
Free of charge
Calibration part for 3D printer
Free
Interlocking Calibration Clamps - Curves and Straight Lines
Free
Accuracy block
Free
Close tolerance calibration clamps
Free
Individual overhang test 5-35 degrees
Free
Door temperature
Free
TorreDeTemperaturaABS
Free
Microbench
Free
Torture Twist Fidget Star
Free
ty
Free
Suit cover
Free
Z-Axis Layer Consistency Test Print (can be used as hanger)
Free
Manual test Revopoint Mini
Free
MP MINI PLA dehydrated
Free
Twin tower temperature check
Free
Heattower1
optiFree
Adjustable intelligent temperature tower + injector script
Free
Wall box 24.