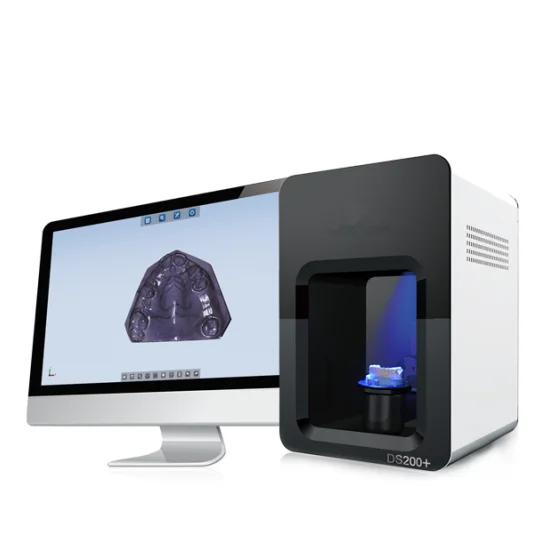
3D scanner for cad
The Best 3D Scanners and Scan-to-CAD Softwares
Computer-aided design (CAD) is defined as the use of computers to assist in the creation, modification, or optimization of a design. CAD software enables designers and engineers to model shapes and add features with the ultimate goal of producing parts. The CAD process, however, is a closed digital procedure, meaning that all of the functions happen digitally inside the computer. But how do we get into this process, knowing that, of course, we cannot insert a physical object into a computer?
New parts can be designed entirely and directly in CAD software or they can be hand-sculpted using clay or other materials. Obsolete parts and damaged components must not be forgotten, as they often need to be updated, replaced, or fitted into a new assembly or environment. Thus, a bridge between the physical and the digital world is necessary to transition from an existing object to a CAD model. The process of converting a physical object into a virtual 3D model is called reverse engineering, and the bridge between worlds can be crossed thanks to 3D scanning.
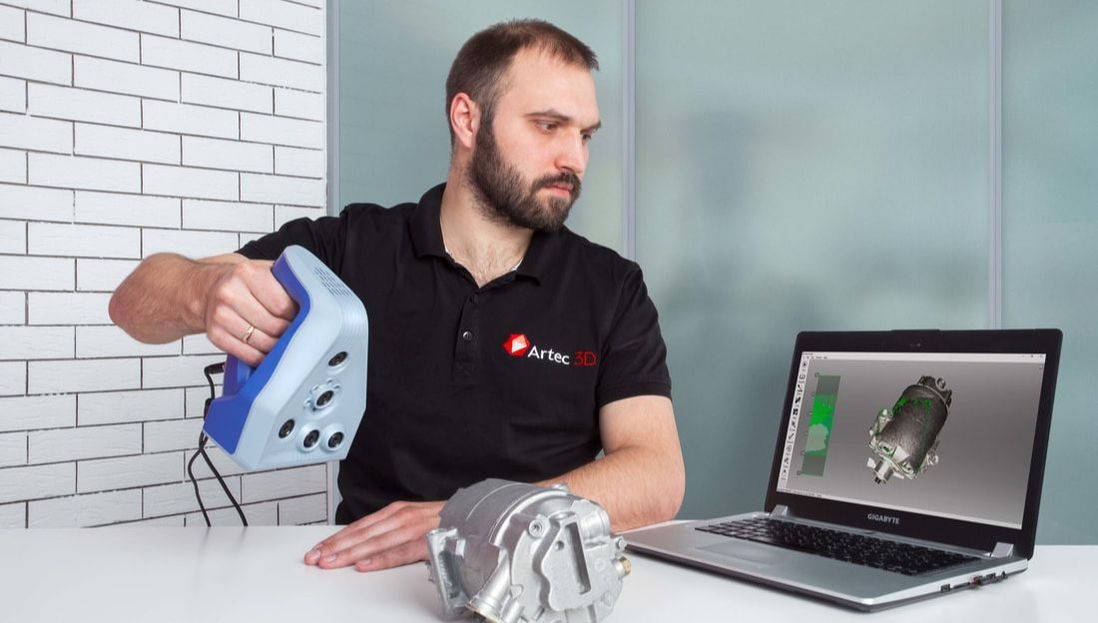
When designing new products or adapting existing parts, engineers and designers like to use 3D scanners as a starting point for digitizing clay models or measuring physical objects in order to reconstruct their 3D models and integrate them into their designs.
But the role of 3D scanners does not stop at the design stage. They can be used throughout the entire product development process. After manufacturing, 3D scanning participates in quality control by checking that the part is accurate and conformed to the CAD model. Next, as parts are used, 3D scanning can reveal if there are deformations, showing engineers and designers where reinforcements, improvements, or variations should be added in the next version.
In this post, “3D Scanner for CAD” we want to guide you through the process of reverse engineering and demystify the process from a 3D scan to a CAD model. We also want to address the quality of 3D models generated with 3D scanners. Finally, we wish to help you choose the best 3D scanner and Scan-to-CAD software based on your needs and budget.
- 1 The Way to CAD
- 1.1 Can a 3D Scanner Directly Output a CAD model?
- 1.2 How Good are Generated 3D Models, and is Post-Treatment Required?
- 2 Selection of 3D Scanners and Scan-to-CAD Software
- 2.1 Do You Need a Stationary or Mobile 3D Scanner?
- 3 3D Scanners for CAD and Reverse Engineering
- 4 Ways from 3D Scan to Final CAD Model
- 5 Benefits of 3D Scanning for CAD Designers
Let’s say you have to replace a damaged component or update an obsolete part for which the original CAD model is nonexistent or inaccessible. So, you have to create a new CAD model for manufacturing. You can either start your CAD design from a blank canvas, which is likely to be a long, overwhelming iterative process, or you can leverage the data you already have from the existing object and use that information as a foundation for your design, which will make your work more accurate and effective.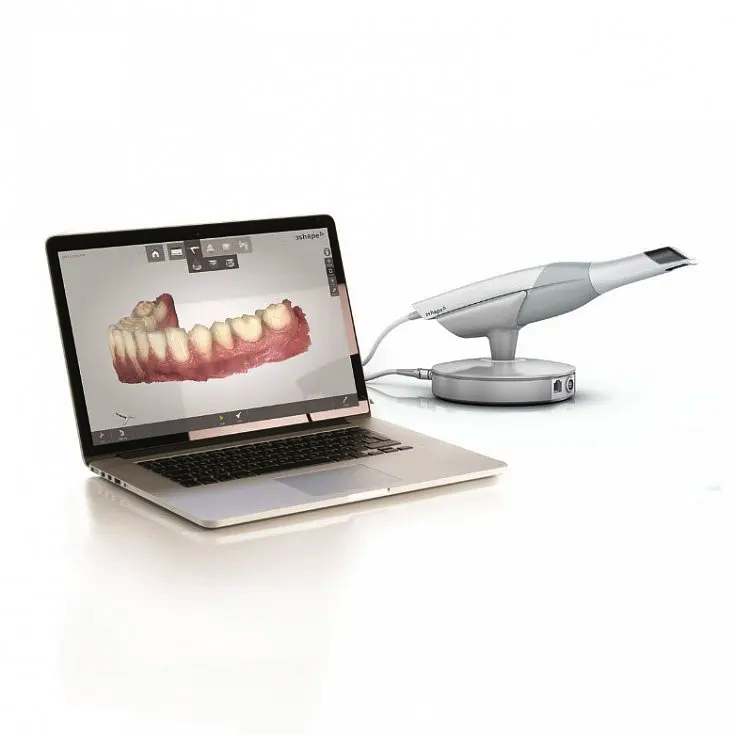 This avenue involves 3D scanning.
Here are the typical steps to create a virtual 3D model from an existing physical object:
- Obtain the 3D scan mesh (STL) by 3D scanning the part.
- Extract dimensional information, such as geometries, dimensions, and cross-sections.
- Import models into CAD software and proceed with CAD modeling.
- Compare the resulting CAD model (STEP or IGES) with the initial 3D scan mesh.
- Analyze feedback and use the comparison to optimize the CAD reverse modeling.
- Export the final CAD model of the part for manufacturing.
Can a 3D Scanner Directly Output a CAD model?
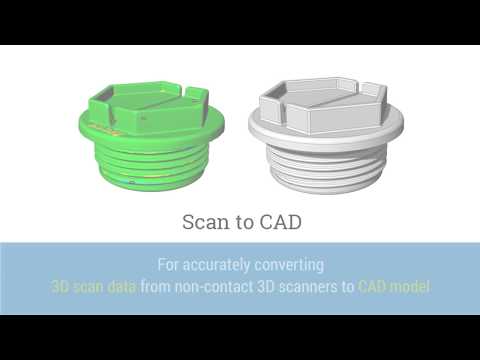
In short, the 3D scanner produces a mesh, or point cloud, which provides all of the needed dimensional information about the part’s surface geometry. This mesh can then serve as a template to sketch the new CAD model. CAD models are usually created using non-uniform rational basis spline (NURBS), which consists of points connected by curves, while 3D scans are typically exported as meshes, which are made of millions of small triangles.
Thus, a 3D scanner does not directly output a CAD model. An intermediate Scan-to-CAD modeling stage is necessary to bridge the gap and convert non-editable triangles into editable NURBS surfaces, with which you will be able to create a solid CAD model with editable features.
How Good are Generated 3D Models, and is Post-Treatment Required?
Based on your needs, there are different methodologies available to build a CAD model from an existing object. You may want to (1) reproduce a CAD model with accurate dimensions and precise angles to develop and manufacture new parts, or (2) reproduce an exact copy of a part (usually made of organic shapes) in its current condition. The first possibility creates a design intent and outputs a parametric model. The second option provides an as-is reproduction and outputs a surface model. Hybrid models also exist, which combine both methods for different areas of the object.
To get a parametric model from a 3D scan mesh, you first need to understand how the object was conceived. To do so, you must extract information from the scan data by creating entities, such as planes, cylinders, or cross-sections, on the mesh. These operations take place directly in Scan-to-CAD bridge software, such as VXModel. The parametric model and its entities can then be transferred to your preferred CAD software.
Similarly, to get a freeform surface model based on an optimized 3D scan mesh, you need to recreate the exact shape of a scanned object. To do so, you must improve and optimize the mesh by filling holes, smoothing surfaces, and trimming boundaries. Then, on the optimized mesh, you can create accurate freeform surfaces (NURBS) with control points. Again, all of these operations happen directly in the Scan-to-CAD bridge software before importing the freeform surface model into CAD software.
The 3D scanner does not generate NURBS surfaces (STEP or IGES) directly, but the Scan-to-CAD bridge software can. Nevertheless, the 3D models must then be imported into CAD software to get a parametric model for design intent.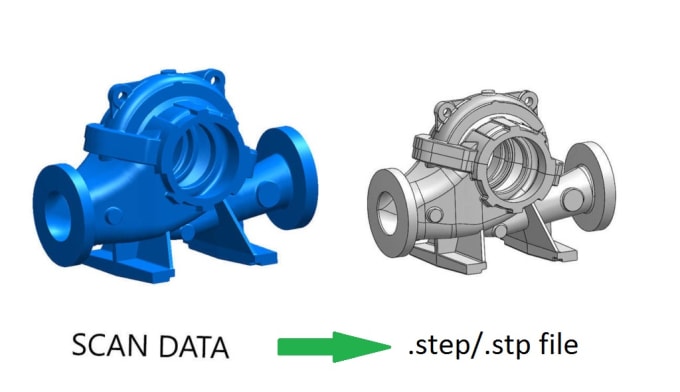
Prior to choosing a 3D scanner and Scan-to-CAD software, you must identify your needs.
- What is the size of the part you want to scan?
- Is its geometry simple or complex?
- Can you easily move the part to the scanning session?
- What accuracy and level of detail do you need?
- What is your budget?
Do You Need a Stationary or Mobile 3D Scanner?
Stationary scanning systems are an option for limited budgets, but—as their name indicates—they require the part to be brought to the system, and they are mostly suitable for parts that are limited in size. Mobile scanners, which include both articulated arms and handheld scanners, are usually more accurate and better suited for large parts, and—as their name suggests—they go to the part rather than the other way around.
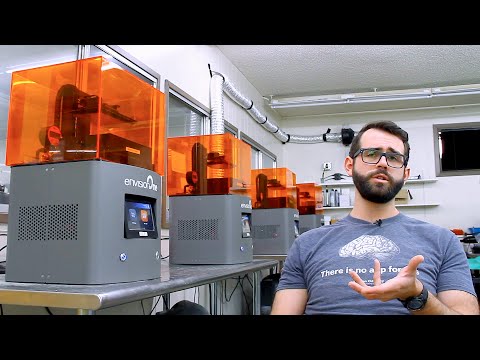
3D Scanners for CAD and Reverse EngineeringCreaform offers a variety of handheld 3D scanners, but three series stand out for product development and reverse engineering applications. Based on your budget and specific speed and accuracy requirements, a Creaform 3D scanner can certainly meet your needs.
The HandySCAN 3D | SILVER Series offers the best value for the money for technology innovators who wish to develop better products that are more suited to customer needs. This proven and trusted technology is accessible to low budgets and can shorten the development process.
The Go!SCAN SPARK offers the fastest and easiest 3D experience for product development, design, and reverse engineering. It enables the development of new products, with more complex shapes and designs, and gives a competitive edge by accelerating the time-to-market.
The HandySCAN 3D | BLACK Series is the most reliable and accurate ISO 17025-accredited portable 3D scanner available on the market. It can generate accurate 3D measurements and high-resolution results with the best scan quality.
Ways from 3D Scan to Final CAD ModelAs previously mentioned, 3D scanning and CAD modeling are like two different subway lines that require 3D Scan-to-CAD software to connect them efficiently.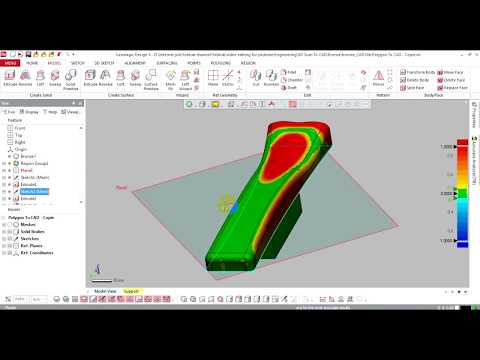
One avenue is to opt for complete reverse engineering (RE) software, such as Geomagic Design X, which offers high-performance functionalities for alignment, information extraction, and feature modeling. Complete RE software basically replaces CAD software for reverse engineering activities. In fact, it is a ”high-end solution” for designers who do RE on a daily/weekly basis. Consequently, designers who usually feel comfortable with their preferred CAD software must learn to use new software with different features. It is also more expensive than the other options.
Another way is to start the design from a blank canvas directly in CAD software without resorting to reverse engineering. CAD software is known to be designers’ favorite place for feature modeling, but developing a sketch from nothing can be a long and tedious journey. In addition, CAD software has limited functionalities for mesh editing, alignment, and information extraction from the mesh.
A more appealing approach is to choose Scan-to-CAD bridge software, such as Creaform’s VXmodel, which includes all of the functionalities to align, clean, and optimize the mesh as well as to extract dimensional properties before transferring the entities and cross-section into CAD software, such as SOLIDWORKS, Autodesk Inventor, and Solid Edge, where designers can comfortably proceed with feature modeling. This option is more appealing because it is less expensive than complete RE software; it is also simpler to use and easier to learn.
The benefits of using reverse engineering from Scan to CAD to create CAD models are important. It enables designers and engineers to create their 3D models from existing parts in less time, reduce the number of iterations leading to a part ready for manufacturing, and get a perfect fit of retrofit parts the first time. It can also shorten product development and time-to-market. But, more importantly, it provides an accurate foundation on which designers and engineers can build and improve their models—instead of starting from scratch—giving them more means to conceive complex geometries, modern shapes, and organic surfaces.
Scan-to-CAD bridge software is also ideal for CAD experts, as it is the shortest path back to your workflow and preferred CAD modeling software. Why learn completely new RE software when you’ve already mastered SOLIDWORKS, Autodesk Inventor, and Solid Edge?
In short, products designed through reverse engineering from Scan to CAD are not only of better quality, but also they are market-ready with fewer iterations and in less time.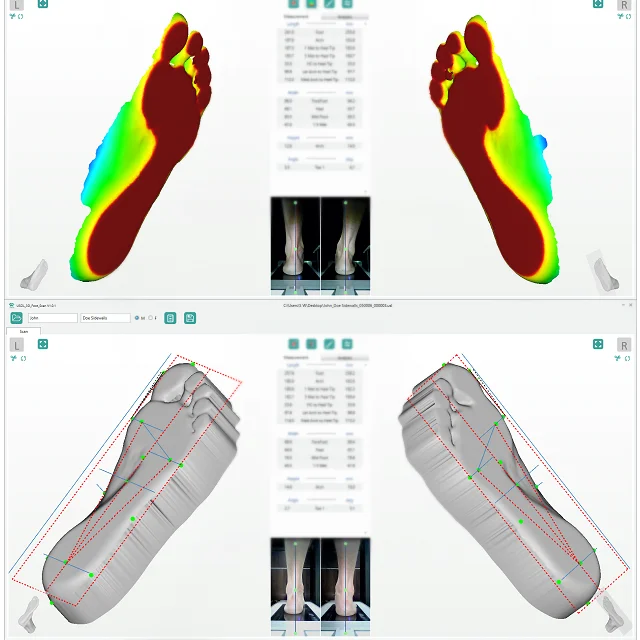 This is particularly valid for complex parts with intricate geometries. Creaform professional 3D scanners, such as the Go!SCAN SPARK, make reverse engineering more efficient, faster, and simpler. Scan-to-CAD bridge software, such as VXModel, leads you back to your preferred CAD software faster than any other solution, so you can get back to the joy of designing and innovating!
Can A 3D Scanner Directly Output A CAD Model?
Answer | 5 Minute Read
The short answer is no. A 3D scanner cannot directly output a CAD model. This is because a 3D scanner outputs point clouds or mesh data, which acts as a single entity that is not editable.
You would need a Scan to CAD modeling stage to get scan data (not editable) to a CAD Model (building blocks and editable features).Let’s explain this concept using a camera as an example. A 3D scanner is just like a fancy camera, except instead of taking photos it captures scans of objects in 3D.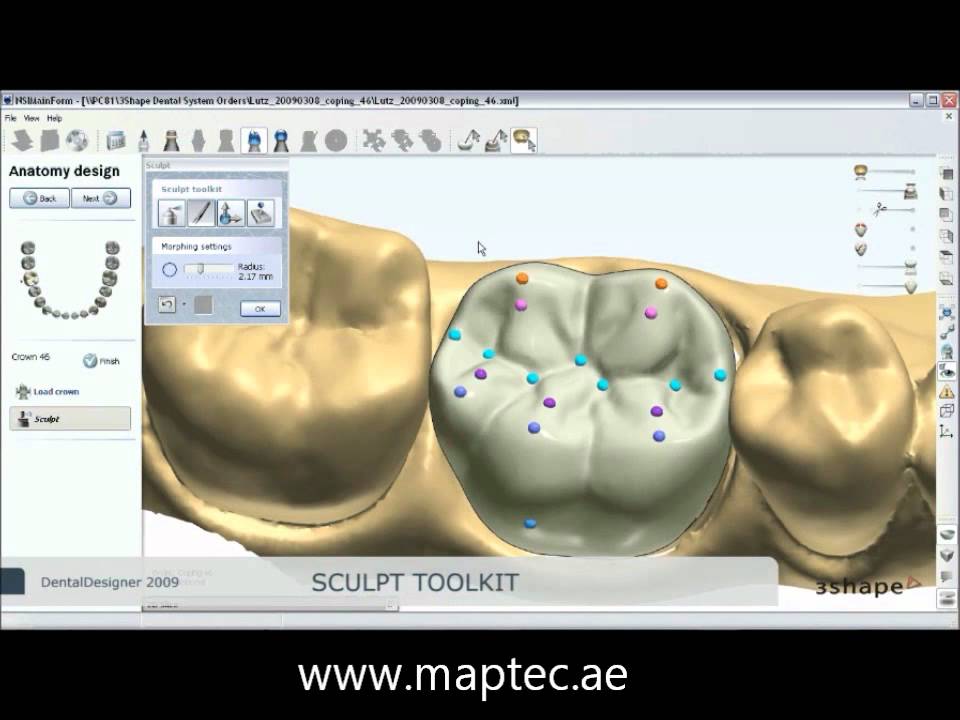 If you take a photo of a car with a camera, you know that the photo has a car in it. However, your camera cannot interpret what exactly is in the picture. It only understands that the file is a picture. If you upload the photo into your computer to view it, likewise, the computer would only know that it is a picture, but not what the picture contains.
A 3D scanner is just like that. The computer program knows there is a scan but it has no idea what the scan is supposed to represent. You must interpret what the scan is. Then using CAD software on the computer, you sketch the object into a CAD model using the scan data as a tracing guide. Just like if you want to draw a realistic drawing of a car, it would be much easier to directly trace right on top of the photo than if you have to draw it from memory or just by looking at a photo.
Using scan data from a 3D scanner as a reference for design creates incredibly accurate CAD models. This process is known as Scan to CAD. You need this modeling step to bridge the gap before you can have a CAD model consisting of a solid CAD model with editable features, the design blueprint of the product for manufacturing.
This sounds rather complicated. Can you show me the Scan to CAD process?
It’s actually not too complicated once you understand the basics. Sometimes it’s easier to explain this with a simple demonstration. In this video, scan data was imported into SOLIDWORKS CAD modeling software. Mesh3Surface for SOLIDWORKS plugin that works natively inside the CAD modeling program was used to reverse engineer the part.
If you are already a SOLIDWORKS user, it’s a logical choice to use Mesh3Surface for SOLIDWORKS that works natively inside the CAD software to easily reverse engineering objects from 3D scanner data to CAD.
Point cloud or mesh output by the 3D scanner provides pertinent surface measurements about the object’s surface geometry which is useful in creating a CAD model of the part.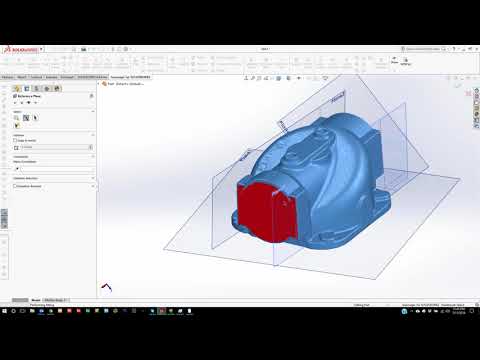 The scan data functions as a template in building the new CAD model.
Once you go through this modeling stage, your output is a CAD model (STEP or IGES) which is now ready for manufacturing.
Then why use a 3D scanner to create a CAD model if I have to recreate it anyways?
Designing from a blank canvas can be an overwhelming project to take on. You might not get it right on the first try and may take you many versions to get you to the final CAD model you are happy with. Why not leverage knowledge from an existing object and learn from it which will make your work much easier and more accurate?
Reasons why to Scan to CAD:
- It’s more efficient than designing from scratch
- It gives you an accurate representation of the existing part to create the CAD model
- It gives you the ability to insert design intention and fix problems or damage
Creating CAD models through the process of reverse engineering from Scan to CAD gives you insights into designing better products but also do it in a faster amount of time than designing from scratch.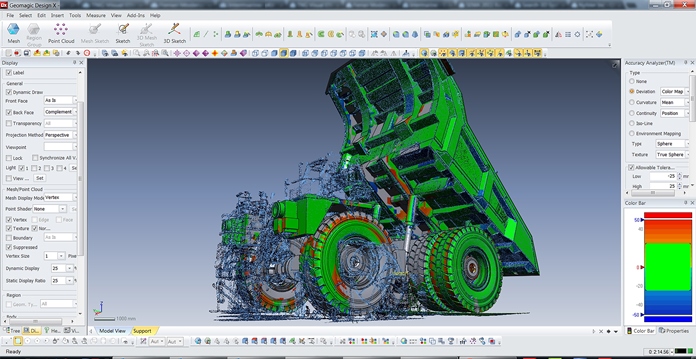 This is especially true for objects with organic surfaces. A 3D scanner makes reverse engineering faster and much simpler than if you have to do it without aids. Instead of trying to get complex curves and angles just right, reverse engineering gives the user the ability to snap onto the curve and create an identical profile. If the profile is incorrect or the physical part has any damage, then the designer has the power to see where the old geometry is and has the ability to correct it.
Pros and Cons of 3D Scanners and Troubleshooting Scanning
Maya Khmelevskaya
Certified CoDiagnostiX Instructor and co-author of Guided Surgery. Working part-time in dental laboratories, she has gained additional knowledge of dental technology that assists her in her daily surgical practice and implant planning. Her CAD/CAM experience includes both intraoral (IO) and lab scanners, CAD/CAM lab software, milling machines and 3D printing, especially in implant-based cases.
Contents:
- Introduction
- Benefits of 3D scanning for patients
- Benefits of 3D scanning for the clinic
- Patient Monitoring and Model
- Scan Accuracy
- What problems can be expected and how to solve them
- Surface/color not scanned
- Scanner memory and data storage
- High mobility of the mucous membrane of the cheeks, lips and tongue
- Color varies in different scan areas
- Scan Distortion
- Summary
Introduction
Dentistry is becoming increasingly digital, although currently only a small proportion of dentists have gone digital. At the same time, the topic of digital impressions is relevant in the field of implantation, orthodontics, guided surgery and prosthetics. You are most likely wondering if you should purchase an intraoral scanner for your clinic, or if you already have one, you might be wondering how best to use it.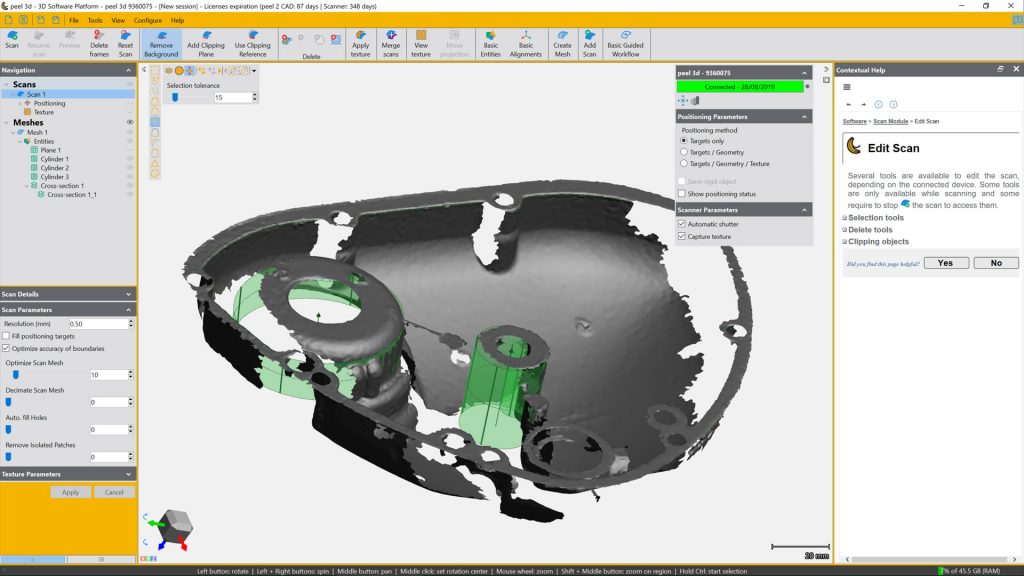 Like all technologies, intraoral scanners have their pros and cons. In this article, I will try to answer most of the questions that arise when moving to digital and give you some practical tips and tricks on how to achieve better scanning results.
Benefits of 3D scanning for patients
Intraoral 3D scanners make visiting the dentist more positive for most patients. It's not just about new equipment. This equipment shows patients that their dentist is developing, investing in his skills, improving the quality of treatment. This psychological factor should not be underestimated and can make your clinic more dynamic and strengthen relationships with your existing patients.
The use of an intraoral scanner will also be a great relief for patients who suffer from a severe gag reflex or have had a bad experience taking analog impressions in the past. Being able to immediately show patients their own teeth on the screen is also a great way to communicate with them. The 3D model helps the doctor to explain to patients such restoration limitations as crossbite, post-extraction changes in the dental arch (for example, the Popov-Godon phenomenon), crowding, erosion or abrasion of teeth.
Some 3D scanner software has the ability to take intraoral images to show a specific area in photos and videos, not just 3D reconstructions. Other scanners are equipped with caries detection systems to maximize patient seating efficiency. Most modern scanners are able to quickly create a Digital Smile Design (DSD) to visualize the direction you want to take with your treatment. In general, patients generally rate their experience with intraoral 3D scanning positively.
Benefits of 3D scanning for the clinic
Buying a 3D scanner is a major investment in the equipment of the clinic. Over time, this investment will bring savings, but you must understand that license fees are usually paid annually. Some companies also charge for data export if you want to save the scanned files on your computer or on the clinic server (uploading data is necessary - full internal memory of the scanner slows it down).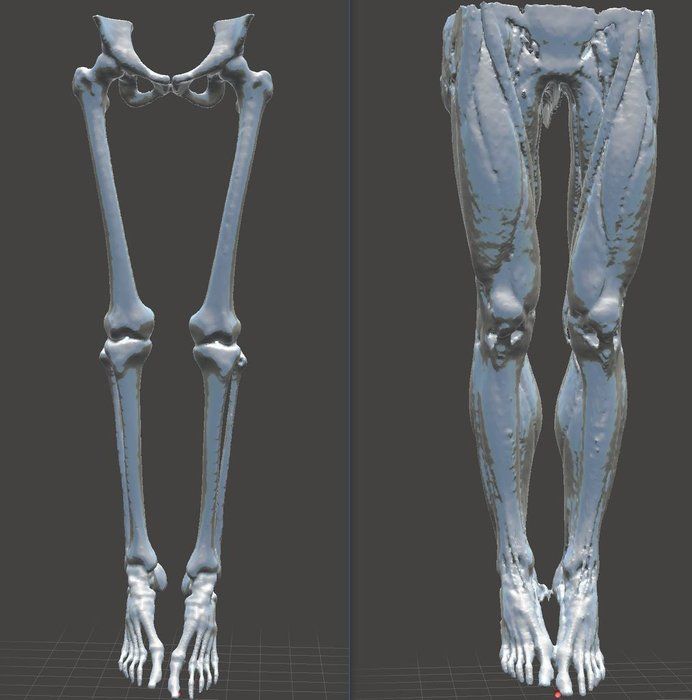
At first glance, the most obvious savings that a 3D scanner can provide are impression materials and plaster casts. Does the scanner free you from all normal impressions? Of course not, but it will cut down on the amount of supplies you use daily. For those dental clinics that have their own laboratory, this means a reduction in material costs. For most clinics cooperating with laboratories, digital impressions also help to save on transport costs, which will positively affect the final cost of models.
There are cases when classical impressions are unavoidable in order to provide the best quality of work to our patients (for example, classical impressions are necessary for highly mobile mucosa of the edentulous mandible).
Reducing chair time spent on individual patient procedures will also free up your schedule, allowing you to perform more restorations or use the extra time for other purposes.
3D scanning instead of taking an impression reduces workflow in the lab. You can provide color information, pre-scan and pre-scan, determine what material you need for prosthetics. The lab does not need to cast plaster casts and can start building the prosthesis right away.
Patient monitoring and models
Intraoral scanning of the oral cavity of patients who visit your clinic on a regular basis will allow you to track the progress and stability of treatment (for example, abrasion and chipping, stability of orthodontic treatment, migration of teeth), which improves the level of communication with the patient and increases his level of trust in the doctor.
By storing 3D models in your data warehouse, you free up space in your clinic. Even if you set up a backup server to store patient data, it won't take up as much storage space as a locker full of plaster casts. If you later need to make a silicone model, you can always make it from the saved data using, for example, 3D printing technology. In addition, your implant analogs and impression copings are not frozen until you fabricate and supervise the prosthetic reconstruction, and assistants do not spend as much time looking for the right box or freeing and cleaning impression caps and implant analogs.
Scan accuracy
3D scanner manufacturers compete in scan accuracy, scan fluency, and advanced features of their hardware. The data provided by companies usually shows the best possible result for their product. This means that testing is usually done in a standardized manner on something that is easy to "scan", such as a plaster model. Yes, you can achieve impressive accuracy when scanning an ideal model, preferably coated with a scanning spray or molded from a suitable material for scanning. However, during the course of your work, you will not be scanning models at all, and it can be very frustrating to see scan results that are significantly different from what you expected.
What problems can be expected and how to solve them:
Surface/color not scanned
There are many different surfaces in the mouth. As a general rule, 3D scanners do not work if the surfaces they need to scan are wet (thicker saliva, blood), very shiny (polished metal fillings/reconstructions), sometimes very dark (corrosion products of metal reconstructions/amalgams, discoloration , caries) or simply located deep (narrow interdental spaces, emergence profile, deep chamfers).
There are several ways to get around the problems listed above. First, try to keep the scanned area dry. You will quickly realize that you don't need to blow dry your teeth all the time, a small amount of low-viscosity saliva (for example, after touching the cheek to the tooth) will not cause problems. However, if you find an area that is difficult to scan, whether it's a bulge profile or an inflamed papilla, dry it out and the scanner will bring out more detail.
If the result is still unsatisfactory, a handy scan spray can usually help. Although theoretically the undercuts or interproximal surfaces depend on the depth of the scan achievable with the scanner tip, the scan spray will help you capture difficult areas of the digital impression.
The reason may be that the darker areas of these undercuts (shadows) are more easily captured by the bright powder lens, and the shiny interproximal areas become less reflective at the angle you need to scan them. Regardless of what's behind it, scanning spray helps in areas that are difficult to scan, even if your 3D scanner is running on powder-free technology.
Scanner memory and data storage
In essence, every 3D scanner is a computer, and, as with any computer, maintenance is key to its performance. If we experience a slowdown in scanning speed, or if the system starts up and processes data very slowly, you may need more computer memory. Most manufacturers allow you to add memory, of course, for a fee.
Another solution is to organize the data and regularly delete patient data from the scanner's memory. As a rule, you can write 3D models to a flash drive, send them to the laboratory, move them to a patient record file on the server of your clinic (including wirelessly if you connect the 3D scanner to a local network). Some scanners allow you to store your data in the cloud, however this often comes with additional cloud storage costs.
“Difficult scan areas”, moving mucosa, and clogged scanner memory will affect the speed at which you can scan – the scanner may freeze during scanning, lose the scan path, stop capturing an image, etc.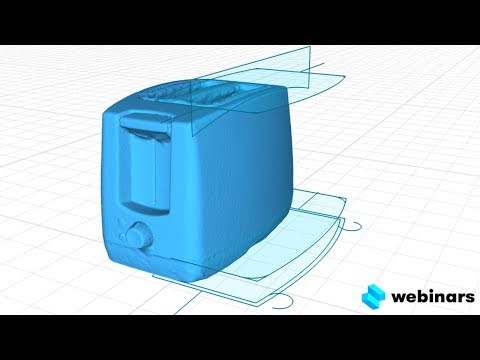 Be prepared for various scenarios, make sure that as little data as possible is stored in the device's memory.
High mobility of the mucous membrane of the cheeks, lips and tongue
Soft tissue mobility can be really problematic for 3D scanners. It's not that the scanner can't scan mucosa: it can, but if the piece of the puzzle your scanner puts together moves, the scan will hang. Let's say your scan shows a small piece of buccal mucosa around the premolar/molar area. It is very likely that when you return to this area, the scanner will take off the surface of the teeth until it again fixes the area with a piece of mucous, where it will hang again. The reason is that the mucosa has most likely changed its position, and now the new piece of the puzzle does not match the previously scanned one. If you continue, the scanner will keep freezing over and over again. An easy solution is to use the scan cropping tools provided by the manufacturers. Pause the scan, cut out the mucosal patches fixed in the problem area, and try again.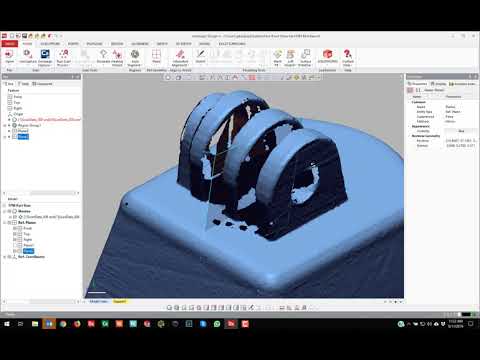
A common way to quickly and correctly scan a patient the first time is to prepare for the scan. Various tools will help you with this, such as plastic or rubber retractors, wooden spatulas, etc. In my experience, black gloves also help. Black is not picked up by the scanner as quickly as other glove colors, so you can use your finger as a retractor when you move the scanning tip in an arc. If the mucosa is very mobile, then the use of a one-piece retractor helps from the very beginning. It will keep tissue away from the wire by applying tension to the frenulum to provide you with scannable reference points on the scan surface.
Color varies by scan area
When using the automatic color matching functions, you must remember that the color recorded on the scan depends on the ambient light. If you are scanning with an additional light source (such as a dental unit lamp), the scanner will capture one color in well-lit areas and a more realistic color in areas lit only by the light from the scanning tip. To avoid this additional complication, simply turn off other light sources - the tip's light is bright enough to properly scan surfaces.
Scan Distortion
3D scanners record a mirror image (in the form of single images superimposed on each other or video) through a built-in lens. They then process the images and create an instant 3D model of the scanned surface. This minimizes the size of the scanning tip, but also creates distortion. Think of it like taking a panoramic shot of a room with your phone. Like a scanner, your phone will take individual pictures and link them together to create the final panoramic shot. Each image is stitched to the next by finding the same places and merging the matching parts. However, over a longer scan path, this can lead to small errors that accumulate, creating distortion in your patient's 3D model. The reality is that even with leading 3D scanners, a full arc scan can result in 1mm of distortion and you never know which way.
Distortions are visible if you overlay two scans in a CAD/CAM program. Step by step scanning of individual teeth and quadrants helps to avoid distortion.
Summary
3D scanners can be of great benefit to your clinic, but as with any tool, you need to spend some time learning to get error-free scans.
Medit i500 - Your passport to the world of digital dentistry!
Intraoral scanning technology today is ahead of all other areas of development in dentistry, as high-quality intraoral scanners greatly simplify the process of taking an impression, reduce treatment time, and relieve the patient from discomfort in the mouth during the procedure (when comparing scanning with obtaining a traditional impression using an impression mass) - and this is just the beginning of the list of advantages of new generation 3D scanners.
A bit of history
The first system for designing and manufacturing crowns was developed in France in 1971 years. The work was supervised by Dr. Francois Duret, who already in 1973 wrote his thesis "Optical impression" and voiced the concept of computer-aided design and manufacture of dental prostheses using CAD / CAM. In 1984, the scientist patented the device he developed and soon presented his system, demonstrating the manufacture of a dental crown in four hours.
Simultaneously with Francois Duret, the first digital intraoral scanner was developed by a Swiss dentist, Dr. Werner Mörmann, and an Italian electrical engineer, Marco Brandestini. As a result, at 1985 saw the first commercial CAD/CAM system for indirect dental restorations.
Thanks to such research and development, 3D intraoral scanners gradually began to appear in the dental world, with the help of which they began to actively acquire three-dimensional virtual images of the oral cavity and teeth, and then using CAD / CAM systems to create indirect restorations.
So, gradually, intraoral scanners began to win their place in the sun and bring great benefits to both doctors and patients.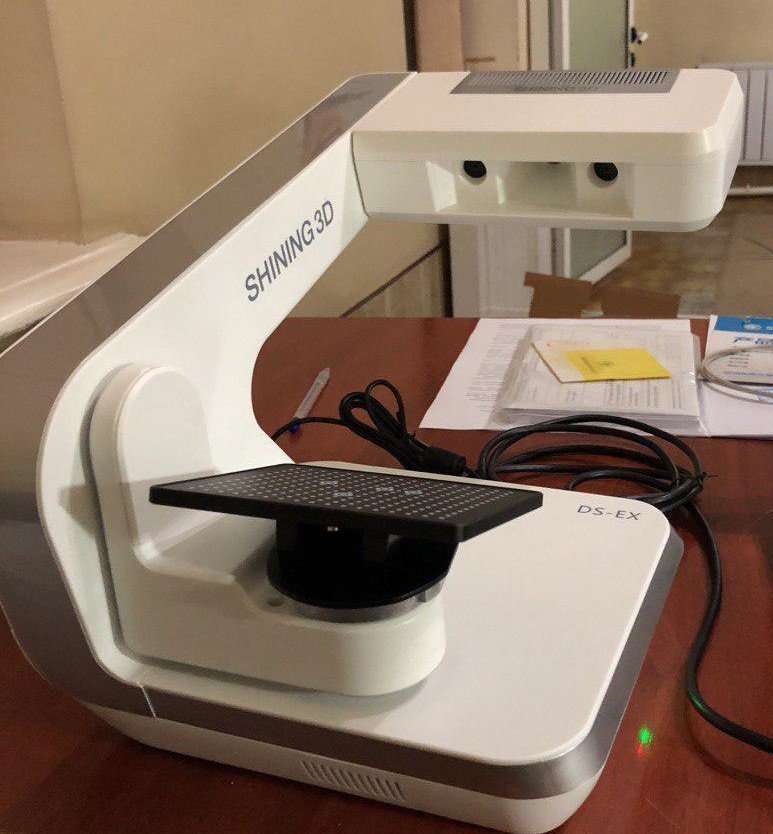
State-of-the-art intraoral scanners
Today, 3D intraoral (intraoral) scanners (IOS) are unique devices for creating digital impressions in dentistry. They project light onto the object being scanned, receive the reflected light signal and transmit it to a computer to create a three-dimensional image.
Images of dental tissues (as well as implants) taken by image sensors are processed by special software that creates point clouds. These point clouds are processed by the scanner software to produce a 3D surface model. As a result, the dentist receives a digital model that is more comfortable to work with than traditional plaster models. Based on this model, a physical copy can be printed on a 3D printer.
The intraoral scanner is the most convenient solution for the dentist and the patient, which is why 3D imaging is the leading trend in dental practice. The range of intraoral scanning devices on the market of modern high-tech dental equipment is quite large.
A unique development - the Medit i500 intraoral scanner - an effective tool to increase the profitability of the clinic.
The Medit i500 is a value for money, high efficiency and performance that makes it easy and simple to implement the scanner into daily practice and quickly pay for the product.
Medit i500 allows you to work quickly and efficiently
-
The open system guarantees a wide range of possibilities - export files in STL, OBJ, PLY formats from the Medit LINK software, share them with the laboratory, easily transfer and track them throughout the workflow. You will no longer worry about the compatibility of products and software.
-
Two high-speed cameras, impressive speed and no need for powder provide smooth and continuous scanning (which is always comfortable for the patient), increasing productivity.
-
The smart scanning algorithm also ensures the continuity of work - it picks up the image at the place where the scan was interrupted.
 In addition, the Medit i500 makes the capture process continuous throughout the video, fully ensuring the stable result of your work.
 -
Enhanced high resolution and true-to-life image quality - the i500 captures true-to-life scans in color, distinguishing between soft tissue, plaque and teeth - allowing you to clearly delineate the structure of teeth and soft tissue. In this way, you can easily define the boundaries of the gums and undercuts.
*Single Crown Scanning Accuracy Test was conducted by Medit according to the Accuracy Evaluation of Six Intraoral Scanning Devices: Laboratory Study ADA 2015 Professional Product Review.
**Accuracy reference model with 1st jaw quadrant and full arch was made using the Solutionix D700 industrial scanner (6.4 Megapixels, advanced blue light technology for small scanned objects) as the accuracy reference.
-
The final image is smoother and more accurate due to dual camera capture.
-
The small size of the i500 scanning head is convenient for both clinician and patient due to its ease of use and comfort.
- The
Medit i500 is lightweight so you can work comfortably.
-
One button to start and stop scanning: pressing it once starts working, the second one stops. You do not have to turn off the scanner using the computer.
Order a presentation of the intraoral 3D scanner Medit
Technical features Medit iScan
-
iScan software automatically determines occlusion with a simple bite scan. The occlusion analysis function quickly detects and reflects the occlusion of the upper and lower jaws and displays the results on a color map. The area to be examined can be fixed and colored. Further scanning will not update it. This function can be used if necessary to scan and fix the gingiva after retraction, as it may collapse.
 In this case, the fixed area can be cropped, and the deleted fixed area can be rescanned.
 -
The built-in HD camera allows you to take 2D images without a 3D model and send them to the laboratory. Cloud storage and open data architecture ensure efficient operation, reduce the chance of error, and support CAD processes.
Medit i500 software includes dashboard, analytics, 3D open access, cloud, communications, management.
Cloud storage
Since everything is done digitally, Medit Link comes with cloud storage - the best place to store all your patient files, digital impressions, treatment plans.
The cloud eliminates the need to store physical impressions and allows more time and money to be invested in patient care rather than logistics and storage space.
All data stored in Medit Link is HIPAA (Health Insurance Continuity and Accountability Act) compliant, meaning your data is secure.
Ease of communication
Open format Medit Link allows you to export STL/OBJ/PLY files and allows you to choose the format of your work.
Whether you're using the built-in communication and data transfer feature or exporting files through your own system, Medit Link lets you work the way you want.
Thus, real-time communication with the laboratory will minimize the number of errors in orders and relieve you of discomfort due to poor communication, help to establish a workflow.
View in 3D
When you finish scanning in iScan, you can view the result in 3D in Medit Link.
Dashboard
Medit Link uses simple and powerful dashboards to give you immediate access to all your data so you can communicate effectively with patients, monitor progress and keep track of all information, including ongoing costs, scan types and patient visit frequency .
Analytics
Medit Link makes it easy to analyze the digital process, eliminating the hassle of checking a stack of invoices to understand how profitable your economic decisions are for the clinic.
Integrated analysis tools help you instantly see all costs associated with a digital workflow.
Workflow Management
Medit Link is designed to take into account all the features of the dental
logical workflow, so it allows you to manage all digital workflows through an integrated system: track orders, organize scans, manage various workstations and employees. In a word, it provides simple and convenient operation.
Thus, the advanced software included and the user-friendly interface make the i500 scanner easy to learn and use, easy to integrate into a clinic or laboratory, spend less time on scanning, and devote more time to diagnosing and treating patients.
Applications Medit i500
The Medit i500 intraoral scanner is now actively used in the case of installation of full-atom crowns and bridges, including telescopic ones based on implants, inlays, onlays, veneers, temporary crowns, partial and complete dentures, when creating diagnostic model of the dentoalveolar system, virtual planning of prosthetics, for the installation of stump inlays, beams supported by implants, for the purpose of virtual diagnostics, implantation planning and many other types of dental treatment.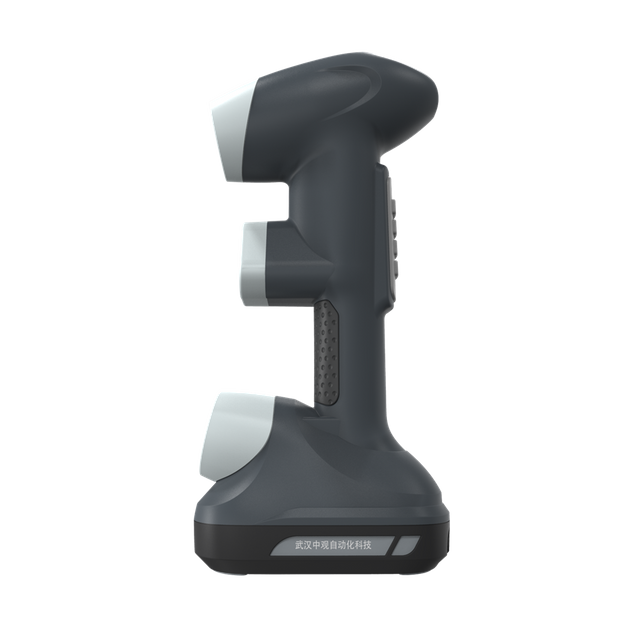
Request a presentation of the Medit intraoral 3D scanner
Benefits of Medit i500
-
Absence of discomfort in the oral cavity (a very important advantage, especially if the patient has an increased gag reflex).
-
Absence of impression/imaging errors: violation of the proportions of the impression, incorrect mixing of the impression mass, untimely hardening of the impression material, incorrect insertion of the impression tray with the impression material into the oral cavity, patient mobility during the procedure and the impression defect associated with this.
-
Ability to immediately see the clinical situation, snapshot; if necessary, also immediately correct the defect by re-scanning the area needed for work.
-
An instant way to transfer data to the laboratory, which, in addition to saving time, completely eliminates the risk of damage to the impression or its loss as a result of delivery.
-
Visualization of hard-to-reach places in the oral cavity.
-
Non-contact method of work, and therefore safe for both the dentist and the patient.
-
Status and prestige - the use of modern, convenient and high-tech methods of treatment and diagnostics increases your status in the eyes of patients and colleagues.
Have fun with the Medit i500 - take your performance to the next level today.
Medit i500 - Your passport to the world of digital dentistry!
CODE: 07293
Art.: i500
South Korea
Medit i500
USB: 3.0
Total tip length: 266 mm
Backlight: Yes
Scan size: 14x13 mm
Color scanning: Yes
You can order a presentation of the Medit intraoral 3D scanner in our showroom.