3D printing tree support
Better looking prints with less wasted material
Arun Chapman15 March 2022
Guide
When used properly, supports allow you to print almost anything using an FFF printer. However, they can be a pain to use. You often need to tweak your support settings to get the best results and even then, they can still be difficult to remove and often result in blemishes on the surface of your model. Luckily, Ultimaker Cura has a second type of support structure called tree supports. On certain models, tree supports can use less material, be easier to remove, and they can leave your model with little to no scarring.
What are tree supports?
Tree supports are a type of support structure available in Ultimaker Cura. When
enabled, they are generated around a print to help support areas that would be
unable to print successfully without it. Unlike standard supports that generate
directly below the areas that need to be supported and nowhere else, tree
supports wrap around a print, starting thicker towards the bottom of the print
and getting thinner as it goes up. Tree supports also branch off at an angle with
only a thin tip of each branch touching the areas that needs supporting. The
result can look almost exactly like the branches of a tree.
Before we go into more detail about how tree supports work, we need to talk about regular supports and why they are needed.
What are supports and why are they needed?
Due to a little thing called gravity, when printing with an FFF printer, each layer of filament must be printed on top of a supporting layer below it. If there is nothing below to print on, the filament will be extruded in midair causing a failed print. It is possible to print in midair for a short distance as long as it’s between two supported areas, this is known as bridging. If, however, there is nothing to support it whatsoever, it’s called an overhang.
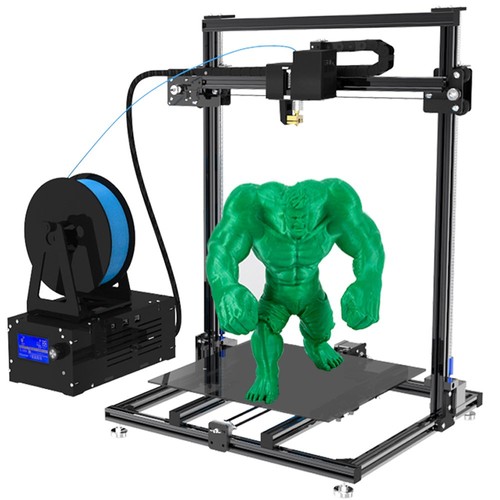
The red section in the middle is an overhang
The long flat section at the bottom is an example of bridging
Both bridging and overhangs are situations where supports may be required. All major slicers can generate supports. When you enable supports in your slicer, sacrificial structures are generated under your object to support the areas that would normally be impossible to print. These supports can then be removed after a print is finished. Supports are normally printed directly beneath the area that needs supporting like so:
The problem with this is that on a geometrically complex print with lots of overhangs, supports may need to be placed on top of some surfaces of the print to reach the overhang. That can lead to blemishes not only where the print needs support, but also on the area directly below.
There are workarounds in some cases and tweaking your support settings can reduce the surface damage. But in cases like this, tree supports are often a better alternative. We will primarily be talking about tree supports and how they can be used in this article. If you want to familiarize yourself with normal supports and their related settings, check out our dedicated article on the topic.
How do tree supports work?
Tree supports have one big trick up their sleeves, and that’s the ability to print at an angle, allowing it to wrap around a print and support hard to reach places. This behavior also means that tree supports touch the print in far fewer places than regular supports which results in a cleaner print with less surface imperfections.
Tree supports were originally created to minimize how much waste material is used when printing supports. As far as that goal goes, they were a success. You can expect to see significantly less material usage on complex prints that require lots of supports. In prints that use material, you can also expect to see lower overall printing times.
The only major downside to tree supports is a large increase in slicing times as the calculations that need to be made to generate tree supports are more complex than those made for normal supports. The smaller parts of tree supports near the top of each branch can also be difficult to print so poorly calibrated printers may have trouble printing these areas successfully and even well-calibrated printers may have difficulty when using hard-to-print materials like PVA and flexible materials. For this reason, it's recommended to use normal supports when printing soluble supports with PVA.
Once you have enabled tree supports in the settings and sliced the model, you can see how they will be printed by using the preview view.
It’s worth noting that SLA printers also use something called tree supports. These are very different to the tree supports used in Ultimaker Cura in both form and function.
Which settings to use?
As with normal supports, you have access to additional settings you can modify to change how tree supports are generated. If you want to learn how all of these settings work, check out the Ultimaker Cura Settings Guide plugin. If you want to access them, they can be revealed or hidden in the configure Cura settings menu. Below are a couple of the more important settings and what they do.
Support Placement: Support placement is a setting also available for normal supports. There are two options. Touching buildplate and everywhere. Selecting everywhere means that supports can print on top of the print itself whereas selecting touching buildplate means that tree supports will only start at the build plate and not be attached to the object anywhere but where it is supporting.
When selecting touching buildplate, tree supports are still capable of supporting areas that regular supports would only be able to reach by using the Everywhere option. However, there may still be some situations in which everywhere may be required when using tree supports.
Support Overhang Angle: This determines the minimum angle of overhang that requires support. Reducing this will result in more of the model being supported and increasing it means less of the model will be supported. What angle of overhang your printer can print without sagging or failures depends on your printer settings. As a rule, setting this at 50 degrees is usually a good place to start.
Tree Support Branch Angle: This determines the maximum overhang angle the support branches are allowed to print at.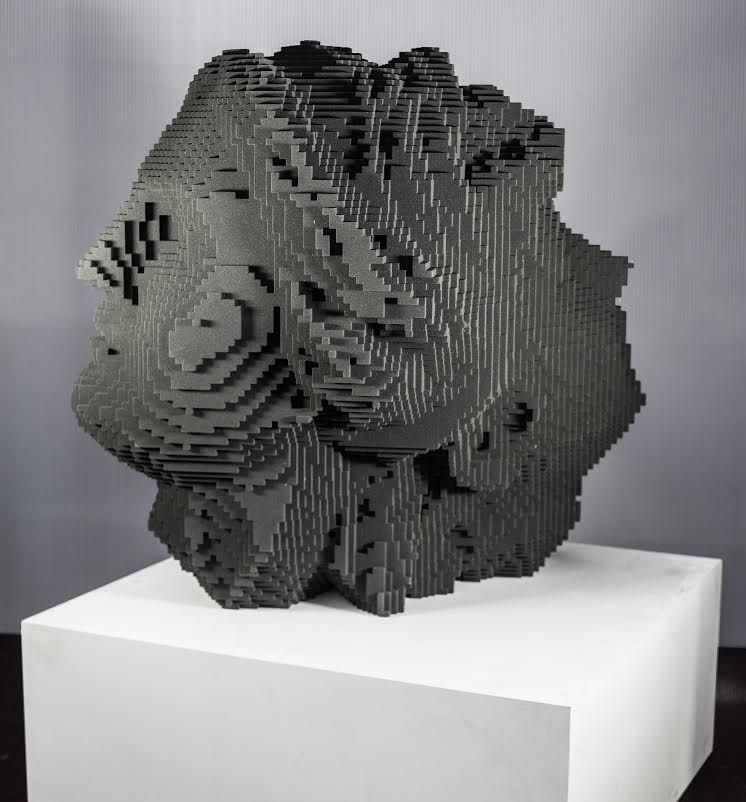 Increasing this will allow the tree supports to branch off at more extreme angles which means they will be able to reach more of the model without needing to rest on the model itself. This means less scarring. However, increasing this value too far will also lead to less reliability and a higher chance of print failure.
Tree supports were originally created as part of an internal research sprint where software
engineers could pitch a project and then spend work time trying to develop that pitch into a usable prototype. These research sprints were eventually opened up to other departments and became the Ultimaker-wide hackathon. The hackathon and its precursor are responsible for not only tree supports, but also another fan-favorite feature in Ultimaker Cura, lightning infill. As well as many other smaller improvements and optimizations.
Tree supports were originally pitched as a way to minimize waste filament use. Supports make up a huge portion of the waste material that is created with FFF printing and any reduction in how much support material is needed would also reduce this waste.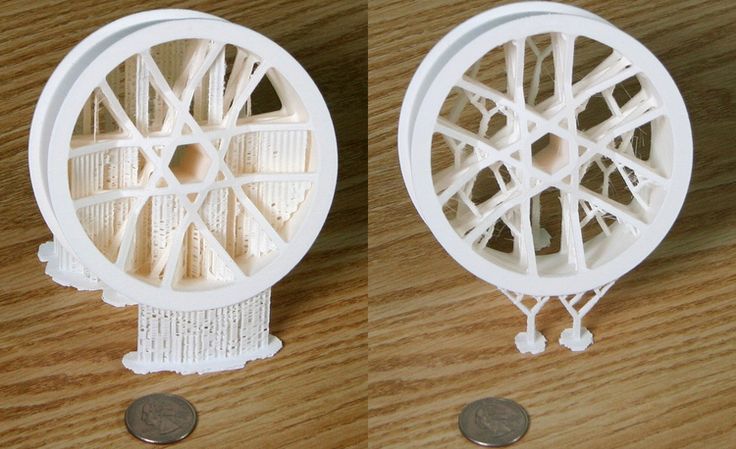 While also having the beneficial side-effect of reducing printing time and costs.
When should you use tree supports?
Tree supports have a number of use cases to which they are particularly suited:
Ornamental prints
Tree supports leave less scarring and other blemishes on your final print so any print that needs to look good can potentially benefit from tree supports. In particular, complex geometric shapes such as busts or statues are well suited to the use of tree supports.
Budget prints
Certain prints can use less material when printing with tree supports as opposed to regular supports. That means less wasted filament and less overall cost. When printing the same model many times, this can add up.
Prints where normal supports are hard to remove
There are certain prints where normal supports can be incredibly difficult to remove. An example of this is where supports generate inside of a partially enclosed part of the print. Tweaking your support settings can often solve this but if you’re having difficulty removing supports, tree supports can often be a solution.
Parts with tight tolerances
Supports can leave behind excess material which may need to be cut or sanded away after the supports are removed. This can be a problem for any part that requires tight tolerances. Tree supports leave behind less excess material which means less post-processing is required for parts where that material may be an issue.
We hope this info helps you to get better prints. If you haven't used tree supports yet, download the latest version of Ultimaker Cura and try them out!
Download Now
Cura Tree Supports; What are they & How to use them? – 3D Solved
Tree supports are essential when printing complex 3D models, and if you’re using Cura, then you should know how to work with tree supports and what settings to use for optimal printing quality.
In this article, I will provide you with a basic overview of what supports are, and more specifically, what tree supports are, their pros & cons, and how to use them in Cura.
So, without further ado, let’s get started.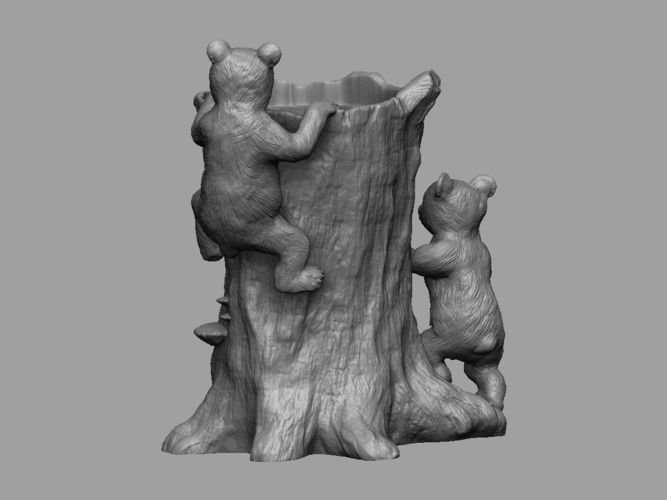
Table Of Contents
- Basics of Supports in 3D Printing
- Why are supports needed and when should you use them?
- When should you use supports in 3D printing?
- Tree Supports
- Benefits of Tree Supports
- When should tree supports be used?
- Settings of Tree Supports in Cura
- Where can you find the tree support mode?
- Tree Support Settings
- Disadvantages of tree supports
- Conclusion
Basics of Supports in 3D Printing
FDM and FFF printers work by printing layers of thermoplastic and each new layer has to go on top of the previous one, and in this method the bottom layer is supporting the newly printed one.
This all works very well until a piece needs to be printed that doesn’t have any type of support underneath it, and that’s where supports-, and more specifically for the sake of this article, tree supports come in.
Supports are structures that are not part of the print itself that let you deal with overhangs and bridges with ease, with the only downside being that you end up consuming more material and having to do extra work to remove them later on once the print is finished.
Why are supports needed and when should you use them?
Before we go into the nitty-gritty of why supports are needed and when they should be put into use in 3D printing, we first need to establish what supports are in general.
Support systems in 3D printing are structures used to hold certain 3D models in place while printing which, once the print has finished, are detached from the model.
It’s important to note that not all 3D models need a support system, but rather those that have physical tilts of 45° and above.
Now that you have a better idea of what support systems in 3D printing are, let us examine how to know whether or not you need to use them or not in your prints.
When should you use supports in 3D printing?
The first thing you have to consider when deciding whether or not to use a support system has to do mostly with the angle of the overhangs, as well as the use of bridges.
Overhangs are parts of the print that need to be printed in the air without having any structure underneath to hold/support them.
A clear example would be if you’re printing the letter “T” vertically, since there no structure supporting the horizontal parts (arms) of the print, and in this case, to have a successful print, additional supports will be needed.
Something similar happens with Bridges, since these are just horizontal structures that are connected to two vertical lines, like a model of the letter “H”, for example.
Overhangs and bridges are usually measured in degrees through the Z-axis above the overhang:
Structure “T” for example, has an overhang of 90° while the structure “Y” has an overhang of 45°.
Now, when asking yourself if a particular model needs a support system, you should consider this; If a particular model has immense and multiple overhangs of 45° and above, you will most likely need a support system, and if the angle is closer to 90°, you will absolutely need a support system for printing.
One thing you could do is check how well your specific printer does at dealing with this issue since not all 3D printers are equal and the results may vary between them.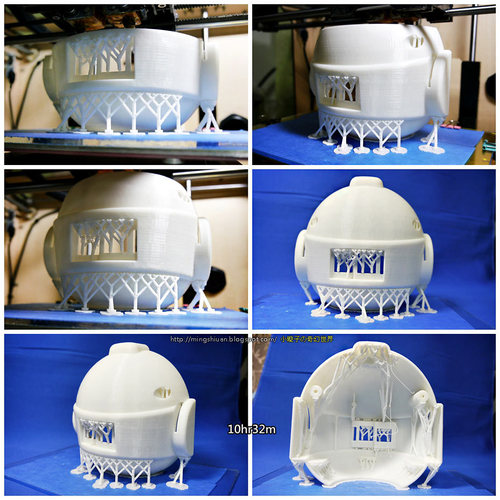
Basically, some models with a 45° overhang may look good on some printers even without a support system, while on others it may be virtually impossible to print them correctly.
3D Printer Overhang test.What you can do is test your 3D printer by printing an overhang test which will show you exactly at what angle your printer can no longer print properly, and this should give you an accurate representation of when to use supports and when you may print without them; If the print fails at 60°, then you know that supports will be absolutely necessary from that point on.
Another thing you might want to consider is adjusting the printing speed:
It is a general rule of thumb in 3D printing that slower printing speeds result in more smooth and detailed models, but this is not the case with support systems and overhangs; The faster the printing speed, the better the overhangs and bridges turn out on your prints.
What does this mean? It simply means that if you prefer slower printing speeds, you will probably need to rely on some sort of support system because there is not enough speed to avoid wobbles around the overhangs and bridges.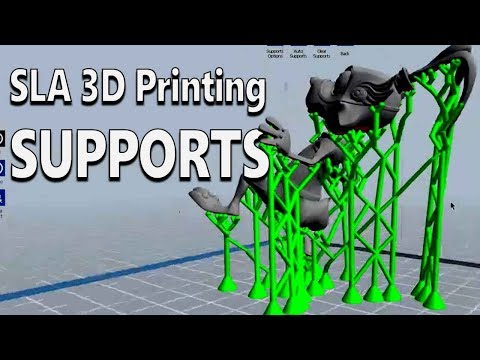
There are many 3D support systems available today, but the one we’ll be focusing on today are tree supports since these are the ones that generally work the best.
Tree Supports
Once you made certain that a support system will be needed, then it’s time to figure out what type of printing support you should use since there are a couple to choose from, like Tree Supports, Linear Supports, Dissolvable Supports, etc.
The support system that is generally used is the Tree support system since it’s unique in its approach as well as being very versatile; it has a tree-like aspect, hence the name, that supports the 3D model with its trunk and branches.
The idea behind this system is to make sure that the support branches are only attached to the overhang pieces that need to be supported.
Now, why do we recommend tree supports?
While supports may be useful in helping you achieve a better print, they need to be removed once the print is finished, which can cause damage to the print itself, or leave marks.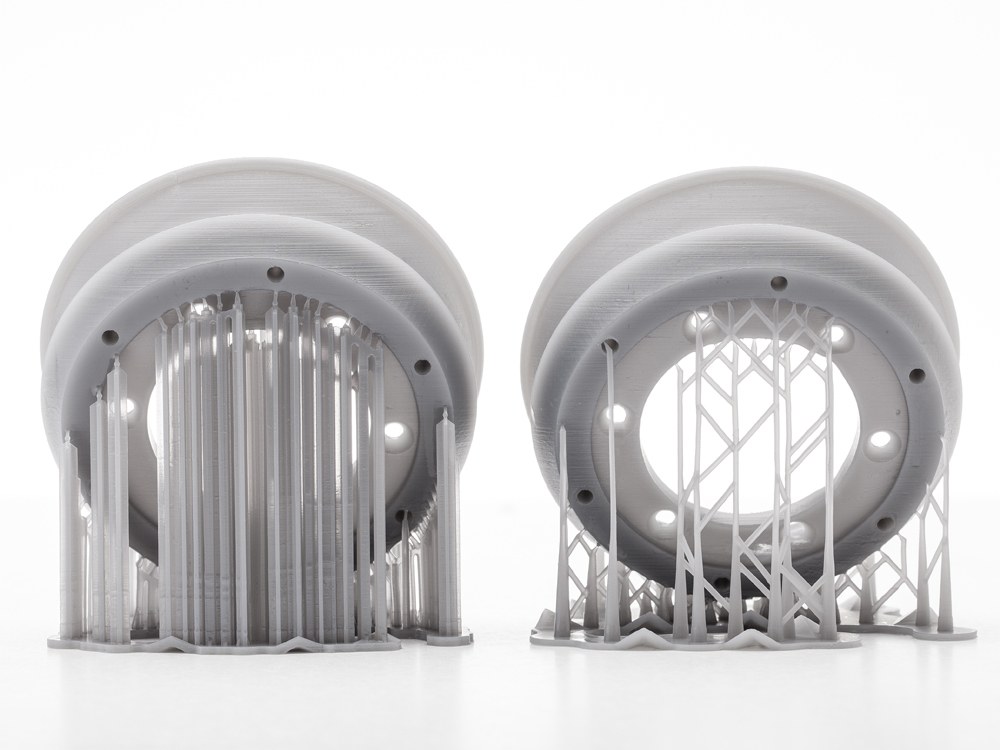
Tree supports are designed to only attach to the parts that strictly need to be supported, and the advantage here is that removing tree supports usually doesn’t cause as much damage as removing other kinds of supports, and this means better prints for you!
Benefits of Tree Supports
I already mentioned that tree supports tend to be superior in most situations than the other types of supports out there, but what are all the actual benefits of using them?
Cleaner surface
When using tree supports, the “trunk” of the tree does not touch the 3D print, and since the branches come out from the main structure, they are contacting only the overhanging structures that actually need support.
This means that there will be no -or very few- marks and imprints left on the print (only where the support branches where making contact), and the model itself will come out looking great.
This support system is very good for printing “letters” and figurines.
Less filament usage and minimized printing time
You do not need a lot of filament to print tree supports since you can use more infill density to make the base of the trunk stronger, but then print the hollow part with a low infill density, and this also applies to the branches themselves.
The interesting thing about creating tree supports in Cura is that it will take a while to calculate the settings with all the specifications needed for making them, but once that’s done, printing the 3D model will be quicker and use less material than if you had used another type of support.
When should tree supports be used?
You should use tree support systems when the overhang angle ranges from 45° to 60°, or higher. In essence, you are considering the relative geometry of your models here. As stated in the introductory section of this article, if your models have overhangs of 45°, you should consider using a tree support system.
If the overhang is closer to 90°, then you absolutely must use the tree support system to get good results. Also, if your model(s) is one that has complex and delicate details, you should use tree support for better detailing.
Settings of Tree Supports in Cura
Let’s start with the basics and then move on to the recommended and advanced settings you should use.
Where can you find the tree support mode?
To access the tree support settings in Cura you need to go to print settings and then hover your mouse over “Supports” and then click on the “Gear” Icon.
Next activate the Cura “Support Structure” as well as all the different Tree Support options available if you want to be able to control the parameters of the supports with more detail.
Tree Support Settings
The settings that make up the tree support system are the branch angle, branch distance, branch diameter, branch diameter angle, collision resolution, wall thickness and the wall line count. In the slicer settings of a 3D printer, there is always a particular setting for all tree support systems. Here are the recommended settings.
Recommended Settings
Branch angle: This is the angle at which the branches will “grow” from the main trunk. A lower value makes them more vertical while a higher value means more strength and distance. A recommended value is 45° to 50°.
Branch diameter: A recommended setting for this is 2 to 3 mm since the trunk diameter must be of a higher value than the branch diameter.
Disable regular support settings: You must always turn off the regular support settings when you want to use tree supports. Otherwise, your 3D printer will generate both the regular- and the tree supports.
Disadvantages of tree supports
The tree support system is so effective and reliable to the extent that the downsides are almost non-existent. The only thing that comes to mind is the extra time consumed during slicing since your CPU will take a bit more than usual to slice the tree support design.
Conclusion
Tree supports will not just help you print better models, but they will also make the whole process faster and consume less material.
Even though there are a host of other 3D printing supports, the tree support system is the better alternative out of all of them, at least in most scenarios.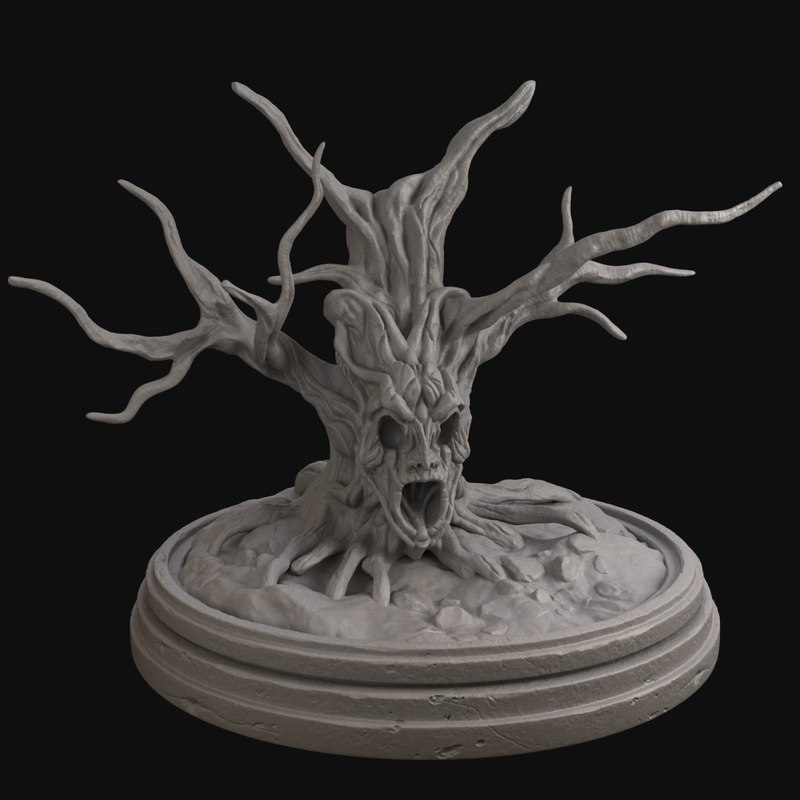
If you want detailed 3D prints, consider giving tree supports a shot.
We created a recommended products section that will allow you to remove the guesswork and reduce the time spent researching what printer, filament, or upgrades to get, since we know that this can be a very daunting task and which generally leads to a lot of confusion.
We have selected just a handful of 3D printers that we consider to be good for beginners as well as intermediates, and even experts, making the decision easier, and the filaments, as well as the upgrades listed, were all tested by us and carefully selected, so you know that whichever one you choose will work as intended.
What is support in 3D printing?
One of the most frequently asked questions when working with clients is “What is 3D printing support?”. In this section, we will clearly show what is commonly called support and what types of support exist at a given point in time.
Support material (supportmaterial) is an auxiliary material used in 3D printing to build complex objects and increase the quality and stability of construction. Without the use of support, it is impossible to 3D print models with cavities, overhanging structures, complex detailing, thin walls or ceilings, and other complex elements.
Simply put, support serves as a kind of temporary foundation for the printed product. Layered construction assumes that each next layer of the product relies on the previous one. In the case when the design of the product does not provide support under the first layer in one place or another, support comes into play.
It must be understood that the removal of supporting structures is one of the most difficult types of work.
Therefore, this article was written, fully explaining what support structures are and why they are needed in 3D printing.
How to determine where support is needed?
This is done automatically by the software supplied with all professional 3D printers. You just need to upload a file in STL format, and the program will independently calculate where the use of auxiliary material is necessary for high-quality construction. It is worth noting that most software also allows the user to edit the number and location of auxiliary structures. The software is directly related to the capabilities of a 3D printer and will automatically show you where support is needed and where it is not.
In addition, the program calculates the amount of auxiliary material needed before printing.
If we do not agree with the automatic calculation of supports by software for a three-dimensional printer, then software comes to our aid where supports can be placed manually. The picture shows an example of manually building supports in the AutoDesk MeshMixer program.
Types of support materials
Soluble
There are 2 types of soluble auxiliary materials such as HIPS and PVA. These types of plastics are used for printing supports in complex models, where high quality of the resulting product is an important component.
Each type of plastic has its pros and cons.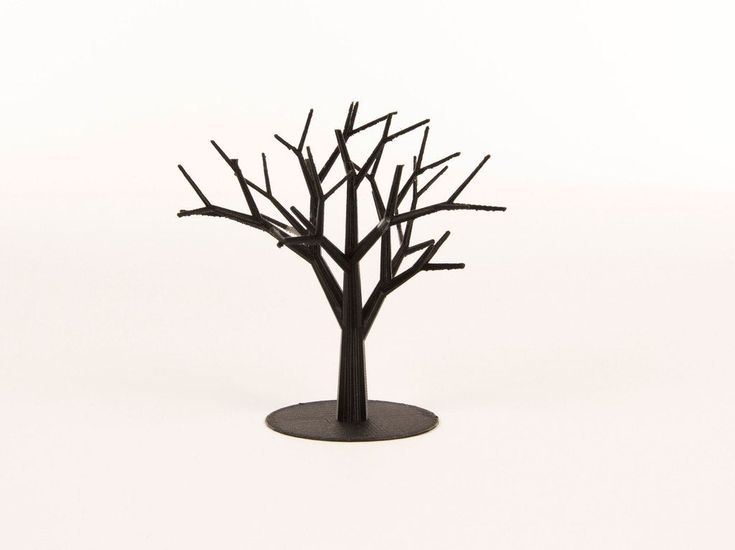
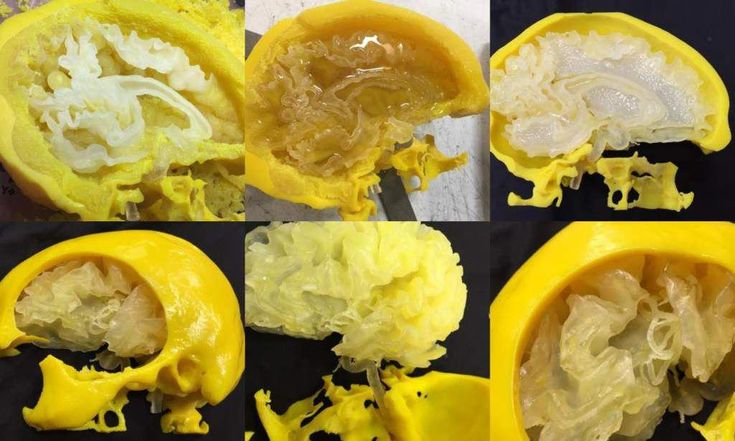
For example, HIPS can be used both as a base material and as an auxiliary. This plastic is soluble in limonene, so it is excellent for printing supports, where the main plastic is ABS, since they do not interact with each other. It also has its drawbacks - this is the high cost of limonene.
PVA, on the other hand, is used exclusively as an auxiliary material. It dissolves well in water and is only compatible with plastics where PLA is the main material. But there are two important differences from HIPS: the high cost of the material and the more simplified post-processing of the finished product.
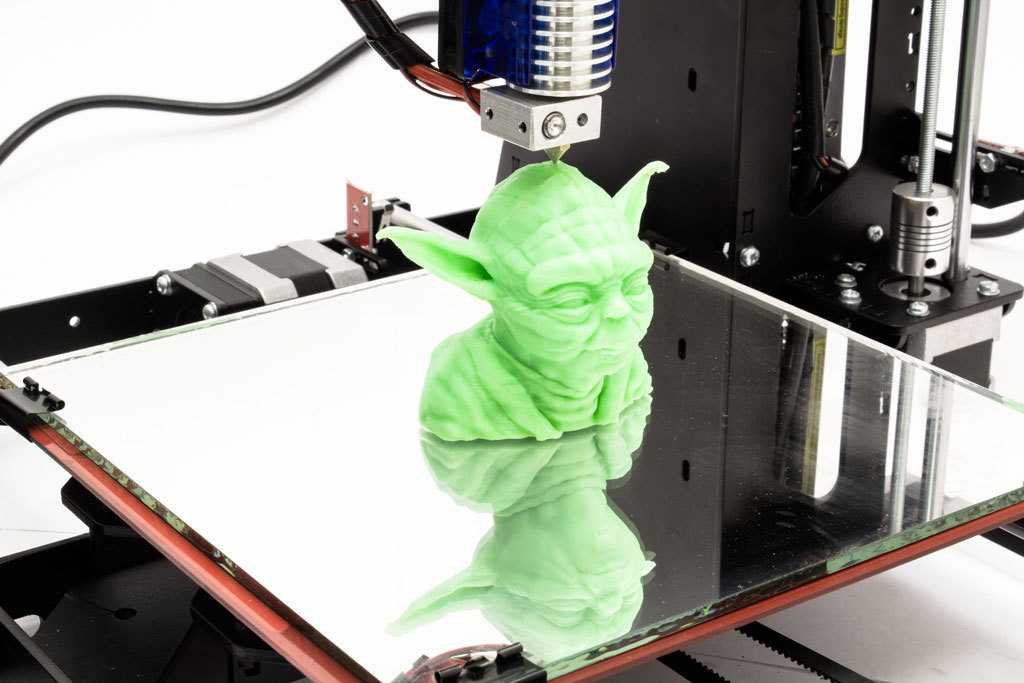
3D printer in the process of printing with support structures.
The finished product immediately after 3D printing.
Detail after washing out the supporting structures.
Mechanically removed
Excess material is broken off, sawn off, scraped off. In this case, the support is the same material from which the model itself is built.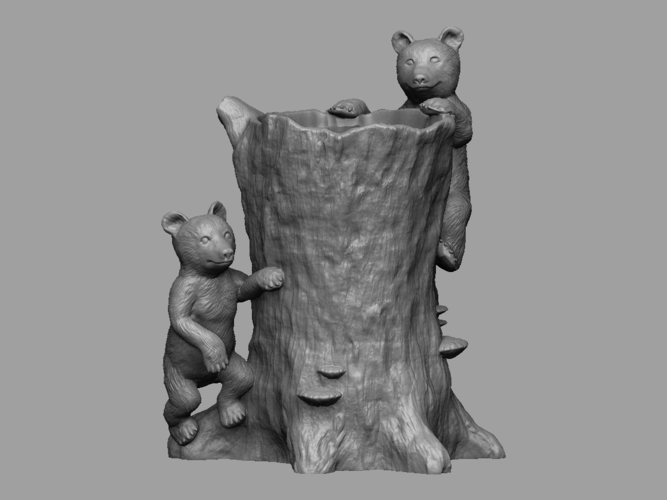 But, in order to facilitate its subsequent removal and reduce the consumption of model material, the support is built more “sparsely” compared to the object itself. It has a much lower density and strength, only sufficient to temporarily support the weight of the object being grown.
Fused
Melts and flows out with slight heating (much lower than the deformation temperature of the main product). Usually has a wax base. Advantages: delicacy, accuracy of application. Used in photopolymer and wax 3D printers of the ProJet series by 3D Systems.
Powder support
Separately, it is worth mentioning powder 3D printing technologies. Here, the same material acts as auxiliary and main. However, that part of the powder that was "auxiliary", after cleaning, can be reused as the main material. Due to this, such technologies are practically waste-free. The only exception to the rule is metal 3D printing. When printing with metal, metal shrinkage must be taken into account. In order for your part not to twist or warp during the printing process, it is necessary to fix it with supports.
Tags: 3D printing, 3D printer, 3D printers, Additive technologies, Parts, Inventions, Housing parts, support material, support
The topic of our today's review is wooden plastic for a 3D printer. Surely many of you are aware of the existence of such material, and some may even have experience with it. For beginners in 3D printing, we have prepared an article in which we will talk about the features and subtleties of working with such 3D plastic, its varieties and 3D printing results. From this review, you will learn everything you need to know about wood plastic, and even a little more. 🙂
Varieties of wooden plastic
So, let's start with varieties of wooden 3D plastic. The modern 3D technology market offers a variety of options for such material, the most common of which are a mixture of environmentally friendly PLA plastic and chopped wood shavings.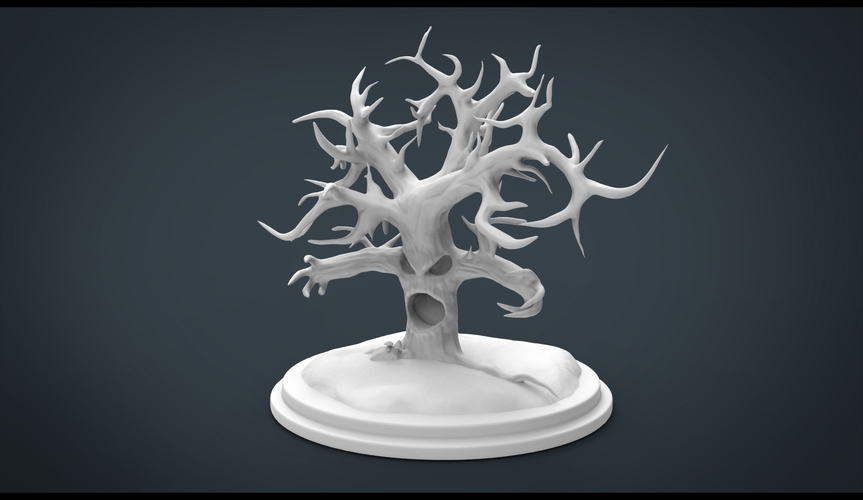 The mass fraction of wood powder varies depending on the specific material, on average it is about 30%. Thus, in terms of its properties, the material is as close as possible to pure PLA and does not differ too much from it in terms of 3D printing parameters.
As for manufacturers, the leading positions in the 3D printing market are occupied by such popular materials as Esun Wood and WoodFill from the well-known Dutch company ColorFabb. By the way, it is them that we will consider in our review. This is followed by 3D plastic LAYWOOD-D3, and smaller manufacturers close the positions. We came across various wooden plastic for a 3D printer, and it happened to test it for a wide variety of purposes. Today we want to share our own experience with you and talk about the features of working with such materials.
3D printing features
So, as mentioned above, Esun Wood and WoodFill 3D plastic from ColorFabb were chosen as test materials for our review. Both polymers are based on ordinary PLA.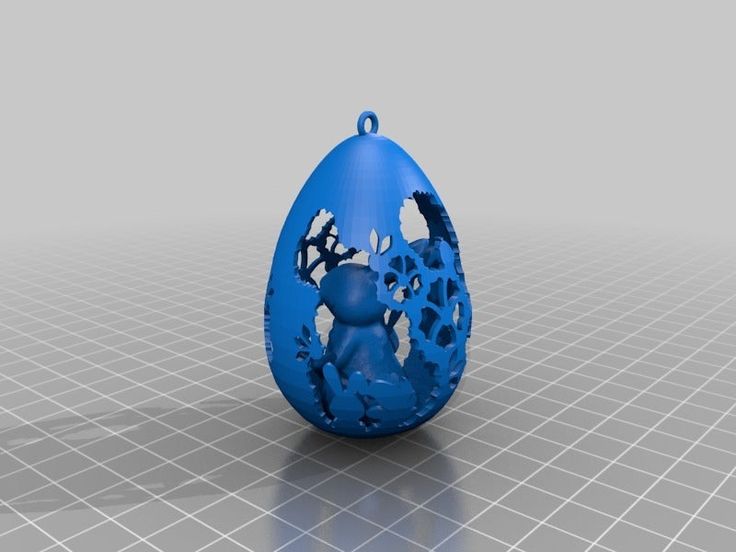 First, let's talk about the general requirements for the material. Wooden plastic for a 3D printer is recommended to be used with the following settings:
- 3D printing temperature - 190-245 ˚С;
- Print speed - 40-100 mm / s;
- Platform heating temperature - 50-60 ˚С.
We would like to note from ourselves that the print settings for wood plastic differ little from the settings for 3D PLA plastic. It is advisable to set the maximum airflow and increase the Flow parameter in the slicer program, since wooden plastic for a 3D printer is characterized by an uneven diameter along the length of the thread. It is recommended to work with a nozzle with a diameter of 0.4 mm or 0.6 mm. Now let's talk about the impressions of printing with specific materials.
Wooden plastic comparison
Esun Wood is fed evenly throughout the 3D printing process, and differs little from ordinary PLA. Changing the print temperature does not affect its color in any way, and the “woody” composition of the material resembles only a slight roughness of the finished model.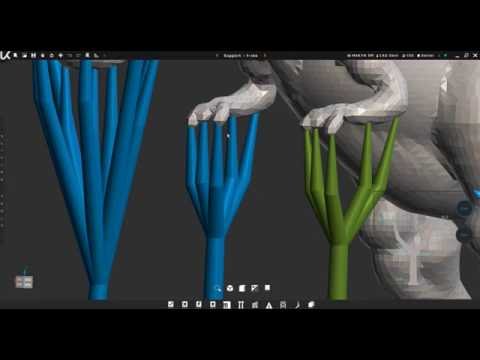 The color of the 3D plastic is light wood. As a test product, we chose a 3D frog model, the photos of which are attached to this article.
As for ColorFabb's WoodFill, at low temperatures this 3D printer wood plastic shows almost identical results to Esun's plastic. It also has a light wood color and prints quite evenly. However, as the temperature rises, rather noticeable dark layers appear on the 3D model, the combination of which gives the product a resemblance to real wood products. This is clearly seen in the example of a chess knight model, the photo of which is attached to the article.
As you can see, there is a noticeable layering and color unevenness on the horse. Darker bands were obtained by adjusting the temperature when setting parameters in the slicer program. Yes, when generating a control code, you yourself can set which 3D printer will raise the temperature, creating unusual combinations. But be careful - an excessive increase in temperature is fraught with a clogged nozzle.