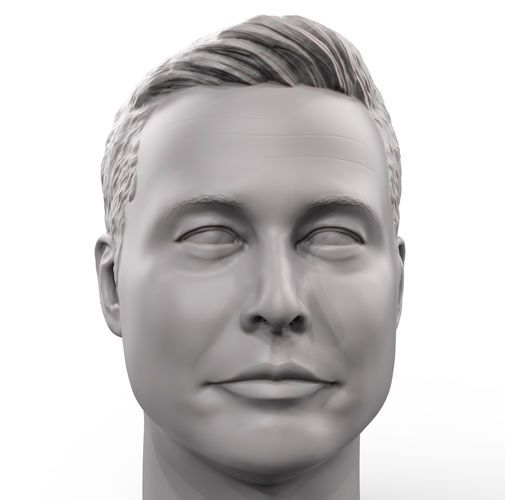
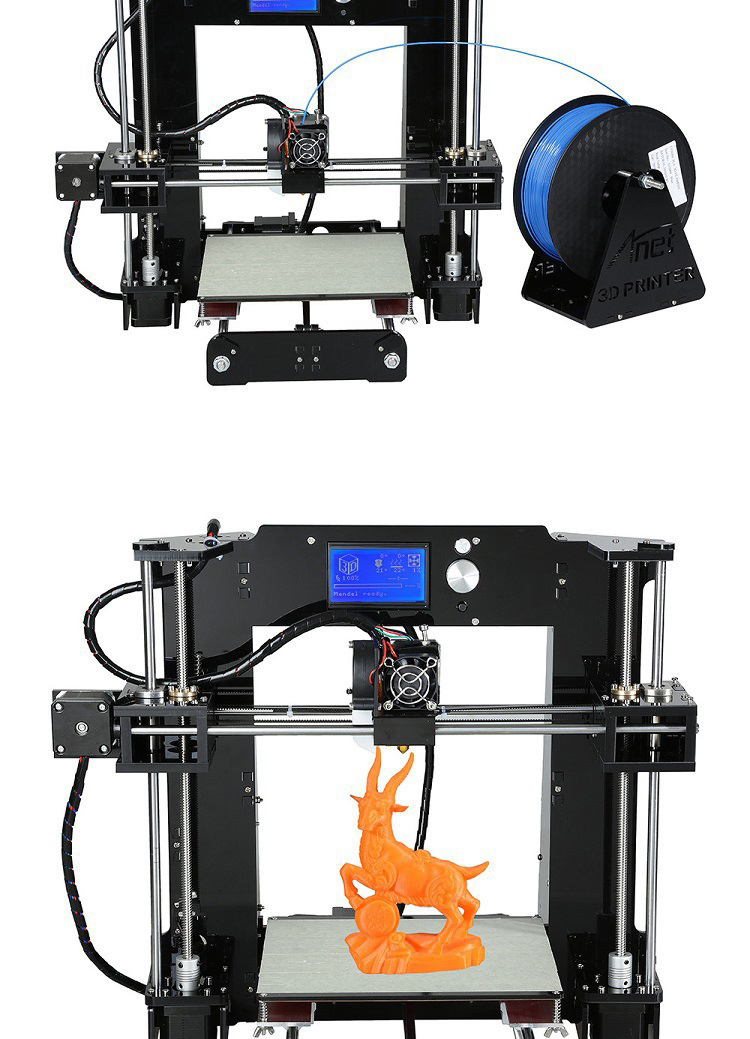
3D printing portraits
FAQ | Shapify
General
1. Why Artec Shapify Booth?
Artec Shapify Booth features a fully automated process for creating 3D files. Use it to set up an innovative, lucrative and scalable business.
2. What is special about your software?
It’s the only software on the market that can process full body 3D scans automatically and quickly. Just compare the Shapify’s 15 minutes of automated cloud computing to create a 3D printable file with at least 2 hours of highly skilled work spent by a 3D modeller on every file made using photogrammetry or any other scanning solution.
3. I’ve heard of photogrammetry scanning solutions, but how does Shapify Booth work?
Unlike photogrammetry the Shapify Booth uses real 3D scanners. This is what has allowed us to create software which automatically creates printable 3D files.
4. What do I need to do to operate the Booth?
I. Front office
1. Meet the customer, check he or she is wearing appropriate clothes for scanning, recommend removing shiny clothes, jewelry, black shoes and glasses. Explain the process and ask the customer to hold still for 12 seconds while being scanned. Type the customer's name (or e-mail) into the system.
2. The customer stands in the booth. You click on the "Start" button and make sure the customer doesn't move during scanning.
3. After scanning, wait with the customer until the preview picture is ready. (About 5 minutes). Meanwhile discuss delivery options with the customer.
4. Make sure the preview is good and that the customer likes it.
5. Store the customer's name (e-mail), chosen delivery address, size of figurine and number. (This can also be done during step 3)
6. Charge the customer.
7. The printable 3D file will be available to order or download on your Shapify.me online account within 15 minutes.
II. Back office, via the booth operator’s online account at www.shapify.me
1. Log in to your personal account at Shapify. me. If you want to print the figurine yourself, just select the model and press the “download” button.
2. If you want to order printing with Artec, please make sure your printing account has enough credit.
2. Go to Gallery, select the required model(s), enter the delivery address, number and size of figurine(s).
3. Click on the "order" button.
Please see the video for a visual explanation
5. If I install a Shapify Booth, will it carry your brand or mine?
The branding on the booth itself cannot be modified apart from in exceptional circumstances. However, if you decide to use an exterior pod or structure for the booth, you can create your own design or use the Shapify design. In both cases, the design should be harmonized with us for technical and marketing purposes.
6. Is the Shapify Booth portable?
Yes. Shapify Booth it is the most portable and easy to deploy automated 3D scanning solution on the market. However, the booth should be assembled and calibrated by an authorized maintenance partner; this is about 4-5 hours’ work for a two man job.
7. So there are 3000 3D model files included in the Optimal business model. But what if I just need to re-scan a customer?
We don’t count scans, we count the processed 3D files you choose to print or download. You can scan your customer as many times as necessary, this will be free of charge.
8. What’s in the box? What is included in the price of the booth?
– Hardware, delivered to your address
The whole scanning system - the scanning with 4 hi-res rotating scanners, lighting, and the computer to manage the process.
The first installation by our certified Maintenance Partner
- Software
There are 3 levels of software:
1. The software installed on the Booth PC for managing scanning and modelling a quick (1 min) preview so your customer can decide whether to accept the quality of the scan
2. Cloud software to process your hi-res model (3-5 min) and upload it to your personal account on the Shapify.Me web site.
3. The Shapify website software and interface to help you to store and manage your scans, download your files, order prints, check your scanning and printing accounts and schedules (within certain business-models)
- Warranty
1 year full warranty
With the “Optimal” business model you will also get 3000 automatically processed 3D files.
9. If I use the “optimal” model, how will I know how many files I have “spent” and what will happen afterwards?
You will have a special counter on your personal account at Shapify.me. You will always know how many files you still have left. When you have used them all, you will be able to top up your account on the website by paying $20 per extra scan.
10. Does the booth have to be connected to the internet? Can’t the file be created locally, on the booth computer?
Yes, the booth has to be connected to the internet since all the calculations are done in the cloud.
11. My client’s data will be transferred to the cloud. Is that safe?
A lot of information, from the photos on your iphone to your credit card details, is sent to and processed in the cloud. All data on the Shapify website and in the Shapify cloud is encrypted and safe.
12. Can Shapify Booth scan a couple or 3 persons together?
Yes, it can. Just remember that the more people are scanned together, the more difficult a job it is for the software, since everyone makes some slight movements even if they trying to keep totally still, and if there are several people in the booth, the volume of movements will be higher. So achieving a perfect scan of multiple people will be a little more difficult - although we have plenty of success stories!
13. What is the approximate processing time for one full body scan?
You (and your customer) will see the finished preview in about 5 minutes. Based on that, the customer can decide whether they like the scan and wish to purchase the printed 3D shapie.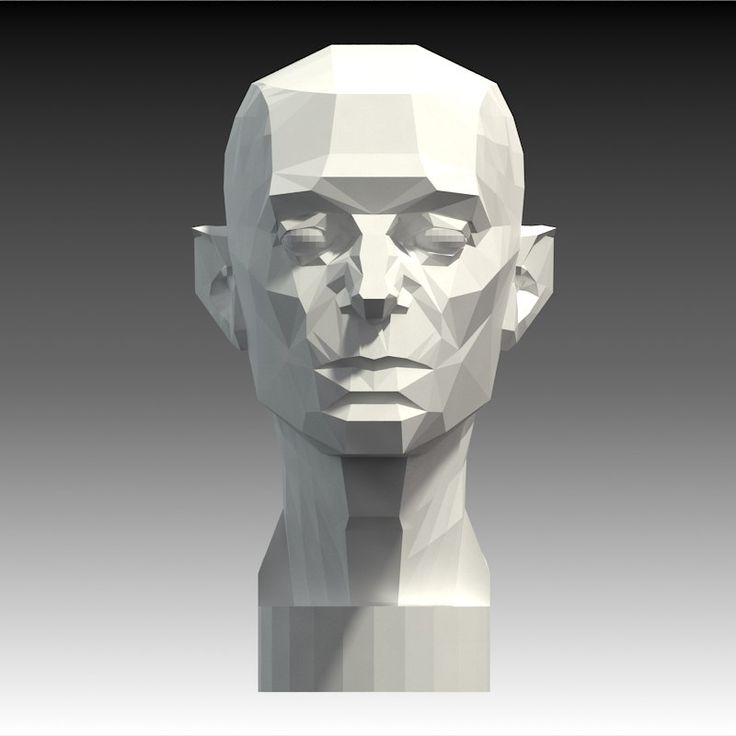 The hi-res fully processed file should be available in about 15 minutes on your personal account on the Shapify.me website
14. What scanners are used inside the booth?
This is the Artec L2, an enhanced version of Artec Eva, but with a wider view field and longer working distance.
15. Will we get trained to use the software and the hardware
Of course!
16. What are the installation requirements?
You’ll need a space of at least 3.3m x 3.3m, ceiling height at least 2.8 m. For electricity you should have 220V and 2500W. We recommend a fast Internet connection of 8-10M. Don’t forget you should also have a Windows laptop or a desktop to run the Shapify software. It doesn’t need to be powerful, though, all the heavy work is done in the cloud and on the Booth PC.
17. Where I can see the Booth in action?
Take a look at our map here and also keep an eye on our news.
18. Are the prices on your website in USD?
Printing
1. The Shapify Booth creates a ready-to-print 3D file. How do I turn it into a 3D printed figurine?
There are 2 options:
1. You can find your own local printing partner.
2. You own a 3D printer yourself and print the figurines on your own premises.
2. Can I order 3D prints directly from Artec 3D?
Artec 3D doesn’t offer 3D printing services.
3. What 3D file format do you support?
Our files are in .obj format (plus texture in .png) which can be easily transformed into any 3D format you need (like .ply or .stl) with free software (e.g. Meshlab).
4. What material can the figurines be printed in?
Once you have downloaded the file, you can print it out using any material you like – gypsum-based polymer, metal, plastic or even chocolate.
3D portraits, 3D figurines and 3D selfies
What are 3D printed figurines or 3D selfies, also known as “mini-me” and 3D portraits?
3D printed figurines, 3D selfies, “mini-me”, and 3D portraits refer to the same thing: a photorealistic 3D printed miniature figurine of a person (or a couple) based on a 3D scan.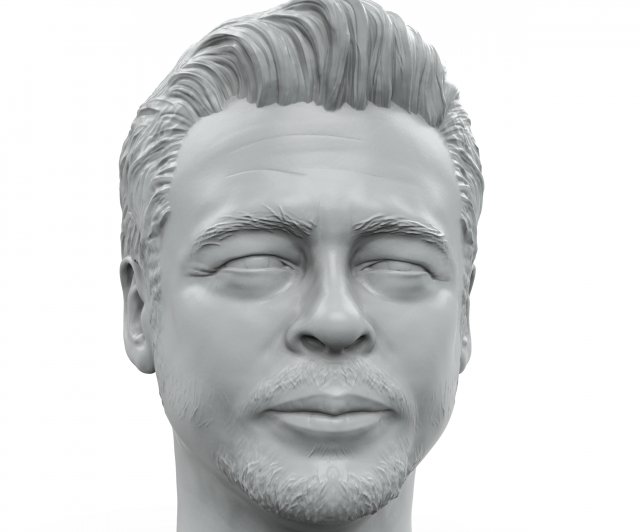
The process to get such a personal 3D self figurine involves two main steps:
- Step 1: 3D scanning the body or face of the person with a handheld 3D scanner or full-body 3D scanner. A 3D model can then be obtained and exported.
- Step 2: 3D printing the figurine or bust on a 3D printer. It can be 3D printed on a full-color 3D printer (expensive systems that can be accessed via a 3D printing service).
The result: a photorealistic, miniature 3D printed statue of the person, in vibrant color and with a high level of details.
Another option is to 3D print the model at home on a cheap desktop 3D printer with white PLA, for example, and paint it after undergoing some post-processing.
How to start a 3D selfie business or 3D figurine business?
If you’re willing to start a 3D selfie business or 3D figurine business, we strongly recommend looking into 3D scanning booths specifically designed for 3D figurines and 3D selfie production.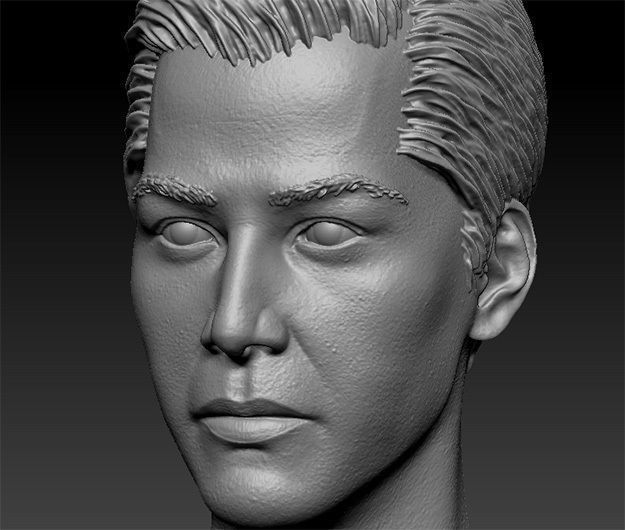
Integrated systems include all you need to get started and do not require you to invest hundreds of thousands of dollars in advanced, industrial-grade equipment.
3D figurines: a unique gift idea to capture memories in 3D
3D selfies and 3D portraits to capture important events
3D printed figurines are great gifts for life events such as weddings, graduations, or birthdays. They make for a great alternative to traditional photos. In the case of a wedding, it is possible to create a 3D printed miniature figurine of the bride and groom to use it as a wedding cake topper.
A personal 3D figurine made by 3D You.Several size options are available for 3D figurines or 3D portraits, ranging from a few centimeters tall to almost life-size dimensions. Pricing will increase with the size of the 3D printed statue.
Create a customized action figure or toy with 3D printing
3D printed figurines can be personalized at will to create action figures with your own face on them, for example! Once 3D scanned, the face of the subject can be integrated on a 3D design of a famous action figure (such as The Hulk on the image below) or even fantasy and historical figurines.
To get such a custom 3D printed mini-me figurine, here are the steps to follow:
- Step 1: Find a 3D printing company offering this type of service near you or online (like MyFaceOnAFigure.com)
- Step 2: 3D scan your face or use regular pictures; some companies can turn 2D photos into a 3D model (a process called photogrammetry) and integrate them onto an action figure
- Step 3: Wait for your 3D printed figurine to be printed and delivered!
If you are already an advanced 3D scanning and 3D printing user, you can also make your own action figure from scratch following this tutorial by Materialise.
Last but not least, for animal lovers, there are even companies specialized in pet 3D scanning and pet 3D printing. 3Dpetshop in Japan offers a unique procedure to get a 3D printed miniature version of your beloved pet companion.
The best 3D printers for 3D figurines, 3D selfies and 3D portraits
Do you want to start your 3D selfie business? Or simply 3D print a miniature version of yourself? Then you will need to find the right 3D printer and 3D scanner to produce your 3D figurines.
For the 3D printer, an important requirement is the capacity to 3D print in full-color (different than simple multicolor 3D printing) with a high print resolution. Only a handful of 3D printer manufacturers currently offer full-color 3D printing, and their systems are usually expensive.
Want to find out more about color 3D printing in our guide to full-color 3D printers.
The best 3D scanners, 3D body scanners and 3D scanning booths for 3D figurines and 3D selfies
In order to print a 3D selfie (or a 3D statue or mini-me 3D figurine), you first need to capture in 3D and in color the face or body of your subject using a 3D scanner.
There are several types of 3D scanners suitable for face 3D scanning or full-body 3D scanning but, in the end, only a handful of 3D scanners can be used for professional applications.
3D scanning booths and 3D body scanners
The full-body 3D scanner market is booming, but only a few of these 3D scanning booths are suitable for 3D printing figurines or “mini-me” applications.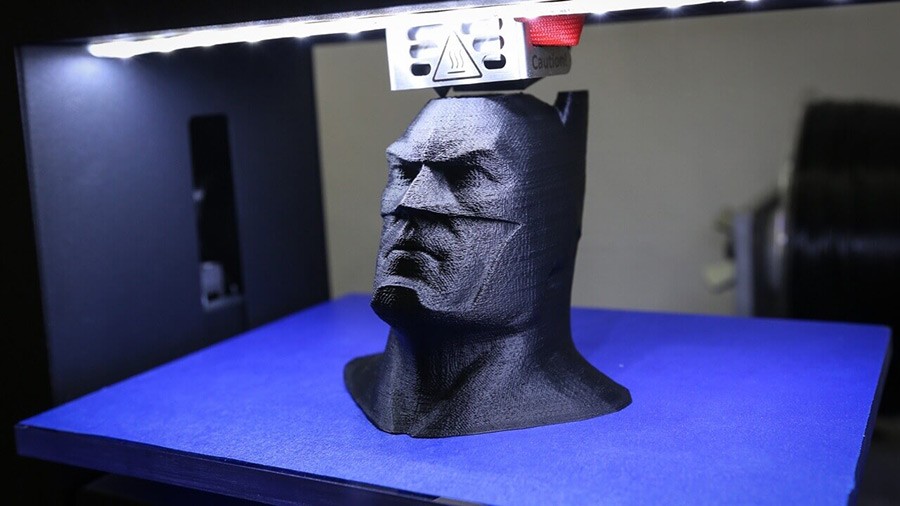
They almost always come as part of an integrated solution designed for 3D entrepreneurs, including a 3D scanning and 3D printing solution. The resulting 3D models obtained are sent to a local 3D printing service with the capacity to 3D print the figurines in color and then ship them to the end customers.
Note: Several of the 3D body scanning systems currently on the market are designed for medical or fitness applications, hence not suitable for a 3D selfie or 3D printed figurines business where capturing textures and colors in high resolution is paramount.
Use our 3D scanner comparison engine to find the best 3D body scanner for you.
Portable 3D scanners and handheld 3D scanners
Handheld 3D scanners technically have the capacity to capture a full person in 3D, but they require the subject to stand still throughout the 3D scanning process which lasts around 2 to 3 minutes. While this sounds manageable for most people, it’s less the case if you want to get 3D figurines of your kids or pets!
Indeed, if the person moves during the 3D capture phase, the 3D model will be unusable. Therefore, most 3D selfie businesses do not use portable 3D scanners but a 3D scanning booth, such as Twindom (see above).
Again, you can use our comparison engine and use filters like “Handheld” and “Texture/Colors” to find a suitable portable 3D scanner (or click here for a pre-filtered search!)
3D figurines and 3D selfies services
3D figurines companies and professional body scanning services
To obtain a photorealistic 3D figurine or 3D selfie, we strongly recommend working with a qualified service. Professional 3D figurine services often use integrated 3D scanning booth solutions such as Twindom.
In this case, the service provider takes care of the 3D capture part of the process, scanning the person(s) with a 3D scanning cabin. The resulting 3D file is then sent to an external 3D printing service provider specialized in full-color 3D printing and equipped with the best 3D printers for 3D figurines on the market.
How to make your own custom avatar with 3D scanning?
Get your own 3D body scan or 3D face scan
To obtain a detailed 3D model of a subject, you have to use 3D scanning. The result of the 3D scanning step is a 3D file with the shape, texture, and colors of the person.
Several types of 3D scanners exist and you don’t necessarily need to purchase an expensive 3D scanner to perform a 3D scan of a person:
- Free 3D scanning mobile apps can turn a smartphone into a portable 3D scanner. 3D scanning someone usually requires around 20 photos for a full-body scan in color.
- An affordable 3D scanner can be a good option to produce decent quality 3D scans of people.
 It only requires someone else to perform the 3D scan.
 - A professional handheld 3D scanner, capable of capturing an object (or a person) in full color and with textures.
- A 3D scanning booth or full-body scanner, the ideal solution to obtain a detailed 3D scan of a person’s body. 3D body scanners are typically used by companies offering 3D printed figurine services.
Customize your own 3D avatar with a 3D software
Once you’ve obtained a 3D scan of yourself (full body or face), you can import this 3D file in CAD software (a 3D modeling program).
A 3D model with UV maps in Blender 3D software. Source: gamedev.netIn order to customize the 3D design, software solutions like Blender can be an affordable option. You can then modify the shape, textures and even add accessories to your original 3D scan.
Your imagination – and 3D design skills! – are the limit!
Paper-based 3D printing vs powder-based 3D printing
Only a handful of 3D printing technologies can produce full-color, photorealistic 3D prints with professional-grade quality.
Powder-based 3D printing
A powder material (sandstone, gypsum, …) is sintered or melted by an energy source. Then, a binding agent can be applied to form the object layer by layer. Each layer is colored as it’s being solidified.
The main advantages of this technology are the large build size capacity of the 3D printers and the ability to produce photorealistic 3D portraits and figurines, with vibrant colors and a high-quality look and feel. However, the 3D printing material (powders) and the machines themselves are quite expensive.
Paper-based 3D printing
This approach, developed by Irish 3D printer manufacturer Mcor (now CleanGreen3D), uses regular paper as a consumable. The 3D printing process is derived from the lamination technique.
First, the sheets of paper are printed and colored with regular inkjet heads. The sheets of paper are then fed into the 3D printer to be cut and glued together to form a colored 3D object.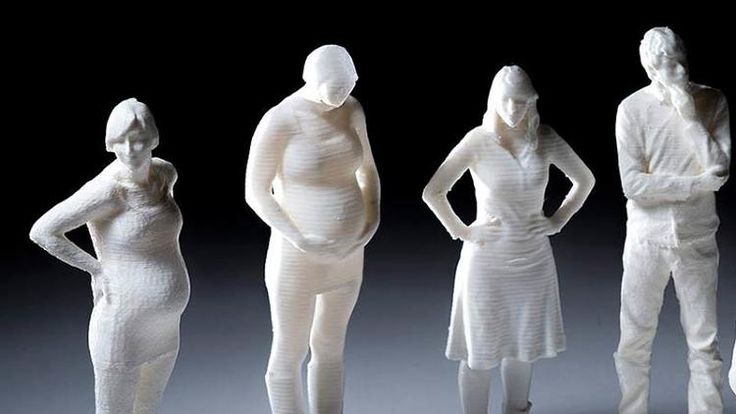
The main benefit of paper 3D printing is its affordability since paper is a lot cheaper than other 3D printing materials (filaments, powders, or resins). Downsides of this technology include small maximum build sizes and tricky post-processing when working with 3D models that have complex geometries and details.
Gallery, photos of completed 3d printing works
- Home
- Gallery
3d printing of lodgements for the production of durable plastic packaging. More photos inside. 02/01/2023
3D model editing, printing, processing and painting. At the output - a node layout for presentation at the exhibition. More photos inside. 12/14/2022
Plastic 3d printing, assembly and basic seaming of a set of large flat parts (90 cm per side) with for checking before production. More photos inside. 09/01/2022
Printing from photopolymer, processing and painting. At the output - a layout of the installation unit with moving parts inside for presentation. More photos inside. 01/19/2023
3d plastic printing and basic processing of "working" tableware prototypes. More photos inside. 08/24/2022
3D modeling from a photo, printing, processing and painting in an accelerated mode. The output is a set of mock-ups of equipment for SPIEF 2022. More photos inside. 08/15/2022
3d printing and complex surface treatment of the product. This model will be used to create the form. More photos inside. 08/09/2022
3D printing of weather-resistant plastic and assembly of car body parts for further processing. . 07/06/2022
3D modeling of a prototype of engineering products for presentation from a photo. More photos inside. 06/20/2022
Plastic 3D printing and dimensionally controlled assembly of two sets of container prototypes for testing before production. More photos inside. 06/07/2022
3D modeling from photo, printing, assembly, processing, painting and integration of electronic components. At the output - a working model of a lamp for a theatrical production. More photos inside. 05/27/2022
3D printing from durable plastic, assembly and processing of the inner surface (filler and polishing) of a large functional model. More photos inside. 04/29/2022
3d printing of a series of souvenir products from abs plastic with acetone vapor treatment and installation of fittings. More photos inside. 03/22/2022
3D printing, assembly, processing and painting of the coat of arms-emblem 120 cm high for installation on the street. More photos inside. 02/22/2022
3D printing, assembly, surface treatment and painting of building models. More photos inside. 02/08/2022
3D modeling from photographs, 3D printing, assembly, processing and white painting of the bust. More photos inside. 02/03/2022
3d modeling according to the original, 3d printing from plastic, processing for painting and chrome plating for car rims. More photos inside. 12/09/2021
3D printing from plastic with maximum filling, processing for painting and painting parts of the parts. More photos inside. 01/10/2022
3d printing from a budget photopolymer, processing and painting of figurines - souvenirs. More photos inside. 12/28/2021
3D prototyping of electric motorcycle body parts as part of the development process. More photos inside. 01/19/2022
Details are a disassembled layout (spiral design with wings 1 meter long). It is intended for experiments with streams. Inside the model and wings there are special through channels and cavities. ABS plastic 3d printing, assembly and comprehensive surface treatment. More photos inside.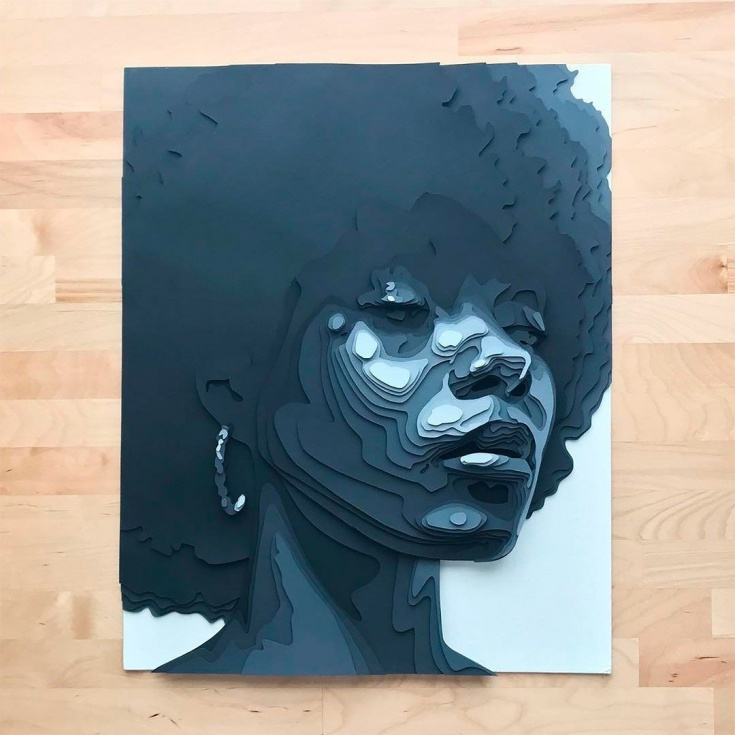 05/11/2021
3D printing, assembly, processing and white painting of the bust of Pythagoras 70 cm high. More photos inside. 08/25/2021
3d printing from a budget photopolymer, processing and painting. More photos inside. 08/09/2021
3D printing, assembly and basic seam processing of a smaller version of the rider sculpture. This miniature is needed for the presentation and for checking the work of the sculptor. More photos inside. 06/02/2021
3D prototyping of household chemicals packaging. More photos inside. 07/08/2021
3D printing, assembly, basic seam processing. The model has a length of 2 meters and a complex shape, with a minimum wall of about 2 mm. Used to test production tooling. More photos inside. 04/27/2021
Creation of 3D models from pictures and layouts, 3D printing and assembly of a series of corporate souvenirs for shooting a TV program. More photos inside. 03/26/2021
Preparation of a 3D model for production, 3D printing, assembly, reinforcement, complex surface treatment, painting and installation on site of a sculpture of a soldier and mother. More photos inside. 03/16/2021
3D prototyping of skirting assembly parts as part of the product development process. More photos inside. 03/08/2021
3D modeling from photo, 3D printing, assembly, surface treatment and painting of a gift bust. More photos inside. 02/10/2021
3d printing, assembly and basic seaming. The model has a length of 2 meters and a complex shape, with a minimum wall of about 2 mm. Used to set up production equipment. More photos inside. 02/03/2021
Preparation of a 3D model, 3D printing, assembly, complex surface treatment and artistic painting of a wolf head sculpture 1 meter long. Designed for placement in the interior. More photos inside. 10/09/2020
Pilot production of a small series of cases, through 3D printing, processing and painting, installation of metal threaded bushings. More photos inside. 08/31/2020
3D printing of a 3-part collapsible mock-up made of ABS plastic. More photos inside. 06/08/2020
3D printing, assembly and complex surface treatment of the ABS plastic model. This product was made to be removed from the mold, for subsequent replication. More photos inside. 06/08/2020
3D printing of a small series of products from original German high quality polyamide. More photos inside. 05/27/2020
Pilot production of parts by 3D printing from ABS plastic, with complex processing and painting. More photos inside. 05/03/2020
Creation of a 3d model according to pictures and description, 3d printing and chemical processing of a series of corporate souvenirs. ABS plastic + chemical treatment. More photos inside. 01/29/2020
3D modeling according to a sketch, 3D printing, assembly and complex surface treatment of models made of ABS plastic. These products will be used to remove the form from them, for subsequent replication. More photos inside. 01/23/2020
3d modeling according to the original and manufacturing using 3d printing, laser cutting and processing with painting of a model of medical equipment 1 meter long. More photos inside. 11/21/2019
3d printing of a small series of award figurines. 25 cm high, ABS plastic gluing, processing and painting. More photos inside. 11/05/2019
Editing of a 3D model and 3D printing of a small series with anatomical accuracy of repeating sections of the arterial system in photopolymer parts. processed to give transparency. More photos inside. 10/25/2019
3d printing of a medium series of PLA plastic parts kits. Parts are used in the finished product. More photos inside. 10/15/2019
Creation of a colorful art object with a logo 140 cm long. 3D printing, processing, painting in individual colors, assembly. More photos inside. 09/24/2019
3D printing, assembling and seaming of a template for creating an ABS plastic sculpture. This template will be used to create the actual sculpture. More photos inside. 10/03/2019
3D printing from abs plastic with sanding. preparation for painting and painting. Details are the constituent parts of the functional device prototype. More photos inside. 09/15/2019
Development of hinges and fasteners, 3D modeling and 3D printing from plastic with complex processing. The output is a functional prototype of the case, with a loop and a lock. More photos inside. 09/02/2019
3D printing of products for use in high-load conditions. Part of the parts is chemically treated to increase friction resistance. Material - ABS plastic. More photos inside.
3D printing of a set of parts for assembling a filter mask prototype. All parts form one complex assembly. We printed all the parts in abs plastic and finished them by hand. Dimension tolerance is 0.15-0.3mm. More photos inside. 08/02/2019
3d printed abs plastic with assembly and basic surface treatment. The prototype is a lamp body. More photos inside. 07/15/2019
3D modeling and 3D printing of plastic with complex processing. The output is a functional model of a bathtub that does not let water through. 60 cm long. More photos inside. 07/12/2019
3d printing, assembly and complex surface treatment of an ABS plastic product. This product will be used to create a mold, presumably for casting into concrete. More photos inside. 07/02/2019
3d printing from abs plastic with processing and painting of the front side of the functional prototype of the device. More photos inside. 06/25/2019
3d printing, assembly and special processing of ABS plastic sculpture to create a mold for casting in porcelain. This is one of the many works we have commissioned by the art association AES+F. Lots of photos inside. 06/25/2019
3D Printing of Iron Giant Helmet. The helmet measures 35 cm on the larger side. Creation of a model, printing from abs plastic, gluing, processing and painting. More photos inside. 06/25/2019
3D printed plastic sculpture with painting for presentation. 35 cm long, abs plastic gluing, processing and painting. More photos inside. 06/20/2019
3d printed product for use in high load conditions. The size of the larger product is about 60 cm in length, and the weight is more than 8 kg, despite this, the size discrepancy is within 1 mm. Material - ABS plastic. More photos inside. 06/15/2019
Production of a plastic hand sculpture for room decoration. ABS 3D printing, assembly. processing and painting. More photos inside. 06/02/2019
3d printing of a sculpture with a soccer ball for the presentation of the NIKE company, abs plastic gluing, processing and painting. This order was created for the presentation of the company before the World Cup, the composition embodies the French team. 04/20/2019
3d printed set of parts for assembling filter mask prototypes. This set contains small, thin and complex parts that need to be assembled together. We printed the individual parts in abs plastic and processed them by hand. Dimensional tolerance is 0.15-0.3mm. More photos inside. 04/10/2019
3D printing and assembling of an ABS plastic sculpture, for the subsequent creation of a porcelain product. This is the largest of the works (length 1 meter) made by us by order of the art association AES+F. Lots of photos inside. 02/22/2019
3d printed prototype of an intricately shaped large ABS headlight with basic processing. Length 50 cm. The model is an intermediate prototype for testing and adjustment during production. More photos inside. 12/22/2018
3d modeling from sketches and 3d printing and complex processing of the steering wheel layout for the Jaruar concept car. The prototype was modeled from several parts, so that it was possible to paint each part separately and then assemble it. Material - ABS plastic. More photos inside. 12/02/2018
3d printing, processing and painting of a series of 50 stands for placing aircraft models on them. The products have been processed to give the surface a maximum "premium" quality - this means that the surface not only does not have any traces of printing, but is also uniformly smooth. Material - ABS plastic. More photos inside. 11/20/2018
3d printed and assembled ABS plastic sculpture to create a mold for casting in porcelain. This is one of a series of works made by us commissioned by the art association AES+F. Lots of photos inside. 11/02/2018
3d printed functional product prototype for trial use. The size of the product is more than 70 cm in length, despite this, the size discrepancy is in the range of 0.6-1 mm. Material - ABS plastic. More photos inside. 10/15/2018
3d printing and assembly of abs plastic sculpture for the subsequent creation of a mold for casting in porcelain. This is one of a series of works made by us commissioned by the art association AES+F. Lots of photos inside. 10/02/2018
3d printed skull sculpture of an unknown animal for the presentation of the famous shoe brand NIKE. 50 cm long, ABS plastic, glued, processed and painted white. Lots of photos inside. 09/22/2018
3d printing and assembly of abs plastic sculpture for subsequent casting in porcelain. This is one of a series of works made by us commissioned by the art association AES+F. Lots of photos inside. 09/18/2018
3D printing of a prototype of a dismantled filter element for testing before production (pilot production). Despite the fact that 3D printing was made from ABS plastic, the dimensional accuracy was up to 0.2 mm. More photos inside. 08/25/2018
3d printed soccer ball sculpture for NIKE company presentation, abs plastic gluing, processing and painting. This order was created for the presentation of the company before the World Cup. Lots of photos inside. 08/22/2018
3d printing of a headlight prototype for a car from abs with processing and painting. Length 50 cm. The model is an intermediate prototype. More photos inside. 08/02/2018
3d printing of a Tyrannosaurus rex sculpture with a sneaker, instead of a head. 60 cm wide, abs plastic gluing, processing and painting. This order was completed in 2 days. More photos inside. 07/22/2018
3d printed award for the TV show Agents 003 on TNT. 25 cm high, ABS plastic gluing, processing and painting. More photos inside. 07/14/2018
3d printing of prototypes of electrical appliances from abs plastic with processing and painting. More photos inside. 06/25/2018
3d printed sculpture of a scorpion for the presentation of a famous shoe brand. 40 cm long, abs plastic gluing, processing and painting. We would especially like to draw your attention to the upside down image with the mounting hole, which, in our opinion, looks very surreal. More photos inside. 06/15/2018
3d printing of various ABS plastic containers and containers, for testing before production. Some used assembly and seam processing. More photos inside. 06/02/2018
3d printed sculpture for the presentation of a famous shoe brand. 30 cm wide, ABS plastic gluing, processing and painting. More photos inside. 05/23/2018
The functional model is a complex spiral structure with wings 1 meter long and is intended for experiments with airflow.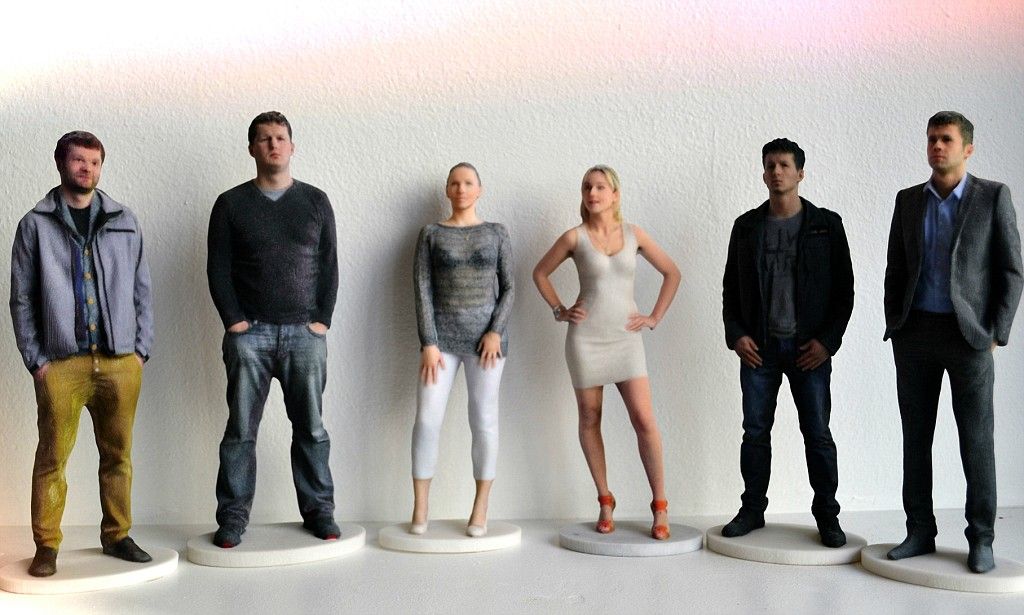 Model assembled in 14 separate parts. Inside the model and wings there are special through channels. ABS plastic 3d printing, assembly and comprehensive surface treatment. More photos inside. 05/16/2018
3d printing of parts made of polyamide with painting and transparent photopolymer, for assembly and exhibiting at a specialized exhibition. High precision and surface quality. More photos inside. 05/01/2018
3d printing of fasteners for product presentation. The overall height of the larger object when assembled is 75 cm. ABS plastic 3d printing, gluing, sanding and painting. More photos inside. 03/15/2018
3d printed prototypes for assembly testing. The largest part - the body consists of 16 parts. ABS plastic 3d printing, gluing and surface treatment. More photos inside. 03/15/2018
3D printed bottle prototypes with 200 micron accuracy. 3D printing from abs plastic, gluing, grinding. More photos inside. 01/03/2018
Operational 3d prototyping of the body for assembly. for checking and testing. 3d printed in ABS plastic. More photos inside. 02/15/2018
We made a whole mini-army of these bulls. 3d printing of a corporate souvenir: abs plastic gluing, grinding and painting. The model is additionally weighted. More photos inside. 01/25/2018
3d modeling and 3d printing of engine layouts for presentation. 3D printing from abs plastic, gluing, grinding and painting. More photos inside. 01/10/2018
3D printing, processing and painting of a collapsible model of a house frame structure. Each individual element is a component of the overall design. 3d printing from abs plastic. More photos inside.12/15/2017
Creation of a sculptural composition using the additive manufacturing method from a finished 3D model. The overall size of the composition is 50 cm. 3d printing from ABS plastic, assembly and seam processing. More photos inside. 11/25/2017
The layout consists of several parts and can be assembled together if necessary. Serves the purpose of showing how the mechanism works. ABS plastic 3d printing, assembly, surface treatment and painting. More photos inside. 11/15/2017
3d printing of Kalashnikov assault rifles 240 cm high, as well as 3 assault rifles in a size slightly increased from the original to create a sculptural composition. ABS plastic gluing, grinding. More photos inside. 10/13/2017
3d modeling from photographs and 3d printing of a small series of souvenirs made of abs plastic with acetone treatment for distribution at a specialized exhibition. More photos inside. 09/20/2017
3d modeling and 3d printing of the emblem of one of the departments of the Ministry of Defense. Each individual color is a separate model. ABS plastic assembly, complex processing and painting. More photos inside. 09/05/2017
3d printing of a small series of parts in parts. ABS plastic, gluing, surface treatment and painting. More photos inside. 08/22/2017
3D printed bottle prototype with 200 micron precision. ABS plastic, assembly and processing. More photos inside. 08/05/2017
3d modeling from photography, 3d printing and post-processing of a small series of masks for the event. ABS plastic, sanding and painting. More photos inside. 08/05/2017
13 pieces together. The model is a complex spiral structure 1 meter long and is intended for experiments with airflow. ABS plastic 3d printing, assembly and comprehensive surface preparation. More photos inside. 07/15/2017
Correction of 3d models and 3d printing of models of AUDI cars, abs plastic assembly, grinding. More photos inside. 07/02/2017
3d printing of a rider 50 cm long to create a sculpture, abs plastic gluing, grinding. More photos inside. 05/15/2017
3D printed composite cartoon character figurine. ABS plastic, painted. More photos inside. 05/01/2017
Creation of 3D models by 3D scanning and 3D printing of bottle exhibition layouts, ABS plastic gluing, grinding and painting. Overall height 70 cm. More photos inside. 04/20/2017
3d printed container prototype 50 cm high, 10 part assembly. ABS plastic gluing, grinding. More photos inside. 04/05/2017
3D printed model of an aircraft engine blade approx. 80 cm in diameter, 31-part assembly. ABS plastic gluing, grinding. More photos inside. 03/15/2017
3d printing of the master model of the part with an accuracy of 0.2 mm. Polyamide. More photos inside. 03/07/2017
Online 3d printing of a prefabricated prototype for testing. For the correct pairing of parts in the 3d model, gaps were provided 3d printed from ABS plastic. More photos inside. 02/22/2017
3d printed abs plastic product prototype. The case is printed in parts, in order to be able to place all the internal content and assemble. More photos inside. 02/12/2017
3d printing complex layout set. The task is to create several sets of layouts for the exhibition with painting and preparation for painting. The priority is geometry, surface quality and relatively low cost (since the total volume is very large). ABS. More photos inside. 01/20/2017
3d printed layout for subsequent assembly. PLA. More photos inside. 05/01/2017
3d modeling and 3d printing functional pot mock-ups for testing. PLA. More photos inside. 12/25/2016
3d printing, painting and assembly of a small series of figurines - corporate gifts. Polyamide. More photos inside. 12/15/2016
The dummy is a complex spiral structure 1 meter long and is intended for experiments with airflow. ABS plastic 3d printing, assembly and comprehensive surface preparation. More photos inside. 12/06/2016
3d printed polyamide compound body prototype. High precision and surface quality over the entire length. More photos inside. 11/22/2016
3D printing of several customized disks on the car according to the finished 3D model. When you need a special or rare piece, 3D printing can be a great tool. 3d printing from abs plastic. More photos inside. 11/17/2016
Development of a 3D model according to the drawing and technical description and 3D printing of a polyamide body of a complex device.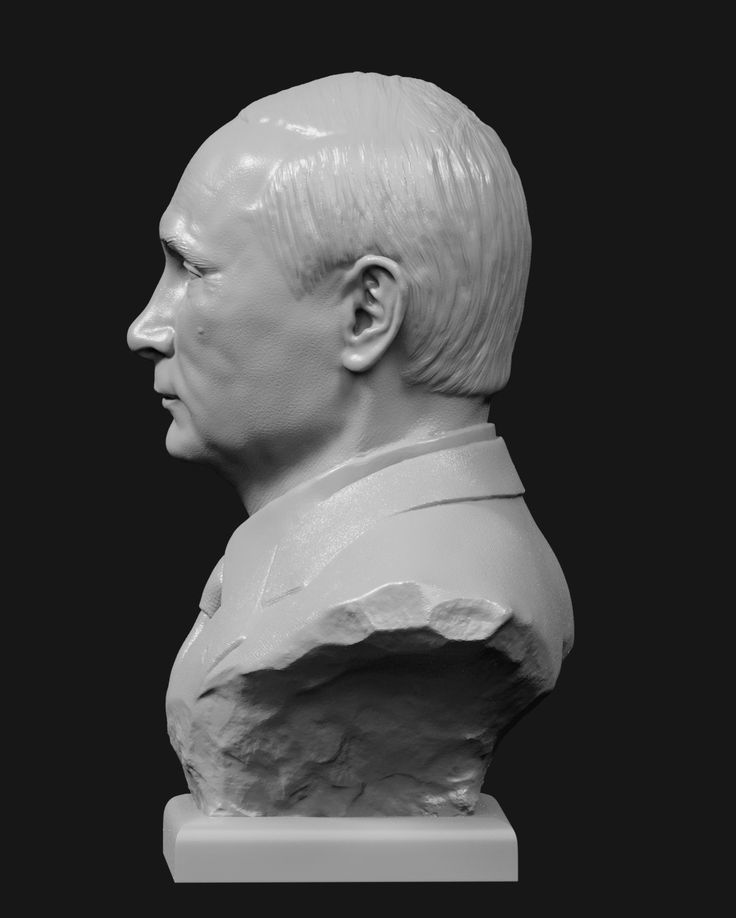 The housing consists of several parts in close contact with each other, including threaded connections. More photos inside. 11/10/2016
3d printed cowboy figurines as a visual prototype before casting. Polyamide. More photos inside. 11/02/2016
3d printing of two doves made of photopolymer. More photos inside. 10/20/2016
3d print of a small copy of the Quidditch field, for placement in the aquarium, made of ABS plastic. More photos inside. 10/05/2016
3d printing of a small series of instrument cases made of plastic Pla. More photos inside. 09/25/2016
3d model editing, 3d printing, assembly and painting of polyamide plant layout. More photos inside. 09/14/2016
3d printed instrument prototypes made of ABS plastic. More photos inside. 09/02/2016
3d printed quadcopter kit. More photos inside. 08/25/2016
3d printed small polyamide disassembled prototype. More photos inside. 08/15/2016
3d modeling and 3d printing of a spare part/disc, 300 microns thick from photopolymer. More photos inside. 08/07/2016
3d printed prototype and small series of polyamide cases. More photos inside. 08/01/2016
3d printed PLA robot kit. More photos inside. 07/22/2016
Prototype demountable headlight housing made of PLA plastic. More photos inside. 07/17/2016
3d printed and painted polyamide medal layout. More photos inside. 07/10/2016
Development, 3d modeling and 3d printing of a fragment of a wall gardening system made of PLA plastic. More photos inside. 07/01/2016
3d printed PLA and ABS plastic bottle mockups. More photos inside. 06/25/2016
Chess pieces from Dota2 game characters, up to 67 mm high. made of PLA plastic. Processing and painting. More photos inside.
3d printing models of Hogwarts castle buildings for placement in an aquarium made of ABS plastic. Lots more photos inside.
3d printing of a small prototype of a flash drive housing made of photopolymer. More photos inside.
Editing of 3d models and 3d printing and assembly of exhibition models of polyamide equipment.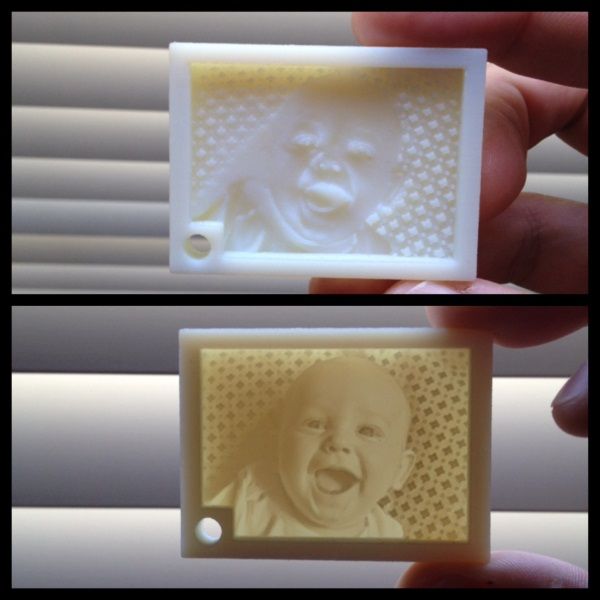 More photos inside.
3d printing of a full-color plaster house model. More photos inside.
3d printed lost wax jewelry wax models.
3D printing of an architectural model made of PLA plastic. More photos inside.
Large and complex project. Experimental spiral installation for the passage of air streams 1 meter long. 3d printing from PLA plastic, with assembly, grinding and seam processing. More photos inside.
3d printed castle mockup 29 cm high entirely in PLA plastic. More photos inside.
3D printing of prototype elements of a composite instrument for assembly from ABS plastic.
3d printed collapsible polyamide case prototype. More photos inside.
3d print a pair of PLA shoes for an exhibition. More photos inside.
3d modeling and 3d printing of spare parts made of ABS plastic. More photos inside.
3d printing of a table composition: coasters/bonfires and napkin holders made of ABS plastic. More photos inside.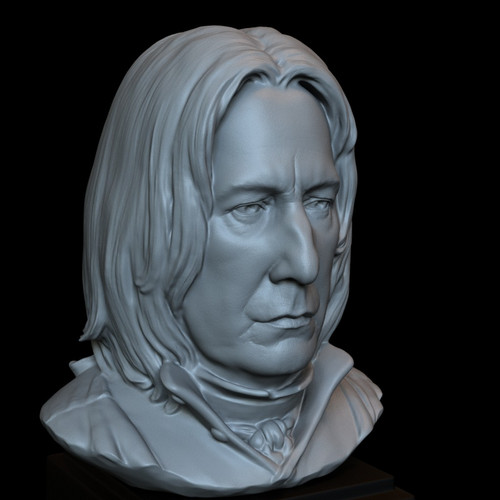
3d printing and painting of a small device body made of polyamide. More photos inside.
3d printed frame profile in 3 materials: ABS, PLA and polyamide. More photos inside.
3D printing prototypes of engineering mechanical elements made of PLA plastic. More photos inside.
3d printed wall trophies in the shape of low poly crocodile heads made of ABS plastic. More photos inside.
3d modeling from a photograph and 3d printing of a bust 38 cm high in PLA plastic. Post processing and painting. More photos inside.
Operational 3d printing of PLA housings for an exhibition layout. More photos inside.
Prototype of complex PLA body for assembly testing. More photos inside.
Part of the body of the bench model 28 cm long made of PLA plastic. More photos inside.
3d printed PLA composite case prototypes. More photos inside.
3d modeling and 3d printing of text and signs made of PLA plastic. More photos inside.
3d3d printed PLA composite case prototypes. Gluing and processing of seams. More photos inside.
3d printed architectural layout in PLA plastic. More photos inside.
3d printing, gluing and seaming and sanding wings to guide air currents 1m high. PLA plastic. More photos inside.
3d printing of a lampshade for a 28 cm high lamp made of PLA plastic. More photos inside.
3d modeling and 3d printing of a "pencil" with a logo for the NTV television company. PLA plastic. More photos inside.
3d modeling of an award figurine with corporate symbols. More photos inside.
3d printed PLA body prototype. More photos inside.
Preparation of a 3d model and 3d printing of a prototype of a complex device. After printing, the components were placed inside. after which gluing and processing of seams was carried out. PLA plastic. More photos inside.
3D printing of complex polyamide structure. More photos inside.
3d printed PLA ice mold prototype. More photos inside.
3d modeling of the layout of the molecular structure. More photos inside.
3d printed cases for instrument development. In total, about 10 sets of PLA and ABS plastic were printed. More photos inside.
3d printing of figurines for awarding for painting from PLA plastic. More photos inside.
3d printed ABS prototype part.
Very large and complex project. Experimental turbine for air streams 1 meter long. PLA plastic 3d printing, assembly, sanding and seam processing.More pictures inside.
3d printing of a font and elements for creating a sculptural composition from PLA plastic. More photos inside.
3d printed functional gears in different sizes from PLA plastic and nylon. More photos inside.
3d printed palette prototypes for testing before production in PLA plastic.
3d printing of a small batch of PLA cases. More photos inside.
3d printing and gluing of fasteners made of PLA plastic. More photos inside.
Chess pieces from Dota2 game characters, up to 67 mm high. made of PLA plastic. Processing and painting. More photos inside.
3d modeling and 3d printing of ABS plastic pen cases. More photos inside.
3d printed ABS plastic part. More photos inside.
3d printed ABS plastic vase mockup for student project. More photos inside.
3d printing of several items based on 3d models from free access for Afisha magazine. Everything is printed out of PLA plastic, on a MakerBot Replicator 2 3d printer. More photos inside.
3d printed functional elements of the mechanism. ABS plastic. More photos inside.
3d printing of a frame and individual elements made of PLA plastic.
3d printing of cartoon bull models for staging in the scene. Printed in PLA on a MakerBot Replicator 2 with hand-crafted supports. More photos inside.
3d printed ABS plastic tooth box. Sanding and varnishing. More photos inside.
Pla
white plastic train car model 3d modeling and 3d printing of PLA film props. More photos inside.
3d printed composite instrument housing prototype made of PLA plastic. More photos inside.
3d printed functional gears of various sizes made of PLA plastic and nylon. More photos inside.
Development, 3d modeling and 3d printing of bird feeders. ABS plastic. More photos inside.
3d printed PLA case prototypes. Gluing. sanding and painting. More photos inside.
Playable character figurine printed entirely from PLA plastic on a MakerBot Replicator 2 3d printer. More photos inside.
3d printed PLA plastic push button housing. More photos inside.
3d printed PLA case mockup. Gluing and painting. More photos inside.
3d printed figurine for painting, made of ABS plastic. Painting. More photos inside.
3d printed PLA parts kit and simple gluing. More photos inside.
3d printed ABS plastic parts set. More photos inside.
3d printed models of cartoon characters for their arrangement in the scene. Printed in PLA plastic on a MakerBot Replicator 2 with hand-crafted supports. More photos inside.
3d printing of a small series of plugs for furniture made of PLA plastic.
3d printed PLA case prototypes. More photos inside.
3d printed several sets of small parts made of PLA plastic. More photos inside.
3d printed cartoon character mockup for staging in scene. Printed in PLA on a MakerBot Replicator 2 with hand-crafted supports. More photos inside.
3d printed composite exhibition cases made of PLA and ABS plastic. More photos inside.
3d printed PLA VR goggle case.
3d printed composite housing prototype made of PLA plastic. More photos inside.
3d printed set of small parts with threads in ABS plastic. More photos inside.
3d printing of a complex geometric figure for an exhibition from PLA plastic.
3d printing of prototype elements made of ABS plastic.
3d printed PLA bottle prototype. More photos inside.
3d printed set of small parts made of ABS plastic.
3d printed PLA hand shaped mockup. More photos inside.
print your photos in 3D! - qbed
| Detailed instructions for 3D printing of lithophanes |
|---|
3D printed lithophane from kraftly.com
Modern 3D printers allow you to create many original and unique things, and one of them is 3D photo-lithophanes, which are gaining more and more popularity as a customized gift for loved ones or just an original product for sale. Let's take a look at what linophane is and how to print it.
Article content:
What is lithophane?
Design Lithophan
Select photo
Convert photo to 3D model
Create and print 3D model of Lithophan in Photoshop
How to slice Lithophan?
Seal of lithophane
What is lithophane?
Classic lithophane is a three-dimensional image on thin translucent porcelain that can only be seen when illuminated from behind by a bright light source (such as the sun or a light bulb). The image will appear in gray tones. Traditionally, lithophanes were created in several stages: first, the image was cut out of wax, then, based on the wax model, a mold was created from plaster, into which porcelain was cast, after which the image was fired.
German lithophane of the 19th century, on the left - without illumination, on the right - with illumination. Photo — Diego Verger
The first lithophanes appeared almost simultaneously in several cities of Europe — France, Germany, Prussia and England — at the end of 1820s and their three-dimensionality was strikingly different from the two-dimensional engravings popular at that time and daguerreotypes . The fact is that the quality and quantity of light interacting with lithophane significantly changes the characteristics of the image itself - such dynamism arouses great interest in the viewer. For example, lithophane inserts in windows change their appearance throughout the day depending on the quality and intensity of the sun's rays.
Modern 3D printers allow you to print lithophane from any high contrast photo. How? Varying the thickness of different sections of the 3D model to render different shades of gray when the lithophane is backlit: thin sections let in more light and look brighter, while dense parts of the print let in little light and create dark details in the image. Don't panic, you don't have to manually calculate the thickness of various sections of the digital model - there are many programs that create 3D models for lithophanes automatically and for free! Let's get down to business!
Back to Contents
Designing the Lithophane
First we need to create a digital model of the lithophane.
Choosing a photo
The first step towards a great printout is choosing a suitable photo , because not all images will look good in the form of a lithophane.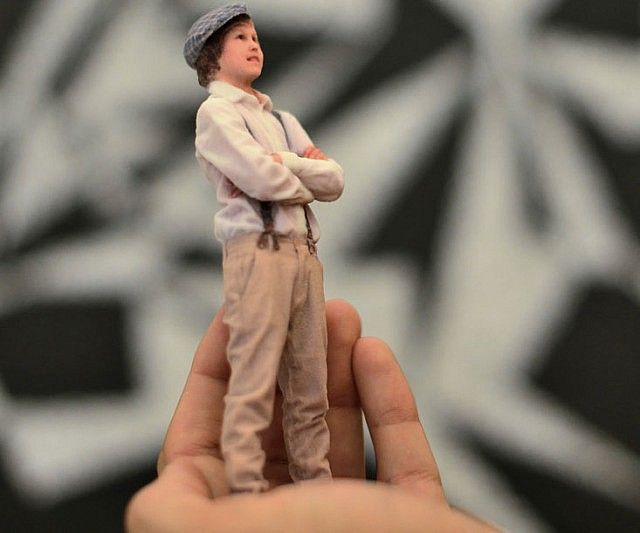
-
Firstly, the finished lithophane will be displayed in grayscale, so images where color plays an important role or where there is a lot of color detail will not work. You can try to convert the photo to b / w in Photoshop or any other program to make sure that you like the picture even if there are no colors.
-
Secondly, it is better to give preference to contrasting photos - so the printed linofan will look more interesting (unlike the image, where adjacent details will merge due to lack of contrast). Again, you can add contrast to the selected photo in Photoshop or any other program.
An example of a low-contrast image, not quite suitable for lithophane printing. Photo — Christina Ryumina
-
Thirdly, avoid photos consisting only of small details , it can be difficult for the printer to print them.
 For lithophanes, images with large contrasting details, such as portraits, are more suitable. Images with a single-color background without details are also good, for example, portraits against a backdrop or against a clear sky. You can clean up the background or create a color fill instead of an existing background in Photoshop or any other program.
Contrasting photo on a plain background is ideal for printing lithophane. You can further clean up the background and add photo contrast in any post-processing program. Photo — Christina Ryumina
An example photo with lots of details is not the best choice for creating a lithophane. Photo — Christina Ryumina
Of course, you don't have to follow these tips. If you print on a high-quality printer with high resolution, then you can handle any details! For example, SLA printers allow you to print smaller details than their FDM counterparts (read more about 3D printing methods here), so a photo for printing on an SLA printer may contain small elements.
Convert photo to 3D model
There are several ways to convert your photo into a 3D model for printing lithophane:
-
You can convert photos with the free online Image to Litophane converter.
-
Models for lithophanes can be created in Photoshop CC by downloading a special Operation (Action) from the official website (detailed instructions read below), or in Blender: these programs have more options to edit the model. It is worth considering that a subscription to Photoshop CC is paid.
-
Cura software (version 13.11 and higher) from Ultimaker will also work. The program is easy to use and allows you to smooth the model, but it does not have the ability to edit the image and create a frame around it.
-
You can use the Customizable Lithopane from printer manufacturer MakerBot on Thingeverse. Here you can add a hole in the frame of the lithophane so you can hang your masterpiece, but in this application your photo resolution will be compressed to 100x100 pixels.
 Another disadvantage: the application can be quite slow, because the Thingeverse website Customizer creates a model and STL file instead of your computer.
-
There is also a free 2D to STL converter for Windows. There are options for smoothing the model, but no way to edit the image.
-
You can create a model for lithophane in a paid Photo to Stereolithographic file converter. This program allows you to create lithophanes on spheres, cubes and other shapes, but the interface here is not the most understandable.
-
There is a nice free Portuguese converter where the language can be changed to English after installation by going to the Iniciar menu, then Idioma and finally selecting English. Here is a link to download the program. In this converter, you can create a frame for the image, edit it before creating a 3D model, and also enlarge / reduce the image. The converter generates models quite quickly, so you can experiment with 3D model settings until you are completely satisfied with the result.
The list of programs, of course, is not exhaustive. You can use any converters of 2D files to 3D models that support export to STL. In this article, we will be using Photoshop CC to create a 3D model from a photo. Create and print a 3D model of Lithophane in Photoshop Attention! The operation only works if the interface language in your Photoshop CC is English. You can change the language by going to menu Photoshop CC → Preferences → Interface.
To add an action in Photoshop, go to the program, go to the top menu in Window → Actions or click the Play icon in the side menu (see screenshot below).
Going into the Actions panel in Photoshop
Opening the operations panel, click on the menu icon (see screenshot below) and select the command "Load Actions...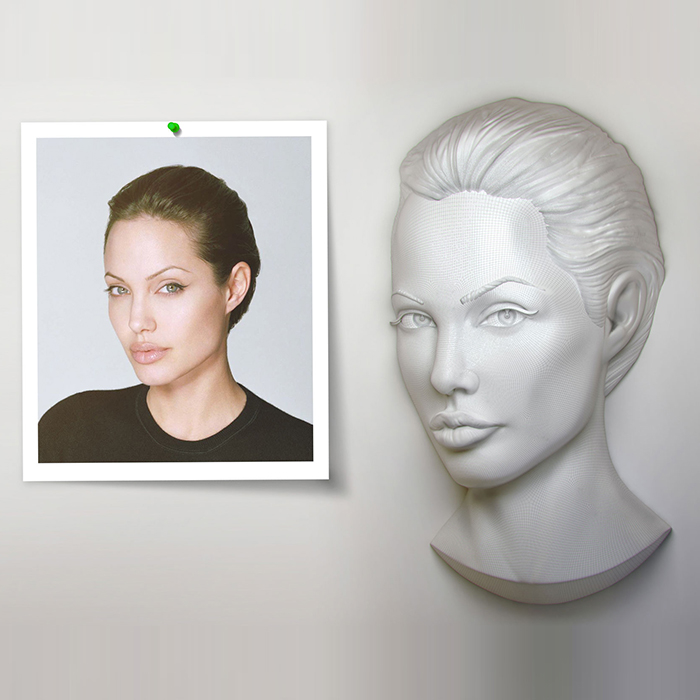 " . We go to the location where your downloaded Lithophane folder and the operation "Make Lithophane.atn" are located and select it. The operation is now available in your Photoshop.
Loading the operation "Make Lithophane.atn"
Operation "Make Lithophane.atn" ready to go
Open the image you are about to print. You can convert it to black and white, add contrast and make any changes, then print the visible layers into one by pressing Ctrl + Shift + Alt + E (English), or simply merge the layers through the menu Layers (in any case , you will be prompted to merge layers when starting the operation). In the layers panel (marked in blue in the screenshot below), select the layer with the final version of your image and name it Background (or select the Background itself directly if you haven't changed anything). Then open the "Make Lithophane" operation folder, select "Make 100mm x 6.25mm Lithophane" (marked in red in the screenshot), press Play (marked in green in the screenshot). The operation automatically converts the 2D image into a 3D printable object: Photoshop converts the image to Grayscale, inverts the tones, creates a 3D depth map, as well as a frame and a flat surface on the back of the image.
Starting the operation of creating a digital model of lithophane
Litophane in Photoshop CC
To print a 3D object, click on the top menu 3D → 3D Print (marked in red in the screenshot below) or click on the print icon (marked in pink). Next, you will see the 3D printing settings panel (see screenshot below). Select a printer (or specify Printer: STL File if you want to export the model as STL), set Printer Units , Detail Level . Determine the size of the model by setting the X / Y / Z values. Option Scale to Print Volume will create the largest printout that will fit in your printer's camera.
Click on the icon marked in green in the screenshot below to have Photoshop prepare your model for printing. Photoshop will analyze the object and show you a print preview with supports in a new window (supports are turned on and off by ticking Scaffolding ). From the same window, we can print or export the model.
Prepare model for printing/export
Model
print/export window
Do not forget that the size and thickness of the lithophane, as well as the amount of detail in the photo and model, affect the printing time. Depending on these settings, it may take 30 minutes or 5 hours to print.
How to slice lithophane?
The slicer will help convert our model into a printer-friendly G-code (read more here).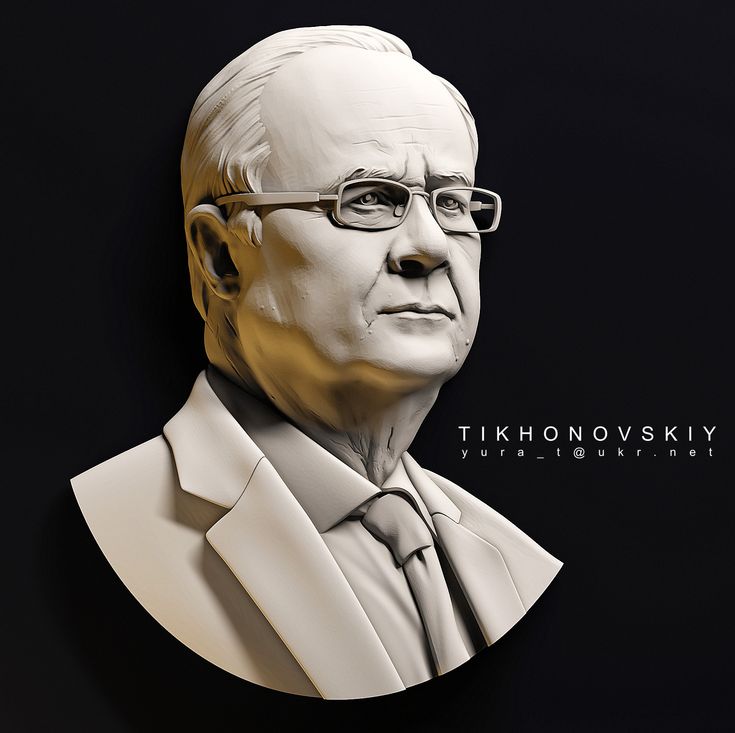 To open a 3D model in a slicer, you need to export it as a STL file. To do this, in the Photoshop 3D printing settings panel, select Printer: STL File , export the model as described above, and open it in your slicer to set up the location of the model on the platform and set other parameters. You can also export photos to STL from any of the other converters mentioned above and then open the file in a slicer.
To achieve optimal printing results, it is recommended to slice the lithophanes as follows:
-
Set straight infill to 100% at an angle of 30-35°. 100% infill will provide the best quality lithophane, as there will be no honeycomb inside the layers, which will spoil the tones in the printout.
-
Set the minimum layer height that your printer supports. This way you will ensure high resolution details and the maximum number of shades of gray in your lithophane.
-
Print as slowly as possible. Speaking of FDM, slow printing will help you avoid retraction problems, because most of the print is created with little extrusion, which can provoke a huge amount of retraction. To prevent your printer from smearing your printouts with unwanted material smudges and your extruder from clogging due to fast retractions, it is best to print as slowly as possible.
-
Select the optimal lithophane slicing parameters available in your slicer. Different slicers provide different options. Choose the slicer you like, however, be aware that some slicers take longer to layer the model than others, for example, Cura usually slices faster than Slic3r. Experiment!
-
Do not scale the model in the slicer. The model should be scaled in Photoshop or other converters mentioned so as not to lose resolution when printing.
Litophane Printing
Now it's to load our STL file into the printer via USB or SD card (or whatever methods are available in your printer).