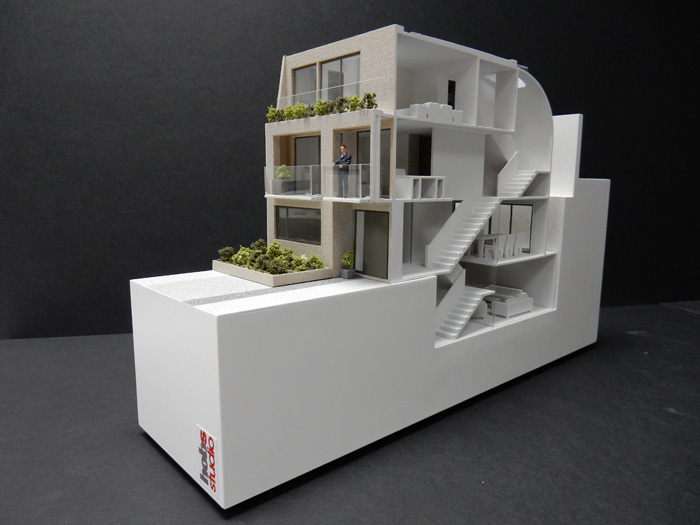
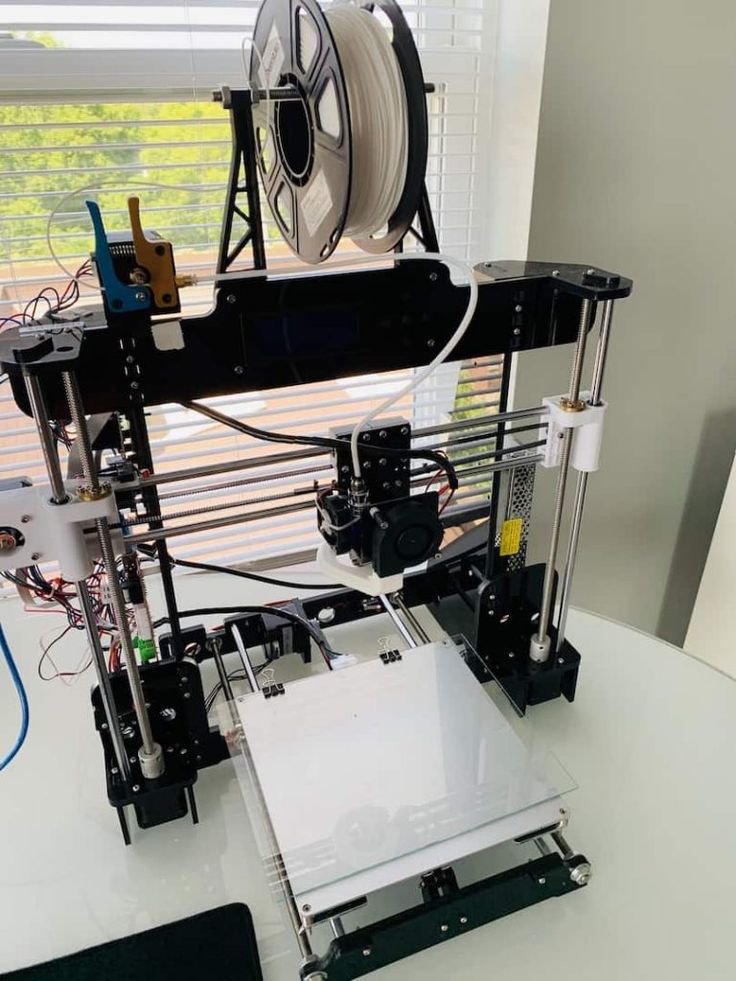
3D printers for architectural models
Top 6 Best 3D Printers for Architects 2023 (In Every Price Range)
Creating a 3D model is a great way for any architect to impress a potential client. Bringing the model to life makes it easy for a client or customer to understand your vision in all its glory — and 3D printing makes this easier than ever.
Budget pick
4.3
$549-999
Amazon here
Best Resin pick
4.7
Premium FDM Pick
4.5
Matterhackers
How 3D printers help with architectural projects
✅ Cheaper 3D printed architectural models
It can cost thousands of dollars for an architectural model if you go down the traditional route. However, if you have a 3D printer capable of 3D printing architectural models, your only costs are the filament you use.
✅ Faster to produce in-house
With time your only constraint, 3D printers make reprints and adjustments an affordable option. Also, having physical models ready in just a day or two is an excellent selling point for a potential client.
✅ Easier to present and show stakeholders your vision, and diagnose errors
In architecture, you don’t always know what will work until you can see it for yourself. Printing multiple concept models allows you to determine which design works best, and tweak them before any concrete is laid. Seeing the model in real life first prevents costly mistakes that can slow a project down.
When trying to win a new contract, your scale model needs to stand out. Using multi-colored 3D printing will also make your models different from the competition. For example, anyone with an Ultimaker printer and Palette filament splicer can make concept models with different-colored sections to emphasize certain characteristics.
Using multiple colors makes architectural models look classier. This reflects well on the person behind the pitch, so clients know they have a knowledgeable architect at the helm.
3D Printers vs Traditional Scale Models
3D printing doesn’t just save you money, it also speeds up production compared to traditional methods. What used to take weeks can now be completed in a matter of hours. This frees up more time for working on the creative side so you can meet your clients’ needs.
3D printers are now so advanced that they can add detail to a concept design, and will be able to make intricate finishing touches that will be a real highlight in any presentation.
There are so many reasons why the industry is turning to this new approach. We therefore put together our recommendations for the best 3D printers for architects in every price range, from under $500 for any small businesses or individuals looking to start cheaply, up to more professional printers for commercial architectural projects.
The best 3D printers for architectural projects
3DSourced is reader-supported. When you buy through links on our site, we may earn an affiliate commission. Learn more
Crealty CR-10 / CR-10 Smart – Best Under $500
- Price: $369-499 — Available on Creality Official Store here / Available on Amazon here
✅ Pros
- Generous build volume
- Large prints make for impressive models
- Simple assembly
Thanks to the generous 300 x 300 x 400 mm print area, this is one of the most popular 3D printers for making impressive concept models.
Anyone looking to make even bigger models will find the CR-10 SS with its 400 mm cubed work area, or the massive CR-10 Max, which boasts an area of 500 mm cubed for making even more impressive models. This does mean the print bed takes a little while to heat up, so it requires a little patience when starting a new print.
The CR-10 Smart requires self-assembly, but even for a first-timer it only takes a maximum of 30 minutes before it is up and running.
Print management is made easy as it has USB connectivity and an SD card slot (a microSD card is included). Using the control wheel to navigate the LCD screen, and an intuitive keypad makes print preparation easy. Tweaking those fine details to meet your client’s changing needs is simple.
The aluminum structure is what makes it so stable, inspiring confidence for reliable prints so you can keep to those tight deadlines. Also, the 100-micron layer resolution means you 3D print models that will wow your potential clients with excellent surface finish and precision.
The downside is that it will take up a fairly large area on your workspace. For anyone with a limited workspace, the CR-10 might be difficult to accommodate.
Still, with Cura software, it can be used in different settings. These include different methods of printing. They vary in their complexity and include full, expert, and even quick print. Once you get up to speed, this is an intuitive 3D printer at a very reasonable price and is ideal for architectural projects.
Flashforge Creator Pro 2 – Best Dual Color 3D Printer For Multi-Color Architectural Models
- Price: $649 — Available at Flashforge here / Available on Amazon here
Pros
Dual extrusion offers multiple color and filament options
Touchscreen display
Easy setup
Tidy design
Cons
The print bed isn’t removable
The print cooling system takes a little longer than some others
Every creative wants to be able to work with multiple colors, which is why the Flashforge Creator Max is one of the best 3D printers for architects.
A dual extrusion 3D printer, it can work with a variety of materials and offers you the ability to make rapid prototypes that capture the imagination of potential clients.
For a printer that uses dual extrusion, it is a shame to see the cooling fan only operates from the left. This means each print takes a little longer before it is ready, but upgrading to a dual-fan duct can fix this.
There are small conveniences that make a difference such as the carry handles on either side of the enclosed unit. Every build can be watched through the acrylic door and the option of the acrylic lid means you can improve ventilation.
It takes a little while to level but produces impressive results that bring every concept building to life. The print bed measures 227 x 148 mm, which should be enough for reasonably-sized architectural models. However, you’ll likely need to attach multiple models together anyway for any reasonably-sized architectural model anyway, it just means more prints will be required than on a larger 3D printer.
The print bed isn’t removable so print removal can be tricky at times, but a spatula and a little encouragement will always remove those scale models.
All in all, it is a viable 3D printer for any architect. Setting up is simple, just attach the print head, connect it to WiFi, and use the touchscreen interface to navigate to start the journey of printing affordable, impressive models.
Qidi Tech X-Max – Best For Different Materials
- Price: $1,099 — Available on Amazon here
Pros
The enclosed design prevents warping
Wifi connectivity
Large 5-inch touchscreen display
Removable build plate
Generous build area
Cons
No filament runout sensor
With a 5-inch touchscreen display, this is one of the easiest 3D printers for an architect to navigate. You can see how those models are going to come to life before printing.
Its enclosed design is essential for making consistent prints since the temperature within the unit is easy to regulate. This is vital for certain materials such as ABS which can warp if the temperature starts to dip.
Considering it boasts intuitive features like Wi-Fi connectivity as well as being a quiet printer, it is surprising that it does not boast a filament runout sensor. Still, compared to other brands, it is easy to use for a first-timer, and still has a pause and resume function that makes it easier to switch between filament.
The removable build plate makes it easier to pry your finished masterpiece away so you can meet tight deadlines without having to worry about how long it is going to be before it is ready.
The build area of 300 x 250 x 300 mm is more than generous enough for most large projects, and means you can create big concept models that are the talk of the presentation.
Any architect wants their models to stand out, which is why it is great to be able to work with a variety of materials. Opt for the common ABS, PLA, and TPU, or go for carbon fiber or Nylon and make sure your models are ones to remember.
Because you are going to be printing tall architectural models, you need more than build space. You also need stability, which is where the double Z-axis comes in. This is an upgrade from the previously questionable single Z-axis that provides a solid base to ensure consistent prints, and 3D print accurate building models.
Dremel 3D45 – Best Under $2,000
- Price: $1,899 — Available at Matterhackers here / Available on Amazon here
Pros
Can read Dremel branded filament for quick set up
Comes pre-assembled
Removable glass plate
Easy to control via WiFi
Heats up fast
Cons
The touchscreen could be more responsive
The build volume of this 3D printer measures 254 x 152 x 170 mm, meaning it isn’t one of the biggest on our list. However, if you aren’t looking to make huge models, this is likely to be plenty enough for making architectural models that have plenty of detail.
The brand prides itself on making 3D printers that are easy to use, which is evident in the longevity of its brand. The direct extrusion system feeds filament from within, which makes it easier to load for each new project.
Although it is an open material system, it can work with an RFID sensor. This means it can read Dremel-branded filament, and quickly provide the print settings for easy set up every time.
What sets it apart is that the print bed comes in two parts. There is a heated bed that can reach a temperature of 100°C to prevent warping and make smooth first layers for a solid foundation for every architectural mode. Then, the glass plate can be removed to make it easier to pry the finished print, ready to present in front of a room full of stakeholders.
The 5-inch touchscreen navigation display ensures it is easy to make minor adjustments to please a fussy client, and if you are working within a tight timeframe, it only takes a couple of minutes before it is hot enough to get going.
There is plenty to like about the Dremel 3D45. Not only does it come pre-assembled, but it is easy to use, makes reliable prints that look professional, and has a closed frame design that looks great.
Ultimaker S3 – Best 3D Printer For Architects Overall
- Price: $3,980 — Available at Matterhackers here / Available at Dynamism here
Pros
20-micron layer resolution
Compact footprint
Can print two materials in one job with the dual extruder (or two colors of the same filament material)
Cons
Might be a bit pricey for some
It is easy to see why the Ultimaker S3 is often considered the ultimate 3D printer for architects.
Boasting a decent 230 x 190 x 200 mm print area that will be more than enough for most models but it is the 20-micron layer resolution that provides impressively smooth surfaces that is sure to be the talk of client presentations.
The 4.7-inch touchscreen display is pretty straightforward, so making those custom changes doesn’t feel like a chore. At 24 cubic millimeters a second, this is also one of the faster options on our list. Why is that important? Because printing 3D models for architecture is so convenient you are going to want to use it as much as possible.
A lot of 3D printers that are big enough for an architect to make use of are guilty of having a bulky footprint. This is another area where the Ultimaker S3 excels. It takes up a total area of 394 x 489 x 637 mm, so it should fit conveniently into almost any work area without taking over a room.
At nearly $4,000, it could be out of budget for some. Still, this is an impressive option for any professional. It can print two materials in one job, offers automatic bed leveling, and WiFi connectivity.
For more: the best auto-leveling 3D printers to save you hassle
Formlabs Form 3 — Best for high-resolution architectural models
- Price $3,499 — Available at Dynamism here
Pros
Incredibly easy printing
Extremely fine details and precision
One-click printing
Cons
Smaller build area — so less suited for larger architectural models
People don’t generally think of resin 3D printers for architectural models, instead opting for FDM, but for high-resolution models with precise surface finishes and details, there is no better than Formlabs’ Form 3.
It can print in incredible detail thanks to it being a stereolithography (SLA) machine. It works by hardening liquid resin and turning it into a solid 3D architectural model, layer-by-layer. The sensors used at every stage of the print are highly intuitive and help to create fine details that make 3D models of buildings that stand out and look highly professional on a board room table.
One of the most reliable options for making a consistently high standard of prints, the Form 3 inspires confidence that your models are going to come out as you intended the first time.
There is a larger color touchscreen that allows you to watch the material cartridge whilst it is being used. You can even view a chart of how the print went, to see where any failures or imperfections may have occurred.
Automation is the name of the game with this option. The Form 3 tries to make life as easy as possible so the user doesn’t have to spend much time holding its hand. You can operate multiple Form 3’s like a factory with Formlabs’ software to create larger models quickly.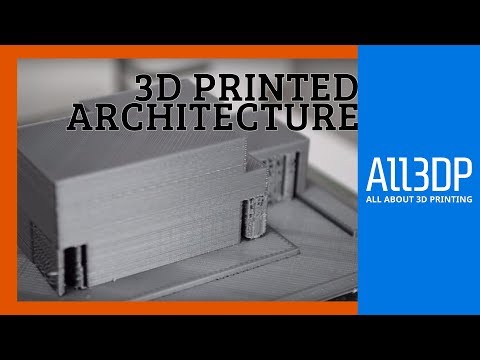
The technology is impressive, but the volume of 145 x 145 x 185 mm might be restrictive for some. Therefore, we recommend it for smaller, more detailed projects where communicating certain features within a larger build is important.
Guide to 3D Printing Architectural Models
Despite a move from the drawing board to digital screens, physical architectural models still play a significant role in helping architects visualize blueprints.
3D printing technologies help bridge the gap between digital and physical worlds and empower architects and model makers to create high-precision architectural models quickly and cost-effectively directly from digital drawings.
This guide provides comprehensive information about using 3D printing to produce architectural models, the different 3D printing processes for architecture, and the workflow for creating 3D printed models from architectural computer-aided design (CAD) software.
White Paper
This white paper covers how to make smart modeling decisions, from choosing scale to designing for assembly to post-processing, and how to use these strategies in common software ecosystems.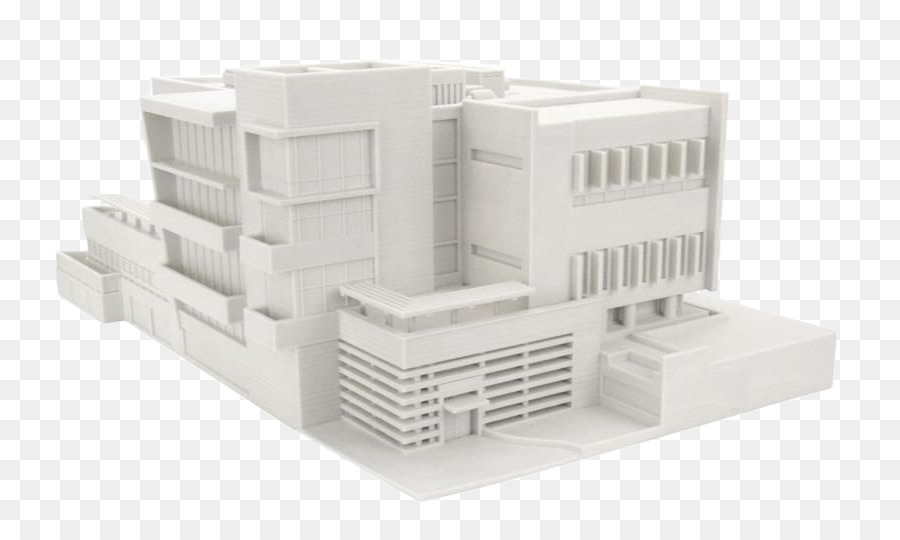
Download the White Paper
Since the age of the Pharaohs, architectural models have served as physical representations during structures’ development to help sell a project, support fundraising efforts, and solve construction challenges.
Traditionally, model-making is a manual craft that involves working with materials such as wood, ceramic, cardboard, or clay, which can be extremely time-consuming and repetitive. Architecture studios and practices today have access to a wider range of tools, including CNC milling machines, laser cutters, and 3D printers that can reduce labor needs and speed up the workflow.
Modern 3D printing processes provide architects and model makers with the means to revolutionize how models are made. They do this by:
-
Speeding up the architectural model making process.
-
Translating CAD drawing directly into physical 3D models with a high level of precision.
-
Developing intricately designed parts that’d be hard or impossible to produce by hand.

-
Simplify communication and showcase specific areas that would be hard to convey through conventional 2D drawings.
-
Creating more design iterations at reduced production costs.
For example, model makers Renzo Piano Building Workshop (RPBW), founded by the Pritzker Prize laureate architect, use an SLA 3D printer to quickly develop and fabricate accurate models.
“Our models change every day or even every hour. Because the architects change the project very quickly, most of the time, we don't have enough time to do it by hand. Therefore, we have to find a way to do it quicker,” said Francesco Terranova, model maker at RPBW.
3D printers can create models within a few hours and even operate overnight to save time. “The good thing is that we can launch the printer in the night, and when we come back in the morning, we find the model done. This way, we don't lose time during the day,” said Mr. Terranova.
3D printing in architecture is ideal for intricate parts—the trees on this model were 3D printed on a Formlabs SLA 3D printer.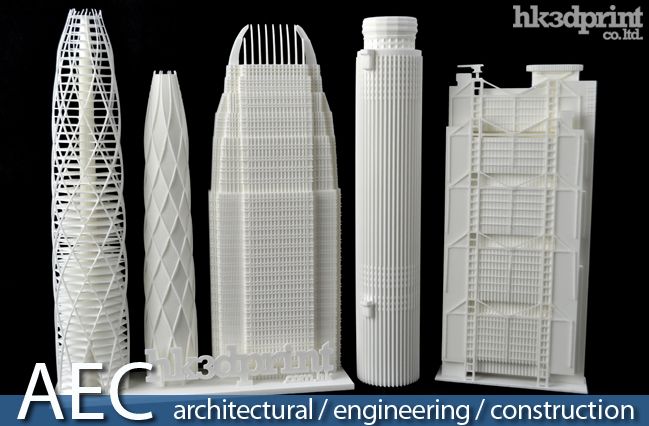
3D printing can be used to produce architectural models of entire buildings, but also in combination with other tools and processes. RPBW’s model builders may use CNC machining or laser cutting to produce the base parts of their architectural models and a 3D printer to develop more complex or intricate components like stairs, trees, spheres, and curved surfaces, which would be time-consuming to manufacture by hand. For example, the RPBW team 3D printed the complex joints of the columns for the model of the new San-Giorgio motorway bridge in Genoa that has recently replaced the Morandi bridge that collapsed in 2018. This combination of 3D printing alongside traditional manufacturing solutions speeds up the creative process and increases the accuracy levels of architectural models.
One of the main goals of 3D architecture models is to simplify communication between architects and to make it easier to showcase plans to clients. Los Angeles-based design firm Laney LA’s projects are mostly custom homes, so communicating the scale of a home or structure is particularly important.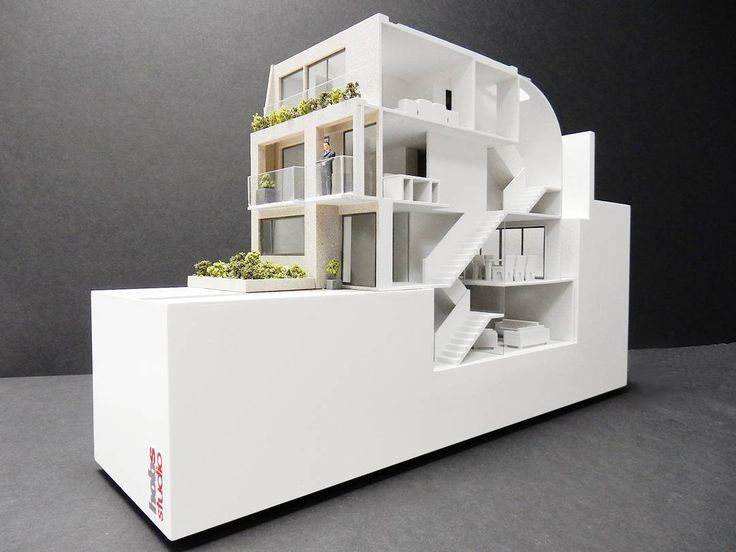 Architect Paul Choi and his team use 3D printing to showcase specific areas of the project that can be more complicated to convey through conventional 2D drawings.
Laney LA’s architects use 3D printing to create models that allow them to view the project from a fresh perspective while simultaneously providing vantage points.
“It's fun to always try to depict a certain idea about the project and isolate that through the model, whether it's a certain room or a space that we want to highlight through a section cut of the model, or even the topography of the site,” Choi said.
RPBW’s model makers use a Form 3 SLA printer to speed up the production of scale models.
When it comes to 3D printing architectural models, not all methods are created equal. It is important to choose the right printing technology for specific use cases.
The most popular 3D printing technologies for architectural models include stereolithography (SLA), fused deposition modeling (FDM), selective laser sintering (SLS), and binder jetting.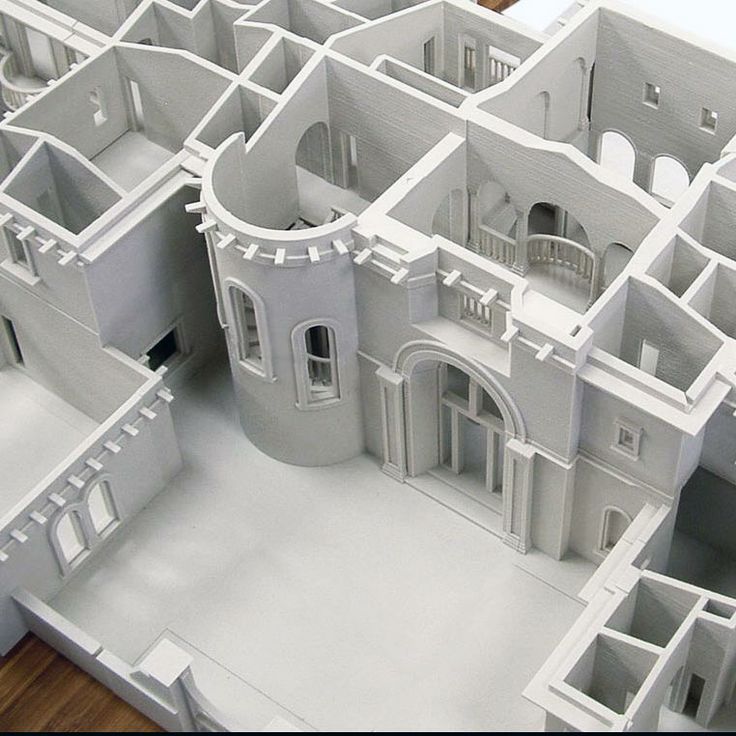
Stereolithography was the world’s first 3D printing technology, invented in the 1980s, and is still one of the most popular technologies for professionals. SLA resin 3D printers use a laser to cure liquid resin into hardened plastic in a process called photopolymerization.
SLA parts have the highest resolution and accuracy of all plastic 3D printing technologies. SLA parts also offer the smoothest surface finish that is easy to paint.
SLA parts have sharp edges, a smooth surface finish, and minimal visible layer lines that are ideal for highly detailed presentation models. This model was printed on a Form 3 SLA printer.
SLA is a great option for highly detailed presentation models for presenting concepts and ideas to clients or the public.
Thanks to fast-printing materials like Draft Resin, SLA is also the fastest 3D printing process for most parts. While desktop SLA printers offer a more compact build capacity, with large-format SLA 3D printers like the Form 3L, architects and model makers can create truly large-scale models.
Sample part
See and feel Formlabs quality firsthand. We’ll ship a free sample part to your office.
Request a Free Sample Part
Fused deposition modeling (FDM), also known as fused filament fabrication (FFF), is the most widely used form of 3D printing at the consumer level, fueled by the emergence of hobbyist 3D printers. FDM 3D printers build parts by melting and extruding thermoplastic filament, which a printer nozzle deposits layer by layer in the build area.
FDM has the lowest resolution and accuracy from the four 3D printing processes and is not the best option for printing complex designs or parts with intricate features. It is ideal for basic concept design models produced during the initial stages of design as it can create relatively large models fast and at a low cost.
FDM printers struggle with complex designs or parts with intricate features (left), compared to SLA printers (right).
Selective laser sintering is the most common additive manufacturing technology for industrial applications. SLS 3D printers use a high-powered laser to fuse small particles of polymer powder. The unfused powder supports the part during printing and eliminates the need for dedicated support structures.
SLS printing is ideal for complex geometries, including interior features, undercuts, thin walls, and negative features. Parts produced with SLS printers have excellent mechanical characteristics that make them suitable also for structural parts.
SLS is ideal for complex geometries and intricate details. The details on this model were printed on a Fuse 1 SLS printer.
Binder jetting 3D printing technology is similar to SLS printing but uses a colored binding agent to bond powdered sandstone material instead of heat. Binder jetting printers can produce vivid, full-color 3D architecture models.
Parts produced with binder jetting have a porous surface and are very brittle, which means that this process is recommended only for static applications.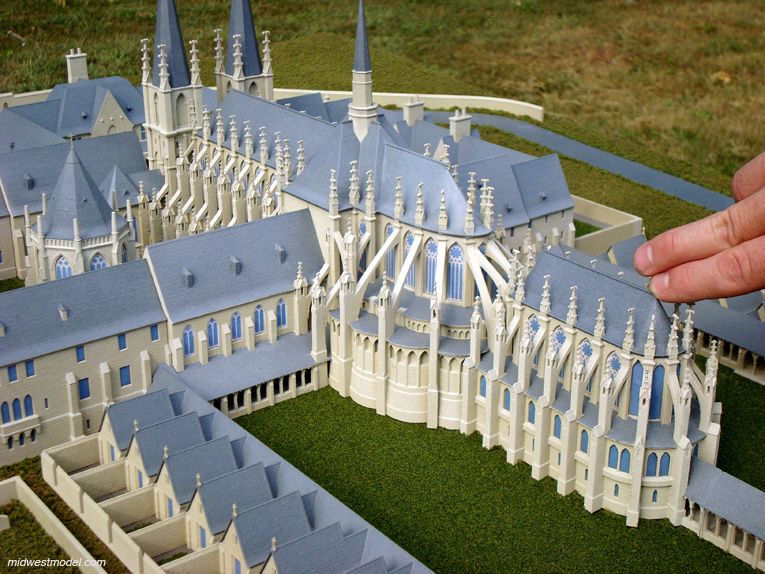
Binder jetting printers can produce vivid, full-color architecture models.
| Stereolithography (SLA) | Fused Deposition Modeling (FDM) | Selective Laser Sintering (SLS) | Binder Jetting | |
|---|---|---|---|---|
| Resolution | ★★★★★ | ★★☆☆☆ | ★★★★☆ | ★★★☆☆ |
| Accuracy | ★★★★★ | ★★★★☆ | ★★★★★ | ★★★☆☆ |
| Surface finish | ★★★★★ | ★★☆☆☆ | ★★★★☆ | ★★★☆☆ |
| Ease of use | ★★★★★ | ★★★★★ | ★★★★☆ | ★★★★☆ |
| Complex designs | ★★★★☆ | ★★★☆☆ | ★★★★★ | ★★★☆☆ |
| Build volume | Up to 300 x 335 x 200 mm (desktop and benchtop 3D printers) | Up to 300 x 300 x 600 mm (desktop and benchtop 3D printers) | Up to 165 x 165 x 300 mm (benchtop industrial 3D printers) | Up to 254 x 381 x 203 mm (industrial 3D printers) |
| Price range | Professional desktop printers start at $3,500, large-format benchtop printers are available from $11,000.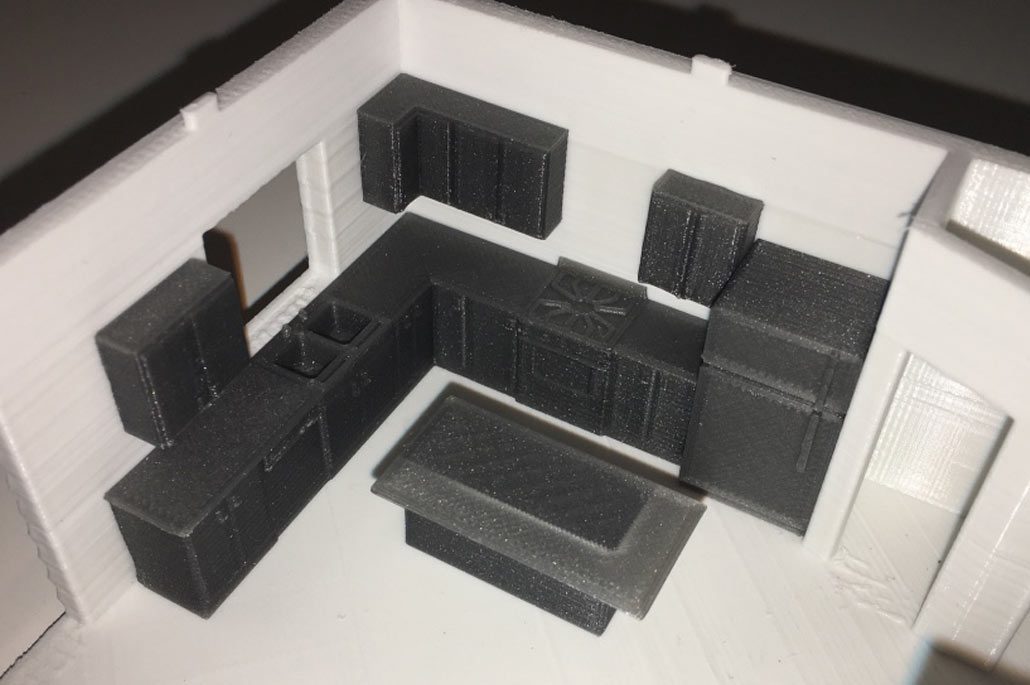 | Budget printers and 3D printer kits start at a few hundred dollars. Higher quality mid-range desktop printers start around $2,000, and industrial systems are available from $15,000. | Benchtop industrial systems start at $18,500, and traditional industrial printers are available from $100,000. | Binder jetting 3D printers are expensive industrial machines, with prices ranging from $30,000 to $100,000+. |
A team from the Institute of Architecture at the Hochschule Mainz - University of Applied Sciences reconstructed the medieval german cities of Worms, Speyer, and Mainz with large-scale 3D printed models.
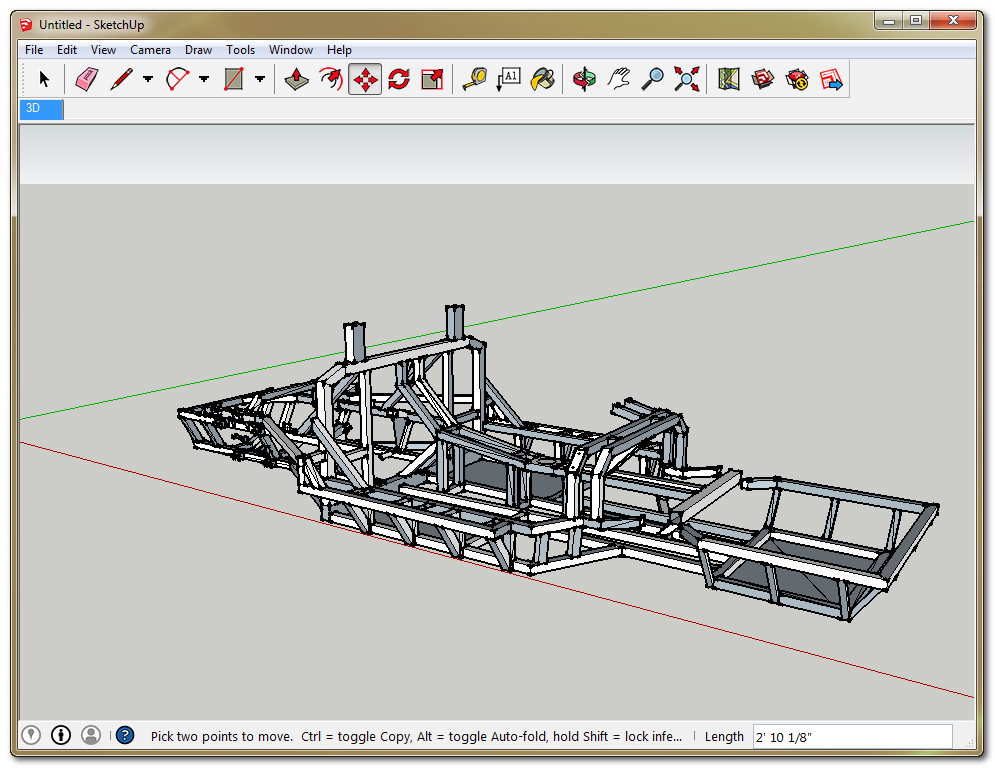
Most architects today already work in the digital space, using architectural CAD software like BIM (Revit and ArchiCAD), Rhino 3D, or SketchUp to create digital CAD designs. However, these digital files cannot always be used to create the physical scale models directly with 3D printing.
A successful transition from a CAD model to a 3D printable file relies on a baseline understanding of design for 3D printing, how regular modelmaking constraints relate to preparing a file for 3D printing, and how to approach and make smart modeling decisions, from choosing the right scale to designing for assembly to post-processing.
Architectural models are conventionally assembled with a variety of materials and components. 3D printers help fuse these components into as few individual parts as possible, but some assembly is still required for two reasons:
-
The constraints of the build volume: Unless you’re using a large-format 3D printer such as the Form 3L, you might need to divide the model into multiple parts to fit it inside the build volume of the 3D printer.
-
The need to show interior detail or materiality: Certain models require components that come apart to reveal more information about the design.
The size and geometry of different components within an architectural model are key considerations when preparing an architectural model for 3D printing. Generally, large models, models with multiple components, and models with intricate features are split into 3D printable components for assembly. Parts can then be easily joined together through chemical adhesion or mechanical assembly; the high accuracy of the prints with technologies like SLA and SLS ensures that the parts join together seamlessly.
Getting the best results requires applying modeling strategies for assembly, including:
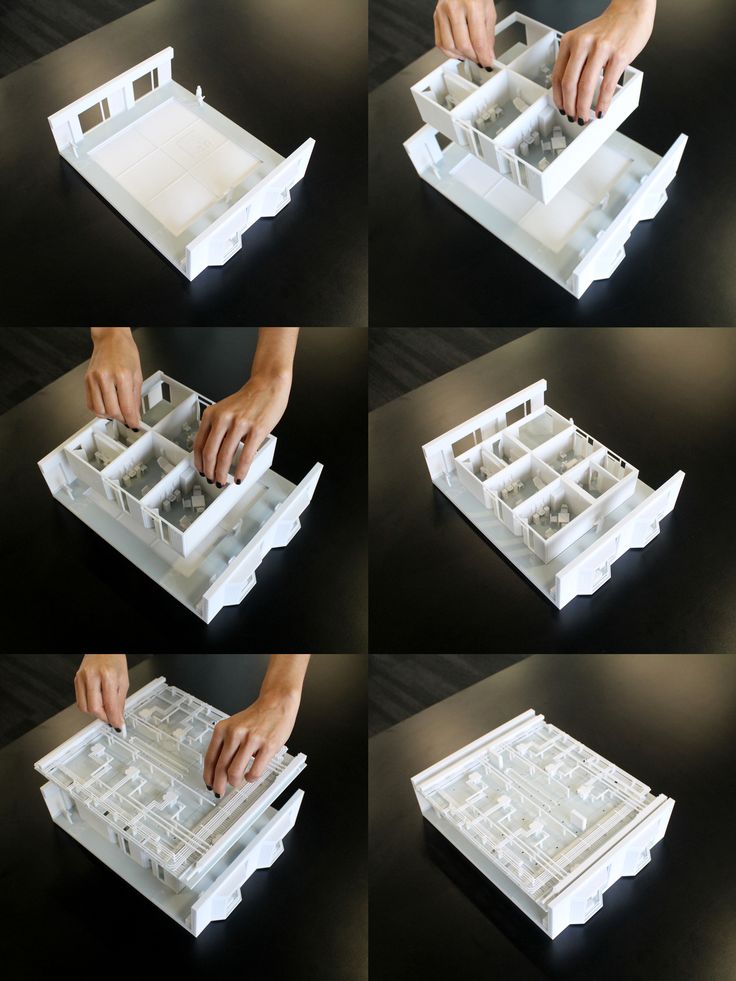
Since each housing unit followed the same design, it made sense to simply print one removable unit that would allow the client to understand the generic unit typology. Model by Stanley Saitowitz | Natoma Architects Inc.
Advancements in CAD technology have drastically simplified the process of developing 3D printable files. Modern CAD platforms have dedicated 3D printing modules to help architects convert a CAD design into a printable model. However, do remember that you are still working at a 1:1 scale–some quick conversions will be required to achieve the correct dimensions at the print scale.
Developing architectural models require some important considerations depending on the CAD platform used. These CAD-specific considerations include:
-
BIM Workflow: Developing 3D printable models with BIM software that leverages parametric modeling such as Autodesk Revit or Graphisoft ArchiCAD requires some component management.
 Components such as ductworks, double glazed windows, and HVAC systems do not translate in 3D prints and must be removed, while other parts such as doors, windows, walls, slabs need to be thickened.
 -
Surface Modeling Workflow: This workflow is often an easier approach, starting from 2D drawings solely with the intention to 3D print. It involves exporting a simplified drawing, scaling it down, and extruding and trimming until there’s an external shell.
Download our white paper for step-by-step workflows in common architectural CAD software ecosystems.
The next step in 3D printing architectural models is transcribing your digital 3D model into a language your 3D printer understands. Accomplishing this requires the use of slicing or print preparation software, such as PreForm. Whether you’re new or experienced, slicing software is generally intuitive to use. The software highlights details such as walls that may require strengthening, unsupported areas, and closed volumes that affect the structure of the 3D print, which can be addressed before printing. Using the software, you can also optimize settings such as resolution, build platform position, and support structures.
Materials play an important role in conveying the underlying concept of a design. It isn’t always imperative to simulate the exact color and texture of a material, but it can help to distinguish between different materials. Splitting a model by its components makes it possible to display materiality, as parts can be produced with various 3D printing materials, or individually painted with different colors.
This site model was created with laser-cut chipboard. The primary building was 3D printed with both Clear Resin and White Resin. Model by Schwarz Silver Architects.
Post-processing differs depending on your specific 3D printing technology, but generally includes sanding, bonding, and painting models.
Here’s an overview by 3D printing process:
| Post Processing Technique | Stereolithography (SLA) | Fused Deposition Modeling (FDM) | Selective Laser Sintering (SLS) | Binder Jetting |
|---|---|---|---|---|
| Sanding | Light sanding is recommended to remove support marks. | The lower quality of FDM prints means sanding is required to get a smooth finish. | No sanding is required due to the quality of the finished parts. | No sanding is required. |
| Bonding | Bonding of SLA components is done with super glue or liquid resins. | FDM components can be assembled using adhesives such as super glue. | SLA components can be assembled using adhesives such as super glue. | Components printed using binder jetting printers can be bonded using super glue. |
| Priming and painting | SLA components can be painted to achieve the desired finish. | FDM components can be painted to achieve the desired finish. | SLS components can be painted to achieve the desired finish. | No painting is required for full-color parts. |
Professional SLA and SLS 3D printers empower architects with the tools to create accurate and attractive 3D architectural models.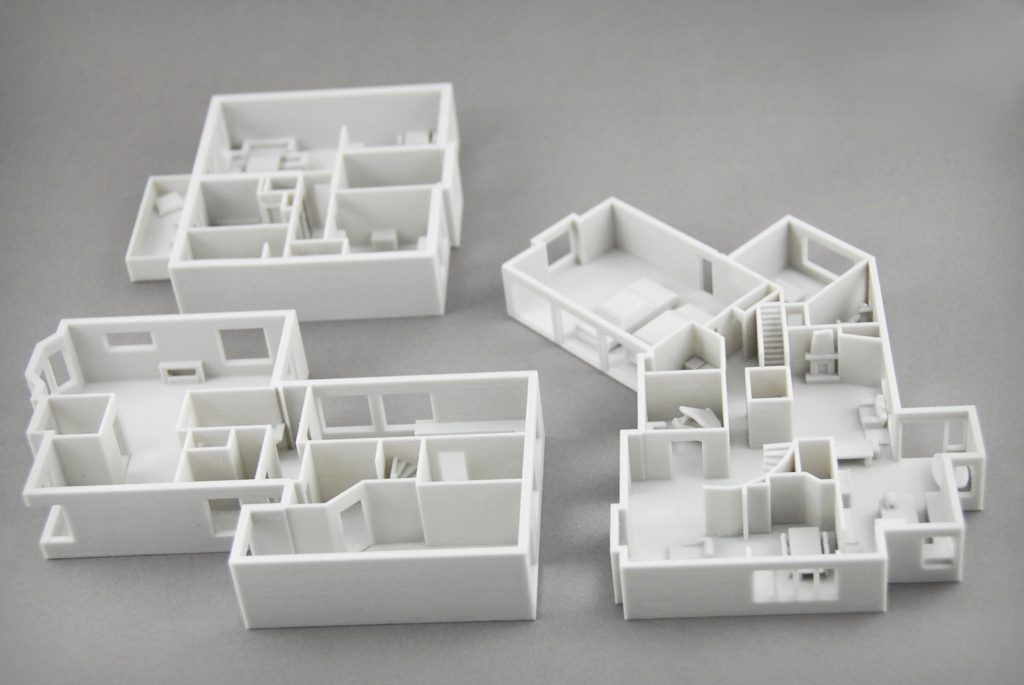 Choose the Form 3 for a compact solution that can fit on a desktop, the Form 3L for high resolution large-format models, and the Fuse 1 for structural parts and the most complex shapes.
See the Form 3See the Form 3LSee the Fuse 1
Download our white paper for an in-depth overview of modeling strategies, step-by-step workflows in common architectural CAD software ecosystems, as well as printing and post-processing recommendations.
Download the White Paper Now
3D printer for architect and designer, pros and cons, examples of use
3D technologies are becoming good helpers in various fields. In architecture and design, 3D printers are successfully used mainly to create architectural models.
Illuminated layout
Architectural layouts can be divided into several types:
Layouts can be used for a variety of purposes:
-
Visualization for buyers or to coordinate the project with the client.
 Many customers find it much more difficult to perceive a digital layout of a building or interior. 3D printing allows you to quickly and inexpensively produce, for example, a miniature apartment model with a furniture model. The client himself will be able to visually see a variety of interior options and choose the one he likes the most.
-
Project presentation. A presentation with a beautiful layout looks much more colorful and effective, for example, a building or an entire microdistrict. But making an architectural model in the classical way is a long and painstaking, often manual, work. What if you need multiple layouts? A 3D printer can significantly speed up and reduce the cost of production of a layout.
The cost of the layout depends on several factors - this is the complexity of manufacturing and artistic value. The use of a 3D printer allows you to speed up and significantly simplify the production of complex and simple layouts. For example, making a layout of modern buildings with non-linear geometry becomes a real headache for layout designers. 3D printing allows you to quickly and accurately reproduce an exact copy of any building, regardless of its geometry.
Non-linear building layout
FDM printers for architecture and design
FDM is a technology for layer-by-layer deposition of plastic to obtain a physical model. As a consumable material, a plastic thread is used - a filament.
FDM printers are very popular due to their large working area, printing speed and inexpensive consumables.
The choice of printer model depends on what needs to be produced. Some devices are poorly designed to work with some engineering plastics.
Pros and cons
pros
Models of 3D printers appeared with an “infinite” printable area along one of the axes. These printers use a conveyor belt instead of a printtable. Such printers are suitable for mass production.
For the manufacture of simple layouts, you can give preference to models with a single extruder. But if a 3D printer is required to solve a variety of tasks, then models with two extruders and a closed chamber should be preferred. Such devices are universal and can print on almost any material.
Minuses
Application and printing examples
Model of the city of Astana. Production took 1 month.
Building kit
Prefabricated house model
San Francisco layout
Furniture and interior elements made on a 3D printer
Layout of the floor of the building for arranging furniture
Printer Rating
CreatBot D600 Pro
CreatBot D600 Pro
Features:
Print technology: FDM/FFF
Workspace size: 600x600x600
Number of extruders: 2
Max.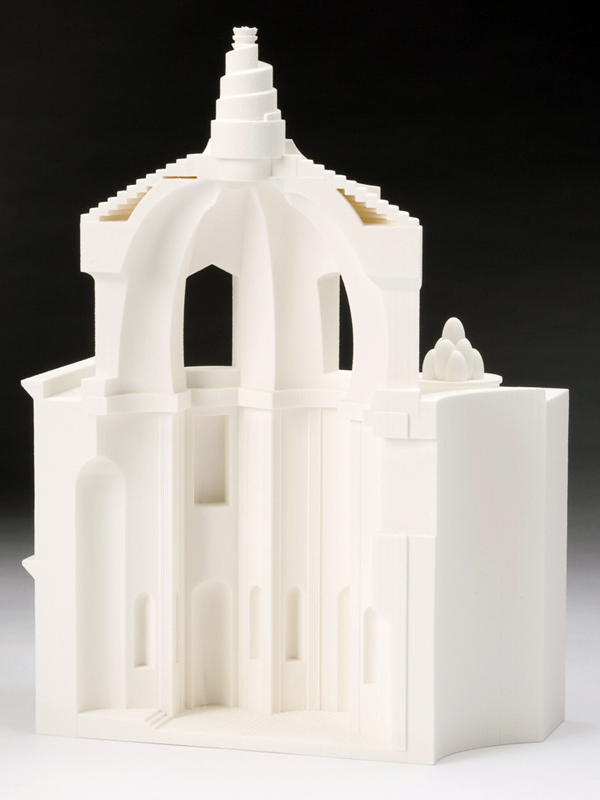 extruder temperature: 420 degrees
Closed Camera: Yes
Heated table: Yes
Plastic type: ABS, ABS+, PLA, PLA+, PETG, Flex, Nylon (Nylon), ASA, Carbon, PEEK, Decorative plastics, others
CreatBot D600 Pro is a professional device that has many options that will be useful not only for a beginner, but also for an experienced user. Two extruders with a high heating temperature and a closed chamber allow you to print on all available types of plastics. And automatic table calibration using the BL-Touch sensor eliminates the need to level the table plane.
Raise3D E2
Raise3D E2
Features:
Print technology: FDM/FFF
Working area size: 330 * 240 * 240 mm - when printing with the 1st extruder
295x240x240 mm - when printing with 2 extruders
Number of extruders: 2
Max. extruder temperature: 300 degrees
Closed Camera: Yes
Heated table: Yes
Plastic type: ABS, ABS+, PLA, PLA+, PETG, Flex, Nylon (Nylon), ASA, Carbon, Decorative plastics, others
Raise3D E2 is a small device with unusual kinematics. Raise3D E2 has two independent extruders that allow the printer to work in several modes:
In addition, Raise3D E2 is equipped with a convenient touch screen, automatic table calibration, an assistant for calibrating the height of extruders relative to each other and other nice features that do not affect the final print, but make working with the printer easier and more comfortable.
Raise3D Pro2 and Pro2 Plus
Raise3D Pro2 left and Pro2 Plus right
Features:
Print technology: FDM/FFF
Stage size: Raise3D Pro2
305x305x300 mm - when printing with the 1st extruder;
280x305x300 mm - when printing with 2 extruders
Raise3D Pro2 Plus 305x305x605 mm - when printing with the 1st extruder;
280x305x605 mm - when printing with 2 extruders
Number of extruders: 2
Max. extruder temperature: 300 degrees
Closed Camera: Yes
Heated table: Yes
Plastic type: ABS, ABS+, PLA, PLA+, PETG, Flex, Nylon (Nylon), ASA, Carbon, Decorative plastics, others
As you can see from the specifications, the only difference between Raise3D Pro2 and Pro2 Plus is the size of the workspace in height. Pro2 Plus has twice as much.
The Raise3D Pro2 series has proven itself in various fields. These are reliable workhorses with a set of all the necessary options for high-quality printing, and the presence of two extruders allows you to make models of any complexity.
PICASO 3D Designer XL Pro
PICASO 3D Designer XL Pro
Characteristics:
Print technology: FDM/FFF
Working area size: 360 x 360 x 610 mm
Number of extruders: 2
Max. extruder temperature: 410 degrees
Closed Camera: Yes
Heated table: Yes
Plastic type: ABS, ABS+, PLA, PLA+, PETG, Flex, Nylon (Nylon), ASA, Carbon, PEEK, PC, Decorative plastics, others
PICASO 3D Designer XL Pro is a Russian-made professional printer with an enlarged working area. Designer XL Pro is equipped with automatic table calibration, plastic feed control sensor and other nice features.
Photopolymer printing in architecture and design
The principle of operation of a photopolymer printer is based on the illumination of a special resin using directional UV radiation. Photopolymer printers can work on one of three technologies:
Photopolymer printers allow you to get a product with an ideal surface. It is not for nothing that LCD, DLP and SLA devices are actively used in the jewelry and dental industries, where accuracy and the ideal surface of the finished model are important.
Currently, LCD technology has gained particular popularity due to its availability and inexpensive printers.
Pluses and minuses
pros
Minuses
-
After printing, it is necessary to rinse and dry the product in a UV chamber. After printing, it is necessary to wash off excess polymer from the surface of the finished print. For this, isopropyl alcohol is usually used, although resins have now appeared that can be washed with plain water. In order for the photopolymer to gain the declared strength, it must be additionally illuminated under an ultraviolet lamp or in a special box.
Application and printing examples
Miniature model of building
Model of the Cathedral of the Intercession of the Most Holy Theotokos on the Moat (St. Basil's Cathedral)
City map
Miniature “extras” for layout
Printer rating
Prismlab RP400
Prismlab RP400
Features:
Print Technology: DLP/LCD/SLA
Material: Photopolymer resin
Construction area size: 384x216x384 mm
XY positioning accuracy: 100/67/50 microns
Z-axis positioning accuracy: 100/50 microns
Prismlab RP400 is a professional photopolymer machine with a large printable area. Humidity and temperature sensors in the build chamber allow Prismlab to adjust print settings for the best print quality, while open source software allows the use of third-party photopolymer resins.
Peopoly Phenom XXL
Peopoly Phenom XXL
Characteristics:
Print Technology: DLP/LCD/SLA
LCD display resolution: 3840x2160 (23. 8", 16:9, UHD 4K)
Material: Photopolymer resin
Construction area size: 527x296x550 mm
XY positioning accuracy: 137 µm
The Peopoly Phenom XXL is a large format photopolymer printer with a huge printable area. The improved monochrome LCD matrix allows you to quickly and accurately produce large models or small batches of small products.
Phrozen Sonic MEGA 8K
Phrozen Sonic MEGA 8K
Features:
Print Technology: DLP/LCD/SLA
LCD resolution: 15" 8K Mono LCD
Material: Photopolymer resin
Build area size: 330 x 185 x 400 mm
XY Positioning Accuracy: 43 µm
Sonic Mega 8K is the first LCD printer with a matrix resolution of 8k, but the accuracy of printing depends on the resolution of the matrix. Sonic Mega 8K allows you to produce large models with amazing clarity, without “blurring” or smoothing small elements.
Construction printers
Construction printers are just groping for their niche for application, and the technology itself is still far from ideal. But the projects already implemented allow us to imagine a possible future where it will be possible to print entire houses.
Application and printing examples
Bridge in Shanghai.
In Shanghai, using a construction 3D printer, a whole bridge was printed and installed over a pond in the Baoshan area. The new bridge is 26.3 meters long and 3.6 meters wide.
Shanghai Bridge
Before making a concrete, full-size model, a reduced copy of the bridge 1: 4 was printed for testing the strength and safety of the structure. 3D printing took 450 hours. A load and deformation monitoring system was installed in the finished bridge. This allows you to explore the properties of printed concrete elements in real time.
Up close, you can see the concrete layers that appeared due to the peculiarities of printing
Bridge in Amsterdam
In Amsterdam, a printed steel bridge was installed.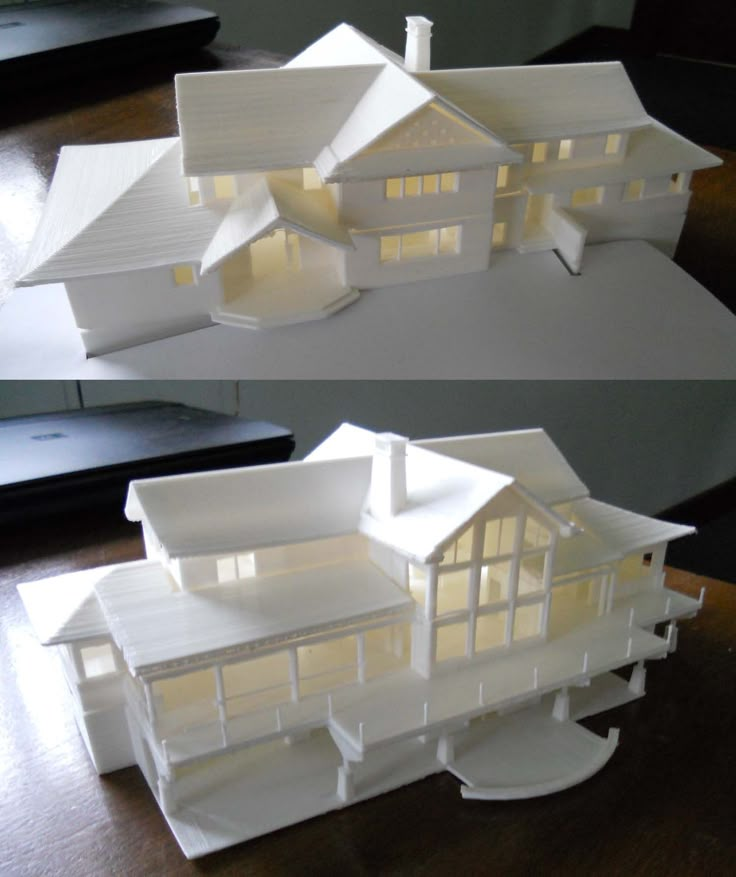 It connects the embankments of the Oudesijds Achterburgwal canal. The length of the finished bridge is 12.2 m, the width is 6.3 m, and the weight is 6000 kg.
Bridge in Amsterdam
Sensors were installed in the bridge to track the deformation of the structure and count the number of people passing through it. For the manufacture of a modern "crossing" 4 robots for 6 months layer-by-layer made a construction of stainless wire.
Bridge manufacturing process
Printed house in Germany
In Germany, builders built an entire house using a 3D construction printer. The house is designed for 5 families, the total area is 380 sq.m.
Almost finished house
In the model of the house, cavities are initially laid for all communications, which the builders will later install. Thus, while the printer is building walls, the workers are solving other tasks.
The structure of the walls is hollow, after hardening it is filled with a special insulating material.
After all the work, the apartments in the house will be rented out, and one, the manufacturer, will be used as an exposition to demonstrate the possibilities of construction 3D printing.
Totals
Architecture and design are already firmly established digitally, making it possible to more visually demonstrate models of future buildings and interiors. It is already difficult to meet an architect who draws his masterpieces only on paper.
Three-dimensional technologies make the visualization process simpler and more visual. Already today, 3D technologies make it possible to partially abandon painstaking manual labor in the manufacture of models, and perhaps in the future, with the help of construction 3D printers, it will be possible to build beautiful architectural structures much faster and easier.
How to 3D Print an Architectural Model
No amount of blueprints or digital 3D models can replicate the real perspective you get with your own 3D printed architectural models. 3D printing makes this easier, faster and more accurate.
3D printing allows the architect to quickly and relatively inexpensively build a physical representation of a project, thereby improving the final concept at a minimal cost and time. Clients generally feel more comfortable making decisions about the physical representation of a building or development.
Which 3D printer you will use depends on your budget, your familiarity with machines, and a host of other factors.
There is a wide range of FDM printers available on the market that use filament extruded through a nozzle. The main advantage of FDM printing - besides its low price - is the ability to interchange plastic filaments to produce models or model parts in different colors and material properties, although printing is only possible with one or two types of filament. There are dual extrusion FDM printers that extrude filament from two nozzles. This can be useful for printing a model from one material and support structures from another, such as soluble support materials that dissolve.
Depending on the quality (and usually price) of your FDM printer, you may need additional post-processing to sand down layer lines and remove supports to get the quality you want before painting or adding other surface finishes.
Stereolithography (SLA) uses a liquid polymer cured by a UV laser. Printing achieves a very high level of detail, and models are produced with smooth, durable surfaces. Some small desktop SLA printers are available on the market, but professional large scale printers are more commonly used for full architectural design. The large assembly volume allows you to create models as whole parts, which means less time spent hiding seam lines and less disruption to the overall design of the model.
As with FDM printers, you can only print on one material at a time, and there are slightly fewer material options available for resin printers than for FDM.
Color Binder Jetting 3D printers use plastic powder as printing materials and can create models with a high level of detail and full color images without the need for supports.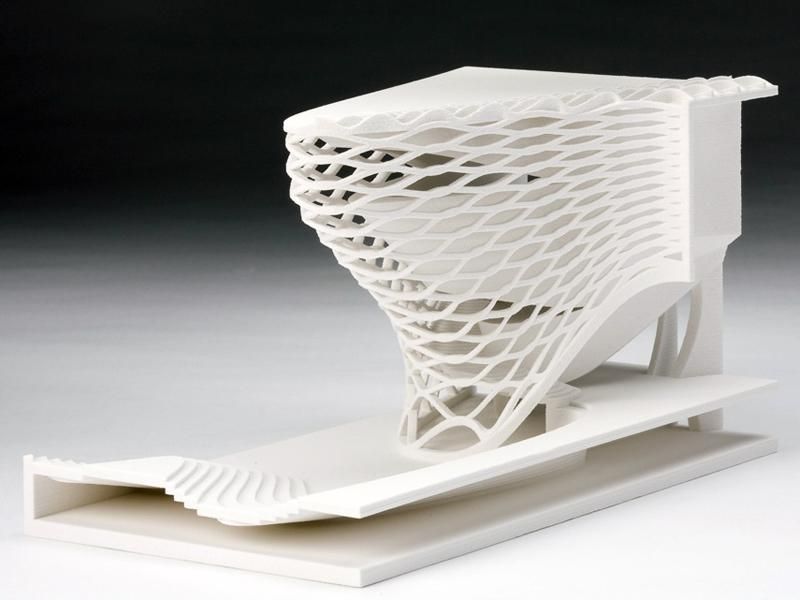 This method greatly reduces your post-processing effort. After removing excess powder, the print is dipped in a stabilizing adhesive to seal the outside surface and add strength.
No matter which CAD or 3D modeling application you choose, creating a 3D architectural model is almost always done by printing individual parts and assembling them. An architectural model may consist of tens, hundreds or even thousands of parts. You will collect all the parts to complete the final model.
Each detail of the future layout should be represented by a separate 3D model. Precise geometry, uniform wall thicknesses and no holes in the mesh allow you to achieve the best results. If the 3D model does not meet the printing requirements, it must be prepared using a special assistant program (slicer). Most 3D printers come with software to prepare files for printing (slicers). But if you need full control over all parameters, then there are special programs for correcting errors in STL files.