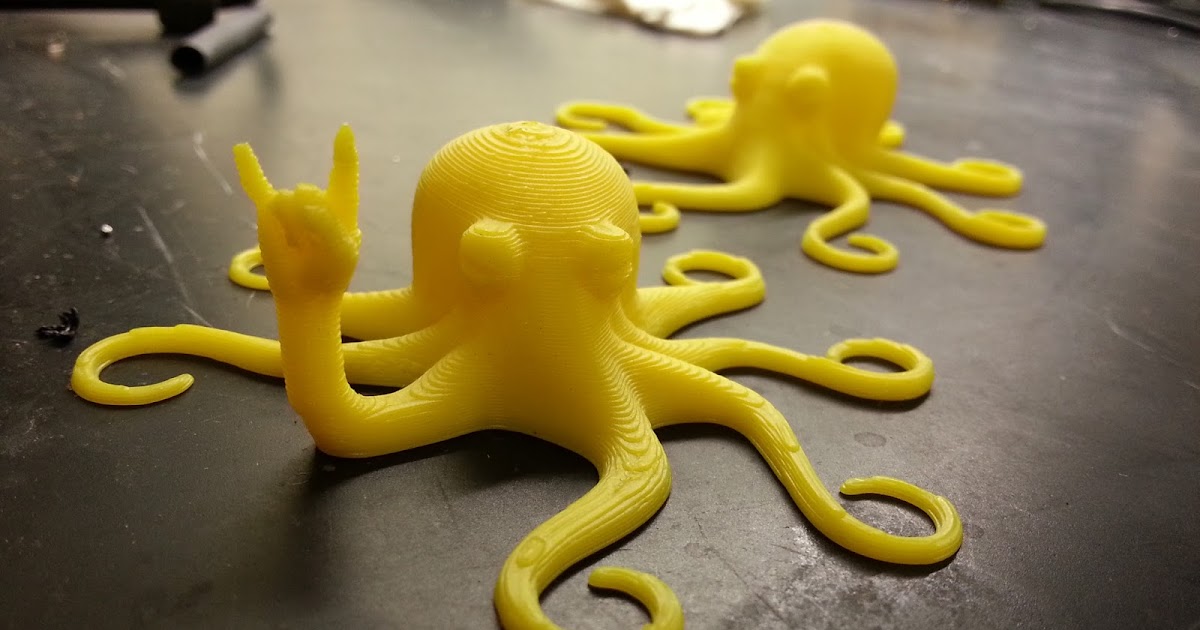
3D printing miniatures supports
Best 3D Print Miniature Settings for Quality – Cura & Ender 3 – 3D Printerly
Using the best settings for 3D printed miniatures is important for getting the best quality and success that you can get. There are some specific settings that you’ll want to use, so I decided to write an article detailing some of those ideal settings for your miniatures.
Keep on reading through this article for info on how to get the best miniatures settings for quality.
How Do You 3D Print Miniatures?
Before we look into the best settings for 3D printed miniatures, let’s quickly go through the basic steps to 3D print a filament miniature.
- Start by creating or downloading the miniature design you want to print – Thingiverse or MyMiniFactory are great choices.
- Open Cura or any other chosen slicer and import the miniature design profile into the slicer.
- Once it has been imported and is displayed on the print bed, move the cursor and zoom in to see the details of the print.
- Adjust print scaling and orientation if necessary. Make sure that all parts of the print are within the boundary of the print bed. It’s usually best to print miniatures at a 10-45° angle.
- If there are some overhangs in the print design, add automatic supports to the structure by enabling supports in Cura. You can also choose to create your own “Custom Support Structures” to manually add supports. It’s easy to do when you get the hang of it.
- Now adjust the best suitable settings for the print in the slicer. It is the most important part of any printing process. Set values for infill, temperature, layer heights, cooling, extruder settings, print speed, and all other necessary settings.
- Now it’s time to print and wait as it may take some hours to get completed.
- Remove the print from the print bed and cut off all its supports either with pliers or simply breaking them with your hands.
- In the end, do all the post-processing which may include sanding, painting and other activities to make them smooth and look shiny.
Best 3D Printer Settings for Miniatures (Cura)
Adjusting settings is necessary to achieve the point where the best quality miniatures can be printed efficiently.
Calibrating extruder, print speed, layer height, infill, and all other settings at the best suitable points are more than essential to get 3D prints of decent quality.
Below are settings for the 3D printer assuming a standard nozzle size of 0.4mm.
What Layer Height Should I Use for Miniatures?
The smaller the print’s layer height is, the higher quality your resultant miniatures will be. In a general, experts say that a layer height of 0.12mm would bring the best results but depending on the type of miniatures and required strength, you may go up to 0.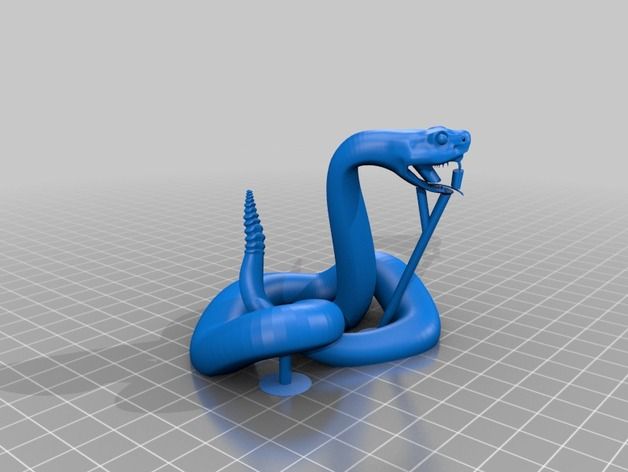 12 & 0.16mm as well.
- Best Layer Height for Miniatures (Cura): 0.12 to 0.16 mm
- Initial Layer Height for Miniatures: X2 Layer Height (0.24 to 0.32mm)
If you did want to try a higher resolution or a smaller layer height like 0.08mm, you’d need to change your nozzle to something like a 0.3mm nozzle.
What Line Width Should I Use for Miniatures?
Line widths usually work good being the same diameter as the nozzle, which for this example is 0.4mm. You can experiment with this and try reducing the line width to try get better details in your model as suggested by Cura.
- Line Width: 0.4mm
- Initial Layer Line Width: 100%
What Print Speed Settings Should I Use For Miniatures?
Since miniatures are a lot smaller than normal 3D prints, we want to also translate that to reducing the print speed. Since there is a lot more precision and accuracy involved, having a lower print speed helps get that higher quality.
It’s definitely possible to get some good miniatures at a standard print speed of around 50mm/s but for optimal results you want to decrease it.
Printing miniatures at 20mm/s to 40mm/s should bring the best results, depending on your 3D printer and setup.
- Print Speed: 20 to 40mm/s
- Initial Layer Speed: 20mm/s
Make sure to keep your 3D printer on a stable and sturdy surface to contain any vibrations.
What Printing & Bed Temperature Settings Should I Use For Miniatures?
Printing & bed temperature settings may vary a bit depending on different 3D printing filaments.
For miniatures printing with PLA, the printing temperature should be around 190°C to 210°C. PLA doesn’t really require any heated bed but if your 3D printer is equipped with one, its temperature should be set at 30°C to 50°C. Below are the best suitable temperatures for varying filaments types:
- Printing Temperature (PLA): 190-210°C
- Build Plate/Bed Temperature (PLA): 30°C to 50°C
- Printing Temperature (ABS): 210°C to 250°C
- Build Plate/Bed Temperature (ABS): 80°C to 110°C
- Printing Temperature (PETG): 220°C to 250°C
- Build Plate/Bed Temperature (PETG): 60°C to 80°C
You may want to have the Initial Layer Temperature a little hotter than the normal temperature, so the first layers have better adhesion to the build plate.
Check out my article How to Get the Perfect Printing & Bed Temperature Settings.
What Infill Settings Should I Use For Miniatures?
For miniatures, some people suggest infill set to 50% as it helps in building strong prints, but you can go lower in many instances. It really comes down to what model you are printing and your personal preferences for how much strength you want.
You don’t usually want an infill above 80% since it means the heated nozzle is going to spend a lot of time emitting heat in the middle of the print, which can lead to printing issues. Some people do actually try 100% infill and get decent results, so it really can go either way.
- Infill Level for Miniatures: 10-50%
What Supports Settings Should I Use For Miniatures?
Support is necessary for almost all kinds of prints, especially if they’re miniatures.
- Supports Density for Miniatures: 50 to 80%
- Supports Optimizations: Less is Better
I’d highly recommend creating your own custom supports so you can minimize any damage from large supports, especially on delicate parts. Also, rotating your miniature to minimize supports is another useful tip, usually towards the back direction.
What Retraction Settings Should I Use For Miniatures?
Retraction should be enabled if you don’t want stringing effects on your miniatures which is really common especially if retraction settings are disabled. It mainly depends on the 3D printer setup and you need to calibrate it accordingly.
You may also test some really small prints to check the restriction setting and determine if it is suitable for your miniature. You may set it at 5 and test by increasing or decreasing 1 point at a time.
Typically, a direct drive extruder gives the best results with a retraction value set between 0.5mm to 2. 0mm. While if we talk about Bowden extruders, it may range between 4.0mm to 8.0mm, but this value can change depending upon the type and model of your 3D printer as well.
- Retraction Distance (Direct Drive Extruders): 0.5mm to 2.0mm
- Retraction Distance (Bowden Extruders): 4.0mm to 8.0mm
- Retraction Speed: 40 to 45mm/s
I wrote more about How to Get the Best Retraction Length & Speed Settings.
What Wall Settings Should I Use For Miniatures?
Wall Thickness sets the number of external layers your 3D print has, contributing to strength and durability.
- Optimal Wall Thickness: 1.2mm
- Wall Line Count: 3
What Top/Bottom Settings Should I Use For Miniatures?
The top and bottom settings are important to ensure your miniatures are durable and have enough material at the top and bottom of the model.
- Top/Bottom Thickness: 1.
 2-1.6mm
 - Top/Bottom Layers: 4-8
- Top/Bottom Pattern: Lines
Is the Ender 3 Good for Miniatures?
The Ender 3 is a great, reliable 3D printer which is good for creating miniatures. You can reach high resolution layer heights such as 0.05mm with a smaller nozzle, providing amazing details and clarity in the models. Once you dial in your settings, your miniatures should look remarkable.
Check out the post below showing off many miniatures 3D printed on the Ender 3.
[OC] 3 Weeks of Mini Printing on the Ender 3 (Profile in Comments) from PrintedMinis
One of the professionals shared his experience stating that he has been using Ender 3 for a long time now but after the continuous printing of 3 weeks, he can fairly say that he is totally happy with the outcomes.
The settings he used on Ender 3 for miniatures are:
- Slicer: Cura
- Nozzle Size: 0.
 4mm
4mm - Filament: HATCHBOX White 1.75 PLA
- Layer Height: 0.05mm
- Print Speed: 25mm/s
- Print Orientation: Either standing up or at 45°
- Infill Density: 10%
- Top Layers: 99999
- Bottom Layers: 0
The reason he used so many top layers is to trick the slicer into creating a solid model rather than with using the 100% infill setting because slicers had trouble implementing this in the past. I think they are a lot better these days, but you could try this out to see the difference.
He made a video walking people through his process.
Best Slicers for Miniatures
- Cura
- Simplify3D
- PrusaSlicer (filament & resin)
- Lychee Slicer (resin)
Cura
Cura is the most popular slicer in 3D printing, which also translates into being one of the best slicers for miniatures. It constantly provides users with updates and new features from user feedback and developer innovation.
The workflow and user interface with Cura is fine-tuned, working very well to process your models with great default settings, or even specific Cura profiles that other users have created.
There are all sorts of settings, from basic down to expert which you can adjust and test for the best results.
You can check out my article Best Slicer for the Ender 3 (Pro/V2/S1) – Free Options.
FDM Miniature Printing – Support Settings – Crazmadsci
QuickLinks: Support Settings, Step By Step, Tips & Tricks, Removing Supports, Want to Know More
FDM Supported KoboldBottle Brawler without Supports
Printing miniatures on a FDM printer can be difficult but it does not have to be a miserable process. One of the most difficult aspects of printing miniatures in either FDM or resin is of course supporting the model. However, presupported miniatures in FDM are not nearly as common as resin. So what do you do? Well you have come to the right place!
Here I will break down the my thought process when printing miniatures in FDM and support settings.
While FDM support settings are crucial to the success and finished quality of your prints do not forget that print orientation is crucial. I will also discuss proper orientation and bed adhesion which can be a vital aid in printing your model while also being less dependent on your need of supports.
Support Settings
Currently for printing my miniatures I print using Cura 4.8.0 but any newer version will work with my settings. I do not know if versions older than 4.7.0 will work due to Tree Supports being moved from the experimental category to normal support settings.
Print Profile: Download from Google Drive
Slicer: Cura 4.8.0
Printer: Currently Set to Prusa MK3s (Can be used on other types of printers)
Print Layer Height: 0. 08 mm
08 mm
Print Speed: 45 mm/s (Travel 60 mm/s)
Filament: ESun PLA+ Grey (Current Favorite)
Special Note: I highly suggest also selecting “Limit Support Retractions” under Travel as it will make it easier to remove supports if printing in larger groups.
Group Print using above settingsStep By Step: Setup & Thought Process
If you are curious of my mental thought process for printing miniatures on FDM follow along below. Comment below if you have any of your own mental steps or questions.
For this example I am going to use a recently test printed model of the Bottle Brawler Kobold from the Lost Adventures Volume 3 Kickstarter which is running until August 31, 2021.
Bottle Brawler KoboldWhen printing miniatures in filament I always think to myself first. “Is this model designed with filament printing in mind?” This is important as sculpts will sometimes utilize the strengths of a printer type or sculpt with the mentality for easier printing. This is not always the case. If you do not know ask the community or place where you got the model. Commonly companies will advertise if a model can print supportless and if it was tested in FDM or resin or both.
Before I then go to print I run through a brief mental check list.
- Does this model even need supports?
To answer that question think to yourself is there any place on this model that has filament floating without anything beneath it holding it up?
Bottle Brawler: Yes, you need to add supports most notability supporting each arm, the tail, and front loin cloth.
- Is there anywhere on the model that just doesn’t make sense to print in filament or will make the print more difficult to accomplish?
The answer to this question takes time to practice but in the case of the Bottle Brawler yes there are a few areas that are difficult to print in filament. The largest issue of difficulty was its feet.
 The curvature of the Kobold ankle made it extremely difficult to print as you does not provide a clean area to lay down a solid first layer and build upon. Also although not obvious the talons were not flush with the build plate either and printing the tiny toe nails starting off are incredibly difficult.
For easier printing I rotated the kobold backwards 45 degrees AND lowered the model into the buildplate 0.2 mm to level out the heel of the model and give it some place for the model to grow on. Looking at the image above you can see the curve of the foot and even talons of the Kobold are not flush. I could have just lowered the model but found that the ankle was sometimes too skinny and would cause the model to fail. This way I build the figure up the leg while laying down filament and ensure a more sturdy and stable print.
Tips & Tricks
When printing these models there are also a few things I almost always do.
- If the model does not have a base I print using a Brim.
Since miniatures have such a tiny surface areas of which to build from. Using a brim helps me adhere the model to the build plate and ensure it does not shift and move in the printing process. This is especially true when printing in groups of models as traveling from model to model can cause things for me to wiggle and pop off. If you continue to have issues check your bed level and perhaps lower your travel speed.
- Always try build from the most solid foundation you can. Orientation is Key
This piece of advice sounds pretty obvious right? Well having the best first layer on your print will help you stick to the build plate and give you the best odds for success. But what if I wasn’t just talking about your first layer?
Lets take the tail of the Kobold as an example
Loaded in model shown on left (not ideal print orientation).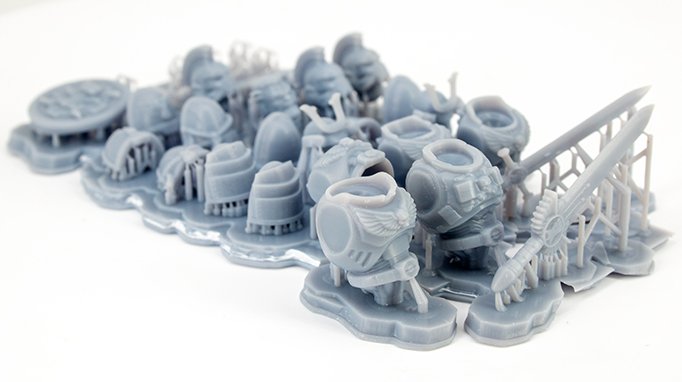 Modified and rotated 45 degree model on right (ideal print orientation).
Looking at the tail of the bottle brawler you can see that when you attempt to start the print of the tail the Loaded in STL (top left) has to start from an incredibly small point and has a pretty large series of overhangs when printing out. This makes the tail incredibly more reliant on having fine tuned support settings. This resulted in less success when printing the tail of the model since the printer was frequently having to add new material to build from.
When looking at the modified and rotated version of the tail (top right) you see that the layers of the tail will be printed using the tail itself as a support. This results in more overall strength in the tail and less overall demand and pressure on your support settings, therefore resulting in more successful prints.
3. Not all models should be rotated backwards
Taking tip #2 to heart looking at the Kobold Shaman you can see that its tail is already pointed in such a way that gives a great starting point for the entire print to build the tail from. Rotating the model would have actually made it more difficult to print and I don’t recommend doing it. Do not listen to the advice that “All models should be rotated 45 degrees”. Which this is good advice for the best detail on the face since you have improved resolution along your z-axis it does not always ensure a successful print.
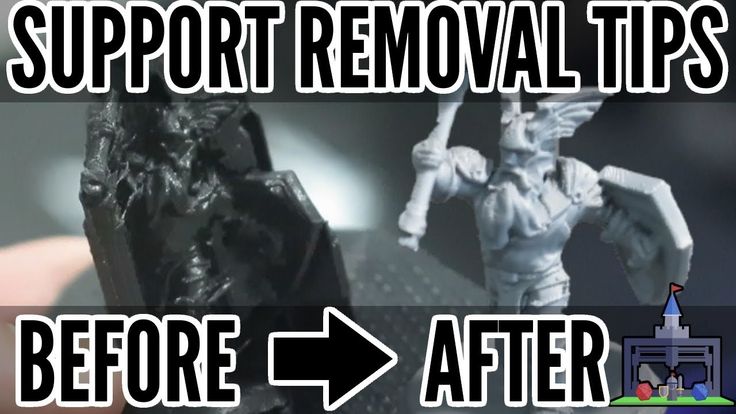
Removing Supports
When removing supports you should do so very carefully. Your friend when removing supports is to cut, do not pull the supports away. To cut the supports off the model I use a Flush Cut Micro cutter such as this one.
When you go to make cuts. You can snip material off and then rotate your cutter away from the model therefore pulling the material away and removing it.
As an example of the order of which I remove supports I will do so from a tested model of the Kobold Shaman. Please note this was the best model I had on hand to describe my method and do know that the spear of this print did not come out, I am only human. (Printing at a slower print speed 30 mm/s fixed this issue).
For the order of which I remove supports:
1. Remove from the least supported area first.
Removing from these small areas can reduce the amount of impact you have overall on that location for model. If you are supporting a small piece of the face, an arm, monster horns etc continual tugging or twisting of supports while removing them can cause damage to those locations. It is best keep them safe and to give yourself an area to work with by reducing the points of contact with the supports and those areas.
Warning: Be careful when removing supports from long thing objects such as staves, bows, spears etc. Removing the support can cause the print piece to flex and in some instances snap. Remove tiny pieces as a time and try not to move the printed part if possible.
Removing lease supported areas first2. Cut away the brim material from the final model.
Cutting the brim is a commonly overlooked step since I include a brim in my support material. When trying to remove supports and not cutting the brim from the model most commonly results in pressure on the ankles of the model and their amputation. If you cannot tell where to cut try shining a bright light on the underside of the model and use a sharp knife to cut around it. The cut out does not have to be perfect.
Example of cutting the brim of your model to not pull at the feet of the model.3. Remove the material, rotating around the figure.
Try to remove material in one area of the figure at a time and move around. In this method you are only removing material in one section at a time and the rest of the support material is still “supporting” and protecting your figure from the force of your excitement to extract it. In this case I do the spear last while still supporting it. These do not have to be completely perfect to the skin of the model and can be rough cuts. Feel free to remove small pieces at a time.
Special Note: I also tend to move from the top of the figure to the bottom since I care about the quality and finish of the top more than the bottom. Cutting top to bottom can also give you more control of the direction of any pull material and scarring you might have.
4. Clean up any supports that might be dangling from the rough cuts above and clean up any remaining brim material.
5. Enjoy your beautiful & freed model. Or note any print issues and go back to hobbying and modifying your settings.
The Feeling of SuccessTips & Tricks:
Have a render or loaded version of your model open on your computer so you can see pieces that might be engulfed or hiding by your support material. There is absolutely nothing worse than accidently cutting a piece of the model that you think is a support.
Print Logs For Kobolds
Want to Know More?
Let me know in the comments below if you found this helpful. Think I left something out? Do you think a support setting is crucial that I don’t use? Have a challenge you think I should print? Post down below!
Also do not hesitate to ask any questions you might have. Have a question revolving 3D printing that isn’t about supports? Ask always as I aim to constantly grow the site with the goal of making 3D printing for tabletop gaming more approachable for all.
Like this:
Like Loading...
Free STL file Minifigure Stand 25mm・Object for Download and 3D Printing・Cults
Best 3D printer files in Game category
Magnetic table football 1vs1
€3.20 -thirty% 2.24 €
3,95 €
Dwarven dice tower
2. 35 €
35 €
Fun planetarium
0,50 €
QR Dice (di)
Free
Mini Golf - Hole 3
Free
nine0007 Hummer h2 (printed on site)0.91 €
Wall-E Figure
Free
Bestsellers in the Game category
Flying unicorn
1.77 €
Destroyers of Nehron Lochust
3 €
Catafrac Heavily Armored Warriors - Limb Set
1.85 €
Altair Amberwatch
9.41 €
Savages Fotianna
9.41 €
Nice flexi dragon
1. 77 €
77 €
Articulated snowman
2.81 €
Catafrac Heavy Armored Warriors - Civil War Wargear Pack
€2.50
Healer conversion kit SM
6 €
RC 1/10 Dodge Challenger
7,50 €
USS EnterSurprise - printable game container for tiny F14 jet fighters
3.75 €
Dugtrio Funny 3D print model
8.47 €
Off-road vehicle
2 €
Voidwalker Exosuits Truescale
14.83 €
Articulated dragon
3.75 €
Snake and rattlesnake
3. 75 €
75 €
Do you want to support Cults?
Do you like Cults and want to help us continue our journey on our own ? Please note that we are a small team of 3 people, so it is very easy to support us in maintaining activities and creating future developments of . Here are 4 solutions available to everyone:
-
AD: Disable your AdBlock banner blocker and click on our banner ads.
-
AFFILIATION: Shop online with our affiliate links here Amazon. nine0006
-
DONATIONS: If you want, you can donate via PayPal here.
-
* INVITE FRIENDS: * Invite your friends, discover the platform and great 3D files shared by the community!
What are some ideas for 3D pens? Unleash your creativity!
Contents
With 3D printers, you can print 3D parts and draw them with a 3D pen.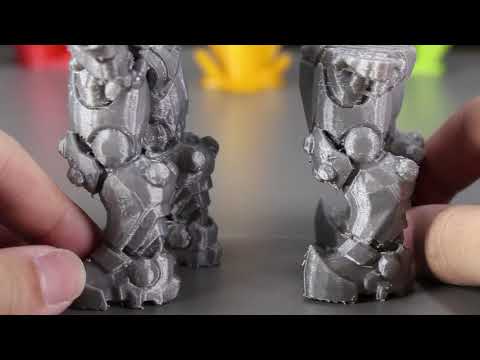 nine0006
It's not just a hobbyist's tool or an artist's tool (although it does both very well). 3D pens can be incredibly useful.
What are some ideas for a 3D pen? You can make useful things with a 3D pen, such as game pieces, coasters, phone and tablet stands, and tutorials. 3D pens can be used to create artistic creations such as sculptures, jewelry, clothing accessories and decorations, and as a welding machine for home repairs. nine0006
Drawing 3D objects with a pen is a wild concept, and you probably have millions of ideas swarming in your head about what you can do with this technology.
However, if you are looking for some useful suggestions, you will find them in this article.
If you haven't purchased a 3D pen yet, this variable speed pen is a great option.
Not only does it allow you to adjust the filament feed speed, but it also comes with a temperature control so you can work with different types of filament at the ideal, recommended temperature. nine0006
3D Pen Ideas: Useful Items
Play Parts
It's a shame to lose a play element. It could even be something as simple as a checkers button, but its absence means you can't play the game.
Of course, you can use several random items instead, but being able to replace it with a similar one is the first solution.
With a 3D pen and a little practice, this is quite possible. The following video shows how you can use the 3D pen to draw game shapes. nine0006
However, this is not only for replacing lost game pieces. A 3D pen opens up completely new possibilities for you if you are an avid RPG lover.
You can use it to draw figurines and props. The finish is unlikely to be as smooth as if you bought or even 3D printed these items, but you will enjoy the process.
What's more, you can hone your skills until you reach perfection!
Stands
Coasters are one of those items you don't think about until you need them, but when you need them, you need them.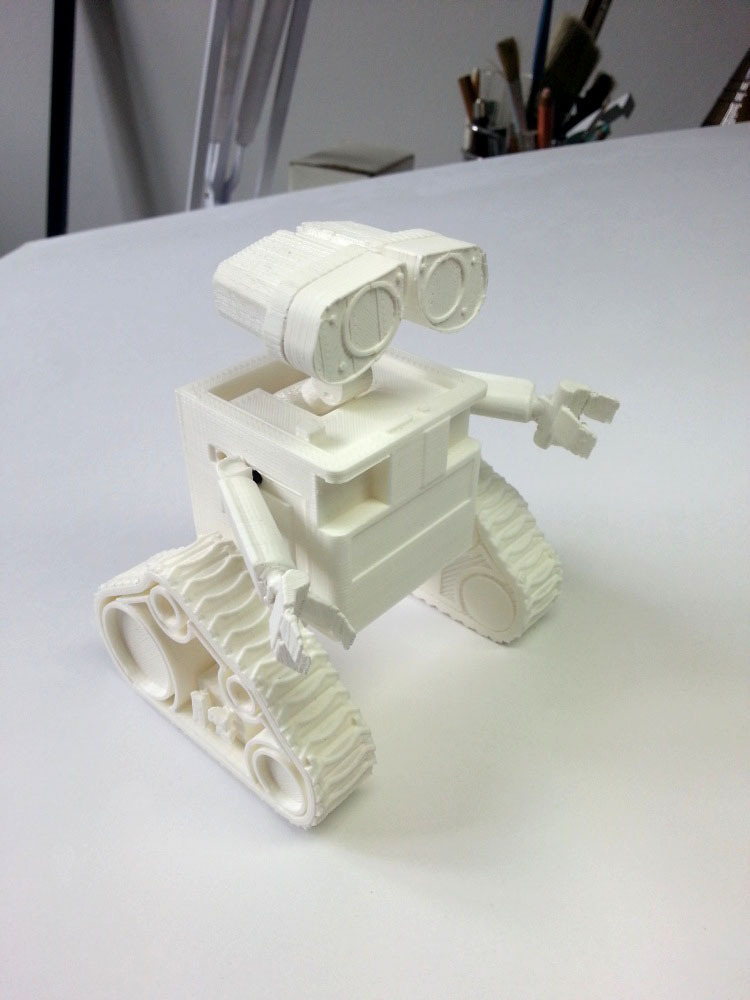
You can go out and buy some coasters, or you can make a unique set with a 3D pen. For example, this video shows you how to create geometric coasters.
Tripod for phone or tablet
Most of our lives are spent with mobile phones and tablets.
This includes entertainment like social networking or streaming movies and series, but these days we also use these devices for work and school. nine0006
Holding a phone or tablet in your hands for the duration of a meeting, lecture, or a great rom-com is tiring.
Leaning expensive electronic devices on books, shelves, and other random objects can be a little dangerous.
This is what stands and tripods are made for. But you, with your smart 3D pen, don't have to buy them.
You can use the 3D pen to draw a tripod or stand for your mobile phone (see tutorial video here) or tablet (see demo here). nine0006
Teaching and educational aids
Teaching and educational aids, such as 3D molecular models or even just non-square 3D shapes, can be very expensive, especially when you consider what they are and what they are made of.
Instead of spending money on them, why not try drawing them with a 3D pen?
As a science or biology teacher, you can take visual learning to a whole new level. nine0006
If you are demonstrating how molecules bind to each other, you can make individual molecules and then use the 3D pen to glue the two molecules together in the correct way.
You can also demonstrate human anatomy by drawing a human hand step by step. When studying the skeleton, you can draw the bones.
Then, as you progress through the soft tissues, vascular system, nervous system and skin, you can add to the model until you have an anatomical hand! nine0006
3D Pen Ideas: Artistic Creations
Sculptures
Sculpting with 3D pens has great potential as an art form. For example, here is a video of a man who created a 3D sculpture of his cat.
It's very interesting to see how this artist approaches post-processing, as 3D pens don't tend to create smooth surfaces on products.
Jewelry
If you are a jewelry maker or have a small jewelry business, the 3D Pen can be the perfect addition to your toolbox. nine0006
Necklaces, rings, bracelets, earrings and pendants can all be created with a 3D pen.
Clothing accessories
Fashion designer Patrick Tai demonstrates that a 3D pen has a much wider scope than you might think.
He designed and created the dress using only a 3D pen. The dress can be seen here.
Another fashion designer, Eden Saadon, created a line of lace black clothing accessories using a 3D pen.
Some are made of plastic only, others are made of plastic glued on gauze. The results are amazing and exquisite. nine0006
In the next video, you can see how someone actually made a dress with a 3D pen! The same person also made a pair of shoes using a 3D pen.
Jewelery
You can make an infinite amount of jewelery with the 3D pen. From Christmas decorations to Halloween decorations (think of the amazing webs you can make with a 3D pen), candle holders, garlands, mandalas, and more.
You can also give existing decorations a new twist by painting new designs on old vases, plant pots and trinket boxes. nine0006
3D Pen Ideas: Repairs
3D Pens are a great addition to any home repair kit.
If your scissor handles are broken, you can "weld" the pieces together with the plastic from the 3D pen. The same can be done if the lever or the nose of the glasses is broken.
You can repair or make new zippers if the old ones are broken.
To prevent knives, forks and spoons from slipping out of the dishwasher, repair the bottom of the cutlery tray with a 3D pen. nine0006
Plastic pipes and casings can be repaired, strengthened or even replaced with a 3D pen.
The possibilities for home repairs with a 3D pen are almost limitless.
Yes, glue can stick parts together, but the 3D pen can be used to make missing parts and assemble parts.
Another use for a 3D pen is to repair or put the finishing touches on imperfections in 3D printed objects.
What can't be made with a 3D pen? nine0005
Anything that requires complex geometry, or items that need to be exact copies of each other, cannot be made with 3D pens.
Furthermore, supporting structures and parts cannot be produced with 3D pens. The joints are not as reliable as 3D printed ones and therefore their structural integrity is lower.
If you need an object, object or part with a smooth surface, then a 3D pen is not the best option.
You may be able to achieve the desired finish, but only after a significant amount of tooling and post-processing. nine0006
Large objects are difficult to make with a 3D pen because they require time and structural support to make.
How much filament does the 3D pen use?
The amount of filament used by a 3D pen depends largely on the size of the object being created, the complexity of the design, and the skill of the handler.
Larger and more complex items require more thread, and the more mistakes made during assembly, the more thread is used and the faster it ends. nine0006
But the great thing about 3D pens is that there is very little uncontrolled waste. That is, how much thread you put in the pen, so much you have to work.
Can I use 3D printer filament in a 3D pen?
Sometimes 3D printer filament can be used in a 3D pen, but not always.
Filament is usually made from the same printer and pen materials, but filament size can be an issue.
Some pens use the same thickness of filament as printer filament, others do not. nine0006
In addition, you need to be careful with composite threads.
The printer nozzle can handle the abrasive nature of stone, wood or metal composite, but the pen nozzle is more likely to be damaged.
Conclusion
3D pens can be used to create a range of useful items such as tripods or teaching aids.
While the same items can be made with 3D printers, 3D pens are cheaper.
The human factor of 3D pens may be a drawback when it comes to accuracy and uniformity, but it's a bonus when it comes to artistic expression.