3D printing laser resin
Guide to Resin 3D Printers
There are many 3D printing processes on the market. Getting familiar with the nuances of each helps to clarify what you can expect from final prints to ultimately decide which technology is suitable for your particular application.
Stereolithography (SLA) and digital light processing (DLP) 3D printing are the two most common processes for resin 3D printing. Resin printers are popular for producing high-accuracy, isotropic, and watertight prototypes and parts in a range of advanced materials with fine features and smooth surface finish.
While these technologies were once complex and cost-prohibitive, today’s small-format desktop SLA and DLP resin 3D printers produce industrial-quality parts at an affordable price point and with unmatched versatility thanks to a wide range of materials.
Both processes work by selectively exposing liquid resin to a light source—SLA a laser, DLP a projector—to form very thin solid layers of plastic that stack up to create a solid object. While very similar in principle, the two technologies can produce significantly varying outputs.
In this in-depth guide, we walk through the details of the two resin 3D printing processes and explore how they compare in terms of resolution, accuracy, build volume, speed, workflow, and more.
Sample part
See and feel Formlabs quality firsthand. We’ll ship a free sample part to your office.
Request a Free Sample Part
Desktop SLA 3D printers contain a resin tank with a transparent base and non-stick surface, which serves as a substrate for the liquid resin to cure against, allowing for the gentle detachment of newly-formed layers.
The printing process starts as the build platform descends into a resin tank, leaving space equal to the layer height in between the build platform, or the last completed layer, and the bottom of the tank. A laser points at two mirror galvanometers, which direct the light to the correct coordinates on a series of mirrors, focusing the light upward through the bottom of the tank and curing a layer of resin.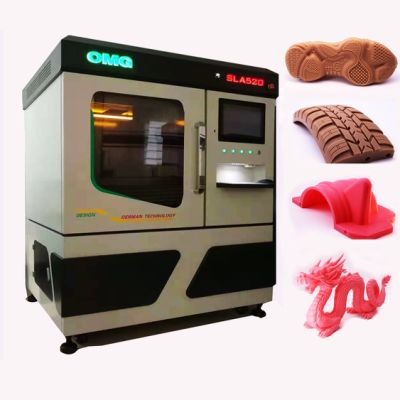
The cured layer then gets separated from the bottom of the tank and the build platform moves up to let fresh resin flow beneath. The process repeats until the print is complete.
Low Force Stereolithography (LFS) technology, used by the Form 3+ and Form 3L, is the next phase in SLA 3D printing.
In LFS 3D printers, the optics are enclosed in a Light Processing Unit (LPU). Within the LPU, a galvanometer positions the high-density laser beam in the Y direction, passes it through a spatial filter, and directs it to a fold mirror and parabolic mirror to consistently deliver the beam perpendicular to the build plane and ensure accurate, repeatable prints.
As the LPU moves in the X direction, the printed part is gently peeled away from the flexible bottom of the tank, which drastically reduces the forces exerted on parts during the print process.
LFS 3D printing drastically reduces the forces exerted on parts during the print process, using a flexible tank and linear illumination to deliver incredible surface quality and print accuracy.
This advanced form of stereolithography delivers vastly improved surface quality and print accuracy. Lower print forces also allow for light-touch support structures that tear away with ease, and the process opens up a wide range of possibilities for future development of advanced, production-ready materials.
White Paper
Looking for a 3D printer to realize your 3D models in high resolution? Download our white paper to learn how SLA printing works and why it's the most popular 3D printing process for creating models with incredible details.
Download the White Paper
Just like their SLA counterparts, desktop DLP 3D printers are built around a resin tank with transparent bottom and a build platform that descends into a resin tank to create parts upside down, layer by layer.
The difference is the light source. DLP 3D printers use a digital projector screen to flash an image of a layer across the entire platform, curing all points simultaneously.
The light is reflected on a Digital Micromirror Device (DMD), a dynamic mask consisting of microscopic-size mirrors laid out in a matrix on a semiconductor chip. Rapidly toggling these tiny mirrors between lens(es) that direct the light towards the bottom of the tank or a heat sink defines the coordinates where the liquid resin cures within the given layer.
Because the projector is a digital screen, the image of each layer is composed of square pixels, resulting in a three-dimensional layer formed from small rectangular cubes called voxels.
Resolution shows up more often than any other value in 3D printer spec sheets, but it’s also a common ground for confusion. The basic units of the SLA and DLP processes are different shapes, making it difficult to compare the different machines by numerical specifications alone.
In 3D printing, there are three dimensions to consider: the two planar 2D dimensions (X and Y) and the third vertical Z dimension that makes 3D printing.
Z resolution is defined by the layer thicknesses a 3D printer can produce. Resin 3D printers like SLA and DLP offer some of the finest Z resolutions—thinnest layers—of all 3D printing processes and users can normally choose from a range of layer height options between 25-300 microns, allowing designers to strike a balance between detail and speed.
In DLP 3D printing, XY resolution is defined by the pixel size, the smallest feature the projector can reproduce within a single layer. This depends on the resolution of the projector, the most common being full HD (1080p), and its distance from the optical window. As a result, most desktop DLP 3D printers have a fixed XY resolution, generally between 35 to 100 microns.
For SLA 3D printers, XY resolution is a combination of the laser’s spot size and the increments by which the laser beam can be controlled. For example, the Form 3 LFS 3D printer features a laser with an 85 micron spot size, but because of the constant line scanning process, the laser can move in smaller increments and the printer can consistently deliver parts with 25 micron XY resolution.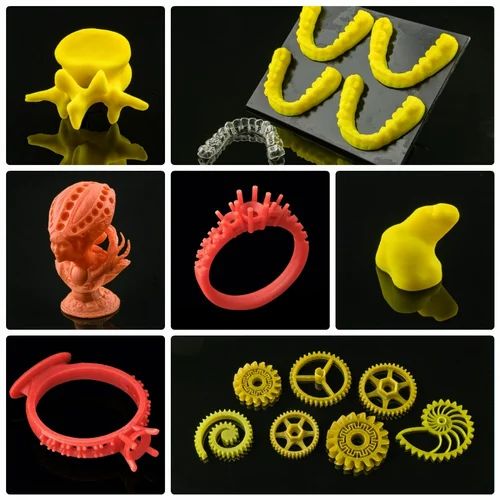
However, resolution in itself is often just a vanity metric. It offers some indication, but it doesn’t necessarily correlate directly with accuracy, precision, and print quality.
Learn more about resolution in 3D printing in our in-depth guide.
Because 3D printing is an additive process, each layer introduces an opportunity for inaccuracy, and the process by which layers are formed affects the level of precision, defined as the repeatability of the accuracy of each layer. Accuracy and precision depend on many different factors: 3D printing process, materials, software settings, post-processing, and more.
In general, both SLA and DLP resin 3D printers are among the most accurate and precise 3D printing processes. Differences in accuracy and precision are often better explained by the differences between machines by various manufacturers than differences between the technologies themselves.
For example, entry-level SLA or DLP printers might use off-the-shelf projectors, lasers, or galvanometers, and their manufacturers will try to get the best performance possible out of these parts.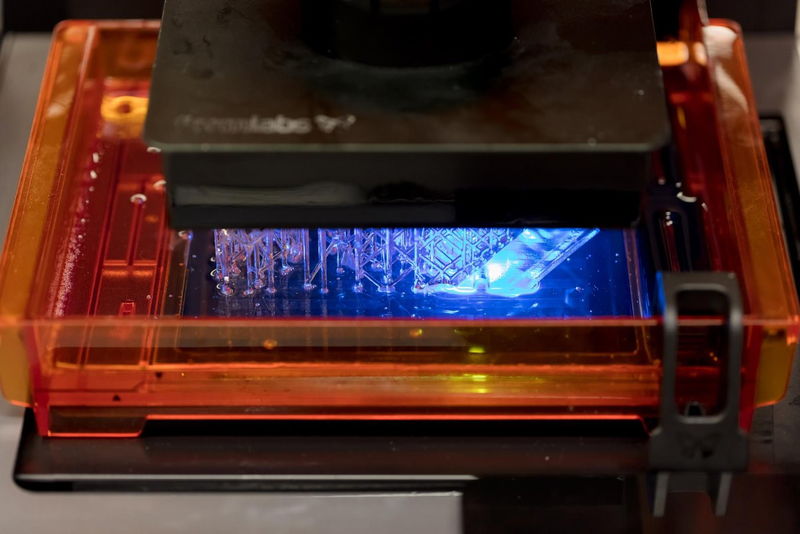 Professional SLA and DLP 3D printers, like the Formlabs Form 3, feature a custom optical system adapted to the specifications required by professional customer applications.
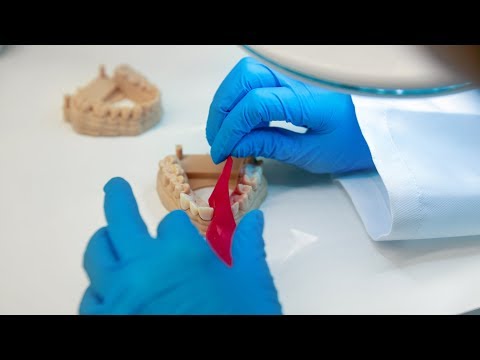
Accuracy and precision are crucial for parts like dental splints (left) and surgical guides (right).
Calibration is also crucial. With DLP projectors, manufacturers need to deal with the non-uniform light distribution on the build plane and optical distortion of the lenses—meaning that pixels in the middle are not the same size or shape as pixels on the edges. SLA 3D printers use the same light source for every part of the print, which means it’s uniform by definition, but they still require extensive calibration to account for distortions.
Even a 3D printer with the highest quality components and degree of calibration can produce widely varying results depending on the material. Different resins require optimized material settings to perform as intended, which might not be available for off-the-shelf materials or resins that are not thoroughly tested with a specific 3D printer model.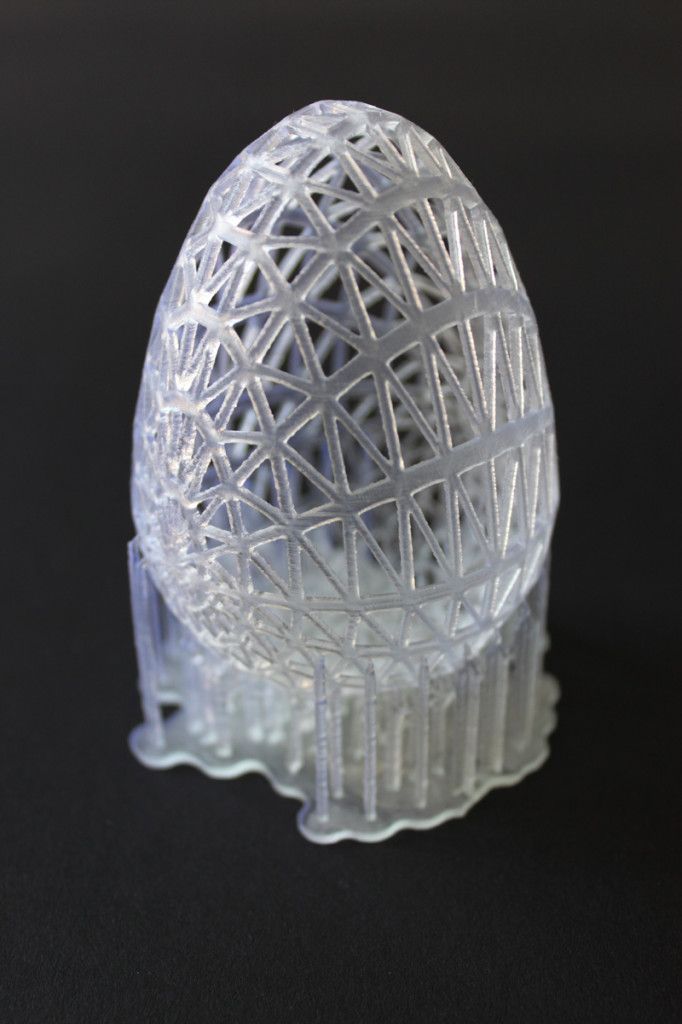
The takeaway? Accuracy and precision are almost impossible to understand from the technical specifications alone. Ultimately, the best way to evaluate a 3D printer is to inspect real parts or ask the manufacturer to create a test print of one of your own designs.
With DLP 3D printers, there’s a direct trade-off between resolution and build volume. The resolution depends on the projector, which defines the number of pixels/voxels available. If one moves the projector closer to the optical window, the pixels get smaller, which increases the resolution, but limits the available build area.
Some manufacturers stack multiple projectors next to each other or use a high-definition 4K projector to increase the build volume, but this leads to substantially higher costs that often price these machines out of the desktop market.
As a result, DLP 3D printers are generally optimized for specific use cases. Some have a smaller build volume and offer high resolution to produce small, detailed pieces like jewelry, while others can produce bigger parts but at a lower resolution.
The stereolithography process is inherently more scalable, since an SLA 3D printer’s build volume is completely independent of the resolution of the print. A single print can be any size and any resolution at any location within the build area. This makes it possible to 3D print large parts at high resolution or a large batch of detailed small parts to increase throughput with the same machine.
The other main barrier to increasing build volume in both SLA and DLP 3D printers is the peel force. When printing larger parts, the forces exerted on the parts increase exponentially as a cured layer separates from the tank.
In LFS 3D printing, the flexible film at the base of the resin tank gently peels away as the build platform pulls the part up, significantly reducing the stress on the part. This unique feature has made it possible to substantially increase the build volume for the first accessible large format SLA 3D printer, the Form 3L.
The Form 3L is the first affordable large format SLA 3D printer with a build volume of 30 cm x 33. 5 cm x 20 cm.
Webinar
Want to learn more about the Form 3L and Form 3BL ecosystem, and the new large format post-processing machines?
In this demo, Kyle and Chris will expain how to navigate the Form 3L end-to-end workflow, including post-processing.
Watch Now
SLA and DLP resin 3D printers both known for creating parts with the smoothest surface finish of all 3D printing processes. When we describe the differences, in most cases these are only visible on tiny parts or highly detailed models.
Because objects are made of layers in 3D printing, 3D prints often have visible, horizontal layer lines. However, because DLP renders images using rectangular voxels, there is also an effect of vertical voxel lines.
DLP 3D printers render images using rectangular voxels, which causes an effect of vertical voxel lines. In this image, see the vertical voxel lines as they appear naturally on the left, and then outlined to more easily identify on the right.
Because the unit is rectangular, voxels also have an effect on curved edges. Think of building a round shape out of LEGO bricks—the edges will appear stepped on both the Z axis and the X-Y plane.
The rectangular shape of voxels makes curved edges appear stepped. Removing the appearance of voxel and layer lines requires post-processing, such as sanding.
In LFS 3D printing, layer lines are close to invisible. As a result, surface roughness is reduced, which ultimately leads to smooth surfaces, and for clear materials, more translucent parts.
When thinking about speed in 3D printing, it’s important to consider not just raw print speed, but also throughput.
Raw print speed for SLA and DLP resin 3D printers is comparable in general. As the projector exposes each entire layer all at once, print speed in DLP 3D printing is uniform and depends only on the height of the build, whereas, SLA 3D printers draw out each part with a laser. As a rule of thumb, this results in SLA 3D printers being comparable or faster when printing small or medium-size single parts, while DLP 3D printers are faster to print large, fully dense prints, or builds with multiple parts that fill up much of the platform.
But once again, it’s worth considering the trade-off between resolution and build volume for DLP printers. A small DLP 3D printer can print a small part or a (small) batch of smaller parts fast, at high resolution, but the build volume limits the part size and the throughput. A different machine with a larger build volume can print larger parts or a batch of smaller parts faster, but at a lower resolution than SLA.
SLA 3D printers can produce all of these options in one machine and offer the user the freedom to decide whether she wants to optimize for resolution, speed, or throughput.
SLA 3D printers offer a larger build volume, allowing users to batch parts and print overnight to increase throughput.
Speed can also depend on the material choice. Printing four times faster than Formlabs standard materials, Draft Resin fast-printing resin that is ideal for initial prototypes, rapid iterations, as well as dental and orthodontic models. From fast print initiation speeds to minimal support removal, wash, and cure times, Draft Resin has an optimized workflow to truly maximize efficiency.
100 microns | 200 microns |
|---|---|
100 microns | 200 microns |
|---|---|
100 microns | 200 microns |
|---|---|
Interactive
Try our interactive ROI tool to see how much time and cost you can save when 3D printing on Formlabs 3D printers.
Calculate Your Savings
Just like with accuracy and precision, the workflow and available materials differ more from machine to machine than technology to technology.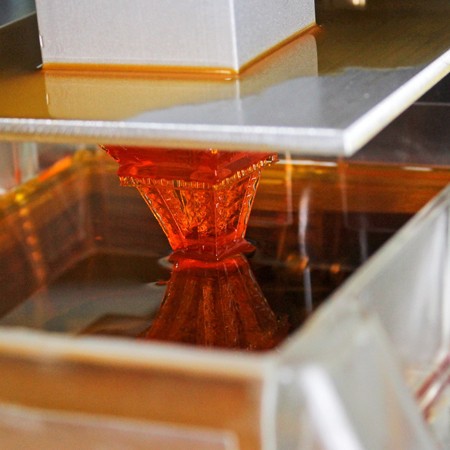
Most SLA and DLP 3D printers are “plug and play,” with easily swappable build platforms and resin tanks. Some more advanced models also come with a cartridge system to automatically refill the tank with liquid resin, which requires less attention and facilitates printing overnight.
Some printers come with proprietary software to prepare 3D models for printing, such as PreForm for Formlabs SLA 3D printers, while other manufacturers offer off-the-shelf solutions. Features differ by software tool, for example, PreForm offers one-click print setup, powerful manual controls to optimize support density and size, adaptive layer thickness, or functions to save material and time. Luckily, the software can be easy to download and test before purchasing a 3D printer.
Resin 3D printers offer a variety of materials for a wide range of applications.
One of the most significant benefits of resin 3D printing is the variety of materials that make it possible to create parts for diverse applications. Resins can feature a wide range of formulation configurations: materials can be soft or hard, heavily filled with secondary materials like glass and ceramic, or imbued with mechanical properties like high heat deflection temperature or impact resistance.
However, the range of supported material options depend on the 3D printer model, so we recommend inquiring with the manufacturer before purchase.
Parts printed with both SLA and DLP technologies require post-processing after printing. First, the parts need to be washed in a solvent to remove excess resin. Some functional materials like engineering or biocompatible parts also require post-curing. For SLA 3D printers, Formlabs offers solutions to automate these steps, saving time and effort.
At last, 3D printed parts printed on supports require these structures to be removed, a manual process that is similar for both SLA and DLP 3D printers. LFS 3D printing simplifies this step by offering light-touch support structures that use very small touchpoints to enable easy removal with minimal support marks left behind.
Interactive
Need some help figuring out which 3D printing material you should choose? Our new interactive material wizard helps you make the right material decisions based on your application and the properties you care the most about from our growing library of resins.
Recommend Me a Material
After sorting out the differences in technology and outcomes, we hope it’s much easier to select a resin 3D printer that best matches your workflow and output needs.
To explore the next generation of SLA 3D printing, learn more about the Form 3 and Form 3L LFS 3D printers.
Curious to see the quality firsthand? Order a sample part shipped to your office.
Request a Free Sample Part
Laser SLA 3D Printer Resins
- Home
- Store
- 3D Printer Resins
- Light Source
- Laser SLA Resins
High-quality Laser SLA 3D printer resins and 3D printer photopolymers available for a variety of stereolithography 3d printers, including high-temperature resins, castable resins, and flexible resins. What is SLA Laser 3D Printing? SLA 3D Printing uses a laser that focuses on a vat of resin and photopolymers. The laser follows a 3D design or model and cures the resin point-by-point to create the design. SLA 3D printing is popular for projects/industries that require highly-detailed 3D printed parts.
Laser SLA Resins Collections
All Laser SLA Resins Browse by Light Source
Laser SLA Resins
Peopoly SLA Resins
SLA 3D printer resins formulated for 405µm curing lasers and LCD arrays
PhotoCentric 3D UV Laser Resins
Formulated to work in a large number of third-party SLA printers.
Guides & Articles
How To: Perfectly Level Your Resin 3D Printer's Build Plate
With any 3D print, a perfect first layer is essentially, especially so with resin 3D printing. Let's take a look at how you might be able to increase the adhesion of your resin 3D prints.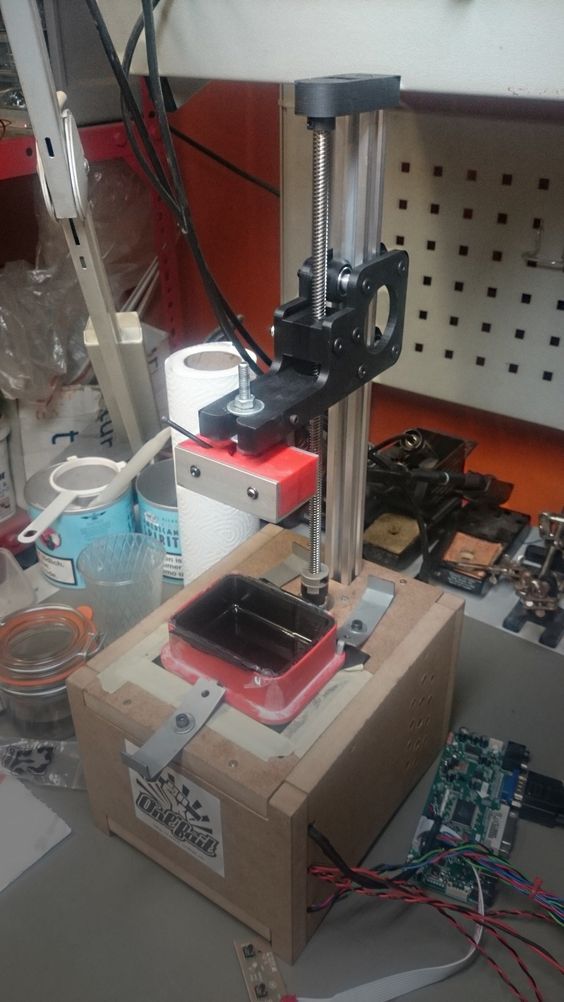
How To Succeed with LayerLock SLA Build Surfaces
Successfully achieve strong bed adhesion for Laser, DLP, and SLA resin prints using LayerLock SLA Resin 3D Printing Build Surfaces.
How to Succeed When 3D Printing with MH Build Resin
Make SLA resin 3D printing easier with this helpful detailed article on how to successfully fine-tune photopolymer resin to your 3D printer.
MH Build Resin Profile Settings for SLA 3D Printing
Succeed with MH Build Resin using these helpful printer and support ChiTuBox profile settings for your specific SLA machine.
Tech Breakdown: Peopoly Phenom Noir Resin 3D Printer
For high definition resin 3D printers, Peopoly is hard to beat, and with the Phenom Noir you can print faster than ever.
Getting Started with the Peopoly Moai SLA 3D Printer
MatterHackers' Pros detail the unboxes and set-up steps of the awesome Peopoly Moai SLA 3D printer.
How To: Print, Clean, and Post-Process SLA 3D Prints
Laser and resin 3D Printers have a very different workflow from the more common extruder and plastic 3D printers. Learn what it takes to use these high-resolution machines.
How To: Safely Handle, Use, and Dispose Resins for SLA 3D Printers
3D prints from SLA 3D printers solidify liquid resin to create high-resolution parts. These resins need to be handled with care from opening to disposal.
Tech Breakdown: Peopoly's Moai SLA 3D Printer
MatterHackers' pros take an in-depth look at why this incredibly precise resin 3D printer is quickly becoming a crowd favorite.
Choosing a liquid photopolymer for a 3D printer. Classification of materials for SLA/DLP 3D printing.
Contents:
- Introduction
- SLA Overview
- SLA Standard Resins
- Standard photopolymer resin - Standard
- Clear Photopolymer Resin - Clear
- Engineering photopolymer resins
- Rigid photopolymer resin - Tough (like ABS)
- Durable photopolymer resin - Durable (PP-like)
- Heat resistant photopolymer resin - Heat resistant
- Rubber-like photopolymer resin - Rubber-like (Elastic)
- Ceramic photopolymer resin - Ceramic filled (Hard)
- How to choose the right resin for your application
- Dental and medical SLA resins
- Medical Device Photopolymer Resin - Custom Medical Appliances (Class I Biocompatibility)
- Dental Long Term Biocompatible Resin (Class IIa Biocompatible)
- Biocompatibility class I vs biocompatibility class IIa
- Cast SLA resins
- Cast resin for jewelry making
- Generalized rules
Hello everyone, Friends! With you 3DTool!
This article compares photopolymer resins using Formlabs SLA 3D printing products –
Catalog of photopolymer 3D printers
Photopolymers from FormLabs
Detailed review of the Formlabs Form 3 3D printer
Introduction
The stereolithography prints plastic parts with high resolution, good fine detail and smooth surface. Due to the variety of photopolymer resins available for SLA, this technology is used in many different industries: nine0053
-
"Standard" photopolymers are used for prototyping
-
Engineering photopolymers have certain mechanical and thermal properties
-
Dental and medical photopolymers have biocompatibility certificates.
-
Cast photopolymers have a zero ash content after burning. nine0053
SLA 3D Printing Resin Overview
SLA uses a laser to cure a liquid photopolymer resin. This process is called photopolymerization. Various combinations of polymers and other additives that are part of the resin allow you to get different material properties.
The main advantages and limitations that are common to all resins in SLA 3D printing are:
Benefits:
Weaknesses:
Base Resins for SLA
Post-Processing SLA/DLP 3D Printing Article
Standard photopolymer resin - Standard
Standard resins produce parts with high stiffness, detail and a smooth surface. The low cost of resins, from $250 per liter, makes them ideal for prototypes.
The color of the resin also affects its properties. For example, in FormLabs products, gray resin is suitable for models with fine details, and white resin for parts that require the smoothest possible surface. nine0053
Benefits of using Standard grade resins:
Cons Standard:
Also included in the class of "Standard" photopolymer resins from FormLabs is the Color KIT - a set of special dyes and "Color Base" photopolymer resin for mixing and obtaining a variety of color solutions. This eliminates the need for painting parts after 3D printing.
FormLabs Engineering Photopolymer Resins
Engineering resins have a range of properties for injection molded plastics.
All engineering resins require additional UV curing, such as using the Form Cure, to achieve their maximum properties.
Tough photopolymer resin - Tough (ABS equivalent)
Tough resin was developed for models that need to withstand high loads and be durable. nine0053
This material produces strong, shatter-resistant parts and functional prototypes such as snap-on housings.
Pros:
Cons:
Ideal for: functional prototypes, mechanical parts
Durable photopolymer resin - Durable
Durable resin is a wear-resistant and flexible material with mechanical properties similar to polypropylene.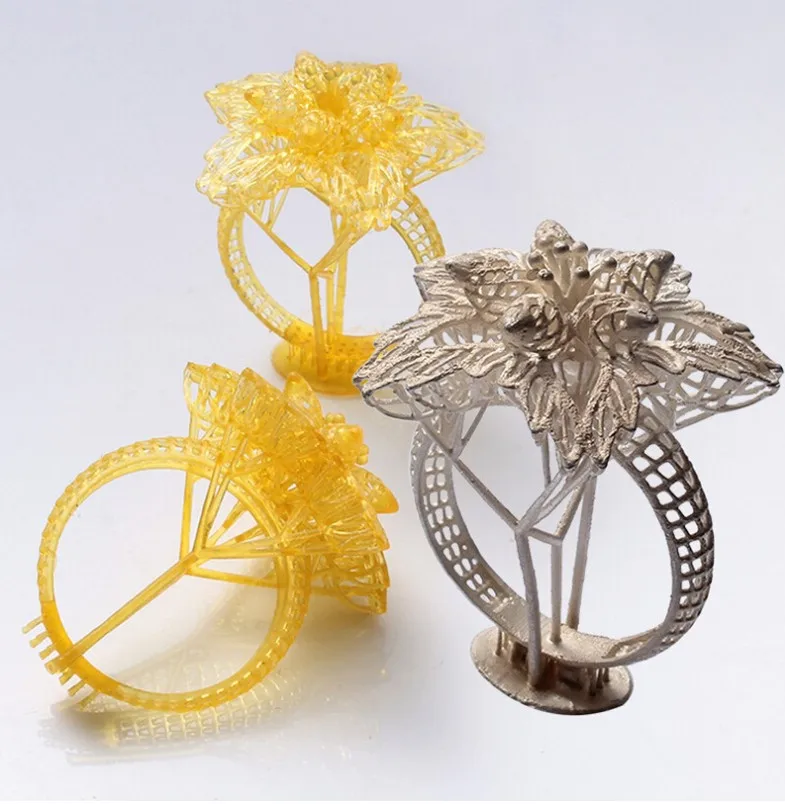
Durable photopolymer produces models with a smooth glossy surface and high resistance to deformation.
Durable Resin is ideal for:
- Bushings and bearings;
- Various functional compounds
Pros:
Cons:
-
Not suitable for thin wall parts (recommended minimum wall thickness 1mm)
-
Low heat distortion temperature
-
Low flexural strength (lower than hard resin)
Ideal for: functional prototypes. nine0053
Refractory Photopolymer Resin - Formlabs High Temp Resin
The heat resistant resin is ideal for parts that require high temperature resistance and operate at high temperatures.
Formlabs High Temp Resin provides the highest melting point (HDT): 238°C at 0.45 MPa.
The resin should be used to print detailed, accurate prototypes with high heat resistance. nine0053
Pros:
Cons:
Flexible Resin
Rubber-like resin allows flexible parts to be made. This material has a low tensile strength and high elongation at break and is well suited for parts that will be bent or compressed.
It can also be used to add ergonomic features to multi-material assemblies such as: dies, wearable prototypes, handles, pads and grips. nine0053
Pros:
-
High flexibility (high elongation at break)
-
Low hardness (simulates 80A durometer rubber)
-
High impact resistance
Cons:
-
Doesn't have all the properties of real rubber nine0053
-
Requires extensive support structures
-
Material properties deteriorate over time as the part is exposed to ultraviolet radiation (sunlight)
-
Not suitable for thin wall parts (recommended minimum wall thickness 1mm)
Ideal for flexible prototyping. nine0053
Ceramic photopolymer resin - Rigid Resin
This resin is reinforced with glass, which provides very high rigidity and a polished surface. The polymer is very resistant to deformation and is excellent for 3D printing thin elements.
Ideal for: molds and tooling, jigs, manifolds, retainers, electrical and automotive fixture housings
nine0053
Thermal management components printed with SLA ceramic (hard) resin. Image credit: Formlabs
How to choose the right resin for your application
The table below shows the main mechanical properties of photopolymers for SLA:
Source: Formlabs
Standard resin ( standart ) has high tensile strength but is very brittle (very low elongation at break) so it is not suitable for functional parts. The ability to create a good part surface makes it ideal for visual prototypes and art models. nine0053
Durable ( durable ) resin has the highest impact strength and elongation at break of any other SLA material. Best suited for prototyping parts with moving parts and latches. It lacks, however, the strength of thermoplastic 3D printing materials such as SLA nylon.
tough tough resin is a compromise between the material properties of tough and standard resin. It has a high tensile strength, so it is best suited for rigid parts that require high hardness. nine0053
heat resistant resin ( heat resistant ) can withstand temperatures above 200 o C, but has poor impact strength and is even more brittle than standard resin.
ceramic ( ceramic reinforce ) resin has the highest tensile strength and flexural modulus, but is brittle (poor elongation at break and toughness). This resin is preferred for thin wall parts that require increased rigidity. nine0053
The graphs below compare the mechanical properties of the most common SLA materials visually:
Comparison chart for elongation at break and toughness for common SLA printing specifications and standard media. Image courtesy of Formlabs.
Stress-strain curves for conventional SLA technologies and standard materials. Image credit: Formlabs nine0053
Pros:
Cons:
- Moderate wear and tear resistance
Ideal for: Surgical aids and appliances
Dental Long Term Biocompatible Resin - Dental Long Term (Class 2A biocompatible)
0114
These resins are specially formulated for long term dental fixtures. Class 2A biocompatible resins can come into contact with the human body for up to a year.
High resistance to breakage and wear make this resin ideal for making rigid cotter pins or retainers.
Pros:
Cons:
-
High price nine0053
Ideal for: durable dental instruments, fracture and wear resistant medical parts, rigid cotter pins, retainers
What is the difference between class 1 and class 2a biocompatibility?
Class 1 biocompatibility rules apply to materials that are allowed to be used for:
-
non-invasive devices that come into contact with intact skin nine0053
-
devices for temporary use or short-term use in the mouth or ear canal or in the nasal cavity
-
reusable surgical instruments
Class 2a biocompatibility rules apply to materials that are allowed to be used for:
-
devices that come into contact with bodily fluids or open wounds nine0053
-
devices used to introduce substances into or remove substances from the human body
-
invasive short-term devices such as invasive surgical items
-
long-term implantable devices placed in the teeth
Photopolymer resins in SLA 3D printing for jewelers
Jewelry resins
This material allows you to print models with fine details and a smooth surface without leaving ash or residue after burning.
Cast resin allows you to get the finished product directly from design to precision casting with just one 3D printed part. It is suitable for making jewelry and other small and complex components.
nine0113 Pros:
Cons:
Ideal for: investment casting, jewelry making
SLA/DLP 3D printer catalog
Photopolymers from FormLabs
Post-Processing SLA/DLP 3D Printing Article
Well, that's all we have! We hope this article was useful for you! nine0053
To order Formlabs SLA 3D printers or ask your questions and find out the status of your order, you can
- Email: [email protected]
- By phone: 8(800)775-86-69
- Or on our website: http://3dtool.ru
-
Don't forget to subscribe to our YouTube channel:
Subscribe to our groups in social networks:
INSTAGRAM nine0053
In contact with
Photopolymer 3D printer
3D printers can be sorted not only by the printing technologies used, but also by the consumables used.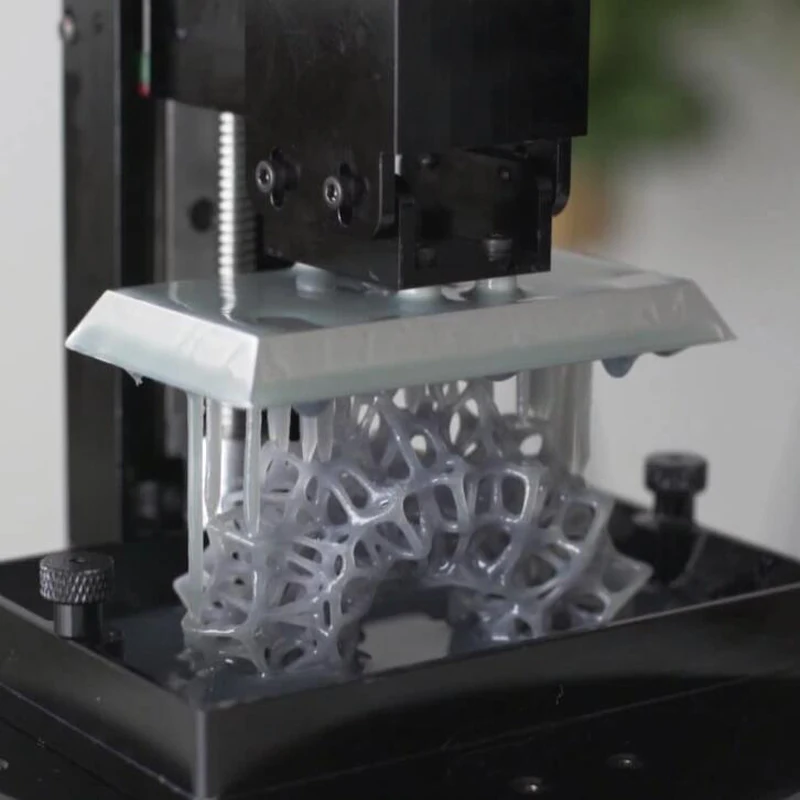 In this section, we will look at devices that use photopolymer resins to build models.
- 1 Consumables
- 2 Laser stereolithography (SLA)
- 3 Projector stereolithography (DLP)
- 4 Multi-jet (MJM and PolyJet)
- 5 3D pens
- 6 Additional illumination
Consumables
Photopolymer resins are liquid polymers that harden when exposed to light. As a rule, such materials are sensitive to the ultraviolet range, which determines the design of photopolymer printers. One of the common design elements is a transparent colored cap or housing made of a material that filters ultraviolet radiation. This is done both to protect the user's eyes and to protect the supplies inside the printer from exposure to sunlight and background lighting. nine0053
Photopolymer resin loaded into Form 1 3D printer
The physical properties of resins after polymerization vary widely.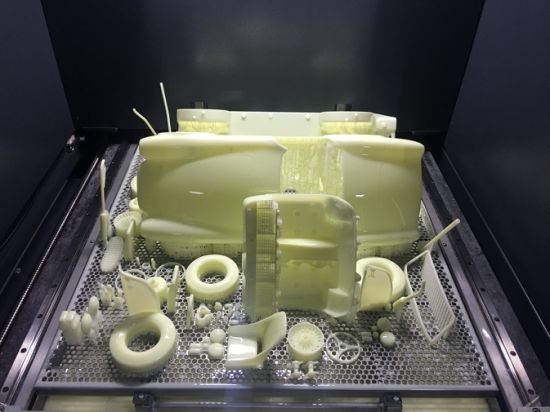 Both rigid and flexible options are available, transparent and matte. A wide selection of colors is also available. Resin consistency and exposure times also vary, so a range of compatible media should be considered when choosing a printer.
The last aspect to consider when choosing a material is its toxicity. There are both quite toxic options and biologically safe ones. nine0053
The cost of consumables can be considered the Achilles' heel of photopolymer printing. The plants themselves are already reaching quite acceptable price levels, but it is still quite difficult to find inexpensive photopolymer resins. It is hoped that the proliferation of inexpensive photopolymer printers will lead to an increase in the production of consumables and lower prices.
Laser Stereolithography (SLA)
SLA Model
The firstborn of photopolymer printing and modern 3D printing in general. The technology was developed in 1984 by Charles Hall, who later founded 3D Systems.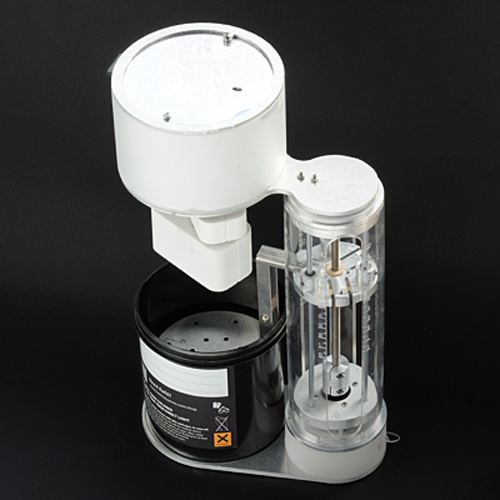
SLA printers use laser emitters to cure the photopolymer supply.
A typical SLA printer consists of a consumable tray sitting under a build platform driven vertically by a raise/lower mechanism.
Alternatively, the cuvette itself can be driven - what matters is the relative movement of the platform and the container. Above the cuvette is a laser emitter and a mirror system for deflecting the laser beam. nine0053
During the printing process, the platform is immersed in the consumable for the thickness of one layer of the digital model.
Since photopolymer resins can be quite thick, a leveling mechanism is often used to speed up the process.
SLA printer operation diagram
After leveling, the process of illumination of the material begins. Illumination is produced by laser irradiation. Most photopolymer resins are designed to cure (polymerize) when exposed to ultraviolet light, which determines the choice of laser frequency. The movement of the beam along the X and Y axes is determined by the operation of the deflecting mirrors. nine0053
After the drawing of the layer is completed, the platform is immersed in the material for the thickness of one more layer, and the process is repeated with the drawing of the next layer of the digital model.
Animation of the build process
SLA printing takes quite a long time, and printers using this method tend to have relatively small build areas.
This is mainly due to the high cost of laser emitters: printing large objects with a single laser will take too much time, and installing additional emitters and mirrors will complicate the design, increase the installation dimensions and raise the price to an unacceptable level for most users. nine0053
Despite the success of this technology, projected stereolithography is considered to be a more promising, albeit very similar, method.
Projector Stereolithography (DLP)
Formlabs Form 1 Desktop DLP Printer
A close relative of laser stereolithography, this method uses digital LED projectors instead of laser machines with mirror deflection systems.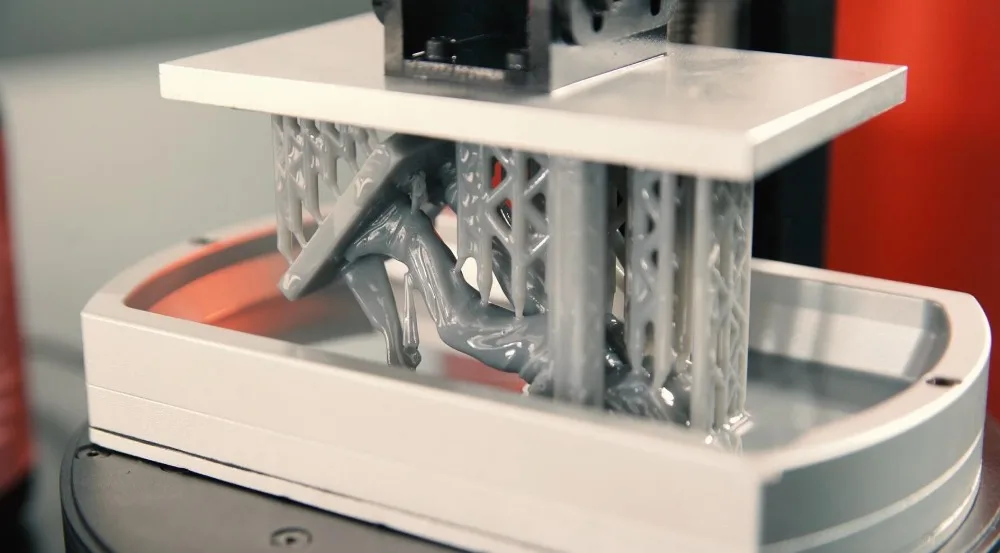 The method became popular due to the development of technology for the production of low-cost high-resolution digital projectors by Texas Instruments. nine0053
Layers are illuminated using a digital projector that highlights the patterns of the entire layer, which distinguishes this method from SLA, where the "picture" emerges progressively using an ultraviolet laser.
A similar approach has previously been used on SGC-type units, but this technology used physical photomasks, making the process costly, time consuming, slow and noisy.
FTI continues to exist, a development of SGC that is virtually indistinguishable from DLP printing, as it also uses digital LED projectors. nine0053
DLP printer design
Simultaneous illumination of an entire layer using projectors can significantly speed up the printing process even compared to SLA printers that have a high scanning speed (ie beam movement).
In addition, these printers are less sensitive to rough physical impact due to the lack of delicate mirror systems.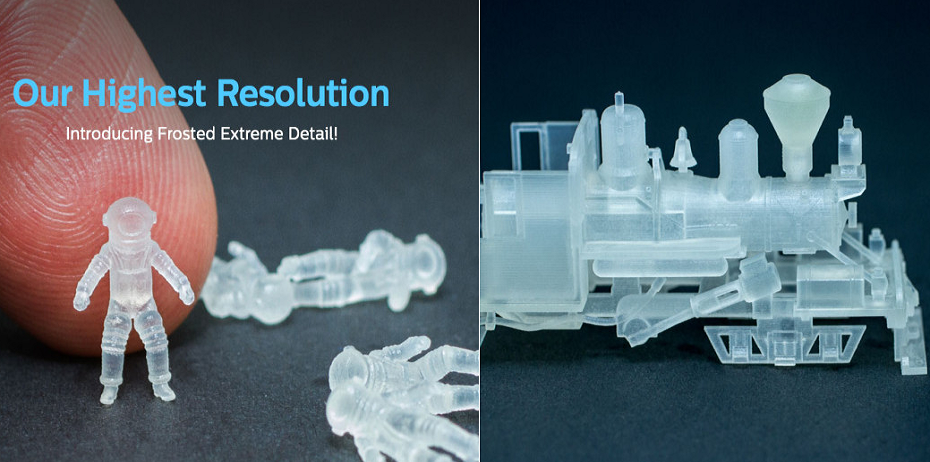
The absence of mechanical mirror systems improves accuracy. Finally, the cost of projectors sets them apart from laser systems. nine0053
Projection size can be quite significant, reaching the average of popular FDM printers.
An interesting feature of DLP printers is the ability to "reverse" or "reverse" printing.
In this case, the projector is installed under a transparent (material choice for transparency in relation to ultraviolet light) cuvette, and the platform does not sink into the material, but gradually rises, pulling out the layers of exposed polymer. nine0053
This approach eliminates the alignment mechanism and achieves even higher Z resolution than SLA printers.
In addition, the size of models in height is not limited by the depth of the cuvette, which favorably affects the dimensions of the printer and the possibility of increasing the build area.
Multi-jet printing (MJM and PolyJet)
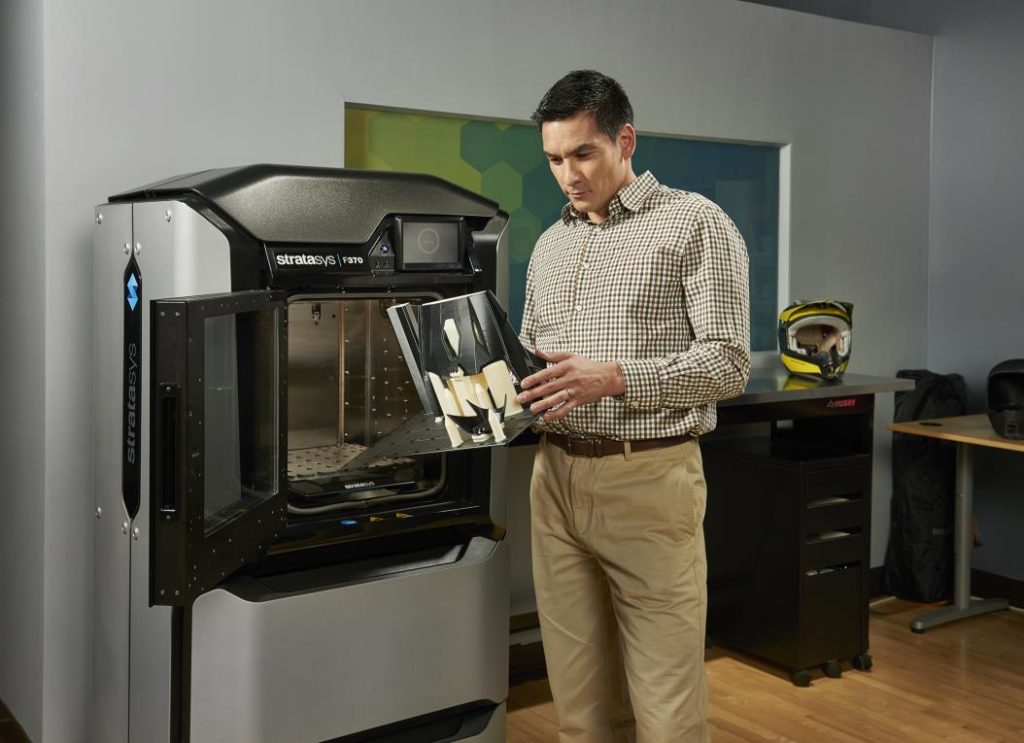
MJM printer 3D Systems ProJet 3500HDMax
MJM and PolyJet technologies are practically indistinguishable from each other.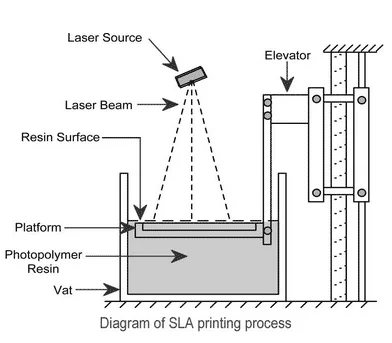 The name difference comes from the respective patents: Multi Jet Modeling is owned by 3D Systems, while PolyJet is owned by rival Stratasys. nine0053
The very principle of multi-jet polymer printing was developed by the Israeli company Objet, which eventually became a division of Stratasys.
Multi-jet printing technology combines features of 3D inkjet printing (3DP) and projection stereolithography (DLP).
How the MJM PolyJet printer works
Models are built by spraying photopolymer using linear arrays consisting of multiple nozzles.
The applied layer is immediately exposed to ultraviolet lamps - as a rule, two processes occur simultaneously.
By the time the array reaches the end of the build chamber, the previously deposited material is hard enough to print a new layer.
Composite models created on the ProJet 3500 DP dental printer
This approach allows for very high printing speeds, but is characterized by high design complexity, which negatively affects the cost of such installations and limits their distribution to professional use.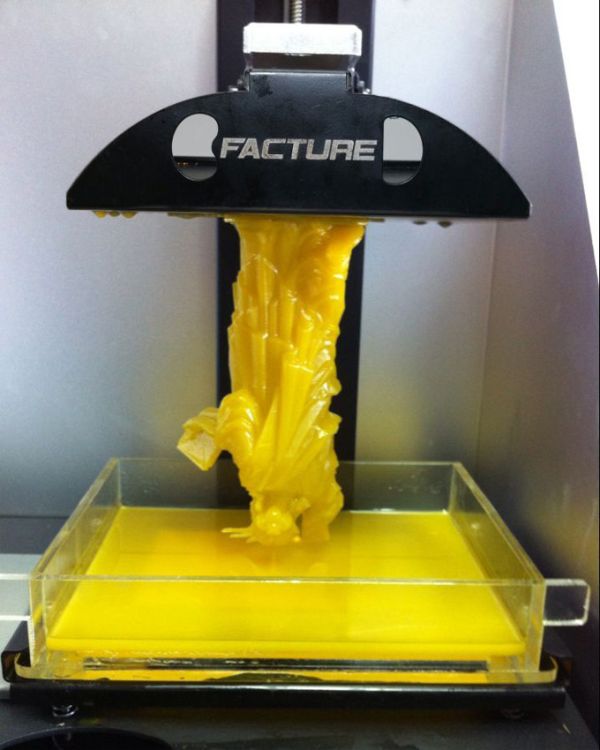 nine0053
One of the advantages of MJM and PolyJet technologies is the ability to create composite structures from photopolymer resins with different physical characteristics.
It is therefore possible to create models with easily removable supports, use multiple colors and use flexible and rigid materials in parallel within the same model.
3D Pens
CreoPop 3D Resin 3D Pen
Recently, there has been a craze for hand-held printing devices called 3D pens. At the moment, there are three main options for such devices: drip-jet pens (DOD), called BioPen and used in the development of new methods for treating damaged tissues, FDM 3D pens, which are manual extruders (essentially similar to the usual hot glue guns, but using thermoplastics) and developments in 3D-drawing with photopolymer resins.
CreoPop 3D pen was the first "handheld photopolymer printer". The design of this device is quite simple, because the most complex function, positioning, is performed by the user himself.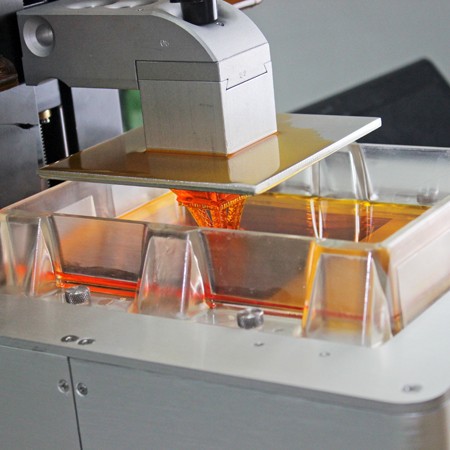 The pen only extrudes resin through the tip surrounded by LED emitters. nine0053
CreoPop 3D pen in action
This way the resin hardens immediately after application, allowing you to literally draw on air.
The advantage of such handles over FDM-analogues is the low operating temperature - there are no heating elements in the device. As a result, with such pens you can even draw on the skin.
In addition, a wide range of photopolymer resins with different physical properties can be used with such devices, which greatly expands the range of possible applications. At a minimum, this is a relatively inexpensive, but entertaining toy. nine0053
The only drawback is the relatively high cost of consumables, but such devices are unlikely to require large volumes of photopolymer resin for domestic use.
Additional Lighting
Final Lighting of Resin Models in a Homemade Camera
Full curing of models can take quite a long time, so models during SLA and DLP printing are only partially polymerized, sufficient to maintain the physical shape of the part.