3D printing lost wax casting
How To Get Into Lost Wax Casting (with A Dash Of 3D Printing)
I’ve always thought that there are three things you can do with metal: cut it, bend it, and join it. Sure, I knew you could melt it, but that was always something that happened in big foundries- you design something and ship it off to be cast in some large angular building churning out smoke. After all, melting most metals is hard. Silver melts at 1,763 °F. Copper at 1,983 °F. Not only do you need to create an environment that can hit those temperatures, but you need to build it from materials that can withstand them.
Turns out, melting metal is not so bad. Surprisingly, I’ve found that the hardest part of the process for an engineer like myself at least, is creating the pattern to be replicated in metal. That part is pure art, but thankfully I learned that we can use technology to cheat a bit.
When I decided to take up casting earlier this year, I knew pretty much nothing about it. Before we dive into the details here, let’s go through a quick rundown to save you the first day I spent researching the process. At it’s core, here are the steps involved in lost wax, or investment, casting:
- Make a pattern: a wax or plastic replica of the part you’d like to create in metal
- Make a mold: pour plaster around the pattern, then burn out the wax to leave a hollow cavity
- Pour the metal: melt some metal and pour it into the cavity
I had been kicking around the idea of trying this since last fall, but didn’t really know where to begin. There seemed to be a lot of equipment involved, and I’m no sculptor, so I knew that making patterns would be a challenge. I had heard that you could 3D-print wax patterns instead of carving them by hand, but the best machine for the job is an SLA printer which is prohibitively expensive, or so I thought.
A Pattern of Creativity
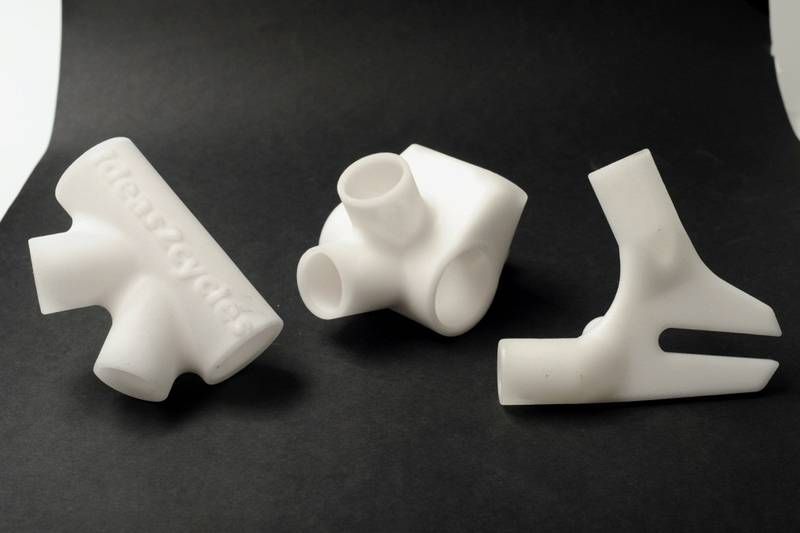
That perception changed when my brother Sam picked up an Elegoo Mars 3D printer. I was surprised that you could get a sub-$300 SLA machine, and absolutely floored by the quality of prints it produced.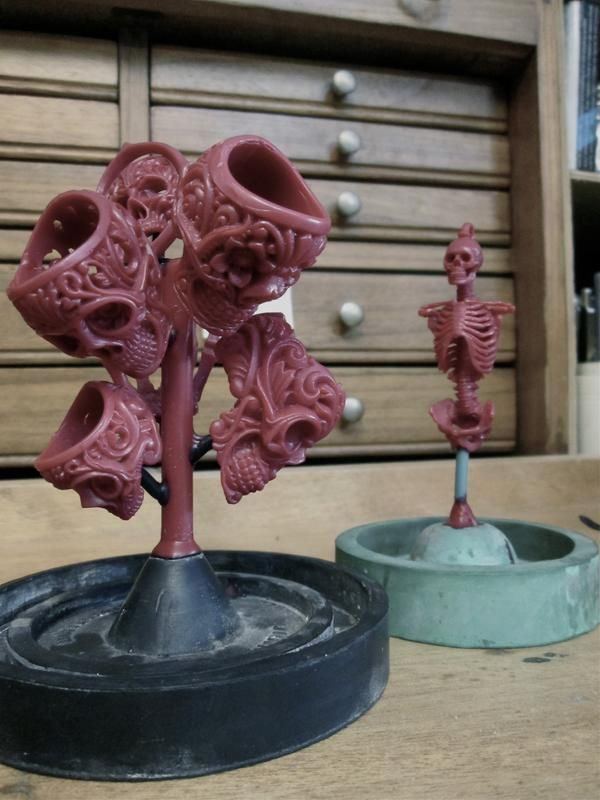 I was able to pick up some printer resin designed for investment casting, and printed my first pattern- two tiny Pikachus and a rook.
I use PowerResins WAX for my printing resin. It’s pricey but prints really well and burns out cleanly. It does have issues adhering to the build platform, but you can get around that by priming the plate. Some people recommend painting on a few payers of resin and curing them with UV light before printing. I follow a tip I found in this YouTube video and just include a few primer layers in my print. This may seem a bit wasteful, but if it keeps one print from coming off the plate, it’s worth it.
Of course, we can go the classic route here and make our patterns by hand instead. I’ve taken a swing at this and had success making simple things like a ring which I carved from wax, but I would be lost on more intricate designs. Like I said, I’m no sculptor, but it’s fun to carve a pattern manually. Wax is available in many forms — sheets, blocks, ring blanks, and others. There are some real nice carving tools out there which I own now, but my first ring was formed with a pocket knife, a file, and a disc sander. It’s not all about removing material either- since wax is easy to melt, it’s common to fuse parts together to create a finished piece.
Some like to either take their wax model, or something else entirely and make a silicone mold of it before starting the process. That lets them inject hot wax (a process called injection molding) into the silicone to create the pattern, allowing them to save the original. I’ve never tried the process, but its a great way to make multiple copies of a piece.
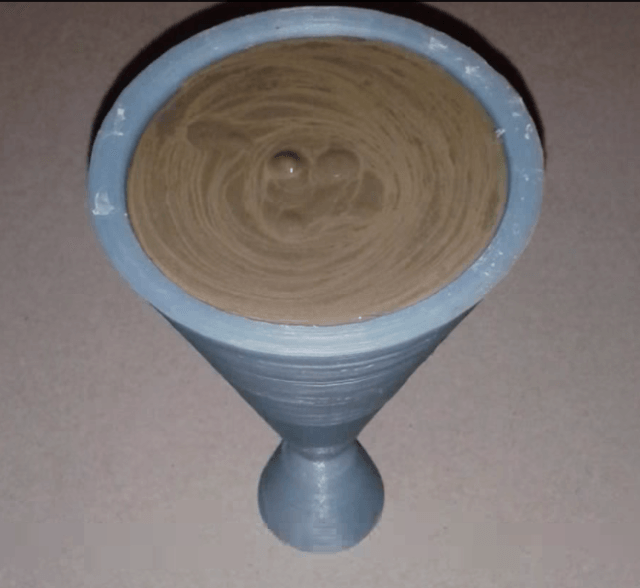
Once we have something to replicate in metal, it’s time to make a tree. The tree is a wax structure that holds all of the wax bits we’ve just made, and once wax is burned out of the mold, acts a guide for the molten metal as its poured.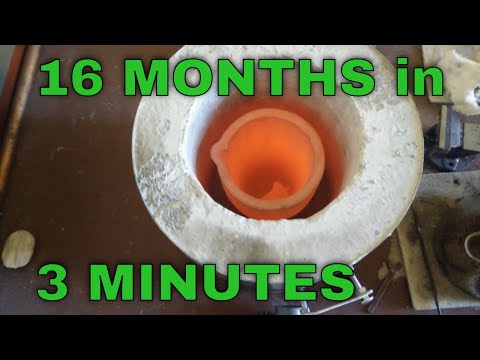 The branches of the tree are often referred to as sprues, and the process as spruing. To form the tree, we start with a central wax rod and attach smaller wax wires to it using sticky wax and a wax pen, which heats up wax to melt it. (Man, that’s a lot of wax.) We can then attach the parts we made to those wires. The tree sits in a rubber sprue base, which will form a bowl in the top of the mold called the button. Now that we have a complete pattern, it’s time to make a mold.
Set in Stone… Well, Plaster
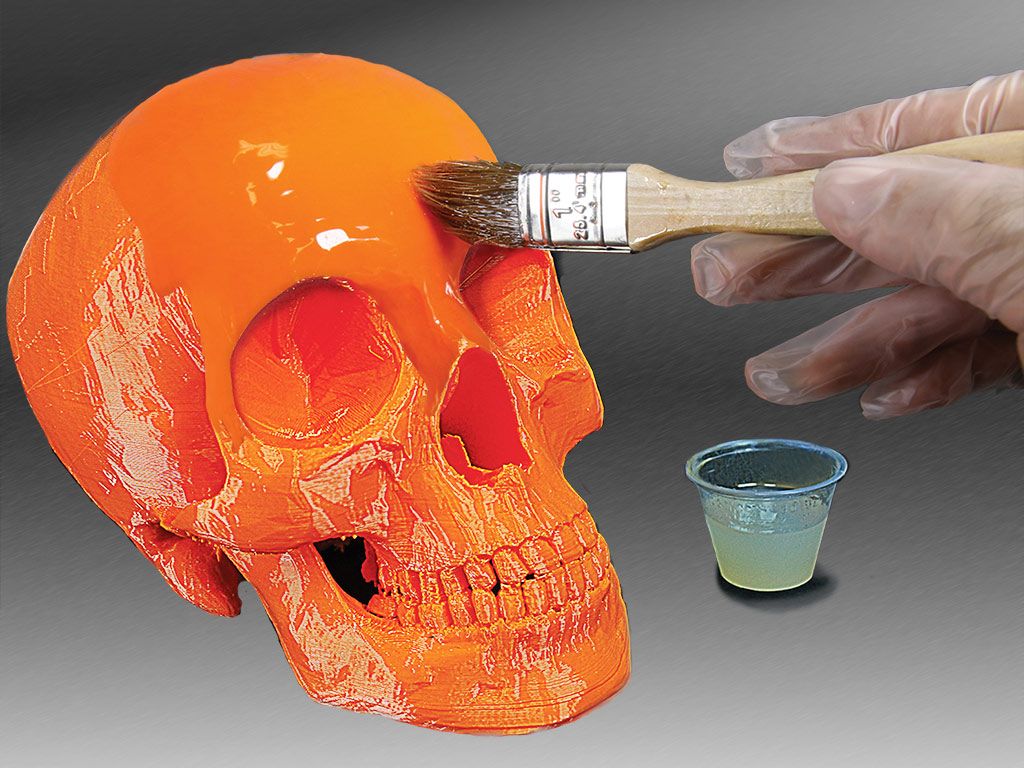
We have a positive of our final part, but now we need to make a negative. We’ll take a steel cylinder called a flask and slip it onto the sprue base. We’ll need some investment plaster here too — standard plaster of Paris won’t cut it, as it won’t stand up to the heat. Thankfully, it’s not hard to get your hands on a bag of the the right material. Less thankfully, it’s nasty stuff. I always wear glasses, gloves, and a respirator with I work with it, and work outside for good measure. I even brush my clothes off before going indoors. It turns out that the ingredient that binds the investment, free silica, can cause cancer when inhaled. I’ve found that if something can withstand high temperatures and gives off powder, you probably shouldn’t breathe it. Anyway, we can mix some of that with water and pour it into the flask. I use a handheld electric mixer, which will never see a kitchen again, to mix my investment.
If we just pour it right in, the final piece won’t come out very nice. The mixing process introduces tons of bubbles into the slurry, and thanks to its high viscosity those bubbles aren’t gonna pop themselves. I like to use a vacuum chamber to debubble my investment before pouring it into the flask- don’t let that scare you though.
My “vacuum chamber” is an old mechanical pump plumbed to a Maxwell House coffee can. While the pump is running and the cup of investment is in the coffee can, I violently tap the chamber for a few minutes to help the bubbles make their way to the surface. Another trick I’ve picked up to get rid of bubbles is to wipe isopropyl alcohol onto the pattern and shake off the excess right before pouring the investment. Some like to paint a think layer of investment on and let it harden before mixing up more to pour into the flask. After pouring, I like to put the whole flask into the vacuum chamber to pull out any remaining bubbles, while tapping the chamber a bit more gently. Once we have a flask full of hardened plaster, we should let it to cure fully: at least an hour or two, but I like to wait overnight.
Getting Burned Out
So we’ve made a replica of our final piece, then entombed it in metal and plaster. Now it’s time to destroy all our hard work by throwing it in a furnace. Well, placing it in a kiln. Very carefully. While wearing gloves and safety glasses.
A flask undergoing burnout in a kilnThis part of the process, called burnout, is where we remove the wax/ plastic pattern from the mold. This leaves behind a cavity that, if we’ve done everything correctly so far, is free of ash and ready to accept some molten metal. It’s a bit nerve-wracking, especially if we’ve spent hours carving a wax model.
I like to start the flask out hole-down so that the wax can drip out into a tray as it melts, and then flip the flask hole-up to allow gasses to escape once the melting is complete. Some say to keep it hole-up the entire time. Investment manufacturers have recommended schedules (times and temperatures) to follow, but I like one suggested by Practical Casting by Tim McCreight. I listed the schedule I use in the original blog post I linked at the start of this article. We also have some leeway in our choice of kiln here; for my first few tries, I used a lab furnace I stole off of my brother’s nanofab bench, returning to it every 15 minutes or so to adjust temperatures to follow the scheduled ramps. Now I use a purpose-built programmable kiln.
The last step in any burnout schedule is to hold the flask at a temperature suitable for casting, generally a few hundred degrees below the pouring temperature of the metal. I usually keep it at 1250 °F until I’m ready to pour.
Melting Some Metal
After all that work we finally have a mold, and now it’s time to fill it. Basically, we’ll melt some metal the pour it into the cavity. We’ll need another furnace for this part- while our kiln is keeping the flask hot, we add metal to a crucible, place it in the furnace, and melt it down. Knowing the pouring temperature of the metal is important here- for example, silver melts at 1,763 °F but pours around 1850 °F. I learned that the hard way when silver which appeared molten in my crucible turned solid in the air between the crucible and the flask while I was trying to pour it. We also need to be careful not to boil the metal, which is actually something that can happen.
Similarly to the previous step, I started out with a furnace stolen from Sam before getting one meant for the task. Both my furnace and kiln are small electric ovens made by TableTop furnaces (in America!). I have links to them in the full equipment list in the blog post I linked to.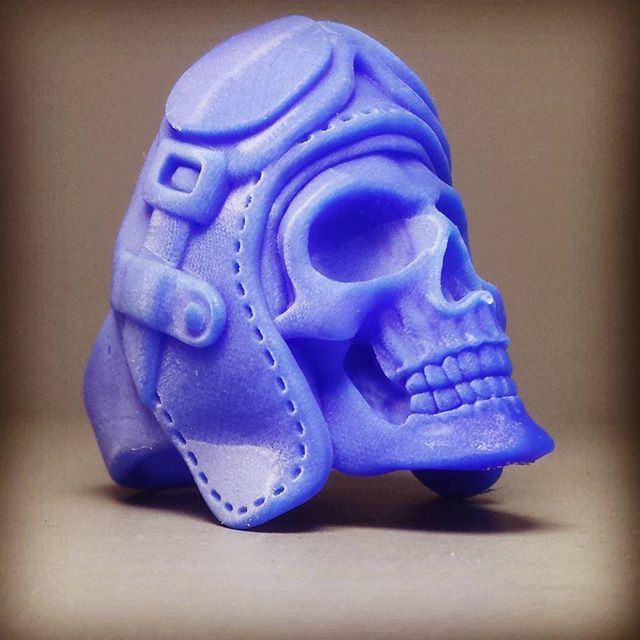
There are a few ways we can approach the pour. We can take the flask out of the kiln and simply, well, pour the metal. This is known as gravity casting, because we rely on gravity to pull the molten metal down into the mold. It works, but we might see some loss of detail and unfilled crevices where the metal was not able to flow.
Another method is called sling casting, where we put the flask in a holder with a rope tied to it and use our arms to swing the flask in a circle next to us. The centrifugal force helps push metal down into those hard-to-reach spots. I haven’t tried this method, as it terrifies me for obvious reasons.
A slightly more tame version of sling casting is centrifugal casting, where the flask is placed horizontally in a centrifuge, which uses similar action to pull metal into the mold.
My preferred method is vacuum casting. I have a hole in the top of my coffee can vacuum chamber, on which I place a silicone mat (also with a hole through it).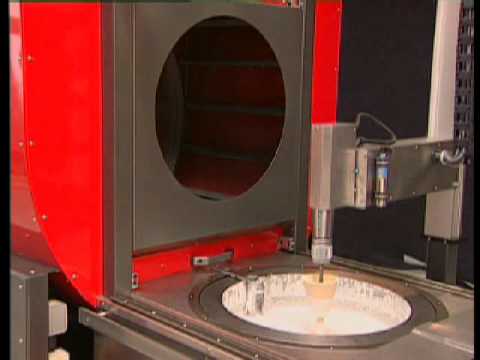 The investment plaster is porous, so when I pull a vacuum through the flask, the molten metal is pulled down into the mold.
During the pour, it often doesn’t look like the mold took any metal at all. Instead, it looks like the metal just pooled up in the button rather than flowing through the cavity. This fools me every time, and the pour almost always turns out fine.
Regardless of the method we chose, now we wait a few minutes for the button to cool to a dull red color. At this point, we can quench the flask in a bucket of water. Using tongs, by the way. We’ve been using tongs this whole time. As the water around the flask boils, the investment dissolves and we’ll hear a thud as the metal tree falls to the bottom of the bucket. Wait a minute or so for everything to cool, assuming there’s enough water in the bucket: I use 5 gallons. (Less water = more cooling time.) Finally,we can retrieve the tree and hopefully marvel at how well the process went.
Post Processing
We’re done! Well, almost. We have a metal tree, but what we want is metal parts. Unless the parts we cast are tiny trees, in which case I suppose we have a tree of trees. Now we need to do a few post-processing steps to clean up the parts.
First up is removing them from the tree. We’ll try to cut the part off of the sprue as close to the part as possible. I use a jeweler’s saw and a small hacksaw for this, but a rotary tool or larger saw should work fine too. Once the parts are separated, we can clean them up. I often grind the remnants of the sprue off with a grinding wheel, and touch up the area with a file. Any bubbles or other defects can be similarly dressed up, then it’s off to a tumbler.
I like to tumble with Dawn dish soap and water in stainless steel shot for several hours to polish up the part. This won’t soften the raw cast texture, so if we want to smooth out any surfaces we’ll need to do that with files and sandpaper ahead of time. The post-processing is an art in itself, so we can expect to spend quite a bit of time in this area, depending on the final look we want to achieve. If the as-cast finish is acceptable then the process goes much quicker.
Well, now we’re actually done. All that’s left is to admire the cool thing we just cast, and make our friends jealous with our newfound hobby.
Waxing Philosophical
I’ve been making things with my hands as long as I can remember, but this process feels different from all the others. There’s something existential about spending hours crafting (or even printing) a wax pattern, only to consume it in the process of forming something new. Most steps of this process are a “point of no return” so everything we do must be deliberate, creating as well as destroying. Any mistakes in the wax pattern are carried through to the final metal piece. There are countless ways for it to go wrong, but it’s the most gratifying process I’ve ever worked with.
Maybe I’m reading too far into the whole thing though. All I can say for sure is that I made some cool stuff, and had a ton of fun along the way.
Shapeways: Wax Casting
Wax Casting
The ancient art of Lost Wax Casting (also known as Investment Casting, Precision Casting, or cire perdue) is thousands of years old, with numerous theories as to which culture can stake a claim regarding its invention. A craft that still retains remnants of its intrinsic mystery in applications like fine jewelry and sculpture, Lost Wax Casting today also requires considerable expertise, and a supply of sophisticated tools and materials.
Upload Now
3D Printing and Lost Wax Casting
Casting with metal is multifaceted, and usually includes numerous, careful steps. At Shapeways, the process is accompanied by modern technology like 3D printing to make wax patterns for building plaster molds. Sprues are added so that metal can flow through, as the initial wax is melted and drained, thus explaining the term lost wax casting.
Once the metal cools and is solidified, the plaster is broken away from the mold. The metal product is detached, and from there, post-processing begins. This may include tumbling to polish the metal piece, or where applicable, it may be plated; for example, metals like Brass can be plated in Gold or Rhodium.
Benefits of 3D printed Wax Casting include:
- The ability to make professional-looking, innovative products that would be impossible to manufacture using traditional processes.
- The potential for complex shapes with built-in intricacies like interlocking parts.
- Superb finishing, with good corrosion resistance in materials like Copper.
Lost Wax Casting Materials
Shapeways customers can choose from a range of metals for 3D printing with Lost Wax Casting, to include:
Brass
This material is made up of a copper alloy containing 15% zinc, 5% tin and 80% copper. Used for products with intricate details, Brass tarnishes but can be polished for a shiny surface with a professional, finished look and feel.
This material is available in Gold Plate and Rhodium also. Both Natural and Polished finishes are available.
Brass is suitable for applications like prototypes, jewelry, home accessories, and miniatures.
For this material, 3D models must meet the following minimum and maximum bounding box sizes:
- Bounding Box Min: 2.4 × 2.4 × 0.6 mm
- Bounding Box Max: 89 × 89 × 100 mm, 75 × 75 × 40 mm for Interlocking Parts
Explore the design guidelines for Brass
Bronze
A copper-tin alloy, 10% tin and 90% copper, Bronze is famous for its deep red color. This metal also presents a marbling effect, with silver highlights that offer a vintage look. Used for products with intricate details, Bronze tarnishes but can be polished for a like-new surface. Both Natural and Polished finishes are available.
Bronze is suitable for applications like jewelry, fashion, home decor, and prototypes.
For this material, 3D models must meet the following minimum and maximum bounding box sizes:
- Bounding Box Min: 2.4 × 2.4 × 0.6 mm
- Bounding Box Max: 89 × 89 × 100 mm, 75 × 75 × 40 mm for Interlocking Parts
Explore further design guidelines for Bronze
Copper
Featuring the well-known red-orange hue which oxidizes over time, copper parts can be 3D printed in Lost Wax Casting with intricate details. The end product offers a professional, finished look and feel which is also corrosion resistant due to the continued oxidation process. Both Natural and Polished finishes are available.
With Lost Wax Casting, Copper is suitable for applications like prototypes, heat accessories, and marine accessories.
For this material, 3D models must meet the following minimum and maximum bounding box sizes:
- Bounding Box Min: 2.4 × 2.4 × 0.6 mm
- Bounding Box Max: 89 × 89 × 100 mm
Explore further design guidelines for Copper
Gold
A premium metal used primarily for creating fine jewelry, Gold is available in yellow, white, rose, 14K and 18K.
This is one of the highest quality materials Shapeways offers, and it is recommended for parts with intricate details and a professional, finished look and feel.
For this material, 3D models must meet the following minimum and maximum bounding box sizes:
- Bounding Box Min: 2.4 × 2.4 × 0.6 mm
- Bounding Box Max: 89 × 89 × 100 mm
Explore further design guidelines for Gold
Platinum
An extremely high-quality material, popular for making upscale jewelry, Platinum is made up of 95% Platinum and 5% Ruthenium. Used to showcase parts with intricate details, this material offers a professional, finished look and feel.
For this material, 3D models must be within the following minimum and maximum bounding box sizes:
- Bounding Box Min: 2.4 × 2.4 × 0.6 mm
- Bounding Box Max: 89 × 89 × 100 mm
Explore further design guidelines for Platinum
Silver
A high-quality Sterling Silver alloy, at 92.
5% silver, this material is used for jewelry as well as other skin-safe applications. Sterling Silver allows for intricate details to be included in parts, accompanied by a professional, finished look and feel. Silver tarnishes, but can be polished for a shiny surface. This material is also softer and more malleable with thinner structures.
Silver is available in Natural, Polished, Fine Detail Polished, and Antique finishes.
For this material, 3D models must be within the following minimum and maximum bounding box sizes:
- Bounding Box Min: 2.4 × 2.4 × 0.6 mm
- Bounding Box Max: 89 × 89 × 100 mm, 75 × 75 × 40 mm for Interlocking Parts
Explore the design guidelines for Silver
Ordering from Shapeways Saves Time & Capital
Enjoy the benefits of Shapeways advanced technology and a wide range of materials for manufacturing your creations with accuracy and intricate detail. Ordering and manufacturing is as easy as uploading one or more designs, requesting instant quotes, and then waiting for parts to be manufactured—whether designated on an average, priority, or rush basis.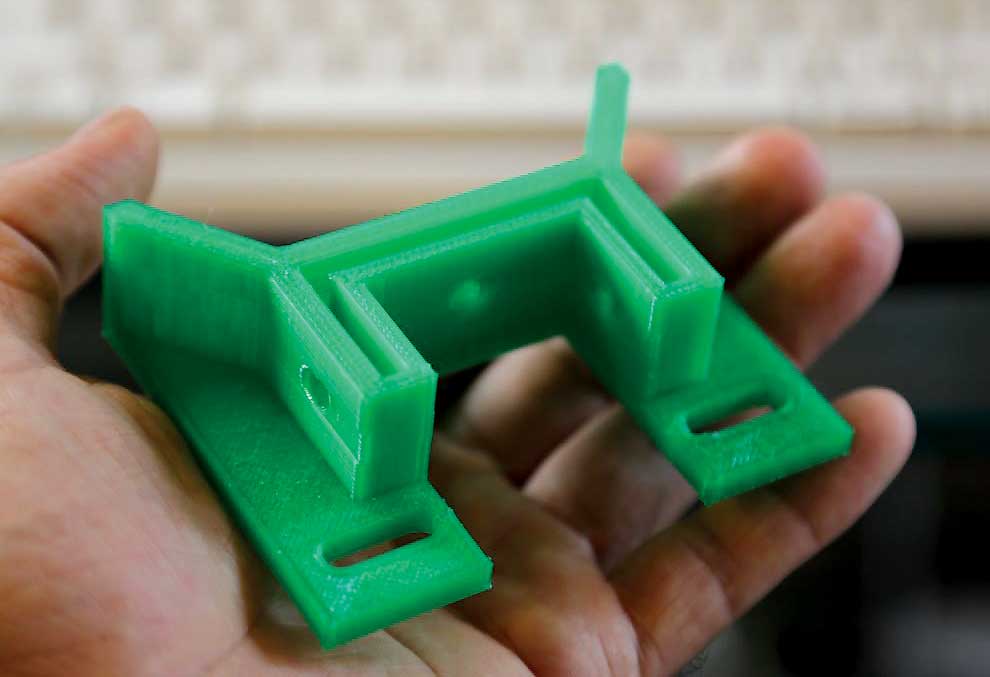 Read about case studies, find out more about our solutions, and get instant quotes here.
Contact Sales
First Name*
Last Name*
Email*
Phone*
Company
Title
Country*
--None--AfghanistanAlbaniaAlgeriaAndorraAngolaAnguillaAntigua and BarbudaArgentinaArmeniaArubaAustraliaAustriaAzerbaijanBahamas, TheBahrainBangladeshBarbadosBelarusBelgiumBelizeBeninBermudaBhutanBoliviaBosnia and HerzegovinaBotswanaBrazilBruneiBulgariaBurkina FasoBurundiCambodiaCameroonCanadaCape VerdeCentral African RepublicChadChileChinaColombiaComorosCongo, Democratic Republic of theCongo, Republic of theCosta RicaCroatiaCyprusCzech RepublicDenmarkDjiboutiDominicaDominican RepublicEcuadorEgyptEl SalvadorEstoniaEthiopiaFaroe IslandsFijiFinlandFranceFrench GuianaFrench PolynesiaGabonGambia, TheGeorgiaGermanyGhanaGibraltarGreeceGreenlandGrenadaGuadaloupeGuamGuatemalaGuernseyGuineaGuinea-BissauGuyanaHaitiHondurasHong KongHungaryIcelandIndiaIndonesiaIraqIrelandIsraelItalyIvory CoastJamaicaJapanJerseyJordanKazakhstanKenyaKiribatiKorea, SouthKuwaitKyrgyzstanLaosLatviaLebanonLesothoLiberiaLibyaLiechtensteinLithuaniaLuxembourgMacauMacedoniaMadagascarMalawiMalaysiaMaldivesMaliMaltaMarshall IslandsMauritaniaMauritiusMexicoMicronesiaMoldovaMonacoMongoliaMontenegroMontserratMoroccoMozambiqueNamibiaNepalNetherlandsNetherlands AntillesNew CaledoniaNew ZealandNicaraguaNigerNigeriaNorfolk IslandNorthern Mariana IslandsNorth KoreaNorwayOmanPakistanPalauPalestinian TerritoryPanamaPapua New GuineaParaguayPeruPhilippinesPolandPortugalPuerto RicoQatarRomaniaRussiaRwandaSaint Kitts and NevisSaint LuciaSaint Vincent and the GrenadinesSamoaSan MarinoSaudi ArabiaSenegalSerbiaSeychellesSierra LeoneSingaporeSlovakiaSloveniaSolomon IslandsSouth AfricaSpainSri LankaSudanSurinameSvalbard and Jan MayenSwazilandSwedenSwitzerlandTaiwanTajikistanTanzaniaThailandTimor-LesteTogoTongaTrinidad and TobagoTunisiaTurkeyTurks and CaicosTuvaluUgandaUkraineUnited Arab EmiratesUnited KingdomUnited StatesUnited States Minor Outlying IslandsUruguayUzbekistanVanuatuVatican CityVenezuelaVietnamVirgin Islands (British)Virgin Islands (US)Wallis and FutunaYemenZambiaZimbabwe
How can we help?*
Choose an optionI'm interested in repeating ordersI'm interested in batch productionI want to design a one-time prototypeI'm new to 3D printing and need guidanceI’m interested in custom packagingOther/general questions
Description
By entering your email address, you grant Shapeways permission to send you messages about Shapeways and Shapeways services.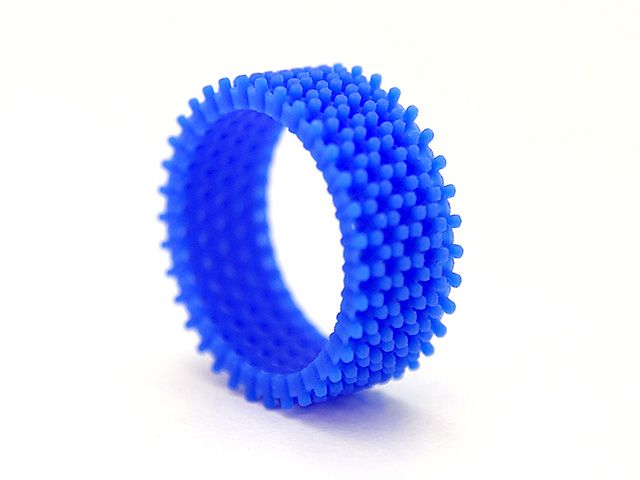 You may unsubscribe from these messages at any time by using the unsubscribe link. Your information is protected by the Shapeways Privacy Statement.
Please check recaptcha box
Newsletter Sign up
Stay up to date on promotions, case studies, and more.
Email Address
3D printers in the production of investment casting process
Fundamentals of 3D
Casting
Author: Aleksey Chekhovich
Author: Aleksey Chekhovich
Basic steps of investment casting | The main advantages of 3D printing in comparison with traditional technologies | Examples of 3D printing in manufacturing
As already mentioned in the introductory article of our “casting” cycle, shell casting uses one-time models and molds. Today we will look at how additive technologies increase the efficiency of the investment casting process. This is one of the most accurate casting methods in the modern industry, allowing you to obtain products with tolerances of 100-200 microns.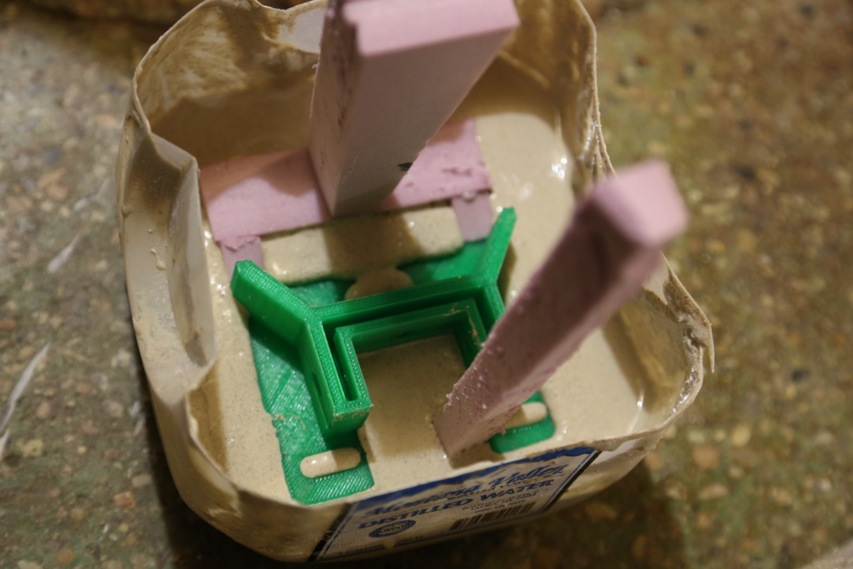
Investment casting basic steps
- A sample model is being created.
- The specimen is attached to the sprue.
- The sample and sprue are lowered several times into the refractory material, creating a shape around the sample.
- The sample is removed from the refractory mold. The mold is ready for pouring metal.
- Metal is poured into a mould.
- After cooling, the mold material is removed by mechanical processing, chemical cleaning or dissolution in water.
- Parts are cut off from the sprue and lightly sanded.
The creation of new products, and especially casting parts, is the most time-consuming and expensive part of the technological process. In standard production, a new iteration of a product often requires new casting tooling as it is either too costly or impossible to upgrade an existing one.
It is not for nothing that additive technologies are called revolutionary: they have reduced the time for manufacturing products for pilot production by several times and even dozens of times.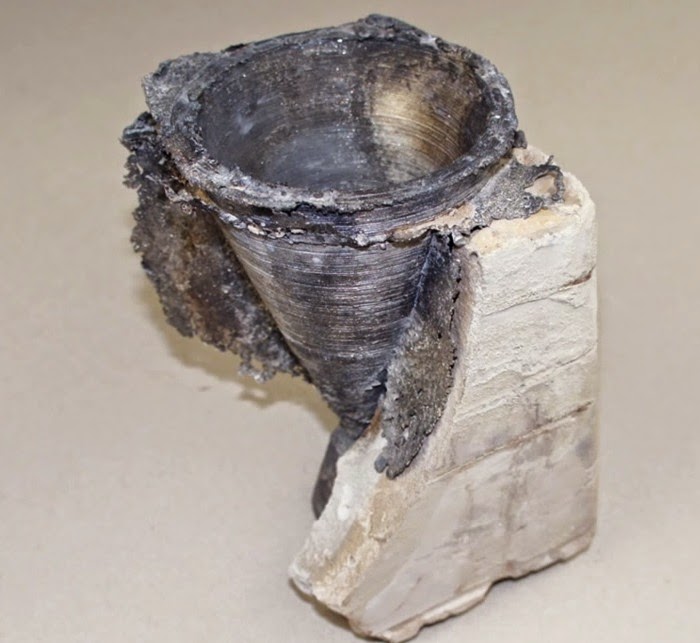 For example, a prototype car engine block can be 3D printed in just two weeks, while it takes six months to produce it using traditional methods. 3D printing not only saves time, but also allows you to grow models and shapes of any complexity. In casting, in this sense, the possibilities are limited.
When it comes to part precision, the application of 3D printing is also unmatched. This technology is most widely used in jewelry, dentistry, instrument making - in those industries where small dimensions and complex geometry of the product are a priority. In the manufacture of objects such as small machine parts, jewelry, dental prostheses or implants, particularly high precision and quality castings are required.
Photo 1. Models created on a 3D wax printer
Key advantages of 3D printing over traditional technologies
- High performance;
- increased accuracy;
- high quality;
- the possibility of round-the-clock operation;
- application of 3D printing materials with qualities optimized for specific applications.

Photo 2. Wax models printed on a FlashForge WaxJet 400 3D printer and finished jewelry
The construction of models in a 3D printer is carried out using MJP (MultiJet Printing) technology, based on multi-jet modeling using wax or photopolymer. This makes it possible to obtain models with high detail and excellent surface quality.
Examples of 3D printing in manufacturing
Photo 3. Model and casting of a component of gas turbine engines
American company Turbine Technologies, Ltd. developed a modification of internal combustion engines, on which high-pressure turbines are installed. The company purchased a 3D printer for printing wax models and receives a finished casting within 3-4 days. Wax models are now made directly from 3D CAD models, and Turbine Technologies' foundry produces gas turbine engine prototype components with greater accuracy and lower costs.
Photo 4. Goodwill Zvelitini's gold coin
And here is a unique example: for the 40th anniversary of the king of the South African Zulus tribe, Goodwill Zwelitini, a coin was cast from 18-carat gold. Its diameter is 100 mm, its thickness is 7 mm, and its weight is just under 0.5 kg. The manufacturer was challenged to print the coin in the shortest possible time, and thanks to the outstanding 3D printing capabilities, it was produced in just a week.
Photo 5. 3D-printed master model to obtain a silicone mold
Printing wax has its drawbacks. All costs for growing a wax model are borne by the final product, since the model is disposable and cannot be reused. iQB Technologies specialists decided to slightly modify the process, which allowed to reduce production costs. A model of a metal souvenir product was created at one of the Russian enterprises (see photo 5). In order not to pay for all the wax that is spent on each product, the model was 3D printed not from wax, but from plastic (photopolymer resin). Further creation of master models was carried out by melting wax and investment casting.
Let us dwell on this example in order to consider the entire technological process step by step.
After the plastic models are 3D printed, they are mounted on a slab.
Mounts are installed.
Forms are filled with silicone.
The silicone mass, as a rule, is highly susceptible to gassing, therefore, to remove air bubbles, the molds are placed in an impromptu degassing chamber.
When the polymerization of the silicone is completed, the flasks are removed. A plastic model is "walled up" inside the silicone.
This is followed by the most difficult stage - the separation of the silicone mold into pieces and the extraction of the master model.
The silicone mold is reassembled and casting wax is poured into it.
The mold is taken apart and wax master models are obtained, which are attached to the sprue riser (the so-called herringbone model assembly).
The Christmas tree is dipped in a special solution and sprinkled with ceramic sand - thereby creating a refractory shell around the model. Then the herringbone is heated, and all the wax flows out, leaving a cavity that exactly repeats the shape of the model. Metal is poured into it. The mold is destroyed, the finished castings are cut off from the sprue riser and cleaned.
The process is over - we have received the finished product.
And how are additive technologies used in the process of casting on burnt models? Read on our blog!
Article published on 08/02/2017, updated on 05/26/2022
How to know 3D printing investment casting?
Compared with traditional investment casting technology, 3D printing of investment casting saves human resources and time, and can create more complex casting patterns. As such, 3D printed casting patterns are increasingly becoming the investment casting solution of choice for foundries and professional engineers.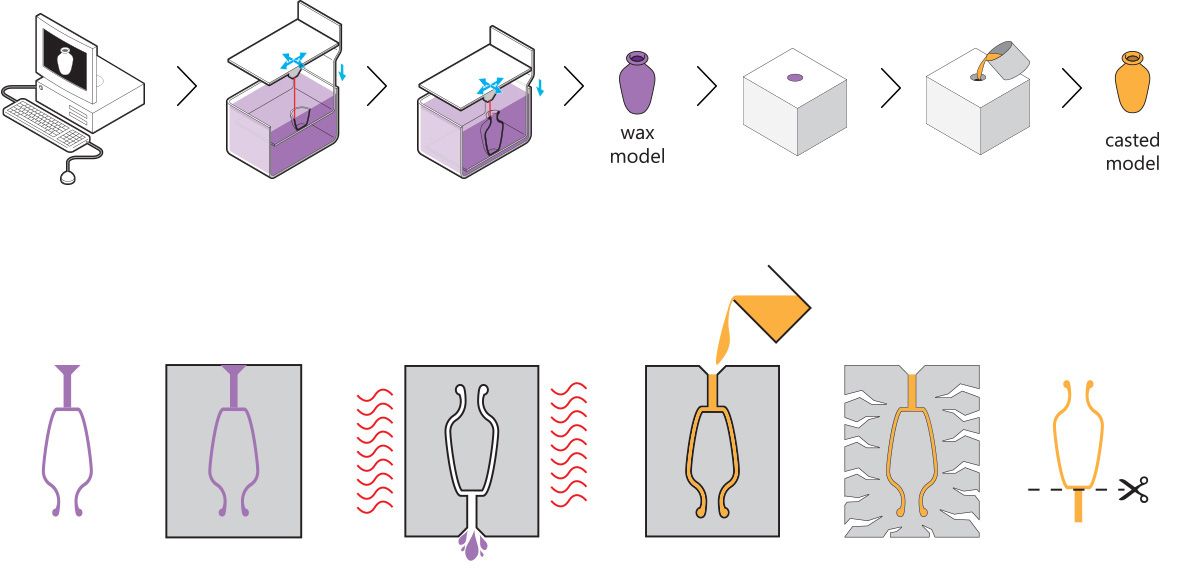 In addition to providing better surface quality and precision, 3D printed investment casting also ensures high quality and consistency in the production of low volume casting components. So how do we understand 3D printing investment casting? We can learn some facts from its benefits and applications.
Benefits of using 3D printing for investment casting
For a long time, the focus on investment casting with 3D printing has taken precedence over investment casting. He doesn't need to spend a lot of time and money creating models because he uses CAD files for prototyping. Use sla investment casting technology to directly print the model with extremely low cost and high speed.
First, 3D printed investment casting reduces the number of assembly parts and allows for lighter castings. Strength and durability surpass even traditional metal parts. Be aware that investment casting takes a long time to design and manufacture wax molds.
Secondly, using 3D printing for investment casting to print large-sized parts is an ideal choice.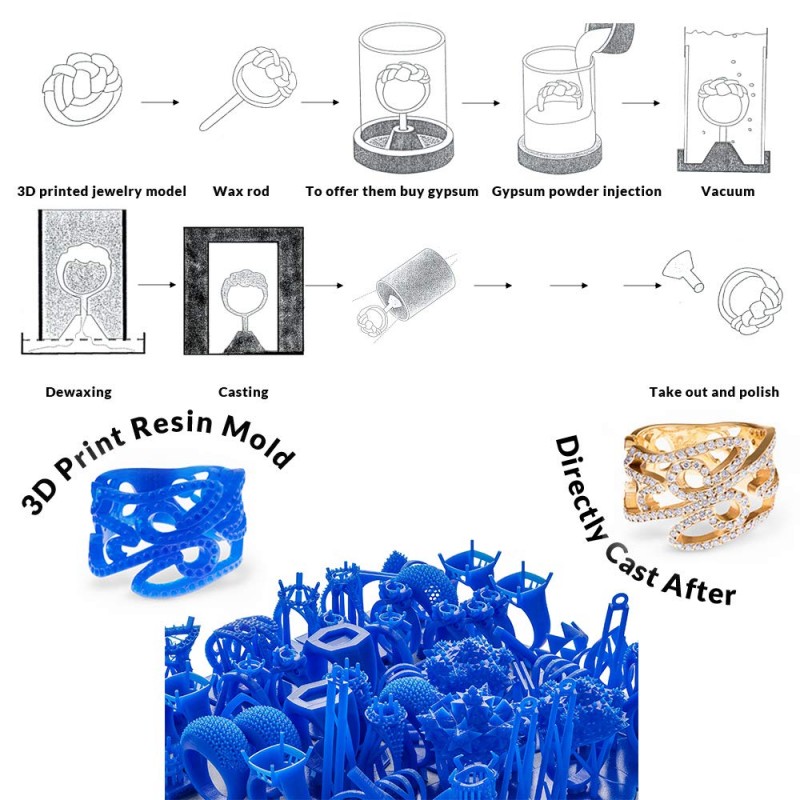 Because it can work at the same time, there is no need to use the small device to print twice as usual. Significantly reduces not only the production time of the model, but also significantly reduced labor costs. In other words, the fewer parts, the less gluing is required.
Finally, 3D printed investment casting technology has a higher fault tolerance. Typically, the traditional process of making lost wax takes weeks or months to change the wax shape. And if something goes wrong while building a prototype, 3D printed investment casting will only take a few days to reverse engineer. This situation also applies when a component does not meet the expected standard.
Therefore, 3D printed investment casting is far superior to traditional investment casting in terms of time, cost and ease of use. Adding 3D printed investment casting to your engineering work should be the best choice to grow your business more vigorously!
3d printed metal casting models
The traditional method of investment casting is to use an injection molding process to make wax molds. The cost is about $10,000 and the delivery time is about two months. The disadvantage of this approach is that the foundry cannot produce any prototype castings before the injection mold is made. This significantly increases the time spent on the production of components.
And investment casting sla uses FDM technology to create 3D printed casting models to solve this problem. Because foundries can directly print metal casting patterns without waiting. As an alternative to traditional investment casting, 3D printed investment casting is highly efficient and economical. Thanks to investment casting technology in the foundry, it takes only one day to make a model. We can also use it as a prototype to evaluate the shape of a part that perfectly matches the casting produced.
In addition, the 3D printed casting models are very durable and difficult to accidentally damage during transport. You can also put it in a component for testing when you put it into production. The important point is that 3D printed casting patterns printed by sla investment casting have high flexibility.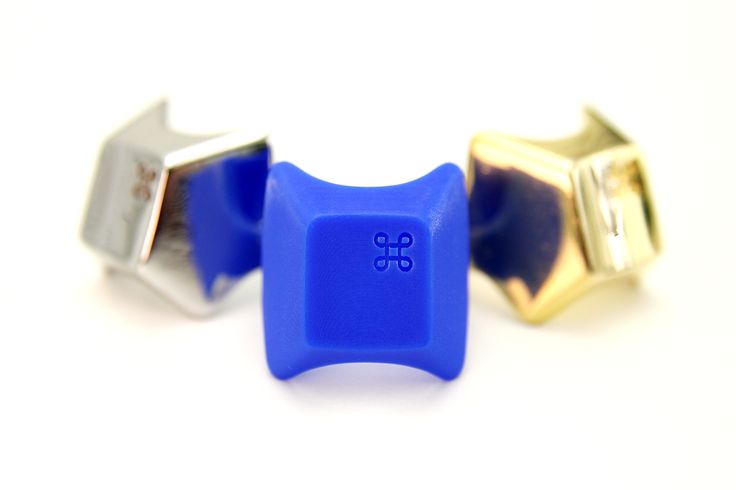 So you can print complex or simple 3D metal casting models according to the actual situation. And your expenses will not increase.
8 steps investment casting process with 3D printing
3D printed casting models are a direct replacement for traditional casting models, but 3D printed investment casting wax does not melt like wax molds. When making metal parts, the 3D printing wax for investment casting will burn in the cavity and leave a small amount of ash. Therefore, we need to remove it when cleaning the shell cavity. When using 3D printed casting patterns to make ceramic cases, vent holes are usually added to the surface. This contributes to the calcination of the 3D printed investment casting. In addition, to prevent casting defects, 3D printed casting models must have excellent surface finish and tight tolerances. Let's see what is the process of investment casting 3D printing?
In this case, we have broken down 3D investment casting into eight easy steps.
Step 1:
Select the configuration file in the printer and click Print. In addition, there are a few things to note: First, when placing the model on the board, choose a direction that requires as little support as possible. Second, use as few fillers and shells as possible. Finally, there must be a certain compensation factor between the 3D printed models of castings and real metal castings. The best value is between 1.007-1.030.
Step 2:
Before we can 3D print the investment casting, we need to make sure that the print surface is smooth, free of defects and debris. At this stage, we recommend two post-treatment methods: spray polishing and dipping.
Step 3:
First lay the piece horizontally on the cup, then join the piece and cup with a wax stick or sprue. This is done to ensure that the liquid metal enters the parts accurately and smoothly. In addition, we must minimize the curvature of the circulation channels. Otherwise, it will impede the fluid flow rate. It is best to place smaller wax blocks in weak spots to achieve an even flow. If there are any holes or gaps, we can use small incisions to fix them.
Step 4:
Dip the wood of the pieces into the ceramic mortar to create the shape. Pay attention to repeated alternation so that the liquid completely and evenly covers the parts. We recommend applying at least five coats. For 3d printed castings with more complex structure, we need to apply about eight layers. Please note that the coating is completely dry before repeating the work. Eventually, the printed material will evaporate during the firing process, resulting in a ceramic shell being used as a casting.
Step 5 :
Put the ceramic coated parts into the furnace. We usually use firing at 1100-1200°C for 40-60 minutes. The time has not been determined. It depends on the type of metal and furnace. After the printed material has burned inside, allow the ceramic shell to cool completely.