
3D printing letters
How to design and 3D print letters
We have realized that there are many people who for one reason or another need to generate 3D models of certain letters. From Bitfab we have shown you many alternatives to generate your 3D models without the need to design them yourself. Below we leave you a series of articles that you may want to read after this one:
- The best sites to download STL files: in this article we explain where to look for 3D models to download
- Convert a 2D image to 3D: Here you can find a tutorial on how to convert a 2D image to a 3D model. We will refer to this article later
- Customized keychains, how to make them?: Here we show you a very simple way to generate key rings with text.
Based on these previous articles and new content we will explain a few ways to get 3D letter models you’ll like.
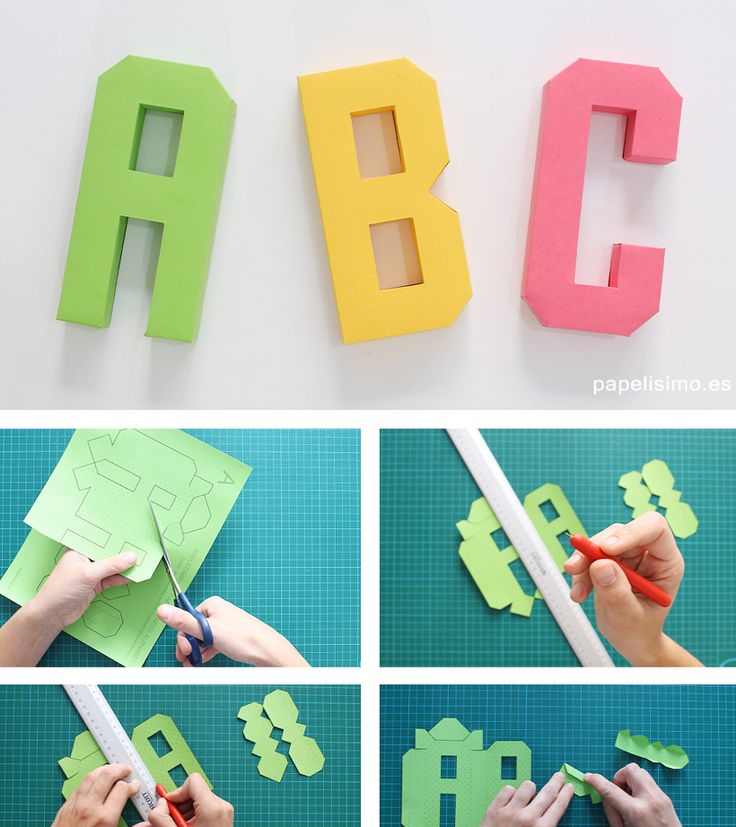
Create 3D letters from an image
In our article Convert 2D images to 3D we show you how to convert any image to a 3D model. The main method described in this tutorial works especially well with high contrast images and well defined geometries. Don’t you think the letters fit perfectly here?
Well, following the article that we have left for you above, you will be able to create in a very simple and fast way your 3D model from an image of the letters that you want. It is possible that you already have the image of the letters you want to convert to 3D, as in the case of a famous logo with text. But we also want to give you the tools to generate an image of any text with the typography you want to create your 3D model. Yes, you heard right: you will be able to generate a text using the most popular font styles and that you like the most using fontmeme. And the best of all is that it is totally free.
It is very easy to use this text generator. All we have to do is go to the aforementioned website and look for a font that you like. At the bottom of the resulting page you will find a window similar to the one we show you, where you can customize the text to your liking, choosing color and font size.
Once the text has been generated, right click on it to save the image. Now we only have to follow some of the methods proposed in our post to convert a 2D image to 3D to create our ready-to-print 3D model. If you are an Avengers’ fan, for sure you love this example, because with this system you can get something as cool as this:
Another positive of using this page, is that it has a font search engine. In it we can search for any type of font we want, and we will get results from fonts that are on the page itself or from other users’ posts linking to external sites. It is quite the powerful tool, since it allows us to access not only the catalogue of this page itself, but it also compiles the knowledge of a lot of users.
Let’s say, for example, that we are looking for the typography of the tremendously awaited Netflix series: The Witcher. If we use the search engine, we’ll see that this font is not in the page’s catalogue, but we find a post by another user where we link to another website where we can find a text generator with this font.
As you can see this method is easy and gives excellent results with very little effort. The truth is that this method is so good that we would love to see what you have created. Don’t hesitate to post a picture of your 3D letter models, because we love to see your ideas come to life. Here’s an example (spoiler: you’ve seen it on the cover) of what can be done with this method:
Create a 3D text with Fusion360
The method proposed in the previous section is great for the vast majority of users, but you may need something more advanced. If this is your case, you are in luck since we are going to show you the steps you have to follow to create 3D text in fusion 360.
First of all, download the font you want to your computer. For this we can use a page like dafont. In this web we must look for (either using the search engine or the filter by categories) a font that we like and click on download.
There are lots of websites to download fonts for free, so try googling the font you want if you can’t find it on dafont.
Install the font in our computer. This step is very easy so don’t panic. Just type “fonts” in the Windows search engine and click on “font settings”. Here we only have to drag the file of the font where it indicates us and the font will be installed.
Once the font is installed, we can use it in any program as if it were another font, such as Arial or Calibri. From here we can use any text editor, such as Word, to write the text we want, save it as an image and proceed as we have done in the previous case.
To use our font in fusion 360 we will have to use the text tool (it appears inside the sketch menu with the icon of an A). We can create text of the size we want, and we can use it as it is or include it in our designs.
Although it is a simple process, here’s a video that explains the process:
This method is quite powerful, and will allow us to integrate any text we want, in a huge variety of typographies in our 3D designs.
Conclusions
In this article we have learned how to create 3D text, either from a photo or using our own generated text. It is very easy and you have seen that you can get very cool results that will be the envy of your colleagues.
Don’t hesitate to share your creations, because we use this method often and we want you to do it too.
Best Ways How to 3D Print Text on Your 3D Printer – 3D Printerly
There are many things you can print on a 3D printer, one of those being text generated 3D letters for a name, logo, or almost anything you can think of.
The process to design these things can be confusing at first, even with 3D text, so I decided to make an article to show people how to get it done.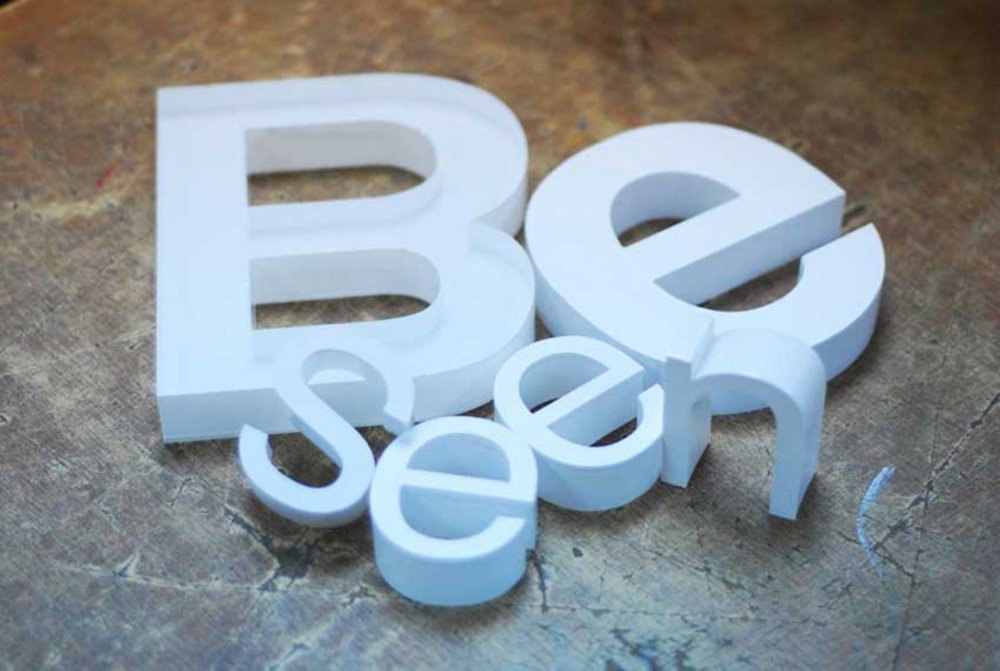
To convert text to 3D letters ready to 3D print, you need to choose a CAD software such as Blender or SketchUp to design the 3D text. Once you’ve entered your text, you can use a rectangular frame for the text to sit on and extrude the text past the frame. Export your file as an STL after complete.
I’ll go through the process in a little more detail, as well as list the best 3D printer text generators and how to make 3D text logos using this method.
Words are great, and they look even better when they can be touched physically. The conversion does not take much time as you would require specific software for converting a 2D text into a 3D one.
This is the only part that would require time, and then you can send that 3D text file to a 3D printer for printing.
There are different ways through which you can convert your text into 3D letters and print it with a 3D printer, such as Blender, SketchUp, FreeCAD, or Fusion 360. However, to convert a plain text into a 3D one, you will require software to perform certain tasks.
Creating 3D Print Text Using Blender
Getting & Opening the Application
- Download the latest version of Blender from their official website and install the application.
After it has installed, open Blender and you should see the main interface with a cube in the middle.
Adding the Text
- Click on the cube and delete it using the ‘Del’ button on your keyboard or by pressing the ‘X’ key
- Press Shift + A to add an element and select ‘Text’ from the menu.
- It will bring up actual text for you to edit.
- Now you want to rotate the object so you can see it clearer.
- Highlight the text and press ‘R’ on your keyboard then press ‘X’ to rotate it around the X-axis.

- Then press 90, to rotate it 90° and press ‘Enter’ to accept.
- You also want to rotate it 90° around the Z axis.
- To do this, highlight the object, press ‘R’ then ‘Z’ for the Z-axis, then press 90 again on your keyboard to do the rotation and press ‘Enter’.
Time to Edit Our Text
- In order to change the letters in your text, you want to change from ‘Object Mode’ to ‘Edit Mode’. You can do this by simply pressing the ‘Tab’ button on your keyboard.
You can also change mode by clicking the ‘Object Mode’ box and selecting ‘Edit Mode’.
- Once you’re in Edit Mode, you can easily change the text as normal. Delete the placeholder text and type your desired text.
- You can also change the font by using the main command zone on Blender to your right.
- This is done by clicking on the folder icon beside the ‘Font’ then choosing one of the several fonts in the list.
- If you want your letters to be closer together and not so spaced out, you can adjust the spacing under the ‘Spacing’ section.
 You can adjust spacing between letters and words too.
Making Your Text 3D
- This is pretty simple to do. Within the ‘Font’ area, there is a section you can edit under ‘Geometry’ called ‘Extrude’ which, if you increase, will make your text 3D.
- You can easily adjust Extrude values using the left and right arrows, or by inputting your own values.
Secure Your Text with a Block
- Make sure you’re in Object Mode & click an empty space on the build plane to deselect all objects.
- Press ‘Shift’ + ‘C’ to make sure your cursor is centered so your objects will be in the correct place.
- Now press ‘Shift’ + ‘A’ to add an object & add a ‘Mesh Cube’.
- Scale the added cube down using the ‘Scale’ box on your left, or using the ‘Shift’ + ‘Spacebar’ + ‘S’ shortcut.
- Scale the cube to fit your writing, from front to back and side to side until it looks right. You also want to be moving the block to the right location under your text.
- Change your view by clicking the Z in the view changing section, or by clicking ‘7 on your NumPad’ so you can get a good angle and move the block nicely in the center.
- Make sure your block and text are actually well-connected and overlapping over each other.
Printing Your 3D Text
- When it comes to printing your text you want to make sure you’re printing it on its back.
- We can rotate it within Blender like we did before, so click your object, press ‘R’, ‘Y’, ‘-90’ to put the object on its back.
- Make sure both objects are selected, then click ‘File’ > ‘Export’ and export it as a .STL file. Make note of what folder you saved the file so you can easily find it to import to your slicer.
- It will be very small when you put the STL into your slicer, where you then just have to scale it up, slice it, then print your custom 3D text!
Using SketchUp to 3D Print Text
There is a free and pro version of SketchUp, and in the video below, you’ll be following the free version if you choose this option.
The great thing about the free version is you don’t need to download any software. It’s all done straight from the SketchUp Browser App.
Adding text is very simple.
After clicking the ‘3D text’ option, the following box will pop-up where you can enter your custom text.
Below is a cool example of something you can create from following the video tutorial.
You can choose to just create the simplified text with the supporting block underneath like in Blender. With the video below, you can easily figure out how to navigate and adjust shapes and text to create your desired design.
3D Printed Text Using FreeCAD
The video below does a pretty good job showing how to create your 3D print text on FreeCAD, as well as creating an embossed text.
It’s pretty easy to follow, and once you get the hang of it, you can 3D print plenty of your custom text ideas, signs, and tags.
The picture below is after creating the text and extruding it by 2mm.
Now let’s get a nice rectangular frame on that text to support it and extrude that by 2mm also.
Then we extrude the text even further to get it sticking out of the frame, 1mm works out pretty well.
Select the files simultaneously then export them using ‘File’ > ‘Export’ and save them as a .stl file. You can then simply import that into your slicing software to get ready to 3D print your text!
3D Print Text Generator Using Fusion 360
Fusion 360 is a pretty advanced design software which can definitely create some great 3D text. If you need to design something a little more complex, it’s a great software to use, although, it works really well for creating 3D text.
The video below takes you through the process.
3D Print Text Troubleshooting
Some people run into issues such as gaps in the lettering of their 3D text which can be caused by either your slicer not correctly processing the model, or by under extrusion in your 3D printer.
If your problem is caused by your slicer, it’s hard to tell, but you can try changing your slicer to see if the model prints differently. Many people have seen massive differences in print quality just by using a different slicer, so I’d give this a try.
If the problem is under extrusion, I’d slow down the printing speed and also calibrate your e-steps to make sure you are extruding as much material as your 3D printer says you are.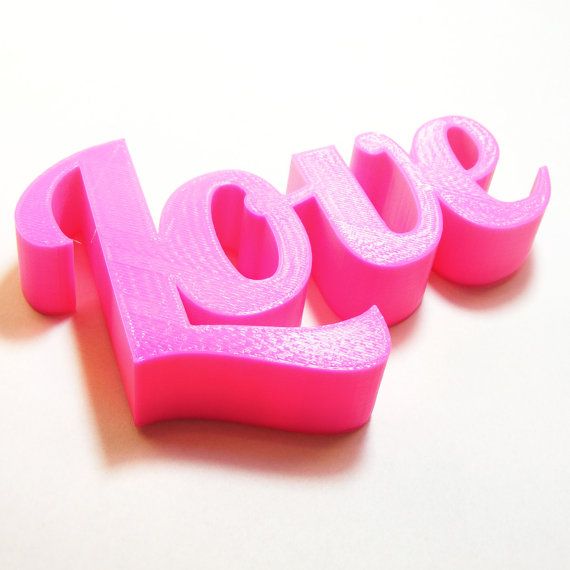
Another thing you can do is set your infill to 100% to properly fill in the gaps in your model, as well as increase the overall wall thickness of your print.
When it comes to creating embossed text or recessed letters, you can do this within your CAD software, usually by a dragging function, or by inputting the distance you want your text to move.
It is done different with separate software, so try to figure out where you can input these values to move your 3D text.
If you are having trouble reading your 3D text, a great font you can use for 3D printing text actually happens to be Comic Sans since the spacing in the font is done very well and the letters are bold enough to make it easier to read, perfect for smaller text.
Arial is another font that works well for 3D text, as well as Montserrat, Verdana Bold, Déjà vu Sans, Helvetica Bold, and other heavy weight Sans-Serif or Slab-Serif fonts.
Overview of 3D printers for printing advertising signs and 3D letters
3D printing is becoming more and more popular even in industries such as advertising. The production of advertising signs and volumetric letters on modern high-tech equipment is a great way to save time and money. Find out what 3D printers are good for advertising and what equipment is better at handling tasks in this article.
3D printing and advertising
In addition to conventional printing, which is used to create advertising (leaflets, catalogs, banners), 3D printing is also used to produce advertising structures. This technology is often used to create outdoor advertising - three-dimensional letters, signs, signs and logos, as well as for souvenirs. nine0003
3D printing capabilities allow you to create objects with complex geometry that can be placed outdoors or indoors. A wide choice of materials and colors provides freedom in the embodiment of any ideas.
Various printers are used for the production of advertising - from desktop to professional. Desktop are suitable for printing souvenirs and small branded products. Professional installations with a large print area are designed to create large products - letters and signs. nine0003
Unlike traditional production, 3D printing offers shorter production times as well as a wide range of material shades. On a 3D printer, you can quickly make a letter frame of the desired color without wasting time gluing, processing and coloring.
Features of 3D advertising printers
Professional equipment for advertising - these are large-format FDM devices that print with special materials that are resistant to ultraviolet and temperature changes. nine0003
Professional advertising printing equipment has a large X and Y plotting area, which allows you to create large letters and even whole words. Since a large thickness of printed elements is most often not required, the height along the Z axis is limited to 100-150 mm.
Budget 3D advertising printers have an open body, a heated bed for improved adhesion and easy setup. All print options can be set in the software. Software capabilities allow you to produce complex parts - inclined and with bends, as well as provide holes for wires or fasteners.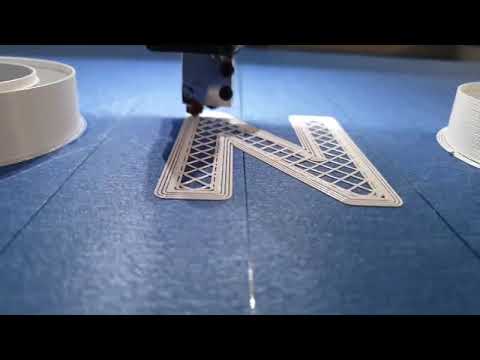 nine0003
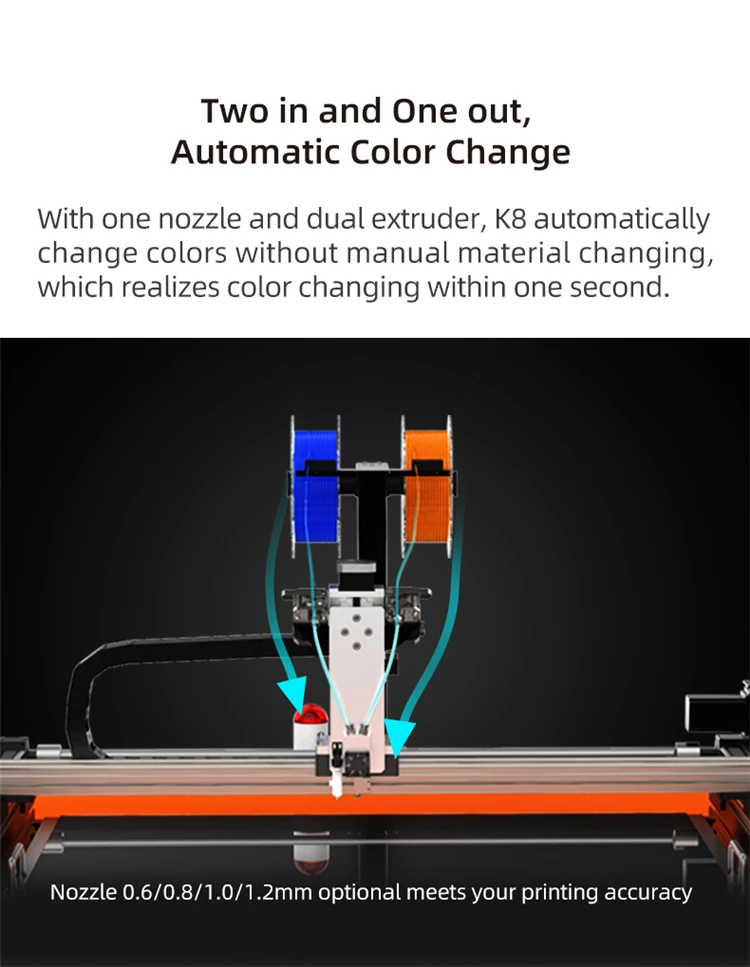
Specially designed 3D printer for printing advertising signs, letters and words. The device allows you to create, among other things, advertising for the installation of LED lighting.
This budget 3D advertising printer has a printable area of 600x600x85 mm, a heated desktop and convenient operation. The ability to print with 2 types of plastic allows you to achieve interesting effects when installing internal lighting, as well as complete almost any design project.
Creatwit Industrial Led Letter 3D Printer K6 can work with translucent PETG plastic, which has a fairly high strength, moderate flexibility and resistance to most alkalis and acids. This material is ideal for creating signs due to its good light transmission. nine0003
K6 has a fairly high accuracy - 0.02 mm along the X, Y axes, as well as the ability to adjust the layer height from 0.1 to 0.6 mm. Convenient data transfer via USB or SD card allows you to quickly move on to printing.
Press examples
Technical characteristics:
- Print technology: FDM / FFF
- Press material: Plastic thread: Open
- Mm Diameter: 1.70049
- Number of print nozzles: 1 pc.
- Extruder temperature: 220 ° C
- Table temperature: 65 ° C
- Press area: 600x600x85 mm
- Calibration: Automatic
- layer thickness: 0.1 - 0.6 mm
- Axis XY: 0.02 mm
- Number of colors : 2 colors
- Heated table: Yes
- Forced chamber heating: No
- Nozzle: 0.6/0.8/1.0/1.2 mm
- Supported materials: PETG
- Supported file formats: STL, SVG, NC, BMP, JPG, STEP, DXF
A selection of articles from the "Knowledge Base" section from the LIDER-3D website: 1) Guide: print figures on a 3D printer • 2) Like 3D technologies are used in different industries • 3) How to choose a good portable 3D scanner
The top model in the Creatwit line. This 3D printer has an enlarged construction area of 800x800x85 mm, so it is suitable for creating large-format advertising.
Industrial printer has excellent performance and flexible settings for any task. The all-metal open body provides stable printing, and the heated work platform allows you to securely hold the object during the printing process. nine0003
K8 has automatic calibration, as well as convenient operation using a touch screen. The equipment comes with proprietary software that has a wide range of tools for work. The program features allow you to set personal settings to create bright and memorable designs.
Industrial Led Letter 3D Printer K8 prints with translucent PETG material and has the ability to work with 2 colors.
Examples of print
Technical characteristics:
- Print technology: FDM / FFF
- Press material: Plastic thread
- PRICE BACK: Open
- DIECTION LIFE LIFE LIFE: 1.75 mm 2 nozzles: 1 pc.
- Extruder temperature: 220°C
- Table temperature: 65°C
- Print area: 800x800x85 mm
- Calibration: Automatic
- Layer thickness: 0.1 - 0.6 mm 9No file formats: STL, SVG, NC, BMP, JPG, STEP, DXF
Professional equipment from the industry leader from China. AD1 Channel Letter, unlike the other two models presented in our review, can print not only PETG, but also ABS, PLA and Flex plastics. This means that the printer can create both outdoor and indoor advertising, as well as implement the creative ideas of the designer. nine0003
The printer has a large construction area 600x600x70 mm, heated table up to 100°C. The equipment has the ability to print two materials alternately thanks to two filament supply channels.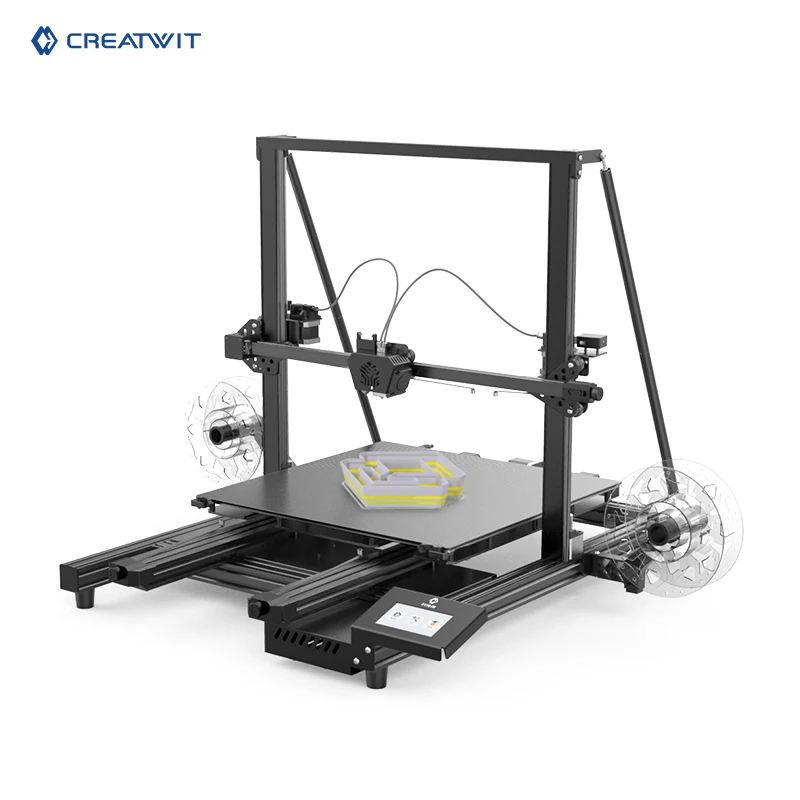
The main advantage of the AD1 Channel Letter is the user-friendly and intuitive FlashAD software, which has intelligent features. You don't need to download additional software to get started - all the necessary tools are in FlashAD.
Users can enter text in the application, and then the program will automatically create a file for printing. But this does not negate the possibility of using third-party programs for preparing images, such as CorelDraw. nine0003
Like other FlashForge equipment, AD1 Channel Letter has access to the company's FlashCloud cloud service, which allows you to quickly share print files and manage devices.
Printing
Technical characteristics:
- Print technology: FDM / FFF
- Press material: Plastic thread
- Printer Corp0049
- Number of print nozzles: 1 pc.
- Extruder temperature: 260 °C
- Table temperature: 100 °C
- Print area: 600x600x70 mm
- Print speed / print speed: 40 - 200 mm/s
- Layer thickness: 0.009 0.49 0.49 growth axis XY: 0.5 mm
- Number of colors: 2 colors
- Heated bed: Yes
- Plastic control: Yes
- Print resume system: Yes
- Nozzle: 0.6 mm
- Supported materials: ABS, PLA, PETG, Flex
- Supported file formats: CDR, STL
Thank you all, the material was prepared by the LIDER-3D team of specialists, we will be glad to hear your questions in the comments.
If you are interested in 3D printers for advertising, you can get detailed expert advice by contacting us at LIDER-3D, as well as purchase this equipment on our website.
Follow us on social networks: Telegram, VKontakte, Ya. Zen, RuTube, YouTube, TikTok, Instagram, Facebook to be the first to receive the most interesting materials! nine00843D printing (exclusive) to order in Moscow
Description
Branding and advertising are among the widest applications for 3D printing.
Most often, additive technologies are used in the manufacture of souvenirs, but little by little this approach is being adapted to the production of large forms: signs, plates, signs. 3D printing is difficult to compete with traditional methods in these areas, but it successfully complements laser cutting and milling where it is difficult or impossible to use sheet materials. nine0003
Advantages of 3D printing in advertising
- Simplification of production. Many manipulations are performed manually or with the help of expensive equipment (for example, cutting and gluing side plates). The 3D printer immediately prints the body of the product, you only need to supplement it with the front part.
- Combination of materials. The equipment can be filled with two threads of different textures, which gives an original effect. The addition of UV-resistant filaments saves on protective treatment of the structure and extends its service life. nine0049
- Minimization of the human factor.
The result of the work does not depend on the skill and well-being of the employee, but on the quality of raw materials and printing.
- Making complex shapes. Volumetric structures with a pronounced relief are difficult to make from classic sheet materials. 3D printing provides almost unlimited possibilities for design imagination.
Technologies used
Our production arsenal includes a Diamond-Tech 640 x 640 3D printer that works with PLA and PETg filaments. The equipment with the same success copes both with printing miniature letters up to 5 cm high, and with the production of three-dimensional structures up to 0.6 m high. Among its features: nine0003
- accurate calculation of the cost of work and the timing of order production - the printer immediately indicates the required volume of polymer thread and the duration of the process;
- the ability to print beveled sidewalls - the side parts of the structure with different areas of the front and back;
- alternate printing option, which uses threads of different colors;
- compatible with many file formats, including ARTCUT, STL, CDR and SVG.
nine0082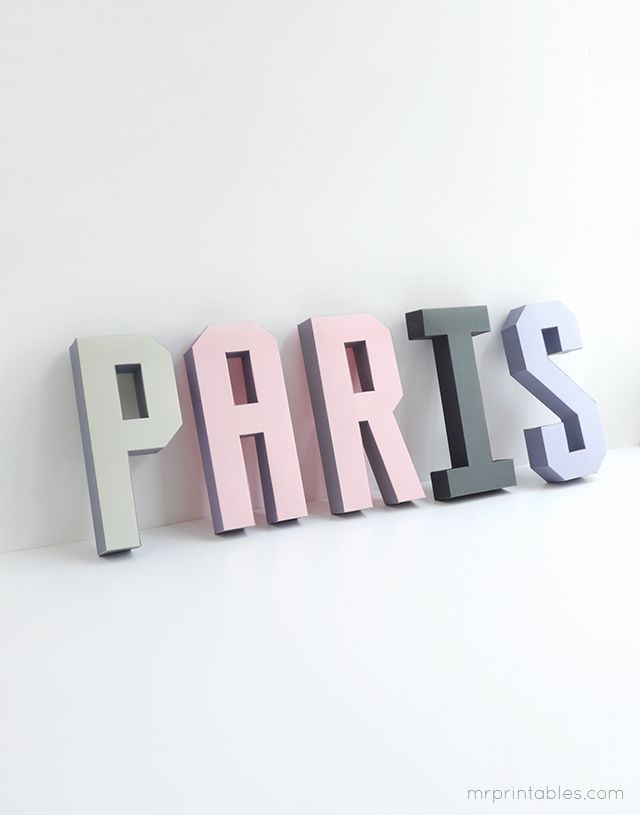
Using Diamond Tech to mold the rims, two to five light strips can be obtained in a variety of combinations. The palette includes 3 opaque options and over 50 translucent shades. This set is sufficient for the production of both classic letters and original designs - for example, signs with luminous sides or contour lighting.
Liquid acrylic 3D printing
The innovative 3D printing technology is best complemented by another modern method based on the use of liquid acrylic. Volumetric letters are printed on a Diamond Tech printer, the back walls are produced by milling, and the front part is treated with a special composition. nine0003
How does this happen:
- The workpiece prepared for processing is fixed on one of the tables of the drying platform. The working field is presented in two standard sizes: 1200*1500 mm with six Philips UV lamps and 1500*2340 mm with twelve lamps included.
- After filling the tank with raw materials, the autosampler is included in the process.
Based on the given parameters, he measures the required volume of liquid acrylic and distributes it over the front surface of the workpiece. nine0049
- Under the influence of ultraviolet lamps, liquid acrylic takes a solid form. The curing of the composition without color pigment takes about 60 minutes. If there is a color pigment in the solution, the time increases to 80 minutes.
The flooded front side perfectly keeps on the surface without additional fastening to the sidewalls. Good adhesion is ensured by the material of the filaments used in the 3D printer and the special paint used to process the inside of the aluminum profile. The latter also provides a uniform distribution of illumination over the entire area of the structure. nine0003
Advantages of Liquid Acrylic and Diamond Tech
The technology minimizes the impact of the human factor, speeds up the production process and eliminates the appearance of defects.
When cured, liquid acrylic forms a smooth and durable surface without chips or other defects. Ready-made signs are only slightly inferior to neon signs in terms of the spectacular glow.
The milky color of liquid acrylic looks much brighter than the traditional sheet version due to the addition of translutens. To create different shades, the manufacturer offers more than 15 options for pigment pastes, which are mixed in different proportions. The required color scheme is selected according to the factory formula, which eliminates deviations from the specified color. nine0003
You can leave an application for the manufacture of a sign using 3D printing technology by calling +7 (495) 645-21-70 in Moscow.
Video
3d printing of three-dimensional letters, filling with liquid acrylic