Stop warping 3d print
Prevent Warping - You Can Do It
In particular, if you frequently print with materials like ABS and HIPS, over time you will get annoyed by what is known as “warping”. This is an unsightly misprint in which part of the model bulges or warps. In the worst case, the print is completely detached from the bed.
Especially with functional parts, the accuracy of which is of great importance, warping can quickly mess up the entire print. Mostly, models with a large contact surface on the print bed are affected. In this article, you will find out what causes warping and how you can avoid the “warp effect”.
Causes of WarpingWarping occurs due to uneven temperature distribution and the resulting tension in the substrate. Since ABS or HIPS filaments warp more at uneven temperatures than PLA, for example, and tend to shrink during cooling, the warp effect can be observed more frequently with these materials.
If an ABS print is cooled down at room temperature, it can shrink by almost 1. 5%. The larger the print model, the more unevenly it cools, the layers shrink unevenly and parts of the print bulge.
So the reasons for warping mostly have to do with temperature:
- Unevenly heated print bed
- Too fast printing process
- Incorrect location of the 3D printer (for example at the window)
- Incorrect slicer settings
- Contaminated print bed
1. Use a heated bed
A heated print bed keeps the model evenly warm during the printing process by equalising the temperature in the print object. At the same time, it also ensures better bed adhesion. If possible, the bed temperature should be just below the filament softening point, because: The higher the temperature of the bed, the lower the temperature difference in the individual filament layers and the resulting warping.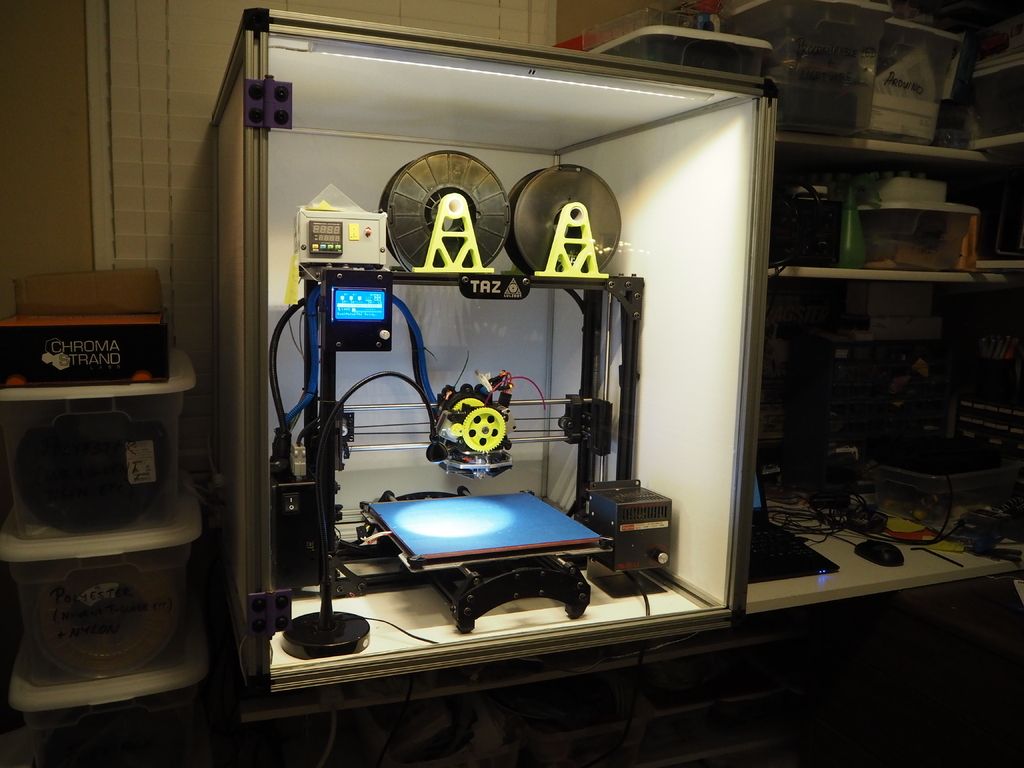 However, be careful not to set the heating bed temperature too high, otherwise you risk plastic deformation of the model and intensification of the warp effect.
In addition, always preheat your heating bed and do not print immediately without waiting for a suitable temperature so that the heat can stabilise to some extent. The print bed can even be insulated for optimal heat distribution; temperature-resistant insulation from the automotive sector is very suitable for this.
2. Print in an enclosed print chamber
A closed housing keeps the temperature inside the model constant during the entire printing process. When printing with a heated chamber, you should always make sure to keep the doors closed during the printing process so that the heat inside cannot escape. You can find a suitable 3D printer cover in our shop.
3. Choose the right location for your 3D printer
A 3D printer should ideally be set up in a place where there are no drafts.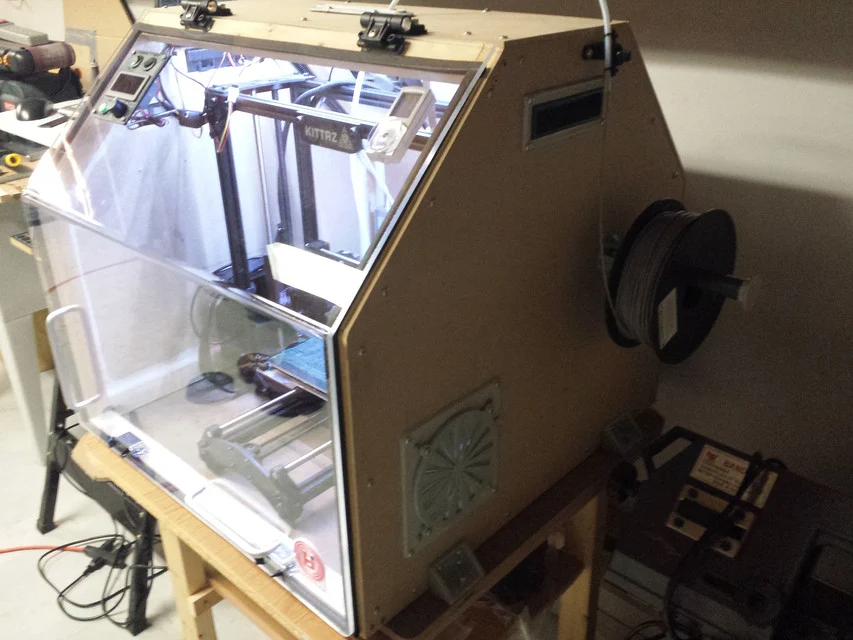 A window seat, in the hallway or next to a door is therefore less ideal, as drafts of air unintentionally cool the print. Basically, you should regulate the room temperature by keeping windows and doors closed as much as possible.
4. Turn off the material fan for the first few layers
To prevent the bottom layers from becoming detached from the build bed, you can turn off or slow down the fan while the first layers are printing. Keep in mind, however, that the melted filament still needs to solidify quickly enough to allow a precise build-up of the layers.
5. Improve bed adhesion with adhesives or a suitable bed surface
As already mentioned, the lack of adhesion of the print to the bed can also lead to warping. To avoid warping your prints, use a build plate with good adhesion or improve your adhesion with adhesives, glue, blue tape, or a print bed coating.
Since most FDM printers are equipped with a glass or aluminium surface and the surfaces are often too smooth for printing thermoplastics, it can be worthwhile to use a flexible plate as a print bed upgrade.
6. Adjust your slicer settings
Not only can the temperature and print bed adhesion affect the bulging of your 3D print, but the wrong slicer settings also have an impact on your print quality.
- Reduce your printing speed
Especially if you have frequent problems with warping, you should try to reduce your printing speed. At the same time, the nozzle temperature should also be reduced accordingly as the extra heat is not heated with this lower flow.
- Use rafts and brims
A raft can help with larger and a brim with smaller components to avoid warping by building up a base layer, the edges of your model are “held” and these warp less. The raft can easily be detached from the model after printing.
7. Thoroughly clean your print bed
If you often have problems with warping or your prints do not adhere to the bed, clean it thoroughly with the cleaning agents provided. Stubborn residues such as glue can be removed with chemical solvents.
If your build platform is uneven or damaged, you should definitely replace it.
8. Use good quality filament
Last but not least, it should be said that you should always use high-quality filaments for successful 3D printing - and always adhere to the material-dependent application instructions. Only a high-quality filament that has been used correctly can achieve a beautiful print result.
What Causes 3D Print Warping and How to Prevent It
3D print warping is a common problem in fused deposition modeling (FDM) that causes parts to deform on the print bed. If you’ve ever noticed that the base of your 3D print is curling up and the corners are unsticking from the build plate, that’s warping. The good news is that there are several tips and tricks to prevent warping and improve your chances of a successful, warp-free 3D print.
What causes 3D print warping?
3D print warping happens when extruded filament layers on the 3D printer build plate cool too quickly and shrink. This causes the plastic material to contract and pull away from the build plate, resulting in warping (or curling, as it is sometimes known).
We can understand the problem of warping better if we zoom out a bit and look at the FDM process on the whole. In FDM 3D printing, a heated extruder deposits melted filament onto a print bed. This filament is made from a thermoplastic, a type of material characterized by its ability to melt into liquid form and resolidify when cooled. This means that in the printing process, as each layer is deposited, the filament hardens as it cools, but it also shrinks.
Thermoplastic filament shrinks as it cools; if it shrinks too quickly it can lead to warping
Warping occurs when the cooling process happens too quickly or unevenly and 3D printed layers shrink and pull on less solidified layers, ultimately lifting the first layer off the build platform and causing deformation. Though it is possible to experience warping with any type of 3D printed part, it is more common when 3D printing larger parts or parts with a large surface area. Certain 3D printing filaments are also more prone to warping than others. Typically, materials with a higher printing temperature, like ABS, suffer more from shrinkage because the temperature difference as they cool is more extreme.
How to fix 3D printer warping?
Fortunately, the chances of 3D print warping can be mitigated and 3D print outcomes can be improved using a few key techniques.
Bed Adhesion
One effective way to minimize the risk of 3D print warping is to improve your 3D printer’s build plate adhesion. Good bed adhesion will keep your 3D printed part stuck to the build surface and prevent the first layers of the print from curling up as they cool.
Bed adhesion can be achieved in a few ways. For example, there are dedicated 3D printer adhesives that can be applied to the build plate before printing. Many also opt for more DIY adhesives, like glue sticks and hairspray. A third option is tape, which is placed on the build plate surface. Painter’s tape is a popular option because it can be removed easily and the porous texture of the non-stick side keeps filament stuck down.[1] Kapton tape is also commonly used to encourage bed adhesion.
If you are using adhesives on your 3D printer, be sure that the print surface is clean before and after printing. Glue residue can cause an uneven print surface, potentially impacting calibration and the quality of future prints. It is also a good idea to try a test print if you are using a new adhesive to ensure it keeps the bottom layer of the print down but can also be easily unstuck when the print is done.[2]
An enclosed build chamber can reduce the risk of warping by maintaining a stable print temperature.
Temperature
Because cooling filament too quickly is what causes shrinkage and warping, it is key to control the temperature of your build as much as possible. 3D printer temperatures can be regulated using different methods or a combination of approaches. One of the most effective tricks for improving bed adhesion is to use a heated build plate. Each type of filament will have its own recommended bed temperature for good adhesion—for example, PLA works best with a heated bed at a temperature of between 60 and 70°C, while ABS requires a hotter print bed of between 100 and 120°C.[3]
Using an enclosed print chamber can also help to maintain an ambient temperature throughout the printing process and stop 3D printed layers from cooling too quickly. Many 3D printer models have a built-in enclosed chamber, but those that don’t can still benefit from a DIY enclosure. Other ways to improve temperature consistency in your 3D printer are to adjust cooling fan speed settings (especially for the first layers of a print) and keeping your room temperature as ambient as possible (i.e. keeping cold air out by closing windows).
Brim or Raft
Brims and rafts are tried and true techniques for boosting bed adhesion, especially for ABS and other high-temperature filaments. These 3D print features are added in slicer software right before printing and have several functions.
Specifically, a brim is a 3D printed border that connects to and goes around the edges of a 3D printed part. Brims are typically a few millimeters wide and consist only of 1-2 layers. They increase the footprint of the 3D printed part and anchor its edges to the build platform. A raft is similar, only it is also printed under the 3D printed part, acting as a base for it.
Brims and rafts are especially beneficial for 3D printed parts with unbalanced geometries or small footprints, as they can stabilize the print and secure it to the build surface. Both brims and rafts must be removed after printing, either by hand (by peeling them off) or using a tool. Printed parts with brims or rafts may require additional post-processing to achieve a smooth first layer.
3D printed brims can help to anchor the printed part down to the build platform.
Slicer settings
The risk of warping can also be reduced substantially by implementing the right print settings for the first layers of the printed object. Most slicer software programs allow you to adjust the print speed and layer height specifically for the first layer. A slower print speed for the first printed layer of a build will help to ensure that the filament sticks to where it has been deposited and is not pulled by the nozzle as it moves. Choosing a slightly thicker layer height for the first layer can also improve bed adhesion and help reduce any leveling inconsistencies.
Another print setting that can influence warping is fan speed. Fans are built into some FDM 3D printers and ensure the build space does not get too hot. By tweaking fan speeds you can maintain closer control over print cooling. For example, fans can be programmed to turn on only after the first few layers of a print have been deposited. This helps the first layers cool slowly and evenly on the print bed.
Conclusion
3D print warping is a frustrating problem most makers will encounter at some point or another. By following the tips and methods laid out in this article, however, you can ensure good bed adhesion, consistent printing temperatures, and ultimately reduce warping and improve print quality overall.
References
[1] TapeManBlue, 2022. “The Complete Guide to Blue Tape for 3D Printing”. [Internet]
https://tapemanblue.com/blogs/tips-tricks/blue-tape-for-3d-printing [Accessed March 31, 2022].
[2] Ultimaker, November 10, 2020. “Build plate adhesion: How to get your print to stick to the build plate”. [Internet] https://support.ultimaker.com/hc/en-us/articles/360012015680 [Accessed March 30, 2022].
[3] Simplify3D, 2022. “Warping”. [Internet] https://www.simplify3d.com/support/print-quality-troubleshooting/not-sticking-to-the-bed/ [Accessed March 30, 2022].
8 3D printing options to help you get rid of the elephant leg.
What is an elephant leg in 3D printing? 8 ways to get rid of an elephant leg in 3D printing.
1. 3D printer bed calibration. 2. Reducing the temperature of the printing platform. 3. Install the cooling of the first layer. 4. Increase the first layer print time. 5. Reduce the flow rate of the first layer. 6. Adding a raft to your model. 7. Use of chamfers in models. 8. Elephant leg compensation in the slicer. nine0003
Output.
In the world of 3D printing, such a defect as an “elephant leg” is quite common, and in our opinion it is not given enough attention.
For most 3D printing applications, this disadvantage can be ignored, as it does not greatly affect the final result.
However, when it comes to practical applications, the elephant's foot can present serious problems. This defect sharply reduces tolerances, which makes it much more difficult to fit parts to each other. nine0003
For example, you want to fit one piece to another, but you run into a problem because the first layer is much larger than the next.
In the architectural field, engineers can use 3D printing to check and determine the accuracy of a design before it is manufactured on a significant and costly scale. If there is a defect in the print, it distorts the representation of the final product.
For example, if a civil engineer is designing a building and the printout is faulty, it will not display the structure of the building correctly. nine0003
We have been providing 3D printing services for several years, and the presence of an elephant leg for most of our clients' projects is an unacceptable defect.
We hope that with our preface we have convinced you that it is still worth getting rid of the elephant's foot. And in this post, we will introduce you to the basic ways to fix this problem.
Some of our recommendations may seem difficult for beginners. But it's actually much harder NOT to know what to do than it is to have a clear step-by-step guide. nine0003
What is an elephant leg in 3D printing?
Elephant foot is a deformation of a 3D model caused by the temperature and weight of the model.
The upper layers put pressure on the first layer, which has not yet cooled down, and under the influence of the mass of the object, the first layer is flattened, and its geometry is distorted.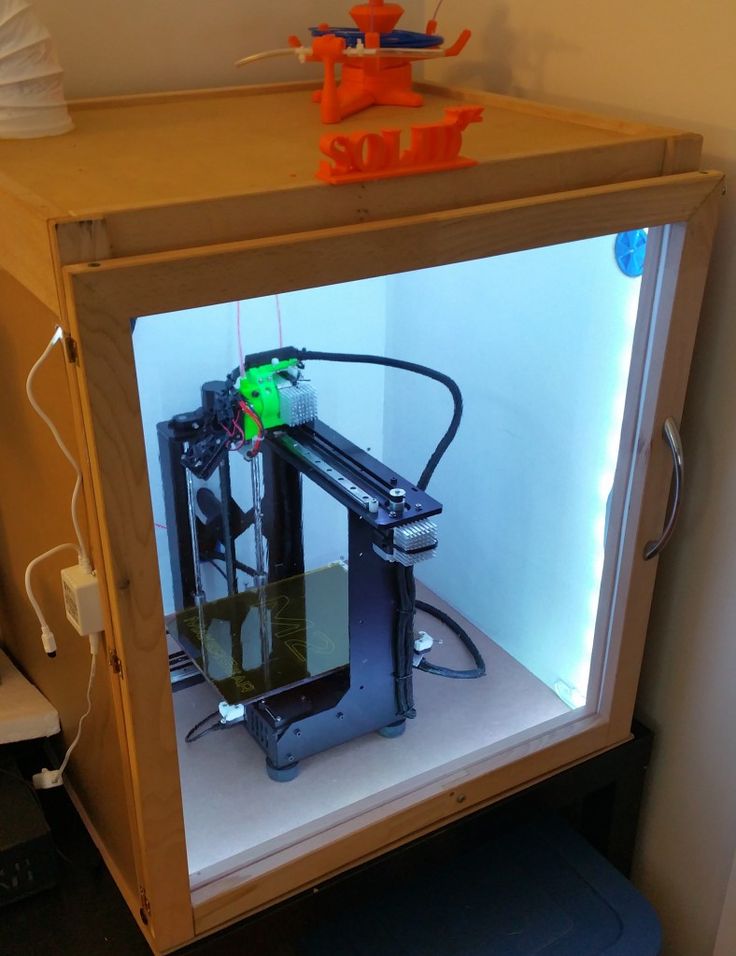 Accordingly, the higher your model, the more the effect of the elephant's foot is manifested.
In our blog, we have repeatedly mentioned that printing the first layer and calibrating the platform are critical to obtaining quality prints. And, describing the causes and ways to eliminate the elephant's foot, we are again forced to return to this topic. nine0003
8 ways to get rid of an elephant leg in 3D printing.
Of all the many limitations and challenges users face with 3D printing, the elephant leg remains one of the easiest to solve. You just need to run a few test operations to determine which factor in your case is causing this effect.
1. 3D printer bed calibration.
Fixing almost any 3D printing problem starts with platform calibration. And the elephant leg is no exception. nine0003
This effect may be due to an incorrectly calibrated table or an incorrectly set nozzle height.
Positioning the nozzle too close to the 3D printer bed causes the first layer to be pushed too far into the bed and flatten out.
The principle of calibration is that the nozzle is at the same distance from the platform over the entire working area of the printer.
Also, as is often the case in 3D printing, properly leveling the platform can generally improve the print quality of your projects. nine0003
Calibration of the 3D printer bed is a key factor in 3D printing and can eliminate many 3D printing problems.
2. Reducing the temperature of the print platform.
High table temperature does not allow the layer to cool sufficiently.
The fusing of subsequent layers of the part on it leads to squeezing of the object and the appearance of an elephant's leg.
Normally the table temperature is set according to the recommendations of the plastic manufacturers. Properly selected temperature ensures good adhesion of the layer to the platform. nine0003
If you are experiencing the elephant foot effect, try lowering the temperature of the platform.
Do not rush this process. It is recommended that you gradually reduce the temperature by 5°C until you start getting good quality prints.
If you have reached the minimum recommended temperature for the platform and the problem persists, there is likely another reason for your elephant foot and you should consider other options.
3. Install the first layer cooling. nine0041
Most slicers have cooling of the first layers disabled by default. Turning off the fans on the first layer ensures good adhesion of the part to the platform.
But we have already found out that the elephant's foot appears when the first layer does not have time to cool.
Increasing the initial fan speed to 5% or 10% will cool the filament faster and prevent flattening of the initial layer.
We recommend using a 3D printing varnish to improve adhesion. nine0003
4. Increase the time to print the first layer.
Increasing the initial layer print time is also a cooling solution, but instead of activating/increasing the fan speed or lowering the table temperature, we set the first layer print speed to be slow.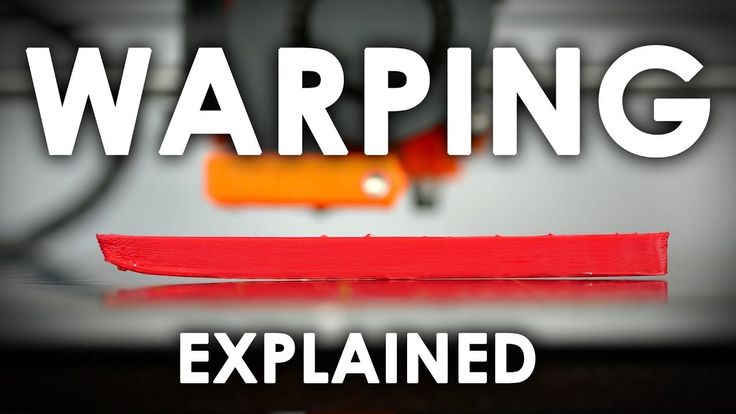
This will give it time to cool down before the printer starts printing the 2nd layer.
If the first layer has not had time to cool down, then applying the second layer compresses the first layer. This issue can also cause your part to be sized incorrectly not only horizontally but also vertically. nine0003
It is also clear that the use of quality 3D printer filament with the same diameter along the entire length ensures uniform extrusion and reduces the likelihood of elephant's foot.
5. Reduce the flow rate of the first layer.
Your printer may be set to over-extrusion and extrude too much plastic on the initial layers. Excessive extrusion may also be due to your nozzle being too close to the platform. We mentioned this in the first paragraph of our guide. nine0003
You can calibrate your printer using our guide to setting extruder pitches.
How to calibrate the extruder steps (E-steps).
Or you can simply reduce the flow rate of the first layer to 95%. This will not have any effect on the adhesion of the first layer, but will affect the elephant's foot.
6. Adding a raft to your model.
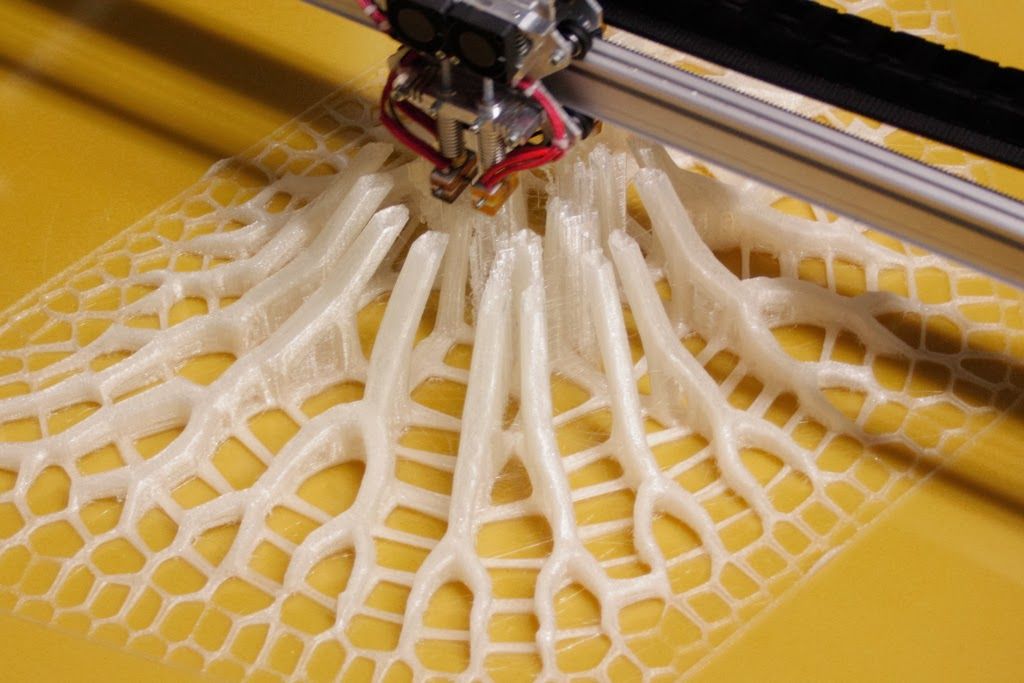
A raft is a horizontal mesh created by placing strands of plastic on a platform.
Since the elephant foot problem occurs between the working platform and the first layer, the raft will take the hit. nine0003
This will certainly get rid of your elephant's foot, but it's more of a workaround than a solution.
Using this option you will get a rough surface on your part and you will have to spend some time removing the raft. However, you can consider this as a useful alternative, especially in cases where you need to place one part inside another.
7. Use of chamfers in models.
There are times when getting rid of elephant legs is not possible at all. All options seem to be unable to provide the expected results. nine0003
If setting up and calibrating the printer is a tedious process for you, and a slight change in the 3D model seems to be an easier way, then choose this option.
All you have to do is add a small 45° chamfer to the bottom of your model. The figure shows two identical parts. Left part with chamfer, right without.
Any modeling software has a set of functions for creating a bevel and usually it does not take much time. nine0003
The top layers will weigh down on the first layer, and the chamfer will compensate for the elephant's foot in your print.
8. Elephant leg compensation in slicer.
An even easier way to get rid of an elephant's foot is to compensate with a slicer. Cura, one of the most popular and widely used slicers, has incorporated this setting into its software.
This parameter is called initial layer horizontal expansion (horizontal expansion of the first layer), located in the section Shell (Walls). nine0003
You can also easily find it by entering the word elephant or elephant in the Russian version in the search bar.
In Slic3r and PrusaSlicer this parameter is called Elephant foot compensation.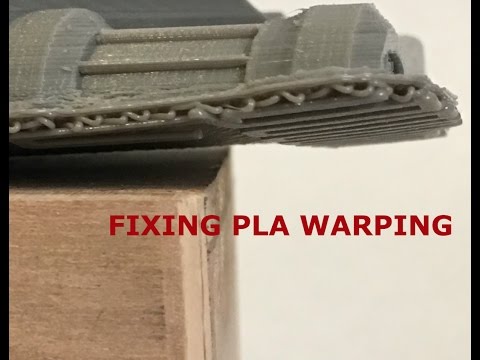
In Slic3r you can find this setting here: Print Settings tab -> Advanced settings
In PrusaSlicer the setting is under Print settings - Advanced - Elephant foot compensation. PrusaSlicer must be in advanced or expert mode to access this setting. nine0003
Simplify3D has a "horizontal size compensation" setting. By default it applies to all layers, but you can limit it to only print the first layer.
To calculate the correct compensation value, we recommend that you print a test cube. After printing, measure the dimensions of your cube at the top and bottom.
Let's say the cube measures 20.02 mm at the top and 20.3 mm at the bottom (elephant's foot).
To calculate the compensation factor, plug these values into the following formula:
(20.02-20.3)/2=-0.14.
We got a negative value, and this is what we need to set in the slicer. In fact, this method creates a chamfer without changing the model itself, but with the help of a slicer.
Conclusion.
Elephant foot on a 3D printer is a common mistake that is easy to fix.
In this post, we have outlined several approaches to help you achieve the best possible results.
It is important to understand that steps 1-5 really solve the elephant's foot problem, while steps 6-8 just cover it up. nine0003
Using a raft will get rid of the elephant's foot, but you will spend more time and materials and will not get a smooth surface of the bottom layer.
We recommend that you first try simpler solutions that do not take much time.
If you have identified the cause that causes the elephant leg defect, then use a specific solution aimed at eliminating the cause.
Problems like the elephant's foot may interfere with motivation for a while, but they cannot stop those who are focused enough on achieving expected results. nine0003
With a little testing and patience, not only will you get quality prints, but you will gain additional experience that will help you with other 3D printing tasks as well.
If you want to unlock the hidden possibilities of 3D printing, you have to solve these little problems yourself. Learn and grow by printing amazing designs.
Happy printing!
The first layer does not stick when printing on a 3D printer?
Home » Articles » Problems with 3D Printing » First layer not sticking when printing on a 3D printer? nine0003
First coat not sticking?
This problem must be urgently solved, since the quality of the model construction depends on the first layer serving as the basis, or rather on the reliability of its fastening to the desktop. There are several reasons for its appearance, consider the most common of them.
1. Skewed print platform.
The print platform must be in an absolutely flat horizontal position before starting the 3D printer, otherwise the distance between the nozzle and it will be uneven. To align it with the design of the printer, screws and handles are provided, as well as a special function - the "Bed leveling wizard". It can be found in the "Tools" menu and can be used to step-by-step configure the platform by setting the required parameters. nine0003
2. Wrong working distance calibration.
Leveling the worktable is only half the battle, it is important to place the extruder nozzle over it correctly so that there is enough free space for the filament to exit, but at the same time the filament seems to be pressed into it. To do this, you need to use the calibration function of the working platform, which most modern models have. If your 3D printer does not have this feature, then you will have to manually calibrate the desktop - fix the print head in a static position and stop the motors, and then adjust the distance by moving the print unit. nine0003
Another way to calibrate the 3D printer desktop is software adjustment, which is highly accurate and easy to use. You will find all the necessary parameters for it in the menu. All you need to do is to correct the indicators in the slicer G-Code. Initially, it is better to set small distance values, and then control them by test printing and, if necessary, make changes to them.
When calibrating the 3D printer desktop, please note the following:
- If the nozzle is at a considerable distance from the build platform, there will always be a risk of the filament coming off during printing due to insufficient pressure on it.
- Insufficient clearance between the build bed and the nozzle can cause damage to them and poor print quality due to lack of space for the filament to exit and form a 3D model.
- A normal distance between the nozzle and the work table will ensure that the layers are formed correctly over the entire surface area and that they adhere well to each other. nine0206
Consider the above recommendations and do not ignore the need for calibration.
3. Print speed selected incorrectly.
Incorrectly selected print speed can break the adhesion between the layers of the grown model. This is especially true for the output of the first layer. Its insufficient adhesion to the working surface indicates too high a print speed. The output of the filament thread can and should be slowed down using the corresponding First Layer Speed function from the Edit Process Settings menu. When printing the first layer, reduce the speed settings set by the program by half. nine0003
4. Incorrect operating temperature setting.
A 3D model may warp due to its rapid cooling. High-temperature ABS plastics “sin” with this, which need to be given more time to cool than other materials. Cooling models provide special fans. They have their own operating parameters, which users can change on their own. With rapid cooling, there is a risk of plastic peeling off the desktop, which provokes deformation of the 3D model. Switching off the fan is usually enough to prevent this. This will allow the first layers of the model to cool slowly and reduce the risk of deformation to zero. To turn off the fans, the Cooling function is provided from the Edit Process Settings menu. Some models even allow users to specify a different fan speed for the first layer and each subsequent layer. When printing a 3D model with high-temperature ABS plastics, the fan can be completely turned off and the platform heating turned on, which eliminates the risk of deformation of the first layer. This feature is found in the Edit Process SettingsTemperature menu. To turn on the platform heating, you need to specify the temperature parameters of the first layer of the future model. In order not to make a mistake with them, we recommend using the established material heating standards that are used for 3D printing. In the presence of drafts, additional protection of the working platform from cooling is required. nine0003
5. Incorrect material selection for platform protection.
For both professional and amateur 3D printing, different filaments are used, so their reaction to the consumables used - tape, glue, etc.