3D printing large objects
How to 3D print large objects
BlogDecember 16, 2020 (Last updated)
3 min read
3D printing is something of the latest craze. No longer exclusively the domain of corporations, home printing machines are becoming increasingly more affordable and accessible. There are whole networks of people who share files and offer their services at a scale that is continually increasing.
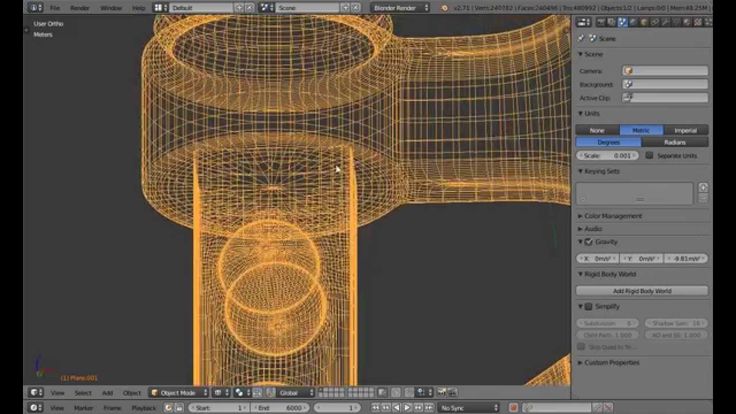
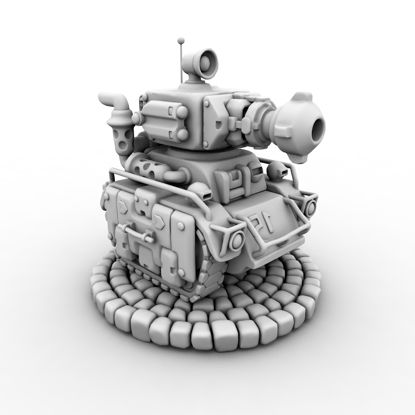
1. Use a 3D Modelling Software
Courtesy: Luban3D
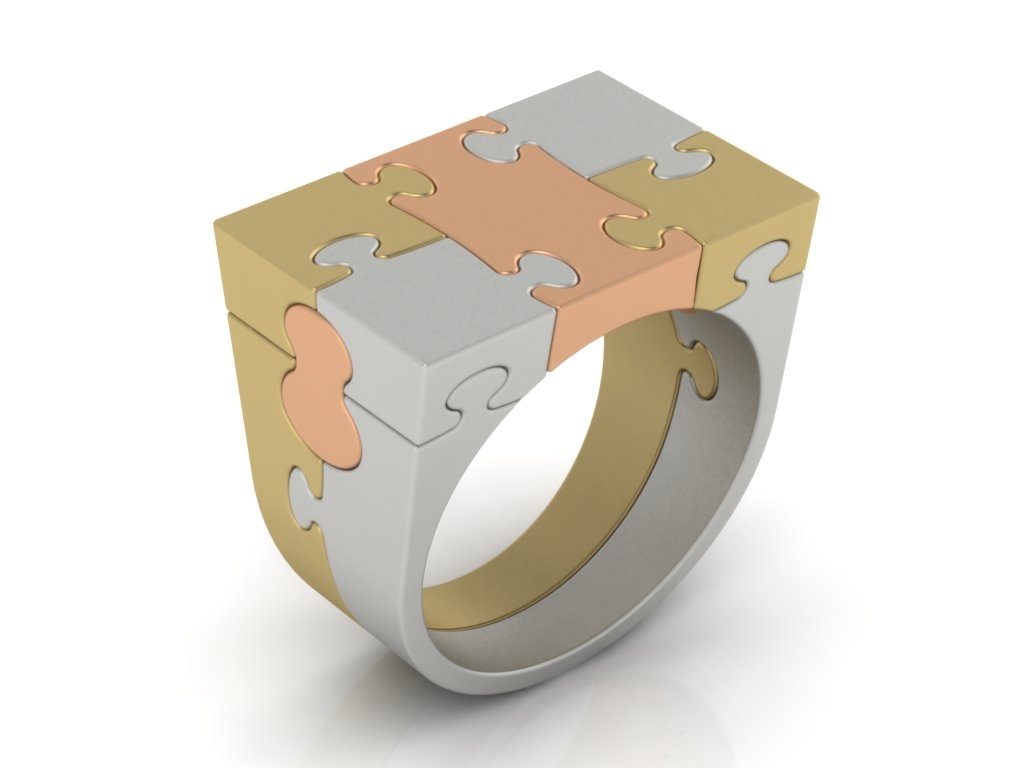
When it comes to 3D modeling software, we recommend Luban 3D. It is a generative design software created by a small expert team to facilitate small-scale home printers with large-scale printing ideas. There are many options available when it comes to breaking down a large project into something more manageable: printing off separate layers to stack as you go, printing off smaller chunks to assemble, printing off interlocking layers, radial layers and even interlocking panels that resemble a jigsaw puzzle. Luban3D will work with you to find the solution to your large-scale project that meets your needs and the specifications of your machine.
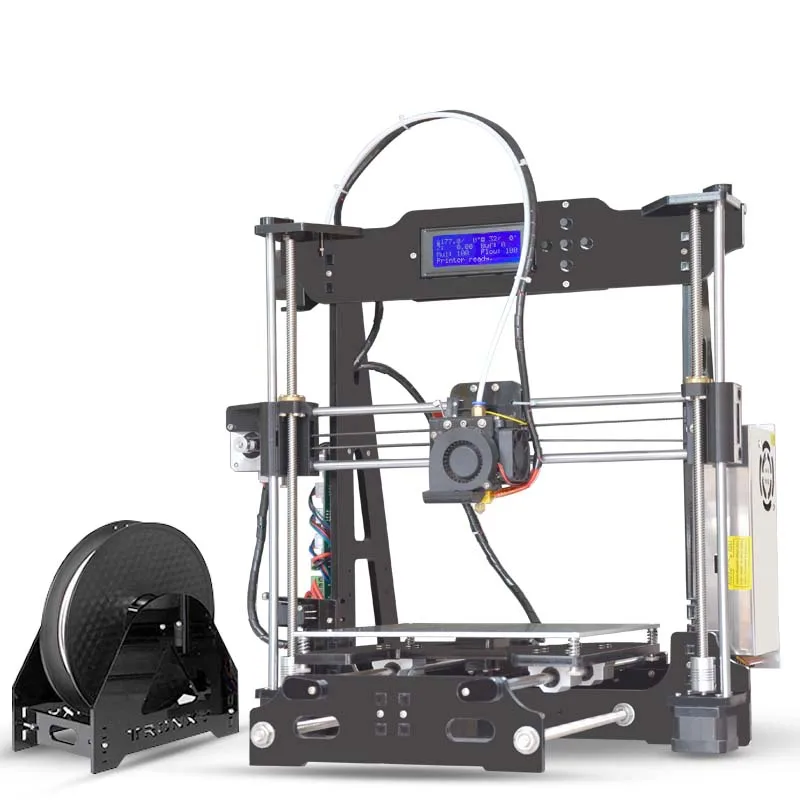
2. Buy a large a 3D printer like the Creality CR-10S Pro
Courtesy: Creality
Here we are looking at a large-scale printer available on the market for home buyers. The Creality CR-10S Pro comes from a line of reliable machines. It is available for just under $600 which, for a large-scale printer, isn’t bad. It is easy to assemble and the navigation touchscreen is intuitive, although changing the language may be necessary during the initial set-up. The calibration is not quick but it leaves a nice finish. The downside is that there is a build-up of filament dust due to how it is arranged, so regular checks to clean it and ventilation are recommended. Another problem encountered was overheating causing the fan to sag – smaller tests when using a new material are recommended to determine if this is going to be an issue. Here is where you can find the CREALITY CR-10S PRO on Amazon.
3. Hire a 3D printing service that offers large scale 3d printing
Outsourcing large-scale 3D printing is a way of benefiting from the expertise available in the industry while avoiding the high investment cost of buying your own 3D printer. We provide large-scale printing for a range of individuals whether they are looking for prototypes, final products, both or everything in between. Our printers have a build volume of 23.6” x 23.6” x 19.7”. We’ve worked on products including architectural models, art sculptures and event fabrication. This isn’t the limit of what we can work on however – bring us a file and we’ll see what we can do! When it comes to recommending services, we suggest going to Printaworld for all of your large-scale 3D printing needs. That’s us! We can complete your project within 1 -2 weeks or 1 – 2 months depending on what you want and how large the objects you are wanting printed. Let us know if there is a deadline! Here at Printaworld, we can save you time, money and energy.
When it comes to 3D printing large-scale, there are a variety of options available to suit every budget, space and need. If you have a smaller-scale machine but still want to make something larger at home, software that disassembles your project into smaller, more manageable pieces is the way to go. If you have the budget at your disposal, purchasing a large-scale machine is efficient and effective. If you want to save money, you can always outsource and hire a 3D printing service. Whatever the route you want to go, we can offer and suggest a solution.
Visit Our Social Media Pages
About the author
Editorial Team
How to 3D Print Models Larger than Your 3D Printer’s Build Volume
Don’t own a large format 3D printer yet? When determining what’s possible with a compact desktop 3D printer, think beyond the build volume. Just as assemblies such as your smartphone or even a road bridge consist of many individual building blocks, splitting a model into smaller parts that can be combined after printing is a great solution for 3D printing large objects that don’t fit on a build platform.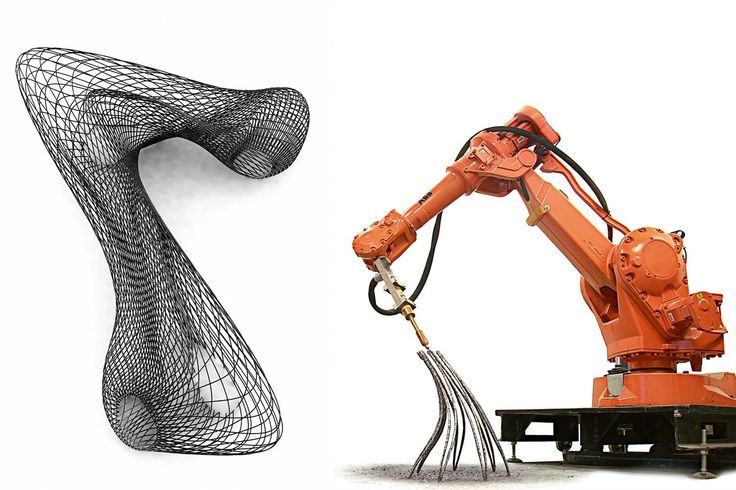
Splitting a part can also be the best way to get a high-quality result, even if the whole part could fit into a single build. This is the case when multiple or opposing surfaces need to be free of support marks, a design has complex overhangs, or a model contains cavities that would trap the liquid resin inside.
3D printing multiple pieces also opens up new opportunities, such as creating multi-material assemblies or combining rigid and flexible 3D printed parts to simulate overmolding.
When selecting a bonding method, your primary consideration should be the strength of the bonded joints, which is dependent on the ultimate use case of the parts:
-
Chemical fastening: Use a bonding agent for art, scale models, and complex shapes that are not meant for functional use and to sustain impact.
-
Mechanical fastening: Add screw thread or pockets to functional engineering parts that require a robust mechanical connection or if you need to repeatedly attach and detach components.
This guide will focus on creating large multi-piece stereolithography (SLA) 3D printed models using chemical fastening. Read on for a step-by-step walk through the process, from splitting your model to post-processing for a professional finish.
Formlabs’ Form 3L is the first affordable and easy-to-use large format 3D printer optimized for the reliable production of industrial-quality parts. The Form 3L SLA 3D printer offers a massive 30 cm x 33.5 cm x 20 cm build volume at an unprecedented value.
See the Form 3L
There are two methods we recommend for splitting models: Add features to your design that will allow the prints to align themselves, or simply split the parts with straight cuts, requiring you to align them during the fastening process.
Regardless of which method you choose, if you have a large number of parts it’s also a good idea to add a unique identifier (letters, numbers) to each part to help you solve the puzzle during assembly.
Use the CAD tool of your preference to split your 3D model and add basic aligners like slots, pins, grooves, recesses, and lips or more complex aligners like dovetails and cuts that follow existing creases in the model.
Adding aligners to a design can help when it comes to assembling parts.
In a perfect world these aligners make it simple to align and assemble your parts, but can lead to issues when they turn out even slightly different from your 3D models and don’t line up perfectly. Consequently, only use aligners if your printer can print dimensionally accurate parts that are unlikely to warp.
Splitting your 3D model along straight lines is less design-intensive than adding aligners. Straight cuts are also more forgiving when prints turn out slightly warped or have generally a higher degree of dimensional variation.
Adding identifiers to each part helps you solve the puzzle during assembly.
On the downside, straight cuts can be time intensive when it comes to assembly, as you have to manually align each part and make sure they remain in the correct position until the adhesive fully bonds them.
By default, the stereolithography (SLA) 3D printing process creates fully dense parts. Depending on your design, this might not be a requirement when 3D printing large objects. In such cases, 3D printing the outer shell or hollowing out your design are great ways to save a considerable amount of material and time. When printing hollow models with an SLA 3D printer, be sure to add venting holes to avoid creating pressure volumes with air and resin.
Sample part
See and feel Formlabs quality firsthand. We’ll ship a free sample part to your office.
Request a Free Sample Part
Hollowing out your model can save substantial time and material, as the printer will only need to print the outer shell.
Find out more on how to save material and time by hollowing out your 3D models.
We recommend three methods for bonding parts, depending on their size and ultimate use case:
| Epoxy (5-30 minute) | Cyanoacrylate (CA, Super Glue) | Resin | |
|---|---|---|---|
| Area to bond | Large | Small/Medium | Small |
| Paintable | Yes | Yes | Yes |
| Impact strength | Medium | Low | Low |
For the largest parts and the strongest adhesion, use 5-30 minute epoxy. It has the longest work time, which helps when adjusting the position of larger 3D printed parts, but also leads to an overall slower assembly process. Most 5-minute epoxies won't change shape after about five minutes and reach approximately 75 percent cure strength in less than an hour.
For the largest parts and the strongest adhesion we recommend epoxy.
The next option is cyanoacrylate (CA, or Super Glue), which creates a quick, reasonably strong bond making ideal for small- and medium-sized parts. Clean the part thoroughly before applying it to the surface, as CA does not bond dirty surfaces well. CA has moderate impact strength, but is not recommended for high-impact applications.
For smaller prints you can also simply use the liquid resin from your SLA 3D printer. Pour a small amount of resin into a tray from the bottle or cartridge, use a dropper or syringe to pick it up, and place it onto the surface to bond. Join the parts and wipe off any excess resin that might spill out around the edges.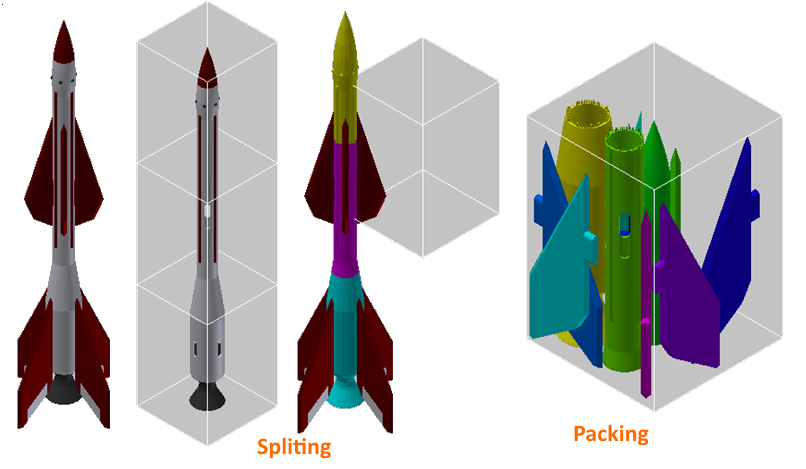 To solidify the resin and bond the parts, use a 5mw UV laser light pen (405nm wavelength) and direct it to the bonding area around the parts.
This method will create a chemical bond, just as if the part was printed on your SLA 3D printer, but is only applicable to small bonding surfaces as the low power light pen cannot penetrate the model deep enough to create a strong bond.
Note: When dealing with resins, make sure to wear protective equipment including appropriate eye protection and gloves.
Webinar
Formlabs 3D Model Manager Evan Fisher walks the viewers through CAD and PreForm tips for larger parts and introduces Form Wash L and Form Cure L for post-processing.
Watch the Webinar Now
Now that you’re finished assembling your model, the final step is post-processing. This step consists of geometric correction of the part to ensure it has an even surface true to your original 3D model and aesthetic finish to get a consistent painted surface.
Depending on the accuracy of your printer and the size of the printed parts, it’s almost inevitable to have slight voids or incorrections where the parts meet. Automotive putty (such as Bondo 907) sticks to the resin well and should be applied to the surface in thin layers to patch these inaccuracies. Alternatively, use resin to fill the seams and cure it using a UV pen. Sand lightly after each layer dries to help bring the part towards its final form.
Patching parts with automotive putty (red area on the image) will help you mend slight voids or incorrections in between parts.
Sanding will help you remove support marks and any remaining inaccuracies from your model. Start with carefully dry sanding the surface using ~150 grit sandpaper to remove large support marks and level the edges where parts meet. Once the part’s surface is even, wet sand it with ~320 grit sandpaper to remove all remaining layer lines. Move the sandpaper in a random motion to avoid creating a grain. In most cases these two steps will create a smooth enough finish, but you might continue increasing the sandpaper grit count by a factor of ~2 and wet sand the entire part until the surface reaches the desired smoothness.
Power sanding works best on large flat surfaces, but can easily destroy small features. For smaller parts we recommend manual sanding, for larger ones a combination of manual and power sanding.
For larger parts, a combination of power and manual sanding can save you considerable time. Power sanding works best on large flat surfaces, but can easily destroy small features, sharp corners, and the subtle contours characteristic of SLA printing. Power sanding also creates a lot of dust, so make sure to prepare the surrounding area.
Note: Power tools require your full attention and wearing protective equipment. It is very easy to leave the sander stationary and quickly wear down that area without realizing it.
Once you’re finished sanding your model, rinse it in soapy water to remove any dust or debris and dry it thoroughly before moving onto the last step.
Priming ensures paint adhesion to the surface and can alert you to where you may need to sand more or trim support marks you may have missed. Generic plastic primer in matte grey shows details exceptionally well—apply it to the surface in several thin coats for the best results. Continue sanding on critical areas, apply a light coat of primer again, and repeat this process until the full part has an even surface.
Note: When priming and painting, wear protective equipment including a respirator designed for paint fumes.
Generic grey primer shows details exceptionally well and will help you uncover spots where additional sanding is required.
Find out more about sanding and priming from our extended guide.
For a finish with multiple colors, you’ll need to mask your model. First, plan the order in which you will paint your model depending on the color, opacity, and size of the area that will have the specific color. Start with the smaller parts so you’ll need to cover less when painting the bulk of the area with the main color. Use painter’s tape for covering the edges and corners, and sheets of paper to cover larger sections faster. Tape guides (lasercut) can also be helpful to create clean lines, circles, and complex shapes.
When it comes to masking, figuring out the correct order is your first priority. In our case, the parts were first painted silver and the sections that would remain silver on the final part were then covered with painter’s tape to hide them from the next l
Just as with priming, apply several thin coats rather than one heavy coat for the best results. Most spray paints work best in warm, slightly humid, and not windy conditions, but always check the specific paint can or technical documentation for the manufacturer’s recommendations.
Consider the time the paint takes to dry: Let layers sit before applying the same color and allow the paint to dry fully before applying a new color.
The area we covered with painter’s tape remained the original silver color after its removal.
Learn the ins and out of painting 3D printed parts in our extensive guide
Wondering how it looks when all these pieces come together?
“Excuse me sir, but that R2-D2 is in prime condition, a real bargain.”
Formlabs Optical Systems Engineer Adrian Tanner 3D printed this R2-D2 replica consisting of 105 3D printed pieces on a Formlabs SLA printer. It even has working electronics inside, borrowed from the Form 2 — the galvo drivers to make the sounds, the cartridge dispenser for lights, and the Z axis driver for the dome motor.
White Paper
In this free report, we look at how in-house large-format 3D printing with the Form 3L stacks up against other methods of production, chiefly outsourcing and using FDM printers. We also compare costs between methods, and review when it would be best to bring the Form 3L in-house.
Download Now
The Form 3L large format 3D printer offers a 30 cm x 33.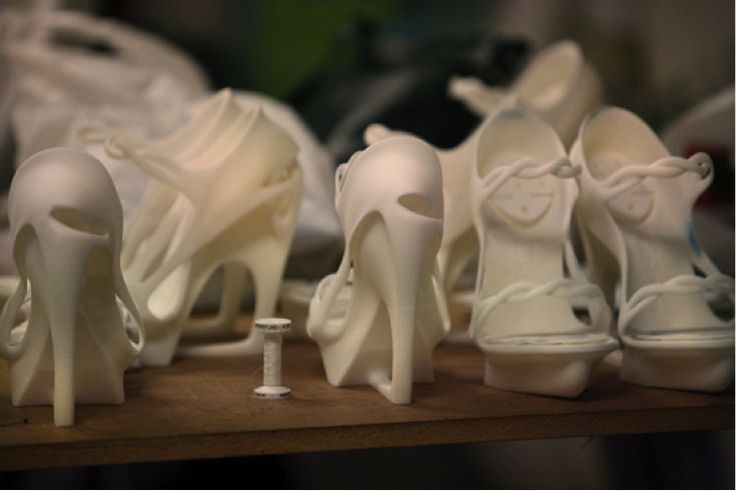 5 cm x 20 cm build volume for 3D printing massive industrial-quality parts.
Eliminate the turnaround time of outsourcing or the manual work of assembly for large scale 3D prints. Now you can 3D print large objects in one piece with the Form 3L, the first affordable large format 3D printer using SLA technology.
Curious to see how SLA parts perform? Explore our materials to learn more about SLA resins, and request a free sample part to experience SLA quality firsthand.
Request a Free Sample Part
How to create models that are larger than the print volume of a 3D printer
Don't have a large format 3D printer yet? When evaluating the capabilities of a compact desktop 3D printer, do not limit yourself to print volume. Many objects, like your smartphone or a bridge over a river, are made up of many individual components. Therefore, splitting the model into smaller parts that can be aligned after printing is a great solution for 3D printing large objects that do not fit on the platform. nine0003
Also, splitting the model can be a great way to get a high quality result, even if the whole model fits on the platform. This makes sense when multiple or opposing surfaces must be free from support structures, when the model has complex ledges, or contains cavities where liquid polymer can remain.
3D printing of various parts opens up new possibilities, for example, the creation of prefabricated structures from various materials or the combination of rigid and flexible parts to simulate the overmolding method. nine0003
When choosing a gluing method, it is necessary first of all to take into account the required degree of strength of the glued joints, which depends on the purpose of the models:
-
chemical: use adhesive on artwork, scale models, and complex shapes that are not intended for functional use and should not be impacted;
-
Mechanical: Provide threaded holes or sockets for attaching parts that require a secure mechanical connection, or repeatedly detaching and attaching components as needed.
 nine0003
This tutorial focuses on building large, prefabricated 3D stereolithographic (SLA) printed models with chemically bonded components. Read on to learn all the steps in this process, from model separation to post-processing for a professional finish.
Formlabs Form 3L is the first affordable, easy-to-use large format 3D printer optimized for reliable production of industrial-quality models. The Form 3L stereolithographic 3D printer features a huge print volume of 30 x 33.5 x 20 cm and unrivaled cost-effectiveness. nine0003
Meet the Form 3L
We recommend two ways to separate models: adding features to the design that will allow the parts to fit together, or separating the model with straight lines, which will require them to fit together properly during the bonding process.
Regardless of which method you choose, if you have a lot of parts, it's helpful to add a unique identifier (letters/numbers) for each one to make assembly easier.
nine0035
Use CAD software to split a 3D model and add basic centering components such as slots, pins, slots, notches, and tabs, or more complex features such as dovetails and slots to match model folds.
Adding centering components to the design makes it easier to assemble parts.
Ideally, these components should make it easier to align and assemble parts, but can cause problems if they differ even slightly from your 3D models, preventing perfect centering. Therefore, it is best to use centering components only when the printer can print parts with accurate dimensions that are not subject to deformation. nine0003
Splitting a 3D model along straight lines requires less effort than adding components to center it. With this separation method, there are also fewer problems if the parts are slightly deformed or differ in size.
Adding IDs for each part makes the assembly process easier.
On the other hand, parts separated by straight lines can be time consuming to assemble, as each part must be manually centered and ensured that they all remain in the correct position until the adhesive is completely dry. nine0003
By default, when printing on a stereolithographic 3D printer, solid models without voids are obtained. Depending on the design, different requirements may apply to the manufacture of large items. In such cases, 3D printing the outer shell or converting the structure into a hollow is a great way to save a lot of material and time. When printing hollow models on a stereolithographic 3D printer, be sure to add ventilation holes to avoid creating cavities filled with air and pressurized resin. nine0003
SAMPLE PART
Experience Formlabs print quality first hand. We will send a free sample of the printed model directly to your office.
Request a free print sample
Converting a model design to a hollow saves a lot of time and material because the printer only needs to print the outer shell.
Learn more about how to save materials and time by hollowing out 3D models.
Depending on the size of the details and the purpose of the model, we recommend three mounting methods:
| Epoxy glue (5-30 min) | cyanoacrylate (CCA, Supercollah) | Resin | ||||
|---|---|---|---|---|---|---|
Square. | Large | Small/Medium | Small | |||
| Paintable | Yes | Yes | Yes | 9006 70072Medium | Low | Low |
For large parts and maximum adhesion, use 5-30 minute dry epoxy. It takes longer to dry than other adhesives, allowing you to fit large 3D printed parts but slows down the assembly process. Most 5-minute epoxy adhesives stop changing shape in as little as five minutes and cure by about 75% in less than an hour.
For large parts and maximum adhesion we recommend using epoxy adhesive. nine0003
The next option is cyanoacrylate (CA or superglue), which quickly forms a strong bond, ideal for small to medium sized parts. Thoroughly clean the part before applying CA to the surface, because contaminants adversely affect the quality of the connection. CA has a moderate impact strength, but is not recommended for models that require high strength.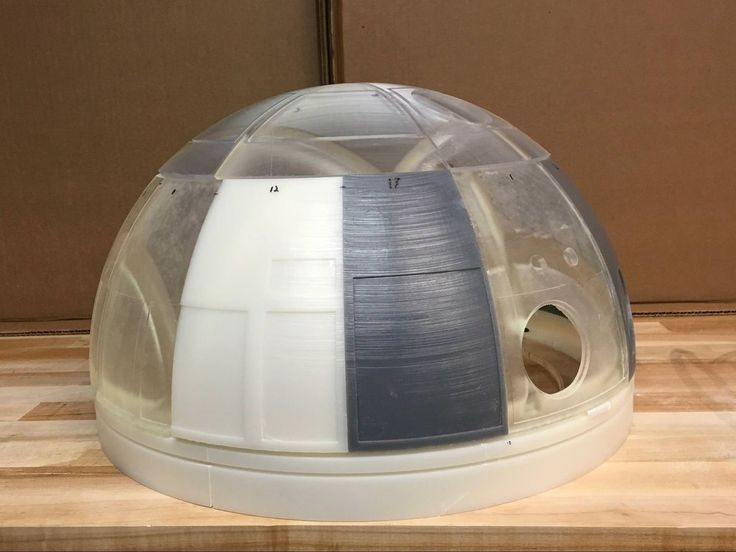
For small models, you can simply use liquid resin from a stereolithographic 3D printer. Pour a small amount of resin into a tray from a bottle or cartridge, pick it up with a pipette or syringe, and place it on the surface to be bonded. Connect the parts and wipe off excess resin that may spill around the edges. Aim a 5mW (405µm wavelength) UV laser pointer at the contact area to cure the resin and bond the parts. nine0003
This method produces a chemical bond similar to 3D stereolithography printing, but is only suitable for bonding small surfaces as a low power light pointer cannot penetrate the model deep enough to create a strong bond.
Note. Protective equipment must be worn when working with polymers, including proper eye protection and gloves.
Download PDF
Don't have time to read the article now? Download it in PDF format.
Download as PDF
After assembling the model, it's time to move on to post-processing. This step includes geometric correction of the model to provide a smooth surface that matches the original 3D model, and aesthetic finishing to obtain a uniformly colored surface.
Depending on the precision of the printer and the size of the printed parts, there will almost always be slight voids or mismatches at the contact points. Automotive sealant (e.g. Bondo 907) adheres well to polymers, therefore, to eliminate such inconsistencies, it is recommended to apply it in a thin layer on the surface. Lightly sand the surface after each coat has dried to bring the model to its final shape.
Sealing models with automotive sealant (red area in image) will help eliminate small gaps and inconsistencies between parts.
Sanding helps remove traces of support structures and remaining inconsistencies in the model. Gently start sanding the surface with 150-grit sandpaper to remove traces of support structures and smooth edges where parts meet. Once the surface is smooth, sand it wet using 320 grit sandpaper to remove any remaining layer lines. Sand the surface in random motions so as not to leave marks. In most cases, these two methods will produce a fairly smooth surface, but you can continue to increase the grit of the sandpaper up to 2 times and, after wetting it, sand the entire model until the surface is reasonably smooth. nine0003
Power sanding is great for large flat surfaces, but can ruin fine details. Grinding of small models is recommended to be done by hand, and for large ones, a combination of manual and mechanical grinding is recommended.
Machining large parts with mechanical and manual grinding saves a lot of time. Power sanding is great for large, flat surfaces, but can ruin the fine details, sharp corners, and subtle contours that are typical of stereolithography. As a result of mechanical grinding, a lot of dust is also generated, so before starting processing, it is necessary to prepare the working area. nine0003
Note. The use of power tools requires full attention and the use of protective equipment.
The surface can be damaged very quickly without even realizing it, just by leaving the sander without moving.
When finished sanding the model, rinse it in soapy water to remove dust and debris and dry thoroughly before proceeding to the last step.
The primer helps the paint adhere to the surface and can indicate areas where additional sanding is needed or removal of traces of supports that you may have missed. The Universal Matte Gray Plastic Primer shows these spots exceptionally well. For best results, apply it to the surface in several thin coats. Sand critical areas and reapply a thin coat of primer. Repeat this process until the entire surface of the model is level. nine0003
Note. Use protective equipment during priming and painting, including a respirator to protect against paint fumes.
All-purpose matt gray primer for plastics is exceptionally good at showing fine details and helping to identify areas that need to be sanded down.
Find out more about sanding and priming in our detailed guide.
When painting with multiple colors, protect the model with a temporary coat. First, plan the order in which you will paint the model, depending on the color, transparency, and size of the area of a particular color. Start with small details so that fewer of them can be protected when painting with the main color. Apply painter's tape to the edges and corners. To quickly cover large areas, attach sheets of paper to them. Ribbon guides (laser cut) can also be useful for creating straight lines, circles and complex shapes. nine0003
When it comes to masking, figuring out the correct order is your first priority. In our case, the parts were first painted silver and the sections that would remain silver on the final part were then covered with painter's tape to hide them from the next l
painting. In our case, we first painted the parts silver and put masking tape on the areas that should remain silver in the finished model so that they do not get paint of a different color. nine0003
As with primer, several thin coats of paint should be applied for optimal results rather than one thick coat. Most spray paints will achieve the best color in warm and slightly damp conditions in the absence of wind. In this case, you must always follow the manufacturer's recommendations, which can be given on the paint container or in the technical documentation.
Consider the time the paint needs to dry: Allow layers to settle before applying the same color and allow the paint to dry completely before applying a new color. nine0003
The area where we applied masking tape is still silver.
Become an expert in painting 3D models with our detailed guide
Already wondering what your finished model will look like?
"Sorry sir, that R2-D2 over there is in excellent condition and inexpensive."
Formlabs optics designer Adrien Tanner created this R2-D2 model from 105 parts printed on a Formlabs stereolithographic 3D printer. It even has working electronics borrowed from the Form 2 printer - a galvanometer drive for sound reproduction, a cartridge dispenser for lamps, and a Z-axis drive for dome rotation. nineThe 0003
Form 3L is the first large-format 30 x 33.5 x 20 cm 3D printer for producing massive, industrial-quality models.
Reduce order processing time when outsourcing or manual work when assembling large-scale 3D models. Now you can print large 3D models in their entirety on the Form 3L, the first affordable large format SLA printer.
Want to see how stereolithographic parts work? Explore our resources to learn more about stereolithographic resins, or request a free sample to evaluate print quality for yourself. nine0003
Request a free print sample
Custom 3D Printing | 3D Printing of Large Plastic Products from Tsar3D
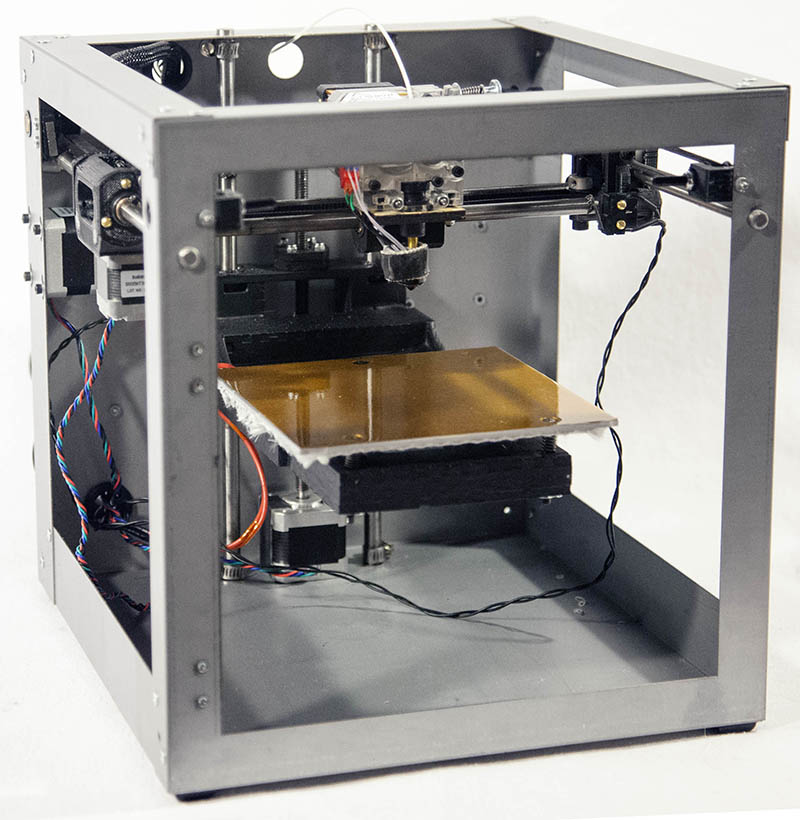
How printing is done on an FDM 3D printer
A simplified 3D printing scheme using FDM technology (FFF)
The essence of 3D printing technology FDM is as follows: A plastic thread is pushed into the extruder nozzle, moving according to the program in the horizontal plane. After the start of the 3D printing process, the plastic is melted in the nozzle and applied in layers, forming the product according to the 3D model loaded into the printer. If it is necessary to form overhanging geometry elements, then the printer uses a second extruder to extrude supporting structures from the second type of plastic for 3D printers. This support plastic breaks off or dissolves after printing is complete. nine0003
Why order 3D printing from us
Extensive industry experience
We are experts in FDM 3D printing for commercial enterprises
We own a fleet of 3D printers
We process orders in-house, so the cost of the service is minimal
Economic efficiency
We provide the best price / quality ratio depending on the requirements for the product
Material and maximum dimensions of parts
Our main work is 3D printing of large items made of PLA plastic. It is a durable plastic that can be sanded and painted. The softening temperature is about 50 degrees Celsius, melting - 175 degrees Celsius. Density - 1.25 g/cm3 cu. .3 MPa
Printing from ABS, PETG, SBS, carbon-filled, metal-filled and other plastics and composites is also possible.
The maximum dimensions of the printed part are 1.2 meters x 0.6 meters in the horizontal plane and 0.9meters in height.
Also available with PETG. SBS is used as plastic for supports.
Benefits of printing with our 3D printers
Our industrial 3D printers are equipped with professional high performance extruders. As a result of their application, the best interlayer adhesion is obtained, the product is obtained with monolithic walls. In addition, the speed of 3D printing is generally faster - up to 10 times compared to printing on desktop 3D printers. nine0003
When printing large parts, the choice often arises: to print the product as a whole or from parts with subsequent gluing.
The correct solution in this case is to 3D print entirely on a large printer, because there is no need for gluing and grinding of joints - this leads to a reduction in manufacturing costs up to 70%, because gluing and grinding is done by hand and is a laborious process that requires time, equipment and consumables.
Also, in 3D printing, the main reason for the inapplicability of gluing a product from parts is too large deviations in the dimensions of the product. nine0003
Delivery
Tsar3D operates throughout Russia and the CIS. We carry out high-quality packaging of 3D printed parts, models and send orders by transport companies, so we can bring the finished product to your city.
Custom 3D printing
3D printing throughout Russia
We accept orders from customers throughout Russia and the CIS. You can always remotely order 3D printing of large and small products by contacting us via the feedback form or by phone. Let's carry out delivery to any region of the Russian Federation. nine0003
3D printing in Moscow
We carry out high-quality 3D printing in Moscow and Moscow region on favorable terms for our regular customers. Delivery to the city within 1-3 business days.
3D printing in St. Petersburg
Cheap and fast 3D printing in St.