Heatbed for 3d printer
Heat Beds in 3D Printing – Advantages and Equipment – Boots Industries
Why use a heat bed?Heat beds are used because they dramatically improve print quality by keeping the extruded plastic warm and thus preventing warping. Warping is a common condition caused by plastic on the edges of the part cooling down at an uneven rate when compared to the plastic inside of the part. The result is that corners warp up and deform your model.
Rafts are an effective ”no-heat bed” strategy to deal with warping when a heat bed is not available.In the past, techniques such as the raft (building parts on top of a ‘raft’ of material which is larger than the final part onto the build surface) were used to prevent warping by increasing the surface area of the part (and increasing it’s adhesion – thus fighting warping).
Derived from the raft, mouse ears are a clever and effective technique to make sure that the corners of your prints are well secured to the platform and won’t lift. Although they offer greater adhesion by increasing the surface area for your part to grip onto the bed, they are not 100% effective without a heat bed. Sometimes the warping forces are simply too great and can overcome the mouse ears.
Heat beds work to prevent this warping effect by keeping your part warm during the whole printing process which keeps the material at or above heat-deflection temperature (the temperature at which it is malleable). Keeping the parts in the heat-deflection range ensures that the part remains flat on the print bed. Heat beds, in combination with other tools to increase adhesion, will be covered in this article to bolster your ability to fight unwanted effects and improve your printing quality.
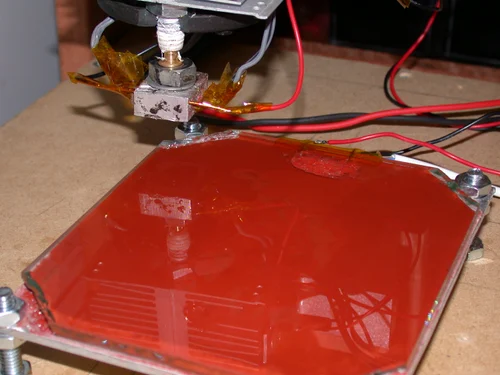
The following video shows what happens with no heat bed and no adhesive added to the glass. It depicts what can typically happen when printing on a non-sticky platform with no heat bed – Disaster!
No heat bed, print stuck to the extruder.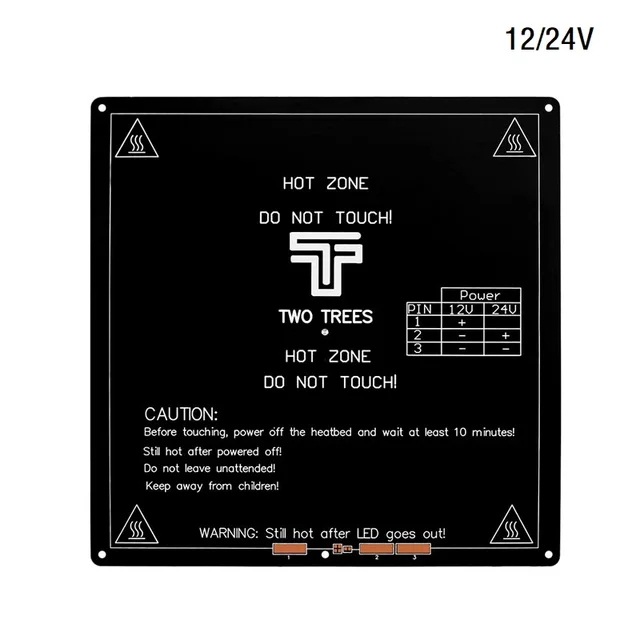 Disaster!No adhesive used; a dramatic result and wasted PLA!
There are several types of heat beds & heating elements. We specifically discuss the PCB heat bed, the polyamide film heater (kapton film heater) and the aluminium clad heater. You can find a more exhaustive list of heater types here.
Types of heat bed
Regardless of the heat bed you are using, you should generally use these temperatures (heat deflection points) for PLA and ABS:
| PLA | 50-60°C |
| ABS | 100-110°C |
The MK2A heat bed (200mm x 200mm) is a good example of a PCB heat bed. These heat beds are used by many 3D printers and our own (Rostock V1.0) due to their great performance and affordability. This particular heat bed has 2 integrated LEDs and an integrated resistor which makes it rather ‘plug and play’ when compared to other solutions.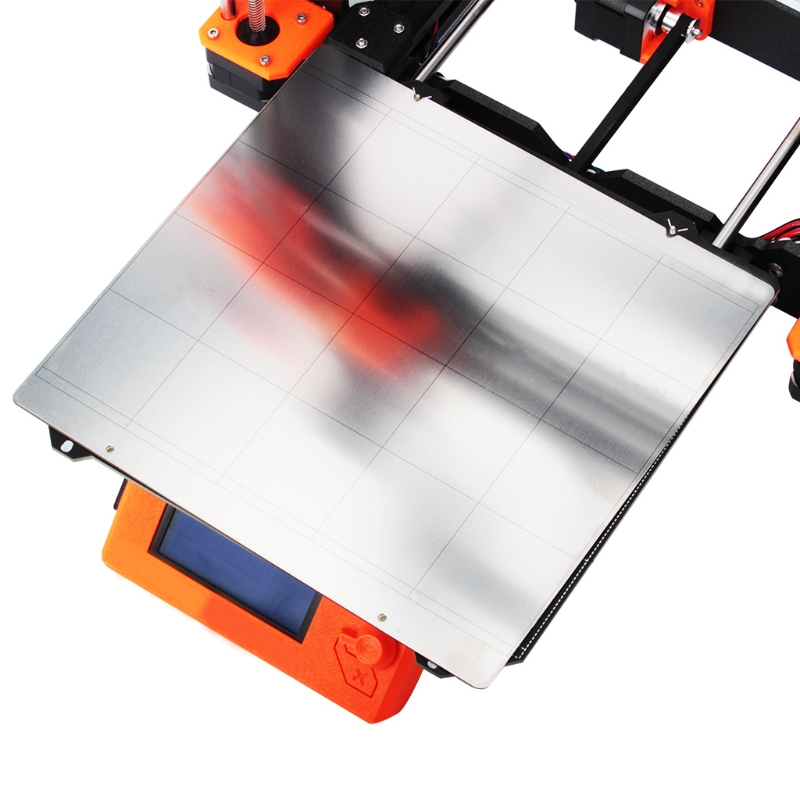
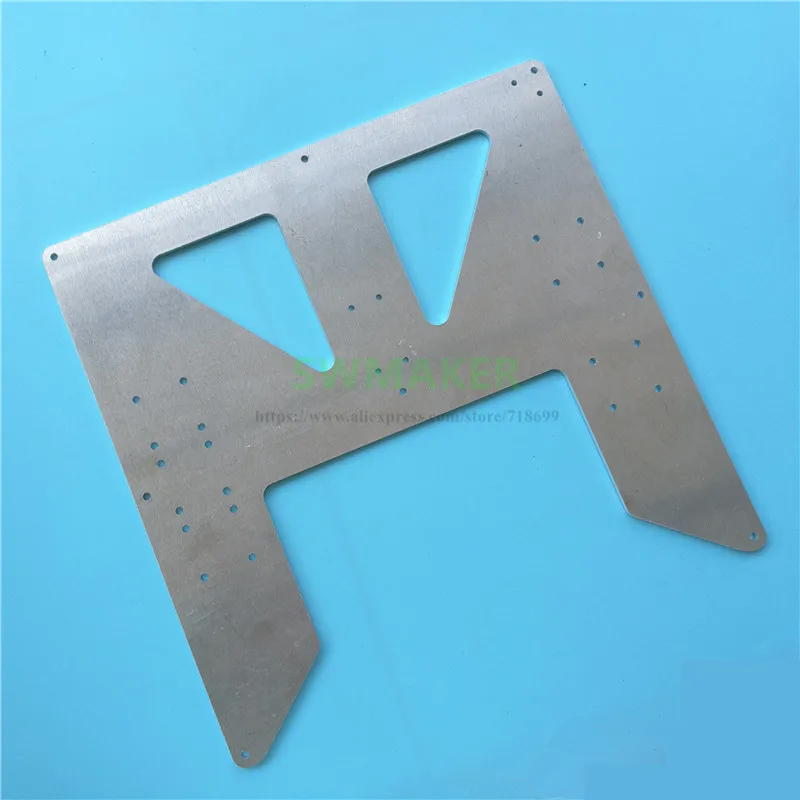
You can generally expect a simple & clean implementation with these heat beds thanks to the 5 holes available for leveling and installation purposes. They require little vertical clearance when compared to a stainless steel sheet mounted with aluminium clad resistors and offer an even heat distribution. The cons is that they can be slow to heat up especially when used with another surface such as a glass pane.
Kapton (Polyamide) film heaterKapton or polyamide is well know as a tape of choice for print surfaces, because of its heat resistance, smooth finish and high adhesion for PLA. Now think about two films of polyamide with a heating element sandwiched in between, now you have a polyamide film heater. Obviously, these are very thin, easy to install with an adhesive back, reliable and heat really fast. They have an integrated thermistor and are provided, unlike the PCB heat bed, in an unlimited variety of shapes. For these reasons, this is the type of heater foil we use on our latest 3D printer (BI V2.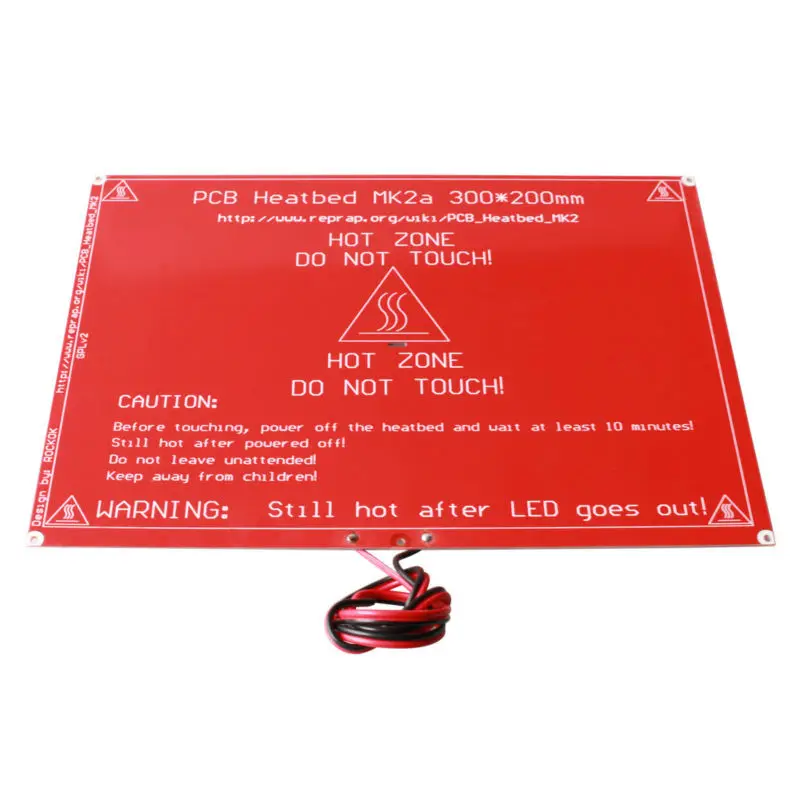 0).
0).
This type of heaters is both very efficient and inexpensive, but they require more installation steps than the last two heat source we’ve discussed. As a matter of fact, they need to be screwed onto a surface, normally a stainless steel or aluminium plate. Then, the electrical circuit needs to be completed with a thermistor and an insulator if you have any temperature sensible elements under the print bed. Finally, it’s also a good idea to use thermal paste between the clad heater and the surface to be heated.
Surface to use with heat bedsAll the heat sources mentioned in this article will typically need an added surface to preserve the quality & integrity of the heating element over time or to provide protection in the event of a hotend collision. Obviously, the aluminium clad heaters are always used in conjunction with a surface.
The recommended print surface to be used with a PCB or Polymide film heater is a borosilicate glass, or when unavailable, a tempered glass.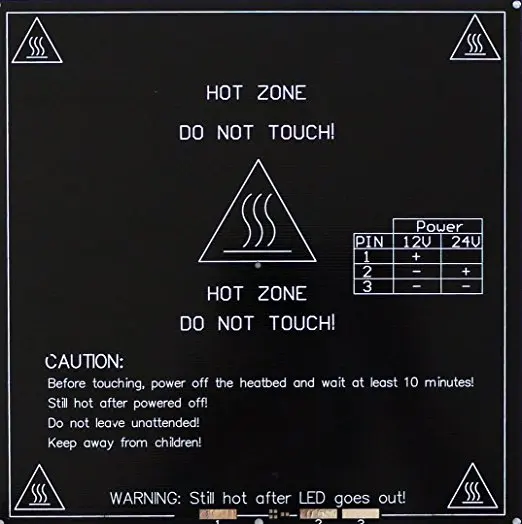 For the PCB heat bed, we recommend layering Kapton tape or using a thin glass (2 mm) over-top.
In addition to a heat bed surface, most users will experience that some form of adhesive or method is required to make PLA or ABS stick properly. This is where Kapton tape, painter’s tape, glue or hairspray comes into play.
Painter’s tape is an ideal product for printing ABS with a heat bed because of it’s textured surface increasing adhesion. We’ve used it with varying degrees of success and others report great results as well.
As far as PLA is concerned, our experience is that it doesn’t stick well to heated painter’s tape and that painter’s tape itself doesn’t stick well to the glass when heated. However, we found that PLA sticks very well to Kapton tape which is typically layered to cover the entire print area. The Kapton tape needs to be periodically replaced and this process can be tedious. To remove this obstacle, you can buy Kapton tape in wider rolls which means you need to layer a lesser amount of strips onto the print area to fully cover it.![]()
Glues are frequently used to make sure your print “sticks” to the print surface. The most common glue we have seen is the typical arts and craft glue stick (Elmers). This technique works well with ABS in conjunction with painter’s tape.
In the PLA department, we prefer to use hairspray on a glass surface. The glass surface is really flat and produces a really smooth finish for our parts. Another advantage of hairspray is that it can be applied in a few seconds and will typically create a thin film that strips away with the printed part or is easily scraped with a wood chisel or similar tool. Sometimes we use a wet rag to remove hairspray residue from the underside of parts when it’s not desired for aesthetic reasons.
What we recommendWe recommend the PCB heat bed or Polyamide film heater in conjunction with a glass surface. For PLA we always apply a thin coating of hairspray and so far this simple combination has been producing great results.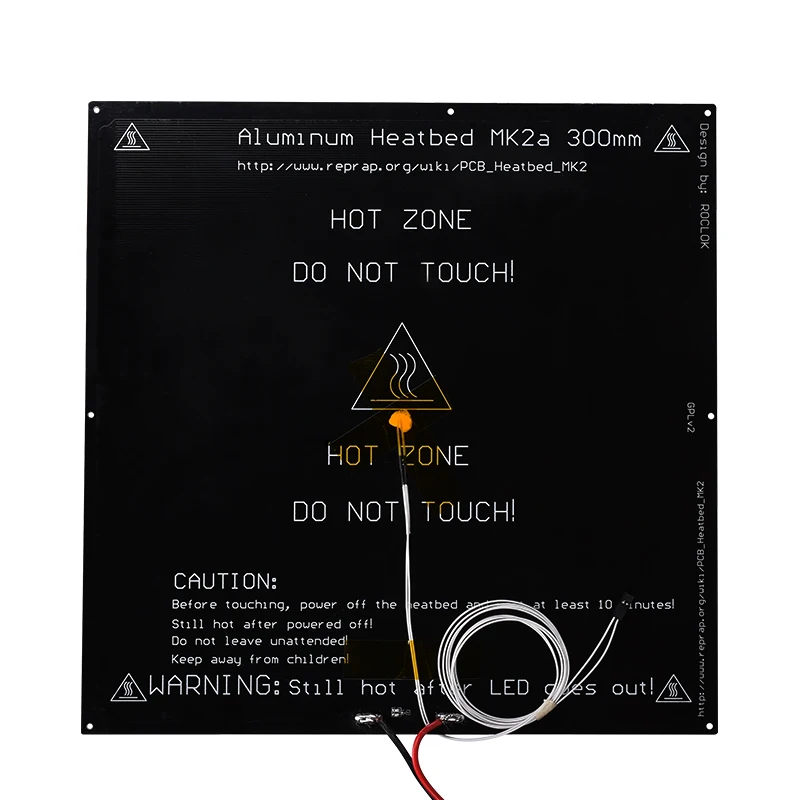
3D Printer Heated Bed - Everything About Heated Beds
ADVERTISEMENT
Table of Contents
With the advancement in 3D printing, a lot of new research and experiments have surfaced. Many of them are tailored towards finding the best way to increase the first layer adhesion.
And, we all know why it is so important. A 3D printer heated bed can handle that part pretty well. Although there are other alternatives to work with the first layer, nothing beats this one.
Most importantly, print beds are a very crucial part of the overall design of the machine. This is because, without a print bed, you won’t be able to create your models.
Hence, realizing how you can make the best use of it must be your first priority to know. Understanding the different types of heated beds and their usefulness would help you select the right device.
So, before we progress to explore everything about the heated bed, let us get an idea about what 3D printing is. Most of us already know about it, but a quick recap will only ensure that all our readers are on the same page.
ADVERTISEMENT
What is 3D Printing?
We have been hearing about additive manufacturing or 3D printing for a long time now. There are few lucky ones who even had the chance to work with this technology. But it’s never late whenever you decide to do something.
3D printing has emerged as one of the most revolutionary technologies and is propagating to impact the entire ecosystem of manufacturing units.
But what the technology really entails or means? This is a process where the 3D printers create layers of 3D models, one over the other, to create a complete item.
There are various 3D Printing processes available.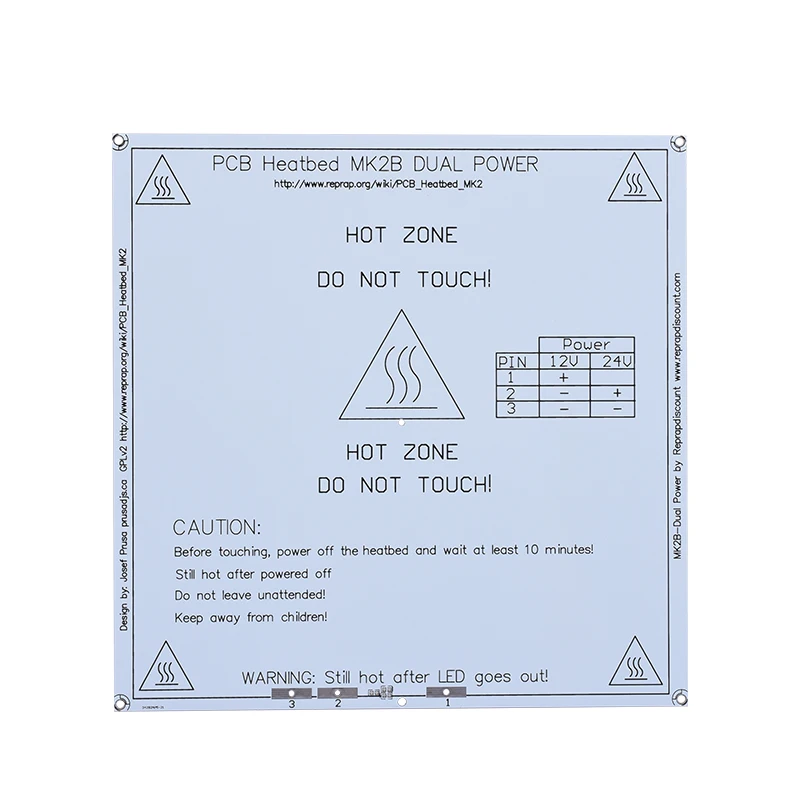 For instance, FDM, SLS, SLA, and many others. These differ in the way the layers are created and connected. However, the basics remain the same. The layers forms over each other to build the entire 3D model.
3D printing has made the creation of extremely detailed models and structures possible at much faster and affordable rates. But certain precautions need to be taken while using the printer to ensure the part being printed adheres closely to the desired specifications.
However, 3D printing comes with its own challenges. And, the biggest setback is when the layers rapidly heat and cool down.
One of the serious problems that occur because of such a process is wrapping. It changes the shape of the 3D model and deforms it. Hence, running the entire 3D printing project.
To cater to the problem, the 3D printer heated bed surfaced. These print beds are very successful in allowing the proper cooling of the layers.
At the same time, these help in controlling the temperature while the 3D Printing is in process.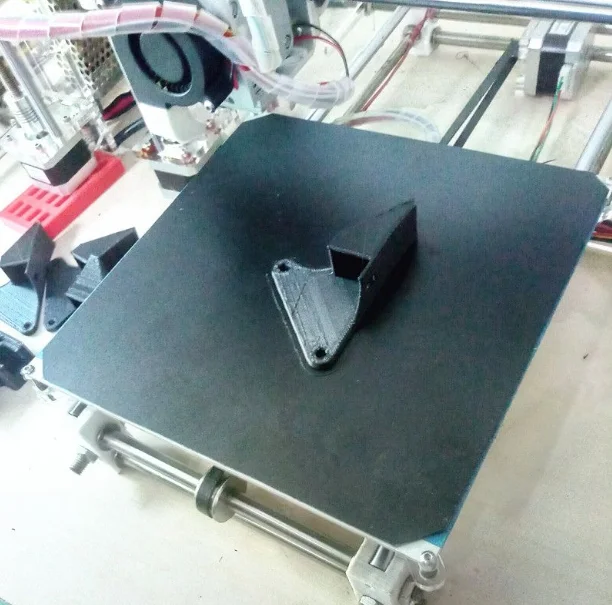 Hence, further resulting in proper bed adhesion.
ADVERTISEMENT
What is a 3D Printer Heated Bed?
Coming back to the topic in the light, we must answer the question: What is a 3D printer heated bed? While we have already discussed in brief about the way heated beds are useful, let us find out more about them.
Heated Beds Using PCBs as Heating Element
A 3D printer heated bed design can differ. Among the most common types, the heated bed makes use of circuity boards or PCBs as the heating elements.
These are available with the budget 3D printers. However, these won’t last long if your 3D printing projects are complex and require frequent jobs with 3D printers. In short, they are meant for smaller projects that do not take much longer to complete.
The reason why these are not suitable for complex 3D printing is that the PCBs are made of copper s and aluminum strips.
And, these are susceptible to deformation when subjected to heat for longer periods. Over time, the heated beds will fail to do the task for which it was chosen in the first place.
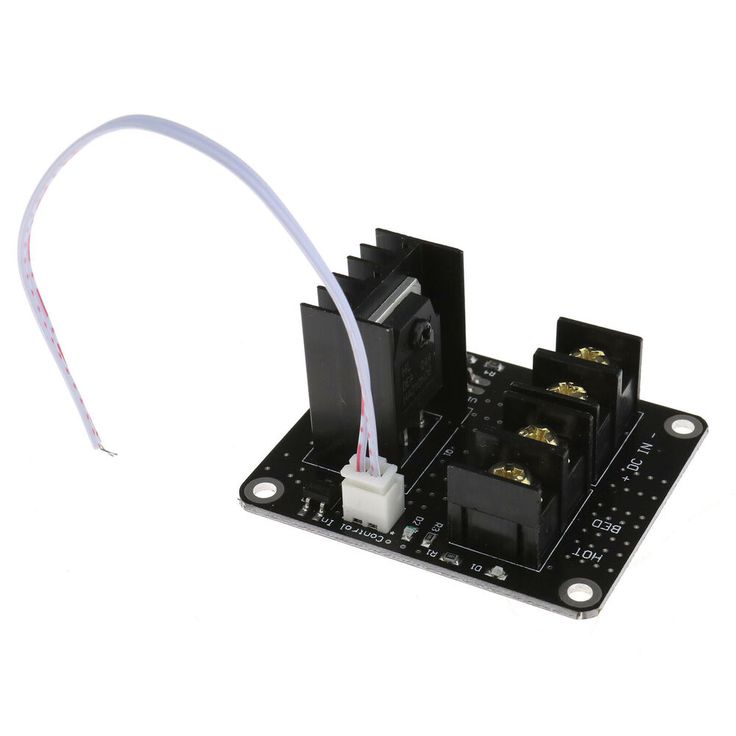
There is one more problem that won’t be acceptable to many. These take a longer time for heating up. You can actually get rid of that problem. But you may have to spare some more bucks to get the larger power supply source connecting the bed.
ADVERTISEMENT
Heated Beds Using AC Silicone Encapsulating Heated Element
One more type of heated bed is the one that uses AC silicone encapsulating heated elements. To design the arrangement, the heated element is stuffed between glass pieces and a thermal insulator.
This is to minimize the excess leakage of heat and to deliver the maximum amount of heat to the printing surface. Hence, realizing the efficient design for the creation of 3D printer heated bed.
Moreover, the electricity consumption is also less. And, they can work for longer without giving any trouble to the users.
You can 3D print without much hassle when using the heated bed with AC silicon encapsulating heated element.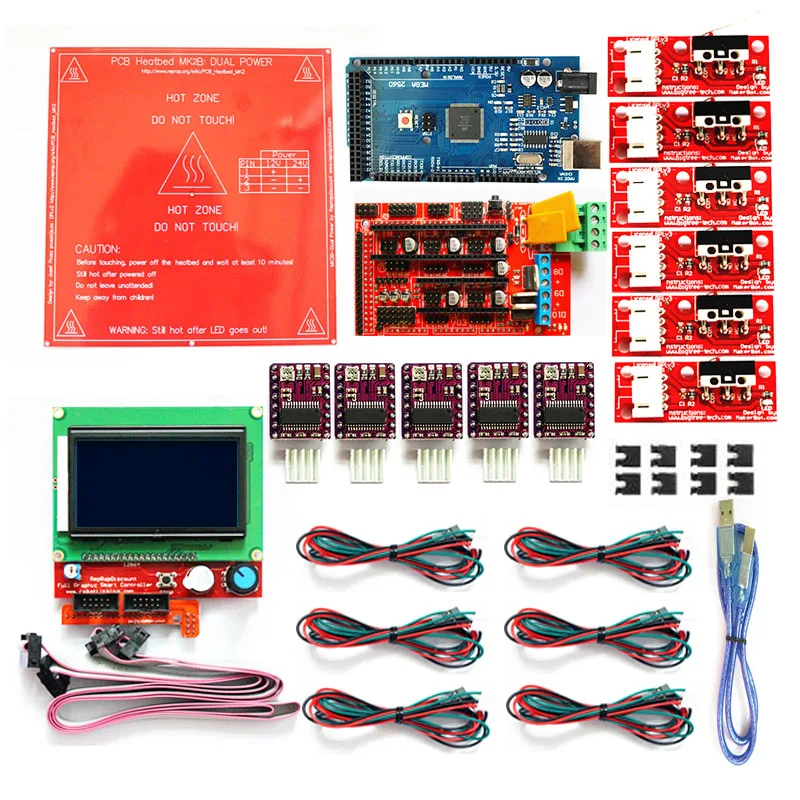 In addition, these are highly portable too. With all the right perks, it is worth spending a little more if your goal is to 3D print for long.
Working of 3D Printer Heated Bed
The 3D printer works by extruding the plastic filament over the printed bed. Right after coming out of the extruder, the filament starts cooling.
As we all know, with cooling shrinkage comes hand in hand. The problem arises when the layer does not cool consistently at all points. This leads to uneven shrinking and ultimately, warping of the entire 3D model.
To avoid plastic from cooling at different rates at varied points, heated beds were introduced. The job of the 3D printer heated bed is to make sure that the parts do not cool completely unless the printing is still in process. This allows for a more even shrinking process.
In short, the heated beds mainly take care of two things. First of all, by increasing the surface energy of the print bed, the heated bed strengthens the bonding of the top layer.
Plus, it ensures that the bottom layer stays hot enough for avoiding the warping issue in any stage of the 3D Printing process. Hence, the heated bed maximizes the efficiency and avoid excessive cooling of the layers.
When the filament is deposited on the print bed through the extruder, it carries with itself a certain degree of heat. For the best results, the heated bed temperature must be below the glass point.
This is to turn the liquid filament in solid form. The temperature sensor is responsible for maintaining the required heat of the print bed.
You may have to go through a few trial and error to understand the correct calibration of your machine based on the filament you use. This is because the melting point of filament differs widely.
ADVERTISEMENT
Few 3D Printer Heated Bed DIY Designs
We have already discussed the most basic one before. Let’s elaborate on the topic a little bit.
Apart from the PCB and AC Silicon encapsulating heating element, there are other DIY designs to replace your non-heated bed with a heated one.
Polyamide Film Heater
Polyamide which we also call Kapton is already providing huge benefit as a tape for print surfaces. These are best when used with PLA filament.
By providing efficient heat resistance, and high adhesion for printing with PLA, these are already very popular. These also help in increasing the surface finish of the 3D models.
However, you may not know that when coupled with a heating element which when sandwiched between two films of Polyamide you can come up with a Polyamide film heater.
Plus, they are simple to install as well by adding an adhesive to the back. These heat up really fast.
Moreover, these can be prepared in different shapes and sizes. And, are easily portable. Hence, a great choice for many 3D printing experts as well as beginners.
3D Printer Aluminium Clad Heater
If you are looking for the most effective as well as the inexpensive solution, this is what you must look for. However, do not forget, you may have to go through more steps for installing these heaters to your 3D Printer.
Not to forget, you must also require to screw these onto a surface. Usually, users suffice the arrangement with a stainless steel or 3D printer aluminum heated bed.
Later, you must complete the electric circuit arrangement using a thermistor and an insulator. It is the best way to go about it even if you do have any temperature sensible elements stuffed under the print bed.
Last but not the least, a thermal paste must stay between the clad heater and the build surface. This further enhances the healing process and brings more perks for the users.
ADVERTISEMENT
Do I Need A Heated Bed?
Because a lot of 3D printers do not have a heated bed, the question is: Is heated bed required? It is okay to be attentive to the details.
You may have heard that PLA does not need a heated bed to work with. Or, you may also have listened about printing ABS only with a printed bed. But what is the actual story?
You do need a heated bed when 3D printing with ABS material. But why is that so? ABS has the characteristic to contract more than other filaments.
Hence, the chances of warping become higher when printing with ABS. However, with the inclusion of a heated bed, the material finds it easy to attach to the bed surface, while reducing the chances for contraction.
Now, what about PLA. Do we require a heated bed or not? In the case of PLA, we do not always need a Heated Bed. However, if you wish to 3D print is longer, or the bottom surface is larger, it is better to use a heated bed to eliminate the chances of probable problems.
Not just that, you must also understand the optimal temperature that you must maintain when working with different materials.
For instance, when working with ABS, you must heat your print bed to 110°C. On the other hand, PLA can be settled for a lesser temperature of around 60°C.
It is very easy to set the temperature of the heated bed with the help of the 3D Slicer.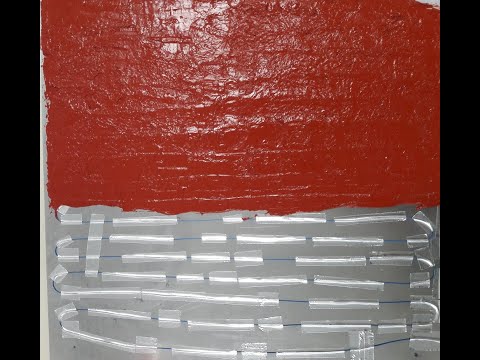 So, you can make the changes as and when required.
ADVERTISEMENT
Caution to Take When Working with Heated Beds?
Heated beds are maintained at a very high temperature. Though we cannot get rid of them because of the many benefits they add to the printing process, we must take the necessary precautions to work around them.
Users must carefully avoid injuries by staying alert and following preventive measures.
These heated beds, when it comes in contact with the skin can end up leaving scars for life. These are very hot and you must avoid any direct contact with the print surface.
If you have kids around, you must take the necessary precautions when working with the 3D printers. If possible, you can go to the closed chamber.
This would anyway help to enhance the 3D print results by letting you maintain a consistent temperature around the build surface.
You may get yourself in other problems when the heated bed is not installed properly.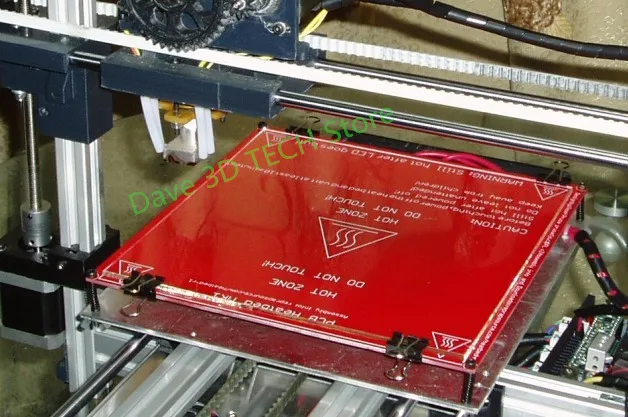 In case, the legs of the bed aren’t positioned evenly, or the bed isn’t placed on a uniform surface, it would lead to imperfection in the 3D models.
It is a good idea to purchase the 3D printer with its own heated bed that comes with the package. This is to ensure that the two combos work together in harmony.
Or else, you may find it difficult to fit the parts from different vendors together because of the difference in the temperature gradient.
The Conclusion
It is a very common mistake that we make when avoiding to look for more details about the crucial components of the 3D printer. But we must not do that.
3D printers are expensive and before buying one, we must understand what we should look for, depending on our needs.
And, even if a 3D printer heated bed seems to be something not needed at the moment, it may help you stretch your goals later.
So, understand the benefits of the same and look for 3D printers that offer a heated bed already.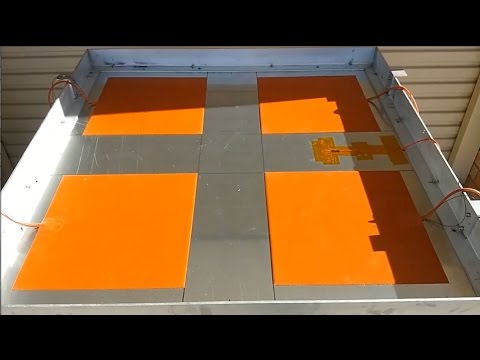
heating connection, from which to make heating from 220 volts
Depending on what plastic will be used during printing, heating of the 3D printer desktop may be required. In addition, budget devices do not always have such a function. Therefore, many make a heating table with their own hands.
Heating table for 3D printer
The heating table is a working surface consisting of several layers, one of which has a heating element. On the heating table and prints the printer. nine0003
The heater usually has a serpentine pattern.
Why is heating needed?
The use of a heated bed during 3D printing is a simple and reliable way to protect finished products from uneven cooling, which often causes deformation of the part. Even on the cheapest printer, you can get good quality models using a heated work surface.
How to make a table for a 3D printer with your own hands?
Types of heating tables:
- Textolite.
 This is the most affordable option. The textolite table consists of a textolite plate with copper tracks applied to it. Most often, they are powered by 12 or 24 V. Direct printing on a textolite sheet will not work, since it is quite flexible and deforms during heating. Glass is attached to it from above to stiffen and level the surface.
 - Aluminium. Textolite is also used in aluminum tables, but instead of glass, an aluminum sheet is laid on top. nine0020
- Silicone. Can be flexible or rigid, depending on the design. It consists of a heating element, which is filled with heat-resistant silicone.
Step-by-step instructions
The easiest way to make a table is based on silicone. To do this, you will need to prepare the following materials:
- nichrome wire with a diameter of 0.2 mm;
- sheets of cardboard;
- mounting tape;
- nails with small head;
- glass;
- heat resistant silicone sealant.
Manufacturing process:
- Several sheets of cardboard are stacked on top of each other and held together with adhesive tape.
- An ordinary checkered sheet is attached with the help of studs.
- Hats are recessed and aligned.
- Tape strips are glued on the sides (next to the caps). nine0020
- The studs are carefully pulled out so that everything stays in place.
- The paper is also carefully removed.
- Glass wiped with alcohol. After that, the resulting design is glued to the glass. First you need to glue one strip, and then the second with a stretch.
- Everything is generously lubricated with heat-resistant sealant (except adhesive tape). The layer must be at least 2 mm.
- After drying, the adhesive tape is removed and the empty spaces are also smeared with silicone.
 nine0020
- A wire is soldered to the end of the wire to connect to the network.
Mistakes and how to avoid them
It is important to correctly calculate the length and thickness of the wire. Otherwise, there will be either overheating (which will lead to a short circuit or burnout of the wire), or too little heating. For calculations, you can use special online calculators. They include the required power and voltage of the network.
Making your own heating table for a 3D printer is quite simple. All materials are available. Home-made manufacturing is especially important for those who have budget printer models. nine0003
- March 28, 2021
- 3561
Get expert advice
Types of tables for 3D printer
Contents
-
- Materials of the printing platform
- Table top
- Calibration types
- Automatic calibration
- Manual calibration
- Cartesian kinematic 3D printer table calibration
- Delta printer table calibration
- Total
The correct calibration of the 3D printer bed, or as it is also called Hot Bed, is very important.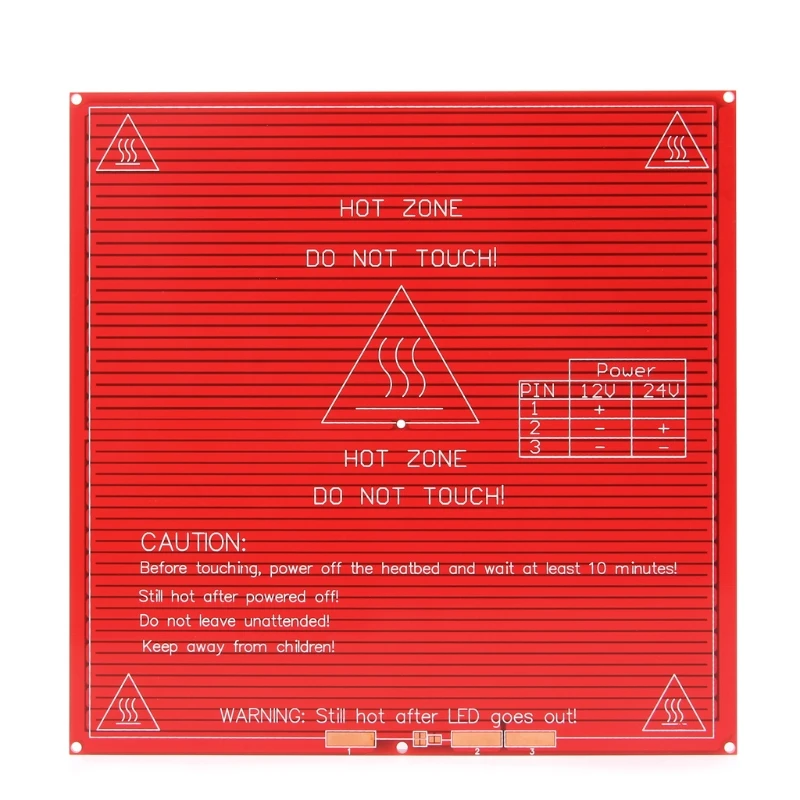 The first layer is like a foundation for a house, if the foundation is fragile, then the house will not stand for a long time.
If the plane of the printed surface is uneven, then the model may be partially peeled off or deformed. The first layer may not stick to the printing platform at all, and the result of many hours of printing will not be a neat 3D model, but plastic noodles. nine0003
Print failure example
Therefore, it is very important to properly calibrate the table. Printing platforms can be conditionally divided into two types - adjustable and not.
The adjustable table is attached to the printer with spring-loaded screws. It is not rigidly fixed in height and with the help of screws it is possible to calibrate the plane and the gap between the 3D printer table and the nozzle.
Adjusting screw
Unregulated is a printing platform that is rigidly fixed to the printer body.
This solution is used in delta printers. Calibrate them only programmatically.
Non-adjustable delta printer table
Print platform materials
The material from which the table is made may vary depending on whether the table is heated or not. nine0003
Heated table
There are several types of heating elements for a 3D printer platform - aluminum, textolite, silicone and kapton. Each of them has its pros and cons.
Textolite heater - inexpensive, but fragile and can be strongly bent when heated.
Silicone heater - can not be used alone. Usually used in conjunction with a metal base. nine0003
An aluminum table is expensive, but it heats up more evenly and is less subject to thermal deformation than other platforms.
The Kapton heater is very expensive and cannot be used on its own. Usually glued to a metal base. Can be heated up to 200 degrees.
Types of heated printing surfaces
Most often, an aluminum heating table or a silicone heating pad is used in conjunction with an aluminum plate. Low price, ease of processing and high thermal conductivity make aluminum the most popular material for the manufacture of heated printing tables. nine0003
The main advantage of heating the printed surface is to increase the adhesion (adhesion) of the first layer of plastic. If the printer is with a closed case and a heated platform, a “passive thermal chamber” is created inside. Due to this, plastics with high shrinkage do not crack in layers during printing, the adhesion of layers (interlayer adhesion) increases, and internal stress is more evenly distributed during cooling.
But there are also disadvantages - when heated, the metal table expands a little, and since it has nowhere to expand, it begins to bend. For a printing platform up to 200x200 in size, deformation will not be very critical, but for larger tables this becomes a tangible problem. nine0003
Each manufacturer of 3D printers with a large printable area solves the problem of deformation of the metal table in its own way.
For example, in Raise 3D, the table is fixed along the entire plane with pins at 13 points.
Heated table fixing Raise 3D
Table without heating.
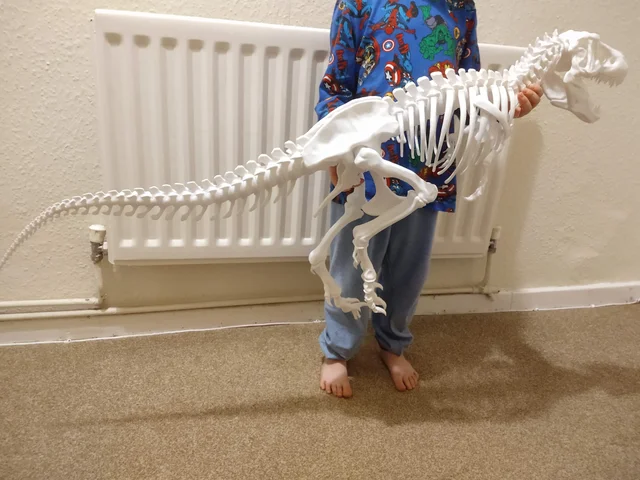
An unheated printable surface is often used in 3D printers designed to work only with PLA and other low temperature plastics. For example - printers for children or large printers with an open case. nine0003
An unheated printable surface is often used in 3D printers designed to work only with PLA and other low temperature plastics. For example - printers for children or large printers with an open case.
Children's printer with acrylic print bed
Tables without heating are made of aluminum or acrylic. If the table is aluminum, then glass or any other coating should be used on top. Aluminum is a soft metal and even a brass nozzle can scratch or damage it if not properly adjusted. nine0142
Heating table with aluminum base and mirror
Acrylic tables are often used in inexpensive 3D printers designed for kids.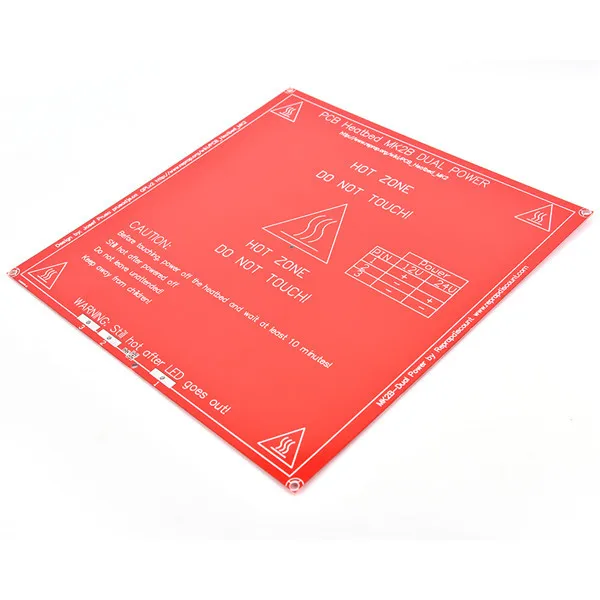 Acrylic is difficult to damage or break. You can print on an acrylic table without glass or other coating.
Free Shipping
Add to compare
Item added to compare Go nine0003
| Manufacturer | Raise3D |
Add to compare
Product added to compare Go
| Manufacturer | Raise3D |
Add to compare
Product added to compare Go
| Manufacturer | Raise3D |
Free Shipping
Add to compare
Product added to compare Go
| Manufacturer | FlashForge |
Tabletop
In order for the first layer to adhere to the table tightly, different surfaces are used that increase adhesion. It is more convenient to remove the model from the removable surface. If you need to immediately start printing another model, you can simply quickly change from one removable surface to another.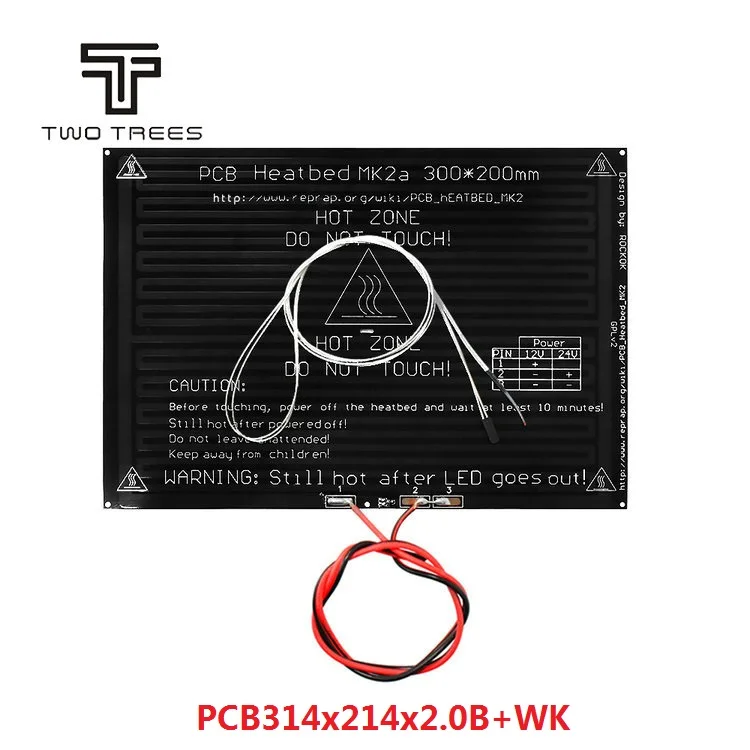 nine0003
The most popular table surface is the regular tempered glass or mirror. It is not expensive and available. It is believed that the accuracy class of the mirror is higher, but for small working areas (up to 200x200 mm), ordinary tempered glass is enough.
Glass itself does not hold the first layer well, so various adhesives or stickers are used to increase adhesion.
Ordinary glass can burst from a temperature difference or “crumble”, then the model comes off along with pieces of glass. Good thing it's easy to replace. nine0164
A piece of glass came off with model
Sitall glass - in fact, it is ordinary glass with the addition of boron oxide. This makes it stronger than ordinary glass and resistant to temperature changes. But the cost of such glass is much higher than ordinary or tempered glass.
Sitall glass
Perforated table - mainly used for printing ABS plastic.
Thanks to the perforation, the plastic adheres firmly to the print platform. In order for the bottom of the model to turn out to be even in the slicer settings, you need to enable printing on a raft (substrate). nine0003
Perforated table used in UP printers!
Stickers - There is a huge variety of stickers for printing platforms. It can be either ordinary masking tape or a specialized surface (rough with an adhesive surface).
The finished model is easier to remove from a flexible substrate than, for example, from glass. With some substrates, the model can be easily removed after the printing platform has cooled down. For some, you need to heat the table and only then tear off the model. nine0003
Separately, you can select a variety of compositions that are applied to the surface of the printing platform to increase the adhesion of the first layers. 3D varnishes, 3D adhesives, etc.
Probably every 3D maker has his own special recipe for the same composition that almost everything sticks to. It can be BF glue mixed with a solvent or alcohol, ABS diluted in acetone, kvass with sugar, glue stick, etc.
Do not spray varnish or other sprays inside the printer. Glue particles can settle on mechanisms, fans, and even get on electronics. This can lead to damage to the 3D printer. Simply remove the platen surface from the printer and apply the adhesive. nine0003
Add to compare
Product added to compare Go
Manufacturer Raise3D Add to compare
Product added to compare Go
Manufacturer FlashForge Add to Compare
Product added to compare Go
Manufacturer FlashForge Calibrations
In addition to choosing the surface of the print platform, it is important to correctly level the plane of the table and set the correct gap between the table and the nozzle.
Calibration can be automatic or manual.
Printers with large print surfaces, such as the Raise 3D Pro 2 and Pro 2 Plus, are calibrated at the factory. The user only needs to check the gap between the table and the nozzle, because it may go astray during transportation. nine0003
Automatic calibration
Automatic calibration is performed using a sensor (optical or contact), which is mounted next to the extruder. The printer checks several points on the print platform one by one and remembers the values. The first layer will be printed correct for the curvature of the table.
You can meet the calibration using a conductive substrate that is placed instead of the printed surface. This method is rare, but still has a place to be. It is commonly used to calibrate 3D printers with delta or delta robot kinematics. nine0003
Automatic calibration allows you to quickly and effortlessly level the table. It becomes especially indispensable for printers with delta or delta robot kinematics.
Optical sensors "do not see" glass, so for printers with an optical sensor, it is better to use other surfaces of the print platform.
Some printer models have a menu with hints to help you properly set the platform plane and gap. It is enough to launch the “assistant” and follow the instructions on the screen. This is not exactly automatic calibration, but with such help it becomes much easier for a beginner to correctly calibrate the table. nine0003
An example of a 3D printer with automatic calibration is Raise E2. The Raise E2 extruder has a contact sensor to determine the distance between the nozzle and the printed surface. The resulting values help to correct the print height of the first layer. You can calibrate not the entire table, but only the area on which the model will be located.
Manual calibration
Manual calibration is when the user sets the plane of the table and the gap between the table and the nozzle himself.
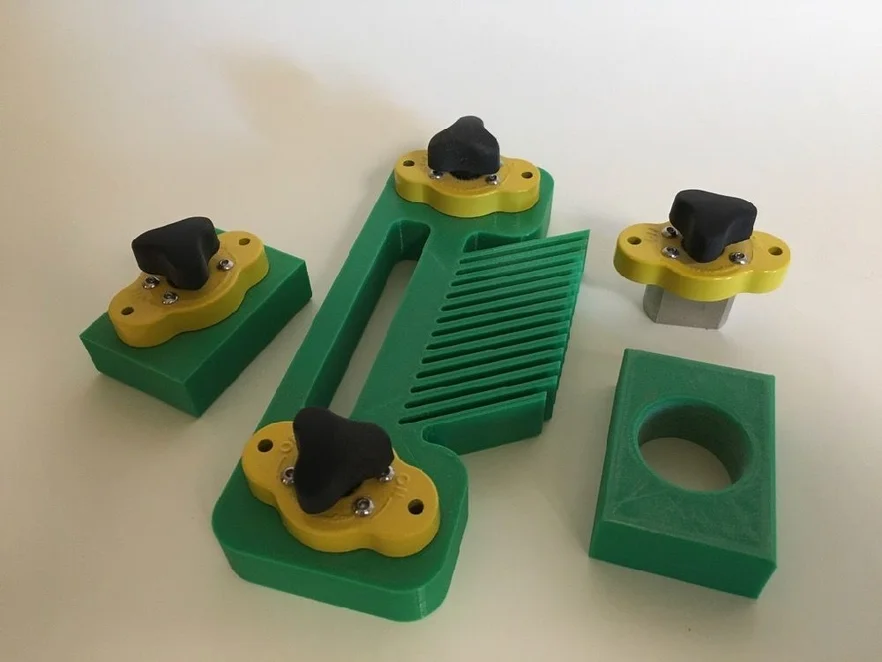
To do this, under the printing platform there are screws or winglets with which you can adjust the height of the printing platform. nine0003
Calibration screws
The standard gap between the platform and the nozzle, for most printers, should be - 0.1-0.2mm. If there is no set of probes at hand, a standard A4 sheet folded in half can replace it. Before calibration, the print surface (if it is heated) and the nozzle must be heated.
Sometimes manufacturers of 3D printers recommend a gap between the table and the nozzle - 0. Therefore, read the instructions before calibrating. nine0003
We will consider the calibration of the two most common kinematics - Cartesian and delta.
Cartesian kinematics is based on the Cartesian coordinate system and the movement of the 3D printer's head along the x, y, z axes.
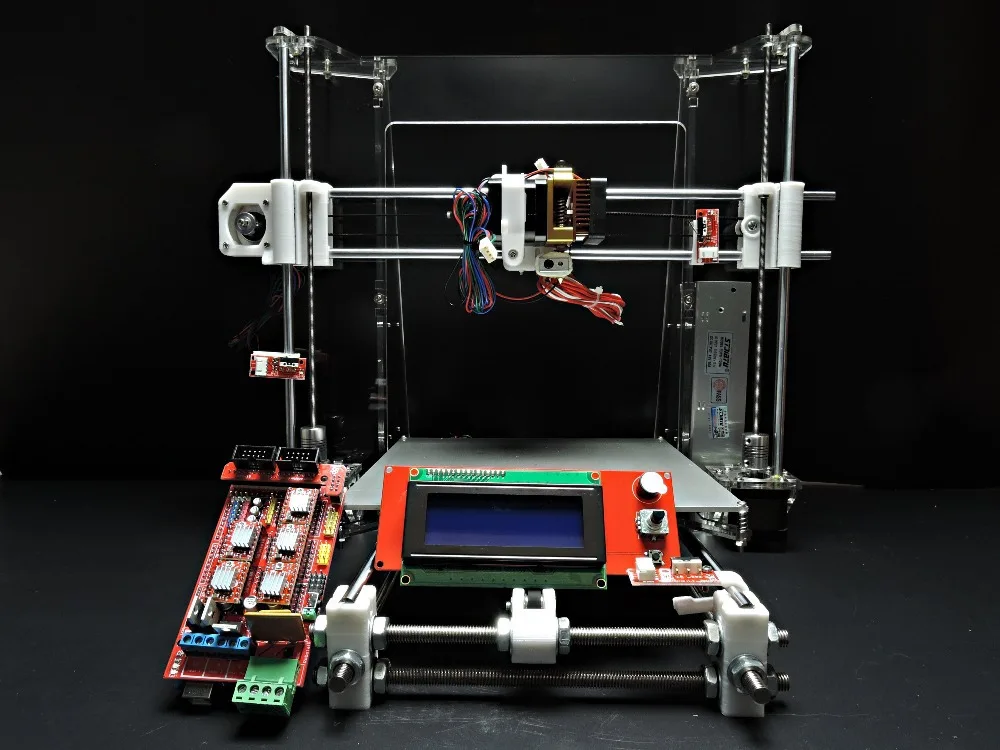
Cartesian kinematic printer example
In deltas, the extruder moves along 3 identical axes using carriages moving along vertical guides.
The delta printer can be called a simplified delta robot, but these are still two different kinematics. nine0003
Example of a printer with delta kinematics
3D printer table calibration with Cartesian kinematics
Different manufacturers may have slightly different calibration instructions. We will consider here the calibration of the printer with standard kinematics.
Heat up the table and nozzle. When heated, the metal expands slightly, so the gap between the printing platform and the nozzle may differ between the “hot” and “cold” ones. nine0003
Through the printer menu, send the table and extruder to the "home" or zero position in all axes. Usually the zero point is the near left corner of the extruder and the top position of the print platform. Be sure to make sure that the 3D printer does not rest the nozzle on the table and does not damage it. If this is the first calibration, use the nuts to lower the table as low as possible.
Through the printer menu or manually (for this you need to turn off the motors through the menu), move the extruder so that the nozzle is above the adjusting screw. nine0003
Use a feeler gauge and adjusting screw to set the gap between the print bed and the nozzle.
Repeat all steps for all calibration screws. Usually there are 3 or 4 screws.
After aligning the plane above the screws, move the extruder to the center and check the gap. If the gap matches the feeler gauge, then the table plane and platform distance are correctly calibrated. nine0003
Delta printer table calibration
Calibrating a delta printer is a very large topic, so here we will only describe the general principles.
The delta printer does not have the x, y and z axes we are used to. Instead, the delta printer has 3 towers - A, B, C, on which the carriages move.
Since the delta table is static, it is calibrated programmatically.
The gap is calibrated by 3 points (at the columns) and the lens (center) of the table. The lens can be concave or convex. nine0003
Before calibration, check the mechanics of the printer - the belts must be tensioned evenly, there must be no play in the carriages and the effector (the plate to which the extruder is attached). If the belts are loose or uneven, it will be problematic to calibrate the printer.
Some 3D makers check belt tension with a tuner. Evenly tensioned belts will sound the same, but the correct “note” is found empirically. nine0003
There are a huge number of programs for delta calibration, but one of two is usually used - Pronterface or Repetier-Host. Using them, you can directly access the printer using special commands and change the values in the firmware.
As auxiliary programs, you can use a virtual calculator and from there transfer the values \u200b\u200binto the firmware or download the finished GCode.
They need to specify the parameters of your printer - firmware (usually Marlin or Repetier), diagonal length, circumference, etc. These parameters can be taken from the firmware or measured with a caliper. It is important to specify all the parameters as accurately as possible, otherwise the printer will not be able to calibrate. nine0003
First, 3 points are aligned at towers A, B, C, and only then the lens in the center of the table is corrected.
Manual delta calibration is tricky, but it doesn't have to be repeated often. Typically, the printer only needs to be recalibrated after some mechanical parts, belts, or print bed cover have been replaced.
Totals
The calibration process may seem tedious and complicated, but in fact, once you do it yourself, the process will no longer seem so intimidating. In addition, most manufacturers try to help novice users and equip their printers with auto-calibration sensors or try to simplify this process as much as possible with detailed menu prompts.
Learn more