3D printer for dummies pdf
3D Printing For Dummies, 2nd Edition
Introduction 1
About This Book 2
Foolish Assumptions 2
Icons Used in This Book 3
Beyond the Book 4
Where to Go from Here 4
Part 1: Getting Started with 3D Printing 5
Chapter 1: Seeing How 3D Printers Fit into Modern Manufacturing 7
Embracing Additive Manufacturing 8
Defining additive manufacturing 9
Contrasting with traditional manufacturing 10
Understanding the advantages of additive manufacturing 13
Exploring the Applications of 3D Printing 17
Working with RepRap 18
Chapter 2: Exploring the Types of 3D Printing 19
Exploring Basic Forms of Additive Manufacturing 19
Photopolymers 20
Granular powders 24
Laminates 27
Filament-based production 28
Understanding the Limitations of Current Technologies 29
Considering fabrication rates 29
Exploring size constraints 30
Identifying object design constraints 30
Understanding material restrictions 31
Chapter 3: Exploring Applications of 3D Printing 33
Looking at Current Uses of 3D Printing 34
Rapid prototyping 34
Direct digital fabrication 35
Restoration and repair 36
Designing for the Future with 3D Printing 39
Household goods 39
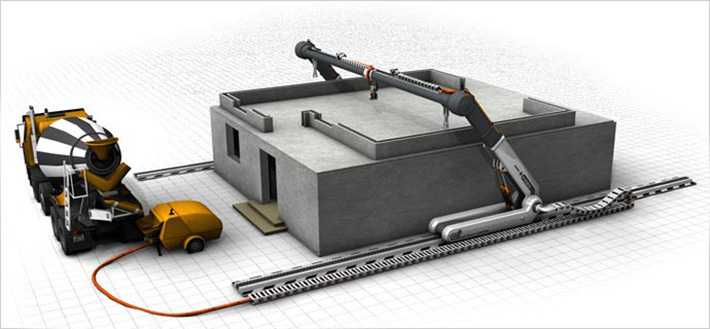
Buildings 40
Bridges 43
Examining Molding and Casting through 3D Printing 43
Lost-material casting 43
Sintered metal infusion 44
Applying Artistic Touches and Personalization 44
Medical implants 44
Biological implants (organs) 46
Item personalization 46
Clothing and textiles 46
Customizing Designs on the Fly 48
Military operations 48
Space 49
Part 2: Outlining 3D-Printing Resources 51
Chapter 4: Identifying Available Materials for 3D Printing 53
Exploring Extruded Materials 54
Thermoplastics 55
Experimental materials 59
Extruded alternatives 59
Identifying Granular Materials 61
Plastic powders 61
Sugar and salt 61
Metal powders 62
Sand and natural granular materials 63
Exploring Photo-Cured Resins 64
Understanding Bioprinting 65
Bioprinting food and animal products 66
Replacement tissues and organs 67
Identifying Other Uses for Materials 67
Recycling materials 68
Producing food 68
Caring for people 69
Chapter 5: Identifying Sources for 3D-Printable Objects 71
Exploring Object Repositories 72
Vendor repositories 72
Community repositories 74
Designing in the Computer 75
Scanning Objects 78
Capturing Structure from Photographs 82
Preparing Models for Printing 85
3D model viewers 86
Mesh modelers 86
Mesh repairers 86
Part 3: Exploring the Business Side of 3D Printing 87
Chapter 6: Commoditizing 3D Printing 89
Democratizing Manufacturing 89
Derived designs 90
Curated artifacts 90
Expanded opportunities 91
Establishing Personal Storefronts 94
Creating a unique design 94
Fabricating a unique product on demand 96
Creating “Impossible” Objects 98
Building New Tools 99
Moving beyond solid blocks 99
Creating the tool that will create the tool 100
Chapter 7: Understanding 3D Printing’s Effect on Traditional Lines of Business 103
Transforming Production 103
Displacing the production line 104
Abbreviating the manufacturing chain 105
Providing local fabrication 106
Eliminating traditional release cycles 107
Challenging Intellectual Property Laws 107
Threatening IP protections 108
Assigning legal liability 110
Leveraging Expired Patents 110
Working around patents 111
Protecting intellectual property rights 112
Imposing Ethical Controls 113
Chapter 8: Reviewing 3D-Printing Research 115
Building Fundamental Technologies 115
Crafting educational tools 116
Expanding 3D-printing options 118
Creating 3D-printed electronics 119
Creating Functional Designs 119
Drones, robots, and military applications 120
Von Neumann machines 121
Expanding Material Selection 122
Supporting Long Space Voyages 123
Creating Medical Opportunities 125
Part 4: Employing Personal 3D-Printing Devices 127
Chapter 9: Exploring 3D-Printed Artwork 129
Adorning the Body 129
Personalizing Your Environment 131
Incorporating Individualism in Design 132
Visualizing the Abstract 134
Sharing Art 136
Chapter 10: Considering Consumer-Level 3D Printers 139
Examining Cartesian 3D Printers 140
Exploring Delta Options 143
Understanding Polar Fabrication 146
Getting to Know SCARA and Robot Arm Motion 147
Building Emerging Alternatives 148
Open innovation and community designs 151
Examining Printers for Flexible Materials 152
Understanding Shore ratings 152
Printing with soft filaments 153
Sampling 3D Food Printers 154
Going beyond RepRap 159
Prusa i3 MK2 159
Sigma 160
Printrbot Simple Metal 161
LulzBot Taz 6 161
Ultimaker 3 162
MakerBot 163
Chapter 11: Deciding on a RepRap of Your Own 165
Evaluating Your 3D Printing Needs 166
Do you want a RepRap or another 3D printer? 166
Do you buy a ready-built 3D printer or use a kit? 167
Licensing and Attribution 168
Selecting a 3D Printer Design 171
RepRap designs 171
Home 3D printer kits and self-sourcing 176
Experimental designs 179
Choosing Print Media 181
Thermoplastic 181
PLA/PHA plastic 183
ABS 185
PET 185
Composite or filled materials 186
Paste 187
Identifying Components 189
Structural framework 189
Extruder 189
Build plate 193
Control electronics 194
Software 195
Simplify3D 197
Part 5: Creating a RepRap 3D Printer 201
Chapter 12: Assembling Structural Elements 203
Locating Materials 203
Kits 204
Self-sourcing 206
Printing your own 207
Ask the community 207
Online marketplaces 207
Obtaining Printed Parts for Machine Assembly 208
Understanding the Machine Motion 209
Z-axis motion 210
X and Y motion 212
Building the Frame Structure 214
Assembling the Prusa i3 Y-Axis Frame 219
Assembling the Moving Axis 220
Assembling the Prusa i3 moving Y axis 223
Assembling the Prusa i3 moving Z and X axes 224
Joining the Z, X, and Y axes 227
Sensing the Home Position 228
Chapter 13: Understanding RepRap Control Electronics 231
Understanding RepRap Electronics 231
RAMPS 232
RAMBo 232
Sanguinololu 234
Minitronics 234
RUMBA 235
Elefu-RA V3 235
Megatronics 236
Adding Electronics to Your RepRap 3D Printer 238
Preparing for electronics assembly 238
Fitting the positional sensors to the frame 239
Fitting the heated bed to the Y carriage 241
Preparing and fitting the main electronics 242
Preparing and connecting the power supply 243
Connecting the motor and position-sensing wiring 244
Adding Modular Components, Sensors, and Motors 246
Printing without a computer 246
Installing stepper-motor driver modules 246
Selecting position-sensing modules 249
Identifying power-supply requirements 250
Installing add-ons 253
Connecting RepRap Wiring 255
Configuring Firmware 256
Configuring Prusa i3 firmware 258
Uploading Marlin firmware to RAMPS electronics 263
Chapter 14: Assembling the RepRap Extruder 265
Thermoplastic Extrusion 265
Filament drive mechanism 266
Idler wheel 270
Prusa i3 Extruder and Hot-End Assembly 273
Fitting the filament drive to the motor shaft 273
Assembling the extruder idler pressure bearing 273
Fitting the J-head hot-end 274
Fitting the assembled extruder to the X carriage 274
Wiring the extruder to RAMPS 275
Multicolor Print Methods 279
Toothpaste effect 280
Three-way color mixing 280
Two-color printing 281
Layer-selective color printing 282
Cut-and-follow-on printing 283
Extruder Operation and Upgrades 286
Fixing a blocked hot-end or extruder 288
Acquiring an assortment of extruders 289
Cooling extruders with fans 291
Chapter 15: Identifying Software and Calibrating Your 3D Printer 295
Finding 3D Design Software and Models 295
Using design software 301
Verifying models with Netfabb 303
Working with Slic3r 305
Configuring Slic3r 305
Processing models with Slic3r 308
Calibrating Your 3D Printer 315
Leveling your print bed 316
Tuning your hot-end temperature control 318
Calibrating extruder distance 318
Printing Objects 322
Printing vases, pots, and cups 326
Printing large single-piece objects 328
Printing tiny or highly detailed objects 328
Printing many objects at the same time 329
Improving print quality 330
Chapter 16: Refining the Design and 3D-Printing Process 331
Being Productive with 3D Printing 331
Refining Your Print Preparations 333
Examining a Design Example 336
Designing Parts for 3D Printing 340
Material 341
Orientation 342
Layer height 344
Nozzle size and perimeter outlines 344
Infill level 344
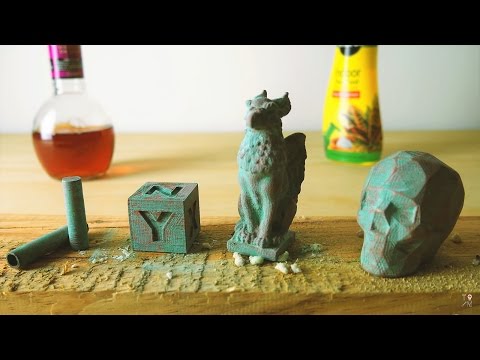
Postprocessing, Recycling, and Finishing an Object 346
Manual finishing 346
Assisted finishing 347
Coatings 348
Printing Big: Bonding and Joining Parts 349
Recycling 351
Using a Web-Based 3D-Printing Interface 354
OctoPrint 354
Duet 354
Part 6: The Part of Tens 355
Chapter 17: Ten Examples of Direct Digital Manufacturing and Personalization 357
Producing 3D-Printed Food 357
Printing Tissues and Organs 358
Fashioning Biological Replicas 358
Crafting Clothing and Footwear 359
Customizing Jewelry 360
Making Hollywood Spectacular 360
Creating Structures 361
Reaching beyond the Sky 361
Constructing Robots 362
Printing 3D Printers 363
Chapter 18: Ten Impossible Designs Created Using Additive Manufacturing 365
Personalized Objects 365
Medical Implants 367
Dental Repair 367
Self-Deploying Robots 368
Printed Drones and Aircraft Parts 368
On-Demand, On-Site Manufacturing 369
Custom Objects Created in Space 369
Art on Demand 370
Locally Fabricated Items 370
Body Parts 371
Index 373
3D Printing For Dummies Cheat Sheet
By: Kalani Kirk Hausman and Richard Horne and
Updated: 03-08-2022
From The Book: 3D Printing For Dummies
3D Printing For Dummies
Explore Book Buy On Amazon
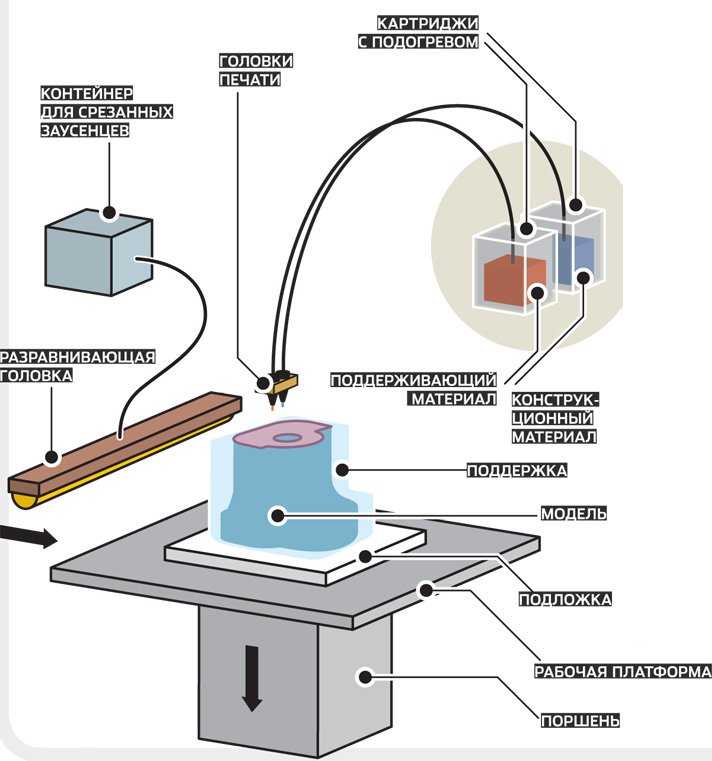
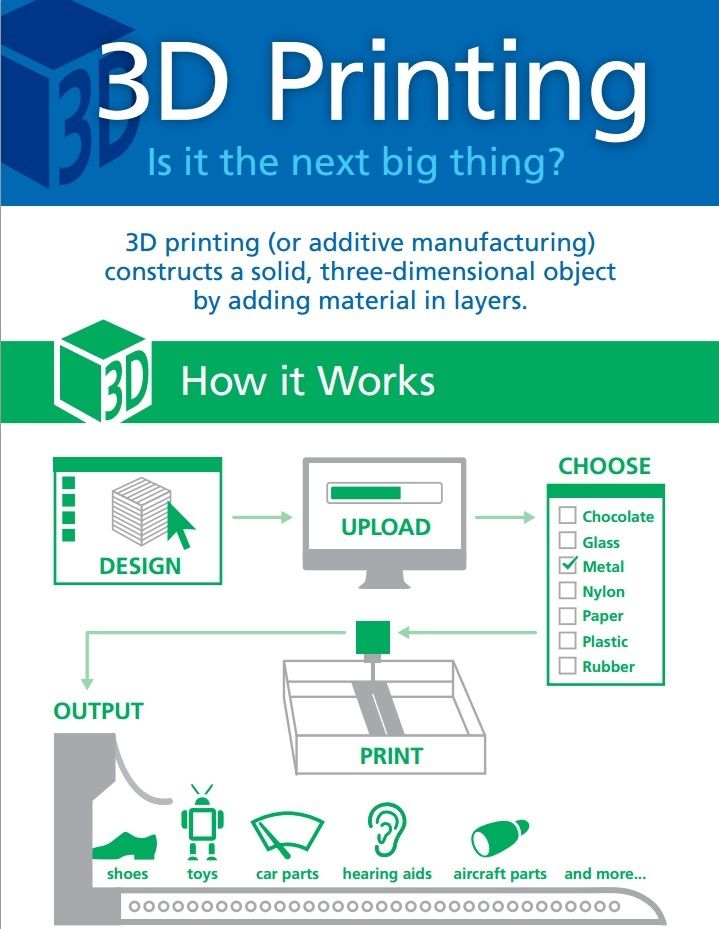
Unlike traditional manufacturing, which involves injecting material into a pre-formed mold or removing material from base material objects, 3D printing starts with a virtual 3D model that is transformed into solid form one layer at a time.You can build your own 3D printer using the open-source self-REPlicating RAPid-prototyper (RepRap) family of designs. Check out these helpful articles to guide you toward selecting the right RepRap design for you.
Deciding on a RepRap of your own for 3D printing
When it comes to 3D printing, selecting a RepRap printer for personal use begins with an analysis of your particular need in terms of the type, size and other qualities such as turnkey off-the-shelf or build-it-yourself creation. Total cost is also a factor, along with source licensing preference such as the determination of open vs. closed source technologies.
Some of the RepRap designs include:
-
Mendel, Prusa Mendel, Mendel90, Prusa i3: One of the more common branches of Cartesian design, this printer has spawned many variations including the miniaturized Huxley.
-
Wallace and Printrbot: Common educational-sector alternatives for kit construction.
-
MendelMax: This is the derivative of the Prusa Mendel that’s an example of Cartesian RepRaps.
-
Ultimaker: A box-frame RepRap using Cartesian movement.
-
Tantillus: A miniature box-frame RepRap which has the most 3D printable parts of current RepRap variations.
Several RepRap options exist beyond the standard Cartesian format, including:
-
Rostock, RostockMax: A Delta-format RepRap printer that provides a tall build volume. The RostockMax is a laser-cut kit form that we will build here as an example of Delta RepRaps.
-
3DR: An alternative delta-style RepRap designed by Richard Horne, based on the Rostock format with inspiration from the Tantillus for self-replication.
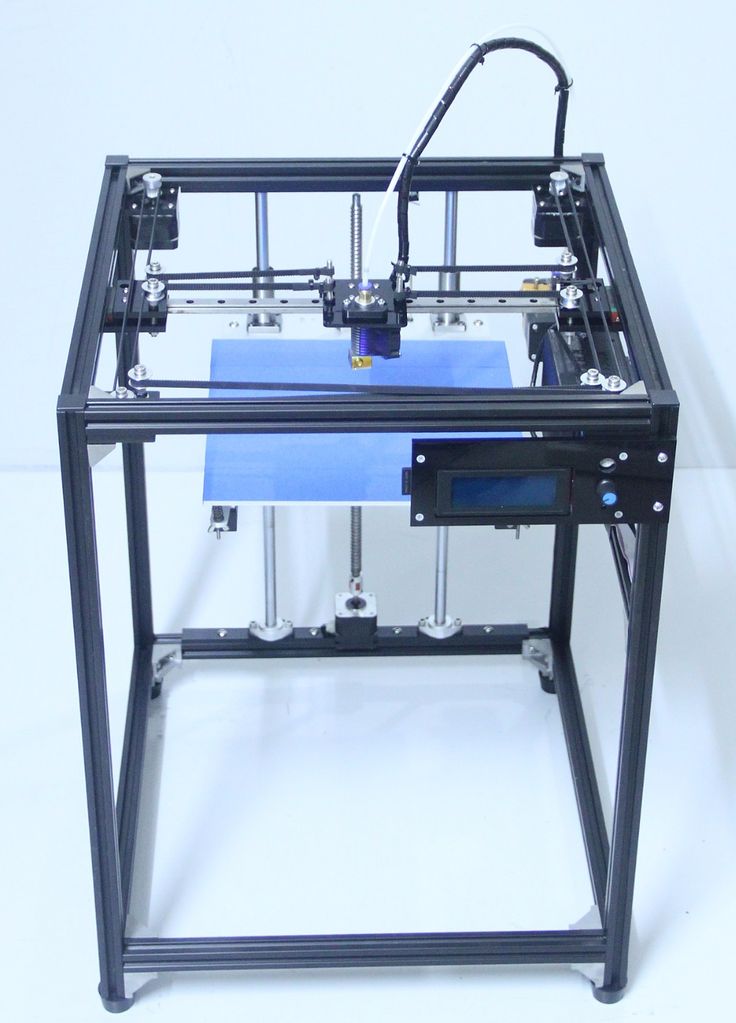
After identifying the type of printer, you will need to select the proper type of plastic filament you wish to print with and the components that will be used in building the printer itself, including the framework, extruder, build plate, control electronics and software that will be used.
Understanding RepRap 3D printer control electronics
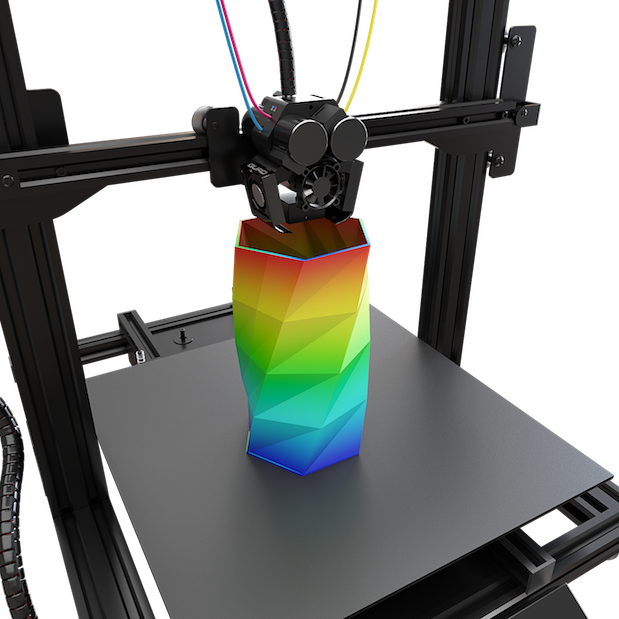
A RepRap 3D printer is an example of a purpose-built robot, using the popular open-source Arduino microcontroller at its heart together with stepper motor controllers, motors, and sensors to control its movements. Some custom 3D printer boards have been created to integrate an Arduino’s functions and the related items typically found on a 3D printing “shield” that attaches to the basic format. Some of these options include:
-
RAMPS: The original Arduino shield designed for multiple stepper motor control and management of the extruder and built plate heaters.
-
RAMBo: A modular all-in-one combination of the Arduino board and RAMPS shield.
-
Sanguinololu: A popular build-it-yourself all-in-one board integrating both microcontroller and stepper motor controllers
-
Minitronics: A reduced size variation of the Sanguinololu.
-
RUMBA: A modular integrated board with modules supporting LCD panels, external memory cards and other add-on capabilities.
-
ELEFU-RA: A developer integrated electronics set that can plug in standard ATX computer power supplies
-
Megatronics: The “big brother” of the Minitronics board, which allows the use of higher-temperature thermocouple thermal sensors in place of the more common thermistor type sensors.
Many components have multiple options such as the selection of contact switches or magnetic hall-type sensors for the end-stops or the use of different fans to meet the type of plastic you are using. Even the type of motor controllers and wire connections (soldered vs. crimped) will affect options available upon completion of your RepRap.
Assembling the RepRap extruder and RepRap upgrades on a 3D printer
Once the framework for a 3D printer has been assembled and the electronics selected, the final component needed is the extruder and hot-end that melt and deposit plastic to create your object. The extruder slides the plastic filament incrementally into the heated hot-end, where it pushes a small amount of the molten plastic out with each step. The extruder can be made in many ways, including:
-
Geared: Some extruders include additional gears to slow the advance of filament with each step to gain greater control, and to increase the force with which the filament can be advanced into the hot-end.
-
Hobbed: Smooth plastic filament can be held by the extruder using interlocking gears or a hobbed bolt (one with teeth cut along the axis around the bolt’s girth) to hold the filament against an idler wheel so its advance and retraction can be carefully controlled.
-
Bowden: This type of extruder forces the filament through a tube connecting the extruder and hot-end rather than forcing the filament directly into the hot-end, separating the two and allowing the hot-end to be lighter without the directly attached extruder motor for non-Cartesian formats.

-
Syringe: For designs like the [email protected] printer or RepRaps equipped with Richard’s Universal Paste Extruder, a syringe can be used with a constrained strap to incrementally extrude paste or gel materials instead of the usual melted plastic.
-
Multi-color: Advanced extruders include multiple gearboxes and motors to advance multiple filaments into the hot end at the same time. By varying the rate of each color using additional electronics, the end result is a multi-colored print that varies throughout.
-
Dual: A common variation with more limited color mixing involves a dual extruder, which is simply two extruders side by side. This is useful for prints that include PVA (polyvinyl alcohol) or other soluble support material integrated into the same print as the object filament material.
Identifying 3D printer software and machine calibration
The software chain for a RepRap 3D printer begins with the products used to create and prepare the virtual 3D model for printing.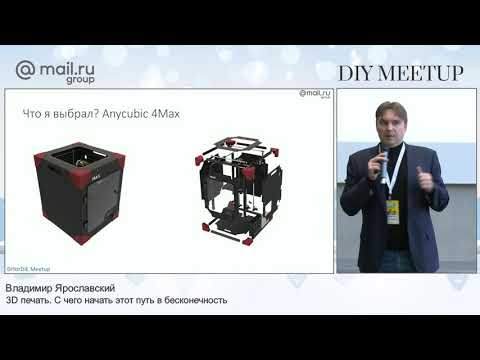 However, once an object model has been created or obtained, the model must be processed through several steps before the solid object is created by the RepRap printer:
-
Support: Unlike granular binding systems, fused plastic extruders cannot deposit plastic in mid-air and have it remain there. For overhangs and wide spans, support material must be added to the design and later removed after printing.
-
Raft: Depending on the type of material and build plate used, it may be useful to add a raft or flat printed layer that forms a base on the build plate for your model. As in the case of support, the raft is later removed in finishing the object.
-
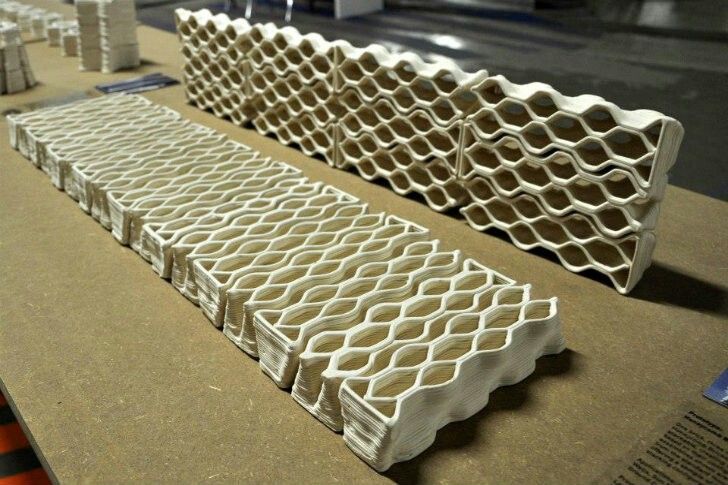
Fill: Because additive systems like the RepRap are unaffected by complexity, it is possible to define any solid object as a solid outer shell and an interior space that can be completely solid (100% fill), empty (0% fill) or some midway point in which a regular pattern of thin walls provide support with voids interspersed.
 The amount of volume that includes plastic is defined as its “Fill” and allows you to produce the same object printout using far less plastic than solid equivalents.
 -
Slicing: The virtual model is calculated as a series of layers, with each slice then translated into codes that will direct the printer to move a particular distance while extruding or not and then again, until that layer is done and the z-axis can be moved to the next layer with the process begun again. This code is called “g-code” and many slicers can add support and raft elements automatically, along with an automatic “fill” pattern to reduce the amount of plastic needed for each print.
Once your model has been prepared and sliced, a few final details are handled by the printer control software. Settings for the hot-end and heated build plate will control the melted plastic viscosity and layer adhesion, while the movement rate of the extruder will control the thickness of the extruded material and the rate of the printer’s movement. Additional factors can be adjusted for finer control of each feature.
About This Article
This article is from the book:
- 3D Printing For Dummies ,
About the book authors:
Richard Horne (RichRap) has worked as an engineer, marketer, and product designer. He blogs and shares ideas on making 3D printing easier for everyone. Kalani Kirk Hausman has experience as an IT consultant, enterprise architect, auditor, and ISO. He conducts research on integrating 3D-printed materials into educational curricula.
This article can be found in the category:
- 3D Printing ,
Book 3D printing from scratch (D. Gorkov)
Book “ 3D printing from scratch ” – title page
from prominent Russian-speaking authors on the subject of volumetric printing - Dmitry Gorkov in 2015. The publication is rightfully considered one of the best sources of information on 3D printing technology and related equipment for beginners.
On this page of the electronic library of the portal you will find a description of this book, content and a direct link to a third-party source on the Internet, where you can download this book for free and without registration.
Description of the book “3D printing from scratch”
The purpose of this book was to fill an empty niche in teaching 3d printing technology. This technology is just beginning to massively penetrate into the life of society. One of the reasons that this process does not happen quickly (according to the author) is the lack of structured information on the topic “where to start”. nine0005
The Internet is filled with promotional articles about the use of industrial printers. But you have to look for information on how to work on a “regular” (household / desktop) FDM printer bit by bit on specialized forums. Much of the information is teeming with specific terms and can be difficult for beginners to understand.
The goal of the book “3D printing from scratch” is to convey all the basic information to the end user in an accessible language without trying to “break the brain”. The author tried to create a step-by-step guide that will allow even a beginner in the field of 3dp to choose the right 3D printer for individual needs. The book also takes a detailed look at how to work with different types of 3D printing plastics. The book also pays special attention to such an important issue as 3d printing software: it discusses the currently used (at the time of writing the book - 2015) computer programs for 3D printing on a printer with practical examples of designing in a 3D editor of simple objects. nine0005
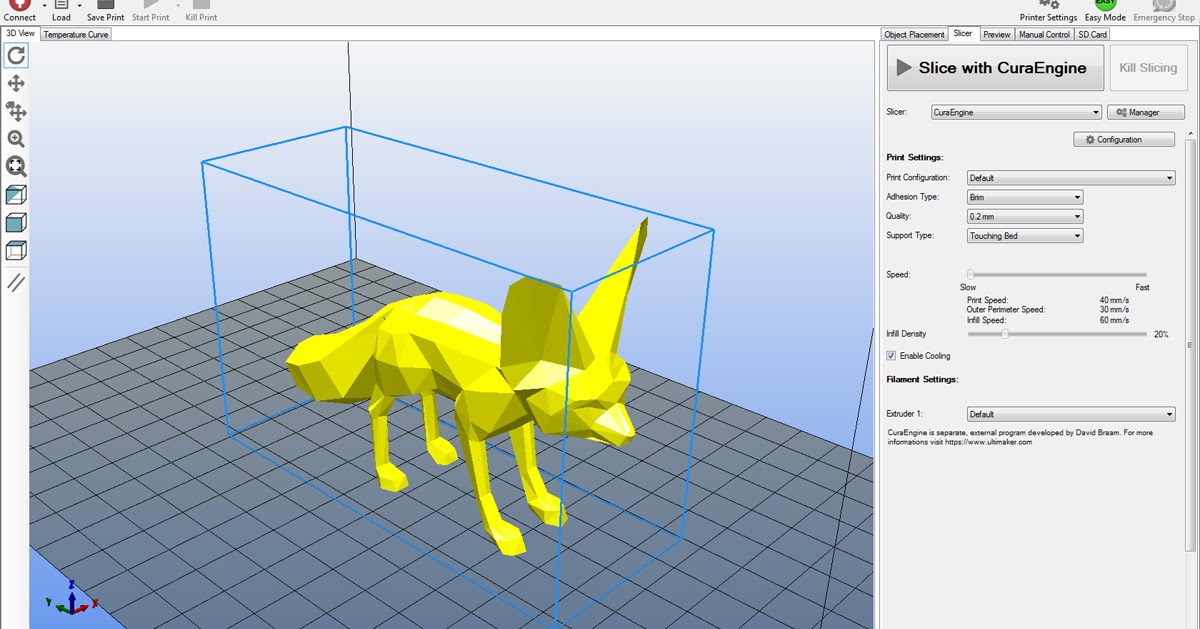
After studying this book, you will receive the necessary basic knowledge to start your work in the field of 3D printing - one of the most promising and rapidly developing branches of science and business in the modern world. Study programs Cura, Tinkercad. Master the skills of post-processing printed products. Learn about all the top causes of poor print quality and how to avoid them.
| Author : | Dmitry Gorkov |
| Issued : | 3D-Print-nt.ru |
| Release date: | 2015 |
| Free download (direct link) | PDF (36.3 Mb ) |
| Volume: | 400 pages |
Contents of the book “3D printing from scratch”
- Brief summary of the book
- Introduction
- Children's dreams. Or like everything, someday it will come true
- Suitable 3D printers and where to buy them
- Which 3D printer to choose?
- Basic circuits used in 3D printers
- 3D printer device
- 3d printing supplies
- Used file types
- 3D printing software
- Cura 3d
- Useful features of Cura.
 Part 1
 - Useful features of Cura. Part 2
- Tinkercad Simulation Editor
- Making a bumper for Iphone
- Metric thread in Tinkercad
- Useful resource Thingiverse
- Post-processing of parts in 3D printing
- How I design parts in the 3D editor
- Types of defects in 3D printing
- 3D Scanners
- Robot with 3D scanner Cyclop
- Processing models in MeshLabs
- 3D Printing Use Cases
- Spare parts for cars (3D printing)
- Auto tuning with 3D printing
- Souvenir printing
- Products for fishermen
- Hobby and model parts
- 3D printing and industrial design
- Souvenir products for organizations
- Parts for small batch production using 3D printing
- Coffee mask
- 3D printing parts for household appliances
- Tool and Equipment Repair Parts
- Extreme
- Print accessories for GoPro cameras
- Photo and video equipment
- Models
- Subculture
- Phone cases
- Fittings for clothes and various accessories
- Appendixes to this book
- Printer and Hardware Reviews
- My Replicator from China.
 Or how a 3D copy can be better than the original
 - Gefesh, as he is. Teapot Notes
- Ultimaker 2 in the grip of a kettle
- How many eyes does a Cyclop have?
- Testing filament for 3D printing
- Flex by REC
- PLA from REC
- Prototyper T-Soft from Filamentarno!
- Ruber from REC
- Afterword to the book 3D printing from scratch
- Book supplements
The book 3D printing from scratch contains a large number of detailed illustrations on the topic of narration - 3D printing (technology, equipment, consumables, application practice).
| Author : | Dmitry Gorkov |
| Issued : | 3D-Print-nt.ru |
| Release date: | 2015 |
| Free Download (direct link) | PDF (36. 3 Mb ) 3 Mb ) |
| Volume: | 400 pages |
Noticed a mistake? Select it and press Ctrl+Enter
Tweet
Zmorph Fab 3D printer - all-in-one device
The Polish company Zmorph is expanding into areas that conventional 3D printers simply cannot go. At the same time, the brand's multifunctional equipment still fits on the table. nine0005
The Zmorph Fab 3D Printer is three tools in one for learning and prototyping. The machine is capable of creating almost anything. With impeccable build quality, a user-friendly interface, and industry-standard electronics, the Zmorph-Fab will be the most sought-after and reliable all-in-one 3D printer on the market.
All-in-one equipment
The manufacturer has integrated a unit for 3D printing, CNC milling, laser cutting and engraving into the machine. The development is distinguished by a list of bright advantages:
- compact device fits even on the desktop;
- simple and convenient tool change takes no more than 60 seconds;
- the machine is compatible with materials not available for single-purpose 3D printers.

Zmorph Fab starts working right out of the box. Smart hardware with automatic tool detection and auto-calibration gets the job done so technicians can focus on ideas.
Technology for Reliability
TheZmorph is a 3D printer that guarantees trouble-free 3D printing. The machine works with almost any type of plastic filament available on the market. Automatic calibration makes the printing process easy and fast even for beginners. The multi-material option allows you to print 3D objects with water-soluble backing.
Unsurpassed build quality
Heavy duty aluminum plates provide increased rigidity and protect electronics from dust and machining residue. The rugged construction is designed to enable fast 3D printing with a variety of filaments. The Cartesian motion system of the XZ head is reinforced with two fiberglass reinforced belts. nine0005
A brand new CNC worktable offers a convenient workpiece system, provides greater stability.
Software
The equipment is equipped with a clear interface and a single software for 3D object construction, machining, laser cutting and engraving. The unit is immediately ready for multi-material 3D printing.
Optimum combination of HEPA and carbon filter disintegrates semi-toxic particles and consumable vapors emitted during 3D printing and laser cutting. The Zmorph-Fab printer notifies the user when the filter element needs to be changed. nine0005
Innovation Features
TheZmorph Fab is equipped with a professional CNC worktable equipped with a simple system for installing components. The technique guarantees safe interaction with various configurations, sizes and raw materials. The brand's software includes a standard workflow for step-by-step CNC procedures, the ability to change tools within a single G-code, and toolpath visualization.
The accessible and intuitive user interface allows for easy menu navigation and is suitable for professionals and novices alike.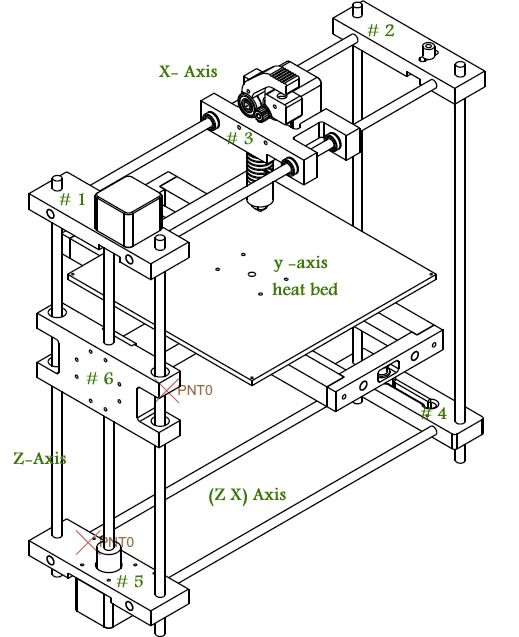 nine0005
Get the most out of Zmorph-Fab with dedicated slicing software. Voxelizer is a versatile software for 3D printing, CNC milling, laser engraving and cutting. The program supports all tool heads of the device. Pre-installed materials allow you to immediately test the unit. The software is optimized for Zmorph 3D printers, providing the best and fastest results.
Changing workflows in Zmorph-Fab is quick and easy with automatic tool head detection. Switching tools takes just a few simple steps and no more than a minute. nine0005
The equipment is so ergonomic that it is comfortable and safe to work near the machine as the printer is virtually silent. Behind the quiet operation lies the design of the unit, enhanced by high quality electronics and carefully programmed drivers.
TheZmorph Fab is a versatile desktop 3D printer, but its heart is an industrial grade machine. The electronics provide reliability and stable repeatability.
What's Included
Powerful hardware capabilities allow you to create multi-material functional prototypes, complex concept models to test original ideas or market-ready products.