Making miniatures with a 3d printer
Designing and 3D Printing Your Own Tabletop Miniatures With an FDM Printer
Tabletop games like D&D and Warhammer provide a great way to enjoy interactive entertainment without any need for a computer or console.
Miniatures are a big element of this sort of game, but who wants to spend their time playing with figurines that other people have designed? Not us! And this is why we have scoured the web to bring you the very best sources for 3D printable miniatures, along with compiling some instructions to help you to print your designs on an FDM printer.
Let’s dive right in.
What Is FDM Printing and Why Is It Harder for Miniatures?
Before we look at the sources and printing options you will be using, you need to understand why FDM printers are typically avoided for miniatures. FDM stands for fused deposition modeling. Printers using this technology lay melted plastic out by moving a print head around above a plate, with each layer adding height.
What Is SLA Printing?
SLA stands for stereolithography apparatus. Rather than using heated plastic to create models, an SLA printer uses a mix of liquid resin and light to create prints. The resin cures when the light strikes it, enabling SLA printers to produce incredibly high-resolution models.
Why Is FDM Printing Harder for Miniatures?
FDM printing makes life harder for those who want to make miniatures, and this is because nozzles can only get so small before they become impossible to use. This means that FDM printers simply can’t print at the same resolution as an SLA printer. No matter, though, as we’re going to show you how to get great results from your tabletop miniature making.
With that out of the way, it’s time to get into the fun stuff. You have two choices when you are looking for printable 3D models of miniatures: paid models and free models. Going down the paid route will give you the chance to customize your miniature, while choosing free models comes with the somewhat obvious benefit of costing nothing.
Using paid models for your main characters and free ones for generic monsters can be a good way to approach this, giving you the chance to save some money without compromising on the miniature you will be using the most.
Buying Printable Miniatures
Games like D&D and Warhammer have seen a significant rise in popularity over the last few years. This has prompted a range of platforms to be built that give you the chance to design your own miniatures and download an STL file to print them out. Let’s take a look at a couple of these options.
- Hero Forge: Hero Forge makes it possible to create detailed custom miniatures with a range of races that are found in games like D&D and Warhammer. This includes races like Gnomes, Humans, and Elves, along with countless other options. Alongside this, you have a wealth of options when it comes to items, outfits, and other customization for your miniature. The handsome chap in the image above was created using this app.

- Eldrich Foundry: Much like Hero Forge, Eldrich Foundry gives you access to loads of customization options for your miniature. This website doesn’t come with as many race options as Hero Forge, but it is also cheaper to buy your 3D model. Other than that, the process is very similar to Hero Forge.
Both of these platforms give you the chance to buy your miniature as a 3D model, but they also allow you to pay for it to be printed and even painted for you. If you want to print the design yourself, you need to make sure that you choose the option for an STL file, as this is what you will use to print the miniatures.
Free Printable Miniatures
From entire Orcish armies to a single Elven Mage, you can find just about any class, race, and civilization available for download for free when you’re searching for miniatures. Like buying your models, there are a few places to look when you are hunting for freebies.
- Thingiverse: Thingiverse is a very popular website for 3D model sharing.
 All of the models on this website are free for personal use, and this means that you can download any of them and get printing. We found this awesome Fantasy Mini Collection and printed the old_man_lantern_out.stl file; he looks sneaky and we like it.
 - CGTrader: CGTrader is a 3D model sharing platform that goes beyond 3D printing. This means that you have to be careful when looking for models, as not all of them will come in the right formats. Alongside this, some of the models on CGTrader are premium and have to be paid for before you can use them.
Whichever route you choose to find your 3D printable miniatures, it’s important to make sure that you take the right steps during printing to get the best results.
Using an FDM Printer to Print Tabletop Miniatures
As mentioned above, FDM 3D printers aren’t ideal for printing miniatures. While many of the FDM printers on the market are able to print at very high resolutions, they simply can’t match an SLA printer for this job.
This doesn’t mean that you can't print your miniatures on the FDM 3D printer you have at home, though. You just have to be willing to make a compromise or two along the way. Join us as we explore all of the most important settings you need to consider when you’re preparing to print your miniatures.
It is worth noting that all 3D printers are different. We are using a FlashForge Creator 3 for our models, and this means that you may need to tweak these settings for the best results.
Related: The 5 Best DIY Dice Tower Projects to Build for Game Night
Model Material
While you can use whatever material you like for your model, we would recommend that you stick with PLA. ABS warps very easily, PETG can be hard to extrude properly, and no material is quite as easy as PLA. Of course, you could consider using soluble materials like PVA for your supports.
Model Size
It’s likely that you will need to make your model larger to print it in full detail. This will be a compromise that some are not willing to make, but we find that increasing the scale to 150% provides good results with our print settings.
General Print Settings
Print speed, layer height, temperature, and retraction are all very important settings to consider. Your layers need to be fine enough to capture the detail in your print, while the speed needs to be nice and slow to avoid artifacts. You can see the general print settings we have used in the screenshot above. Of course, you will need to change your temperature and retraction settings to match the material you are printing with.
Perimeter Settings
Perimeter settings dictate how your 3D printer will handle the outer walls of your print. We set our exterior print speed to 10%, making the printer move much slower as it works on the outside of the mode. You can see our other perimeter settings in the screenshot above.
Infill Settings
Now, this next printer setting is something that you can play with to adjust your print time.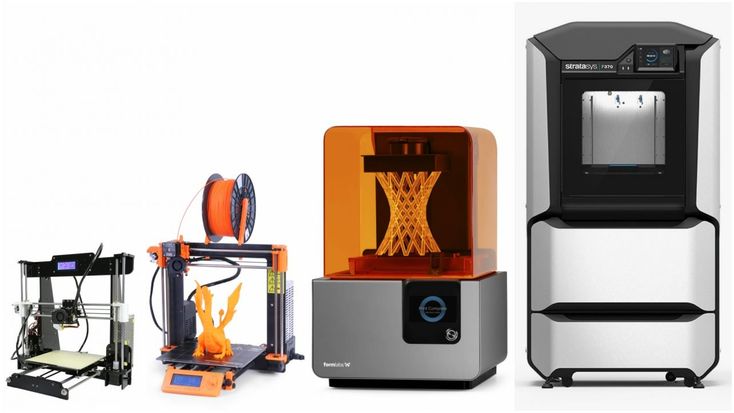 We went with a 100% infill for our models, giving them a solid feel and making them a little bit heavier. You can take this down to as low as 10% and still get good results, but it will always impact the feel of your model.
Supports & Support Settings
There is a lot of debate when it comes to the best supports for miniatures. While many people swear by treelike supports, we have chosen to use traditional linear ones for our models. We set the Overhang Threshold to 60% and the Pillar Thickness to 1.5mm. This provides good results, with supports that are nice and easy to remove.
Printing & Finishing Your Miniature
With all of these settings in place, it will finally be time to print your miniature. The model we bought from Hero Forge took 3.5 hours to print with the settings you can see above, while the free model we found on Thingiverse only took 1.5 hours. It’s never worth rushing a print like this.
Removing Supports
Removing the supports from your miniature can be a challenge. You need to be very careful to avoid snapping small pieces as you work to take the supports away, and a small craft knife can make this much easier.
Sanding & Painting
Most people won’t want their model to remain a single color, and this means that you may want to look at sanding and painting your miniature. There are loads of guides around the web to help with this. You can use the same acrylic paint and primer as you would use with genuine Warhammer figures for this.
Related: Turn Everyday Objects Into 3D Models Without a 3D Scanner
Playing With Your New Miniatures
For the cost of a 3D model and the small amount of filament you will use, this project offers a great-value alternative to using generic miniatures for your tabletop games. You don’t have to stop with one miniature, though: you can 3D print an entire army to serve at your whim.
How to Design & 3D Print Your Own Custom Miniatures
report this ad
report this ad
There is a huge market for wargaming miniatures such as Warhammer, and we show you how to design and 3D print your own custom models like a pro.
Given the current state of the world during quarantine, you may have gotten into 3D printing. Even when you’ve got your equipment all set up, there’s still a learning curve to get through when it comes to taking your ideas from paper into real life.
ANYCUBIC Photon UV LCD 3D Printer (left) and Photon S (right). Image the SLA channel
This was a guest post we published a few years back, by then Shapeways’ Community manager Andrew Simon Thomas. As we mentioned, Shapeways is an online consumer printing service and marketplace, that has been a popular destination for bits and we were psyched when they rolled out some how-to tutorials– like this guest post on how to create your own miniature.
Whether you want to use your own shiny new 3D printer, or Shapeways to make your ideas come to life, this tutorial should help. Maybe you’ll even want to sell your creation to other interested hobbyists as well… Hopefully, these tips will be helpful in getting you started!
If you want to see more about printing models yourself at home, we did a great video recently on that as well:
How to Design & 3D Print Your Own Custom Miniatures
Buckle up because this post is going to be packed with steps. We are going to break each main phase down so it’s a bit more palatable but if you’re going to read all of this from start to finish, you may want to grab a coffee.
First, we’ll focus on planning and getting familiar with Blender. Later we’ll refine the design using Meshmixer, Sculptris, Blender (again), then upload your file for printing.
You may want to download each program now using each of the embedded links.
Remember 3D designing is always a learning process. This tutorial is about learning these new tools and the process for making a miniature, but there are other tutorials out there that will teach you the ins-and-outs of the programs themselves. If you make a mistake, you can always use the undo button (control z for windows, command z for macs) and remember to save often in case you need to go back. Take it easy, be patient, and have fun!
Taking Your Ideas & Making Them Reality
1. Look at inspiration: You likely already have a character created for your campaign, and if you’re a talented artist, you may have a drawing ready to go. If not, scan for cool source material in your favorite movies, shows, video games, or comics. Unless you plan to sell your miniature. Otherwise, all these forms of entertainment and other artists’ work are all fair game, but it’s a lot cooler to use these as points of inspiration rather than just straight copying your favorite characters.
2. Start with a sketch: Draw a picture of your character. Andrew drew on gridded paper to help keep the proportions consistent. Draw out as many sketches as possible to help predict the maximum amount of design considerations before moving on. Don’t worry if drawing isn’t your thing. Try your best, and be specific about the look of the body, clothes, and gear. By making important design decisions early, you can avoid having to restart your design from scratch.
3. Open Blender and start by updating the user preferences: If this is your first time using Blender, don’t be intimidated by all the buttons. We’re only going to use a small portion of what Blender can do. First, we want to change a few preferences to make things easier. Go to User Preferences and change the select to be the left button click. If you’re on a laptop make it so that we’re using the number keys at the top of your keyboard by checking Emulate Numpad.
If you want to really dig in and learn everything Blender has to offer, check out Andrew Price’s free YouTube tutorials.
4. Import your drawing into Blender to use as a reference for your miniature.
Hit N on your keyboard to open a new panel menu. We’re going to call this window the N menu for the rest of this tutorial as it’s pretty useful and we’ll be using it often. First scroll down, check and open Background Images, hit Add Image, click Open, find, and double click your image file.
Now you need to put the image into the scene. To do this, go to the Axis drop-down and select Top view, then hit 5 and 7, which makes the image visible in the background. Hitting 5 allows you to toggle in between perspective and orthographic mode (showing objects without perspective, making it easier to judge sizes and relationships of objects). Clicking 7 shows the image from the top.
I also make the image transparent by lowering the opacity to 0.25. Then I select Front to ensure the image sits over the objects in the scene so both are visible.
Finally, slide the image over—you’re going to do this by using the number counters in the gif above. They’re the number counters directly under the sketch, fit, and crop buttons.
5. Thinking symmetrically: Time to start blocking in all the body parts. Start just with the forms that are in the center of the body and work outward. Going up from the pelvis, up to the chest and then the head is a safe bet. For the limbs, only work on one side of the body. You can always mirror the other half later.
Start by Blocking in the major shapes: Using the sketch as a guide, take the default cube that blender opened with change it by using transformations to have it fit the sketch.
There are three ways you can transform an object: move, scale, and rotation.
To scale, you have two options. With the first option, you can hit S on your keyboard and move your mouse to scale in all dimensions or hold the center mouse button to choose just one. The other option is to use is to scale each dimension on the top of the N panel menu. Transforming this way is nice because it gives me some values to know exactly how much you alter it. You can transform the location (move) and rotation in these ways as well.
Let’s start by sculpting the pelvis. To do so, scale the X and Y and then move the view (hold the middle mouse button or MMB, and scroll. (See this page) for instructions on how to emulate an MMB with 1- or 2-button mouse designs). Do this so you can see the other side of the cube and change the Z dimensions.
Now for the chest. Duplicate the box we used for the pelvis by pressing Shift and D. Then click without moving the mouse. You want it to stay perfectly in line with the other box so all you need to do is move it straight up by clicking the green arrow on the transform gimbal and dragging up. Then all you have to do is rescale it to fit the dimensions of the chest area.
Repeat the process for the head. Make sure to scale it down so that it is about the depth of his neck.
Next, make just one of the arms. Hit Shift and A to open the menu to add new objects to the scene. Go to Mesh, choose an isosphere (one of the present options called primitives) and it loads at 0, 0, 0 in the scene. I scale it down to the appropriate size for his shoulder.
The isosphere, the cube, and other shapes are called primitives, they’re the simplest shapes we can use but we’ll be changing them to be a little more complex with just the primitive shape, using cubes and spheres. I scale the sphere down and move it upwards to become his shoulder.
Now, duplicate the chest, move, and scale it down to create the upper arm. Remember to always rotate the view with the middle mouse button to check the size and location from all angles, sometimes it’s hard to really know just from one view.
For the lower arm, you’re going to make it a bit larger because it will turn into his gauntlets later on. An important key to remember- make the primitives the max size they need to be because as you make detail you’ll generally be shrinking the shape.
Then you’re going to select both parts of the arm and duplicate them. To select multiple objects hold Shift and left-click (deselect the same way). Duplicate the part by hitting Control C for Windows or Command C for Macs.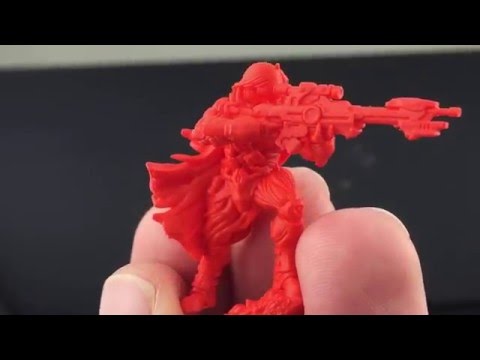
You can also rotate the larger block and turn it into the thigh. Rotate by hitting R and dragging the MMB or by imputing the degree of rotation in the N menu. Once they are rotated 90 degrees, move them into place based on the image.
Finally, duplicate the lower leg, move, and scale it to be about the size of his shoe. You should now have a nice block man ready.
Refining the Shape of Your mini
6. Refining the forms: Now add a subdivision modifier to the primitive that represents the chest. You can do that on the rightmost menu by hitting the wrench icon and selecting “Modify” from the dropdown menu. Andrew chose the subdivision surface. The number of faces on the primitive will increase, causing the shape to appear smoother. By selecting View you can adjust the level of smoothness, but for now, you can just keep it at level one.
Now, go into edit mode by hitting Tab on the keyboard and you’ll see the overall shape along with the subdivided version. A menu will appear on the left side of the screen with options on how you can edit the mesh, open the topmost Tools tab. In the 3D view, notice that each subdivision is averaging out the points between vertices, smoothing the form. This is a super useful way to add detail but keep the forms flexible as you iterate.
On the left side of the screen, you’ll see that the menu has changed to a bunch of options related to edit mode. Click Loop Cut and Slide to add a new line into the model. Click once near an edge to add the loop, then move your slide up and down with your mouse and click again to set the location. Notice that as you move it around, it changes the shape of the model based on the subdivisions.
Add the new Loop cuts to the locations where you want the shape of the object to change. Think of the lines as defining where the top of a mountain, or bottom of a valley would go. Moving the lines closer to the edges makes the corner sharper, and moving it away makes it softer. This is an easy way to quickly get closer to the shapes of the body you want to make. Take your time with these and hit undo (control/command z) if needed.
Shaping the Torso & Hips
Once the Loop Cut is in place, switch to selecting vertices and start selecting the points to move them around. Again, this changes the shape of the part.
Through this process, you’re just adding loops to add more vertices to move. Keep the number of cuts down for the sake of simplicity to change the form. Try to make the most out of each vertex moved, and only loop cut again once you have put all the available vertices where you want them to go. Loop cuts are powerful but be sparing with them. The more you add the more limited your control. You can always hit “undo” (Ctrl Z) if you didn’t get it right the first time. Switch between selecting vertex points, edges, and faces by clicking the icons on the bottom toolbar.
Next, move onto the pelvis. The goal with the pelvis is to make it clearly shaped like the hips, which you can visualize as looking like a bag tipping forwards.
Each time you move to a new part you may want to add the subdivision modifier, move around the vertices to change the shape, and, as needed, create new loop cuts to have more points to refine the form.
TIP: You can select or deselect multiple points by holding shift, and you can box select them by holding Shift and B.
Shaping the Arms & Neck
On the arm, add a loop cut near the inner side of the glove to give it a harder edge.
Then Andrew selected the face and click insert faces from the add section of the edit mesh menu to create a new face in the center of the other one. Once it is in the right spot, hit Extrude (under Add on the edit mesh menu) to push a new face inwards. This will give the glove a sense of thickness and make it feel like the arm is going into it.
Finally, tweak the neck so that it tilts forward towards the chest. I’ll add the actual head later in Sculptris.
7. Duplicate and Mirror: Duplicate the arms and legs and mirror them to the other side. In the Object menu, select all the objects that make up the right limbs and select Duplicate Part ( can also use Shift + D), but leave it where it is. From the same menu, choose mirror and select across the X-axis.
Now that the parts of the limbs have been mirrored, you’ll need to move them into the right place. You can do this by guesswork, but if you want it to be perfect, you can do some very simple math. Selecting the objects shows you their location in the N menu. By comparing the locations values at the top of the N menu I make them the same number but opposite value in the X-axis. To do this, simply copy value the X location of the right arm and paste it into the location for the left arm, but change the negative value to a positive so that they are in exactly the same place but on the opposite side of the X-axis (change +1. 25 into -1.25). Repeat this for each part that was mirrored.
8. Posing the Character: We’ve been working in a T-pose, but now it is time to give this dude some energy! Andrew used that annoying little circle that moves everywhere (it is actually called the 3D cursor) to set the pivot.
You’ll need to set the pivot as close to the “base” of the body part so that it rotates and seems to still be attached to the body. To do this we need to switch to rotate by the 3D cursor, use the dropdown right beneath the 3D view area. Then click near the should to set the pivot point, and rotate in each dimension until you’re am happy with the results.
When you’re working on the legs make sure to select all of the parts of the limb and work from the hips first. Only after you’re happy with the whole legs position should you move to the knee and give it a bend. Next, move the foot at the ankle so that it is parallel to where the ground would be. Sometimes the rotation isn’t perfect, so you have to move the parts into place. That’s ok, just switch back to the transform gimbal and slide the parts around.
9. Repairs, and Prepare to Sculpt: If you mirrored parts as we suggested in this tutorial, we need to get them all to be “right-side in” before you import your model into Meshmixer. This is because when we mirrored those parts, it also turned the direction the face goes (called a Normal) inside out. If you didn’t mirror any parts, skip to just exporting.
For those that mirrored, select all the faces on a part in edit mode (Tab) and select the Shading/UVs tab on the menu. With faces selected under Normals, you can click “flip direction” This should turn the selected parts a darker color. Do this for each of the parts you’d mirrored during your design.
Once done select all of the parts you want to export, head to File, and choose Export as an obj. Make sure you click the checkbox for “selection only”.
10. Import into Meshmixer: Next I need to solidify the mesh to make it easier to work within Sculptris. To do this Andrew imported the repaired model into Meshmixer and go into Edit mode. Andrew chooses to solidify and makes sure he’s pleased with the settings. This will make it so that all the parts get combined into one large mesh, easier to sculpt. Once you’re done, export as a .obj again.
Putting in the Fine Details
11. Sculptris and beyond: Open Sculptris and import the mesh you’ve solidified here. Sculptris is a cool program because you can treat the 3D mesh as if it were a piece of clay. Digital sculpting is similar to traditional sculpting in that we’re no longer following a step by step system for making adjustments, but going by “feel” and making incremental changes. Take your time and have fun with it. Remember to work from largest to smallest forms (start with the whole finger before the fingernail) and save early and often so you can go back if you don’t like what you’ve done.
This is all done using primarily 4 tools with a variety of settings.
Tools settings: Every tool shows a “radius” by which it will affect that portion of the mesh. We recommend starting large as possible and working down to the smallest as you resolve the parts of the sculpt.
Strength: This is how easily you’ll affect the mesh when you use a tool. We recommend starting stronger and making bigger changes in the beginning, then refining as you go. Remember most of this process is iterating, you’re making a decision and then refining it (or fixing totally necessary mistakes as you go. Hold Alt on your keyboard to switch from adding to subtracting.
Draw: This allows you to add or remove the thickness of the materials. This is great for when you’re building up new forms and maintaining the integrity of older ones.
Inflate: To enlarge or shrink areas of the mesh.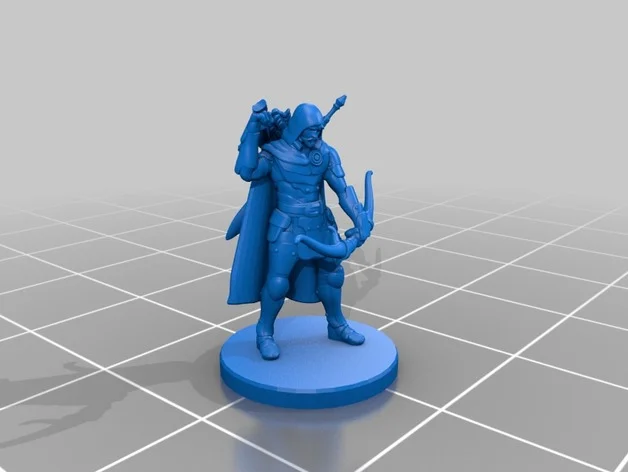 This is similar to draw but it enlarges the space rather than adding onto it.
Flatten: Very useful for making areas smoother and adjusting the surface.
Smooth: Sort of a 3D version of erase, it evens out the mountains and valleys on the surface of the mesh.
Crease: This is really useful for drawing lines and indents into the mesh, think of it like drawing a pencil across clay.
Move: Grab a part of the mesh and shift it over. Nice for making big changes to the mesh.
Throw on a Base
12. Add the accessories: Now you’ve got a sculpted figure with some details and personality. Finish him with some bits and accessories. First, add a base (Shift+A) by creating a cylinder, scaling, and moving it into location.
Then give him a shield so he can protect himself. For shields, use the base to start. Duplicate it and move it into position.
Designing the Weapons
Inset the front face and extrude inwards so that there’s a lip around the edge for more detail.
Andrew added some torus, which is a donut shape-like loop to act as straps so that it looks like the shield is attached to his hand. Again, he wanted them to overlap but not so much so that the straps stick through the other side of the shield.
Finally he added a box to create the sword. From here, scale it down so that it’s the correct size. Then duplicate the box and rescale it to be the hilt.
Andrew adds a subdivision surface modifier (see Refining the forms from earlier if you haven’t) to each to give it some more shape. Add more loop slices for good measure.
I move the vertices on the end of the sword to make the pommel and move the whole sword into position.
13. Upload and print! Now you’re ready to export the model and upload it to Shapeways. Just head to Shapeways.com and log in (create an account if you haven’t already!). Hit upload and select millimeters as your scale. Once the model has been uploaded, you can always rescale it if you think it’ll be too big or small for your printer.
Now you’re ready to order your mini on Shapeways! A typical 28mm scale miniature will be about $3 to print in white strong and flexible nylon (good for prototyping) and $10 in FUD and BHDA (the ideal materials for painting miniatures).
Thanks for sticking with us in this step-by-step process of turning your ideas into reality. Hopefully, this has been helpful to up and coming 3D printing artists!
Editor’s note: another great resource is the YouTube channel Maker’s Muse, that dude is legit and knows the ins and outs of 3D editing and design.
What was your first 3D printed mini? What kind of 3D printer do you have?
Let us know in the comments of our Facebook Hobby Group, and make sure you enter the latest monthly giveaway for FREE today! You can also support us on Patreon and get ad-free access to the site, plus a ton of minis that helps support some of the best creators out there!
If you buy something from a link on our site, we may earn a commision. See our ethics statement.
09.03.2022
Content
- How to choose a 3D printer for miniatures
- Advantage of 3D printing for miniatures 9000 9000 FDM 9000 LCD/ DLP
- FDM
- LCD
Miniature figurines with amazing detail attract the eye. A little grotesqueness and slightly wrong proportions (otherwise it would be inconvenient to play or transport such a “little one”) are more than compensated by detailed elaboration and an abundance of small, at first glance, insignificant details. These are no longer just small table soldiers, but heroes with their own unique history.
Warhammer 40k 9 miniature soldier0044
Miniatures come in different sizes: from 6mm and more. The most popular today is the 28mm format. The creation of such figurines is really almost jewelry work.
A 3D printer will help not only in the production of miniatures, but also in related areas, such as the creation of figurines, details of game locations, or, for example, elements of dioramas. To understand the advantages of 3D printing over classical manufacturing methods, it is worth remembering how such models are usually made at home.
Advantage of 3D printing for miniatures
Not everyone was ready to shell out a substantial amount for the purchase of a set of table soldiers, and sometimes the necessary heroes simply were not on sale. Then baked and self-hardening plastics for modeling were used.
First you need to make a wire frame, so the finished figure will turn out to be more durable, and it will be much easier to keep all the proportions. The wire frame can be attached to the stand, which will make the miniature statue more stable, and it can be easily fixed in any position without fear of smearing small parts with your fingers.
Wire frame for miniature
Gradually, layer by layer, the volume of plastic increases on the frame. Each layer must be baked or dried well, depending on which plastic is used - self-hardening or baked.
Gradually, we begin to add small details and work out the details. In fact, this is a very painstaking process that requires perseverance and some sculpting abilities. For a convenient study of small details, you may need special stacks for modeling, but they can be successfully replaced with improvised tools.
Sculpting tool set
The result is such a miniature statue.
Miniature 28mm baked plastic
By the same principle, large table figures, or some elements of dioramas, can be made.
Sometimes a sculptor is more accustomed to working with plasticine.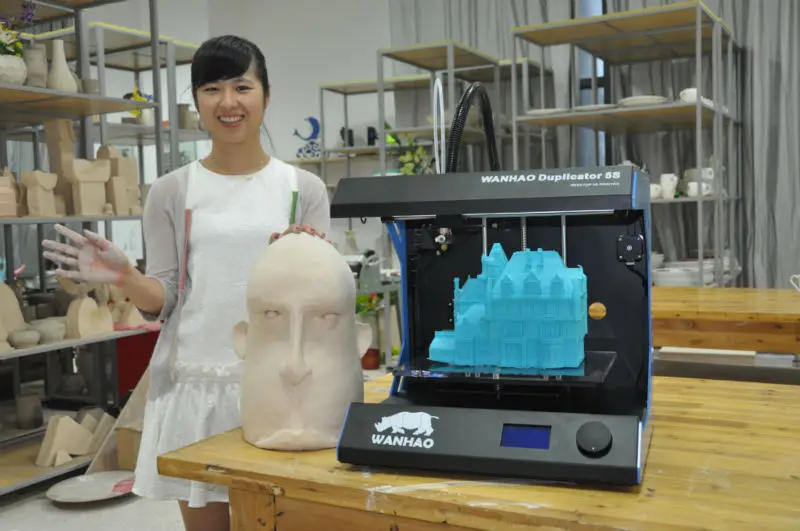 Then, after sculpting, the stage of preparation and casting of the figurine into a silicone mold is added. This method is suitable for small-scale production of a small desktop army.
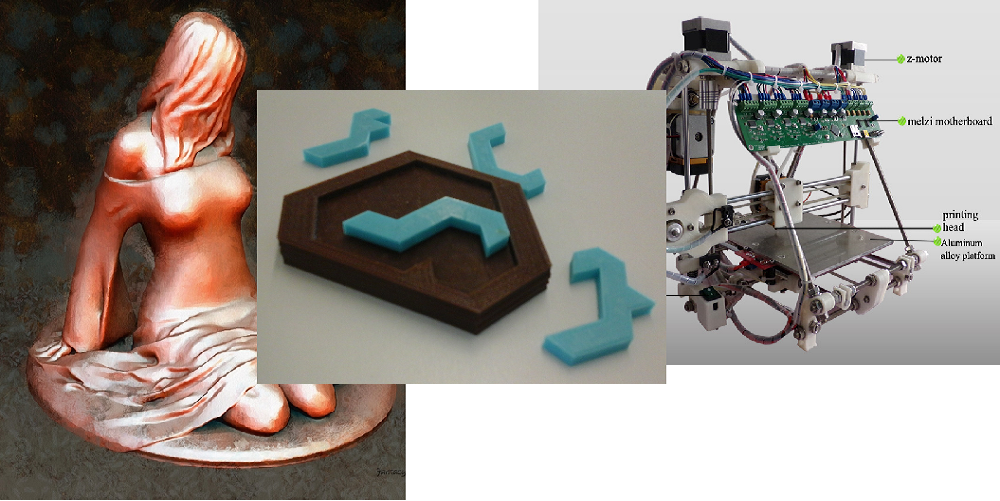
But it is necessary to properly prepare the figurine for casting. The finished "warrior", most likely, will have to be divided into several parts, so that it would be more convenient for the caster to remove the molds and make castings. During the cutting process, it is worth adding a few locks so that the finished castings can be easily assembled, like pieces of a puzzle.
Molded figurine against silicone mold
Some craftsmen have learned to cast metal copies. Such soldiers are usually made of low-melting metals (for example, lead) and cast in plaster molds. Sometimes a special silicone is used, but it is a little more difficult to achieve good shedding of a small product in a silicone mold.
Cast metal soldier
In addition to making figurines from scratch, some craftsmen remake ready-made miniatures. This is called conversion.
Conversion in miniatures is a refinement, stylization or alteration of a finished figure. Unfortunately, not every hobbyist has good sculpting skills, and this alteration helps to achieve good results regardless of artistic skills. The main thing is to act very carefully.
Conversion helps enthusiasts achieve amazing figurine detail, add some detail, change the pose, or create a new character that is not yet on sale.
Lord of the Astral Claws turned to Chaos
In addition to making the figures themselves, modelers create colorful locations to immerse themselves in the world of their favorite game. This is true not only for 28mm miniatures, but for example for DND games. Such voluminous locations allow you to immerse yourself in the world of your favorite game much better and make the game more exciting.
Game location for board game Warhammer40k
The creation of such locations is painstaking work, and both improvised and special equipment are used as material.
Role play location
A 3D printer allows you to produce miniature figures and game locations much faster. On the Internet you can find many paid and free models of 28mm figures from different universes or various elements of locations - houses, fences, mechanisms, etc. Adapting or slightly changing the finished 3D model for yourself is much easier than cutting and gluing a finished figure. And creative people with modeling skills are unlikely to have difficulties with the transition to “digital clay”.
Warhammer40k universe 3D miniature model
And of course, dioramas are worth noting. This is a separate art form with a scene or location frozen in time. Dioramas come in different sizes, but each of them impresses with its detail and careful study.
Diorama based on the game STALKER
Each diorama is unique, so the craftsmen use improvised materials to make it. Everything is limited only by the imagination and ingenuity of the artist.
Diorama “Desert Hero”
The main advantage of 3D printing is high detail and repeatability. If you need to make a small batch of miniatures, it will be much easier to print them than to cast, for example. Casting small items is a painstaking process that requires some skill and equipment. It is very difficult to achieve good pourability of small products the first time.
From model to finished figure
And for the manufacture of piece products, such as a diorama element, a 3D printer can replace many materials and tools for modeling. In addition, by using and combining different materials, it is possible to create models that are difficult or almost impossible to create manually. For example, using a special polymer, you can print optically transparent products that can imitate glass.
Which technology to choose
To begin with, it is important to determine the requirements for the printer - will it be used only for the manufacture of 28mm personal army or should it be a universal printing machine? It is important to understand what size the finished model will be, how detailed it should be, and how much time can be spent on post-processing.
Depending on this, it is worth deciding on the technology by which the 3D printer will work. You can choose one of two technologies - FDM or photopolymer printing (there are several technologies, but DLP and LCD printers are currently popular).
FDM
FDM 3D printers use a plastic filament as a material. In a heated extruder, the filament is melted and extruded through a thin nozzle, so layer by layer, a three-dimensional model is grown.
Working principle of FDM 3D printer
Layer thickness and nozzle diameter can be changed in some printer models. The minimum layer is usually 0.1 mm. In some models of 3D printers, a layer of 0.05 is available, but for printing with such a layer, it is important to choose the right many settings and the print speed will be quite slow.
Pros:
-
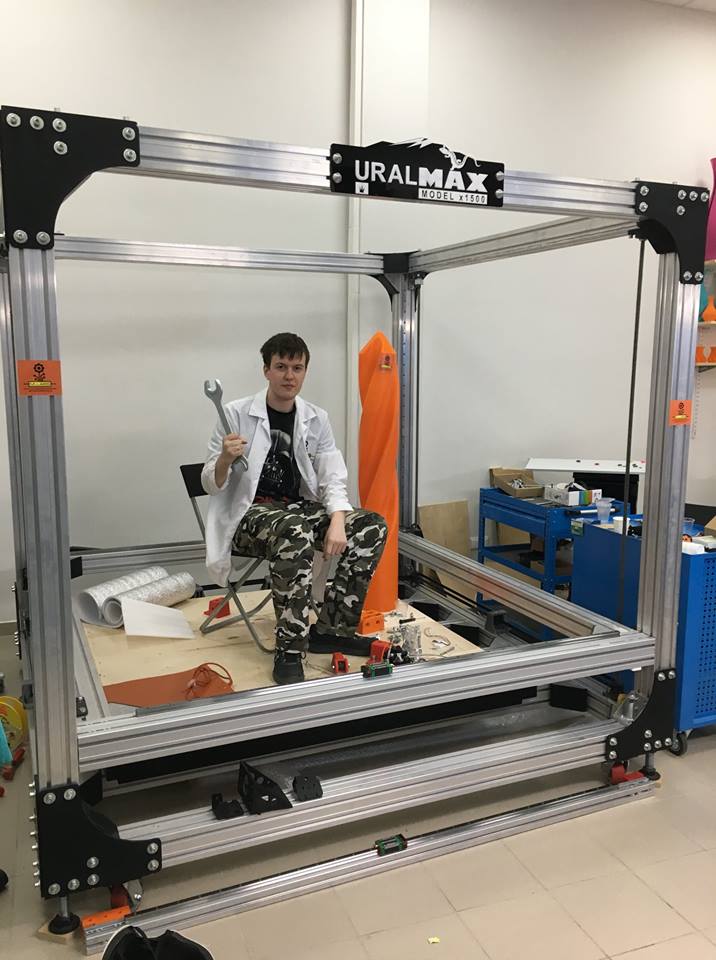
Large print area
-
Many different materials are available for every “taste and budget”
-
Inexpensive Consumables
Cons:
Of course, FDM printers are hardly suitable for making miniature figures, but they can be successfully used to print large souvenir figures, create game locations and some parts of dioramas.
LCD/DLP
The principles of operation of LCD and DLP printers are very similar. The material used is polymers that harden under the action of UV light. The only difference is that an LCD printer uses an LED matrix in conjunction with an LCD screen as a source of UV radiation, while a DLP uses a projector.
Working principle of photopolymer 3D printer
Pros:
-
The ideal surface of the finished figure
-
Many different materials available
-
High print accuracy even for the smallest items
Cons:
Photopolymer 3D printers are able to create miniature products that cannot be made using FDM technology. This technology will be an ideal choice for creating miniatures, small poster models, etc.
Print examples
Robot printed on Asiga Pro 4k
Figurine made with Phrozen Sonic Mini 4k
28mm 3D printed miniatures
3D Printed Halloween Miniature
3D printed play models
FDM Cube Thrower
Figure making process from 3D model to painting
Best Printer Ranking
FDM
Creality3D Ender 3 (Build Kit)
Features:
Print technology: FDM/FFF
Working area size: 220x220x250 mm
Number of extruders: 1
Max. extruder temperature: max. 255℃
Closed Camera: No
Heated table: Yes
Plastic type: ABS, PLA, PETG, Flex, Decorative plastics, others
A popular and unpretentious 3D printer that many makers liked. Creality3D Ender 3 is sold as a kit (assembly kit), but thanks to the detailed instructions, there should be no problems with assembly.
Wanhao Duplicator 6 Plus
Features:
Print technology: FDM/FFF
Working area size: 200*200*180mm
Number of extruders: 1
Max. extruder temperature: max. 260°C
Closed Camera: Optional
Heated table: Yes
Plastic type: ABS, PLA, PETG, Flex, Decorative plastics, others
Wanhao Duplicator 6 Plus is an updated version of the Duplicator 6. The new modification adds automatic calibration, printing resume after a power outage, and others. You can immediately purchase a printer with a closed case, this will allow you to easily print with composites.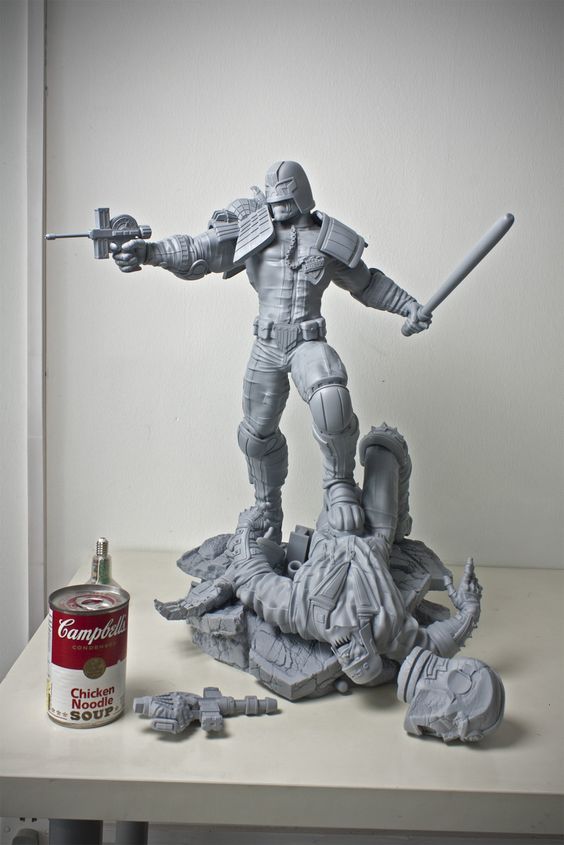 Wanhao Duplicator 6 Plus will become a trouble-free workhorse, and thanks to the “omnivorous” extruder, even a beginner will be able to print exotic materials without any problems, such as soft flexes or rubbers.
FlashForge Creator Pro 2
Features:
Print technology: FDM/FFF
Working area size: 200x148x150 mm
Number of extruders: 2
Max. extruder temperature: max. 240°C
Closed Camera: Yes
Heated table: Yes
Plastic type: ABS, PLA, PETG, Flex, Decorative plastics, others
FlashForge Creator Pro 2 is an almost professional dual extruder 3D printer. Thanks to the closed body, Creator Pro 2 has no problem even with composite materials, and two extruders allow the use of soluble support for complex models. Moreover, FlashForge extruders are independent, this allows you to print 2 mirror or identical models at the same time. This allows you to speed up the production of the same type of models. FlashForge Creator Pro 2 will not only be a good home printer, but also a great helper for a workshop or small production.
LCD
Anycubic Photon Mono 4K
Features:
LCD display resolution: 3840x2400 (4K)
UV wavelength: 405 nm
Working area size: 132x80x165 mm
Layer thickness: 0.01-0.15mm
Inexpensive, but fairly modern 3D printer with a 4K monochrome display. Anycubic Photon Mono 4K will be a good tool for printing miniature models.
Phrozen Sonic Mini 4K
Features:
LCD resolution: 6.1" 4K Mono LCD
XY positioning accuracy: 35 microns
UV wavelength: 405 nm
Working area size: 134x75x130 mm
Layer thickness: 0.01-0.30mm
The Phrozen Sonic Mini 4K is a compact high resolution 3D printer. It allows you to get accurate models even with an abundance of small details. Sonic Mini 4K is a good choice for those who need to print quickly and accurately.
Phrozen Sonic Mighty 4K
Features:
LCD resolution: 9.3" 4K Mono LCD
XY positioning accuracy: 52 microns
UV wavelength: 405 nm
Working area size: 200x125x220 mm
Layer thickness: 0.01-0.3mm
With a larger work area, the Phrozen Sonic Mighty 4K allows you to quickly produce large models or small batches of small items. Such a 3D printer will be a good help for a small workshop or a hobby circle.
Phrozen Sonic Mini 8K
Features:
LCD resolution: 7.1" 8K Mono LCD
XY Positioning Accuracy: 22 µm
UV wavelength: 405 nm
Working area size: 165x72x180 mm
Layer thickness: 0.01-0.3mm
Phrozen Sonic Mini 8K is one of the representatives of 8K photopolymer printers, which can still be counted on the fingers of one hand. The high resolution LCD-matrix allows you to print figures with amazing surface quality and amazing detail. Such a printer is suitable for demanding printers who care about accuracy and the perfect surface of the finished model.
Totals
3D printers are gradually showing themselves to be great helpers in many areas, not only in medicine and industry, but also in home hobbies. Thanks to 3D printing, it is possible to produce small figurines or elements of dioramas much faster, paying more attention to the elaboration of details, rather than painstaking modeling or the search for exotic materials.
And digitalization makes it much easier to share your work and finished models in the community or adjust them to your needs, for example, change the scale or adjust the pose.
Free Shipping
Add to compare
Item added to compare Go
| Manufacturer | Phrozen
Free Shipping
Add to compare
Product added to compare Go
| Manufacturer | Anycubic |
Free Shipping
Add to compare
Product added to compare Go
| Manufacturer | Phrozen
Free Shipping
Add to compare
Product added to compare Go
| Manufacturer | Phrozen
Free Shipping
Add to compare
Product added to compare Go
| Manufacturer | FlashForge |
Add to compare
Product added to compare Go
| Manufacturer | Creality |
Free Shipping
Add to compare
Product added to compare Go
| Manufacturer | Wanhao |
#Application
Share
all materials
Choosing the best 3D printer for printing miniatures
3DPrintStory Reviews Choosing the best 3D printer for printing miniatures
The use of 3D printers for printing game miniatures is gaining more and more popularity today. As the price of 3D printers continues to fall, it is likely that the demand for 3D printed game miniatures will only continue to rise.
If you pick the right 3D printer, you can get amazing 3D models for your board games or to put an inspirational figurine from your favorite game on your desktop.
Today's desktop 3D printers have become reliable, easy to use and deliver decent quality finished products.
How to choose a 3D miniature printer?
There is a wide range of desktop 3D printers that can be used to print miniatures in 3D at home. And if you study the market a bit, or at least the options below, you can get great detailed 3D models.
With the right 3D printer, you can print your own figurines and even create your own board games.
If you don't want to design 3D models of figurines from scratch (and this will really require some skills and time from you), then you can find interesting 3D models on sites with free 3D printable models. After downloading the model, you can immediately print it or edit it before 3D printing for your own needs. We also recommend that you familiarize yourself with interesting 3D models from Dutchmogul. Perhaps in his wonderful collection you will find something interesting for yourself.
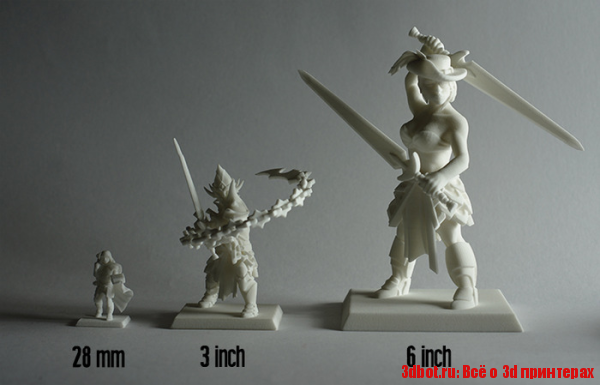
To get the same level of detail as the thumbnails above, your 3D printer must meet certain criteria. The most important feature of a 3D printer to consider is the level of detail it can reproduce. This criterion is formed based on the following parameters:
Nozzle diameter
To create a 3D miniature, heated plastic is extruded through a hole. Orifice is the diameter of the nozzle. Make sure the 3D printer nozzle size is less than 0.4mm.
XY Movement Accuracy
The X and Y axis movement accuracy of the 3D printer head should be taken into account. To get a more detailed model, you need to reduce the layer thickness. However, the low thickness means that 3D printing will take longer.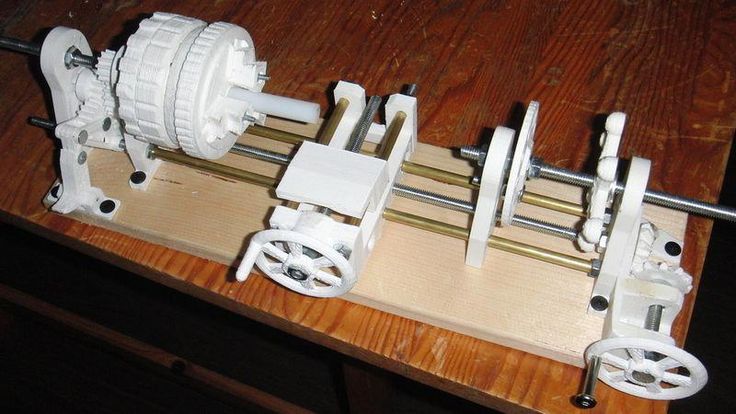 In order to print a detailed miniature, you will most likely need a 3D printer that can print with layer thicknesses of 100 microns (0.1 mm) or less.
Material type
The most common materials used in 3D printers are ABS or PLA. To get a good surface, after 3D printing, it should be post-processed. If you are using ABS plastic, you can sand the miniature and steam it in acetone to get a smooth surface. It is also worth paying attention to PETG plastics, which are gaining more and more attention and positive user reviews.
Thumbnail size (scale)
If you want to start 3D printing game miniatures, think about the size you would like to get.
A 28mm (~1:58 scale) or 54mm (~1:32 scale) miniature can be made with a standard desktop 3D printer that melts plastic filament. To make a smaller miniature, you will need an SLA Resin printer, which uses liquid resin and strengthens it.
In addition to the figurine, you can also print larger models.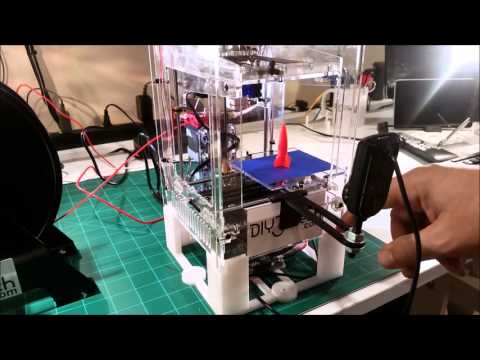 3D printing large models such as houses, huts, castles, trees, and tanks will require more expensive 3D printers that provide faster speeds with good 3D print quality. But there is an important point in the choice. It is better to choose high-quality 3D printing than a large one. You can always separate larger models for printing and then join them together using the same adhesive. The result will be much better than lower quality 3D printing on a 3D printer with a large workspace.
HICTOP CR-10S 3D printer
Value for money, the Hictop CR-10S is one of the best and most affordable budget 3D printers on the market. The Prusa i3 3D printer was taken as the basis for the design.
The Hictop printer uses quality materials for the power supply, motherboard and motion control systems. The metal framework is a rigid and strong design.
The Hictop printer will arrive unassembled, but assembly is easy. You will have to essentially screw in four bolts and connect the necessary wires. That is, you can proceed directly to 3D printing almost immediately after purchase.
The "S" at the end of the CR-10S stands for two Z-axis lead screws and stepper motors.
Dual axis system improves extruder movement accuracy. As a result, you naturally get more accurate 3D printing overall. This is an excellent inexpensive 3D printer that is suitable for 3D printing miniatures and figurines for board games.
The Hictop 3D printer has a mechanism to control the remaining amount of plastic. If the plastic runs out, the printer will go into pause mode and after feeding new material, you can continue printing from the area where you left off. This is a particularly relevant feature for printing large-scale 3D models.
These 3D printers are quite popular, so you will find a lot of information and tips on how to use them online. In addition, thanks to an active community, the Hictop CR-10S has a large number of modifications and upgrades that you can implement yourself and improve its already decent 3D printing quality.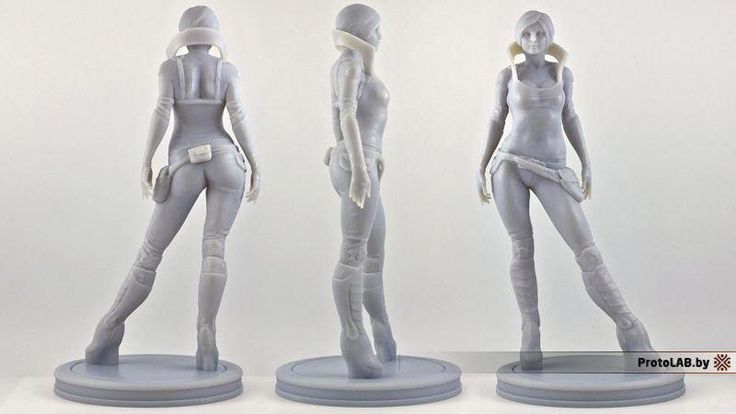
Hictop CR-10S is a quality and affordable 3D printer, which is definitely suitable for 3D printing miniatures and figures of characters from your favorite games or movies.
FLASHFORGE CREATOR PRO 3D printer
FlashForge 3D Printer Creator Pro took inspiration from Makerbot Replica.
A nice feature of the FlashForge 3D printer is that it includes all custom enhancements from Makerbot. These upgrades include:
- Metal worktable supports. Thus, the working table became more stable during heating and assembling.
- Plastic-coated knobs for easy workbench calibration.
- The Central Processing Unit (CPU) supports Sailfish firmware which allows automatic calibration. In addition, the CPU helps regulate heat and delivers higher quality 3D prints.
The above features make the Creator Pro an excellent miniature 3D printer.
In addition, this 3D printer is made in a closed case, which allows you to print ABS plastic with much less difficulty.
Creator Pro allows you to print two colors at the same time. If you plan to paint the finished model in the future, then you don’t really need this feature, but in general it gives you much more options than the standard analogues with one extruder.
Since the Creator Pro is based on the Makerbot Replica, there is a lot of information available on the internet about this 3D printer.
3D printer SINDOH DP200 3DWOX
If you are looking for a reliable 3D printer for printing miniatures, then you should pay attention to Sindoh DP200 3DWOX. This is the best choice if you want to make 3D mini figures.
This 3D printer is easy to use, suitable even for beginners in the world of 3D printing. Below are some of its features:
- 3D printing table covered with aluminum PTFE.
- 3D printing resolution is 50 microns (0.05 mm).
- Equipped with a high efficiency particulate air filter and a closed chamber for 3D printing, which is especially good when using ABS plastics.
- Easy to use material cartridge chamber.
- Sindoh does an excellent job of printing minifigures in high detail.
One of the disadvantages of the Sindoh DP200 printer is that it can only use manufacturer's filament. Consequently, you will pay more money for cartridges because you will not be able to use materials from other manufacturers. The price of these cartridges, of course, is higher than analogues.
Otherwise, the Sindoh DP200 3DWOX 3D printer is a great option for high quality 3D printing of detailed models.
DREMEL DIGILAB 3D Printer
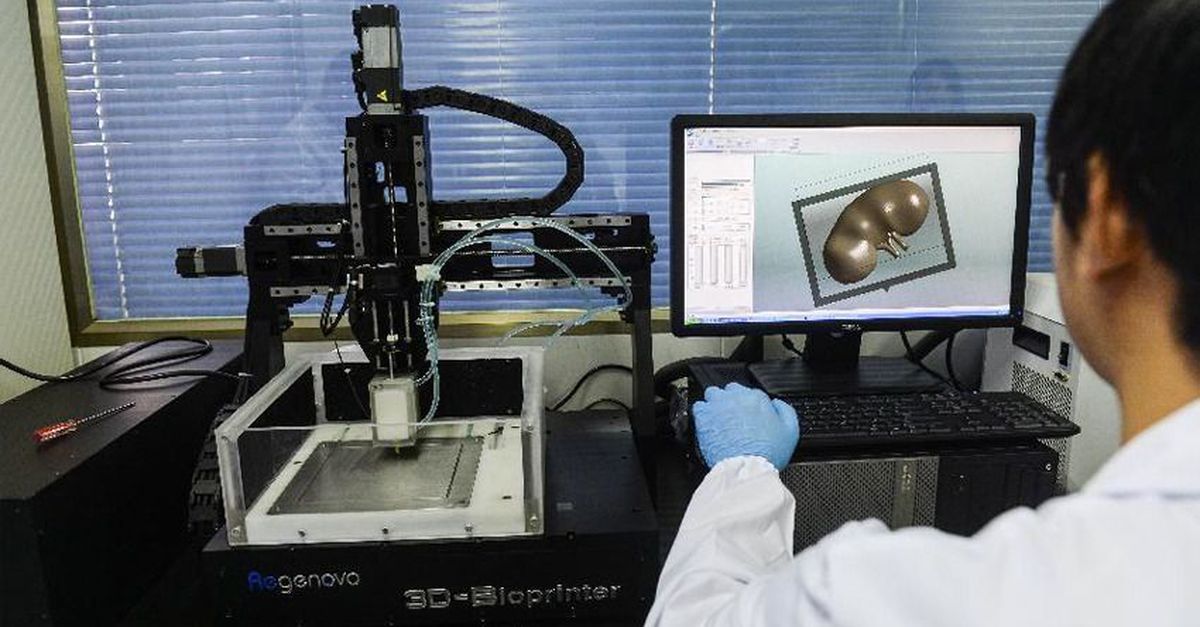
The use of SLA technology for 3D printing helps to obtain miniature products of very high quality. SLA also helps print miniature parts as small as 28mm. The price of this wonderful 3D printer is comparable to the cost of a laptop.
SLA printing differs from FFF printing in the very essence of the processes. During SLA 3D printing, liquid resin is baked using a UV laser. The formation of the part looks like a gradual lifting of the finished model and a bath with liquid material.
Industry-intensive stereolithographic 3D printers are now available at home! The Dremel Digilab 3D printer has proven itself as a hobby printer, which differs from expensive industrial analogues in its exceptionally smaller workspace.
Key Features of the Dremel Digilab 3D Printer:
- The minimum wall thickness of the 3D model is 25 microns (0.025mm).
- Faster 3D printing compared to FFF 3D printers.
- Excellent surface quality of the finished 3D model.
Digilab is an excellent SLA 3D printer. It is easy to use and, according to user reviews, reliable.
With this 3D printer, you can use resins to make investment casting molds. It can also be used to make jewelry by casting metals.
Some disadvantages of using SLA for 3D printing:
- It's expensive. The resin needs to be updated, as over time it ages and loses the necessary properties.
- Resins require maintenance. Make sure you start 3D printing only after the balloons created by adding resin to the tank are gone.
Learn more