3D printing flex
FLEX Filament | 3D Printing Materials
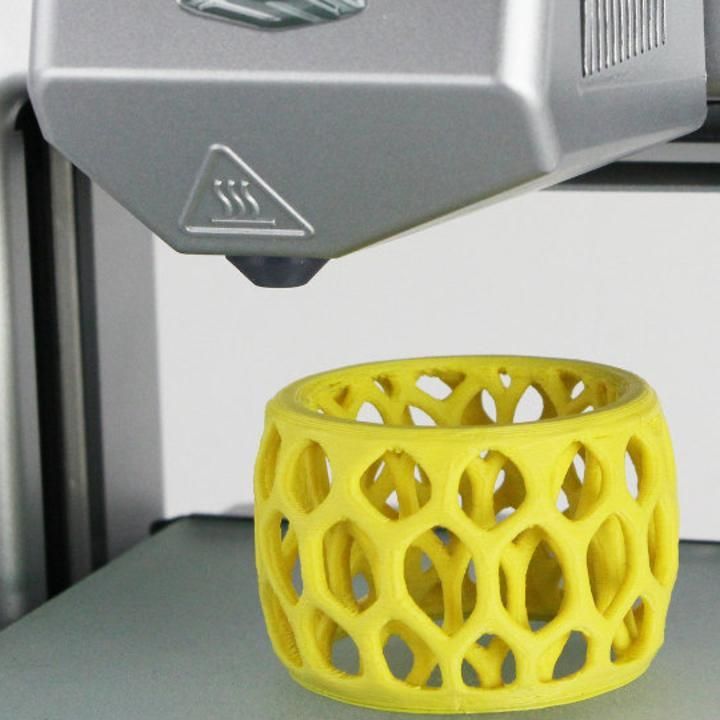
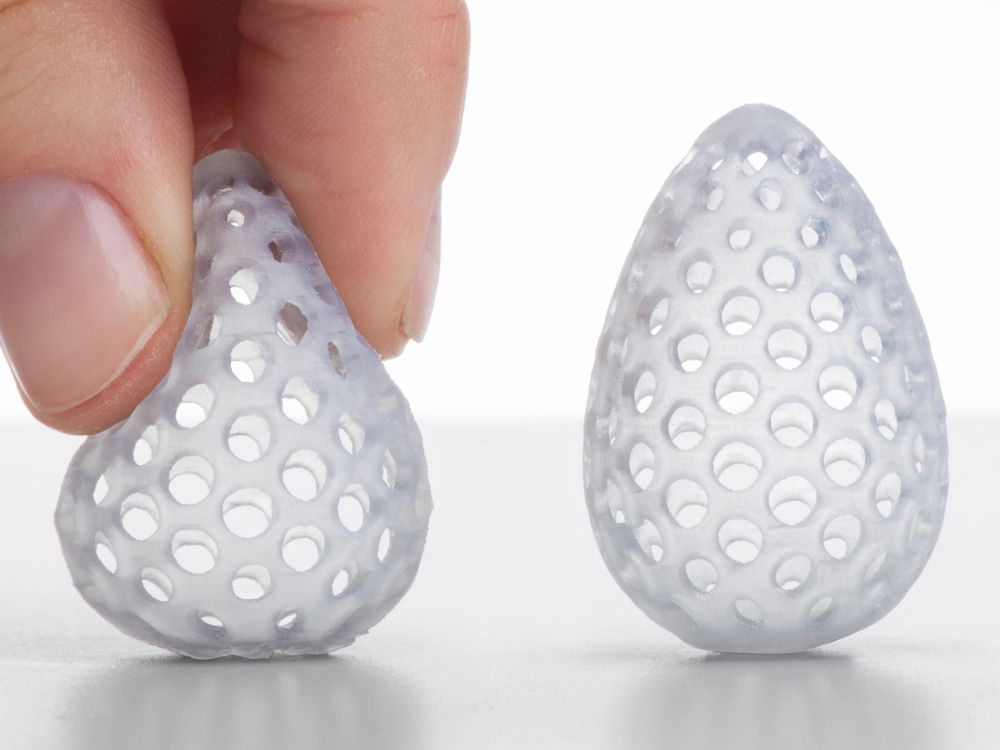
Flex is a filament that uses a combination of plastic and rubber. The main benefit of Flex filament is the creation of flexible prints with elastic properties. When printing with Flex, the amount of infill can control the stiffness of your print. Flex printed with 100% infill will be quite rigid, whereas a 0% infill would create a rubber tube or even balloon-like print.
Flex can be used for rubber wheels, mechanical grips or tough durable parts with superb shock absorption using 100% infill.
Print Speed: Use consistent flow rates and also smaller layer heights to ensure better interlayer adhesion.
Storage: Keep flexible filament dry and away from moisture.
Flexible
Impact Resistant
FLEX PRINTING GUIDLINES
Extrusion temeprature
±230 ºC
Bed temperature
± 70 ºC
Weight (kg)
0.
Warping
None
Layer bonding
High
Suitable for
Bolt Pro
Filament diameter (mm)
1.75
Applications
Visual Prototypes
Due to its rubber content, Flex is a great material to showcase rubber based visual prototypes because, with the correct settings, the achievable quality is high due it its strong interlayer adhesion features.
Functional prototypes
Flex is also used to create high-quality functional parts. The strength of the mix between plastic and rubber gives printed objects great durability features while being flexible. Specifications
ABS
Carbon
E-PLA
Flex
HIPS
Hybrid
Nylon
PETG
PP
Scaffold
ABS
ABS (Acrylonitrile Butadiene Styrene) is a strong popular filament that is used widely for 3D printing parts. It has strong material properties which produce parts with high impact, high-temperature resistance. Having these qualities however does make it a little harder to print with than some other filaments, but our printers come with a heated bed that ensures the filament is constantly heated to ensure prints adhere to the bed and print to specifications.
Temperature: ABS is very sensitive to temperature fluctuations during the printing process. It often cracks or warps as different layers cool differently. To ensure this issue is mitigated, our printers come with an enclosure system and heated bed to produce better results.
Sunlight: Direct sunlight over long periods can degrade the quality of the printed object so store ABS parts away from UV sources.
Carbon
Carbon filament is great for printing strong and durable parts. It is the perfect choice for mechanical parts, housing, shells or other protective casings. Carbon filament usually contains additional printing materials within its composition (ABS, PETG, NYLON etc.) depending on the product needed.
Steel Nozzles: Carbon filament is very abrasive and it is better to print with steel nozzles to reduce clogging.
Print Speed: To ensure better results, print carbon parts with a lower printing speed. This will ensure better results.
E-PLA
Leapfrog Engineering PLA (Polylactic Acid)is a biodegradable plastic that was formulated to provide greater durability than standard PLA without compromising on its eases of use when printing. PLA is the most popular filament used globally, offering great print quality with good dimensional accuracy and is used in many applications.
E-PLA is used in various settings mainly due to its ease of use compared to other filaments. It is the best filament to begin with for novice 3D printing users.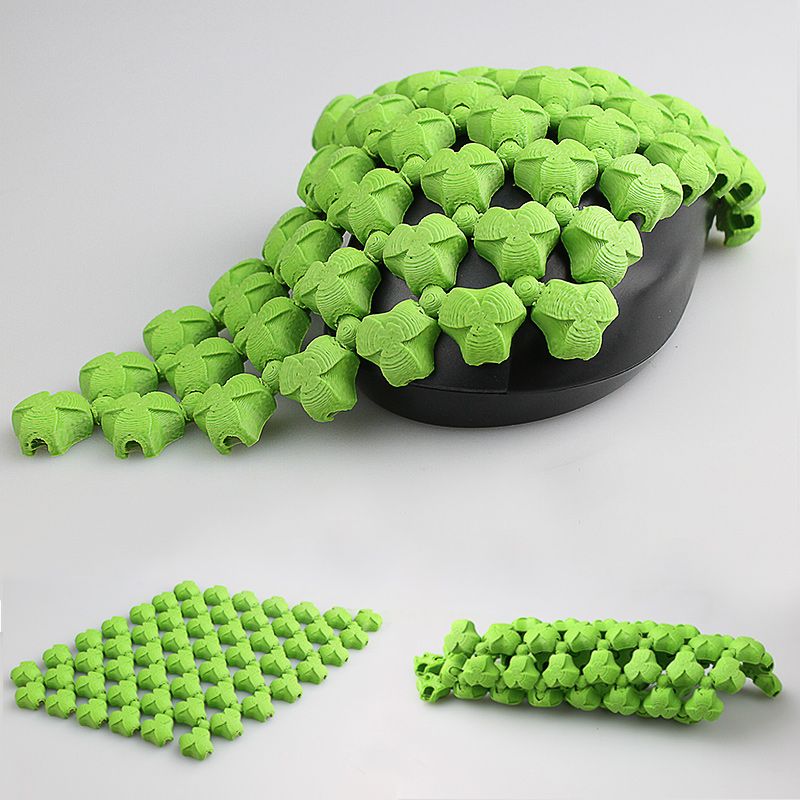
Sunlight: Direct sunlight over long periods can degrade the quality of the printed object so store E-PLA parts inside.
Storage: Store the filament in dry areas since it absorbs moisture.
Flex
Flex is a filament that uses a combination of plastic and rubber. The main benefit of Flex filament is the creation of flexible prints with elastic properties. When printing with Flex, the amount of infill can control the stiffness of your print. Flex printed with 100% infill will be quite rigid, whereas a 0% infill would create a rubber tube or even balloon-like print.
Flex can be used for rubber wheels, mechanical grips or tough durable parts with superb shock absorption using 100% infill.
Print Speed: Use consistent flow rates and also smaller layer heights to ensure better interlayer adhesion.
Storage: Keep flexible filament dry and away from moisture.
HIPS
HIPS is a filament that is used to both print objects and acts as support material during the construction of complex geometric objects with angles greater than 45 degrees. Acting as a support material, HIPS is easily removed when the completed object is submerged in D’Limonene where HIPS is soluble. The best material to pair HIPS with as support is ABS since they both have very similar mechanical properties. If used as a standard material, HIPS objects are very stiff and have good heat resistance.
Printing tips
Heated Bed: Temperature affects HIPS when printing and you need to ensure better management for better printing results.
Hybrid
Leapfrog Hybrid (CPE) is a strong material that is easy to print with and has various properties that make it an ideal material for large objects or objects that are used for mechanical prototypes. In terms of durability, it is between ABS and PLA and produces objects that can withstand high temperatures.
Temperature: Printing with Hybrid requires correct print bed temperature settings and managment.
Nylon
Nylon is a well known and very tough filament that has a wide array of applications. It’ is slightly flexible giving it the ability to bend without breaking and has durability properties such as heat resistance and impact resistance. Compared to other materials, it is the most versatile due.
Printing tipsStorage: Nylon filament like some other filaments can absorb moisture from the air and can lead to printing issues.
PETG
Polyethylene Terephthalate is the most widely used plastic globally and is used to create various products like standard water bottles. PETG on the other hand is specifically designed for 3D printing applications and is considered the bridge in terms of mechanical properties between PLA and ABS. It offers strength, impact resistance and chemical resistance without having issues like warping.
Having similar properties to PLA and ABS, PETG is a great filament for a number of applications that require more durability than PLA can offer, while being easier to print with than ABS.
Printing tipsPrint Speed: We recommend printing with lower than average print speed if the desire is to achieve better strength properties due to better layer adhesion.
Storage: Store the filament in dry areas since it absorbs moisture.
PP
PP (Polypropylene) is a light flexible material that offers a number of highly desired properties. It has high impact strength and bending abilities making it great for parts that require heavy use. In the consumer market, it is used for applications, such as packaging, stationary and more.
Printing tipsTemperature: Printing with Polypropylene requires planning and careful temperature management to ensure successful prints. It is a material that is not as forgiving as E-PLA during the printing process.
Storage: Store the filament in dry areas since it absorbs moisture.
Scaffold
Scaffold Soluble Support Filament is used to print complex geometric parts. Objects that have angles greater than 45 degrees or overhangs require another material to keep the shape uniform, especially during the printing and cooling process.
Printing tips
Storage: Scaffold being soluble in water means it is highly hygroscopic and should be stored in a dry environment.
Ultimate Materials Guide - 3D Printing Flexible Filament
Overview
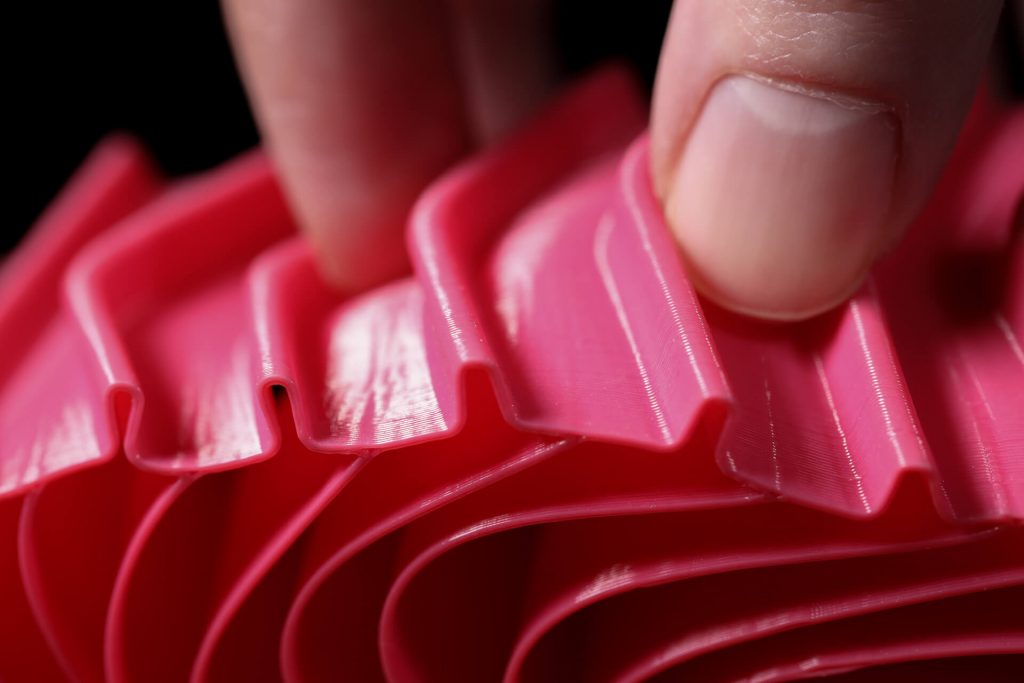
Flexible filaments are made of Thermoplastic Elastomers (TPE) which are a blend of hard plastic and rubber. As the name suggests, this material is elastic in nature allowing the plastic to be stretched and flexed easily. There are several types of TPE, with Thermoplastic polyurethane (TPU) being the most commonly used among 3D printing filaments. In many cases, these terms are used interchangeably, along with popular brand names such as Ninjaflex. The degree of elasticity in the plastic depends on the type of TPE and the chemical formulation used by the manufacturer. For example, some filaments can be partially flexible like a car tire but others can be elastic and fully flexible like a rubber band. This guide will cover tips to help you with both of these variations of flexible filaments.
- Flexible and soft
- Excellent vibration dampening
- Long shelf life
- Good impact resistance
- Difficult to print
- Poor bridging characteristics
- Possibility of blobs and stringing
- May not work well on Bowden extruders
Hardware Requirements
Before 3D printing with flexible filaments, make sure your 3D printer meets the hardware requirements listed below to ensure the best print quality.
Bed
Temperature: 45-60 °C
Heated Bed Optional
Enclosure Not Required
Build Surface
PEI
Painter’s Tape
Extruder
Temperature: 225-245 °C
Direct Drive Extruder Recommended
Cooling
Part Cooling Fan Required
Best Practices
Flexible filaments come with many unique challenges that you want to be aware of.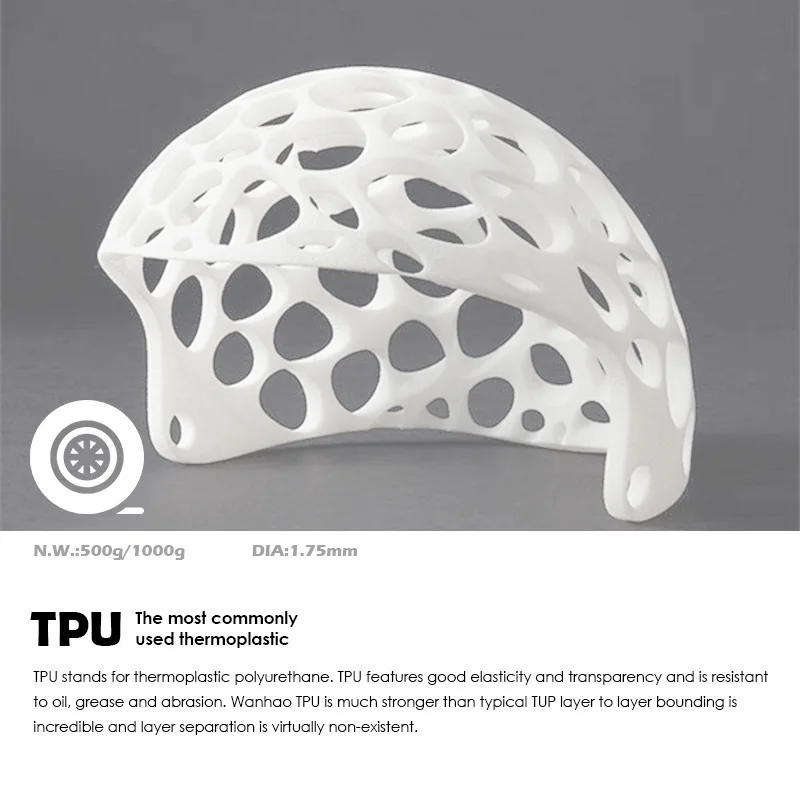 These tips will help you reduce the chances of common 3D printing issues such as clogging, kinking, and stringing.
Use Direct Drive Extruders
While some partially flexible filaments work fine with Bowden Extruders, most fully flexible filaments require a Direct Drive extruder for best results. The distance between the drive gear and the melt zone of the hot-end needs to be as short as possible to efficiently feed the filament into the nozzle. Additionally, the pathway through which the filament travels into the melt zone should have tight tolerances to prevent the filament from kinking or coiling inside. For these reasons, it is typically much easier to print flexible filaments with a Direct Drive extruder versus a Bowden extruder. If you are unsure about your 3D printer’s capabilities, you may want to check with the manufacturer to see if the extruder has been approved for use with flexible filaments.
Use Slow and Consistent Feed Rates
Flexible filaments typically print best using a slow and consistent feed rate.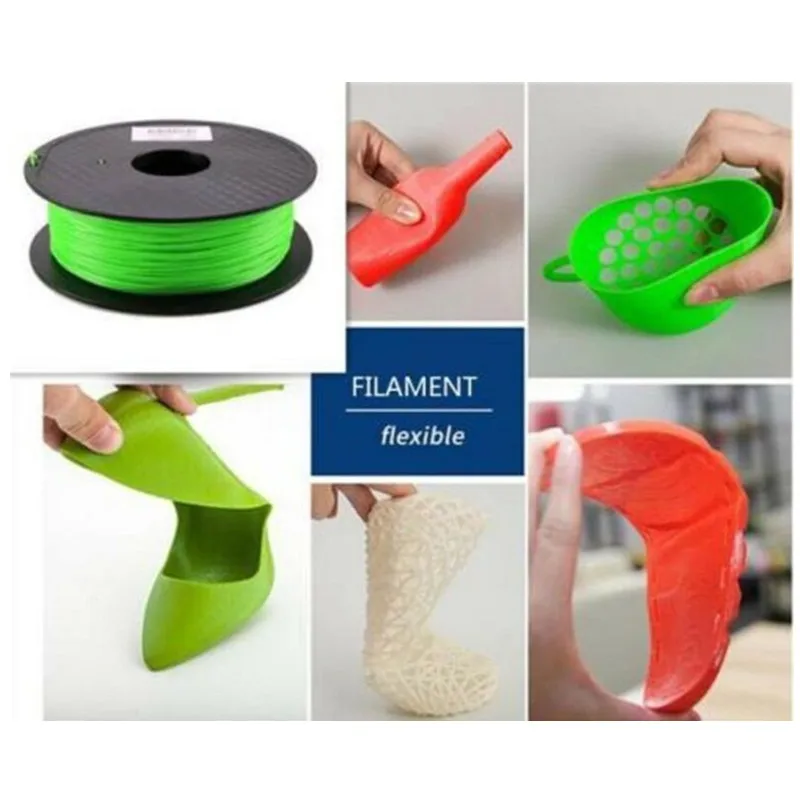 Because the material is elastic, it can be very difficult to control sudden changes in the print speed. Higher print speeds can cause the filament to compress and will most likely result in a jam. Slow and steady is the best approach. Simplify3D provides all of your feed rate settings on the Speeds tab of your process settings so that you can easily configure these values. Finding the optimal print speed for your material can take several attempts based on trial and error. We have seen that speeds of 1200 mm/min (20 mm/s) can be a good starting point for most materials.
Reduce Resistance from the Filament Spool
A few tweaks to your material spool can also make a big difference with flexible materials. Typically, your extruder will pull the filament into the nozzle, forcing the filament spool mounted on your printer to unwind a bit of plastic in the process. However, because flexible materials are elastic, this will stretch the filament out as it is being pulled in and can actually result in under-extrusion.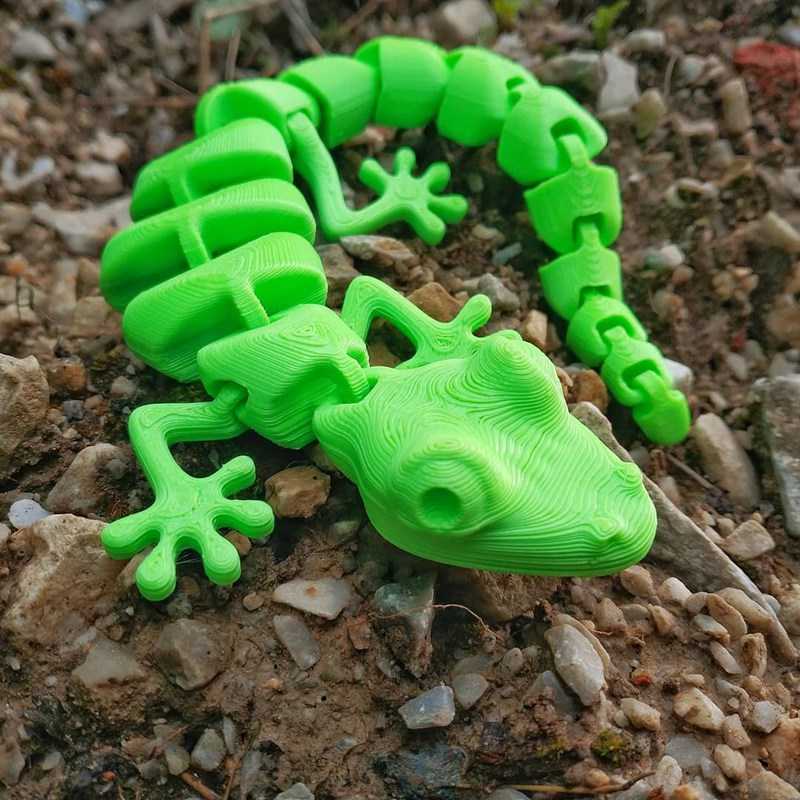 Try mounting the spool above your printer so that the filament unwinds in a downward direction which can reduce the resistance. It can also be incredibly helpful to mount the spool’s hub on a bearing to allow the spool to spin as freely as possible.
Tune Your Retraction Settings
The elastic nature of flexible filament makes it sensitive to quick movements such as retractions. In order to successfully print the filament, you will need to optimize your retraction settings to reduce these movements. While you are first starting with this material, we would recommend disabling retraction completely. You can make this change in Simplify3D on the Extruders tab of your process settings. With retraction disabled, you can focus on finding the perfect speed and extrusion rates that allow you to reliably print your models. After you are more confident in these settings, you may wish to add a very small amount of retraction with a slower retraction speed to help with any potential oozing from the hot-end.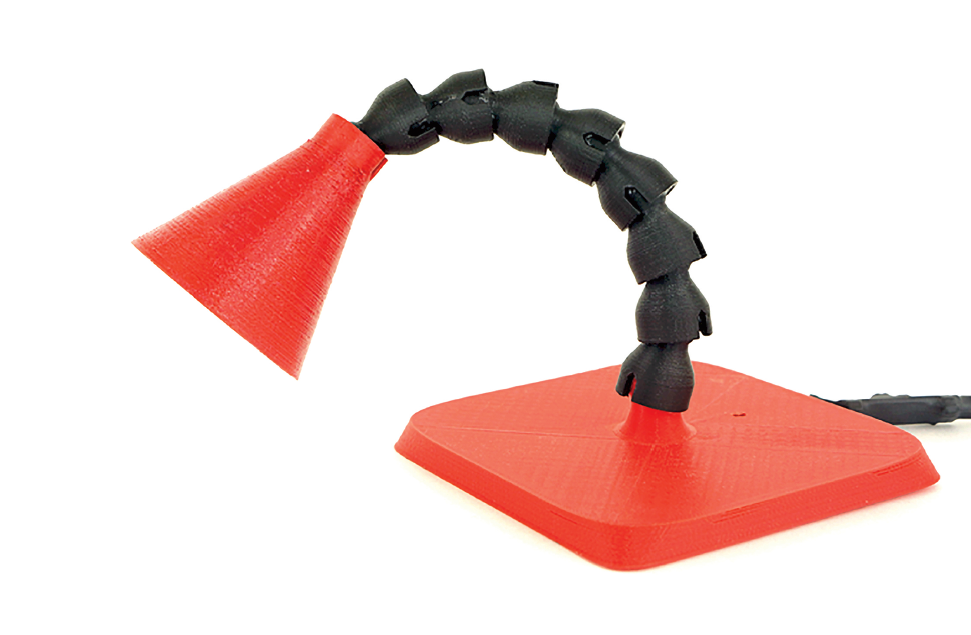 Simplify3D also includes a unique option called Coasting, which will automatically help lower the pressure in the nozzle when you approach the end of a segment, which can significantly reduce blobs and stringing with these materials. If you want more information about other options that can help reduce hairs and stringing on your prints, we have an entire section on our Print Quality Guide dedicated to that issue: How to Reduce Stringing and Oozing.
Optimize Your Travel Movements
Retractions can be particularly troublesome for flexible materials, so it is typically best to minimize the number of retractions required for your print. Simplify3D has a great feature that was built specifically for this situation. Instead of moving in a straight line from point A to B, the software will actually choose a completely new path when moving between these points, with the goal of staying within the interior of your object so that there won’t be any oozing or stringing. With this unique feature enabled, you can greatly reduce the amount of retractions required for your print and significantly improve your print quality.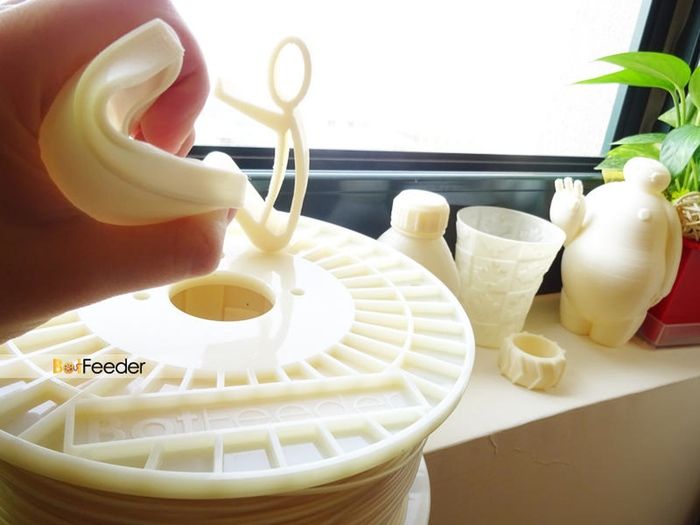 To use this feature, click on the Advanced tab of your process settings, and enable the “Avoid crossing outline for travel movement” option.
Pro-Tips
- Optimize the feed rate by printing at lower layer heights in the 0.1mm – 0.2mm range. The lower layer height requires less plastic, so it allows your extruder to use a lower feed-rate, relieving the burden on the filament.
- Try to avoid using rafts with flexible materials, as the base layers of the raft have higher extrusion rates which may create issues.
- If you are designing a flexible part that needs to fit on top of another object, try using a negative tolerance between the parts so that the flexible part will need to stretch to fit over the other object snugly.
Get Started with Flexible Filaments
Now that you’re ready to start printing with flexible materials, we have a few tips to help you get started. View some typical applications below, try out a few of our sample projects, or choose a popular filament brand to purchase for your next project.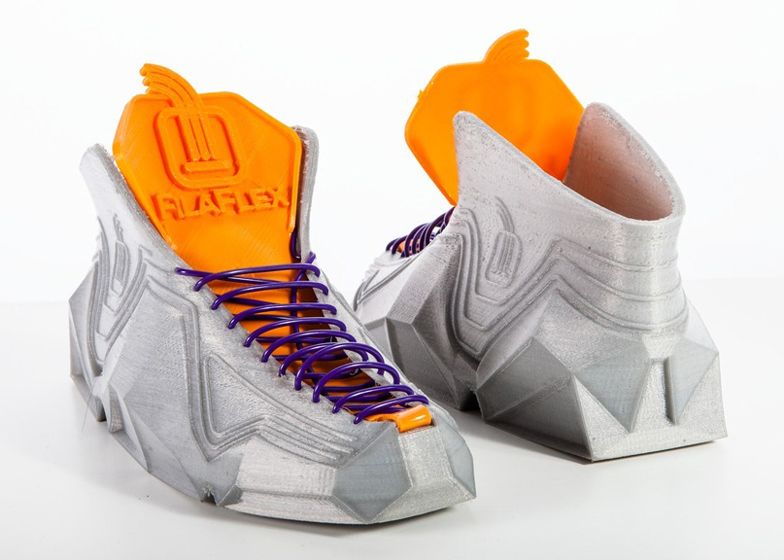
Common Applications
- Vibration dampening
- Grip Sleeves
- Phone cases
Sample Projects
- RC Car Tire
- Phone case
- Bike Handle
Popular Brands
- NinjaTek Ninjaflex, Armadillo, Cheetah
- Polymaker PolyFlex
- eSun TPE
- Sainsmart Flexible TPU
3D printing FLEX plastic in Sprint 3D
FLEX (Flexible PolyEster) – is a plastic used for 3D printing complex shapes containing flexible elements. The material is rubber-like, so you can easily print a flexible part or a separate component for the finished product. The emergence of flexible elements in 3D printing is a new step in its development, opening up even more possibilities. 3D printing of FLEX plastic in Sprint 3D means high quality with fast order execution.
FLEX plastic for 3D printer allows you to create rubber parts for machines and equipment, soft toys, plastic shoes and much more.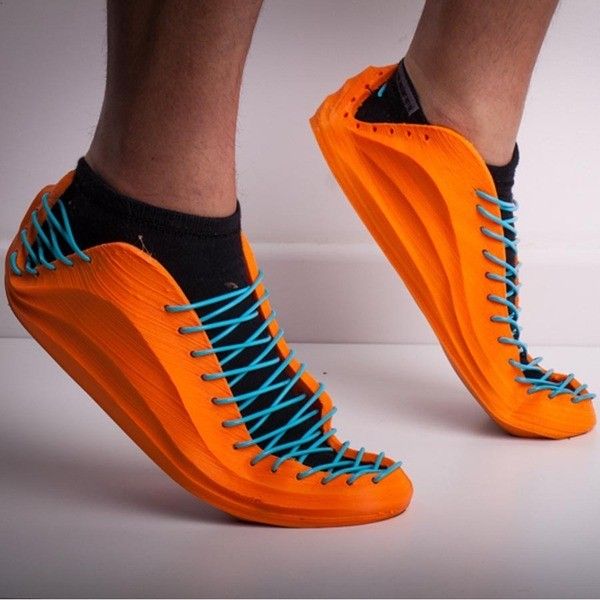 High elasticity, resistance to tearing, resistance to moisture and other negative factors - all this makes FLEX simply indispensable in modern 3D printing.
Material Specifications
The main features are:
- High melting point. The table heats up from 80 to 110 degrees, and the nozzle - from 220 to 240 degrees Celsius.
- Resistant to mechanical stress and even to rather aggressive solvents.
- No reaction with any of the essential oils.
- Large selection of material colors.
- Relatively difficult machining.
3D printing FLEX plastic allows you to create complex three-dimensional models, the individual elements of which are connected using a soldering gun or synthetic rubbers. The sophisticated FLEX print of allows the production of prosthetics, military models and other items where maximum wear resistance is required.
The nature of FLEX plastic for 3D printer is quite similar to PLA plastic, also being a product of natural origin. The main production material is corn. This not only ensures safety and environmental friendliness, but also guarantees complete biodegradability. Unlike a number of other plastics, the use of FLEX is more efficient and safer.
3D printing FLEX plastic in SPRINT 3D
3D-printing on its own industrial 3D printers
The largest working area is 500x500x800 mm
9000 Work with high-quality plastic rodscolor color for the choice
Delivery throughout Russia and CIS countries
If the product does not meet the technical specifications, we return the money
3D printing FLEX - basic rules
Flexible plastics are specific materials that require a clear understanding of how to work with them. When working with
FLEX filaments, there are three main rules to follow:
1.
 Do not put pressure on the filament from above so that it does not bend inside the extruder.
 2. Printing should be carried out at low speeds - up to 40 mm. Otherwise, the filament may sometimes bend and slip between the extruder wheel and the presser mechanism.
3. There must be no space between the thermal barrier and the extruder wheel. If there is one, the thread can also bend, as a result of which it will fill the voids.
We at SPRINT3D have been printing using flexible materials for several years now and create unique products of any complexity, shape and purpose. If you are interested in production using flexible plastic FLEX, , please contact us at any time.
5 reasons why FLEX 3D printing is better than analogues
The properties of
FLEX plastic for 3D printer can be compared with other materials: Elastan, Elastan D and Plastan. But it does have a number of key advantages:
1.
 It is the most flexible plastic of all.
 2. By its properties, it resembles rubber to the maximum, which opens up wide opportunities for the production of original products.
3. The strength and heat resistance are an order of magnitude higher.
4. Better elasticity than the materials in question.
5. Neat appearance of end products due to material properties.
Of course, there are some difficulties with this flexible plastic. Due to its high flexibility, it can be more difficult to load into the printer, parts are sometimes blown off the platform, etc. And this once again confirms that this work should be done by experienced specialists. Otherwise, there is a risk not only to transfer expensive material in vain, but also to damage the printer itself, which will result in expensive repairs.
FLEX print. Process
Loading material into a 3D printer is almost always done manually. Automatic loading is practiced only under the condition of a low thread feed speed.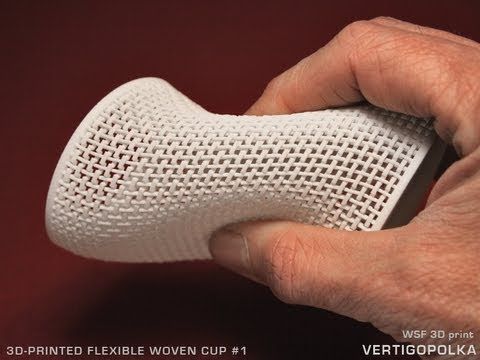 But even in such cases, to guarantee the result, we prefer to load the material manually. New generation clamping mechanisms are used, which greatly simplifies the work and guarantees the absence of defects. Old-style clamping mechanisms are simply not adapted to work with such soft materials.
Use settings close to those for PLA plastics. The differences are small: the temperature of the platform is 80 degrees, the increase in the "Border" parameter and the use of a table substrate, which can be a special glue or ordinary blue tape. We maintain the print speed within the range of 20-40 mm per second, which guarantees the highest printing accuracy and the absence of defects.
Wide color gamut for original results
Like most 3D printing consumables, FLEX is available in a wide range of colors. Including there is a transparent version with good light transmission. This diversity allows you to create original products and elements in the right color, so that they are not only functional, but also presentable - made in a unique design.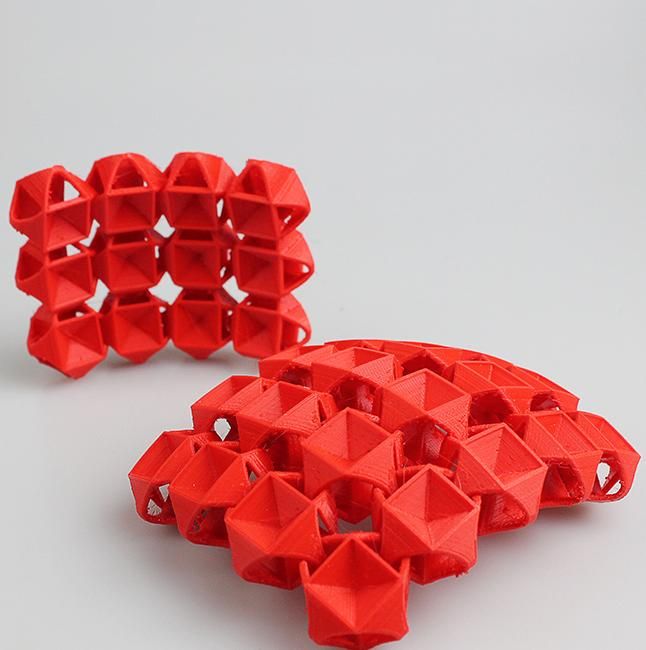 The cost of the material, depending on the color, usually does not change, so this will not be reflected in the cost of the final product either.
If you want to order FLEX print products and be sure of the quality, please contact our company. We use materials from trusted manufacturers and modern equipment for 3D production. We will discuss all the details and start production immediately.
You may be interested in
How to print flexible materials on a conventional FDM printer? Likbez from the company REK.
Along with beautiful photos and interesting videos, where someone prints high-quality models with flexible material on a regular FDM printer without any problems, there are many questions and messages on the Internet, such as “How to print with flex?”, “I generally have flex does not work, what should I do?” etc.
In short, the average picture looks something like this:
It's time to end this. Likbez from the company "REK".
Foreword.
For flex printing, it is important to observe some points. Alas, not all 3D printer manufacturers create their product with the ability to print with flexible materials. But after all, you already have such a powerful tool as a 3D printer, on which you can print any desired part, so it's time to put the old joke “buy a 3D printer - print a 3D printer” into practice. The entire printer will most likely not need to be printed, but a quick and easy tuning will be needed. 9).
Hardware. Extruder. The most common problem is that the extruder chews up the rod and it looks something like this (the problem area is circled):
No matter how carefully and accurately you push the flex into the extruder, after 5 seconds or after 5 minutes, it still chews up. This happens because there is a gap between the feed rollers and the entrance to the hot end or tube (bowden) channel in which the flexible rod will jam (YES, even if it is a very small gap. YES, even if there is only a couple of mm).
Familiar ABS and PLA are quite hard, they are difficult to crumple even in a centimeter gap. Flexible plastic should not be left even the slightest opportunity to go somewhere “not there”, so this gap in the extruder must be removed. For RepRap owners, this will not be difficult at all, because. they probably already have tuning experience; in free catalogs of 3D models (such as thingiverse or youmagine or myminifactory) everything has already been invented before us and there are already ready-made models of modified extruders or parts for tuning existing ones. In general, the new extruder will be different in this:
Here are some examples of tuning extruders for different printers:
http://www.thingiverse.com/thing:247024 - Solid Dulls and analogues
http://www.thingiverse.com/thing:191503 - Printbots (masterkits)
http://www.thingiverse.com/thing:16319 - MK9 Extruders
http://www. thingiverse.com/thing:231310 - Replicator 1, Duplicator 4
http://www.thingiverse.com /thing:18875 - Makerbot variant
http://www.thingiverse.com/thing:553917 - DaVinci
http://www.thingiverse.com/thing:391803 - 3DRag
http://www.thingiverse.com/thing:550788 - Robo3D
https://www.youmagine.com/designs /um2-feeder-sp3d-version - Ultimeker 2
http://www.thingiverse.com/thing:99395 - Orca 0.43
Add to the list in the comments :) Hardware #2. Hot end. (Let's come up with a normal Russian name for this thing). Not all “hot ends” (hot ends) are equally useful and this needs to be corrected.
This moment, by the way, concerns not only flexible rods, but also often causes difficulties when printing PLA.
The essence of the problem lies in the fact that the bar, getting into the hot end, begins to melt even before it reaches the nozzle, and a so-called “plug” from the material melt appears, which is very difficult to push through.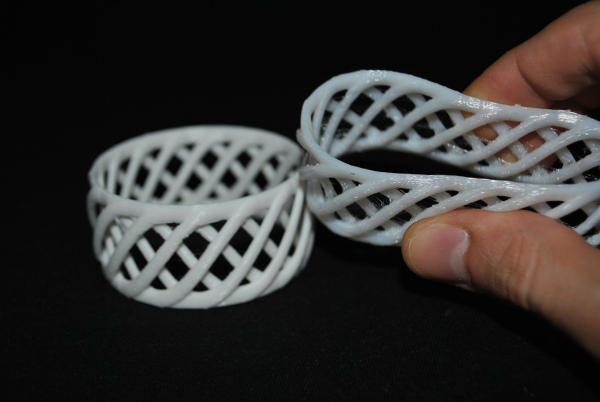 If a rigid PLA rod can still push through the melt due to the power of the extruder, then such a trick will not work with a flexible material - it will wrinkle, bend and curl even in those places where it seemed impossible. Very often, owners of 3D printers in frustration call such a situation “nozzle clogged”, although this is not entirely true.
The picture below shows a schematic of a hot end. Where the color indicates the normal state of the bar during the printing process. (blue indicates where the rod is still hard, red indicates where it begins to melt)
In this state, the plastic will exit the nozzle quite calmly without any difficulty, but if the heat goes higher, the rod will begin to melt earlier (in the cold zone) and will create additional resistance for the extruder. Solution: cool the top of the hot end by any means. Put the fan on the hot end, smear the heatsink (if any) with thermal paste at the junction with the hot parts, make the air flow directed (to the hot end), etc.