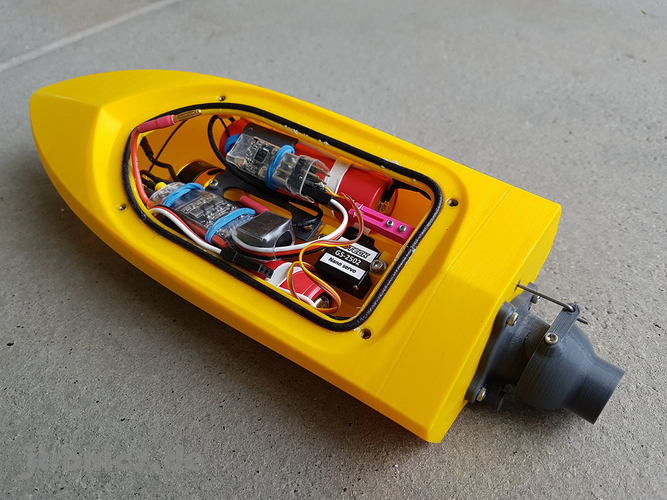
3D printer test boat
The 3D Benchy 'torture test' that pushes 3D printers to the limit
0Shares
New to the world of 3D printing? Or wondering why people keep printing little boats on their 3D printers? The 3D Benchy is ‘the jolly 3D printing torture-test’ designed by Swedish 3D technology reseller Creative Tools.
The name ‘Benchy’ is short for benchmark. This little boat is designed with geometric features, such as the portholes and an open cabin, that provide a challenge to 3D printers. When using a new filament, or 3D printer, the 3D Benchy can be used to see how they measure up. On setup, they can also highlight problems that may be occurring in the software commands sent to a 3D printer, or the filament.
Layer separation and ‘delamination’
If layers of extruded plastic aren’t sticking properly, the issue could be that the layers are too thick, or extrusion temperature is too cold. Both issues can be easily solved in the software used to program a 3D printer.
Spaghetti-ing
The dreaded (and occasionally comical) spaghetti-ing effect of a 3D print occurs when layers become completely delaminated, but the 3D printer continues printing. It can be caused by the same settings as above, but if it’s persistent it can be a fault with a 3D printer part.
A 3D Benchy boat with some spaghetti-ing on the hull. This is the result of an experiment using 2 different colored filaments, which is an extra challenge to extrusion. Photo via: 3DBenchy on FlickrStringing/webbing to make ‘hairy’ prints
This is when thin strings of plastic build up in areas of the object that should be empty.
Enabling filament retraction can solve this problem. Retraction ensures that the 3D printer’s extruder doesn’t let the filament spill over between one section and another. Retraction on – the filament returns into the extruder in-between sections so it is not still melting out of the print head.
A hairy 3D Benchy with some layer delimitation on the hull.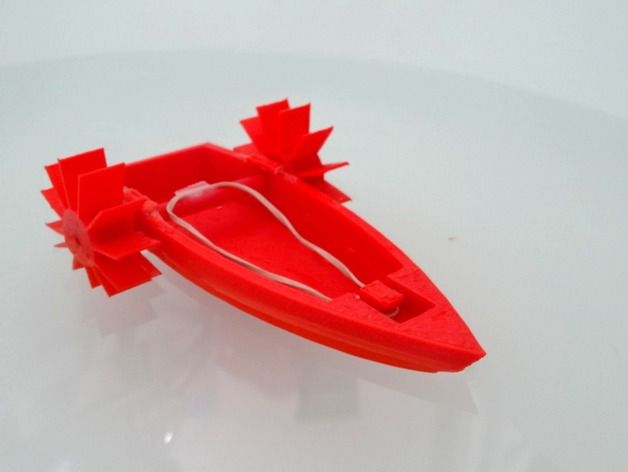 Photo via: wizardru.net
Rough surface blobs
This is a problem that may be solved by turning retraction off. If a 3D printed object doesn’t have any spaces in it, e.g. portholes and cabins, in some cases, it is better to turn retraction off so that the extruder isn’t resetting itself between every layer, meaning it can print more smoothly.
Surface blobs on a 3D print. Photo via: Simplify3DInfill settings
Infill is the interior structure of a 3D print. An ability to set this percentage is one of the things that makes 3D printed objects so light and efficient from a materials usuage perspective. The part of an object you don’t see doesn’t need to be solid, so a 3D printer creates it as a kind of waffle structure instead.
Waffle-like infill of an incomplete boat. Photo via: madprinter.orgThe solid layers is an object’s exterior, i.e. the visible part of an object. Imbalance between the infill and solid layers can create holes or gaps in an object.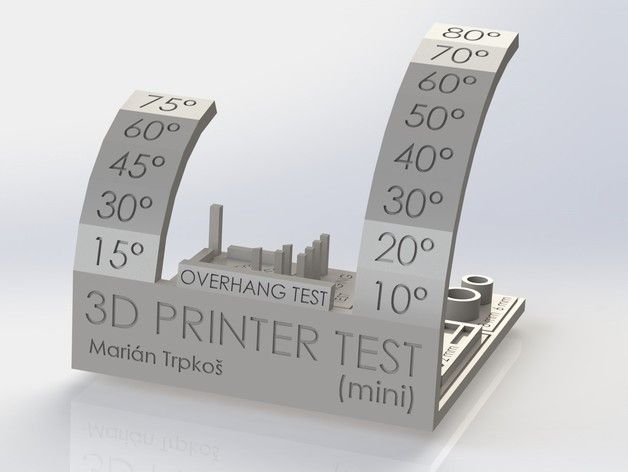
Available for everyone
Licensed under the Creative Commons Act, Creative Tools encourage 3D printer users to download, distribute and remix the 3D Benchy .stl file as much as they please. The license even allows users to sell their 3D printed Benchy creations, as the site stipulates: ‘you own them!’
A devoted Flickr photo archive tracks the different 3D prints and designs of the boat in photos submitted by the 3D printing community.
From left to right: 3D Benchy smoke plume design by AKIRA, boat stand by Tomáš Vít, and a LEGO compatible boat by Creative Tools. Photos via: 3DBenchy on FlickrFailure is a badge of honor
YouTuber Vicky Somma, (TGAW on YouTube) who 3D Printing Industry interviewed for global 3D printing day, has turned the iconic boat design into a badge of honor for 3D printing beginners, and frustrated veterans alike.
From Failure Comes Knowledge Maker Coin by Vicky Somma Photo via: VickyTGAW on ThingiverseThe From Failure Comes Knowledge Maker Coin celebrates the idea that failures are part of the process of 3D printing, and features a Benchy boat with the infamous ‘spaghetti-ing’ effect on top.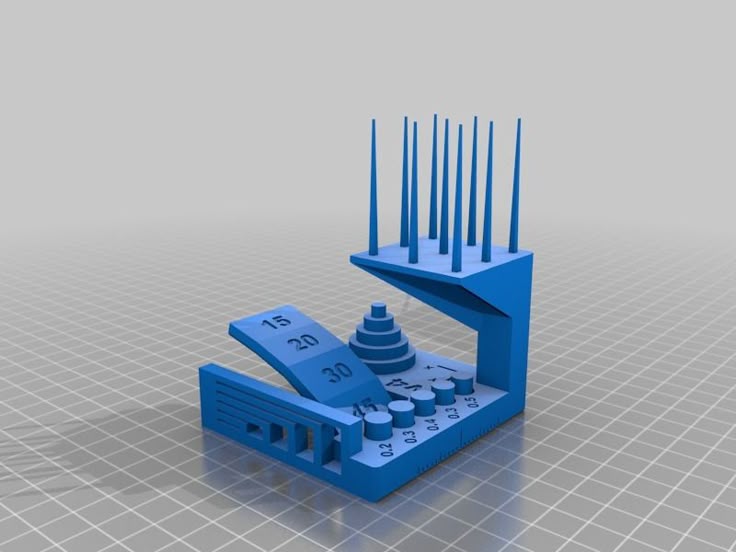
In 3D Printing Nerd’s video ‘My Top 5 3D Printer Tips After Getting Your First #3DPrinter’, Joel Telling also lists failure as an important part of the process. Essentially, it means that you are learning and experimenting.
Other tips, and a preview of people’s first 3D prints can be found in our Welcome New Makers article, from the beginning of 2017.
Joel Telling’s ‘Top 5 3D Printer Tips After Getting Your First #3DPrinter’ Screenshots via: 3D Printing Nerd on YouTubeAny 3D Printing Industry readers making remixes of the 3D Benchy design can send them to us via email, or tweet photos to us on Twitter.
The 3D Printing Industry Awards for innovation are now open for nominations.
Featured image shows Neon 3D Benchy boats by Javen Wilson of Mosaic Manufacturing Photo via: 3D Benchy on Flickr
Tags 3D Benchy 3D printing community 3D printing Nerd 3D printing newcomers beginners benchmark Benchy boat Creative Tools Joel Telling makers new makers TGAW TouTUbers Vicky Somma
Beau Jackson
The ‘Jolly’ 3D Printer Torture Tester
What is a ‘Benchy’?
Benchy is a small model of a boat made by Swedish technology reseller, Creative Tools. It is a calibration model designed to be printed quickly, and without support, to highlight the problems your printer may have under extreme circumstances. From Creative Tools on their Thingiverse page for the model, “(Benchy) is a 3D model designed by us at Creative Tools specifically for testing and benchmarking 3D printers. It is a small recognisable object that you can download for free, make and share.” On their
page for the model, they encourage users to print the small boat and document their results as well as settings used for printing the model. They offer a multitude of social media sites to share the results of your own Benchy. You can find the Thingiverse page for the model at https://www.thingiverse.com/thing:763622
The name given to the small boat, Benchy, stands for “benchmark”. The boat model was designed with torture testing in mind, as it includes challenging geometric features such as bridges, overhangs, small text and steep angles. The idea behind printing a Benchy boat is to be able to figure out exactly what your printer’s weakest point is. As it is known, “A chain is only as strong as its weakest link.” In the case of 3D printers, this is also true.
Why You Should Print a Benchy
By printing out a Benchy boat, you may be able to realize areas of improvement your 3D printer needs. For example, after you print out a Benchy on your own 3D printer, you may realize there are areas of inadequate part cooling, under-extrusion, stringing, etc. Lots of people use a Benchy to test new filament colors, new materials, or new settings using that filament. Furthermore, a Benchy can also highlight problems that may occur during print setup, such as layer delamination, command errors or the filament itself.
If you would like to learn of all the kinds of problems that can occur before or during printing, you can check out the Print Quality Troubleshooting Guide by Simplify3D here: https://www. simplify3d.com/support/print-quality-troubleshooting/
There is no wrong way to print out a Benchy, so get printing and test your printer!
References:
The 3D Benchy ‘torture test’ that pushes 3D printers to the limit. (2020, July 10). 3D Printing Industry. https://3dprintingindustry.com/news/3d-benchy-torture-test-pushes-3d-printers-limit-103662/
Print quality guide. (2019, June 21). Professional 3D Printing Software | Simplify3D. https://www.simplify3d.com/support/print-quality-troubleshooting/
Thingiverse.com. (n.d.). #3DBenchy - The Jolly 3D printing torture-test by CreativeTools.se by CreativeTools. Thingiverse - Digital Designs for Physical Objects. https://www.thingiverse.com/thing:763622
What does a chain is as strong as its weakest link mean? (2017, March 21).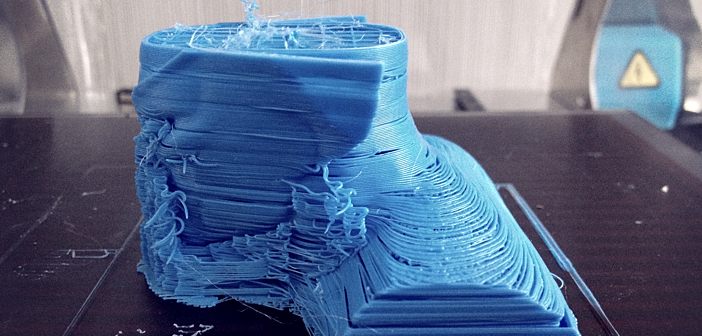 Writing Explained. https://writingexplained.org/idiom-dictionary/a-chain-is-as-strong-as-its-weakest-link
Posted on Apr 21, 2022 2:46:43 PM by Max Edward in Student Work, in Digital Maker Fabrication Degree, in UAT News
3DBenchy - 3D Printer Calibration Boat, detailed description
There are probably 100,500 reference samples that can be used to verify that the part measures exactly 20 × 20 × 10 mm. Or doesn't. Measuring objects coming out of a 3D printer and calibrating the settings accordingly is a tedious task. However, it could be made more fun.
Most 3D printer owners spend a lot of time adjusting hardware and software to make the printed objects as accurate as possible in size.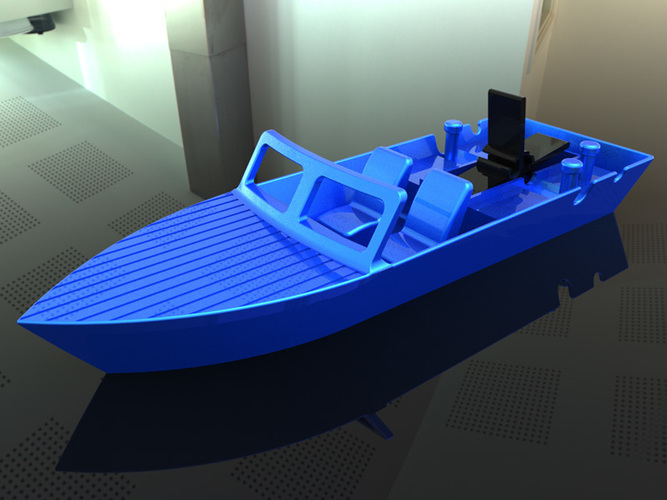 To achieve this, STL files are usually created or downloaded with various measured areas and parts, such as round and square holes, overhanging surfaces at different angles, etc.
These abstract pieces are great for sizing, but once printed and done, they usually end up in the wastebasket.
There is a slightly different 3D calibration model with preset parameters that you can download and use to calibrate your printer. The object that looks suspiciously like a boat is called #3DBenchy. When you print it and take all the necessary dimensions with a caliper, do not throw it away - let the children play with it :) Well, or adults!
The #3DBenchy is designed to offer the maximum amount of measurable parameters possible - all in one model. It's just a small boat, but don't let its modest size fool you! :) Immaculately printing such an STL file is quite difficult - it has several complex surfaces that clearly demonstrate the problems that various 3D printing technologies still face.
The recognizable shape, symmetry, and smooth overhanging curved surfaces of the case make #3DBenchy printed models very useful for identifying what needs to be improved in a 3D printer or slicer.
Some of the features of this boat:
- Symmetry
- Large overhangs
- Horizontal and vertical holes
- Easy to measure
- Troubleshooting Overhangs and Bridging Fragments
- See the full list below the pictures above
- See pictures below for dimensions
Since this object is small, it prints quickly and easily and is very inexpensive. You can easily print these boats one by one, changing the settings step by step to get the desired result. In the end, you will have a whole fleet of ships. And how happy the kids will be when they play their own version of naval combat right on the table! :)
The #3DBenchy.stl file is published under a Creative Commons license, which allows it to be printed, distributed, and sold to your heart's content.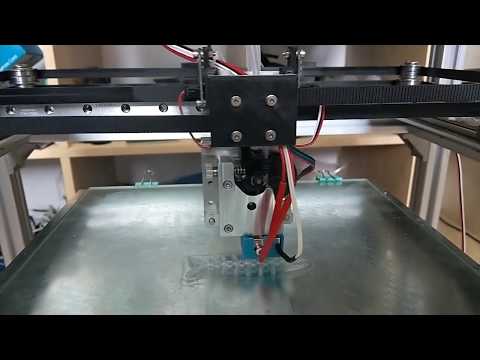
Despite the fact that the authors of the model tried to make something like a Swiss knife for 3D printing calibration out of #3DBenchy, it is not able to replace all calibration STLs. These files should be used in accordance with common practice. #3DBenchy is just an addition to an extensive set of tricky STL files designed for calibration and benchmarking. Use this ship however you like.
#3DBenchy has its own home port, www.3DBenchy.com, where you can download the file and read a lot of useful information about how this boat helps to improve the quality of printouts.
You can download files from Thingiverse and Sketchfab.
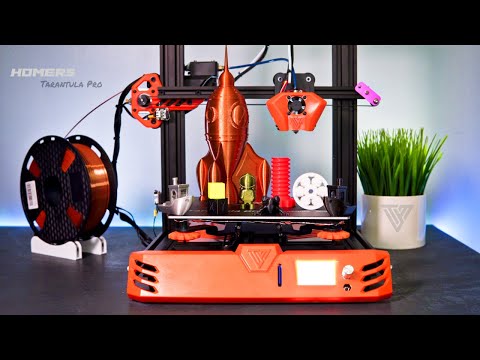
Top 7 models to test and print your Ender-3 (Pro/V2)
Want to see how your Ender 3 really works? Try a few of these Ender 3 3D Print Test Models today to adjust and fine-tune your printer settings!
Meet Your Printer
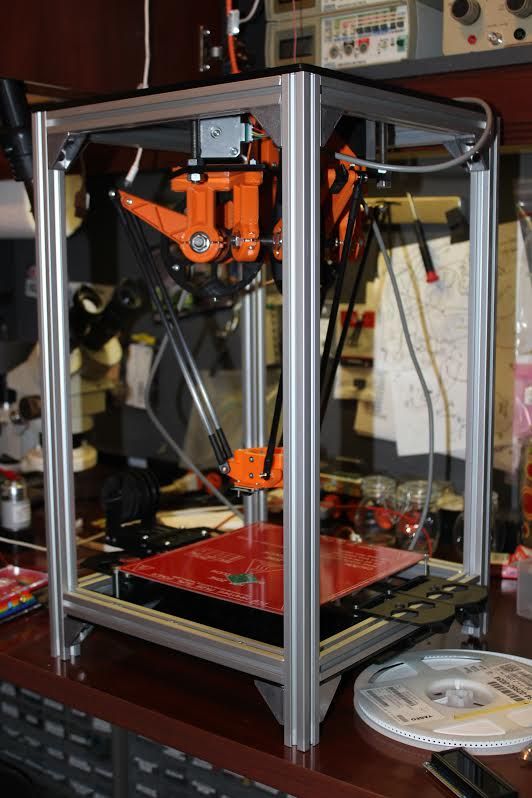
If you've ever bought a 3D printer, you'll know the thrill of getting it delivered. Naturally, the first thing you want to do is assemble it and start printing!
It has now become something of a tradition for manufacturers to include one or more STL print test files with the printer. Usually this model is designed to print beautifully and therefore impress the user with the machine's capabilities. In the case of Ender series printers, the test print is a 3D model of a dog.
And here the dog is a simple model that should print well. What does it mean? This means that you should not use the quality of the resulting model to evaluate the capabilities of your Ender 3. In other words, this dog is not a good test print.
Truth be told, the Creality Ender 3 and the Pro and V2 versions are very powerful 3D printers, so we suggest printing something more complex to get a proper printer preview. This will also help determine if your equipment is properly calibrated.
To that end, we've compiled a carefully curated list of the best Ender 3 test print models. All of the models shown here are designed to help you tweak your slicer settings and get the most out of your Ender 3.
1. 3DBenchy
What is it? This is one of the most popular 3D printing models due to its cute and thoughtful design that is meant to serve as a universal test for your 3D printer.
3DBenchy is a boat with a wide variety of shapes and textures. The purpose of 3D printing this model is to determine what your printer is good at and what it isn't so you can optimize your print profile.
What are we testing?
Surface Quality: Can your Ender 3 print a smooth, curved body?
Warp : 3DBenchy is a perfectly symmetrical model that makes it easy to spot warp problems.
Flat surfaces : The top surfaces of the chimney, main deck and box are horizontal and parallel to the base of the model. This way you can check if the printer prints well on multiple horizontal surfaces.
Tabs : There are some tabs in 3DBenchy that should show how your printer is handling them.
Cylindrical forms : Chimney is a test for printing concentric cylindrical forms. It also serves as a test for deviations in the roundness of such shapes.
Slanted holes : Small hole at the very end 3DBenchy tests your printer's accuracy by printing small parts.
First coat quality : The first coat is the most important. Luckily, 3DBenchy will also help verify this with a caption at the bottom that can show an elephant foot (if it has one).
Where to download? 3dbenchy.com
2. Platform alignment test
What is it? A simple print to help you level your Ender 3's table. The idea is that while the printer is printing these squares, you can adjust the platform and try to make sure all the corners fit properly on it.
How to use it? While the printer is printing squares, check all four edges. If you notice poor adhesion, move the platform closer to the nozzle by turning the rotary knob clockwise. On the other hand, if you see that the filament is not coming out of the nozzle or the print line is too flattened, turn the wheel counterclockwise to move the layer away from the nozzle.
Where to download? thingiverse.com
3. Ender Typing Speed Test 3
What is this? This is a simple model for checking print quality at different print speeds. Since the Ender 3s can print at higher speeds, like over 100mm/s, why not test it out?
How to use it? The test starts with a speed of 50 mm/s and for every 5 mm in height the speed increases by 10 mm/s. As a result, the model has a height of 30 mm and consists of layers created at different print speeds.
This thoughtful design features notches and flat and rounded sides that indicate any signs of poor performance. This way you'll know what print speed your Ender is working at best.
Where to download? thingiverse.com (Keep in mind that you won't see the model right away. You will need to download a whole folder of test files and then find the right file for the speed test.)
4. Snot test
What is this? Snot occurs when filament continues to exit the nozzle while the print head is moving. This simple model has two turrets to help you determine if your printer is having filament flow issues.
How to use it? Simply print the model and watch for any signs of tension between the towers. If the printer is snotty, it's a sign that travel speeds, retracts, and possibly even temperature settings need to be adjusted.
Where to download? thingiverse.com
5. Lattice cube
What is this? Lattice Cubes are a popular choice for testing as they tend to be quite difficult to print. Use it to challenge your Ender 3.
How to use it? The purpose of this lattice cube is to achieve good results without the use of auxiliary material. If the lattice cube is okay, that's a sign that your cooling, temperature, and retract settings are fine!
Where to download? thingiverse.com
6. Testing printing of overhangs (overhangs and bridges)
What is it? This Thingiverse file contains two models for testing hanger angles. The large model has angles from 45° to 15° in 5° increments. The smaller one tests 12°, 15° and 18° angles.
How to use it? As a general rule, angles less than 45° (from horizontal) must be printed with supports. On the other hand, theory does not always correspond to reality. To test this, just print these files and see how the printer performs when printing various overhangs. This can help you determine the overhang thresholds for the support settings.
Where to download? thingiverse.