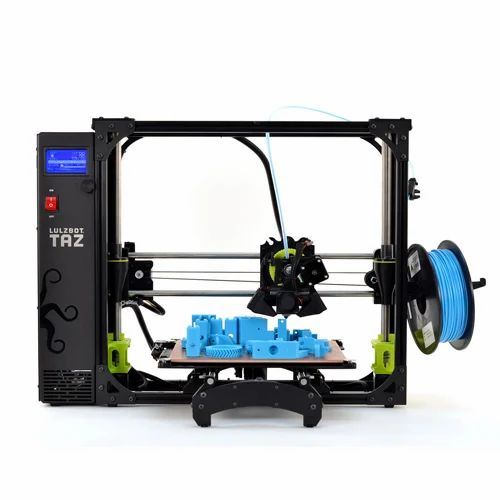
3D printer student discount
6% Student Discount | Creality3D Student Discounts
Creality is a leading 3D printer manufacturer dedicated to developing the FDM/resin 3D printer, 3D printer filament, and maker related products. Subscribe to learn more.
Creality is a leading 3D printer manufacturer dedicated to developing the FDM/resin 3D printer, 3D printer filament, and maker related products. Subscribe to learn more.
Student Discounts
Exclusive
6% Student Discount
Online at Creality3DFAQs
Once you’ve added what you want to your bag and headed to online checkout, simply enter your discount code.
It varies between different retailers, but normally there will be a box titled Promo Code, Discount Code, Student Discount or Voucher Code on the checkout page, just before you put in and confirm your payment details. Once you’ve put in your code, the offer amount will be taken off the total price so you can see how much money you’re saving.
For a select few of our offers, there''s no code involved, you have exclusive access to the discount site without needing our student discount code at checkout. These include brands like Samsung or Apple, for example.
We also have some in-store offers, which require you to show your Student Beans Student ID to access.
Many of the brands we work with offer free or fast delivery. Simply check out the retailer’s site to check out what their delivery and returns policies are. ASOS, for example, offers a variety of delivery options - including ASOS Next Day Delivery, Standard Delivery, Nominated Day Delivery, Evening Next-Day, Click & Collect and ASOS Instant. ASOS Premier Delivery is an additional, paid option.
Typically, yes! But make sure you read the small print before putting any money down on the assumption that you can add our discount codes to a sales item.
Students, silly! Anyone over the age of 16 and in full-time education - including uni, college, sixth form and high school - can use Student Beans. If you’re studying for an apprenticeship, you’re also eligible.
All you need to do is register and verify your student status in order to get access to thousands of free student discounts. You can sign up here.
Each brand we work with has their own rules regarding their discounts. This means that while some discount codes will work with all products, some codes only apply to selected products in the brand’s range. Simply check the Terms & Conditions to see where and when the discounts can be used.
We can all agree it’s pretty heartbreaking to get excited about a great deal, only to find it doesn’t work at checkout.
That’s why all of the discount codes you’ll find on Student Beans are hand tested by us regularly. We also check with our brand partners to make sure our codes are working.
Sign up for free membership, emails and newsletters as these are the most likely ways you’ll be contacted about promotions, sales, discounts and more! You might even unlock member-only product launches and early access to perks.
Check out the sales and discounts section. Often relatively new stock will be moved to make space as new stock comes in, meaning you can get more for less.
Use Buy now, pay later to spread out payments of your order during checkout. An installment plan - like Afterpay, Klarna, or Affirm - will let you enjoy interest-free payments without having to clear the entire amount at once.
Student Beans Guarantee
4.5 out of 5
Here at Student Beans, we aim to connect leading brands to our audience of over 163 million students in 50+ countries worldwide. With access to student-exclusive discounts at over 10,000 stores online and on the high street – including Gymshark, McDonald’s, Amazon Prime and many more – Student Beans unlocks more student discounts than any other student ID card. We regularly hand-test all our discount codes to ensure they’re working as they should, too, so you can be confident in using the deals and discounts you see on Student Beans.
3D Printing in Education | Discounts & Resources
Take the guesswork out of selecting the right 3D printer. Get exclusive education discounts on best-in-class hardware bundled with everything you need to get started. Dynamism’s 3D printer education program makes EdTech integration easy.
Get Started
Reliable Hardware
Our curated list of classroom-ready hardware and materials are independently tested, proven reliable, and easy to use. From grade school through your master’s thesis, we have what is right for you.
Seamless Software
From design to print, most included software is free, easy to use, and enables streamlined classroom and print queue management. Additional paid design, management, and validation software is also available separately, depending on your specific organizational needs.
Curriculum and Professional Development
Getting started is easy with optional installation services, user training, and ready-made lesson plans. Shop online or use the form below.
Higher EDU Makerspaces
3D Printing has become essential to STEM education in universities across the country. Old Dominon University has implemented a new Engineering Makerspace and Invention Center to ensure their students are ready for the professional workforce with the latest technology. Discover their results below:
When we decided to upgrade the 3D Printers for our MakerLab, we contacted Dynamism. They were great to work with, gave us an excellent deal and ensured that we obtained the equipment we needed (Ultimaker 3D Printers). They are super responsive to all questions and requests and are true professionals. We look forward to working with them for many years into the future!
– Aric Rindfleisch, Executive Director Executive Director, Illinois MakerLab, University of Illinois
The purpose of our labs is to allow students an outlet to explore digital fabrication either independently or within the context of coursework with little restrictions other than the limits of their own imaginations.
– Chip Bobbert / Duke University
We have 60 [3D printers] throughout our district and our goal is to effectively train students and have them train each other to use all of our maker hardware and software.Students will learn to use their skills to create models, prototypes, and final products to assist them in their courses and benefit those around them while maintaining an academic and curriculum tie in to all projects.
– Adam W. Davidson / Durham Public Schools
The purpose of The Illinois MakerLab is the world's first 3D printing Lab in a Business School. Our goal is to be the leading educator in the Desktop 3D printing community. We provide courses and workshops in 3D printing at our campus in Champaign, Illinois and also offer anyone in the world an opportunity to earn a certificate in this new technology through our 3D printing Specialization on Coursera.
– Aric Rindfleisch / University of Illinois
The Engineering Makerspace at the University of Wisconsin - Madison has been working with Dynamism since we opened in 2017. Purchasing 3D printers, parts, and material has alway been hassle free and the best price.With over 30 3d printers and growing Dynamism keeps our operation moving forward.
– Karl Williamson, Shop Manager, Grainger Engineering Design & Innovation Lab
FAQ
WE MAKE EDUCATION BUYING EASY.
Education Bundles & Discounts
To make your life easy, we’ve curated a list of the best hardware and combined them into ready-to-teach bundles for every budget level. We know that budgets can be limited, so each bundle includes a discount available only to educators. Need to customize? We’re happy to adjust packages as needed to fit your requirements.
Approved Vendor
Dynamism is already a preferred 3D printer vendor for thousands of schools, libraries, and makerspaces. Look for Dynamism on your approved vendor list. If we’re not on there, just ask us to become an approved vendor and we’ll handle the rest.
Purchase Orders Accepted & Payment Terms Available
Ready to send in a purchase order or request a quote? Contact us at [email protected]. Net 30 standard payment terms are available for qualified institutions. Purchase orders must be signed and dated for processing.
Warranty & Support
Luxury-level personal service is our goal for every single customer. Every product purchased at Dynamism includes free and unlimited support by phone or email. We work directly with manufacturers to make sure any issues are handled quickly and appropriately.
Get Education Discounts & Bundles
Dynamism works with thousands of schools, companies, and government organizations. We understand the unique challenges with acquiring and deploying cutting-edge technology. Just getting started? Know what you’re looking for? We’re ready to discuss requirements and help you make an informed decision about the products you need, all at the best prices available.
short tips for the transition from a CAD model to a printed object / Sudo Null IT News
was withdrawn from publication due to a technical error. Please be understanding. Thank you!
Whether it's just a hobby or a source of income, 3D printing is always based on product design. Those accustomed to traditional technologies will have to rethink the entire approach to product design and manufacture.
When the project is ready, a number of additional operations are performed: setting the orientation of the model and other parameters that ensure the proper printing process. In addition, it is necessary to take into account the fact that most 3D printers allow you to choose the degree of filling the model with cellular structures. The correct choice of this parameter provides protection of the object from deformation and destruction during the printing process, as well as significant savings in material and reduction in production time.
Finally, the last factor influencing the success or failure of the 3D printing process is the strength of the connection between the model and the table. If the workpiece is separated from the table during printing, then all the work will go down the drain.
Here, we'll walk you through the 3D printing process and give you some simple tips on how to use additive manufacturing in the design phase. In addition, we will dwell on the methods of preparing a finished project for printing, and also consider ways to securely fasten the workpiece to the table.
These guidelines apply primarily to Fused Deposition Printers (FDM) printers, but may apply to other types of printers as well. The process of obtaining a finished part by 3D printing is basically the same regardless of the method used.
Designing an object
Any 3D printing starts with construction. If you are developing a product yourself, then you need to build a 3D model of it in a computer-aided design (CAD) system to turn the designer's idea into reality. In this case, the object can be both very simple and very complex. However, too thin and too small models should be avoided.
3D-CAD from Siemens from this article for 49900r (90% discount), the promotion is valid until March 20, 2020. Read more>>
Saving the file in a special format for printing
To print an object, its model must be saved in a special file format - for example, STL, which has become the de facto standard in the world of 3D printing. In this format, model surfaces are represented as a grid of triangles. Simple surfaces are broken down into a small number of triangles. The more complex the surface, the more triangles you will need. Today, other formats are used in 3D printing, in particular, the 3MF format developed by Microsoft. But the most common is still STL.
CAD systems make it very easy to save the model in the desired format: just click the Save As command. To improve print quality, it is desirable to set a number of settings for saving to the STL format - for example, the tolerance during transformation and the angle of the plane. The lower the conversion factor and the better the angle, the smoother the printed part will be.
Opening the file in the slicer program
Most, if not all, 3D printers come with their own slicer software. The slicer loads the STL file created in the CAD system and cuts it into layers, and then creates a control program for the printer.
Place the model correctly in the print space
After entering the print settings, the model (or several models) needs to be placed on the printer table. You can print many objects on one table at once. At the same time, compared to printing a single object, the time slightly increases, but in general it still turns out to be less. Here are some tips for choosing the right model orientation.
Set parameters
In the slicer program, the user sets parameters such as print speed, material consumption, nozzle and desktop temperatures. Most slicers have simple settings for beginners. In this case, most often there are also advanced settings so that experienced professionals can achieve optimal results. Advanced settings include percentage infill, amount of backing material, and type of backing or raft (this is a small, thin base that keeps the printed part stable. The backing is removed when it's finished). The number of options is truly endless. Specific settings vary depending on the brand of printer. It's easy enough to set them up.
Sending the control program to the printer
After setting the print settings, the placement of future objects on the table, their orientation and quality, it's time to finally start the printer. It is enough to press the Print button and find something to do while the production is in progress. Depending on the complexity of the design, the process takes from several minutes to several hours.
Finishing
Finishing includes removing the printed part from the table, as well as removing the support material by melting, mechanical separation or dissolution (depending on the design of the printer). The part may require some light sanding or polishing, but overall a properly printed object looks good from the start. Other types of finishing are placing plastic parts in a container with acetone to smooth out surface roughness, gluing (if the dimensions of the structure exceed the dimensions of the 3D printer or individual elements of the object must have different orientations), drilling holes and painting.
3D printing process
3D printer design considerations
Eliminate sharp corners
If the direction of the surfaces changes abruptly (for example, a vertical wall intersects with a horizontal overlap), then such a model is difficult to print. The printer will build excessive inner surfaces, wasting too much material. There are two easy ways to prevent this: add chamfers to smooth out where the surfaces meet, or round the corners so the printer gradually builds a vertical surface. In addition, rounding will increase strength, since destruction most often occurs at sharp corners.
Elimination of thin walls and small geometries
Layer by layer fusing technology consists in supplying hot plastic through a nozzle with the formation of a printed object layer by layer. The thickness of the extruded plastic layer cannot be made smaller than a certain limit, depending on the diameter of the nozzle and the speed of the print head. Excessively thin-walled details are difficult to print - often the result is a chaotic weave of fibers. If the part can be printed, it is very fragile and breaks easily.
Too thick walls - also bad
On the other hand, if the walls are too thick, they become brittle and crack easily. This is especially important when printing from materials other than resins, as excess thickness during the manufacturing process leads to internal stresses in the part. Even when printing from plastics, material is wasted on walls that are too thick and time is wasted.
Removing large overhangs
3D printers allow you to create amazing shapes and surfaces, but they are not capable of printing directly in the air. If there is a void in the part with material above it, additional support material must be used. Most slicers add material automatically, but require you to specify the orientation and volume of the support structure. Printers with a single nozzle create an array of thin columns, which then have to be broken off. The result is an uneven surface. Therefore, it is recommended to avoid large overhanging elements whenever possible in order to reduce the need for support material.
If such an element is unavoidable, you can try to flip the object. Most printers are capable of printing overhanging elements with an angle of about 45 degrees. At a certain height, the edge of such an element may sag somewhat. The actual capabilities of a particular printer are determined by trial and error.
Holes shrink
Remember that the part is made of heated plastic. As it cools, it inevitably shrinks. Therefore, holes and other critical structural elements have to be made larger so that after shrinkage their size is as close as possible to the required one.
However, if you need to make a tight tolerance hole, it is better to print it with a smaller diameter and then ream it with a suitable tool. This is especially true for holes whose axis is parallel to the printer table.
Increasing the footprint
If the area of contact between the object and the base is small, the part may separate from the table during printing. To prevent this from happening, wide bases are added to the model legs, which are installed on the printer table. In general, the closer to the table, the more material must be added to the support. There are other ways to securely fasten the part to the table, which we will discuss a little later.
Special moves
The right approach to design makes printing easier. In addition, there are special post-processing techniques that are important to be aware of.
Place round surfaces vertically
The model should be oriented so that the minimum amount of support material is used. Ideally, it should rest on the table with a large flat edge. In addition, circular geometry must be placed so that the circular faces are vertical. If we look at the printer table from above, we should see a round silhouette of the object. In this case, the part comes out as symmetrical as possible with the formation of a solid round structure.
Place voids and holes vertically
If there are voids in the model (for example, it is a rectangular pipe), it is desirable to place such voids vertically in order to reduce the volume of the support material. If you print the pipe in a horizontal position, you will have to provide support for the entire interior. If you put the pipe on the end, then no support is required at all.
The same is true for holes: to get a hole with a straight axis, it is best to print it vertically - in the form of a stack of rings, which avoids warping or deforming a round hole into an oval one.
Set print quality settings
Proper selection of print parameters, such as STL conversion tolerance and slicer software settings, allows parts to be produced with a surface quality that matches that of cutting. However, this entails an increase in print time. When choosing quality parameters, one should proceed from the purpose of the object: is it a finished product or a prototype? Will the part be visible or hidden?
The quality parameters also affect the shape of the holes in the part. In CAD files, holes are represented as a set of straight lines at an angle to each other. The higher the quality of the model in the saved STL file, the less the circle looks like a polygon.
Reducing the layer thickness
To obtain the best quality, especially when using layer-by-layer deposition technology, it is necessary to reduce the thickness of the layers. It does increase the print time, but the end result is worth it!
Optimizing the filling with honeycomb structures
In terms of strength, objects do not have to be solid. Similar to a honeycomb, printers can create a honeycomb infill that balances strength and saves expensive polymer material. However, if the printed part serves as a prototype for strength testing, and the serial product will be manufactured by traditional methods, and also if the part is subjected to certain types of mechanical stresses and pressures, a solid design will be preferable.
Choosing a material
The success of printing largely depends on the correct choice of material. Materials have different properties. For example, the melting point of thermoplastic polyurethane (TPU) and polylactic acid (PLA) is lower than that of acrylonitrile butadiene styrene (ABS). In addition, the material is taken into account when choosing the type of support structures. For an object made of polylactic acid, supporting elements can be made from the same polylactic acid, since it will be quite easy to separate them from the finished part. If the part is printed from ABS plastic, then the support elements must be made from a different material, and it is better not to use such elements at all in thermoplastic polyurethane parts.
Cellular filling
A solid body is not always the best choice for 3D printing. Printing solid parts has its advantages, but the internal honeycomb structure saves both expensive material and time.
Creating objects with a specified degree of filling with honeycomb structures is a unique opportunity for 3D printing. Moreover, it is not required to design such a structure: this is done by the slicer program. As a rule, it is enough to set only the percentage of filling (the closer it is to 100, the more solid the object will turn out) and select the type of cells, if the printer has such an opportunity.
In addition to saving time and material, the internal honeycomb structure has many other advantages.
Cellular filling prevents warpage
Printing large objects as a single piece introduces a danger of warpage. By reducing the infill percentage, the air during printing passes through the part, providing more uniform cooling and eliminating warping.
Cellular filling does not lead to loss of strength
Printing cells instead of solid material does not reduce the strength of the part. In many cases, a honeycomb part is strong enough for the chosen application, but lighter and less material intensive.
The function determines the choice of cell geometry
Most slicers support a wide variety of cell geometries. The optimal option is determined by the functional purpose of the object. Standard box padding simplifies printing, while hexagonal and triangular boxes add strength. Wave fill allows the object to bend or twist.
How to choose the right filling percentage?
In general, the strength of an object increases as the percentage of infill increases. Most printers have a default infill percentage of 20, which is optimal in some cases but too high or too low in others. Consider mechanical stresses in the printed object and increase the percentage of infill in areas where greater strength is required. If high strength is not required, choose the lowest possible filling. This saves material and speeds up printing. Most often, the selection of the optimal percentage of filling is done by trial and error.
Ways of fastening the workpiece to the table
“Rafts”, “brims”, “skirts” – these terms sound funny, but they just refer to the three main ways of attaching a 3D printed part to a printer table. Let's take a look at each of these methods and their areas of application.
Skirt
The skirt involves creating a few rings around the object at the beginning of the print to make sure the plastic is extruded normally. The skirt is not in contact with the object at all. It surrounds the printable area and helps start the fusing process. When creating a skirt, a large volume of hot thermoplastic polymer passes through the nozzle. This prepares the printer for printing the part itself. This guarantees good adhesion to the table and obtaining smooth surfaces of the object.
Brim
The brim is a wide, flat area connected to the main object as a support base (think of a brim of a hat).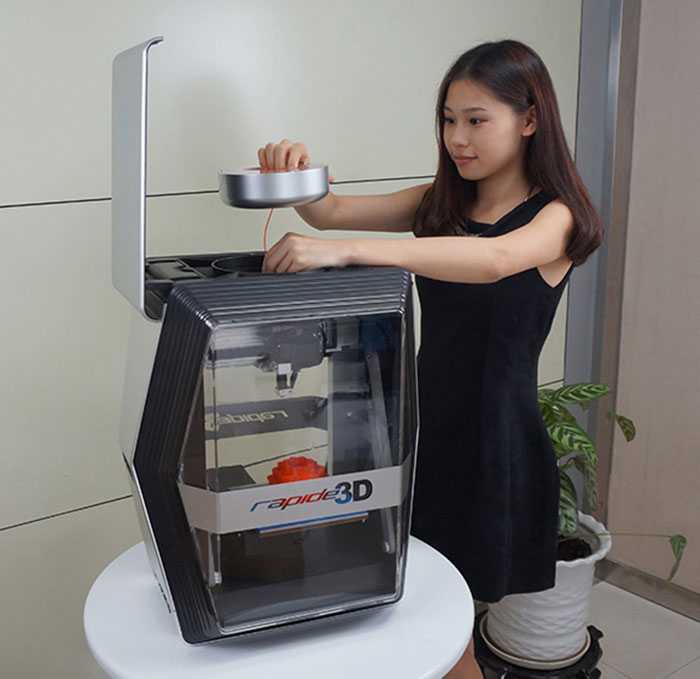 It is very similar to a skirt, but connected to the model. In addition to all the advantages of a skirt, the brim keeps the edges of the object being made on the table.
When printing, the outside of an object often cools faster than the middle, causing the edges to curl. Brim prevents this phenomenon by holding the edges.
Raft
A raft is a detachable base, made in the form of a thin mesh platform, located under the entire object (which lies on the raft). To create a raft, the printer first prints a flat plate in two or three layers, and then begins to manufacture the object.
The rafts provide excellent adhesion to the table surface and also provide a strong print base. This is especially useful when making small and oddly shaped parts that do not fit well on the table, as well as thin-walled objects.
After printing is completed, in most cases the raft will separate easily from the part.
If the printer does not have a heated desktop function
Rafts are used if the printer does not have desktop heating. In this case, excessive adhesion becomes a problem.
An alternative method is to apply adhesive paper tape to the printer bed, with the edges down if possible (this also protects the bed). You can also use packing tape, but it is usually more expensive.
If buckling does occur or the object separates from the table, apply a dissolvable glue stick to the adhesive tape. This will enhance adhesion.
Find out the features of a specific 3D printer and take them into account when preparing a model
3D printing is not only a science, but also an art. Effective design for subsequent 3D printing requires an understanding of the technological process, taking into account its features and the purpose of the future object. This will greatly improve print performance.
Using Solid Edge in 3D printing
Not all CAD systems are suitable for 3D printing
The capabilities of the applied system should not limit the designers. Our Solid Edge system is designed with the latest 3D printing technologies in mind. Various 3D printers and 3D printing services are supported.
Take it to the next level with specific techniques for designing 3D printed parts
Generative modeling in Solid Edge opens up new possibilities: the designer selects a specific material, sets the design space, allowable loads, restrictions and target mass of the part, and the system automatically calculates the desired geometry. As a result, 3D printing methods can produce the most complex shapes.
In addition, when building models, the use of the results of three-dimensional scanning is provided. Solid Edge successfully combines the traditional boundary representation of solid models (B-Rep) and the representation of surfaces in the form of a grid of triangles, which avoids time-consuming transformations that are fraught with errors.
If you've already downloaded an STL file for printing, our unique synchronous technology makes it quick and easy to edit your imported models in Solid Edge in preparation for the process.
Printing with your own printer or submitting an order to a 3D printing service provider
Printing in Solid Edge on a local 3D printer is done using the 3D print command. Models can be saved in STL and 3MF formats, or sent directly to Microsoft 3D Builder. If you don't have your own 3D printer or need to try out different materials and surface finishes, Solid Edge allows you to directly submit your models to cloud-based 3D printing services (such as 3YOURMIND). You immediately receive quotes for the production of parts from various materials with its subsequent delivery directly to your door.
3D-CAD from Siemens from this article for 49900r (90% discount), the promotion is valid until March 20, 2020. Read more>>
Seven reasons to use 3D printing technology in education
The development of modern technologies does not bypass educational institutions. Ceiling projectors in the 1930s, pocket calculators in the 1970s, personal computers in the 2000s, technology has always been used to engage students and prepare students for postgraduate realities.
The era has come when 3D printing will completely change the idea of classrooms and laboratories. Advances in 3D printing have made the technology more convenient and accessible, helping to increase its popularity in educational circles.
Workers in almost any scientific discipline have the opportunity to use 3D printing as part of the educational process, both in classic face-to-face seminars and online classes. The thoughtful integration of this technology into educational spaces will enable educators to improve academic performance by developing student analytical and critical thinking skills.
In this article, we explore seven benefits of using 3D printing technology with Formlabs 3D printers to create a real interactive learning environment, unleash creativity, prepare students for combat, and more.
Seven reasons for introducing 3D printing technology into the educational process:
- 1. Creation of an interactive learning environment;
- 2.
 Development of creativity and innovation;
 - 3. Improved perception of the real world;
- 4. Preparation for postgraduate practice;
- 5. Involvement in digital processes;
- 6. Development of problem-solving skills;
- 7. Development of design thinking.
Creating an interactive learning environment
Students enjoy immersing themselves in the learning process if the learning environment makes them participants in this process. Material presented through slides can at best only arouse interest and hold attention for a short time. 3D printing technology makes learning dynamic by encouraging students to develop critical thinking skills while designing models. Interactive sessions allow you to explore advanced topics in more depth while developing practical skills such as decision making and problem solving. In addition, 3D printing is accessible to students with different perceptions of the material, which means that kinesthetic and visual learners will equally experience all the benefits of this approach to learning.
For example, 3D printing is a part of almost all engineering courses. Students learn 3D printing technology for product development and prototyping, creating functional assemblies and mechanisms, etc. Practicing engineers work on a similar principle. This means that students are given the opportunity, through hands-on experience, to understand what the real job of an engineer is.
Stereolithography (SLA) 3D printing is ideal for custom designs such as anatomy for biology or other medical subjects.
3D printing can be introduced into the educational process not only in engineering areas. In the field of teaching, there are many opportunities for using 3D printing: biology students can print anatomical models of organs, future chemists can study the structure of molecules from their 3D models, graphic designers can create 3D versions of their creative works, historians can recreate historical artifacts, architects - print 3D models of building designs.![]()
Despite the spread of distance learning, the opportunity to gain practical skills has been preserved thanks to technology. A case in point was the case of Michael Silver, professor of architecture at the University of Kentucky College of Design and Architecture, who prints and mails models of buildings his students have been working on. Having physical models of objects helps students analyze their own concepts and ideas. As a result, despite the remote format of classes, 3D printing made it possible to maintain the important principle of “immersion in the process”.
Developing creativity and innovation
Creativity, often underestimated, is nevertheless a critical skill for any successful student. It affects the ability to generate new ideas and develop innovative solutions. 3D printing technology is entirely based on creative skills, encouraging students to find solutions to problems through 3D printing, design models using computer-aided design (CAD) programs, and work on optimizing the printing process. In addition to this, students can color the finished models, further revealing their creative potential.
3D stereolithography (SLA) printed finished products feature smooth surfaces, incredible detail, and ease of painting.
At the University of Massachusetts Lowell, Professor Yoko Oda uses 3D printing to improve his curriculum in 3D design, sculpture, 3D modeling and animation. One of the latest significant developments in the world of sculpture is the use of virtual reality (VR) technology in combination with 3D printing. VR is breaking down the boundaries of 3D design, allowing professional artists and students to create their own 3D artwork using software such as Oculus Medium. Professor Yoko's students can create a 3D object in virtual reality in 30 minutes and then print the finished work on a 3D printer. 3D printing opens up new possibilities for innovation in the creative world.
Improving the perception of the real world
Institutes of higher education are required to prepare their students for "real life" in the profession outside the institution.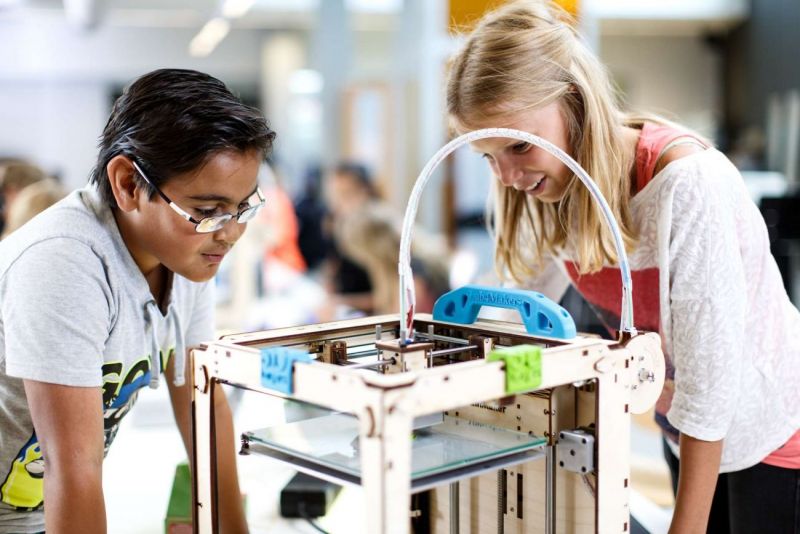 Therefore, it is extremely important for future specialists to understand how to apply the acquired skills in their work. “It is better to see once than hear a hundred times” - this is exactly where 3D printing can help!
Dental students from Turkey practice dental nerve removal on 3D specimens.
Pre-made 3D objects can also be part of anatomy teaching. At the University of Canakkale Onsekiz Mart in Canakkale, Turkey, 3D printing of dental models has made it possible to teach dentistry remotely.
“The Formlabs Form 3B printer is a great machine with a large print platform that can make 80 molars in 9 hours. The finished models are characterized by a high degree of detail and accuracy of the originals, which made it possible to use the models as demonstration samples,” says Mr. Yosunchyr.
3D printing of organs, cells and other biological and medical elements uses polymers specially developed for the healthcare industry, such as Elastic Resin or BioMed Clear Resin. For students of medical specialties, 3D printing technology makes it possible to train operations on finished models. Thus, the high degree of detail of printed objects allows teams of surgeons to plan complex operations.
Postgraduate training
3D printing skills are valued by employers. This technology is used not only in the engineering and manufacturing fields. 3D printing affects many professional areas, from the entertainment industry to jewelry making. According to the report of the research company, the volume of the global 3D printing market in 2019. amounted to 11.58 billion dollars. In addition, the market is projected to grow at a CAGR of more than 14% between 2020 and 2027. In 2018, about 1.4 million 3D printers were shipped worldwide. This figure is expected to reach 8 million units by 2027.
Such a strong growth in the introduction of 3D printers into work processes determines the increase in demand for 3D design skills among graphic design students. 3D printing would not be possible without designers creating models. With the increasing demand for custom-made products, custom design is becoming more relevant than ever. Research and development activities also involve the possession of skills and knowledge about 3D printing. The production of consumer goods requires intensive analytics. 3D printing technology will allow professionals to identify opportunities to reduce costs and improve process performance in their project. The creation of models is also in demand in the field of biology, ranging from the manufacture of three-dimensional sculptural elements to the design of organ models. 3D printing is highly relevant for architecture and construction professionals as they rely heavily on the development of "prototypes".
Students who have knowledge of 3D printing are more prepared for their future jobs. By mastering 3D printing as part of their studies, students develop creativity, which will allow them to easily cope with professional duties in the future.
Digital Engagement
In today's digital world, students need to be able to effectively use the available technological opportunities. Often, modern technologies are perceived as a negative factor that distracts from the educational process, however, with their correct application, students will be able to interact more productively with the outside world. At the same time, there is no need to be limited to a specific specialization, since technological modernization has affected many areas of professional activity: from fine arts to factory production. Incorporating the study of 3D printing technology into the curriculum will allow students to better navigate digital workflows. The concept of 3D printing encompasses more than just the knowledge of a 3D printer. During the training, students comprehensively study this phenomenon, analyzing all the processes completely, from designing a model in a CAD program to post-processing of the finished product.
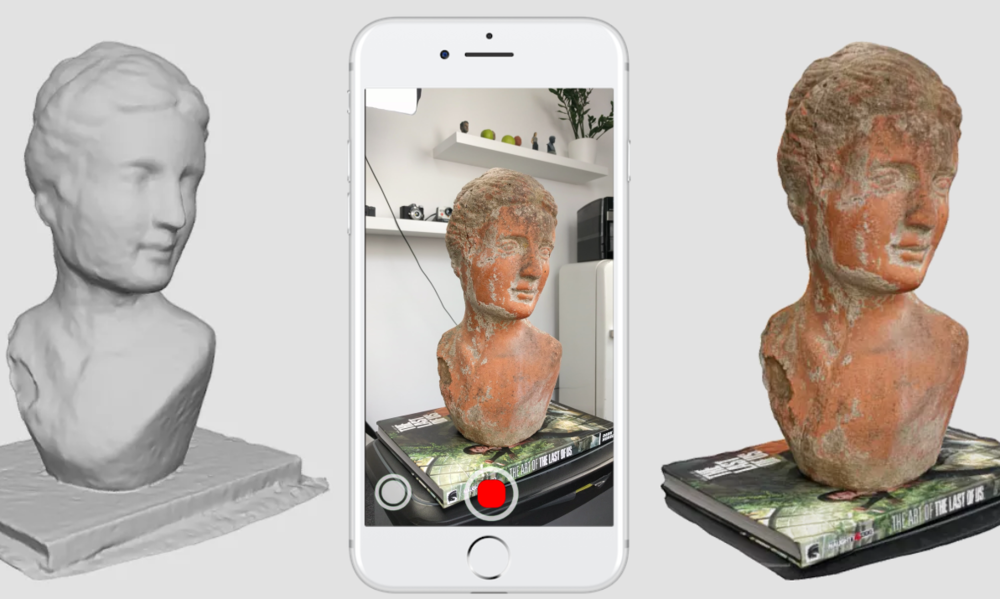
For example, you can study photogrammetry, i.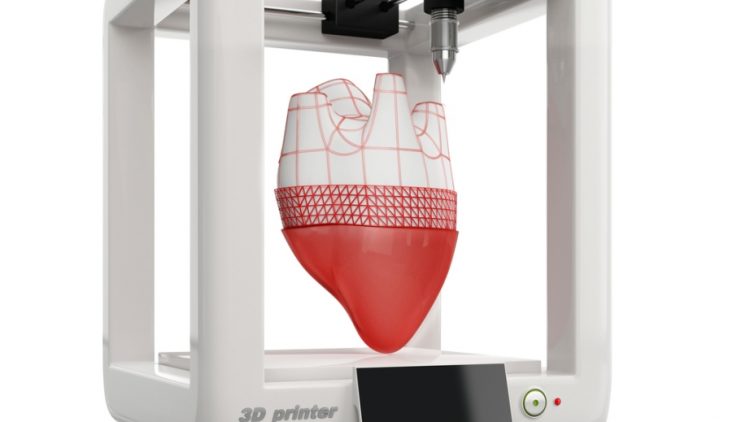 e. a scientific and technical discipline that deals with determining the size and other characteristics of objects from their photographic images. Several photographs of an object, building or person taken from different positions are used as the basis for measurements. Then, using automatic algorithms, the images are transferred to a 3D model.
Developing Problem Solving Skills
3D printing technology can handle real-world problems. So, a solution was found to the shortage of personal protective equipment (PPE) and medical supplies for sampling during the COVID-19 coronavirus pandemic. Similarly, it is possible to build work within the classroom. 3D printing will undoubtedly be an incentive to develop problem solving skills in students. At the initial stage of working on their 3D printing project, the author needs to answer the following questions:
- What will the 3D object I print be used for?
- What should you pay attention to when creating a model, choosing materials, processing a finished object?
- How to organize the 3D printing process in such a way that it is most efficient and productive?
These are just some of the questions that need to be answered early in the project. Problems like these require a critical approach. Students will have the opportunity to go from an abstract idea to a real three-dimensional object by analyzing how these concepts relate to each other. By working on prototyping, students will be able to assess how close their project will be to the intended goal, without focusing only on its functionality. 3D printing allows you to solve problems using a logical systems approach, further developing creative thinking.
Development of design thinking
Design thinking is more than just a buzzword. This phenomenon is defined as “an iterative process in which we seek to understand the user, disprove assumptions, rethink the problem in order to find non-obvious alternative solutions.” Design thinking is not a fast-paced trend, but a truly effective approach that is already being adopted by major brands such as Apple and Google. How is 3D printing related to design thinking?
Collaboration and interaction is a key principle of the design thinking methodology.