3D printer finishing
Ultimate Guide to Finishing 3D Printed Parts
Time to read: 13 min
The purpose of this article is to detail the different finishing methods for FDM and PolyJet 3D printed parts and the techniques/tips that can elevate the look and feel of your prototypes.
A simple Apple Watch stand design will be utilized as a case study. This stand is a model with pockets and internal and external features that needs to be surface finished to a standard that complements the shiny exterior of an Apple Watch put on it.
Here’s a quick overview of the main points this article covers:
- PLA: If you’re working with a tight budget then PLA is going to be your best material choice; the results aren’t as polished but the price is cheapest.
- ABS: If your budget is moderate then go with ABS. It’s not as cheap as PLA but still at a low price point and the material is more reliable than PLA.
- VeroBlack or VeroWhite: For the highest quality parts go with VeroBlack/VeroWhite.
This will give you the best dimensional accuracy and best overall polished look.
The 3d printing post-processing needed for the watch stand parts involves a combination of repairing and preparing the print for post-processing, sanding, and painting.
The finished sample 3D printed parts with all three materials should be smooth, matte black surfaces. Inherent to the 3D printing process, with every print are unique challenges and considerations to arrive at the best finish possible. Although there are ways to mitigate the challenges, experience in 3D printing goes a long way.
The print settings process for each material is detailed separately and a summation of the results may be found in the conclusion of this article.
ABS (Printed on a Dimension Elite)
The Dimension Elite prints are smooth, clean, and ready to sand out of the NaOH bath.
There are, however, clear stepping lines between the printed layers. If we don’t remove these stepping lines, they’ll show up in the final paint coat which will ruin our smooth finish. Thankfully, removing these will be easy thanks to ABS’s high melting point and easy sandability.
Materials Needed
The materials we’ll be using:
- Sandpaper (grits 100 to 600)
- Medium, fine, and extra-fine sanding sponges
- XTC-3D brush-on coating (As an alternative, Bondo putty is a common solution to fill holes in parts. We chose XTC-3D for its viscosity, sandability, and ability to penetrate small perforations, which makes it desirable over Bondo putty)
- Razor blade
- Foam brush, mixing cups and popsicle sticks
- Sandable Krylon Primer
- Montana Acrylic Primer in Shock Black
- Matte Acrylic Varnish
Sanding
Sanding the ABS print is simple and straightforward. First start with 100 – 200 grit sandpaper to remove stepping lines and then gradually increase up to 600 grit to achieve a smooth finish without sanding lines.
Pro Tip: Sand in small circular movements evenly across the surface of the part. Avoid sanding in one direction only, especially in the direction of the stepping lines to prevent striations or “trenches” in the print.
Beware that ABS is very easy to sand, so be careful not to overdo it. Removing as little as .010” can be enough to completely remove any stepping layers and oversanding can compromise critical dimensions.
After sanding the parts, some holes are revealed on our part left by an incomplete layer around the letters DIM. These holes can perforate through the finished paint coat to create ugly sinkholes, so we need to find a solution.
As you can see in the Catalyst tray to the right, there are large holes between the DIM and the edge of the part. Moving the DIM up in our Solidworks model would solve this, but for now we’ll have to find a way to fill these holes with a sandable filler.
Repairing the Incomplete LayerWe’re going to use a thin, sandable epoxy called XTC-3D to fill the tiny holes and crevices in our print. XTC-3D is cheap (a 24 oz bottle costs about $25), quick, thin, and effective. Note that a small amount goes a long way (within the 10 minute pot life).
Pro Tip: Be sure to maintain a weight ratio of 100 Part A to 42 Part B. Mix thoroughly for one minute and coat your part within the 10 minute pot life. For more details, check Smooth-On’s technical bulletin here, and a great instructional example here.
Before applying the XTC-3D, wash the part with soap and dry with compressed air to ensure your part is thoroughly clean and free of any oils or sanding dust. Also make sure to wear gloves so as not to get any hand oils or sweat on your part.
Fill in holes or gaps in your print with a very thin (1/64”) coat; a thin layer of XTC-3D will level itself out. We used a razor blade to scrape excess XTC-3D into the unwanted holes and gaps, making sure to avoid any areas we didn’t want filled (like the letters DIM).
Allow the XTC-3D sufficient time to become tack-free dry (approximately 2 hours). Now we’re ready to continue sanding away at the excess XTC-3D layer with 300 to 600 grit to reveal the repaired surface.
Then, after another thorough wash, we’re ready to begin preparing our repaired surfaces for painting.
Priming and Painting
Painting 3D printed parts is a vast world of acrylics, enamels, sprays, and airbrushes.
In this example, we’ll be using Montana spray can paints to follow a relatively straight forward process: prime, dry, paint, dry, varnish, dry.
Standard spray painting principles apply:
- First make sure your surface is oil-free, dust-free and hole-free
- Shake your cans for at least two minutes prior to painting
- Ensure your cap is clean to prevent drips
- Be aware of how the paint is accumulating on the part and look for any pooling or dripping
- Paint in many light coats rather than fewer heavy coats; this is especially important for 3D printed parts with internal and obscured geometries
- Paint in controlled, well-ventilated and well-lit areas
The Dimension prints started with very obvious stepping between layers. If you’ve sanded properly up until now to create as smooth a surface as possible, these layers shouldn’t show up in your final paint finish.
The finished ABS part is matte black and smooth to the touch with very little evidence of layering in most surfaces. A few important results to note here:
- Sharp internal pockets are tough to sand. After about 30 minutes of sanding, we still had a hard time removing all the layering and the stepping shows up even after priming, painting, and varnishing the print.
- Because we had to remove more surfaces from the sanding, there is some sacrifice in regards to the final geometry of the part.
- Filling the incomplete layer with a thin coat of XTC-3D worked very well; those holes are invisible in the final paint layer.
VeroBlack (Printed on an Objet30)
Thanks to .0011” resolution, the Objet30 prints have some stepping between layers, but nowhere near as obvious as in our FDM prints.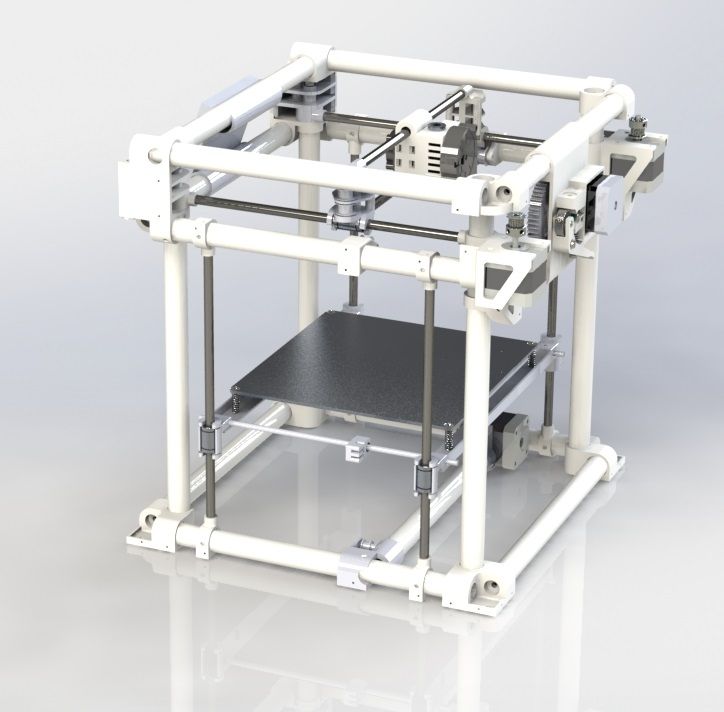
The Objet30 prints come out of the printer with a thick layer of support structure material so before we can begin finishing our VeroBlack part, we’ll need to remove this support structure and the residue it leaves behind.
VeroBlack 3D Printed Part Materials NeededThe materials needed for post-3D printing finishing:
- Sandpaper (grits 100 to 600)
- Medium, fine, and Extra fine Sanding Sponges
- Sandable Krylon Primer
- Montana Acrylic Primer in Shock Black
- Matte Acrylic Varnish
Start with 100 grit sandpaper to wet sand the residue and gradually move to wet sand with 300 grit sandpaper; the residue will fall off in small soft white chunks. This is the hardest part of the VeroBlack finishing process and it took us about 30 to 40 minutes to remove all the residual layer.
After removing the residual layer by wet sanding utilizing 300 grit sandpaper, the surface of the part will begin to feel smooth.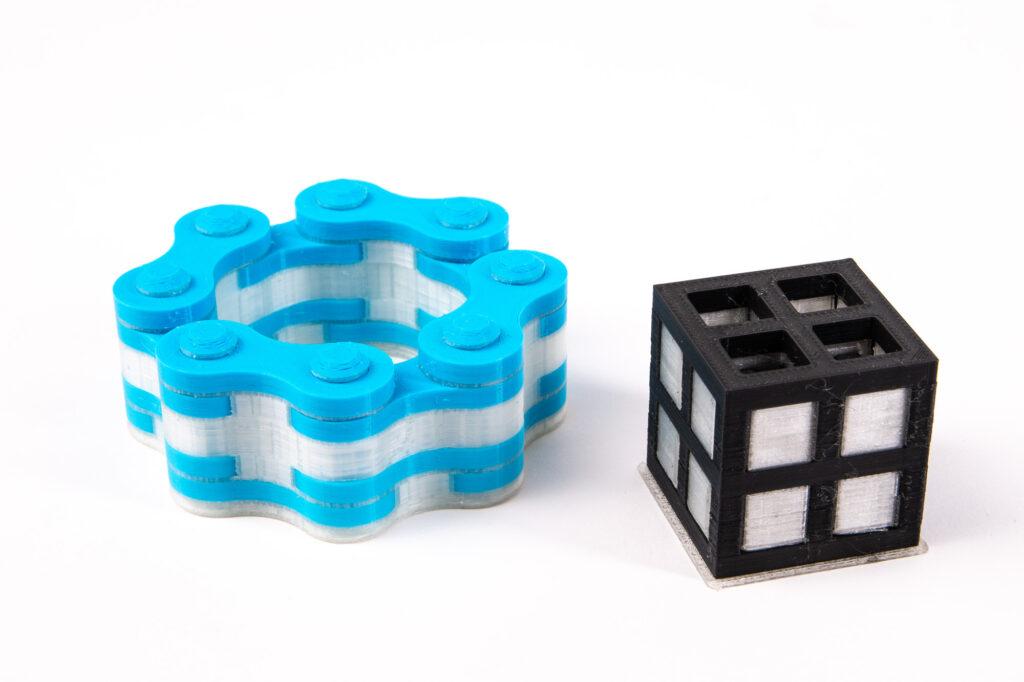 If you rub the part with your fingernail, you’ll feel it’s harder and more plastic-like beneath the gummy residual coat. Continue wet sanding through to 600 fine grit sandpaper until the part is fully smooth.
Pro Tip: Water breaks up the residue, so wet sanding is a highly effective method to get a smooth, residue-free, paintable, and homogenous surface.
Thoroughly clean your part with soap and water before you move on to the next step to remove any additional residue. Again, we recommend using compressed air to dry the part and clear any accumulated dust.
Beware that VeroBlack is like ABS: very easy to sand, so be careful not to overdo it. Once you break through the residual layer, the actual VeroBlack will sand very easily. Removing as little as .005” can be enough to completely remove any stepping layers. Be careful as oversanding can compromise critical dimensions.
VeroBlack 3D Printed Part Priming and PaintingNext, we’re going to paint the VeroBlack part just as we did the ABS part: using Montana spray can paint with the following process: prime, dry, paint, dry, varnish, dry.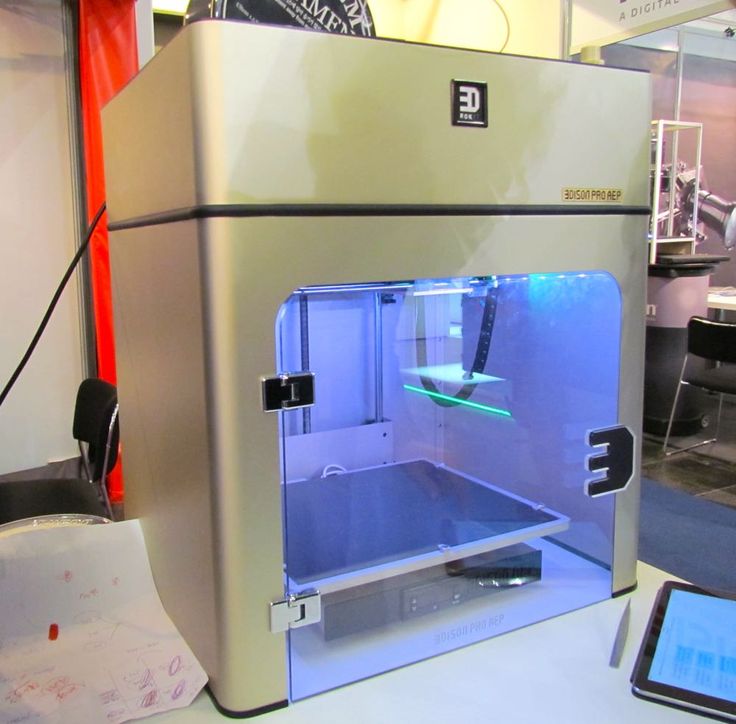
Standard spray-painting principles apply:
- First make sure you have a good surface quality which is oil-free, dust-free and hole-free
- Shake each paint can for at least two minutes prior to painting
- Ensure your cap is clean to prevent drips
- Be aware of how the paint is accumulating on the part and look for any pooling or dripping
- Paint in many light coats rather than fewer heavy coats; this is especially important for 3D printed parts with internal and obscured geometries
- Only paint in controlled, well-ventilated, and well-lit areas
The finished VeroBlack part is matte black and smooth to the touch. A couple points to note here:
- Some of the internal corners were not sanded enough to remove the residue, so you can see how the paint powdered up in these areas.
 This will likely result in peeling paint over time.
 - Although very little stepping is visible on the part, you can see slight evidence of it here. This part could have probably used 30 more minutes of thorough sanding.
Now for the dreaded PLA, a notoriously difficult material to finish. But with some tricks and patience, it too can join ABS and VeroBlack in the ranks of matte black glory!
This Replicator print came off the plate with severe striations: see the parallel grooves in the layers of the part above. This could be a result of machine quality, but for now we’ll just have to find a way to maneuver these striations to a smooth part.
Sanding PLA is difficult, in part because of how soft and gummy it becomes if you try to sand too aggressively or quickly, so we’ll explore options on how to smooth 3d prints with minimal effort and abrasion.
PLA 3D Printed Part SandingIf you choose to sand the PLA directly, the process is straightforward. Note: PLA acetone smoothing is not advisable. PLA smoothing is not as forgiving as ABS when it comes to sanding and abrasion, so you will likely spend more time removing the stepping between layers, especially with the severe striations in a print like ours.
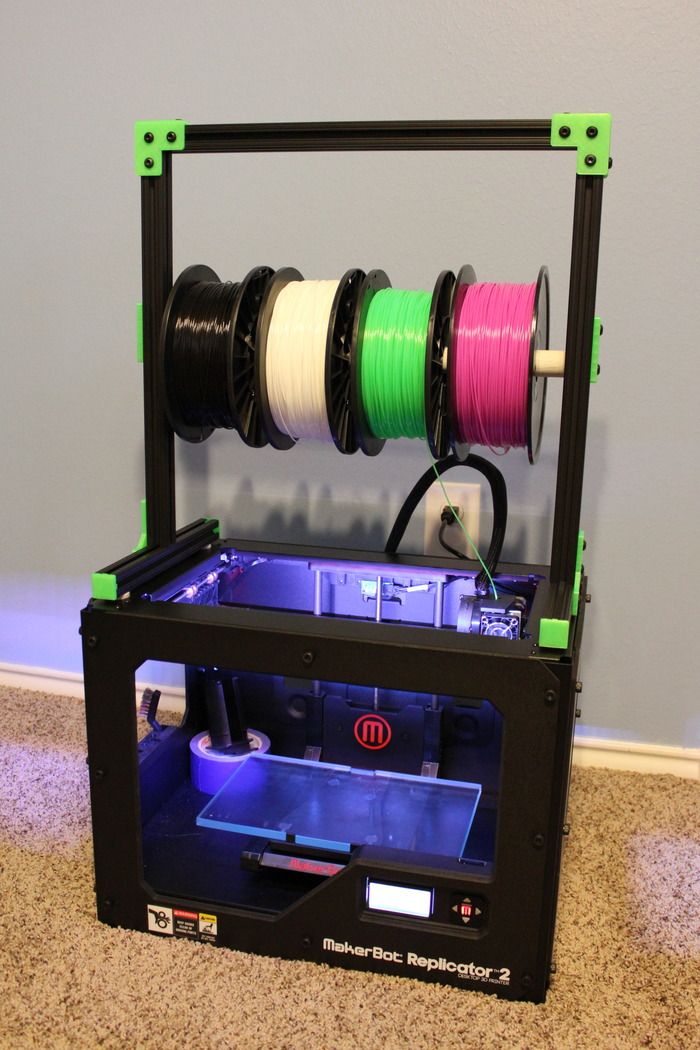
Begin with a low (100 – 200) grit sandpaper, sanding away at the bumpy striations and any raft or support material (aluminum foil) left behind. Particularly in the case of MakerBot support, it’s easiest to remove them with a flush cutter or pair of pliers and brush them with a rotary multi-tool first before sanding away at them.
Depending on the size and geometry of your part, you’ll likely be stuck in the 100 – 300 grit sandpaper range for a while to smooth out striations and pesky support structure remnants.
Once layering and striations are less prevalent, move through finer grits (400 – 600) sandpaper to achieve a shiny surface ready for priming and painting.
Pro Tip: Patience is key when sanding PLA. Turn on a movie or your favorite show, but don’t zone out! Sand in small circles evenly across the surface of the part. If you’re using a sanding multi tool on PLA, be careful not to overheat/melt your 3D printed part.
An alternative method to sanding PLA prints directly is smoothing the PLA print with the XTC-3D first and then sand on top of the coating.
PLA 3D Printed Part FinishingWe’re going to use XTC-3D to create a smooth, sandable, paintable layer of epoxy clear coat glossy finish around our PLA print.
Before applying XTC-3D, ensure that your part is thoroughly clean, free of any oils and sanding dust (sensing a pattern yet?). Wash the part with soap and dry with compressed air to clear any dust. Again make sure to wear gloves to protect both your part and your hands.
Brush on the XTC-3D in a thin (1/64”) coat; as long as the coat is thin enough, it will level itself out. Between coats, leave 1.5 hours for the XTC-3D to dry.
It may be difficult to coat an entire part at once, so don’t be afraid to do it in sections, making sure to keep overlapping to a minimum between sections. Wait 90 minutes between first and second coats and after you’ve finished wait 2 hours to allow the shiny surface to become tack-free.
With striations as severe as ours, it will take multiple coats to get a smooth uniform surface, so patience is key. Remember that multiple thin glossy finish coats will level better than thick coats.
Pro Tip: Internal pockets are susceptible to pooling so be careful to suck up or remove any pooling that occurs before the XTC-3D begins to dry (that’s what we’re doing in the left picture above).
Beware that XTC-3D may compromise critical dimensions, but applying thin glossy finish coats will allow you to minimize the additional material.
After the XTC-3D layer has hardened (two hours after application of the last coat) it should be ready for sanding. Follow basic sanding guidelines, starting with 300 grit sandpaper (thanks to the smoothness of the XTC-3D) and sanding in small circular movements to even the surface. Any wavy patterns may require a coarser grit sandpaper to remove.
The sandpaper will scratch up the XTC-3D coat; focus on getting a level surface, moving through to 600 grit sandpaper.
After you’ve finished sanding 3D prints, make sure to thoroughly clean your part with soap and water and then dry using compressed air before moving on to the next step.
PLA 3D Printed Part Priming and PaintingPainting PLA parts follows the same process as the ABS and VeroBlack parts: prime, dry, paint, dry, varnish, dry.
Standard spray painting principles apply:
- Make sure your surface is oil-free, dust-free and hole-free
- Shake your cans for at least two minutes prior to painting
- Ensure your cap is clean to prevent drips
- Be aware of how the paint is accumulating on the part and look for any pooling or dripping
- Paint in many light coats rather than fewer heavy coats; this is especially important for 3D printed parts with internal and obscured geometries
- Paint in controlled, well-ventilated and well-lit areas
The XTC-3D coated PLA part is matte, black, and has a smooth surface to the touch with a few problems:
- Although the XTC-3D has worked well to smooth the part and make sanding quicker and easier, it has left pooling in the internal pocket that has shown through the paint finish.

- Striations are still visible on the part. 30 more minutes of sanding 3D prints could have prevented these from showing through the final paint finish.
After finishing all three parts to a smooth, matte black finish, let’s take a look at the differences in process, time, materials and finish.
Differences in ProcessABS (Dimension Elite)- Sand from 100 to 600 grit
- Repair holes with XTC-3D (may not apply to your part)
- Sand away XTC-3D with 300 to 600 grit
- Prime, Paint, Varnish
- Sand from 100 to 600 grit
- Prime, Paint, Varnish
- Coat in 1 to 3 layers of XTC-3D (depending on how bad the striations on your print are)
- Sand away XTC-3D with 100 to 600 grit
- Prime, Paint, Varnish
The part that took the longest to finish was PLA due to the XTC-3D coating time. Even without XTC-3D, however, PLA typically takes longer to sand than ABS or VeroBlack.
In our example, the VeroBlack was ultimately faster to finish since we repaired our ABS print with XTC-3D and stepping between layers was not as significant in the VeroBlack print.
All things considered, VeroBlack was the quickest to get to a smooth, matte black finish.
Pro Tip: If you’re in a rush to get from printer to photoshoot, pick the Dimension Elite or Objet30. Especially in models with overhangs and significant amounts of support material, the Dimension Elite and Objet30 both have support material that is quickly removable via dissolution, whereas the PLA support on a Replicator can significantly increase the time required to get to a smooth surface part.
Differences in Cost and MaterialsIt’s important to consider the amount of time it will take to finish your model as well as the overall look and dimension when considering the price.
PLA is the cheapest out of the three, at $20 per part, followed by ABS at $55, and VeroBlack at $110. In our opinion, VeroBlack is the best bang for your buck since it’s the shortest to surface finish and will give you the most accurate model.
At first glance, all three models may look very similar, but there are a few key differences in the final finish.
Both the ABS and the PLA finished prints have evidence of stepping between layers that is visible in the final paint coat. The VeroBlack print requires much less effort to remove these steps, which ultimately are not as obvious in the final paint coat.
Although the ABS and the VeroBlack finished prints have very similar surface finishes, more material (approximately .020”) was lost in the sanding process for the ABS to remove stepping between layers. In contrast, the VeroBlack print required less sanding, so the final object dimensions are closer to the original design intent.
Individual Summary of Each PartVeroBlack: High layer resolution (. 0011”) means little sanding is required to get a smooth, paintable part. Critical dimensions don’t need to be compromised to get a smooth surface quality part and no repairs are needed for fine detailed features.
ABS: Parts are easy to sand, but small fine detailed features may require repairing and careful sanding to remove stepping between layers. Once this stepping is removed, painting is straightforward.
PLA: The cheapest option, but also has the potential to be the most difficult to finish, depending on support structures and quality of the print. May require significant sanding and repairing via XTC-3D or Bondo filler.
Browse our website to learn more about our capabilities, such as 3D Printing and CNC Machining.
Quick Facts:
- Finishing a 3D printed part often involves a combination of the following processes: smoother application, sanding, polishing, cleaning and painting. The process is unique to the material type.
- A smooth finish with 3D printing is achievable but, post-processing will greatly improve the smoothness of parts.
- Epoxy resins are an excellent choice for sealing PLA printed parts.
- Acetone smoothing is not recommended for PLA prints.
- In general, IPA or rubbing alcohol will not dissolve PLA but there are some varieties that may be IPA soluble. Consult your filament material datasheet or technical datasheet for more information.
- PLA may be smoothed without sanding by dipping it or spraying it with a coating.
- ABS is tougher and lighter than PLA which is stronger and stiffer. Both have their ideal applications, but PLA is typically considered a hobby material whereas ABS is ideal for prototyping.
How to Finish Your 3D Prints - Ultimate Guide to Filling, Priming, Sanding & Painting 3D Printed Parts
Your 3D prints are now coming out great & looking as they should, but then again, they’re still looking like they’re 3D printed.
Whether you’re printing for business, want to rescue a not-quite-perfect print, or just need some tips for finishing 3D printed parts, this guide on how to finish 3D prints will explain the various methods the experts use: allowing you to learn the full lowdown on how to smooth out 3D prints.
In general, finishing is the post-printing process of smoothing the surface of a printed object so that it looks as perfect and professional as possible. Large industrial 3D printers accomplish this task by using acetone cloud chambers, multi-axis enamel jets, and agitating chemical baths.
However, I’m guessing you don’t have to have that kind of expensive equipment to finish 3D printed parts that are smooth and sharp.
In this article, we’re going to look at the various finishing techniques that you can use to get perfect-looking printed objects every time. Because every print material requires slightly different finishing techniques, we’re going to look at each of the common finishing techniques in turn and see how they apply to a material you may be using.
This will give you an opportunity to decide what may work for you given your individual setup, circumstances and printing practices.
Basic Best Beginning Practices for 3D Print Finishing
On the subject of printing practices, one of the best ways to minimize the amount of finishing work cleaning up 3D prints is by starting at the very beginning of the printing process. Your slicer settings have a lot to do with how your finished object looks.
For example, layer height contributes greatly to how a finished object looks. Layer height is the setting that establishes the height of each layer of filament in your print. In some sense, layer height in 3D printing is akin to resolution in photography or videography.
When you choose a thicker layer height, your object will have less fine detail and the layers will be more viable. When you choose a thinner layer height, a higher level of detail is possible and your layers will tend to blend into one another.
Print speed is another important setting that can contribute to overall object quality. Print speed is how fast the print head travels while extruding filament. Therefore, optimal speed depends on the object you are printing and the filament material that you are using to fabricate the object.
In general, simple objects with less detail can be printed faster without much loss of quality. On the other hand, more complex objects with more detail will benefit from a slower print speed. Because of this, it pays to experiment with your print speed to see what works best for the job you’re printing.
If you’re intending on painting 3D printed parts after you’ve finished printing, it may be best to use a lower layer height. You’ll spend more time printing, but less time sanding 3D printed parts before painting them. Read on to learn more about painting PLA and other 3D materials.
You’re going to be sanding 3D prints after printing in order to obtain the smoothest surface possible. This means that your object is going to need to be a bit more robust in terms of thickness and infill than you previously planned for.
A shell is the outer wall of a designed object. Shell thickness refers to the number of layers that the outer wall will have before infill printing will begin. The higher the setting is for shell thickness, the thicker the outer walls of your object will be.
Obviously, thicker walls make for a sturdier object. So, when you’re planning to finish your object post-printing through sanding, you want to increase the shell thickness to account for the material that you will be removing later.
Fill density or infill is a measure of how much material will be printed inside the outer shell of the object in question. Fill density is usually measured as a percentage of whole, as opposed to a unit of measure. This means that if 100% fill density is selected, the printed object will be solid, with no empty space inside the outer shell. Likewise, if 0% is selected, the printed object will be empty inside.
Fill density is used to conserve filament while printing and speed up printing times.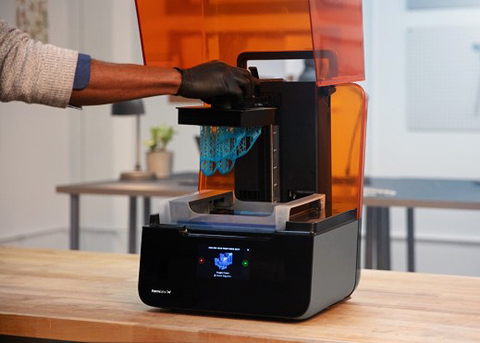 However, an object with more infill will be stronger and heavier than an object with less infill. Again, because sanding removes material from the surface of an object and requires the application of a certain amount of pressure to do so, you’re going to want to increase your fill density when printing the object. Doing so will insure that your object won’t be damaged or deform during the finishing process.
For more information on slicer settings, take a look at our article on the subject here.
Slicer settings are not the only thing that affects the amount of potential finishing work that may need to be done once an object is printed. The quality of the printing filament that you are using can impact end quality as well. Poor quality filament contains impurities that will negatively affect how the material melts, extrudes and cools.
In addition, cheaper filament is not produced to the rigid tolerances necessary for high-quality end results. Specifically, variations in the diameter of the filament can lead to under extrusion and over extrusion problems during printing, both of which will produce a final object with serious surface flaws that will have to be dealt with through finishing.
Finally, consider using a color of filament that will closely match the desired color of the finished object. Doing so will reduce the amount of painting that needs to be done once printing is over and you’re finishing the object.
Admittedly colour is less important for those truly professional-grade finishes though, because of the amount of primer paint coats needed.
Support Structures
As you know, a 3D printer starts printing an object from the bottom up. This means that if you have a design that incorporates overhangs, upper areas in your model that don’t have any underlying material, you’re going to run into problems. After all, your printer filament is subject to the law of gravity. It can’t be extruded onto thin air.
In these cases, you will have used a support structure which supplies a surface onto which your overhangs could be printed. These structures, which may or may not be soluble, will need to be removed before the finishing process can begin. Here you’ll notice Jon printed this helmet inverted, with minimal supports.
If your support structure isn’t soluble, you will need to break or cut away the supporting material. A pair of flush cutters or an Exacto knife can help you get cuts that are flush with the printed surface of the object that you wish to retain. Once the supporting material has been removed, use a bit of 200 grit or 400 grit sandpaper to gently smooth the support marks.
You’ll notice in the image above, the model was printed upside down so that minimal support structures would be left – and so less work to remove them. It’s also easier going smoothing PLA on large, simple areas like the top of the helmet than potentially more intricate parts of the underneath.
If your support structure is soluble, you’re likely dealing with either PVA or HIPS. In this case, simply submerge the object in the solvent in question – water for PVA and Limonene for HIPS. The water should completely dissolve the PVA support structure within several hours.
Limonene will take longer to dissolve the HIPS support structure, usually about 24 hours. In both cases, remember to give the containers containing the solvent and your object a gentle shake from time to time to help the process along.
How to Clean Up 3D Prints With Filler
Before you sand and paint 3D printed models, it may be worth filling any small gaps, cracks, or underfilled sections with a 3D print filler solution. This is usually a variant of epoxy resin that is easy to work with, and can be sanded down afterward.
We recommend using XTC-3D which you can get here. You’ll notice you can even use it for smoothing out 3D prints just by brushing it over as a 3D print coating.
Although you won’t get the same level of high-quality finish we’re aiming for in this article – it could be a quick way to improve a print. Think of it as the lazy man’s 3D printing finishing tip.
The neater you are filling the gaps, the less sanding you’ll need to do afterward – so try to be as neat as possible. You’ll also need to leave it to cure for at least a few hours after filling.
Sanding is a simple and somewhat easy way to finish processing a 3D print, depending on the material in question. Some printing materials respond well to sanding, with other materials it may not be an option.
For example, PLA and ABS can respond very well to sanding. With harder materials, like Polycarbonate and PMMA, sanding is not an option. (We will discuss finishing options for harder materials in more detail below.)
If you’re looking for how to make 3D prints smooth and the material you’re using can’t be vapor smoothed, then sanding it is!
Among the few PLA finishing techniques, sanding gives the best result. Be sure to choose a good quality PLA filament, as poorer filaments can be more challenging to get a good smooth surface on.
Sanding the surface of an object made from PLA or ABS is a fairly straightforward process – as long as you approach the job with some patience. For example, PLA’s lower melting temperature can make it get gummy and soft if it is sanded to aggressively and quickly. Therefore, patience and a bit of time are the keys to getting a smooth mirror finish on any object made with PLA.
Also, you need to be prepared to use multiple grit sizes of sandpaper. For example, with PLA be prepared to use every size from a 200 rough grit to a 3000 fine grit and every gradient in between.
Pro tip: With a material that’s a bit harder, like ABS, you may want to start with the same grit size but try wet sanding the object with a waterproof abrasive sheets such as “Wet & Dry.” A harder material can stand increased pressure while being sanded, but friction still is an issue.
Wet sanding helps reduce the heat that results from friction, allowing for more efficient removal of unwanted material with less deforming of the object due to frictional heat.
No matter the material, you want to start with the coarsest grit of sandpaper.![]() Use a circular motion with a slow moderate pressure to remove unwanted material. The idea is to get rid of what you don’t want while leaving absolutely no trace that you’ve done any finishing work.
Use a circular motion with a slow moderate pressure to remove unwanted material. The idea is to get rid of what you don’t want while leaving absolutely no trace that you’ve done any finishing work.
Once you’ve gone over the object once with coarse grit sandpaper, you want to repeat the process with a finer grit. For example, if you started with a 200 grit sandpaper, you want to switch to a 400 grit sandpaper on your next pass. Once you’ve patiently done a pass over the object with the 400 grit, you switch to 600 grit and repeat the process.
The idea is to slowly and carefully remove the features on the objects that you don’t want, while slowly and carefully retaining and highlighting the finish on the features that you do want to keep.
When you are scaling up the grit number on the sandpaper, remember that time is your friend when it comes to getting a mirror-smooth finish. In general, the more time that you spend sanding, the better the finish that you will obtain. This is especially true with the lower-numbered grit sandpapers.
Keep working your way up to finer and finer sandpaper grits – 600 to 800, 800 to 1000, and so on. As you get up over 1000 grit, the finish on your object will start to feel really smooth, but don’t stop here. To get a truly professional finish, take the time to carefully go over your object with 2000 girt and then 3000 grit. That extra attention will really pay off in the quality of the finish that you end up with.
Once you’ve sanded your object, it’s ready for either painting or simply polishing, depending on your preference. For more detail on this 3D sanding technique, view our guide on getting a mirror finish from sanding here.
Vapor Polishing
The before and after effects of a cold acetone smoothing bath.An alternative to sanding is vapor polishing. With vapor polishing, a small amount of an applicable solvent is placed in a container. The printed object is also placed in the container on a platform that suspends it above the solvent. A non-airtight cover is placed on the container and the solvent is then heated until it begins to produce vapor.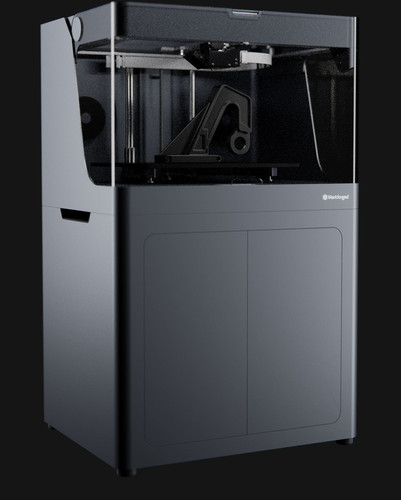
This is an analogous process to what happens when water is heated to a point where it begins to form steam. Essentially, the solvent in question is brought to a temperature where it steams, or begins to transition from a liquid to a gas.
Once this happens, the solvent “steam” is allowed to surround, coat, and interact with the surface of the printed object. Ideally, the gaseous solvent begins to slowly and evenly dissolve the surface of the object, removing unwanted material and features.
Once the desired look of the surface of the object is achieved, the object is removed from the container and allowed to air dry. Drying stops the interaction of the solvent with the material the object is made of. The end result is an object with a smooth and professional finish.
As was the case with sanding, increasing shell thickness and fill density prior to printing will produce a more robust object that will be capable of withstanding vapor polishing without problems.
Vapor polishing softens the rough surface layers of the object so that they flow together to produce the desired finish. So if there are insufficient top layers present when using this process, just like with sanding, the undersurface of the object can be exposed and ruin the effect.
While industrial printers and finishers use cloud chambers to vapor polish projects, many makers replicate the process using common objects. For example, a wide-mouthed glass container with a lid or a simple saucepan can be used to hold the solvent. A raft or platform of aluminum foil can be used to suspend the object above the solvent. Finally, the heated bed of your printer or your home range can be used to carefully heat the solvent.
Now a word of caution. Every printing material is soluble is a different substance. Some of these substances are relatively benign, others are extremely toxic.
For example, in ascending order of toxicity, PVA is water-soluble. HIPS is soluble in Limonene. ABS and PMMA are soluble in acetone. PLA is most efficiently soluble in tetrahydrofuran or THF. Polycarbonate is soluble in dichloromethane. The list goes on.
Vaporizing any chemical solvent poses a number of hazards. First, solvent steam is much more readily absorbed by the body through respiration and contact. The more toxic the solvent, the worse the prolonged exposure to the substance will be. Therefore, any vapor polishing must be done in a well-ventilated environment. The use of a respirator, protective clothing and gloves is well neigh mandatory.
Second, many solvents are flammable. Therefore, heating a solvent must be done under controlled conditions. You need to know the solvent’s boiling point and flame point beforehand and use a calibrated thermometer to ensure the temperature of the solvent stays within safe parameters. Always work with a fire extinguisher handy. To read more about vapor polishing, check out our in-depth guide here.
How to Paint 3D Printed ObjectsNo matter if you’re prototyping an object for use in a Kickstarter campaign or simply want to create something that’s absolutely stunning in its presentation and perfection, painting may be the way to go.
Successful finishing using paint actually involves two separate processes – priming and then painting. However, before looking at either, let’s take a look at a preliminary step that you need to take that will guarantee stellar results once you start painting.
If you’re wondering: can you paint 3D printed objects – the answers yes of course, but you need to do the right…
Preliminary Steps
When priming and painting an object, it’s best to first mount it on what’s known as a painting block using a dowel. A painting block is nothing more than a block of wood that supports the object while it is being primed and painted.How to paint PLA: Here you can see the helmet raised up, ready for finishing touches.
Simply take a wood dowel and, using a drill with a bit that is equivalent to the dowel’s diameter, drill a small hole into an inconspicuous area of your object. Insert the dowel into the hole you’ve drilled until it sets securely. (Alternatively, you can use a naturally occurring hole or declivity in your object to seat the dowel. )
)
Next, using the same size drill bit, drill a hole into a block of wood large enough to securely balance and support your object. Insert the other end of the wood dowel that you used on your object into the wood block. You now have a way to provide even and smooth coats of primer and paint to your object without having to touch it and risk leaving smears and fingerprints behind.
Also, remember that priming and painting an object can be a messy business. You want to stop the paint from getting on objects that it shouldn’t and you want to keep foreign objects, like dust, from settling on your printed object while it dries. Therefore, work in a well-ventilated area that is clean and well-lit.
Most spray-on paints contain solvents that can aerosolize and be inhaled. Consider wearing an approved respirator and nitrile gloves while priming and painting.
Also consider constructing a simple spray booth by hanging plastic sheeting around three sides of the surface you will be placing the object on while priming and painting.
This will contain the paint to the area around the object and will reduce the amount of dust and debris that will adhere to the object while the paint or primer is drying.
Priming before painting 3D printsPrimer for 3D prints is a special type of paint that comes in neutral colors. It is designed to provide a uniform surface that paint can easily bond to. Primer comes in both brush-on and spray-on varieties. When choosing a primer for your object, you are better off going with a spray-on variety.
It will cover the surface of your object with an even coat and will eliminate the use of brushes which can leave noticeable brush marks.
Best paint for 3D prints? For best results, use a primer (and paint) that are compatible with plastic and are of the same brand. Using a high-build filler primer like Krylon and Montana both are good choices.
Before priming your object, spend at least two to three minutes swirling the contents of the can of primer, using a circular motion. Doing so fully dissolves the pigment into the solvent within the can. You should never, under any circumstances, shake the can before you prime or paint. If you do, you will mix the pigment into the solvent, instead of dissolving it.
This will result in the formation of bubbles that will appear on the surface of your object while spraying. After about two or three minutes of swirling, you should hear the metal ball within the can moving smoothly. This indicates that the pigment is dissolved into the solvent and you are ready to begin priming your object.
Start with the nozzle of the can about 15 to 20 cm (6 to 8 in.) from the surface of the object. Using short and rapid strokes, begin spraying the object Start each stroke before the beginning of the object and end each stroke after the end of the object. Move quickly, rotating the object as needs. Avoid over-spraying. The goal is to start with a very thin initial coat that can be built up over time.
Once the initial coat of primer is dry, it’s time to add a second coat. Again, use short rapid strokes that start before the beginning of the object and end after the end. In the vast majority of cases, your object will only need two coats of primer to ensure an even cover that will improve the adherence of the paint you have chosen.
Once your second coat of primer is dry, you want to buff and polish the primer coat. A great and easy way to do this is to use nail buffing sticks, the kind that are available in any chemist or drug store and are used in manicures and pedicures. They come with a three grit surface.
You can skip the roughest surface and use the buffing and polishing surfaces to bring the primer coat up to glossy shine. As you did with the sandpaper, take your time and use a circular motion where possible. The goal is uniformity. When you’ve finished, gently wipe the object with a tack cloth to remove any dust created during the buffing and polishing.
Once you’ve buffed and polished the primer coat, you’re ready to begin painting. The painting process itself involves three distinct steps – undercoating, top coating and clear coating. As was the case with the primer coat, your best bet when painting is to use a spray-on variety. It will give you greater control over uniformity and layer thickness. It will also allow you to avoid brush marks.
You want to choose a painting that goes on as thinly as possible. One of the best choices is Tamiya. Tamiya paints are specifically designed for use by modelers and radio control enthusiasts. This makes them a perfect choice for finishing painting 3D printed objects.
Undercoating
Applying an undercoat layer will allow you to get the richest and deepest color when painting your object. An undercoat should not be confused with the primer coating. The two serve entirely different purposes. The primer coat is there to give the paint something even to adhere to. It prevents blotching and uneven coverage.
The undercoat layer is there to block the neutral and flat color of the primer.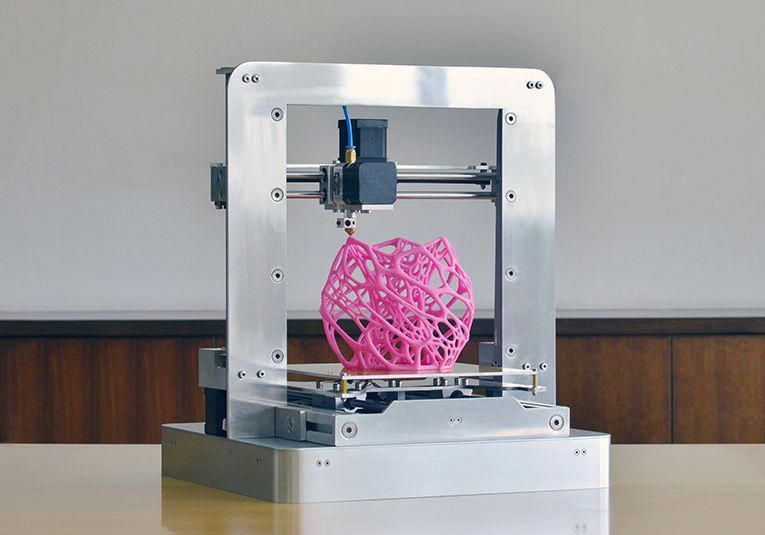 Undercoat layers are usually either solid black or white. Black is used for objects that will be a painted with darker toned colors. Obversely, white is used for objects that will be painted with lighter-toned colors. No matter the color, the undercoat will shine through the topcoat layers, giving the finish a luster and depth that is unmatched.
As was the case with the application of the primer, you want to use a respirator and gloves while painting. Spend two or three minutes swirling the paint can in a circular motion until the pigment dissolves in the solvent. You’ll know that this happened when you feel the metal ball in the can revolve around the inside without resistance.
Once the paint is well mixed, hold the nozzle of the can 15 to 20 cm from the surface of the object and apply the undercoat in short and rapid strokes. Once again, start these strokes before the beginning of the object and end after the end of the object. As always, rotate the object on the painting block while applying the undercoat in the thinnest layer possible.
Once the initial undercoat layer is dry, buff and polish the undercoat layer using a nail buffing stick in the same manner as you did when buffing and polishing the primer. Once this is completed, you are ready to apply a second undercoat in the same manner as the first. Once the second undercoat is dry, buff and polish as you did before.
Top Coating
Now it’s time to apply the top coat. Top coating isn’t about complete coverage. In some sense, it’s the icing on the cake. It’s there to enhance and improve all the work that you’ve already performed. Ideally, the top coat will be a color that contrasts with the color of your undercoat. The top coat will add gradients of color which will allow the contrast of the undercoat to show through. The end result will be a depth and resonance that will make your object look amazing.
All of the steps that you’ve already used when applying the primer coat and the undercoat are also used when applying the top coat. You want to use a respirator and gloves. You want to keep your object mounted on the paint block. You want to keep and the nozzle of the paint can 15 to 20 cm from the surface of the object and use short rapid strokes while painting. You want to rotate your object rapidly on the paint block while applying the top coat. You want to polish and buff in between the first and second coats.
You want to make sure that you don’t apply the paint too thickly when doing the top coating. Remember, the goal is to let some of the contrast of the undercoat to show through the top coat in order to get a sense of depth. To that end, check that there is sufficient contrast showing after the first top coat layer has dried and been polished and buffed. Depending on what you find, apply the second top coat accordingly.
Clear Coating
Clear coating, also known as finish coating, is the last step in the painting process. The purpose of clear coating is twofold. First, the clear coat adds final layers which enhance the finished look of the object. Second, the clear coat protects all of the hard finishing work you’ve already done under a protective coating.
There are two types of clear coating available – glossy and matte. Obviously, glossy is shinier and matte provides a flatter-looking end appearance. The choice between the two is merely aesthetic. Practically, they both do the same thing.
Clear coat is applied in the same way that you’ve applied every other coating. Respirator, gloves, well-swirled coating, short rapid strokes, etc. You can apply either one or two coats of clear coating depending on the circumstances and the finished look that you’re trying to achieve.
I hope this guide has been a comprehensive breakdown of the available options to you for 3D printing post-processing and gives you a clear layout on how to paint 3D printed models. If you’re willing to put in a little time, truly exceptional finishes can be achieved. But if you’re just looking for tips on smoothing out 3D prints, then this guide will at least have given you some food for thought.
Related:
- How to sand PLA to a smooth finish
- Best infill settings
- How to prevent filament stringing and pillowing
How to create models that are larger than the print volume of a 3D printer
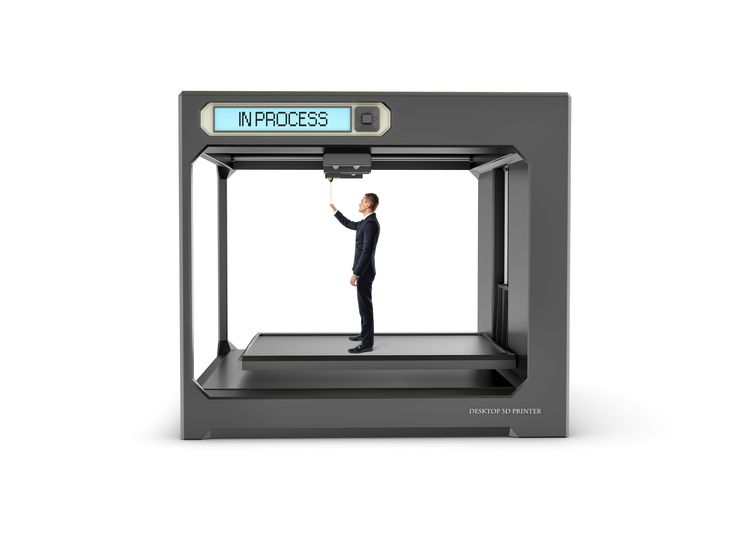
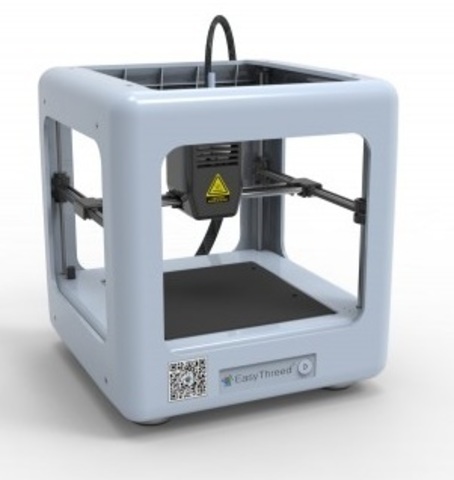
Don't have a large format 3D printer yet? When evaluating the capabilities of a compact desktop 3D printer, do not limit yourself to print volume. Many objects, like your smartphone or a bridge over a river, are made up of many individual components. Therefore, splitting the model into smaller parts that can be aligned after printing is a great solution for 3D printing large objects that do not fit on the platform.
Also, splitting the model can be a great way to get a high quality result, even if the whole model fits on the platform. This makes sense when multiple or opposing surfaces must be free from support structures, when the model has complex ledges, or contains cavities where liquid polymer can remain.
3D printing of various parts opens up new possibilities, for example, the creation of prefabricated structures from various materials or the combination of rigid and flexible parts to simulate the overmolding method.
When choosing a gluing method, it is necessary first of all to take into account the required degree of strength of the glued joints, which depends on the purpose of the models:
-
chemical: use adhesive on artwork, scale models, and complex shapes that are not intended for functional use and should not be impacted;
-
Mechanical: Provide threaded holes or sockets for attaching parts that require a secure mechanical connection, or repeatedly detaching and attaching components as needed.
This tutorial focuses on building large, prefabricated 3D stereolithographic (SLA) printed models with chemically bonded components. Read on to learn all the steps in this process, from model separation to post-processing for a professional finish.
Formlabs Form 3L is the first affordable, easy-to-use large format 3D printer optimized for reliable production of industrial-quality models. The Form 3L stereolithographic 3D printer features a huge print volume of 30 x 33. 5 x 20 cm and unrivaled cost-effectiveness.
Meet the Form 3L
We recommend two ways to separate models: adding features to the design that will allow the parts to fit together, or separating the model with straight lines, which will require them to fit together properly during the bonding process.
Regardless of which method you choose, if you have a lot of parts, it's helpful to add a unique identifier (letters/numbers) for each one to make assembly easier.
Use CAD software to split a 3D model and add basic centering components such as slots, pins, slots, notches, and tabs, or more complex features such as dovetails and slots to match model folds.
Adding centering components to the design makes it easier to assemble parts.
Ideally, these components should make it easier to align and assemble parts, but can cause problems if they differ even slightly from your 3D models, preventing perfect centering. Therefore, it is best to use centering components only when the printer can print parts with accurate dimensions that are not subject to deformation.
Splitting a 3D model along straight lines requires less effort than adding components to center it. With this separation method, there are also fewer problems if the parts are slightly deformed or differ in size.
Adding IDs for each part makes the assembly process easier.
On the other hand, parts separated by straight lines can be time consuming to assemble, as each part must be manually centered and ensured that they all remain in the correct position until the adhesive is completely dry.
By default, when printing on a stereolithographic 3D printer, solid models without voids are obtained. Depending on the design, different requirements may apply to the manufacture of large items. In such cases, 3D printing the outer shell or converting the structure into a hollow is a great way to save a lot of material and time. When printing hollow models on a stereolithographic 3D printer, be sure to add ventilation holes to avoid creating cavities filled with air and pressurized resin.
SAMPLE PART
Experience Formlabs print quality first hand. We will send a free sample of the printed model directly to your office.
Request a free print sample
Converting a model design to a hollow saves a lot of time and material because the printer only needs to print the outer shell.
Learn more about how to save materials and time by hollowing out 3D models.
Depending on the size of the details and the purpose of the model, we recommend three mounting methods:
| Epoxy glue (5-30 min) | cyanoacrylate (CCA, Supercollah) | Resin | ||||
|---|---|---|---|---|---|---|
| Square. | Large | Small/Medium | Small | |||
| Paintable | Yes | Yes | Yes | 9006 70072Medium | Low | Low |
For large parts and maximum adhesion, use 5-30 minute dry epoxy. It takes longer to dry than other adhesives, allowing you to fit large 3D printed parts but slows down the assembly process. Most 5-minute epoxy adhesives stop changing shape in as little as five minutes and cure by about 75% in less than an hour.
For large parts and maximum adhesion we recommend using epoxy adhesive.
The next option is cyanoacrylate (CA or superglue), which quickly forms a strong bond, ideal for small to medium sized parts. Thoroughly clean the part before applying CA to the surface, because contaminants adversely affect the quality of the connection. CA has a moderate impact strength, but is not recommended for models that require high strength.
For small models, you can simply use liquid resin from a stereolithographic 3D printer. Pour a small amount of resin into a tray from a bottle or cartridge, pick it up with a pipette or syringe, and place it on the surface to be bonded. Connect the parts and wipe off excess resin that may spill around the edges. Aim a 5mW (405µm wavelength) UV laser pointer at the contact area to cure the resin and bond the parts.
This method produces a chemical bond similar to 3D stereolithography printing, but is only suitable for bonding small surfaces as a low power light pointer cannot penetrate the model deep enough to create a strong bond.
Note. Protective equipment must be worn when working with polymers, including proper eye protection and gloves.
Download PDF
Don't have time to read the article now? Download it in PDF format.
Download as PDF
After assembling the model, it's time to move on to post-processing. This step includes geometric correction of the model to provide a smooth surface that matches the original 3D model, and aesthetic finishing to obtain a uniformly colored surface.
Depending on the precision of the printer and the size of the printed parts, there will almost always be slight voids or mismatches at the contact points.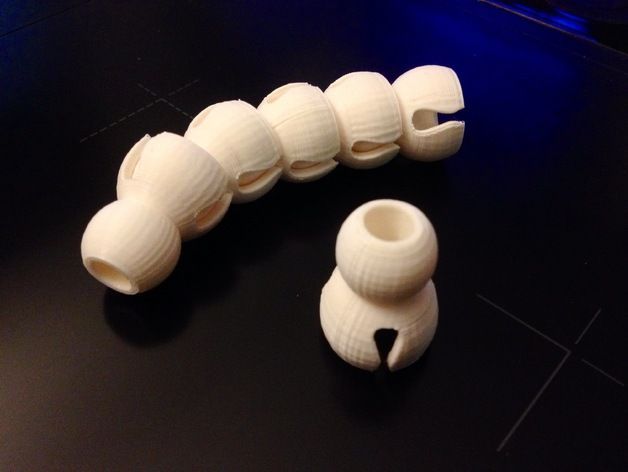 Automotive sealant (e.g. Bondo 907) adheres well to polymers, therefore, to eliminate such inconsistencies, it is recommended to apply it in a thin layer on the surface. Lightly sand the surface after each coat has dried to bring the model to its final shape.
Sealing models with automotive sealant (red area in image) will help eliminate small gaps and inconsistencies between parts.
Sanding helps remove traces of support structures and remaining inconsistencies in the model. Gently start sanding the surface with 150-grit sandpaper to remove traces of support structures and smooth edges where parts meet. Once the surface is smooth, sand it wet using 320 grit sandpaper to remove any remaining layer lines. Sand the surface in random motions so as not to leave marks. In most cases, these two methods will produce a fairly smooth surface, but you can continue to increase the grit of the sandpaper up to 2 times and, after wetting it, sand the entire model until the surface is reasonably smooth.
Power sanding is great for large flat surfaces, but can ruin fine details. Grinding of small models is recommended to be done by hand, and for large ones, a combination of manual and mechanical grinding is recommended.
Machining large parts with mechanical and manual grinding saves a lot of time. Power sanding is great for large, flat surfaces, but can ruin the fine details, sharp corners, and subtle contours that are typical of stereolithography. As a result of mechanical grinding, a lot of dust is also generated, so before starting processing, it is necessary to prepare the working area.
Note. The use of power tools requires full attention and the use of protective equipment. The surface can be damaged very quickly without even realizing it, just by leaving the sander without moving.
When finished sanding the model, rinse it in soapy water to remove dust and debris and dry thoroughly before proceeding to the last step.
The primer helps the paint adhere to the surface and can indicate areas where additional sanding is needed or removal of traces of supports that you may have missed. The Universal Matte Gray Plastic Primer shows these spots exceptionally well. For best results, apply it to the surface in several thin coats. Sand critical areas and reapply a thin coat of primer. Repeat this process until the entire surface of the model is level.
Note. Use protective equipment during priming and painting, including a respirator to protect against paint fumes.
All-purpose matt gray primer for plastics is exceptionally good at showing fine details and helping to identify areas that need to be sanded down.
Find out more about sanding and priming in our detailed guide.
When painting with multiple colors, protect the model with a temporary coat. First, plan the order in which you will paint the model, depending on the color, transparency, and size of the area of a certain color. Start with small details so that fewer of them can be protected when painting with the main color. Apply painter's tape to the edges and corners. To quickly cover large areas, attach sheets of paper to them. Ribbon guides (laser cut) can also be useful for creating straight lines, circles and complex shapes.
When it comes to masking, figuring out the correct order is your first priority. In our case, the parts were first painted silver and the sections that would remain silver on the final part were then covered with painter's tape to hide them from the next l
painting. In our case, we first painted the parts silver and put masking tape on the areas that should remain silver in the finished model so that they do not get paint of a different color.
As with primer, several thin coats of paint should be applied for optimal results rather than one thick coat. Most spray paints will achieve the best color in warm and slightly damp conditions in the absence of wind. In this case, you must always follow the manufacturer's recommendations, which can be given on the paint container or in the technical documentation.
Consider the time the paint needs to dry: Allow layers to settle before applying the same color and allow the paint to dry completely before applying a new color.
The area where we applied masking tape is still silver.
Become an expert in painting 3D models with our detailed guide
Already wondering what your finished model will look like?
"Sorry sir, that R2-D2 over there is in excellent condition and inexpensive."
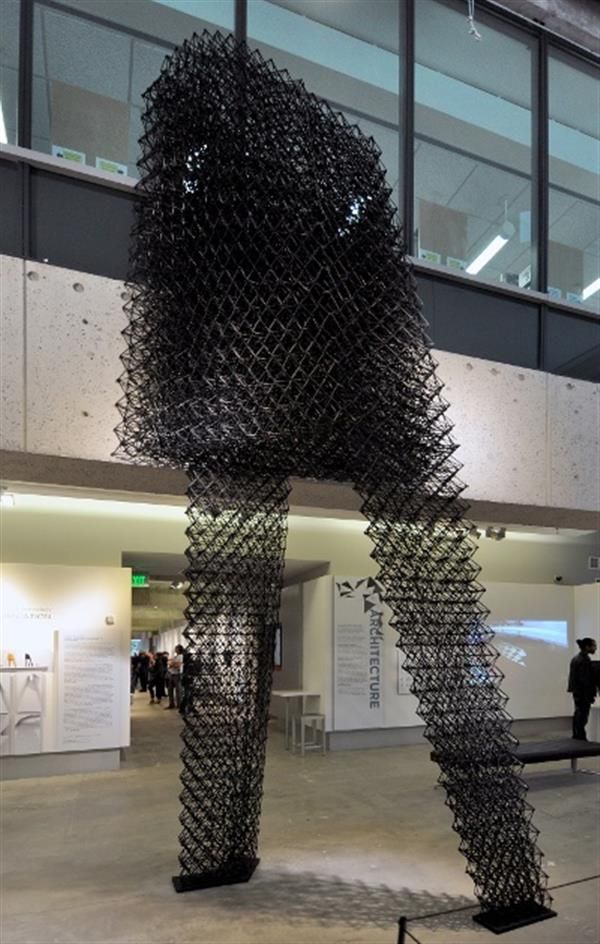
Formlabs optics designer Adrien Tanner created this R2-D2 model from 105 parts printed on a Formlabs stereolithographic 3D printer. It even has working electronics borrowed from the Form 2 printer - a galvanometer drive for sound reproduction, a cartridge dispenser for lamps, and a Z-axis drive for dome rotation. 9The 0003
Form 3L is the first large-format 30 x 33. 5 x 20 cm 3D printer for producing massive, industrial-quality models.
Reduce order processing time when outsourcing or manual work when assembling large-scale 3D models. Now you can print large 3D models in their entirety on the Form 3L, the first affordable large format SLA printer.
Want to see how stereolithographic parts work? Explore our resources to learn more about stereolithographic resins, or request a free sample to evaluate print quality for yourself.
Request a free print sample
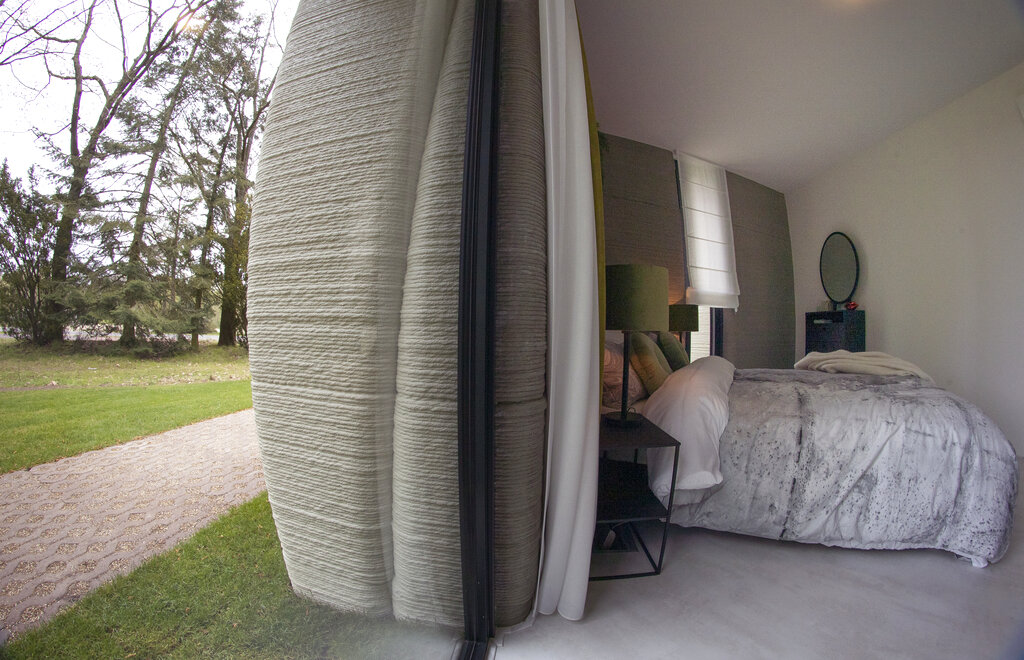
Construction printers - a new method to build small houses
Alexey Rybnikov
Machine that prints concrete structures: layering mortar
In recent years, engineers in many countries - especially those where the population is growing too rapidly , are working hard to create construction printers that can quickly, and most importantly inexpensively, build small houses. Why cheap? Yes, because construction waste is used to create the solution, which is crushed and mixed with cement.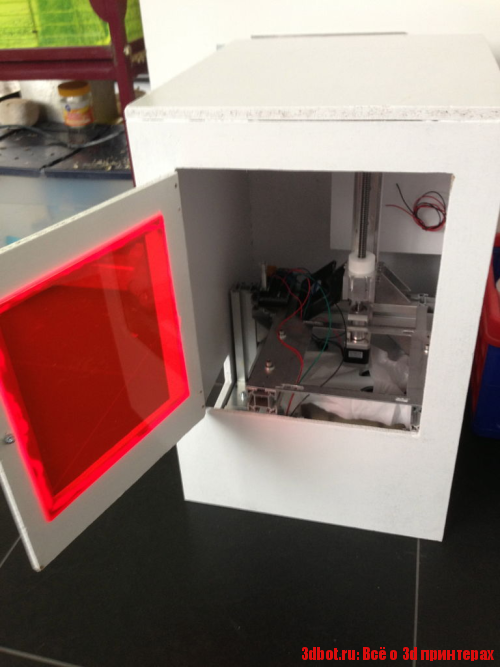 The cost of a 200 m2 dwelling is less than $ 5,000, and for poor people this aspect is most important. Here we want to tell you a little about this technology.
Article content
- Benefits of 3D construction
- This is important
- The essence of technology
- Business prospects
- Is it profitable?
The advantages of 3D construction
Engineers from different countries worked in parallel to create printing devices with which you can build cheap buildings. But as always, the Chinese are ahead of the rest - their printer has the largest dimensions (32m * 11m * 7m). A year ago, 10 small houses (60 m2 each) were printed on it, in just a day.
While no one lives in them, they are tested, observing how the structures behave under the influence of the sun, wind and temperature changes. But the results have not disappointed anyone yet. In any case, it turned out that torrential rains and heat did not bother them. Therefore, countries with a warm climate were the first to build using this technology.
An unusual office in Dubai printed on a
printer This is important
The creators of the largest printer have confirmed the quality of 3D construction by their own example. All walls of the office of the company involved in the development and promotion of this technology, located near Shanghai, are printed on a three-dimensional printer. The building has a total area of 10,000m2 and was completed in just 30 days.
- True, a conveyor of four machines was organized for this - but still, their productivity is amazing. However, Shanghai has a subtropical climate, and the absolute winter minimum for it is -9 degrees. Well, what will be the result of testing such structures in our frosts - this is another question.
- In any case, with such rates and low prices, it is possible to solve housing problems not only for residents of China's poor provinces. But what can I say - what is it worth restoring housing for people who have suffered from all sorts of disasters: fires, floods, hurricanes, earthquakes, from which no one is immune.

- For a man left without a roof over his head, even an unprepossessing house will seem like paradise. There are enough needy people all over the world, so many countries have shown interest in this technology: the United Arab Emirates, America, Italy, Holland, and, of course, Russia.
- Many of them have developed printers of their own design, but by and large, they all operate on the same principle. The creators of 3D printers hope that as technology improves, the price bar for finished homes may drop even lower.
Most importantly, everyone saw and understood that this is a boon for people, and the day is probably not far off when an even more powerful printer will be created that will be able to increase the scale of the object under construction.
The essence of technology
As already mentioned, the capabilities of construction printers are different. Some can only print fragments of houses that are in a horizontal position. After gaining strength, the sections are lifted, installed vertically, and connected to each other - which we see in the photo below.
But there is also an option that can print a house in a continuous way - that is, along the contour. In the future, this will enable construction companies that have such equipment at their disposal to travel with it to the address and build a house right on the spot. We have no doubt that in the near future there will also be combined machines that will be able to do both.
Structure ready for assembly
Reinforcement of the foundation under the house with fiberglass
- In addition, 3D printers are also used to produce fiberglass reinforcement, which is already being used in full swing in low-rise construction today. There is no doubt that the day is not far off when both options will work at the facility: one printer erects a concrete structure, and the second one reinforces it.
- The essence of the technology is as follows: the configuration of a structure or building is given to the printer via a computer. The nozzle, from which a rather thick and elastic solution emerges in a continuous line, moves along a certain trajectory - the contour of the future structure, increasing the height layer by layer.

- The walls are hollow, 30 cm thick. Their inner space is reinforced, filled with foam concrete - and not only a strong, but also a warm house is obtained.
Layering walls with printer
Small architectural forms printed on the printer
In our country, this technology is being worked on in Yaroslavl, where only small architectural forms are being printed so far: benches, gazebos. However, the construction of a residential building with a semi-attic, with an area of 80m2, has already begun. It does not promise to be as fast as the Chinese - after all, we do not have subtropics. Moreover, after all, a house needs not only to be built, but also to be finished, to connect communications. But by the summer of 2017, they plan to hand over the house, after which it will be possible to see photos of its facades and interiors. There's not much left, we'll wait and see.
Business prospects
By following a given program, the 3D printer can work around the clock and does not require any supervision or maintenance personnel. This fact will certainly interest those who are looking for opportunities to create a new business. Although the printer itself is not cheap, the growing popularity of 3D-printed homes promises significant benefits. Moreover, the terms of order fulfillment are incredibly compact.
For the printer to work, it is not necessary, like the Chinese, to use a composition based on cement and crushed construction debris. It can be ordinary sand concrete based on M500 Portland cement, or even adobe, which is used in the southern regions. For strength, the solution is reinforced with fiberglass, cellulose, or polymer fibers.
Please note! Note that you can print on the printer walls, partitions, stairs, and even some elements of the foundation - but the roof will have to be done in traditional ways, because it is not built from concrete, but from wooden beams.
Taking into account the time required for laying communications and finishing work, a house of 200 square meters can be completed in a maximum of 6 months.