3D printer making iron man suit
Full size wearable 3D Printed Iron Man suit made by Frankly_Built
We are supported by you, the reader. We may earn a commission through affiliate links contained in this article should you make a purchase, at no extra cost to you. Thank you.
Hello everyone! My name’s Frank and I’m a huge Marvel nerd! I’m 29 and currently stationed in the UK with my wife and doggos. I’ve been in the USAF for 8 years now and been overseas the entire time. I apologize now for how long this article is but i wanted to get all the information I have out in the open. Hopefully this can help someone!
So this is my fully 3D Printed Iron Man MK85 Cosplay. I’m very proud 🙂
@Frankly_Built on Instagram- Advertisement -
I started 3D Printing just over a year ago after seeing Avengers Endgame to make this suit exclusively and it got a little out of hand. As i started to research and prep and eventually print/build I realized how few resources existed for 3D Printed cosplays to this level. It was very scattered. Any YouTube tutorials and series either never finished or brushed over so much it was more of a demo. And Jesus, are people secretive about their strap and harness systems. So i began to document everything I could and share all the things I was learning to great reception. It’s been such an amazing journey so far and i can’t thank the maker community enough for all the help! So hopefully this is my way to give something back to the next person looking to make a small dream come true.
I’m not too sure on where to exactly start so I’ll try to summarize what i think is each aspect of this suit and build. Along with the reasons I did certain things. Here we go!
The Skills:
What do you need to do this? How hard is 3D printing? Do you need to know how to design? Draft? Paint? Wire? What does into this? To be honest you don’t really need to know much of anything to start. While certain skills obviously put you ahead in some aspects nothing I’ve needed to do through this was something that took months or years to learn.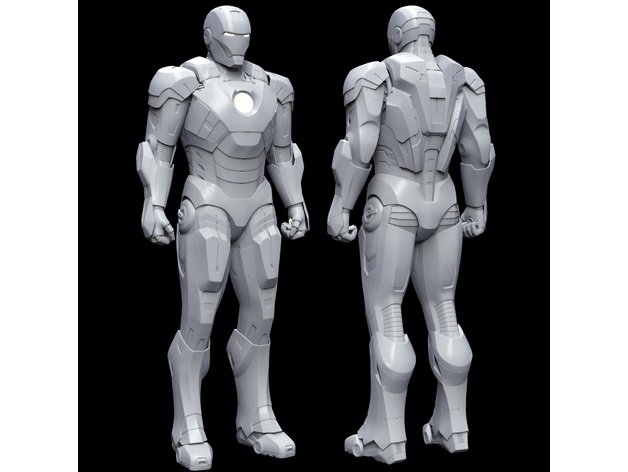 I’ve grown up with a heavy background in the car world. I’m very familiar with 12v electronics, painting and bodywork. I’ve also been building Gundam Models for YEARS so working with plastic and small details is second nature. But again, this only gives me a head start, not an advantage in any way.
- Advertisement -
Now, being comfortable using a computer and possibly have a slight mechanical inclination will pay out in spades but this all boils down to commitment level. It’s not CAN you do this but how much do you WANT to do this. Once you take the dive and start; that’s it. Game on!
The Printer:
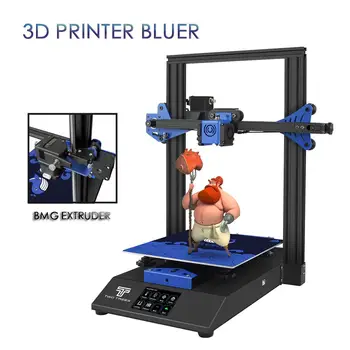
3D printing technology has made a quantum leap in the past few years. It’s cheap! With an quality printer being less that $200! And yes! People make entire suits with that single small printer! Now, i wouldn’t recommend that however. While you CAN do it, you will drastically increase the amount of prints, the amount of parts you need to fuse back together, the amount of time spent printing and much more.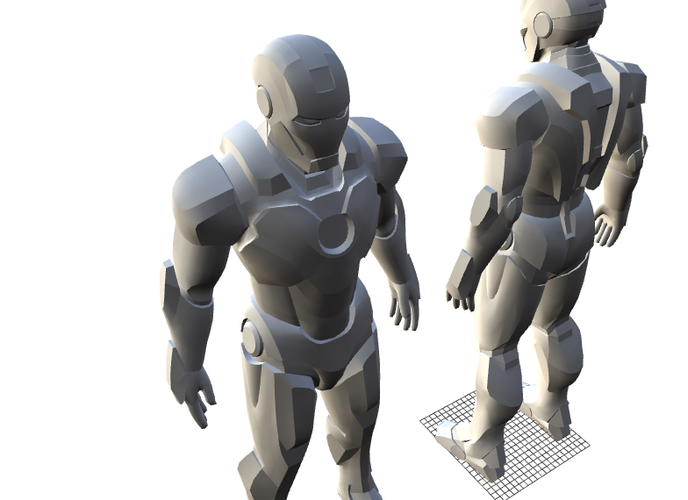 It’s not impossible but not very practical. I HIGHLY suggest a printer around 300 X 300 X 400 build volume. I personally went with the Creality CR-10S but other similar volumes exist across Creality and other brands like Artillery, Tevo, and Sunlu. Do your research!
But please do not fall into the trap that so many others do! This is still a growing hobby! These are ENTRY level hobby printers! No, they don’t need to be 100% assembled like the Anet A8 (nor do they catch fire like the A8) they still have a learning curve that some aren’t ready for. They aren’t an appliance like a microwave or a tool like a power drill. They don’t always “just work” they take some time to understand and learn. But by no means are they HARD to learn; again it boils down to commitment and drive. And let me tell you about the 3D Printing community; it’s HUGE! So many people are willing to help and talk and guide you through nearly anything. Dozens of facebook groups and forums to browse to help you get ready before you even make the purchase.
If you would like a quick summation of what goes INTO 3D Printing you can watch this video i made : How to 3D Print!
But don’t stop there! Check out more resources like The 3D Printing Nerd and Makers Muse!
My top 2 current recommendations for printing a Cosplay armour that still remains beginner friendly are:
Creality CR-10 V2
Creality Ender-5 PLUS
The Software:
How much are the programs? Are they expensive? Nope! They’re free! Well most of them are. And actually? They’re VERY easy to use! I went with an awesome program called Ultimaker Cura. Very user friendly. COUNTLESS tutorials for it and frequent updates. But what does this program do? Well to take a 3D file and make it into a 3D print you need to convert it into G-Code. This is a long written code that tells the printer exactly what to do not unlike a CNC. It traces out the path the printer must follow in order to properly build the 3D part in the real. If you want to see a little preview of how Cura works check out this video! You can also look into other programs like Simplify3d and Prusa Slicer
But you may need another type of software as well.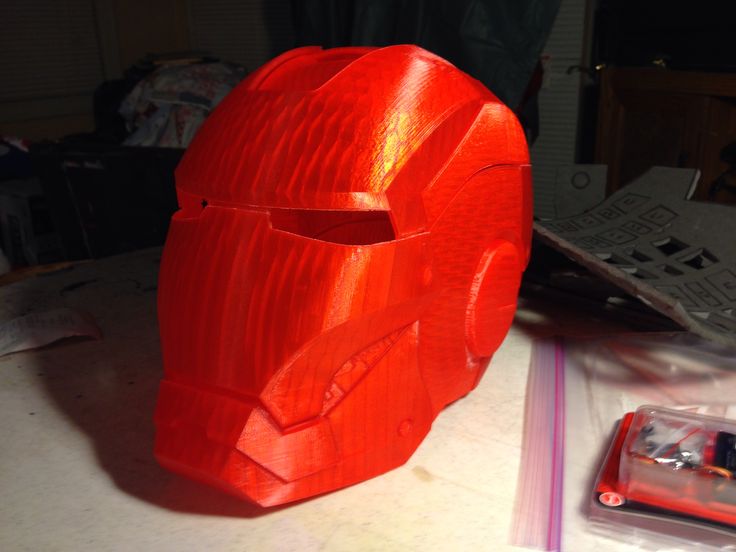 Some 3D files are obviously too large to fit on a printer. You need a Cutting program! Now i vary between 2 different ones. The first is Slic3r. This is a very basic program and actually is the same type of program as Cura except doesn’t work as well. What it DOES do well is let you view the 3D parts in a faster more open space and make “plane cuts” or straight cuts in the XYZ positions to help chop up 3D files! But if you need to get more advanced and accurate you can use Meshmixer! Another free program that is more for organic modeling but holds a great plane cut feature!
You can download Cura, Slic3r and Meshmixer all for free and begin messing with the programs immediately! Head to Thingiverse.com or Cults3D.com to grab free 3D files to play with!
The Files:
Where do you get files from? Are they free? How much? Some 3D files are free, some aren’t. A very basic rule of thumb is you get what you pay for. And if you didn’t pay for them don’t expect too much. Now that’s not to say people don’t share and post AMAZING files for free but few people release entire armor file sets. Usually you have to pay a little for them which make sense! Someone put a lot of time and effort into them (usually). You can find 3D suits and files scattered all over places like Etsy, CGtrader.com, Patreon.com, DO3D.com, and more! But places like Thingiverse.com and Cults3D.com host many for free!
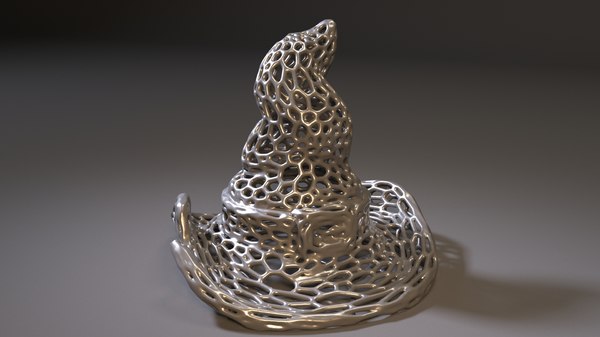
So wanted the MK85. It was beautiful. From the more muscular shape to the original Ditka armour callbacks i knew it was the one I wanted. I did a lot of searching trying to find the right files and it brought me to DO3D.com. This is where i got my hands on The Mark 85 Armor Files and The MK85 Infinity Gauntlet. And later on in the build after I had printed many versions of the MK85 Helmet trying to find the perfect one (The DO3D one was lacking sadly) I discovered this gem. The beautifully made MK85 by Akira Yumming. It was the most screen accurate model i had found. It’s those damn eyes.
But what’s included in 3D files? Do they fit them for you? How do you know what size to make them? This leads me to the next topic.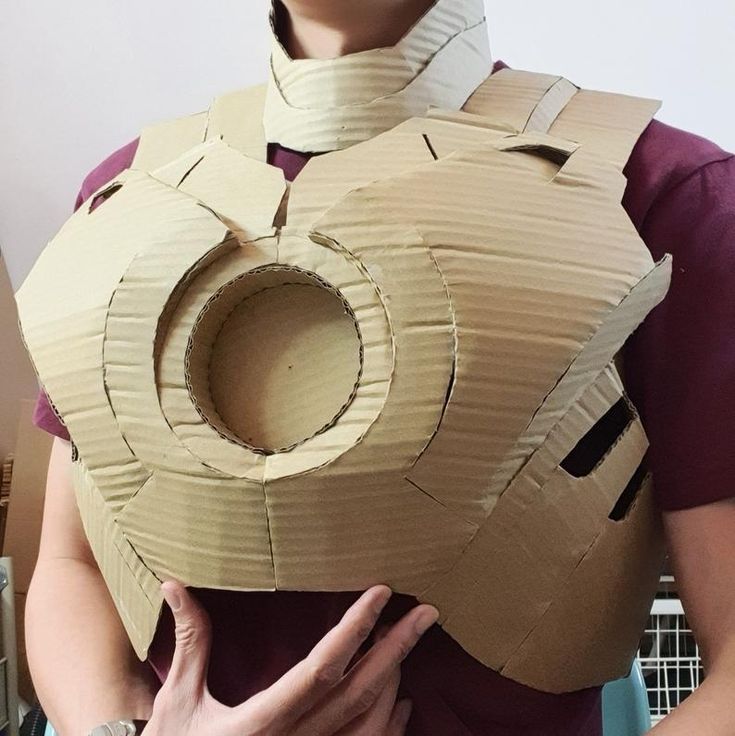
The Filament:
What’s it printed in? Plastic? Is it strong? Did you reinforce it? Will it melt in the sun? Much debate exists for the proper filament to use. So many brands with so many variations. The standard most commonly used plastic when printing is PLA plastic. It’s cheap. Easy to work with. And actually non-toxic when printing it! Other printable material exist such as ABS, PETG, TPU and more. They all have pros and cons so do your research when hunting! Basically ABS is a much stronger plastic but hard to print (needs a heated enclosed space), PETG is also strong, no enclosure but can be very tricky to print with. And TPU is a flexible rubber type material great for joints. Probably one of the hardest things to print with.
I myself stumbled upon a neat little hidden secret (at the time it was still emerging) call PLA+. Now don’t ask me what the difference is because depending on the manufacturer you get different answers. There exist no regulations yet on what material difference needs to be added to standard PLA to give it these properties.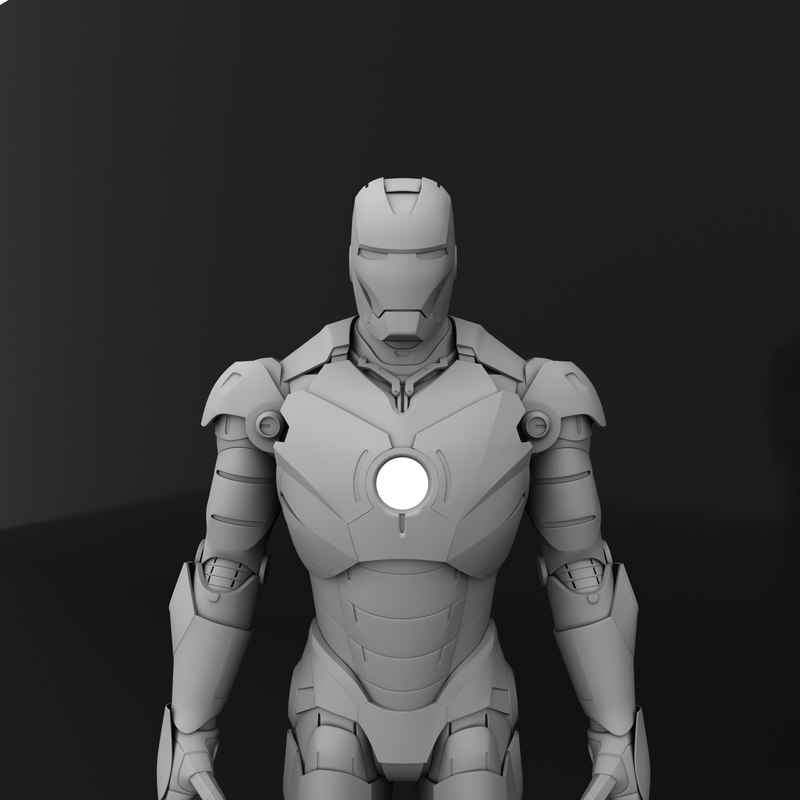 Some brands make it have a higher melting temp, others alter it’s strength. Whatever the case may be always get some and test it before commiting.
PLA has a very low melting temp and can warp in direct sunlight or in a hot car. But PLA+ has a higher melting temp which can widen that gap. Also let’s be practical here; Don’t leave your stuff in a hot car. PETG and ABS will pretty much never warp normal hot environments. So pick your poison!
The Scale:
This is the achilles heel of nearly everyone who make their first printed armor. Scaling. Early on i made one big choice. And i stuck with it the entire time. I refused to have my Iron Man costume look like a bobble head. Now i’m not trying to insult or call anyone out and this by no means accounts for everyone. I get it. We aren’t built like superheros; especially MCU Iron Man with the impossibly long legs and small waist. But you see it happen. People begin to scale the armour down to fit them more snug but wait. You want the helmet to open and you want electronics for the eyes.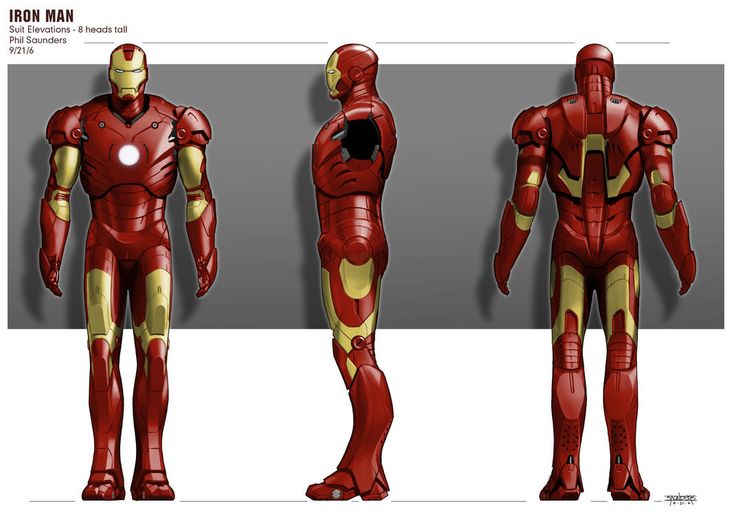 You suddenly need to make the helmet bigger to fit everything. You make the arms super skinny because you don’t work out like Chris Evans (or at all). You shorten the legs because you’re 5ft but you need to be able to walk in the suit properly. And boom. Iron Bobble Head. It’s hard to get past without making some major sacrifices.
If I was going to put the time into this; I wanted it to look proper. Luckily DO3D had my back…Kind of.
When you get 3D suit files sometimes nothing makes sense. Nothing is scaled. Everything is scattered. The coordinates in the 3D scape are set to the build plate so you can’t even match parts up. But D03D (and some others) actually scaled their parts properly to reference material proportions. Now this automatically means it basically won’t fit anyone “out-of-box” but it gives you a baseline to work with. “Oh! That’s how that should look!” With these set and scaled properly you can work up from there.
There even exists a wonderful programs called Armor Smith that lets you make a 3D avatar of your own body to help you size and scale 3D parts before you print them.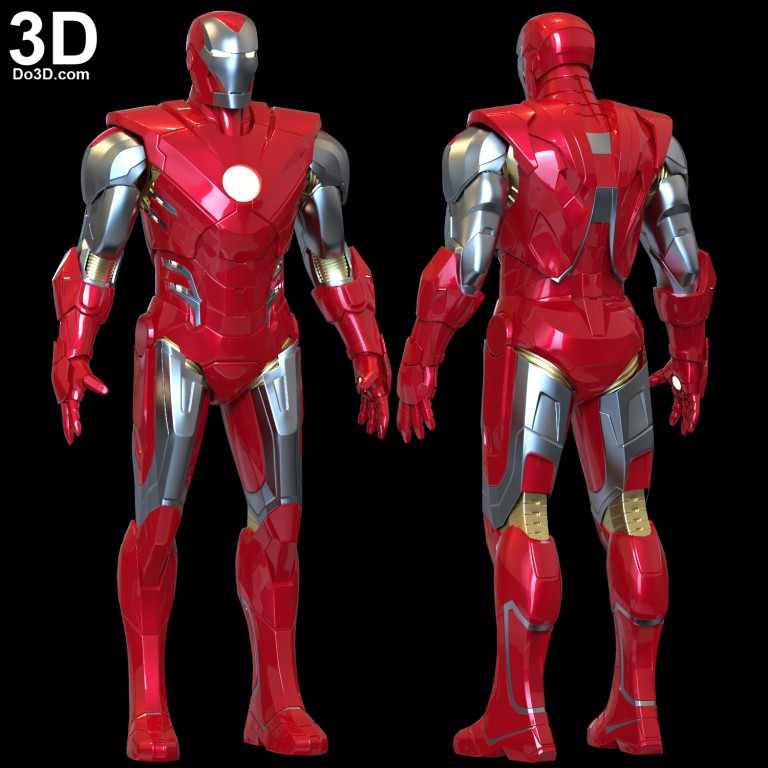 This is an invaluable tool I can’t recommend enough!
But alas I didn’t take my own advice. I took a different route. I printed everything (except the hands) at 100% scale. Turns out DO3D models the Iron Man files at roughly 6ft tall. But i am no 6ft tall man. I am 5’8″ (in the morning) but I AM on the more “fit” side. My plan going into this to avoid that oddly scaled hurdle was to print everything then make MYSELF fit into IT. Instead of the other way around. This required a lot of trimming, sanding, heat warping and some 3″ lifter inserts in my 1″ heeled boots to get me to the proper height. And it worked!
If you want more explanation on my own method of scaling Watch this video here!
The Welding:
How do you fuse the parts? What glue do you use? You’ll also notice I have some very large prints joined together. I originally used a 2 part CA glue until my armor stand fell over one day and broke the chest and abs on my suit. Luckily it was before I painted and it forced me to revise and learn a new method; PLA Welding.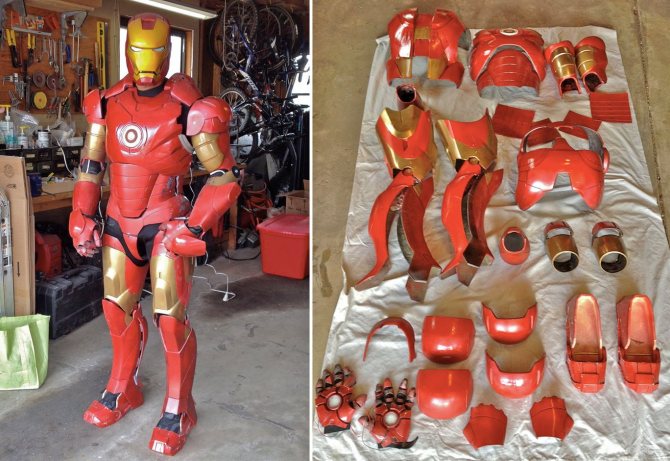 Now it wasn’t new but it was new to me! I don’t use glue. Super Glue, Epoxy, CA Glue; none of that when it can be avoided. I simply use a super cheap $5 soldering iron to fold and melt and interlock the parts. You can even use wasted filament and failed printed as filler material to close gaps and strengthen the joint!
Depending on how comfortable you get at this you can even close up gaps on the OUTSIDE of the prints and smooth over seem lines before you sand and paint! Or i’ll use some super cheap Wood Filler to close up the gaps and fill in any holes. Bondo Spot putty is also great but actual 2 part bondo can be problematic and crack if the plastic flexes too much. It’s a fast way to ruin a good paint job.
This step is extended greatly when you use a smaller printer. Again, it’s possible but you can imagine how many more seams you need to weld and fill.
The Sanding:
How did you get it so smooth? Did it print like that? You must have sanded that for weeks! I’ve heard it all.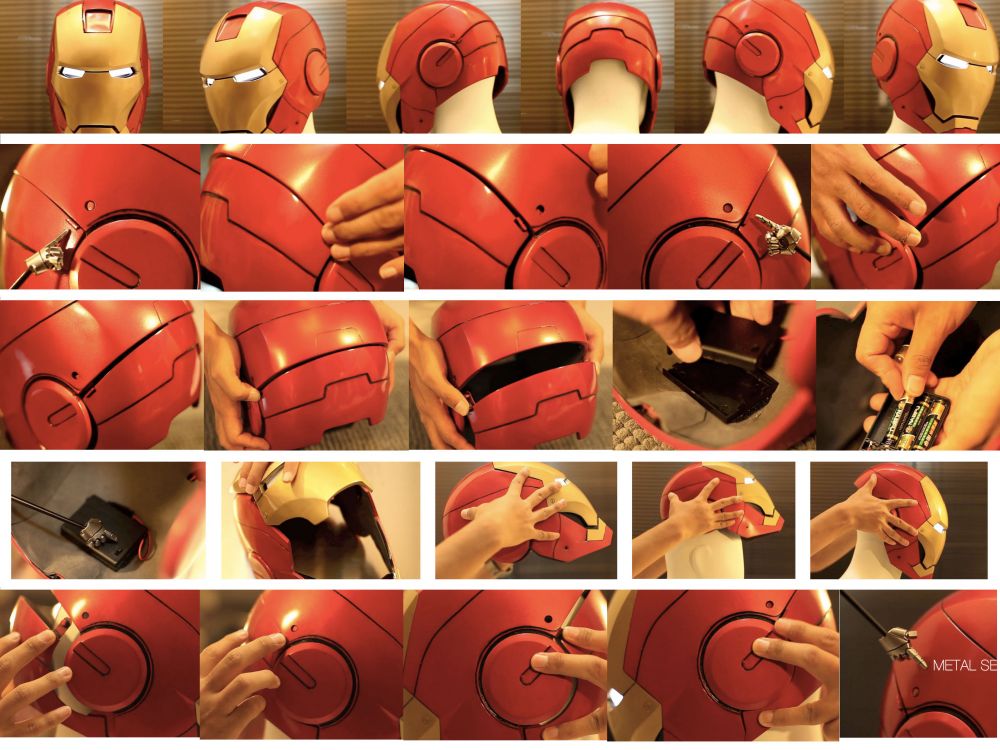 And even had arguments about it being called a liar. I don’t think something has so much debate in the printing community quite like post-processing or sanding. You don’t need to spend days sanding 3D Prints. Aside from an obvious print quality requirement there are a couple ways you can speed up the process of smoothing out a 3D print.
Spray Paint Filler Primer, XTC-3D Smooth-On, Vapor Smoothing (No good for PLA/+) or my personal favorite; Power Tools.
This was something very frowned upon when I started to 3D print. Everywhere I looked for tips on how to sand and smooth my prints everyone said “NEVER USE POWER TOOLS!” so i took that as sage advice. Me, someone who has been working on cars and models and painting for over a decade. Why didn’t I just try it? Why did I wait? I shouldn’t have. So after getting sick of filler primer ruining my sandpaper I took the risk and tested a theory.
I took a Dual Orbital Palm Sander with 80 gritt sandpaper to an iron man mask. And after that i never looked back.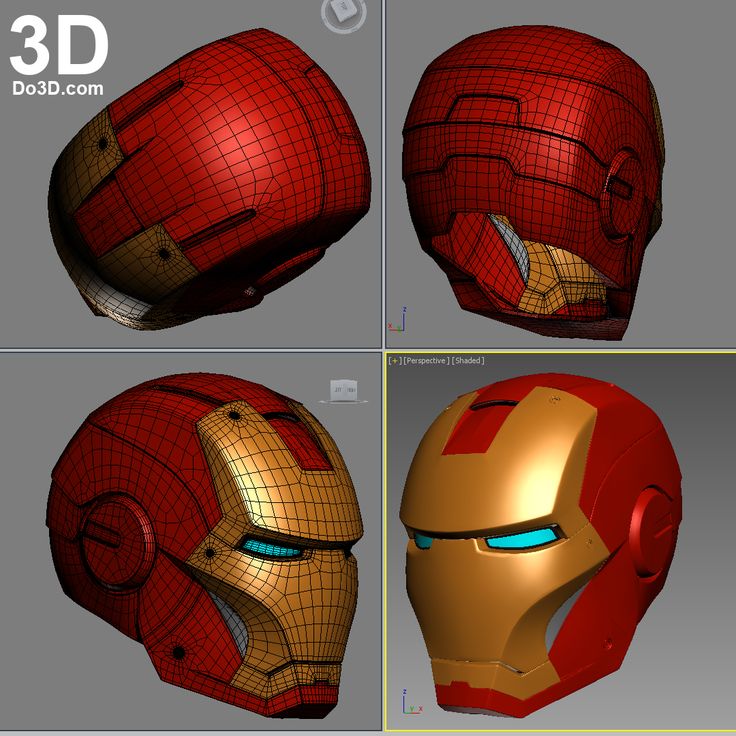 Now this obviously doesn’t work on everything but man does it shave DAYS off of sanding large armor parts. I literally sanded my entire suit in about 2 days and went onto priming and painting. It was amazing. I had been sleeping on this method for way to long. But be warned it takes some time to dial in! You CAN melt parts and you CAN ruin a print so always practice!
The Paint:
What color did you use? What’s the paint code? Where did you get it? If it’s a Metallic Red paint and you can buy it in the UK; I own it. I went through days and days of testing and painting and comparing and clear coating and so many damn plastic spoons trying to dial in the proper colors. But i wanted this to be perfect. It had to be perfect. And why yes; my entire suit is spray painted. It’s what I knew and what I was good at. Maybe one day I’ll upgrade it.
This is something people often neglect. The amount of messages i received while building this asking what colors I was using and where to get them was insane.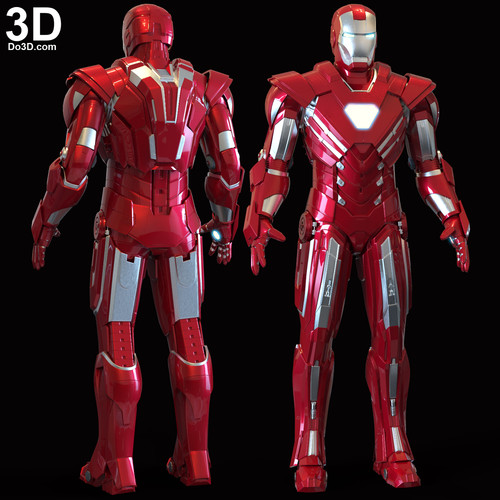 Stop asking. No, not because i won’t share it; I will! It’s because you most likely don’t have access to them. Or you live in a different climate. A different environment. Hows the humidity? Temperature? Do you have a paint booth? A cold garage? So many variables play in when painting you NEED to test it for yourself. Find your own colors. Learn what works for you. Because my red and your red may look worlds apart even if they’re from the same can. And that’s before we even talk about Metallic paint. Many metallic spray paints can’t take a lacquer clearcoat; It ruins it! So testing these combinations of paints is CRUCIAL. I ruined the paint job on an entire arm because I got cocky and didn’t test my new clear coat on the Gold and Red.
I ended up landing on a combination of a UK specific Rustoleum Automotive line of spraypaint. It was perfect. The 2X red was just a base coat for the Metallic red. And all 3 colors could take a lacquer coat just fine.
After all of the painting and clearcoating was complete i actually went over everything with automotive grade polishing products (Meguiar’s sponsor me please!)
This really brought out that deep shine the lacquer had to offer. I started with rubbing compound then moved onto a resin polish. Followed by THE BEST smelling car wax ever; Meguiar’s Gold Glass. It also helped add a small small small layer of protection from grime and dirt. Maybe. Probably. But hey isn’t it shiny?
The Fitting:
How is everything attached? Can you walk in it? What did you use? Let me start off by saying I messed up big time here. I skipped this step before I painted and I regret it every day. I was too eager to paint my suit and get results I didn’t spend enough time right here in this period fitting everything properly. It all “mostly fit” so i went right ahead and painted it. If you take one thing away from this; ANYTHING! Fit the entire suit before you paint a single thing.
No, Really. Please. It may seem obvious to some and i know that. You may get confident like I did. But I implore you, just take your time and make sure you are 100% comfortable in the entire suit before you start painting. I had to make many adjustments after the fact but now i had to worry about damaging the paint. It was not worth the headache. But with that said…
I think I did a good job. I spent a lot of time sanding and trimming the edges of the parts with a Dremel to help it wrap around me better. I had made another choice early on; I didn’t want gaps. No gaps. No seams. No visible body parts in the Costume (within reason). It was something that always bugged me about Cosplays i saw. But I 100% understand it’s a matter of mobility. To increase mobility you NEEDED gaps and openings, I know that. But I sacrificed mobility for accuracy and I’m okay with that. I can still do the typical poses. I can walk. I can move. But sitting? That was never an option. And don’t ask me to touch my nose.
What you see here is the very early stages of my strapping system. It was a lot of trial and error (and duct tape) of adding and moving straps. I used very cheap nylon and elastic straps from Amazon along with plastic buckles and clips. I then began to incorporate magnets and Velcro. I spent months revising and editing and improving the system for comfort.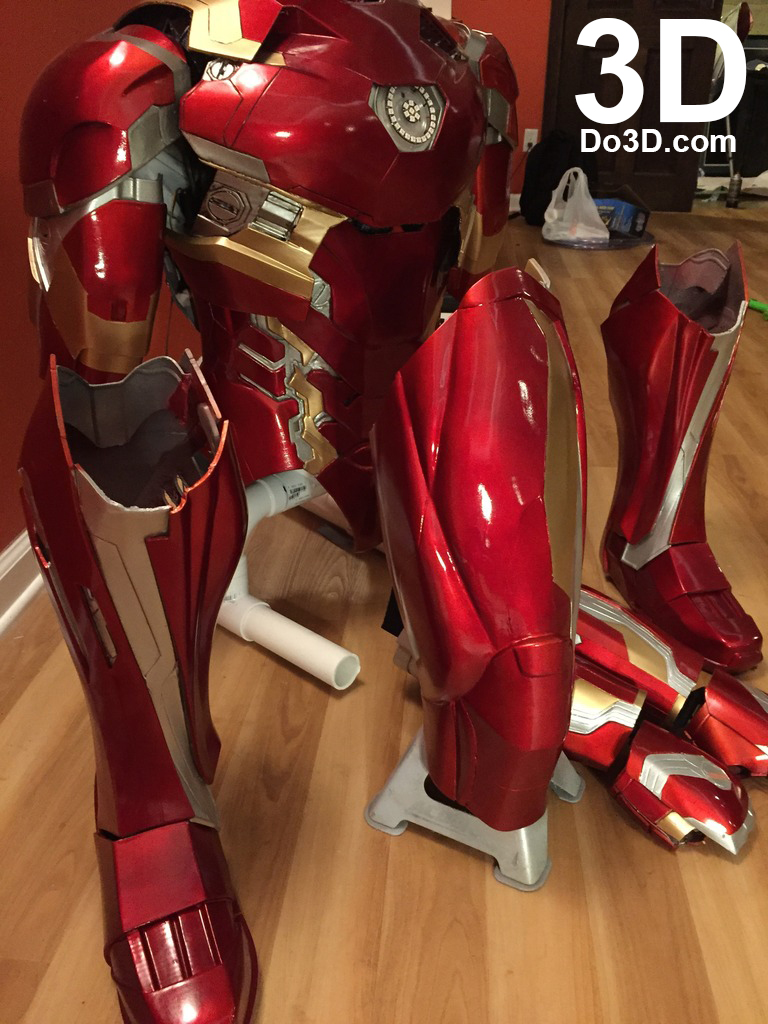 I eventually landed back on much simpler system to the one I started with. It’s a lot to cover but here’s a basic description.
-Shoes have covers over top
-Shins are free-floating and rest on the shoes
-Thighs are held up by a suspender system over my shoulders.
-Cod Piece is one solid part and wears like underwear (my butt keeps it in place)
-Back is literally a backpack that hooks over my shoulders and the lower back tucks into the cod/butt piece
-Chest has velcro on the shoulders that connects to the “hooks” on the backpack. Then velcro on the sides hook it under my arms and waist.
-Shoulder Pads clip into the shoulder part of the chest and hang free for mobility.
-Biceps clip into the shoulder part of the chest and hang.
-Forearms are free floating similar to the shins. Allowing for more twisting and flexibility
-Gloves are…Gloves
And that’s about it! If you want to see more on this you can check out This Video on Strapping and Harnesses
Side note: CA glue works BEAUTIFULLY on elastic and Nylon when fusing it to PLA and PLA+
The Electronics:
I’m proud of this one. I have zero idea how to code and program. And if you start a google search for Iron Man electronics and motorizing an iron man helmet you’ll quickly realise a lot of it revolves around Arduinos and Micro-controllers. All of which I have no idea how to operate. And to be honest I had no intention of learning (yet)
But what I do know very well is 12V DC systems from my automotive background. I know relays and triggers and LEDs and parallel circuits. This I could do. This I was good at. So I started in on it with a goal…
100% Analog Iron Man Suit
And I know that seems silly; just learn to code! But it became a goal. Could I motorize a helmet with no arduino? Could I wire up the entire body light system? Could I incorporate finger controls?
Yes, yes I could. I also decided to do this for another reason; Programming is intimidating. And i know for a fact that it can scare a lot of people away from things like this. It’s scary! So if i could at the very least make a method that would get people in the door; why not? Help get their feet wet and dabble into electronics. They could then grow into it and expand. That’s also what I plan to do.
The systems are actually very basic. And the fact that i found a 12V USB pack still blows my mind but it works! And that’s exclusively to power the 12V COB LEDs i use. One day i’ll downgrade them back to 5v Piranha LEDS but MAN are they bright. Oddly enough i actually use some Arduino based sensors and triggers except i’m just hijacking the signals for relays.
The other challenge was getting an Iron Man helmet to open and close with no programming. Enter The Hotwired Micro Servo. Now I was by no means the one to invent this but the tutorials for it were bad. Like next level bad. Basically I’m turning a Micro-Servo into a DC motor. Now, why not just USE a DC motor? Because that same reason of upgrading. I always planned to move onto arduinos and if the system I install with hinges and brackets already used a servo then it’s an easy swap!
I went through a lot of testing and methods from Reed Switches to DPDT switches but if you want to see how it all comes together and can be applied watch this: Motorizing an Iron Man Helmet
The systems and features in my suit include:
-13x 12v COD LEDS (White) wired in Parallel to a 12V USB pack
– 2x 12V COD LEDs (White) in the palms that turn on when a trigger in my wrist it activated by tilting my hand back.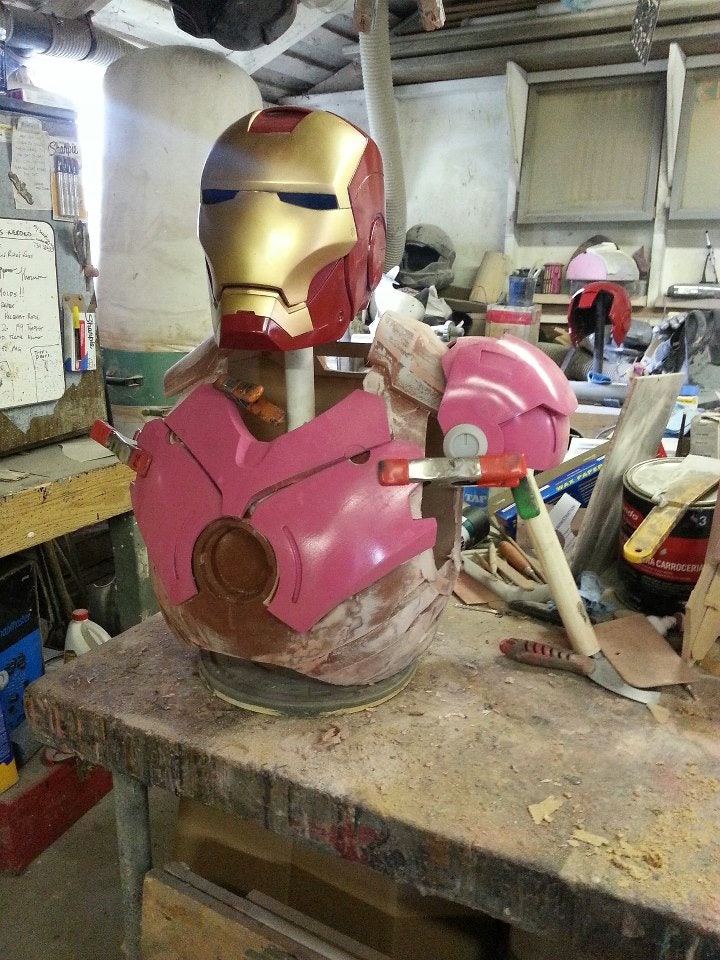
-6 Colored 12v SMD lights (Infinity Stones) Wired in Parallel to a 12V USB Pack
-2 Clear Acrylic LED Cosplay Eyes powered by a 5v USB pack that turn on when the mask closes automatically.
-2 Reed switches in the left hand to control the open/close of the helmet limited by triggers on the faceplate
-2 hotwired micro-servos controlling the facemask powered by a 5V usb pack
-1 Reed switch in the right pointer to control a Flip-Flop relay that turns the LED eyes on/off
-1 Reed switch in the right middle finger to control a Flip-Flop relay that turns the Infinity Stones on/off (like a snap)
-1 Thermal distribution system interlaced throughout the suits exterior for high-altitude flight in opposition to cold temperatures and icing.
The Extras:
The Infinity Stones
Few words can describe just how proud of this thing I am. It was the focal point. The centerpiece. The main attraction.
The process and idea was actually pretty straight forward. I saw people who had just 3D printed colored stones. Or people who printed stones in clear PLA plastic and backlit them with LEDS. Well the Infinity stones aren’t clear. I wanted them to look nice on and off.
Step 1: Print the plastic masters of the stones to proper scale and make resin-safe silicone moulds for them.
Step 2: Buy way to much resin dye and spend a few days testing different colors and combinations. Find the best 6
Step 3: Mix some clear resin with the resin dye and pour into the moulds. Let sit for 6 days because you didn’t use enough hardener.
Step 4: Pop them out and let them sit even longer because damn; you really should’ve used more hardener.
Step 5: Install and backlight the Resin Stones with color specific super bright 12V SMD lights so you can down passing aircraft from the ground.
Step 6: Don’t Snap. Ever.
Could the Mind stone be a little more yellow? Could the Soul Stone be a bit more orange? Yeah. But I’ll live. I’m still super proud every time I look at them.
The Arc Reactor
Okay I lied. THIS was the centerpiece (literally). One of the most recognizable features on any Iron Man suit and I wanted it to have depth. So i took a similar approach to the Infinity Stones plus some extra layers. I first took the master print of the reactor cover and resin cast it. But as you can see it came out hazy as all hell. So i utilized the same methods used when restoring and cleaning the headlights of a car! Lots and lots of wetsanding. Plus some extra buffing for clarity. It worked like a charm and gave me a beautiful near-glass like reactor cover that fit like a glove
Next was the depth. I found a free file on Thingiverse (it’s gone now; sorry :/ ) and printed out the inner detail part of the reactor. Then I trimmed it to fit better inside the chest. After that I printed a small triangle shape on a HUGE raft in clear PLA plastic to mimic the reactors nano-texture. Then finally I suspended 3 12v COD LED boards behind it about an inch from the clear PLA to help diffuse the light and bam; Arc reactor!
I feel this adds such a nice little detail to the suit.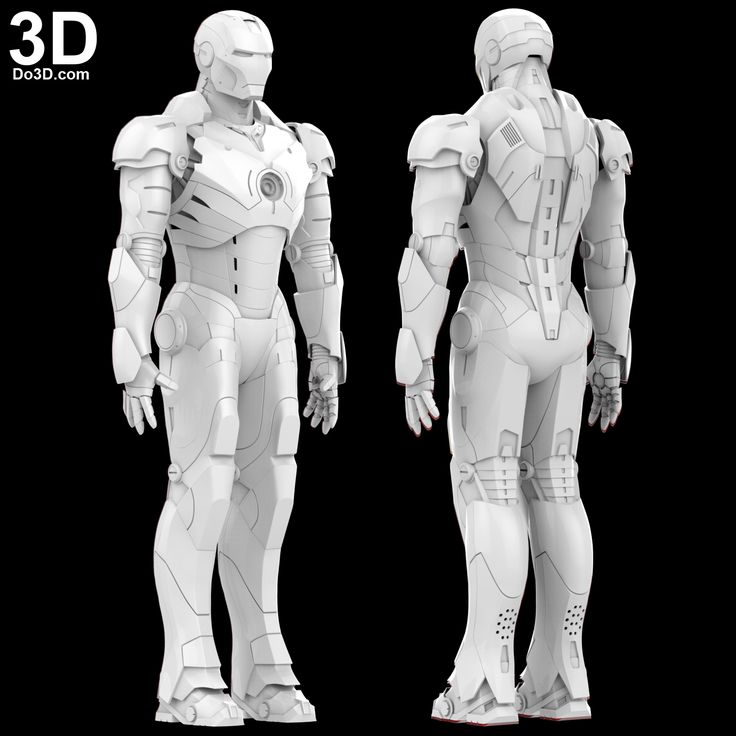 It’s not just a frosted lense with a light. Or hazy plastic. I’m really proud of it.
The Rest:
Resources and Tutorials
There is so much more I didn’t cover. Things I’ve already forgotten I did and methods I’ve always improved upon but I hope this was an good summation of the process.
If you really want to watch the entire journey and see basically everything I’ve talked about in real time I invite you to watch my progress in the following series. I promise, make it through the first few videos; My production quality goes up.
Becoming Iron Man – A 3D Printed Cosplay Armor
I started documenting this process when i was bright eyes and bushy tailed. I was naive and had no idea where this would take me. I found this insane and wonderful new hobby that puts the things of legend and fantasy at our fingertips. 3D Printing has literally changed my life and I’m trying to do my best to give back to the community that received me so openly. It will in no way ever make up for everything that has happened and the benefits or rewards I’ve received but I promise I’ll continue to try.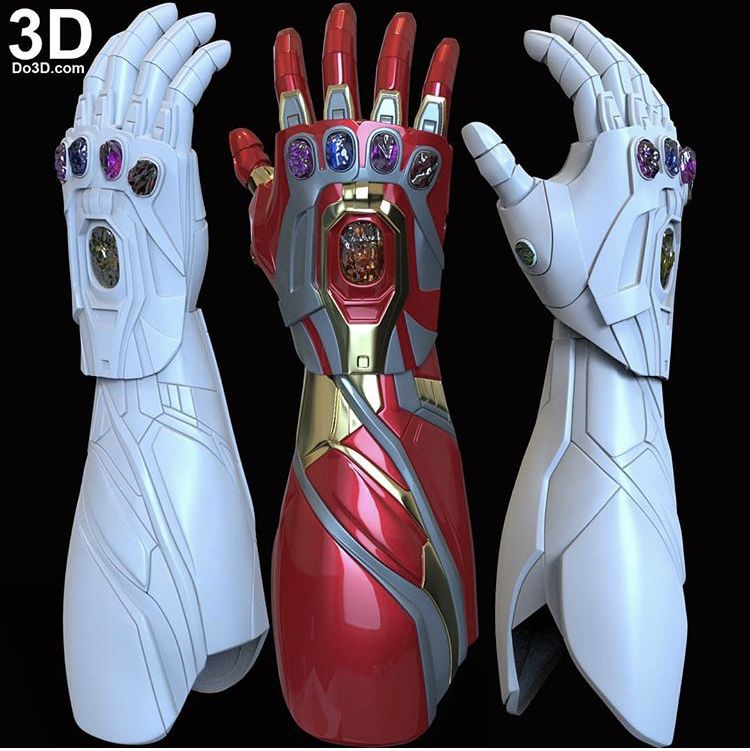 If you’ve made it this far down I appreciate it more than you know. Thank you so much for reading and I truly hope this helps you or anyone get started on a 3D printed or ANY cosplay for that matter.
If you really like my cosplay and want to see some more of it I invite you to view this video.
https://www.youtube.com/embed/ZaWZgZHlJ_Q?wmode=opaque&start=10
Oh yeah! My Cosplay also just recently wont Comic-Con @ Home’s Online Masquerade! So that was pretty cool!
Thank you!
Below is a TL;DR version of the post with the resources laid out a bit better. Enjoy!
3D Printing Information
Helmet Files: Akira Yumming MK85 (A much more movie accurate file over the one provided with the suit files)
Suit Files: DO3D Mark 85 Armor (The stock files are roughly 6ft at 100% scale; also, be very very skinny!)
Gauntlet Files: DO3D Mark 85 Infinity Gauntlet ( I had to scale the gaunlet down to about 90%~ to match the suit scale)
Printers: Creality CR-10s – 300x300x400mm build volume (2 printers used) (This is the minimum build size i would recommend or else you’ll be cutting a LOT)
Material: SUNLU PLA+ Black Filament (Approx 15 rolls (1kg each) Including waste, failures, and re-prints)
Printer Software: Cura 4. 0 w/ Creawsome Mod, Slic3r, Meshmixer (New Cura 4.7 has Creawsome built in! Works great!)
Settings: 215/50 nozzle/bed, 0.6mm nozzle w/ .3mm layer height, 60mm/s, 5% infill, Rafts, Tree Supports Time: Approx 1200 hours of printing total
Scaling: 100% scale (Scaling can be super tricky, I explain in this video how i went about it (or didn’t) but for a great scaling resource try The Armored Garage!)
Post-Processing Information
Sanding: I used 80 Gritt sandpaper on an Electric Dual Orbital Palm Sander. Followed by 200 gritt by hand (For more Info. Click!)
Fusing: To join printed parts back together that i cut, i use a soldering iron while adding lost material from wasted prints. (For more Info, Click)
Priming: I used standard spray paint primer. Black, grey, red. Whatever was cheapest. You can try filler primer but i’m not a fan. (For more info, Click!)
Painting: Rustoleum Automotive Line Spraypaint ( Metallic Red, Metallic Gold (Dull), and Sky Grey) (For more info, Click!)
Clearcoat: Rustoleum Automotive Line Spraypaint Clearcoat Lacquer
Post-Work: I wetsanded my paint after the final color coat with 1500.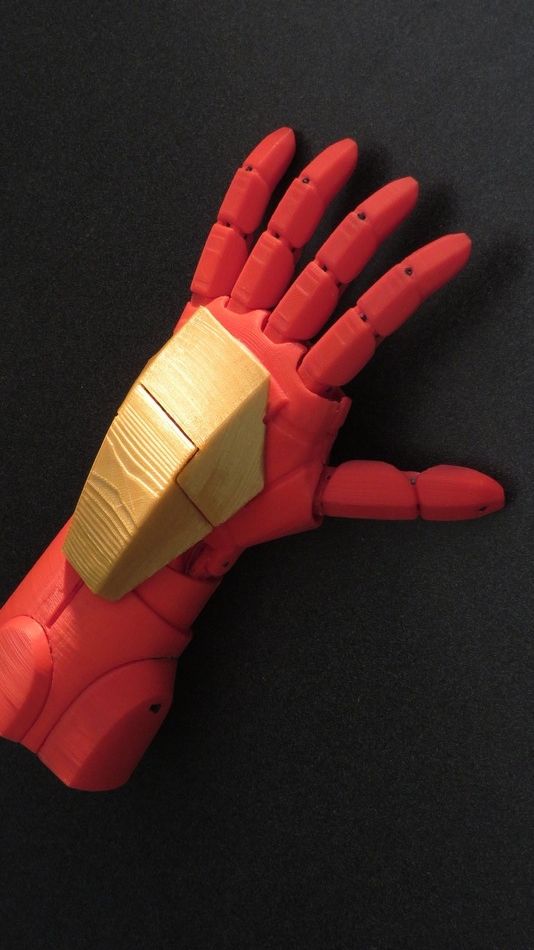 Then again after the final clearcoat with 3000. After that i used Meguiars Automotive Rubbing Compound, Polish, and Gold Class Wax to protect and shine the paint.
Electronics and Extras
LED Cosplay Eyes: I used pre-made see-through LED Acrylic Cosplay eyes from Ebay! Click for more!
Infinity Stones: I 3D Printed the stones then made silicone moulds and cast them in Color Resin
Infinity Stone LEDs: My resin cast Infinity Stones are backlit with Pre-Wired LEDS from Oznium.com!
Servos for Helmet: I repurposed Micro Servos to run with no coding or Arduinos! Click here!
Hinges for Helmet: The MK85 is difficult to motorize. I got creative and used these hinges to do so!
Body LEDs: I used standard 12v COB SMD boards from eBay. But i recommend a 5v LED system
Cosplay Wearables: I used a variety of Nylon/Elastic straps, plastic buckles, and magnets to wear. (Click here for more!)
- Advertisement -
Latest articles
Related articles
This 3D-Printed Iron Man Suit Took Over 1,000 Hours To Create
By Joseph Scotting
Tony Stark would be very impressed with this superfan's viral 3D-printed Iron Man suit, but the amount of time it took to make will shock you.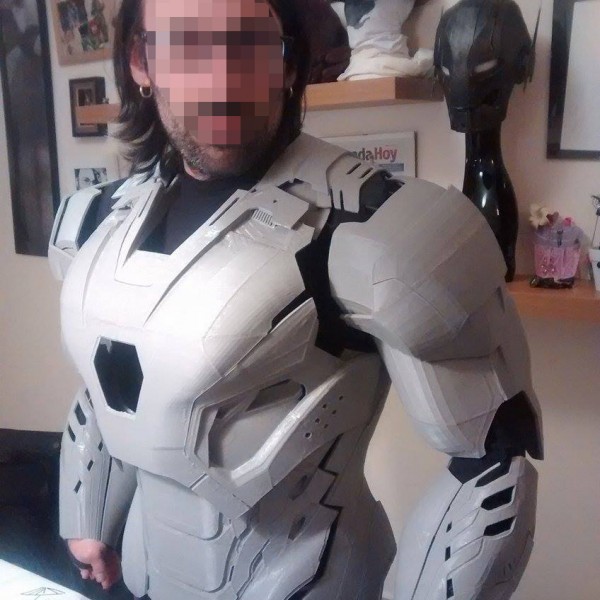
A Marvel superfan spent over 1,000 hours 3D printing an incredible recreation of Iron Man's Mk85 armor. 3D printing has become a popular way for fans to recreate iconic movie and gaming props that are either not on the market, expensive, or rare, making it a favorite for cosplayers. Recently a Simpsons superfan recreated the iconic tv that appears in the show's opening and it can even play every episode from the first eleven seasons. As 3D printing technology has become more accessible financially in recent years, more and more amazing projects have routinely popped up as viral sensations online, with large-scale props and statues being the envy of many.
Marvel superfans have been no exception to the 3D printing craze. Iconic props including Captain America's helmet and Thor's hammer Mjolnir, which is a favorite for 3D printing fans for its iconic look and intricate details in its design. In addition, there are dozens of miniature statues and toys of each Avenger that garner hundreds of upvotes.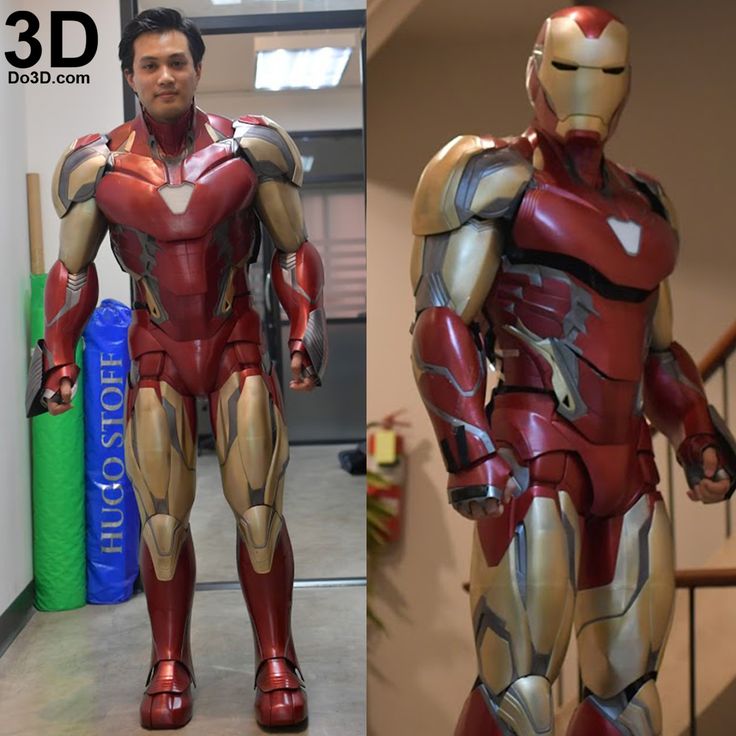 Even works in progress prove to be incredibly popular, also getting much attention on Reddit. Marvel movies clearly have fans eager enough for movie quality replicas that they take up 3D printing as an entire hobby to sate their appetites.
Related: This Incredible 3D-Printed 'Simpsons' TV Plays 11 Seasons Of The Show
The wearable Iron Man suit was posted onto the 3D printing subreddit by the user Lil_Bizkit_Style. The design is based on Iron Man's Mk.85 armor from Avengers: Infinity War, which stands out from other suits for its particularly sleek design. Lil_Bizkit_Style notes in the comments that the suit took a jaw-dropping 1,300 hours over seven months, and is comprised of approximately 50 separate pieces made from a mix of PLA and PLA+. One of the hardest parts about making the armor was spray painting it due to the time it takes and the preparations required, which according to Lil_Bizkit_Style is maddening. The model used came from the 3D printing blueprints website Do3d.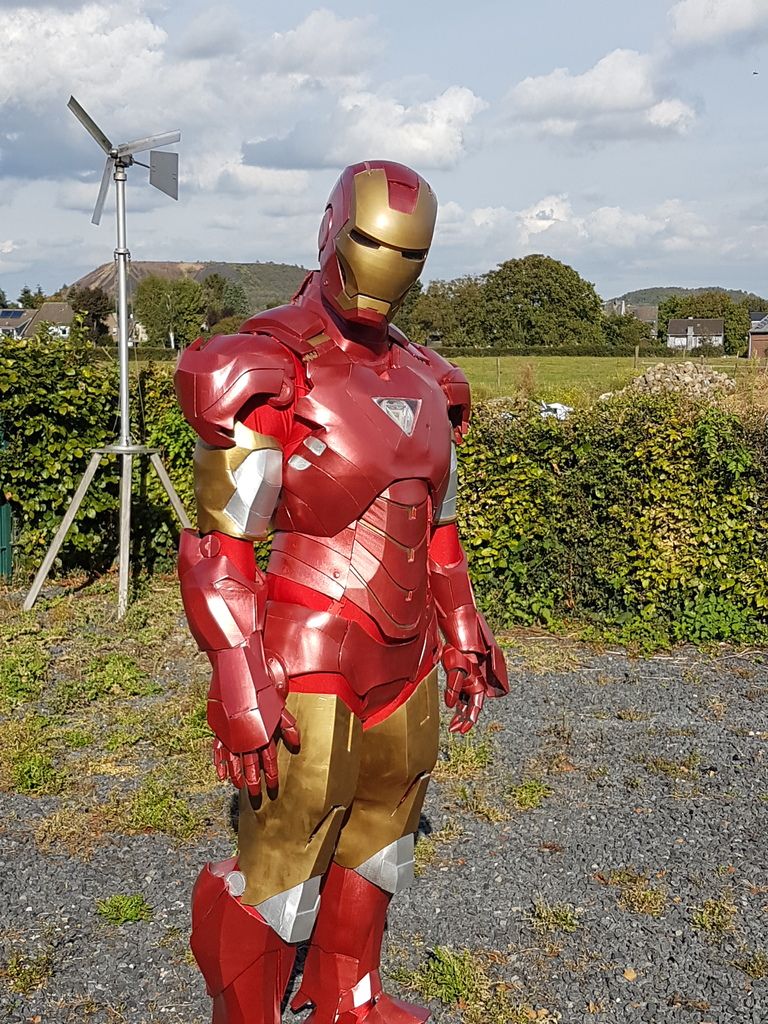 com.
com.
Despite the suit looking incredible and taking thousands of hours to complete, it is still not finished. Lil_Bizkit_Style explained in a Reddit post that he wishes to add light-up LEDs to the outfit, further improving its already movie-quality look. The suit was printed on an FDM Artillery Sidewinder X1 one of the most affordable 3D printers available, though the amount of filament required to create such a large project will set you back a pretty penny.
3D printing can serve other purposes outside of making props, toys, and costumes, however. Recently, scientists successfully 3D printed a thermoelectric generator that could power small electronics. Another scientific breakthrough includes scientists using 3D printers to create a beef steak in a lab, which could hail a new type of future food. Time will tell what more benefits 3D printing can bring to the world with the emerging technology's potential being astronomical.
Next: Scientists 3D-Printed High-Dollar Wagyu Beef.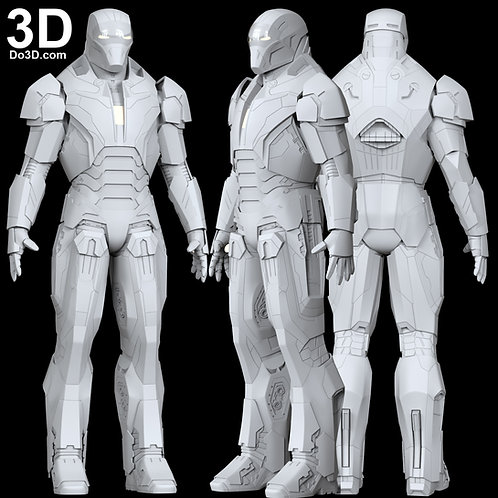 .. Sorta
Source: Reddit
Mythbuster Adam Savage 3D-printed Iron Man
4347 views Posted on: 06/13/2019
Author: 3D4U.COM.UA
Adam Savage, American special effects artist and former co-host of the popular Discovery Channel show MythBusters, finally got his own 3D printed Iron Man suit. It looks like the titanium ensemble was made for the new series Savage Builds.
However, Savage's Iron Man project was not entirely solo. The suit was produced by the Colorado School of Mines, leading 3D printer manufacturer EOS, ceramic 3D printing specialist Lithoz, Hollywood cinematic effects specialist Legacy Effects, and Gravity, which was behind the original version of The Real Iron Man.
The final result will be presented in a show showing the steps taken to assemble the suit, as well as a short flight demonstration integrated with Gravity outboards.
Richard Browning, co-founder of Gravity, is the person people often think of when they talk about "real life Iron Man.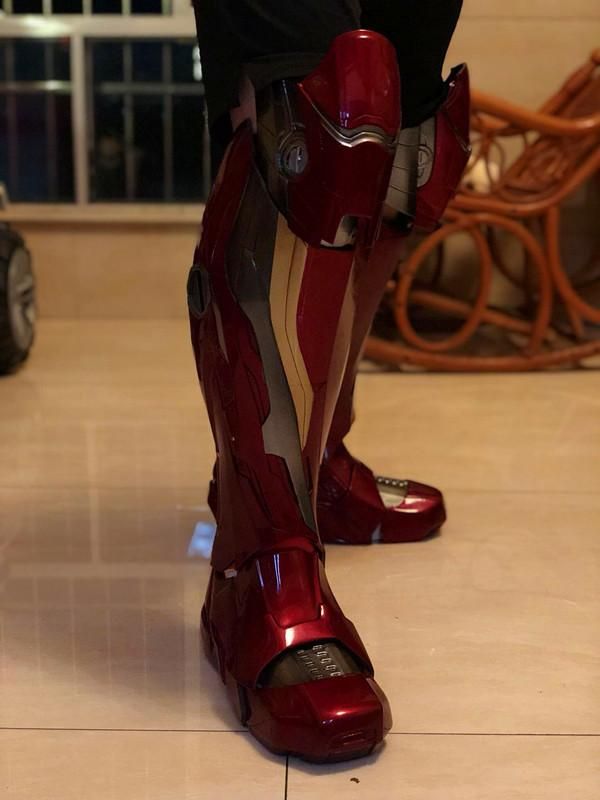 " Ever since his company started in 2017, the Gravity team has been working tirelessly to build hand-mounted rocket motors. This could give people the ability to levitate and travel on land and water. Through countless public appearances, Browning has showcased the accomplishments of the Gravity team, gliding effortlessly across parking lots and fields, and making a commercial version available to buyers at Selfridges in London.
In 2017, Gravity got a place on Savage's YouTube channel, which confirmed some of the subtleties of the design of the wetsuit. In 2018, EOS also confirmed its participation in the wetsuit project at Gravity, giving Formnext attendees a demo of the technology.
At the Colorado School of Mines, Craig Bryce, professor of mechanical engineering and director of the university's advanced manufacturing program, oversaw the production of Savage's Iron Man suit. Explaining his reasons for joining the project, Bryce said: “Who says no to Adam Savage making an Iron Man suit out of titanium? I felt it was a great learning moment.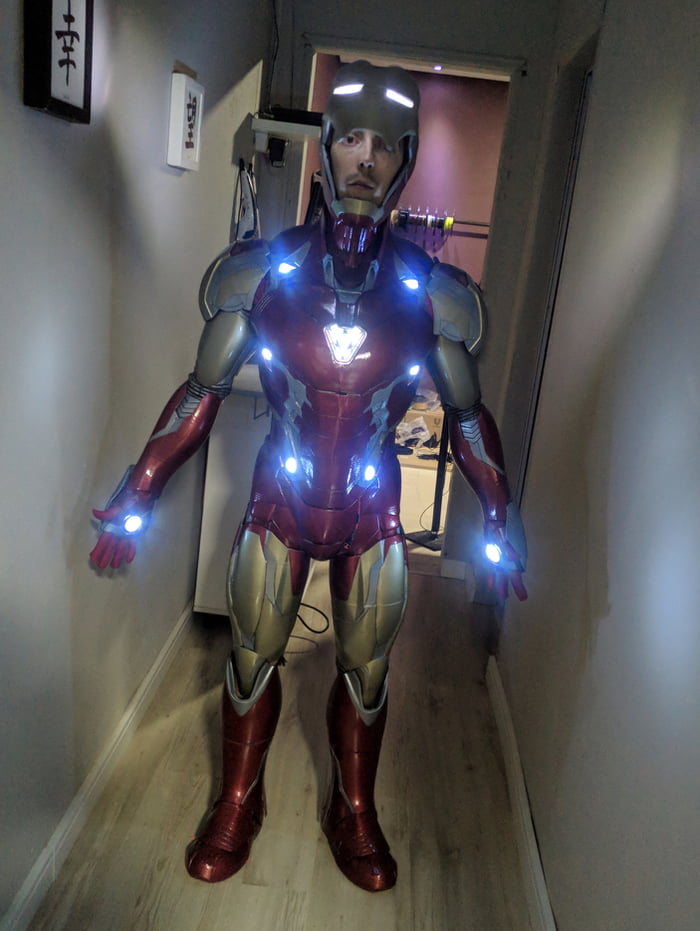 "
"
"Thanks to the engineering approach to the entertainment project, we actually created a usable costume."
First getting the design right, with resolution and official 3D models from Marvel, Bryce and his team sent the suit to the EOS 3D Printing Factory in Texas for production.
The final version of the costume is an assembly of 250 individual parts, 3D printed from lightweight titanium. The promo video also shows the suit paired with Gravity thrusters to get as close to the real Iron Man as possible.
The trademark "arc reactor" in the center of Tony Stark's suit is reproduced using a Lithoz ceramic 3D printer in the ADAPT lab.
3D printing is in high demand in the cosplay and fanart industry. No other technology gives such scope for imagination and subsequent implementation.
Photo taken from the official Youtube channel of Adam Savage
Related Products
-
CR-10S PRO 3D Printer Creality
Price: 30 600 ₴
Creality CR-10S PRO is a 3D printer with a large printable area (300x300x400).
 ..
.. -
Flashforge Guider II 3D Printer
Price: 70,800 ₴
FlashForge Guider II is an improved version of the popular Guider 3D printer with...
Related articles
- Top 20 interesting toys for children on a 3D printer.
Category: 3D printing
02/15/2022
9595 views
What kind of toys can be created with a 3d printer? What are the advantages of 3d printing toys at home? In this article you will find...
Read more - 12 common 3D printing mistakes to avoid.
4289 views
As an industry, 3D printing is evolving every day, so it's important to know all aspects of this technology today. In this...
Read more - 9 romantic 3D printed gifts for Valentine's Day.
Category: 3D printing
02/09/2022
1818 views
3D printing can help you create unique and personalized gifts for your significant other.
Read more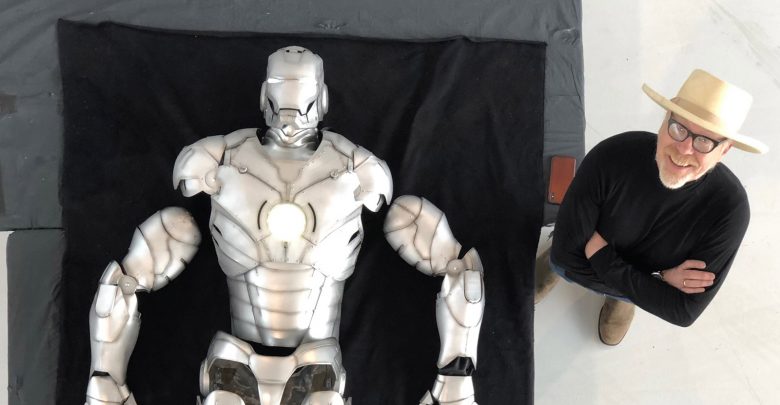 Compilation 9...
 - What can be printed on a 3D printer?
Category: 3D printing
03.02.2022
2358 views
When hearing about a 3D printer for the first time, most people are interested in the question of what can be printed on a 3D printer. In this article...
Read more - Why Succeeding With a 3D Printer Is Easier Than You Think.
Category: 3D printing business ideas
02/01/2022
1844 views
Arguments in favor of a business with a 3D printer. Why the first steps in such a business are much easier to take than in any other.
Read more
The Iron Man suit revolutionizes stop-motion animation
XYZ Media
A technology that has already impacted industry and medicine is now reshaping cinema.
One of the most difficult tasks in filmmaking is the creation of objects important to the plot, whether they be weapons, figures for animation, complex mechanisms and futuristic costumes.
All this requires the right material. Usually objects are created manually, which takes a lot of time and money and often brings inconvenience in operation.
3D printing could be the solution. This technology has already been used in cinema and there is every indication that it will significantly affect the industry in the future.
Author: Mark Tyutyunnik
What is 3D printing?
3D printing (additive manufacturing, AM) is the construction of three-dimensional objects from models created in CAD (computer-aided drawing programs) or other 3D digital models.
It is not necessary to draw up drawings for future objects on your own, you can download already developed 3D models - for example, here. Then you need to cut the model into thin layers (using special programs for slicing), in accordance with which the material will be superimposed during printing. By uploading the file with the model to the printer (via an SD card, flash drive or Wi-Fi), even a beginner can print the object.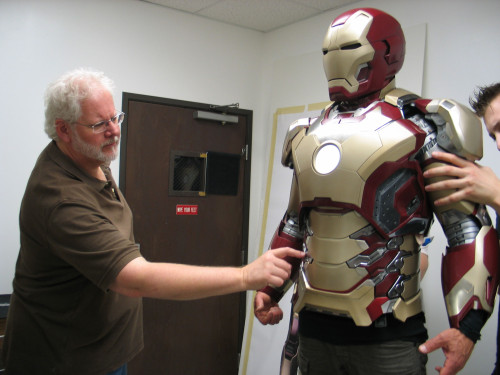
Additive manufacturing has greatly influenced the development of a wide range of industries. It is used in the creation of weapons, the construction of buildings, the development of medicines and in other areas.
Gradually, this technology was adopted in the cinema.
The benefits of 3D printing are many. Firstly, the production of objects is carried out quickly and efficiently. Secondly, very complex objects can be made using this technology, which eliminates additional assembly steps and provides more freedom for designers.
Another advantage of additive manufacturing is the variety of materials. Printer manufacturers offer a set of sources, but the user always has the opportunity to mix different substances and even simulate ceramics or metal.
How 3D printing works
One of the most important parts of 3D printing is the scanner.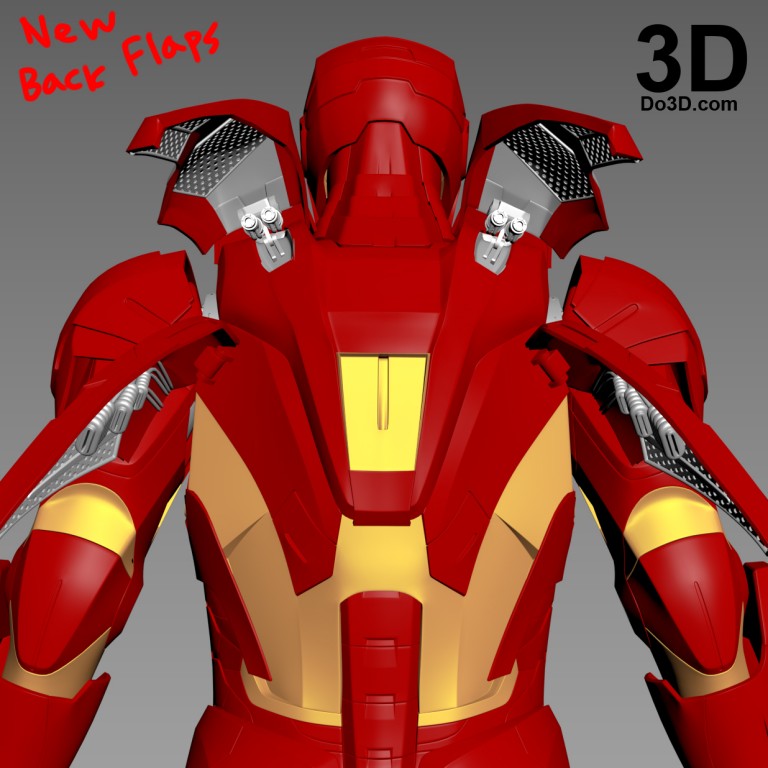 It collects the physical data of an environmental object or (volume, texture and color) to create a digital model.
There are two main types of 3D scanners: contact and non-contact. The former explore the object through physical contact. The second is to collect radiation from the target object using a laser, structured light, photogrammetry, or optical coordinate measurement.
SLS technology is used to manufacture machine parts and objects with complex geometry. It helps to achieve high strength and precision. A roller rolls the powder, consisting of 50 micron diameter nylon spheres, onto a platform, and the printer heats it up to sintering temperature. Then, with the help of a laser, these spheres are sintered layer by layer until the necessary detail is obtained.
BigRep ONE brand printers are mainly used in cinema. A build chamber with a volume of >1m3 simplifies the additive manufacturing of large-scale objects.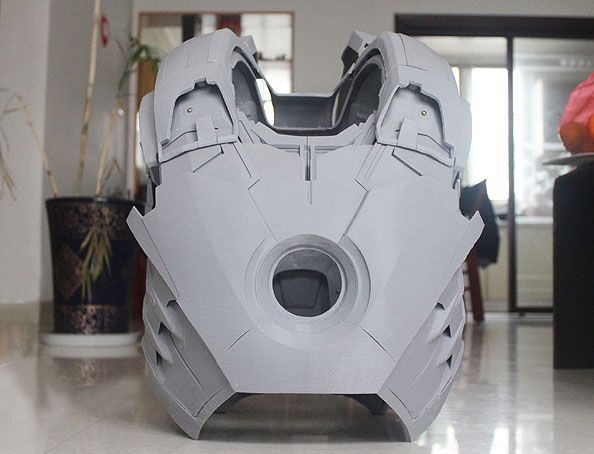
The fast speed and convenience of this kind of production is made possible by the camera, which creates large, life-size parts and allows direct observation of the process. When NeoMetrix Technologies released a video of the development of a functioning car on the BigRep ONE printer, the reason for the technology's popularity in film production was perhaps obvious.
The use of 3D printing in animation
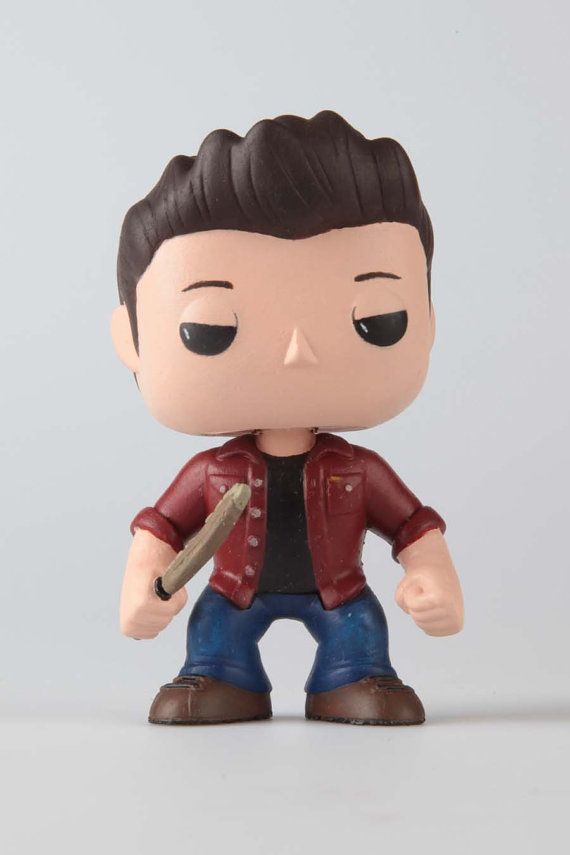
Laika Entertainment has pioneered the full scale application of technology in film. The company has resorted to additive manufacturing to provide naturalistic facial animation for stop-motion dolls. The idea was to take puppet "acting" to the next level.
When working on The Nightmare Before Christmas, director Henry Selick used hand sculpting and the usual replacement of faces - first they shot the head with one facial expression, and in the next frame they replaced it with another. But the range of emotions with this approach turned out to be very meager.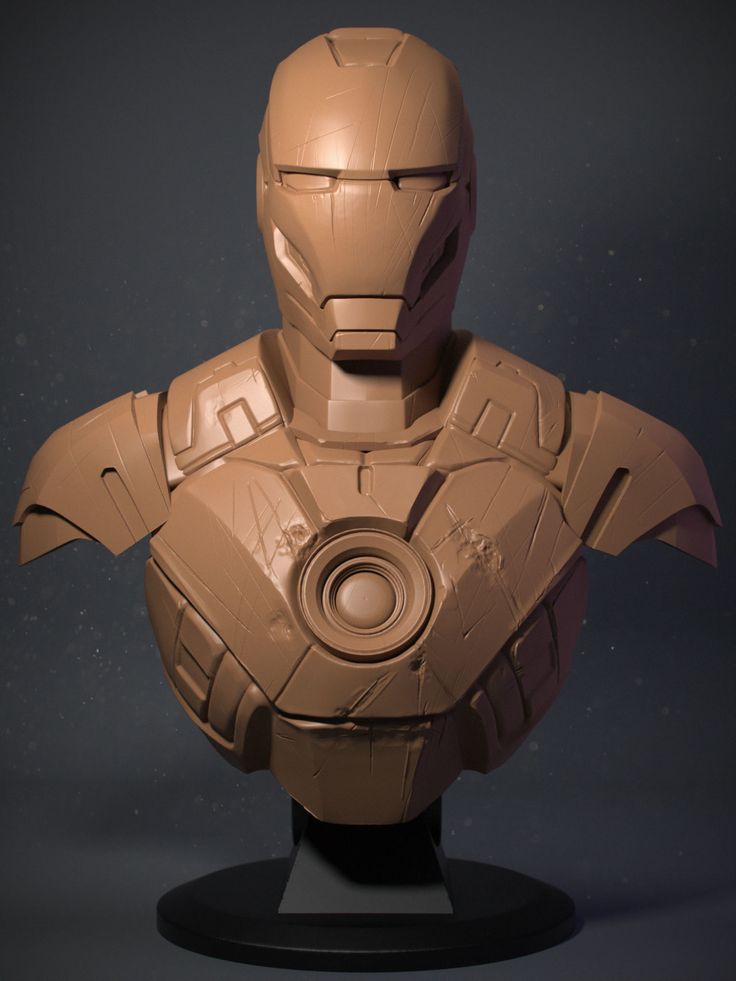 When producing Coraline in the Land of Nightmares, Selick wanted the main character to be able to show as many subtle expressions as possible. That is why the director decided to conduct an experiment using 3D printing.
Leading additive manufacturing industry advocate Brian F. McLean Visual effects specialist for Coraline, Paranorman, Family of Monsters and Kubo: The Legend of the Samurai. He has probably the most experience with 3D printing in the film industry today.
In Coraline, McLean used traditional stop-motion animation and combined it with new techniques. Additive manufacturing has been used to create facial expressions of characters with thousands of details. The specialist used three Objet printers, with the help of which the animators developed about 20 thousand facial areas that could convey more than 200,000 facial expressions.
The image above clearly shows the line of alignment of the upper and lower parts of the face, which was removed in post-production.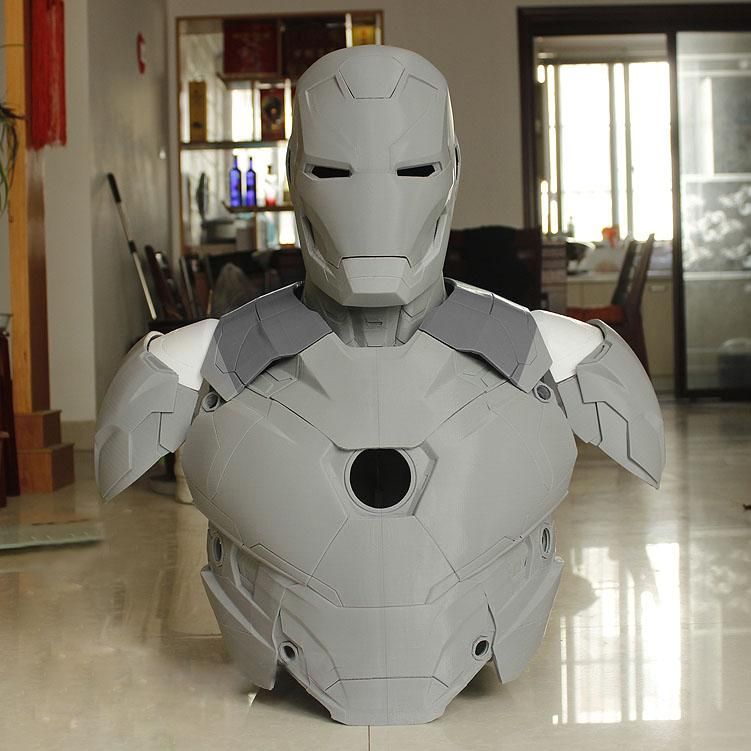 Using traditional methods, this amount of work would have taken about 30 years, but thanks to 3D printing, it turned out much faster.
It is even more difficult to imagine how many years Paranorman would have taken to produce. The animators used about 40 thousand different facial elements to expand the emotional range. Each of the 40,000 elements was put into a special face library. Thanks to their combination, Norman alone had about 1.5 million facial expressions. Each short half-minute episode required about 250 different expressions for one character.
About 56,000 faces were printed for Monster Family, which were divided into two main areas: eyebrows and mouth.
Each of the options had special names, such as "raised eyebrows" or "pursed lips." Combining them, McLean got the unique expression he needed.
According to McLean, the purpose of the rapid prototyping department was "to push stop motion into uncharted territory.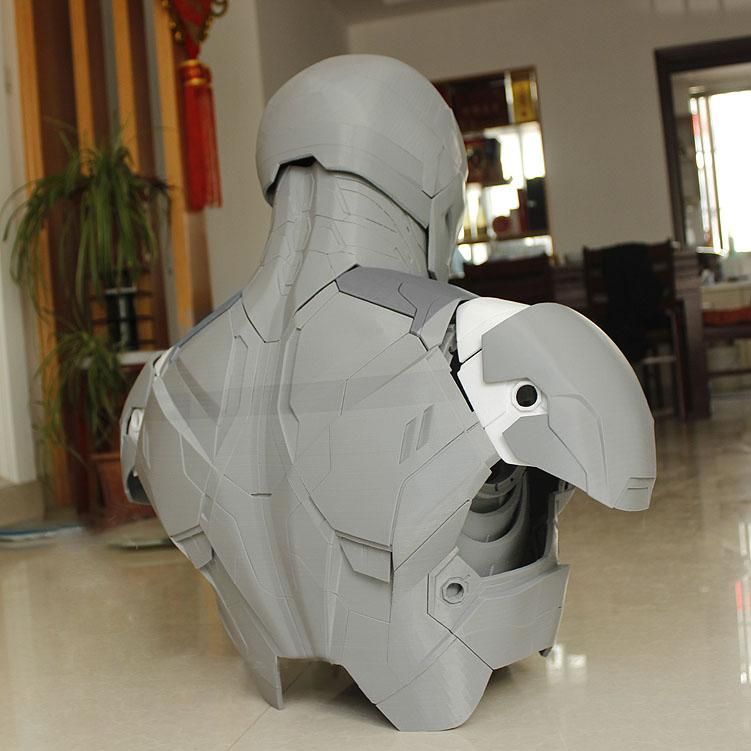 " This idea reached its peak in The Monster Family, where they tried to touch every muscle of the face, and the heads were printed specifically for one frame and were no longer used in the production of the cartoon.
McLean credits lead texture artist Tori Bryant for finding a way to recreate the nuances of coloring layouts by hand using additive manufacturing. She figured out how to compensate for the lack of color calibration on the printer and found that applying traditional drawing and coloring techniques to digital models resulted in a more believable result.
McLean has also used 3D printing on Laika's latest two projects, Kubo: The Legend of the Samurai and Lost Link. The scale increased again - only the main character could have 48 million facial expressions. In addition, when creating both cartoons, PolyJet 9 technology was used.0152 , with the help of which painted the printed objects in the required colors.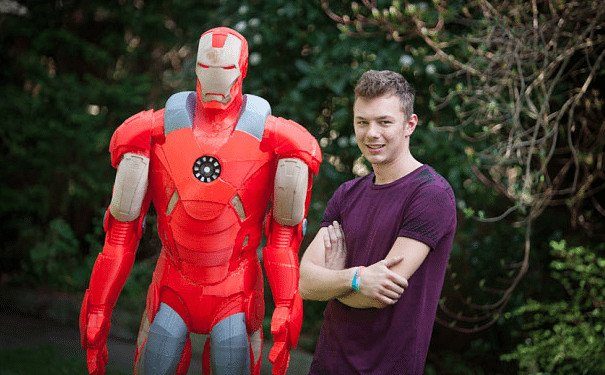
3D printing in big-budget movies
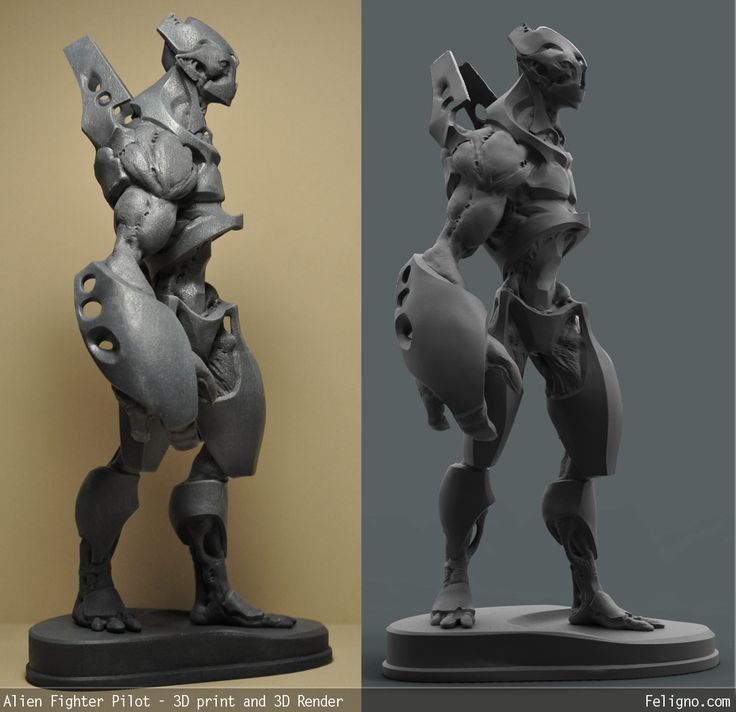
Disney pioneered the use of 3D printing in feature films - Jason Lopez (Legacy Effects specialist who worked with Marvel Studios from Iron Man 2 to Guardians of the Galaxy 2 ”) using this technology greatly accelerated the creation of the Iron Man suit. First, experts scanned the body of Robert Downey Jr. - this was necessary to make wearing the suit more comfortable - and then printed armor fragments on Objet Geometries from various materials. Rubber was used for action scenes and fast movements, and metal for close-ups.
For Thor: Ragnarok, Hela's helmet was designed by José Fernandez, costume designer at Ironhead Studios, using this technology. It used SLS (laser sintered nylon powder) with the addition of reinforced carbon fiber so that the headgear was not heavy.
3D printed synthetic materials such as nylon have also been used in the development of other Disney projects: Queen Ramonda's headdress from Black Panther; Kylo Ren costume, shining chrome stormtrooper armor, some parts of Rey's staff, C3PO droid as a costume for actor Anthony Daniels from The Force Awakens, Interpol car from The Muppets 2. Disney is again the first to apply new technologies, as it was with virtual production or the first “animation” of an actor using a mockup.
Additive manufacturing is also used by Sony Pictures Entertainment, Universal Pictures and Warner Bros.
Rapid prototyping for 007: Skyfall created an Aston Martin DB5 and a one-third life-size helicopter specifically for the explosion scene, which proved to be significantly cheaper than any other method.
Stratasys printers were used to design armor for the 2014 RoboCop remake.
A The red stripe on the visor was printed using a transparent photopolymer material.
The Apollo 11 spacecraft for Man on the Moon was also recreated using large scale printers - it was created using BigRep ONE V3.
Weta Workshop, a special effects and props company, used this technology to design helmets, sword hilts, spears and axes for the Hobbit trilogy. Animatronics engineer Rob Sheeney has stated that using 3D printing is beneficial as it is more economical and less time consuming. Then, in 2012, Weta Workshop also tested large-scale printers.
How 3D printing will change cinema
Cinematographer Victor Marin (Young Americans) believes that this technology will play an increasingly important role in the future. He recommends combining methods, instead of replacing traditional ones with innovative ones.
Julia Koerner (helped with 3D printing for the Black Panther designers) also calls for a combination of these methods. She sees the benefits of additive manufacturing in creating really complex and detailed structures that can't be created with traditional methods. In his work, Koerner tries to combine traditional methods with progressive ones.
Gilles-Alexandre Deschaux, creator of stop-motion short Chase me :
“3D printing is already widely used in the film industry, from stop-motion films to big American blockbusters and commercials. 3D printing is often used to create decorative items and props, but not only there. At the development stages, it is used to promote new individual projects and conceptual solutions.
According to Pinewood Studios 3D supervisor Jet Cooper, the possibilities of this technology are already “incredible”, because if you want, you can even scan someone's face with all the wrinkles and pores.
Jet Cooper, Pinewood Studios 3D Supervisor:
“Voxeljet has the biggest printers. Their maximum format: 4000 mm x 2000 mm x 1000 mm. This is the largest printer in the world as far as I know. We have a 1060mm x 500mm x 600mm resolution printer at Pinewood. Anything over this size, we print in parts and then put them together.
3D printing is used to create props, and the metal coating of the material makes it strong and durable. But the Germans are working on a new material - epoxy resins, which are as strong as stone. They are extremely hard. "
"
3D printing is developing rapidly and is becoming cheaper every time, especially when compared to traditional methods or the use of computer graphics. Perhaps the day is not far off when handmade props and scenery will almost cease to be used in films - they will be replaced by cheaper and faster “printed” counterparts.
Like this article?
WANT TO GET BEST ARTICLES
FROM XYZ ONCE A WEEK?
Subscribe to the XYZ newsletter
By clicking on the button, you agree to the terms of data processing
How physics was used to create animations in Star Wars Jedi: Fallen Order.
About the creation of physical animations for Star Wars Jedi: Fallen Order and the problems that game designers faced. There are 3 ways to adjust the animations in the game for physics.
How Unreal Engine is used in movies
The game engine Unreal Engine 4 is being used in movies. For example, in The Mandalorian they created virtual objects right on the set.