3D printing molds for silicone
Ultimate Guide to Silicone Molding for 3D Printing (Part 1)
Download the full Guide
as a PDF!
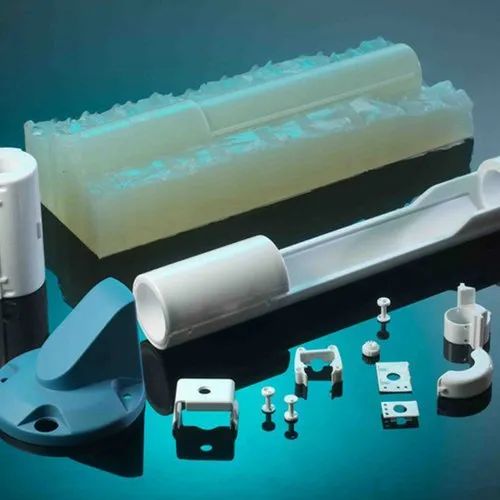
The simple post-processing techniques presented in this guide are an excellent way for professionals to create low-cost silicone molds, threaded inserts for enclosures, vacuum formed parts, and more.
Silicone molding is a powerful production method that, when combined with 3D printing, can allow you to make several copies of one product. You can also create a product in a material that is not supported by your 3D printer.
In this How To, we will show you some of the best practices associated with creating silicone molds around 3D printed parts.
Working time will vary depending on a number of factors. Creating a mold around our 3D printed part took us about 1.5 hours. Casting into our mold took about 15 minutes.
Supplies
3D printed mold box, hardware, vents & keys (read on for more info).
Master (the print you are molding)
Silicone
Resin and dye
Mixing cups
Mixing sticks
Mold release spray
Hot glue or cyanoacrylate glue
Funnel
Ex acto knife
Rubber bands, tape, or straps
Gloves
Respiratory mask
Eye protection
Need some of these products? We've curated an Amazon wish list for you.
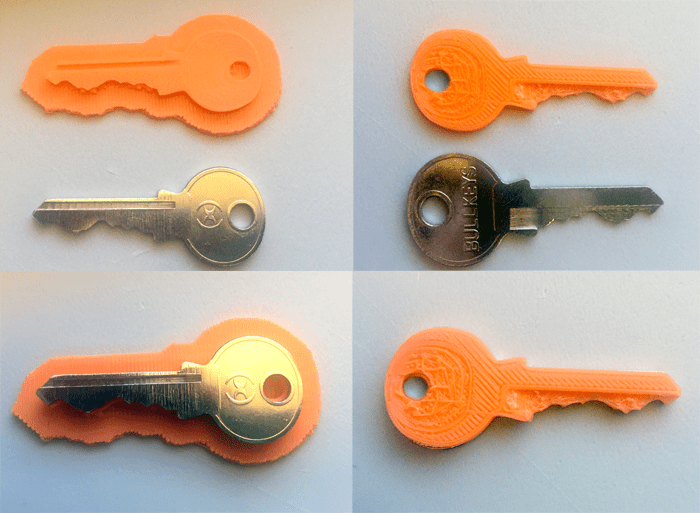
Step 1: Choose a file to cast a mold around
Obtain a file that you would like to either make several of, or create in a material not supported by your printer.
We chose the cap to a perfume bottle to understand what the process would look like for a product development team attempting to produce several concept models of a prototype.
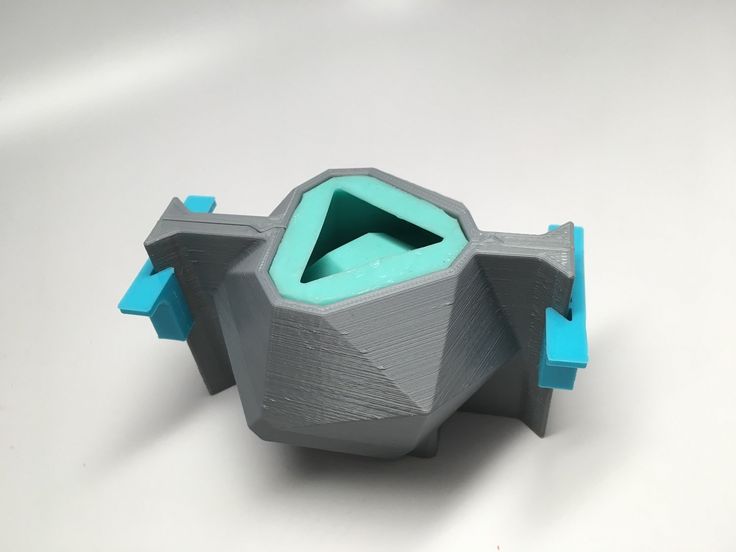
The next step is to create your mold box. This is the structure that will hold the silicone in place around your part when pouring. Your master will need to be suspended in this structure.
You can create mold boxes from:
Foam core board
Legos
3D printing
We chose to design and print ours as this method has a few benefits. Designing and 3D printing mold boxes allows you to:
Print in pour holes and vents
Easily calculate the volume of our mold
Create boxes that perfectly fit the parts you plan to create a mold of
Re-use mold boxes to create multiple molds
While 3D printing your mold box isn’t necessary, it provides you with a reusable customizable mold box that the other methods cannot produce.
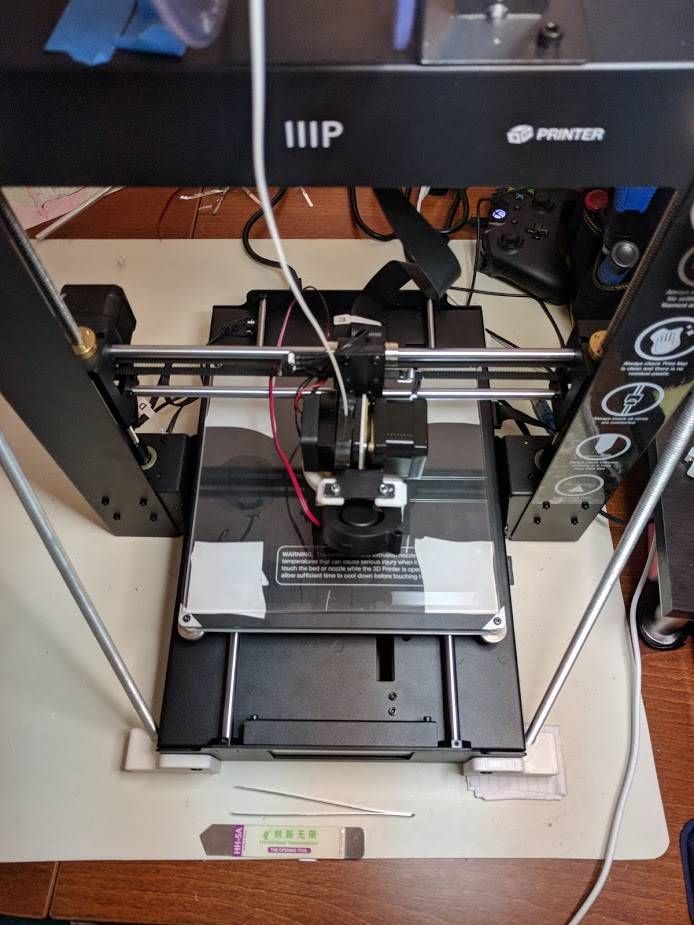
Step 3: Prepare and Print
Because the silicone molding process is not very demanding on the 3D printed mold box or master, you can select standard print settings.
The 2021 Guide to 3D Printing Materials
Learn about polymers, composites, and metals all available for 3D Printing!
Supplies Used:
3D printed mold box, 3D printed master, Cyanoacrylate glue, Mold release spray, Vents & Keys
A: Spray your mold box, master, vents, and keys with mold release.
B: Choose points across model to glue vents
C: With our 3D printed mold box we were able to glue our master directly onto the pour hole during preparation.
D: Spray again with mold release for good measure
You can suspend your master using popsicle sticks, skewers, or 3D printed rods glued to the surface of the master in an inconspicuous place. The holes left in their place after your mold has cured will aid in resin flow through the mold.
Step 5: Open Bottles of Silicone (Parts A and B) and Stir Thoroughly
Supplies Used: Silicone (Part A & B), Mixing Sticks
As silicone comes in two parts, it needs to be mixed both individually and once combined with its hardener.
Mix slowly using separate mixing sticks.
Supplies Used: Measuring cups
A: Determine the volume of silicone needed to fill your mold
B: Measure desired amount of silicone and hardener separately in two measuring cups.
We calculated our mold volume by filling our 3D printed mold box with water and pouring the water into a measuring cup to find exact volume.
For two part molds like the one shown, you only need to mix enough silicone to fill half of the volume of your mold.
Once you have measured each part, combine the two parts into one mixing cup and stir slowly with a mixing tool.
Be cautious not to stir in air bubbles. Be sure to scrape the sides of the cup to mix in all material.
Once your parts are thoroughly mixed the curing process will begin.
TIP
Read instructions on your silicone for “pot-life”. This is how long you have to work with the silicone before it cures.
Supplies Used: Mixed silicone, prepared mold box and master
Pour silicone into the first half of your mold box.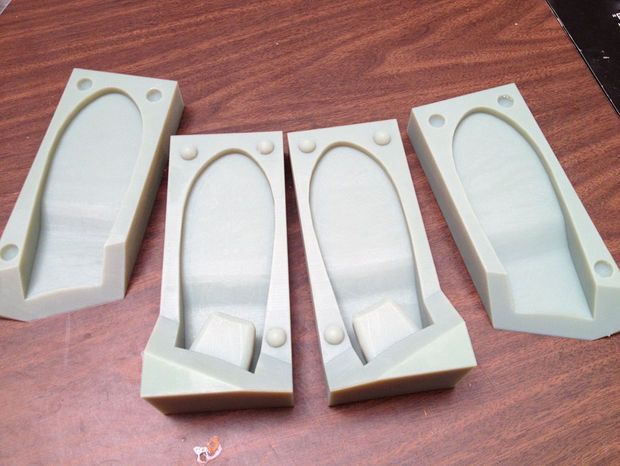
When pouring, pour slowly into one corner of the mold box and allow the silicone to run to other parts of the mold box as it fills.
Stop when the silicone reaches the top of the first half of your mold box.
Once you have poured your silicone place small keys into the silicone. These will create negative spaces and allow the mold halves to fit together once poured. We will remove them before pouring the second half of our mold.
Depending on what type of silicone you are using it can take anywhere from 75 minutes to overnight to cure.
Temperature and humidity will affect curing times, so we recommend this process be done in a room temperature environment.
Step 10: Attach and Prepare Mold Part Two
Supplies Used: Mold box part two, hardware (nuts & bolts)
Once our mold has set, we will prepare to pour the second half of our mold.
A: Remove the keys you inserted in step 9.
B: Attach and secure second half of mold box.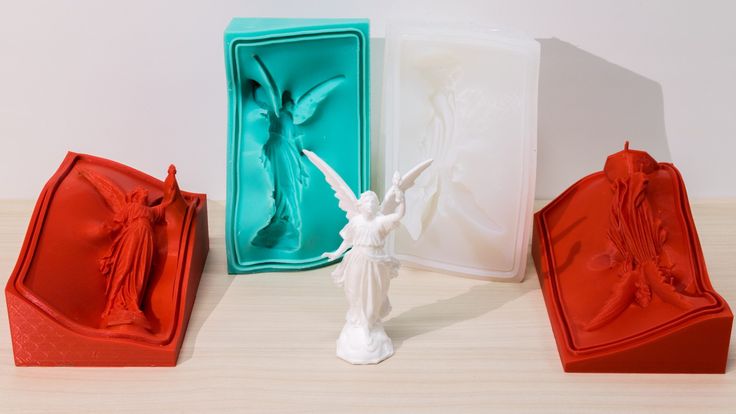
C: Spray with mold release
Next, repeat steps 5-9 and create the second half of your mold using the methods mentioned above.
Step 12: Let Cure
Supplies Used: Pliers or Ex-Acto knife
Once both halves of your mold have cured you are ready to remove them from the mold box and begin using them to recreate parts.
A. Remove the hardware
B: Remove the mold from the mold box and open.
C: Remove the master and vents.
Supplies Used: Cured mold, mold release spray, rubber bands
Next, you will need to reassemble your mold.
A: Ensure that all parts of your mold are correctly aligned, and plug any holes created by vents.
B: Secure mold pieces using rubber bands, straps, or tape.
Tip
Another great application for 3D printing would be to design and print a box to hold the mold together when pouring resin, or modify the mold box we used to serve the same purpose.
TIP:
If your vents leave holes in areas where resin can spill out during the pour, they will need to be plugged.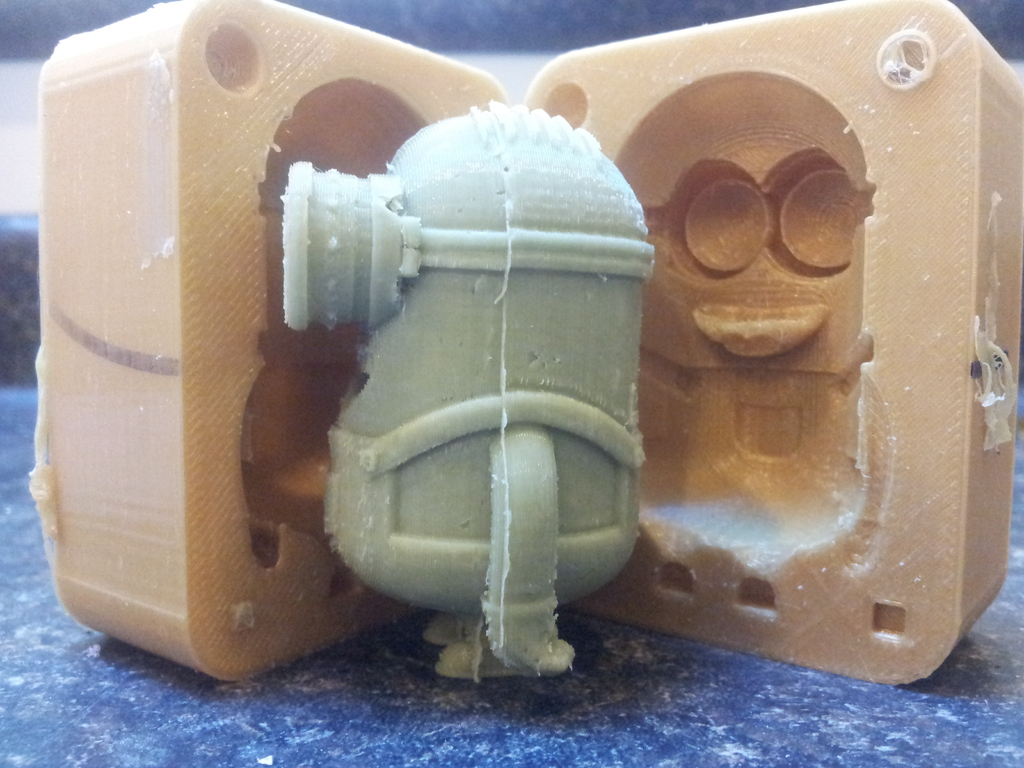
Supplies Used: Resin (Part A & B), measuring cups, measuring sticks, dye.
Just as with silicone you will need to measure each part of the mixture taking into account the volume needed to create a part.
If you have made several molds, you can mix a larger quantity of resin and pour several molds at once.
Add dye to the part of the resin mixture specified in the instructions.
Step 16: Mix Resin
Combine both parts of the resin mixture and mix thoroughly being sure not to stir in air bubbles.
TIP:
Resins typically have a shorter “pot-life” than silicone meaning they will cure faster.
Step 17: Pour Resin
Supplies: Funnel
Once mixed, pour immediately into the opening of your mold using a funnel.
Pour slowly as not to overfill and spill resin.
Any resin that remains in the mixing cup will harden, but can typically be removed afterwards.
Step 18: Let Cure
Once poured, allow the resin to cure for the appropriate amount of time.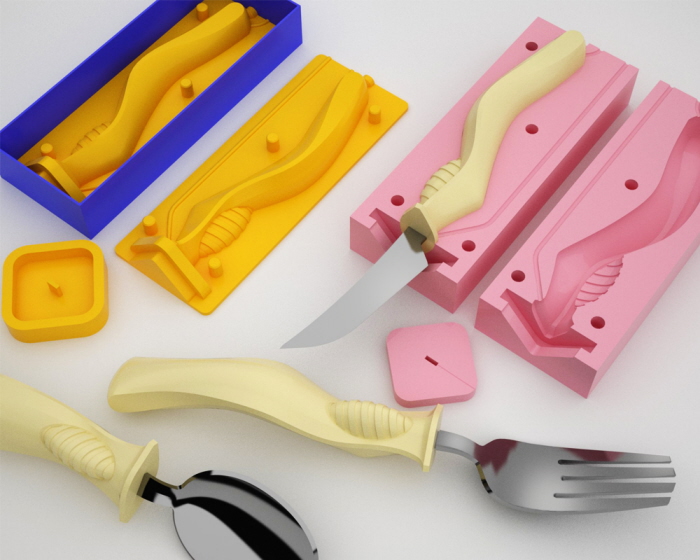
Supplies Used: Pliers
Once your resin has cured, you can open the mold and remove your cast part.
Any resin that escaped through seams or voids and cured is called “flash”. Flash will need to be removed from the part through post processing.
Below, you can see that we were able to recreate our perfume bottle cap in several different colors and opacities using silicone molding.
Visit one of our other applications pages for tips on how to take your print even further.
We recommend that you visit our pages on:
Silicone Molding Part II
Vacuum Forming
Sanding
Last but not least, remember to share your work with us on Thingiverse and social media @MakerBot.
We can’t wait to see what you make!
Powered by MakerBot Learning.
Ultimate Guide to Silicone Molding for 3D Printing (Part 2)
Download the full Guide
as a PDF!
The simple post-processing techniques presented in this guide are an excellent way for professionals to create low-cost silicone molds, threaded inserts for enclosures, vacuum formed parts, and more.
Silicone molding is a powerful production method that when combined with 3D printing, can allow you to make several of one product, or create a product in a material that is not supported by your 3D printer.
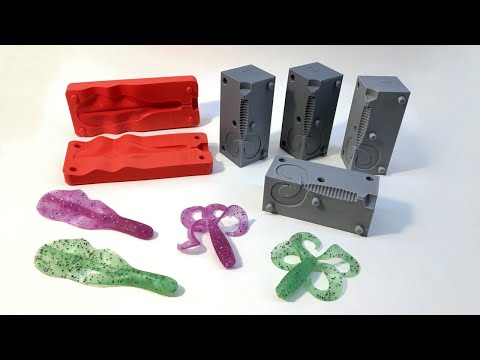
In this How To, we will show you some of the best practices associated with 3D printing molds to pour into. To demonstrate this process, we will create a bicycle handlebar grip out of flexible silicone using a 3D printed mold.
Working time will vary depending on a number of factors. This process took us about 30 minutes excluding cure times, which will vary depending on the silicone products used.
Supplies
3D printed mold
Mold release spray
Measuring/mixing cups
Mixing sticks
X acto knife
Silicone
Gloves
Eye protection
Respiratory mask
Need some of these products? We've curated an Amazon wish list for you.
PRINT MOLD
As silicone molding is not very demanding on your prints, there are minimal print settings to take into account when printing a mold.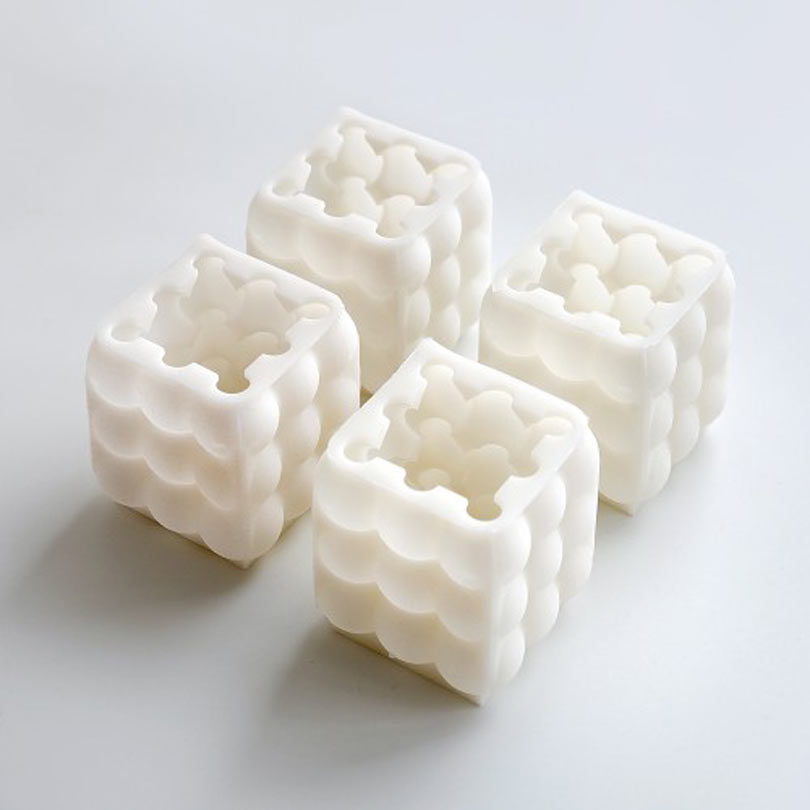
In this case we used standard settings. If surface finish of the cast part is of concern, consider sanding your printed mold.
PREPARE MOLD
Spray all mold surfaces with mold release & fasten mold pieces together with rubber bands
You will need to stir each part of the silicone individually before mixing.
Be sure not to stir too vigorously, otherwise you will stir in air bubbles which can be detrimental to your cast part.
Measure Part A
Measure Part B
Add dye to either Part A or B (this will be specified on your silicone/dye)
Stir in dye
Combine parts A and B and stir.
Stir slowly as not to mix in air bubbles.
Check instructions for the “pot-life” of your silicone. This will tell you how long you have to work with your silicone until it cures.
Here we used a three piece mold, so we only filled about ¾ of the mold to account for the third piece.
After pouring, the insert seen here was added to create a channel in the cast part for a bicycle handlebar.
The 2021 Guide to 3D Printing Materials
Learn about polymers, composites, and metals all available for 3D Printing!
You may need a flat tool like the one shown below to provide leverage when opening the mold.
Open slowly as not to damage your part.
Here, you can see the part we were able to create using a 3D printed mold.
Visit one of our other applications pages for tips on how to take your print even further.
We recommend that you visit our pages on:
Silicone Molding Part I
Vacuum Forming
Sanding
Painting
Gluing
Last but not least, remember to share your work with us on Thingiverse and social media @MakerBot.
We can’t wait to see what you make!
Bike Handle Bar Grip Mold
Rconroy
6/14/2013
https://www.thingiverse.com/thing:103723
Published by MakerBot Learning
Powered by the MakerBot Learning Team
3d printer for silicone molds and products
With a 3D printer, you can create many complex and unusual products from various materials. In recent years, silicone 3D printing has become increasingly popular, which allows you to create implants, organ prototypes, and other useful products. Let's take a closer look at silicone printing, products that can be created with its help, the necessary equipment and the prospects for the development of new technology.
What is 3D printing silicone?
Silicone is a polymer that consists of chains of alternating silicon and oxygen atoms. This material is resistant to various temperature ranges and various chemicals.
In 2016, Wacker Chemie found the most efficient way to 3D print silicone products. Based on this technology, Fripp Design, Envisiontec, Carbon 3D developed and produced equipment and materials that made it possible to work with silicone on a 3D printer.
Silicone is most often used in the medical industry to create objects that are resistant to changing environmental conditions. Until 2016, it was possible to create medical objects from silicone only with the help of injection molding of thermoplastics (injection molding). However, the new technology of additive 3D printing allows you to create smaller parts at an acceptable cost compared to injection molded products.
3D silicone printing technology
3D printer, which can print silicone products, has the same principle of operation as an inkjet printer. Liquid molten silicone is fed through the extruder in small droplets that are superimposed on each other, forming layers. The printer software is responsible for the correct formation of lines and shapes as a whole.
The curing process is required for the silicone to cure. It is performed using ultraviolet radiation, which forms cross-links between sections of the polymer chain. Due to this, the silicone is strengthened and becomes heat resistant.
3D printed silicone inside a microgel
Silicone 3D printed inside a microgel was developed at the University of Florida. This technology makes it possible to create more durable, but at the same time flexible and comfortable implants.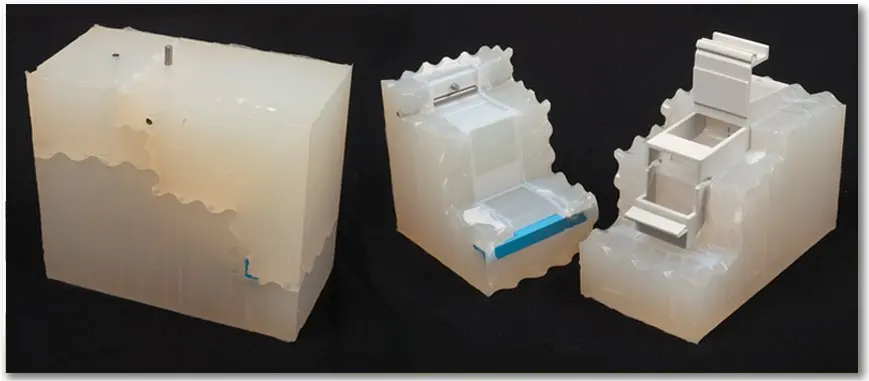 At the same time, the cost of their production will be significantly lower, as well as the final cost for buyers. In the future, silicone printing inside the microgel will allow the creation of various therapeutic devices and very complex structures, such as human organs and tissues.
This 3D printing method allows you to create individual products of various shapes. The printing nozzle moves along a predetermined path and extrudes liquid silicone drop by drop onto the microorganic gel substrate. Depending on the complexity of the finished product, the printing process can take from several hours to several days.
Application of silicone mold printer
3D silicone mold printer is applicable to the following industries:
- Medicine. Silicone is biologically compatible with the human body, does not have a toxic effect on it and is resistant to the influence of an aggressive environment. Thanks to this, the material is used for the production of:
- individual implants;
- respiratory masks;
- hearing aids;
- ear prostheses;
- training preoperative organ models;
- spectacle nose pads;
- contact lenses.
- Automotive industry. Due to the resistance of silicone to extreme temperatures and solar radiation, it is used for the production of automotive plugs, hose. The presence of waterproofing properties also allow the use of silicone for the manufacture of seals in hydraulic systems and materials for sealing automotive joints.
- Manufacture of everyday or sports articles. The elasticity of silicone and the safety of its use makes it possible to produce insoles for running shoes, ear plugs for headphones, and wristbands.
- Manufacture of souvenirs and jewelry.
Which 3D printer is suitable for silicone products?
What to look for when choosing?
When choosing a 3D printer for printing silicone products, you should pay attention to three main parameters of the device:
- Extruder. It must be inkjet, as liquid silicone is used for printing.
- Integrated heater and pump.
 To prevent liquid silicone from cooling down during printing and not clumping, the printer must have a heater that will constantly maintain the same temperature. It is also important to have a pump. It will help to evenly supply liquid filament to the work surface from the extruder.
 - Closed print area. It is necessary for the vulcanization of the printed blank. An ultraviolet emitter is located in the printed area, and the area itself is closed with a darkened glass dome.
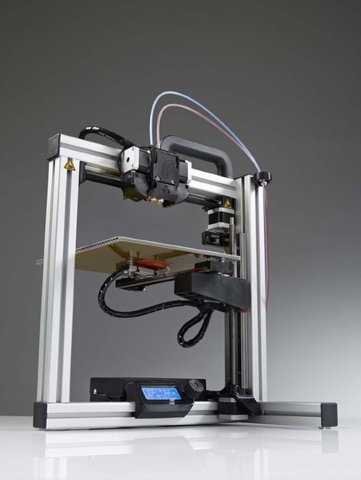
German RepRap LAM PRE-SERIES 3D printer
Ideal for printing silicone products. It adopts FDM technology, in which two-component liquid silicone rubber (LSR) is mixed by a pneumatic piston and extruded by an extruder. Then each layer of material is thermally cured under the action of an infrared rod.
The FDM technology used by the printer has increased print speed, reduced waste during production, completely eliminated post-processing of the product and accelerated its time to market.
The operation of the device is controlled using the touch screen. The printer uses Simplify3D software to process 3D models.
3D printer German RepRap LAM PRE-SERIES
- Base platform heated
- The weight 80
- Material LC-3335
- Seal FDM
- Working chamber area 390 x 400 x 330 mm
- Speed 6000 mm/m or 100 mm/s
- Number of print heads 1
- Layer thickness from 100 µm
- Nozzle diameter, mm 0.
 4
4
Go to product
Top 9 Silicone 3D Printers0021
The following professional silicone 3D printers have proven themselves in the market:
- EnvisionTEC - printing medical and dental parts (Perfactory Micro, Vida HD CROWN & BRIDGE and Xede 3SP Ortho lines).
- Structo - creation of dental products (OrthoForm, DentaForm series).
- Total Z - printing of advertising, souvenir, layout and educational products (Anyform line).
- Stratasys - creation of parts for the automotive, aerospace, defense industries (Connex Objet series), printing of dental products (J720 Dental line).
- 3D Systems - printing of souvenirs, models, promotional items and educational products (sPro series).
- Sinterit Lisa Set is a system for creating advertising, souvenir, mock-up and educational products.
- Intamsys FUNMAT PRO 610 HT is an industrial printer for printing large items and testing functional parts under critical conditions.
3D printer Intamsys FUNMAT PRO 610 HT
- Software IntamSuit, Simplify 3D, Cura
- Control connection interfaces WiFi, Internet, USB
- Material PEEK, PEKK, PEI, PPSU, PC, Nylon, ABS, PLA, PVA, TPU, Carbonfiber Reinforcement
- Seal FDM
- Supported file formats STL, OBJ
- Z-axis resolution 0.0016 mm
- Resolution X and Y 0.016 mm
- Platen Temperature 300°C
- Extruder temperature 500°C
- Working chamber area 610 x 508 x 508 mm
- Number of print heads 2
- Layer thickness from 50 µm
- Thread diameter 1.
 75
75 - Nozzle diameter, mm 0.4 (0.25, 0.5, 0.6, 0.8, 1.2 mm)
- Display 7" color touch screen
Go to product
Sinterit Lisa Set
- Control connection interfaces WiFi
- Laser IR 5W
- Maximum Layer Height 0.15 mm
- Maximum consumer power 24 W
- Maximum build chamber temperature 105 °C
- Maximum platform temperature for printing 190 °C
- Max extruder temperature 275 °C
- Material PA12 smooth, flexa Black
- Minimum Layer Height 0.
 06 mm
06 mm - Seal SLS
- Food 110/120 V or 220/230 V
- Supported software Sinterit Studio 2016
- Dimensions (mm) Sinterit Lisa - 650x550x450; Sinterit Sieve - 600x340x330; Sinterit Sandblaster - 480x370x360
- Accuracy along X, Y axes, mm 0.1
- Speed 15 mm / hour
- Layer thickness from 75 µm
- Weight, kg Sinterit Lisa - 35;Sinterit Sieve - 22.
 5;Sinterit Sandblaster-15
- Data output format STL, OBJ, 3DS, FBX, DAE, 3MF
- Max workpiece size PA12: 90x110x130 mm, flexa Black: 110x130x150 mm
- Print area Sinterit Lisa - 150x200x150 mm; Sinterit Sandblaster - 410x310x200 mm
- Operating system Microsoft Windows
Go to product
The future of silicone 3D printing
Silicone printing was originally developed for medical applications. Therefore, the most promising goal is the development and creation of silicone tissues and human organs that imitate real ones with great accuracy.
Help.
The first attempts to create a human organ from a silicone filament were made at the Federal Institute of Technology Zurich. The artificial heart in design and movement completely imitated the real one. However, the silicone model takes only 3,000 strokes to wear out, which is equivalent to a lifespan of less than one hour.
In 2021, only training and demonstration organs are printed from silicone, which help to study human physiology during training in medical specialties. The first experimental implants and prostheses also began to be developed.
Silicone 3D printing with silicone is a new, emerging technology. It is considered very promising due to the ease of use of the material, its high elasticity, wear resistance, resistance to radiation and aggressive chemical environments.
- March 14, 2021
- 6924
Get expert advice
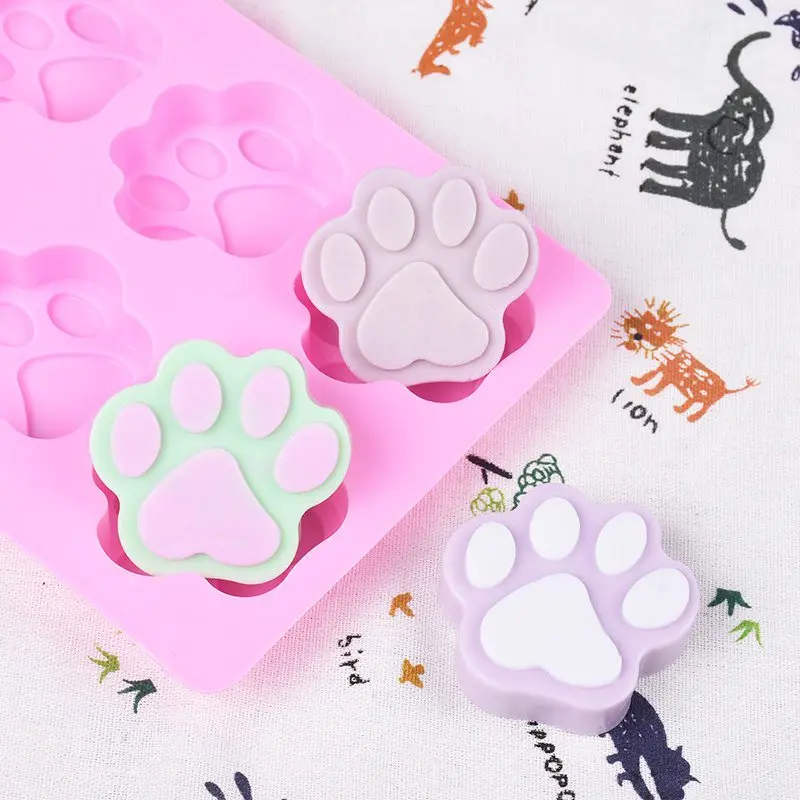
Making a silicone mold "Olympic Bear" for pouring chocolate using 3D printing.
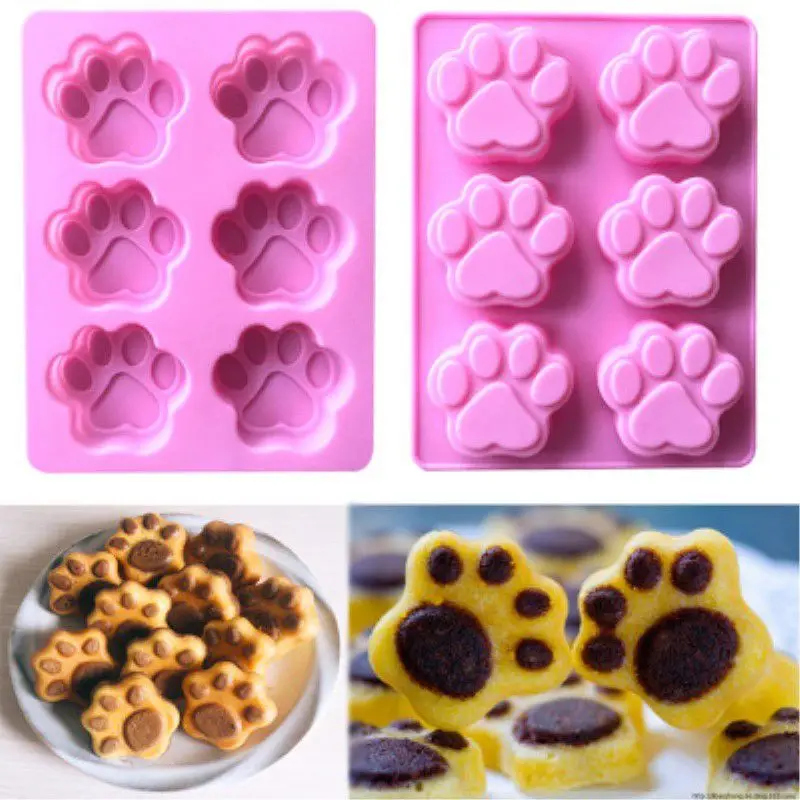
All good mood friends! Today I want to share my experience in creating a 3D printed chocolate mold.
How it's done...
1) A master mold for silicone molding is designed in a 3D editor and printed on a 3D printer (the most interesting stage).
2) All details of the master form are processed with a file or a drill to make the forms smooth (the most difficult stage).
3) Then the master form is filled with food silicone and it hardens (the most exciting stage).
4) Chocolate or baking dough is poured into the silicone mold (the most delicious stage).
So, let's start with the design of a master mold for silicone casting. First, we create in the 3D editor the figure that we should get at the output in the form of sweets. I have this figurine of the Olympic bear.
You can also make a chocolate bar as another example.
This figurine is embossed on the front side, smooth and flat on the back. This is how chocolate should be.
In the silicone mold, this object must be concave so that the poured chocolate or dough will be a copy of our model. On one form, we will have three concave olympic bears connected to each other at the top with a 2 mm silicone layer. Even in this form there should be edges of 10 millimeters, so that it is easier to take and carry it by them.
Therefore, we are designing a tray-like figure with a side height of 2 mm, which will accommodate all three Olympic bears. The distance from each bear figurine to the sides is about 10 mm.
The silicone filled up to the edge of these edges will be the same 2 mm layer that connects the figures and serves for comfortable holding of the mold.
Next, we design the upper part, which lies on the tray and has protrusions in the form of bears. From the highest point of the figure of the bear to the very top edge of this part, there should be a distance of about 2 mm - these are the bottoms of the silicone mold.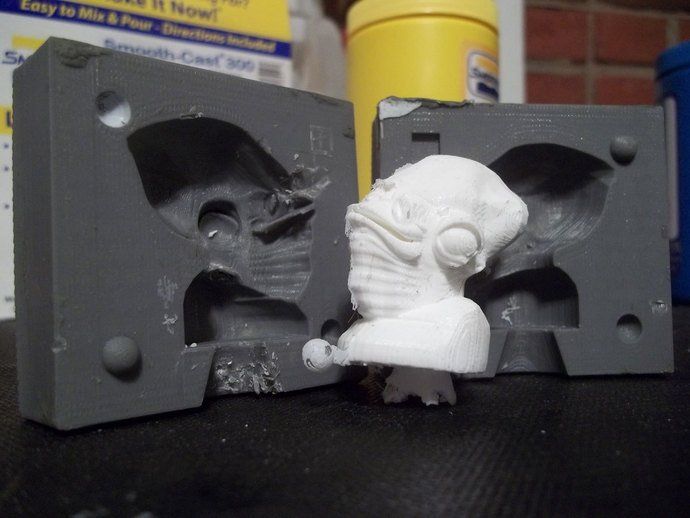
If we consider another example, with the master form of a chocolate bar, then the tray is exactly the same, but the upper part is slightly different.
The master mold model is ready, it remains to be printed on a 3D printer.
But here comes the question! Do you print the figures of the bears and the tray at once as a whole or separately, and then glue them together? Of course, in a good way, it is better to print them immediately, then there will be no gaps between them. But then it will be very difficult to process the entire solid form with a file. And you will have to process it, since smooth forms do not come out from under the 3D printer. You can make chocolate with rough surfaces for yourself and not worry too much about it, but if you are making for a gift or for other people to order, you are usually very jealous of the smoothness of the forms. So post-processing is much more convenient if you separately print a tray, separately three figures of bears. Sand each of them, and then glue to the right places. This is also convenient because the entire structure of the tray and three figures will be printed for several hours, and if the light is suddenly turned off or some other unforeseen failure occurs, it will be painful and insulting for the wasted plastic. And if they are printed separately, then the failure will occur on one part. It is easier to reprint it than the entire structure.
The next step, as the inquisitive reader understood, is post-processing. It is good to use PLA plastic - it is quite easy to grind. HIPS is even better - rub it a couple of times with a file and all the roughness is already smoothed out. Can be processed with a file or drill. Bear figurines need to be smoothed as best as possible, and the tray and the upper part, in principle, can not be processed, because their smoothness-roughness will not affect the chocolate in any way. Those who absolutely need the whole shape to be smooth will have to work on the upper part as well.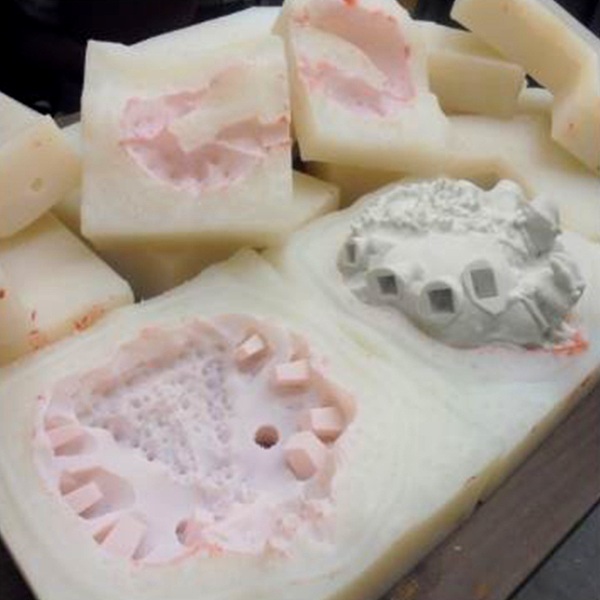 Then we wash off the plastic dust from the figures, which was formed during grinding. But this is not enough. All the same, small grains remain, and if silicone is poured now, then small specks of plastic will be imprinted into it. So I also soaked the brush in acetone and smeared all the surfaces that were being sanded. Acetone does not dissolve PLA or HIPS plastic, but it smoothes their surfaces and sticks together all the small particles. And if two surfaces of PLA plastic are lubricated with acetone, and then joined together, they can no longer be torn apart. So I used acetone to glue the bear figurines onto the tray. Then you need to wait for the time when the surfaces are completely dry and the acetone evaporates, rinse all the forms again and dry again.
The third step in this process is pouring the silicone into the master mold.
Silicone I bought food certified Penelast-750. It is not cheap, but it has all the necessary documents. With it, you need to buy a lubricant-wax, in order for the frozen form to better stick off the plastic. I have this Penta-126.
This silicone consists of two components that are mixed together in equal proportions. Then they need to be intensively mixed for 3 minutes. In a good way, then this mixture should be placed in a degasser chamber, a vacuum should be created so that all air bubbles come out and then poured into the master mold. These degassers are a bucket with a faucet and a glass lid. They can be found in online stores and bought. But those who do not have this camera, like me, for example, can resort to this method.
First, mix a small amount of silicone - a tablespoon of each of the components and a thin layer, using a brush, cover the entire surface of the master mold. If bubbles appear somewhere, they will either burst immediately or be visible to remove them. Then wait 3-5 minutes for the thin layer to lightly set.
Mix some more silicone and fill it up to the level of the sides.
We wait another 3-5 minutes, put on the upper part of the master form and fix it with paper clips.