3D printer large build area
Shop the Best Large Format 3D Printers in 2022 (Including Best Large 500mm 3D Printer)
Welcome to the Thomas guide to the best large format 3D printer 2022. Thomas has been connecting North American industrial buyers and suppliers for more than 120 years. When you purchase products through our independent recommendations, we may earn an affiliate commission.
Printing larger items with most at-home or small-scale 3D printers is possible but consists of separately printing different parts of the project and then connecting them all together afterward to make the much larger finished product. In this way, many 3D printing enthusiasts, such as cosplayers, for instance, are able to get past the 3D printing size limitations and use their machines for much larger products than the print bed will allow.
A large-format 3D printer in actionImage credit: Shutterstock/asharkyu
However, purchasing a large-format 3D printer can provide an increase in opportunities for creativity and a decrease in the amount of "putting together" necessary for those larger projects.
Large-Format 3D Printer—Buying Guide
With the average printing bed size of a 3D printer intended for general use being around 150–300mm, if you wanted to scale up the size of your 3D creations, a printer of 350mm–500mm would be ideal, and luckily, there are a few worthy large-scale models available on the market for you to choose from.
Benefits of a Large 3D Printer
Development in 3D printing technology means that we've recently been presented with 3D printed houses, cars, bikes, camper vans, life-size statues, and even sofas and other pieces of furniture.
Obviously, the "large format" we're referring to in this article is less about making grand-scale structures, and more about moving on from miniatures, ornaments, and other small objects or parts that an ordinary, non-industrial-sized 3D printer can produce.
Since you'll have a little more print bed area to play with, with a large-format 3D printer you can create detailed products that don't require a magnifying glass to really appreciate and also larger parts that would otherwise need to be printed in separate sections.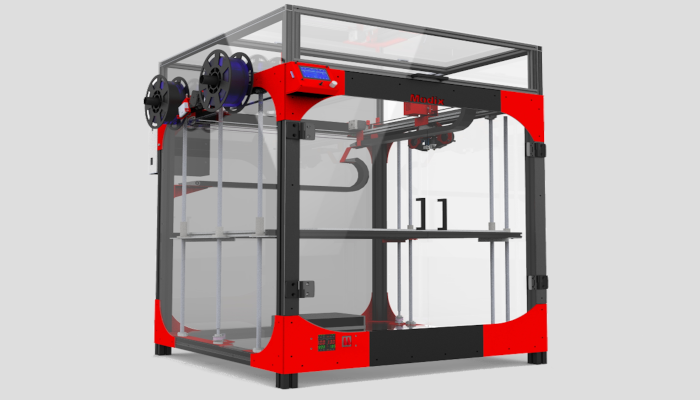
Thomas’ Top Picks for the Best Large Format 3D Printer 2022
If you're ready to step up your 3D printing game, and have a blast doing it, here are some of the best large format 3D printers currently available to buy now.
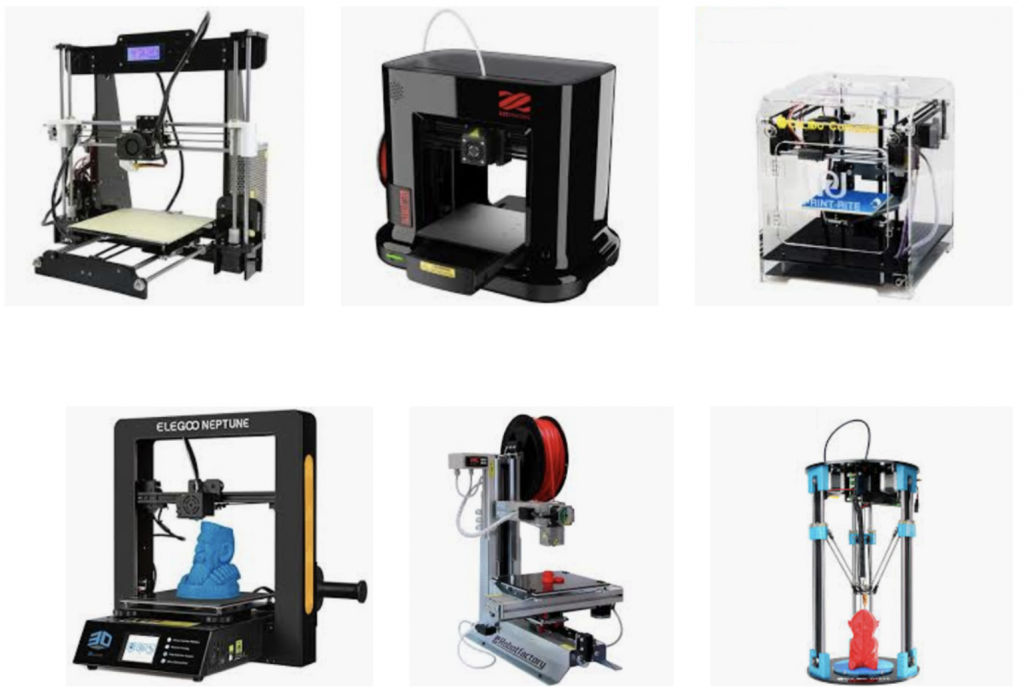
Best Large 500mm 3D Printer: Creality CR-10 S5 Plus 3D Printer | Buy Now Best Large 400mm 3D Printer: ANYCUBIC Chiron 3D Printer | Buy Now Best Large 3D Printer Under $1000: Creality Ender 5 Plus 3D Printer | Buy Now Best Industrial Large 3D Printer: Snapmaker 2.0 Modular 3-in-1 3D Printer | Buy Now Best Large 3D Printer under $500: SUNLU S8 3D Printer | Buy Now Best Cheap Large 3D Printer: LONGER LK1 3D Printer | Buy NowScroll down to see more on our top picks for the best large format 3D printer, according to many happy buyers.
*Prices listed in this article were as shown in US$ on Amazon.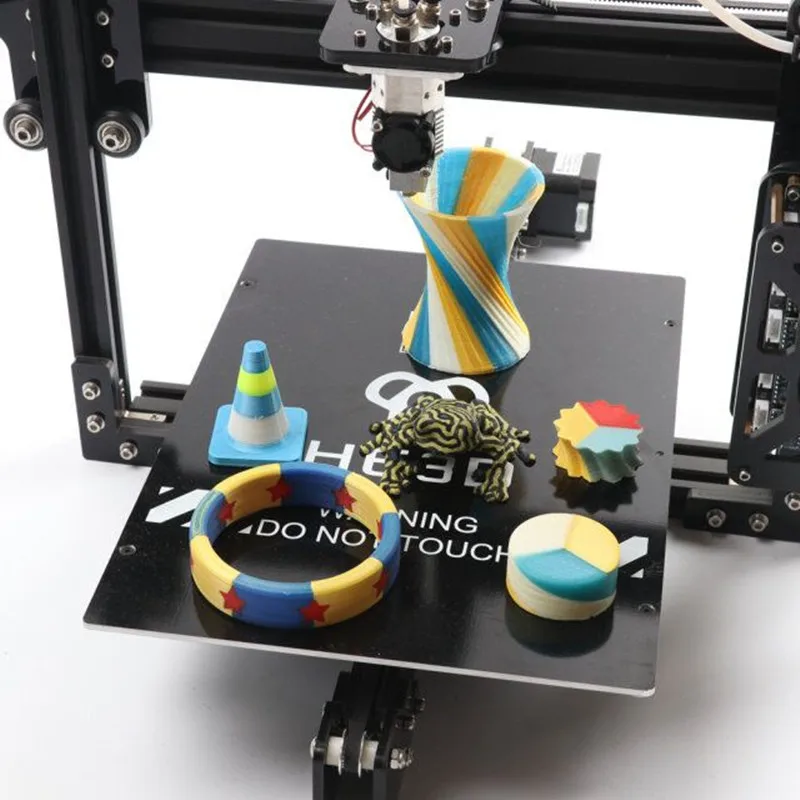 com (USA) and other online retailers as of February 2022
1. Best Large 500mm 3D Printer—Crealty Large 3D Printer 500x500x500mm
As one of the 3D printers with the largest printing beds currently available, the Creality CR-10 S5 3D printer has 500x500x500mm of printing space meaning you can really let your imagination run wild.
Installation is super quick and easy as the machine comes in three pre-assembled parts with clearly labeled wires and instructions. Other features include a resume-printing function in the event of loss of power, and you also get a one-year warranty from the manufacturer.
One buyer who gave this machine five stars helpfully mentioned that you need to have plenty of room to accommodate this huge printer, writing, "The main thing to consider is its sheer size. It requires over a yard, possibly a full meter of depth to move the build plate."
BUY NOW: US$719, Creality 3D2.
 Best Large 400mm 3D Printer—ANYCUBIC 3D Printer 400x400x450mm
 A large-format 3D printer from a trusted brand, the ANYCUBIC Chiron is for anyone who doesn't mind spending some extra time and effort on leveling the bed or working out the settings.
Users have reported this as being rather tricky, but the trade-off is a great 400mm 3D printer with impressive capabilities, plus, a superb customer service department that helped with any and all issues pertaining to the printer, from setup to product completion. One fan wrote, "It took me a long time to dial in my settings and get high-quality prints but I was able to get the printer working and printing decent quality the same day I put it together."
Another happy user who has "completed more than 4,000 hours of printing" and "used many hundreds of rolls of filament," described, "The results I am getting are amazing even with some prints taking over 300 hours to complete. In fact, I have just started a seven-part 700-hour print which is going very well.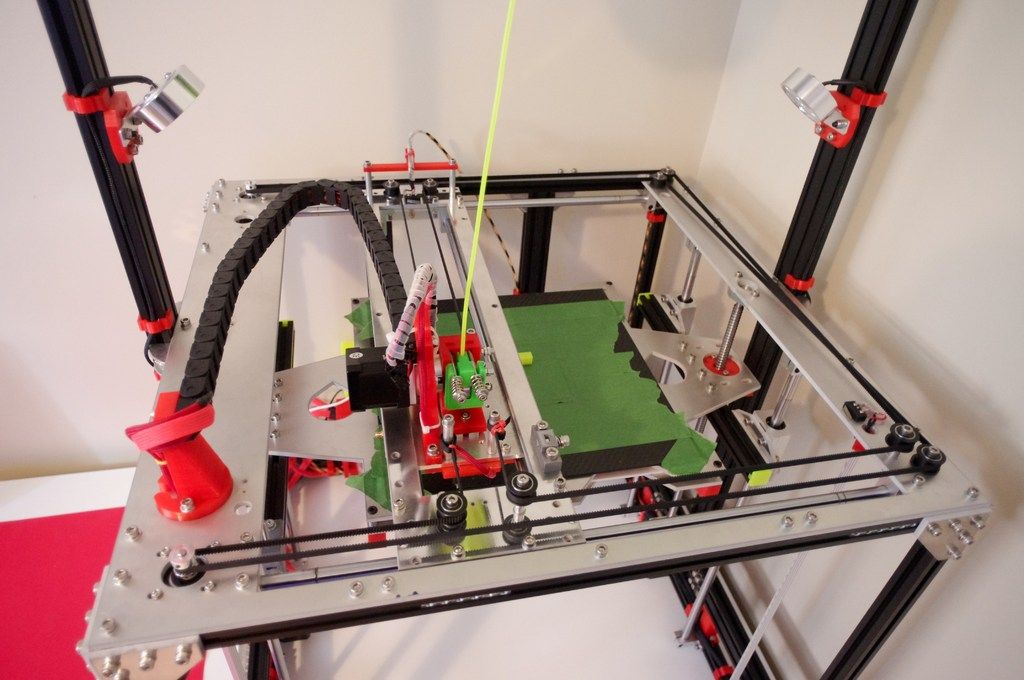 "
"
3. Best Large 3D Printer Under $1000—Creality Ender 5 Plus 3D Printer 350x350x400mm
With pretty much the same capabilities as its equally highly-rated sister model, the Creality Ender 5 Pro, including an automatic bed leveling sensor, bed stabilizer, color touch screen, and easy assembly, the Ender 5 Plus has one major difference; its huge size which accommodates its large build plate.
This sturdy thing works straight out of the box, and in addition to great customer support, there is also a massive Creality community to quickly get any answers and assistance you may require.
"I have printed several large helmets with great results," one happy purchaser wrote, and another added, "I love having the bigger print bed for very big projects. There is some fine-tuning you will have to do but after that, you are ready to rock and roll."
BUY NOW: US$599 (Was US$649), Amazon4.
 Best Industrial Large 3D Printer—Snapmaker 3-in-1 3D Printer 320x350x330mm
 For advanced hobbyists or pros who want to up their 3D printing game, the Snapmaker 2.0 will make a proud addition to your workspace and open up a world of 3D opportunity and creativity. In addition to its large printing capacity, it is fast, powerful, and also allows you to do much more than 3D printing, like engraving, cutting, and CNC carving.
At this price, it's a unit for those who are pretty serious about 3D printing, but for small businesses that rely on the craft, it will end up paying for itself in no time. One reviewer who bought this to enhance their graphic design business, wrote, "It's been a valuable asset so far. We are making our own business cards on metal which is super unique and our customers love the added services we can now offer."
Another happy buyer who raved about its versatility and build quality, added, "I have been making non-stop with this machine. .. [It] allows for the imagination to go absolutely wild with ideas!"
5. Best Large 3D Printer under $500—SUNLU S8 3D Printer 310x310x400mm Upgraded
Another good printer with a large print bed, and a tiny price to boot, the upgraded SUNLO S8 only weighs around 26 pounds so is not as much of a task to move as some of the other large 3D printers.
At under US$300, you get many features like high stability, accurate printing, filament runout detection, a Z-axis dual linear rail, and simple assembly. There's also a resume printing function for power failures.
"This printer provides great value for the cost," one buyer explained. "Not only is the print size large enough to do just about anything you can think of, but at 310x310x400 it is the largest in its price class." Another happy customer wrote, "Awesome printer for the price. Can't beat it. It's open-source so it's super easy to add upgrades if you want. Huge build size."
6. Best Cheap Large 3D Printer—LONGER LK1 3D Printer 300x300x400mm
With an even smaller price tag, the Longer LK1 3D printer is another option for those wanting to dabble in 3D printing but unsure whether to fork out the big bucks just yet.
It provides plenty of features to learn the art, and the customer service is helpful with any questions you may have. The leveling is not the best, but it is easy to assemble and users have been satisfied with the print quality.
"This is an awesome entry-level printer," one satisfied shopper explained. "I was pleasantly surprised, how easy it was to set up... If you're looking for bang for your buck and [to] familiarize yourself with 3D printing, then don't go wasting money on expensive printers; this one works great."
BUY NOW: US$270.39, WalmartThe Best Large Format 3D Printer—Summary
With one of the largest printing beds currently available for a non-industrial 3D printer, the Creality CR-10 S5 3D printer (US$719, Creality 3D) provides an impressive 500x500x500mm of printing space.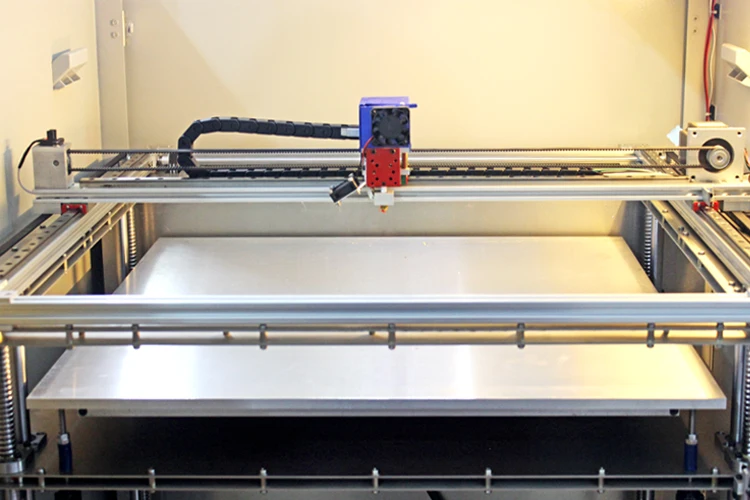 The Anycubic Chiron (US$623.75, Amazon) is another large-format printer with impressive capabilities and has a superb customer service department too.
We hope our review of the best large format 3D printer has been helpful. For more 3D printers and other 3D printing suppliers, including 3D printer filaments suppliers, additive manufacturing suppliers, 3D photographic printing services, and 3D sand printing additive manufacturing, consult our additional guides, or visit the Thomas Supplier Discovery Platform.
Other 3D Printing Articles- The Best 3D Printers under $300
- The Best 3D Printers under $200
- The Best 3D Printer Under $1000
- The Best 3D Printer Under $500
- Top 3D Printing Services Companies in the USA
- Origins of 3D Printing and Additive Manufacturing
- Overview of 3D Printing Technologies
- Top 3D Printing Manufacturers and Suppliers (Publicly Traded and Privately-Owned)
- Top Suppliers of Additive Manufacturing Consulting Services
Other Best Product Articles
- The Best Cordless Impact Wrenches
- The Best Portable Generators
- The Best Portable Band Saws
- The Best Electric Space Heaters
- The Best Mini Milling Machine
- The Best Attic Ladders
- The Best Air Purifiers for Smoke
- The Best Circuit Breaker Locator
- The Best Engine Hoists and Accessories
- The Best Drywall Lifts
- The Best Whole-House Generators
- The Best Home Automation Systems
- The Best Quietest Portable Generators
- The Best Uninterruptible Power Supply Systems
- The Best Commercial Patio Heaters
- The Best Electric Bikes
- The Best Electric Pressure Washers
- The Best Keyless Door Locks
- The Best Electric Lawnmowers
- The Best Electric Hand Warmers
More from Custom Manufacturing & Fabricating
For BIG Projects [Updated 2022]
3D printing is an extremely addictive hobby.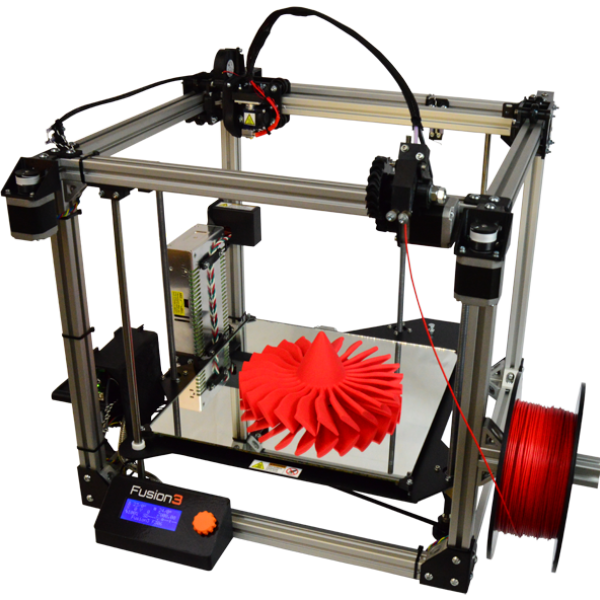
You start with little objects that require a few hours to complete. As you are acquainted with the intricacies of this technology and go through the learning curve, you begin to move on to more ambitious projects. Soon, you'll realize that your 3D printer can't accommodate the sort of items you want to publish.
When that happens, you can try one of two things. Upgrading your build platform is one option, but that’s a really convoluted way of fixing things.
You can’t just slap on a larger build plate and expect it to work, it takes a bit more tweaking than that, and you can’t do that with any 3D printer, especially not enclosed ones.
It’s not a solution that will work out for you in the long run. Your second option is to get a Large 3D Printer.
The problem with Large 3D printers is that there’s just so many of them on the market. From high-end expensive ones to cheap Chinese products, you're bound to experience choice overload (there are in fact more large 3D printer models than sublimation printers)!
With this guide, we’ll be showing you some different aspects of Large 3D printers, which ones are good for beginners and which ones are suited for more experienced users, as well as other significant aspects of Large 3D Printers.
Best Large 3D Printers of 2022
Name | Score | Summary | Price | Where to Buy |
|---|---|---|---|---|
Snapmaker 3D Printer | 4 out of 5 | Best Large 3D Printer |
| Click For Price |
ANYCUBIC Chiron 3D Printer | 4. | Huge building volume | Value for money | Click For Price |
Tronxy X5SA | 4.2 out of 5 | Our Budget Pick |
| Click For Price |
Qidi Tech X-Plus | 4 out of 5 | Budget Option #2 |
| Click For Price |
Creality Ender 5 Plus | 4 out of 5 | Decent & Inexpensive |
| Click For Price |
Dremel Digilab 3D20 | 4 out of 5 | Good Mid-Range |
| Click For Price |
 3 out of 5
1.
 Snapmaker 3D Printer - A 3D Printer Worth Every Penny
The manufacturers at Snapmaker outdid themselves this time around. The predecessor of this 3D printer was excellent by all accounts. But the 2.0 version introduced several more advanced features - like the CNC carving.
We’re getting ahead of ourselves - so, more on that later.
Just by looking at it, it’s evident that we’re dealing with a 3-in-1 3D printer capable of not only printing but carving, cutting, and laser engraving on various types of metals, too.
We dare to say that the predecessors pale in comparison to this model. The overall production speed, size, software capabilities, and materials used in this printer’s construction are beyond superior.
The best part’s that you can decide which size works best for your daily tasks:
The Snapmaker is manufactured in three different sizes - Small (A150), Medium (A250), and Large (A350).
Today, we’ll focus on the A350 model, though. We believe that this large-and-in-charge printer provides the most versatility.
Pen and Plastic Rating“High-precision parts and an overall upgraded design”
Click For Price
Technical Specifications
| RESOLUTION | 50-300 microns |
| BUILD VOLUME | 12.6” x 13.7” x 13” |
| SPINDLE SPEED | 6,000-12,000 RPM |
| FILAMENT TYPE | PLA, ABS, TPU, Wood Filled PLA |
| DISPLAY | 5” Smart Touchscreen |
| CONNECTIVITY | Wi-Fi, USB Cable, USB Flash Drive |
| HEATED BED? | Yes |
Why do we recommend the Snapmaker A350?
Well, for starters, it allows you to create large-scale printouts without too much hassle. And to add to it, most other models struggle to keep up with the faster work speed of this 3D printer.
Another thing we found is that it’s ideal for beginners who are just getting into 3D printing. But at the same time, hardcore enthusiasts can still enjoy using it because it offers customized options that would befit even professional engineers and designers.
Let’s look at those impressive features, shall we?
As mentioned already, this is a 3-in-1 model that does more than just 3D printing.
The Snapmaker also does cutting, carving, and laser engraving. The latter allows you to turn the dullest-looking wooden objects into excellent-grade craftsmanship.
All the while, a built-in camera observes every step of the process - keeping your printer and the things around it safe from potential hazards.
That’s further supported by the filament runout sensor - which automatically pauses the printing process if the filament runs out - and the upgraded cooling system.
We can even dive into CNC carving with multi-material support, which allows you to create 2.5D and 3D objects with utmost precision. Better yet, you don’t need to worry about residual dust, as the Snapmaker boasts dust resistance.
As long as your PC runs Windows or Linux, you’ll be able to access the exclusive Snapmaker Luban software capable of navigating all operations in the 3D printer. Carving, laser engraving, or cutting - you name it, this software has it all!
The workflow is further simplified thanks to the 5-inch touchscreen, the magnetic heat bed with a removable print sheet, and the Power Loss Recovery feature.
It’s relatively easy to assemble, too. It features a one-piece design with several additional items included, such as the OD6 laser goggles and pieces of plywood and acrylic for testing the unit out from the box.
Even if you aren’t sure of the optimal height at which the laser needs to carve or cut something - the Auto Focus system found in the Snapmaker does a phenomenal job of repeatedly testing for the focal points.
All in all, it’s a fantastic three-in-one 3D printer - albeit an expensive one.
Click For Price
2. ANYCUBIC Chiron 3D Printer
If you’re looking to print bigger items than the Voxelab Aquila above will let you print, the ANYCUBIC Chiron will be a nice place to start.
The build volume is just about twice as much, so you can let your imagination wander further as you think of exciting models to print.
But with the bigger size comes a higher price! This 3D printer will cost you more than $500, but you’ll see its worth.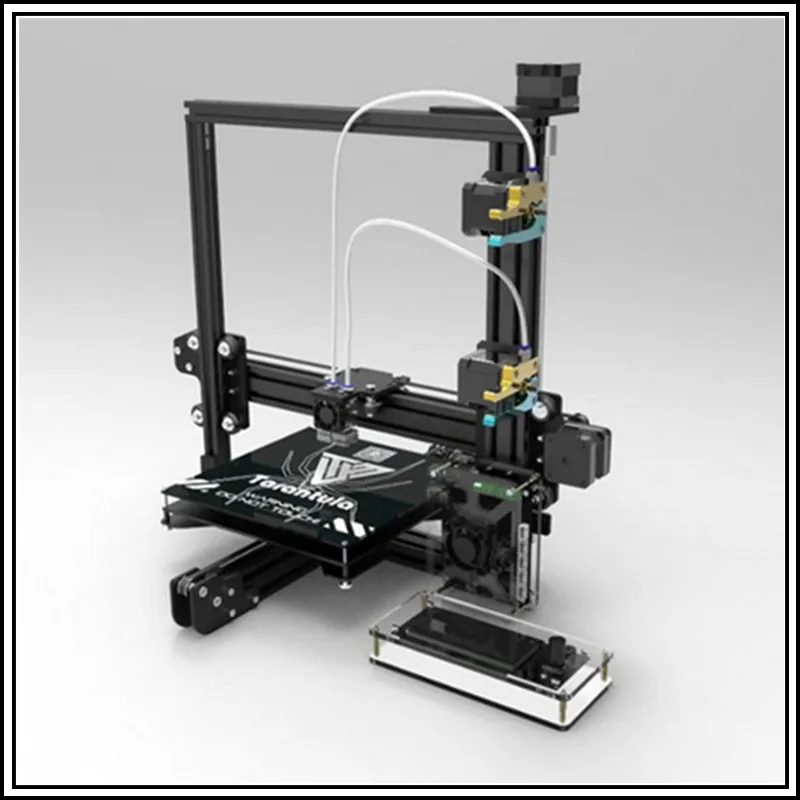 Aside from the larger prints, you’ll be able to create, the printer offers a range of extra features that you’ll ordinarily find in higher-quality models on the market.
For this reason, the ANYCUBIC Chiron is a nice choice for intermediate 3D printing enthusiasts looking for an upgrade. It will help to enhance your interest in this remarkable technology, as well as your knowledge going forward.
Click For Price
Technical Specifications
| RESOLUTION | 100-400 microns |
| BUILD VOLUME | 400 x 400 x 450mm build volume |
| MAX SPEED | 20 to 100 millimeters per second |
| FILAMENT TYPE | PLA, ABS, HIPS, Wood, TPU filaments |
| DISPLAY | Colour LCD |
| CONNECTIVITY | Memory card and data cable Connectivity |
| HEATED BED? | Yes |
The ANYCUBI Chiron is an impressive 3D printer that comes with a build volume of 400 x 400 x 450m. This should allow you to create large-scale printouts with relative ease, and this is enhanced by the open-frame metallic design it comes in.
The unit features a heated print bed while the semi-auto leveling feature ensures you won’t have a hard time setting up the printer. Your prints will also adhere to the bed easily, giving you a comfortable time when you pry them off at the end of the printing process.
You’ll appreciate that the Chiron is compatible with a range of printing materials you can access. From ABS and PLA to wood and TPU filaments, you get to enjoy a variety of choices that also allows you to get more playful and experimental with your projects.
A short-distance extruder is fitted to enable smooth extrusion of the molten filaments, resulting in higher print accuracy of between 0.05 to 0.3 mm. You also get a full-color touch screen at the base of the printer, which makes for easy management of settings while the printer is running.
Overall, the user interface is pretty intuitive and easy to operate, even for the not-so-experienced users. Among the most notable features of the ANYCUBIC Chiron 3D printer is a filament sensor that alerts you when the filament breaks or runs out during printing.
This helps to allow for continuity of the process while saving you precious time. Additionally, the print bed features a microporous coating that holds the print models stably to prevent them from toppling over as the upper layer is being printed.
Unlike some heated beds, the finished models are pretty easy to get off the bed once it has cooled off completely, meaning you don’t risk damaging your work. Lastly, everything on the 3D printer is relatively straightforward.
You won’t have a problem assembling the printer when you get it out of its package or working out the settings before printing your models. Nevertheless, most buyers are pulled towards it by the huge build volume!
On the downside, those who are completely new to 3D printers will have a problem piecing it up together after unpacking, even though the process is easy to figure out with the included instructions.
Another thing is that while the Chiron offers automatic leveling of the bed, there are a few issues worth mentioning. For one, you’ll be required to adjust the bed manually to be sure it’s level. Also, calibrating the bed is usually a nuisance for some people, especially if your experience is still limited.
Otherwise, this is a high-quality printer that you can take a chance on! You will appreciate the lifetime technical support on offer, as well as the 24-hour response. Furthermore, there is a 1-year warranty issued when you buy the printer to make sure you are getting value for your money.
Click For Price
3. Tronxy X5SA
The X5S is a true tinkerer’s machine, suited for more experienced users. And while it is one of the cheaper large 3D printers, it comes as a DIY kit.
It requires tons of adjustments if you want to make full use of it. Unless you already know a lot about 3D printing, or you are willing to put in lots of time and effort into it, this 3D printer is not for you.
Since it’s a DIY kit, it needs to be assembled completely from scratch, and that can take up to 10 hours especially since the instruction manual that comes with it is not very good, which is, unfortunately, a common occurrence among Chinese manufacturers and their 3D printers.
This is a budget 3D printer, so keep that in mind and do not expect to get a ton of extra's, you don't even get more than a couple of meters of printer filament with this bundle!
Pen and Plastic Rating"Great budget pick, easy to use. Does not come with a lot of filament"
Click For Price
Technical Specifications
| RESOLUTION | 100-400 microns |
| BUILD VOLUME | 330x330x400mm |
| MAX SPEED | 150. 00 mm/s 00 mm/s |
| FILAMENT TYPE | PLA, ABS, Hips, Wood, PC, PV |
| DISPLAY | Colour LCD |
| CONNECTIVITY | USB |
| HEATED BED? | Yes |
This printer is equipped with an aluminum frame, making it a lot sturdier than any plastic-framed 3D printers, which is very important for printing Large 3D objects. It is also equipped with an LCD interface and a heated print bed, which is very important if you want to print high-temperature materials.
Like we mentioned before, the X5SA is a DIY kit, and while it might be the cheapest option, it might not be the best option for you if you’re inexperienced in this area.
If you have some experience with 3D printers and don’t mind spending money on upgrades, you can transform the X5SA into a very capable machine that brings you incredible long-term value.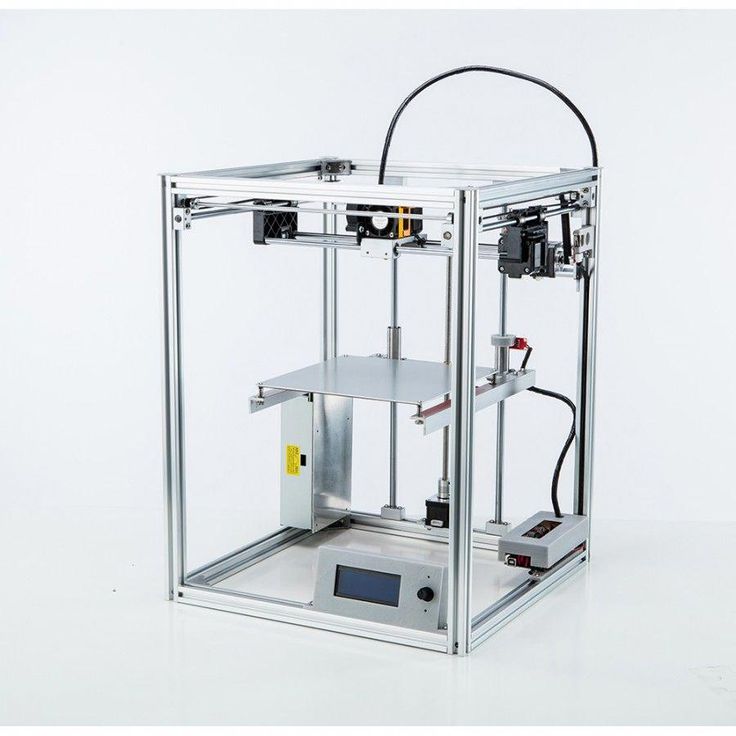
Click For Price
4. Qidi Tech X-Plus
Made by the established Chinese company - QIDI Technology - the X-Plus quickly caught our attention.
The past ten years were big for the 3D printing community. So, one might consider Qidi Tech a veteran company, as it was established in 2012. And boy, do they have the product lineup to show it:
The X-Plus is another one of their closed desktop 3D printers, and there are many things to love about it.
From versatility to convenience, let’s see what this model has to offer.
The Qidi Tech X-Plus is an excellent example of a 3D printer directed at semi-professionals. It’s not as high-end as our number one pick, the Snapmaker. But it offers many options and a lot of versatility - which newer, less experienced hobbyists won’t be able to take advantage of fully.
Pen and Plastic Rating"Truly Customizable DIY kit
Auto-leveling heated bed"
Click For Price
Technical Specifications
| RESOLUTION | 50 microns |
| BUILD VOLUME | 10. 6’’ x 7.9’’ x 7.9’’ 6’’ x 7.9’’ x 7.9’’ |
| FILAMENT SIZE | 1.75 mm |
| FILAMENT TYPE | PLA/ABS/TPU/PETG/CARBON/FIBER/PC/NYLON |
| DISPLAY | Color LCD |
| CONNECTIVITY | USB, WiFi, LAN |
| HEATED BED? | Yes |
That said, Qidi’s X-Plus lets users experiment with various materials. It comes with two extruder setups, the first being the default extruder, working at temperatures up to 260° C (500° F). When working with PLA, ABS, TPU, or PETG materials, this will be your go-to.
The second extruder included with this 3D printer is equally as impressive. It’s an excellent pick for trickier materials - such as nylon, PC, and Carbon fiber - that typically require higher working temperatures. The second extruder can work with temperatures up to 300° C (572° F).
Qidi Tech also provides a two-sided print bed - and external and internal spool holder options to accompany the two extruder setups. One suits lower temperatures better, and the other is used for high-temperature materials.
Pair that with a respectable building volume, and you’ve got a quality piece of equipment that provides great value for money.
Of course, the building volume may not be enough for some users. However, we’re dealing with a fully-enclosed desktop 3D printer.
And for this price range, it’s more than decent.
If we had to point out any flaws, it would be the lack of self-leveling features. But let’s be honest, that’s something everyone in the community knows how to work with.
And the X-Plus has a simple, one-button leveling feature to make up for it.
The UI is intuitive - although hobbyists might run into a learning curve. But getting familiar with X-Plus’ variety of features will certainly pay off!
Click For Price
5.
 Creality Ender 5 Plus
Maybe Qidi’s build volume simply doesn’t cut it for your requirements - and that’s fine. Here’s an alternative:
Comgrow’s Creality Ender 5 series is a considerable step up from the popular Ender 3 model. If you’re familiar with the older series, you’ll find the upgrade attractive in many ways.
Comgrow is known for its affordable, quality products. So, it’s kind of expected that we’d include them in our round-up.
While not as versatile as our previous contender, the Ender 5 Plus is a worthy investment for printing large objects. Plus, it makes up for the lack of versatility in other areas.
First off, as we mentioned, is the build volume. The Ender 5 Plus has the largest build volume in the series (including the Ender 5 and Ender 5 Pro).
Pen and Plastic Rating"Truly Customizable DIY kit
Auto-leveling heated bed"
Click For Price
Technical Specifications
| RESOLUTION | 100 microns |
| BUILD VOLUME | 13. 7’’ x 13.7’’ x 15’’ 7’’ x 13.7’’ x 15’’ |
| FILAMENT SIZE | 1.75mm |
| FILAMENT TYPE | PLA/ABS/PETG |
| DISPLAY | Color LCD |
| CONNECTIVITY | USB, SD Card |
| HEATED BED? | Yes |
Creality has mounted the bed on four sturdy rods and two screws to accompany high production volume. That said, the design itself isn’t too beginner-friendly:
You can expect to receive the printer semi-assembled. Although the assembly doesn’t take long, you’ll need someone with experience to do it.
The Ender 5 Plus comes with a solid printing speed. Users can comfortably work with 40 to 80 mm/s with impressive accuracy. And as you’d expect, it features a filament runout sensor, too.
Considering the size of the products you’ll be working with, the printer will need lots of material. Eventually, the filament will run out or break. And the printer’s built-in sensor allows you to make the adjustments without damaging your project.
While we’re on size, larger printers can pose greater risks if something goes wrong - especially during the heating process. The good news? The Ender 5 Plus boasts a reliable error detection feature:
The printer will shut down all heating elements to prevent hazards and casualties if something goes wrong.
No need to worry about heating issues, anyway; the model is also equipped with dual-cooling. That keeps the filament cool and stable while printing.
As for the downsides, the main issue we have with Ender 5 Plus is the assisted leveling - or lack thereof.
It comes with an Antclabs BLTouch auto-bed leveling probe. However, it is located about seven centimeters (2.7’’) to the left of the extruder. So, the probe can’t measure the entirety of the bed and, therefore, can’t level properly. When you add everything up, that’s about 25% of space out of the sensor's reach.
Another thing to note:
Creality went with a decent motherboard - but the printer could use further noise control.
Click For Price
6. Dremel Digilab 3D20
When it comes to user friendly 3D printers, this one takes the cake!
Basically, the Dremel 3D20 comes almost ready for printing out of the box. It is delivered pre-assembled and all you have to do is feed the filament then level the printing bed.
Unfortunately, there is no auto-calibrating on this printer, so you have to perform the bed-leveling manually.
It is a good thing that this process is explained clearly in the setup instructions and even a novice will be able to nail it after a few attempts. The 3D20 has a small size and a closed design that makes it look like a microwave.
While not the biggest build platform, the Dremel will offer you a build volume of 230*150*140 mm, which highlights the target demographic of hobbyists and beginners.
It has a single extruder that can cope with temperatures of up to 230 degrees centigrade. The touch screen is among the noteworthy features that will grab your attention when you first see the printer.
It is colored and helps you to configure your printing needs with relative ease and excitement.
Pen and Plastic Rating"Easy to Assemble, Beginner friendly, but a limited print platform"
Click For Price
Technical Specifications
| RESOLUTION | 100 microns |
| BUILD VOLUME | 8.9″ x 5.8″ x 5.9″ |
| FILAMENT SIZE | 1.75mm |
| FILAMENT TYPE | PLA/ABS |
| DISPLAY | Mono LCD |
| CONNECTIVITY | USB |
| HEATED BED? | Yes |
The Dremel Digilab 3D20 is a great choice of an entry-level printer that any beginner looking to have an amazing first-time 3D printing adventure. It is easy to use and produces respectable printing results.
Not to mention that it requires no customization and has a reliable support network that you can fall back to anytime you run into issues.
The overall peace of mind you get when using this 3D printer can impress even the more experienced 3D printer handlers.
If you are looking for a printer that offers consistent quality and ease of use, try the 3D20 and experience the simplified process.
Click For Price
7. Xinkebot Orca2 Cygnus
The Xinkebot Orca2 Cygnus is like a better, high-end version of the Creality CR-10S, as all of its parts are higher-quality. It’s not as popular as the CR-10S, so there’s not much of an online community for it. It does, however, come with an actual customer support service.
The Orca2 comes in an easily-assembled package, which is especially important for beginners since the original Orca model proved too difficult to assemble.
The instruction manual for the Orca2 is not as good as it can be, but it comes in a semi-assembled package so you should have no trouble setting it up on your own.
The Orca2 Cygnus features a dual extruder setup and has automatic bed leveling making for an easy bed calibration process. It also features a touch screen interface which is located near the print bed, and the cable management is very clean.
No products found.
Pen and Plastic Rating"Dual Extruder, auto-leveling heated bed. On the pricier side"
No products found.
Technical Specifications
| RESOLUTION | 100 microns |
| BUILD VOLUME | 8.9″ x 5.8″ x 5.9″ |
| FILAMENT SIZE | 1.75mm |
| FILAMENT TYPE | PLA/ABS |
| DISPLAY | Mono LCD |
| CONNECTIVITY | USB |
| HEATED BED? | Yes |
Like the Dremel Digilab 3D20, this 3D printer has an interface at the base, giving it a more modern appearance than 3D printers equipped with the old school knob- or button-operated LCD interface. Though most users prefer the usual USB and SD card setup, BIBO has opted for the WiFi options, although you can still get the USB and SD card reader if you wish.
Equipped with dual extruders, the BIBO2 includes a heated print bed, which opens the door for a variety of plastic filaments. The build plate is detachable, allowing for easy removal of 3D models. The BIBO2 is a well-built 3D printer oozing with features. Once you’ve set it up and configured the settings, it's simple to use and produces great quality prints.
No products found.
8. Ultimaker Extended 3
The Ultimaker Extended 3 is just that, an extended version of the Ultimaker 3, one of the best Large 3D printers designed for professionals and printing enthusiasts alike. It is a semi-enclosed fully assembled 3D printer that takes less than one hour to set up.
The Ultimaker 3 extended comes in a sturdy metal frame, it includes USB ports and an LCD interface but no SD Card slot, unlike the Ultimaker 2. It can connect to a Wi-Fi network, and it is equipped with an onboard camera for remote monitoring.
The main difference between the Ultimaker 2 and Ultimaker Extended 3 is that the Ultimaker Extended 3 features a dual extruder setup in one print head. This setup allows you to print soluble supports for more complex 3D prints and also allows you to print with two colors.
However, due to the heavy load that the Ultimaker 3 carries, the print time is significantly slower than its previous models.
Pen and Plastic Rating"High-end large 3D printer, slow print time"
Click For Price
Technical Specifications
| RESOLUTION | 100 microns |
| BUILD VOLUME | 8.9″ x 5.8″ x 5.9″ |
| FILAMENT SIZE | 1. 75mm 75mm |
| FILAMENT TYPE | PLA/ABS |
| DISPLAY | Mono LCD |
| CONNECTIVITY | USB |
| HEATED BED? | Yes |
The Ultimaker 3 Extended is highly praised for it's precision and accuracy, even in low settings, it still produces detailed prints. When it’s set on the highest settings, the Ultimaker 3 Extended completely outperforms most other printers. And although it needs an enclosure for high-temperature printing, it can consistently print using different materials.
The Ultimaker 3 Extended comes at a price, but you definitely get your money’s worth with it. This printer is recommended for professionals or hardcore 3D printing enthusiasts.
Click For Price
Note: The printers listed in this review, are by nature all open form printers. If you are not able to run one of these, due to having small kids around the 3D printing room for example, then consider our review on fully enclosed 3D printers, as we also focused on models for large build volumes!
Last update on 2022-10-11 / Affiliate links / Images from Amazon Product Advertising API
How to create models that are larger than the print volume of a 3D printer
Don't have a large format 3D printer yet? When evaluating the capabilities of a compact desktop 3D printer, do not limit yourself to print volume. Many objects, like your smartphone or a bridge over a river, are made up of many individual components. Therefore, splitting the model into smaller parts that can be aligned after printing is a great solution for 3D printing large objects that do not fit on the platform.
Also, splitting the model can be a great way to get a high quality result, even if the whole model fits on the platform. This makes sense when multiple or opposing surfaces must be free from support structures, when the model has complex ledges, or contains cavities where liquid polymer can remain.
3D printing of various parts opens up new possibilities, for example, the creation of prefabricated structures from various materials or the combination of rigid and flexible parts to simulate the overmolding method.
When choosing a gluing method, it is necessary first of all to take into account the required degree of strength of the glued joints, which depends on the purpose of the models:
-
chemical: use adhesive on artwork, scale models, and complex shapes that are not intended for functional use and should not be impacted;
-
Mechanical: Provide threaded holes or sockets for attaching parts that require a secure mechanical connection, or repeatedly detaching and attaching components as needed.

This tutorial focuses on building large, prefabricated 3D stereolithographic (SLA) printed models with chemically bonded components. Read on to learn all the steps in this process, from model separation to post-processing for a professional finish.
Formlabs Form 3L is the first affordable, easy-to-use large format 3D printer optimized for reliable production of industrial-quality models. The Form 3L stereolithographic 3D printer features a huge print volume of 30 x 33.5 x 20 cm and unrivaled cost-effectiveness.
Meet the Form 3L
We recommend two ways to separate models: adding features to the design that will allow the parts to fit together, or separating the model with straight lines, which will require them to fit together properly during the bonding process.
Regardless of which method you choose, if you have a lot of parts, it's helpful to add a unique identifier (letters/numbers) for each one to make assembly easier.
Use CAD software to split a 3D model and add basic centering components such as slots, pins, slots, notches, and tabs, or more complex features such as dovetails and slots to match model folds.
Adding centering components to the design makes it easier to assemble parts.
Ideally, these components should make it easier to align and assemble parts, but can cause problems if they differ even slightly from your 3D models, preventing perfect centering. Therefore, it is best to use centering components only when the printer can print parts with accurate dimensions that are not subject to deformation.
Splitting a 3D model along straight lines requires less effort than adding components to center it. With this separation method, there are also fewer problems if the parts are slightly deformed or differ in size.
Adding IDs for each part makes the assembly process easier.
On the other hand, parts separated by straight lines can be time consuming to assemble, as each part must be manually centered and ensured that they all remain in the correct position until the adhesive is completely dry.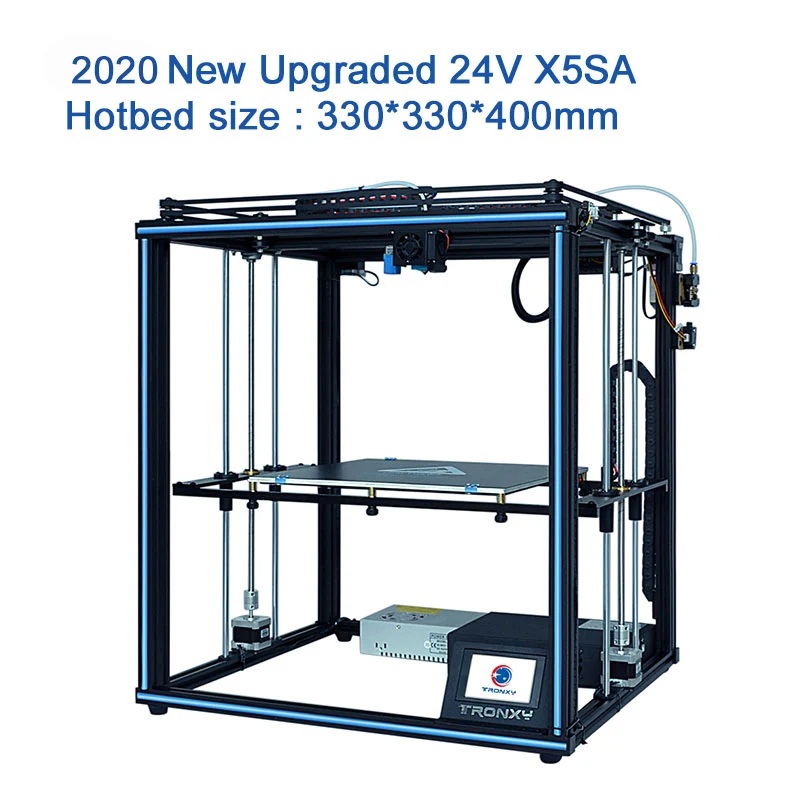
By default, when printing on a stereolithographic 3D printer, solid models without voids are obtained. Depending on the design, different requirements may apply to the manufacture of large items. In such cases, 3D printing the outer shell or converting the structure into a hollow is a great way to save a lot of material and time. When printing hollow models on a stereolithographic 3D printer, be sure to add ventilation holes to avoid creating cavities filled with air and pressurized resin.
SAMPLE PART
Experience Formlabs print quality first hand. We will send a free sample of the printed model directly to your office.
Request a free print sample
Converting a model design to a hollow saves a lot of time and material because the printer only needs to print the outer shell.
Learn more about how to save materials and time by hollowing out 3D models.
Depending on the size of the details and the purpose of the model, we recommend three mounting methods:
| Epoxy glue (5-30 min) | cyanoacrylate (CCA, Supercollah) | Resin | ||||
|---|---|---|---|---|---|---|
Square. | Large | Small/Medium | Small | |||
| Paintable | Yes | Yes | Yes | 9006 70072Medium | Low | Low |
For large parts and maximum adhesion, use 5-30 minute dry epoxy. It takes longer to dry than other adhesives, allowing you to fit large 3D printed parts but slows down the assembly process. Most 5-minute epoxy adhesives stop changing shape in as little as five minutes and cure by about 75% in less than an hour.
For large parts and maximum adhesion we recommend using epoxy adhesive.
The next option is cyanoacrylate (CA or superglue), which quickly forms a strong bond, ideal for small to medium sized parts. Thoroughly clean the part before applying CA to the surface, because contaminants adversely affect the quality of the connection. CA has a moderate impact strength, but is not recommended for models that require high strength.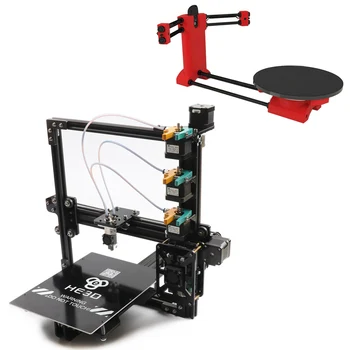
For small models, you can simply use liquid resin from a stereolithographic 3D printer. Pour a small amount of resin into a tray from a bottle or cartridge, pick it up with a pipette or syringe, and place it on the surface to be bonded. Connect the parts and wipe off excess resin that may spill around the edges. Aim a 5mW (405µm wavelength) UV laser pointer at the contact area to cure the resin and bond the parts.
This method produces a chemical bond similar to 3D stereolithography printing, but is only suitable for bonding small surfaces as a low power light pointer cannot penetrate the model deep enough to create a strong bond.
Note. Protective equipment must be worn when working with polymers, including proper eye protection and gloves.
Download PDF
Don't have time to read the article now? Download it in PDF format.
Download as PDF
After assembling the model, it's time to move on to post-processing. This step includes geometric correction of the model to provide a smooth surface that matches the original 3D model, and aesthetic finishing to obtain a uniformly colored surface.
Depending on the precision of the printer and the size of the printed parts, there will almost always be slight voids or mismatches at the contact points. Automotive sealant (e.g. Bondo 907) adheres well to polymers, therefore, to eliminate such inconsistencies, it is recommended to apply it in a thin layer on the surface. Lightly sand the surface after each coat has dried to bring the model to its final shape.
Sealing models with automotive sealant (red area in image) will help eliminate small gaps and inconsistencies between parts.
Sanding helps remove traces of support structures and remaining inconsistencies in the model. Gently start sanding the surface with 150-grit sandpaper to remove traces of support structures and smooth edges where parts meet. Once the surface is smooth, sand it wet using 320 grit sandpaper to remove any remaining layer lines. Sand the surface in random motions so as not to leave marks. In most cases, these two methods will produce a fairly smooth surface, but you can continue to increase the grit of the sandpaper up to 2 times and, after wetting it, sand the entire model until the surface is reasonably smooth.
Power sanding is great for large flat surfaces, but can ruin fine details. Grinding of small models is recommended to be done by hand, and for large ones, a combination of manual and mechanical grinding is recommended.
Machining large parts with mechanical and manual grinding saves a lot of time. Power sanding is great for large, flat surfaces, but can ruin the fine details, sharp corners, and subtle contours that are typical of stereolithography. As a result of mechanical grinding, a lot of dust is also generated, so before starting processing, it is necessary to prepare the working area.
Note. The use of power tools requires full attention and the use of protective equipment.
The surface can be damaged very quickly without even realizing it, just by leaving the sander without moving.
When finished sanding the model, rinse it in soapy water to remove dust and debris and dry thoroughly before proceeding to the last step.
The primer helps the paint adhere to the surface and can indicate areas where additional sanding is needed or removal of traces of supports that you may have missed. The Universal Matte Gray Plastic Primer shows these spots exceptionally well. For best results, apply it to the surface in several thin coats. Sand critical areas and reapply a thin coat of primer. Repeat this process until the entire surface of the model is level.
Note. Use protective equipment during priming and painting, including a respirator to protect against paint fumes.
All-purpose matt gray primer for plastics is exceptionally good at showing fine details and helping to identify areas that need to be sanded down.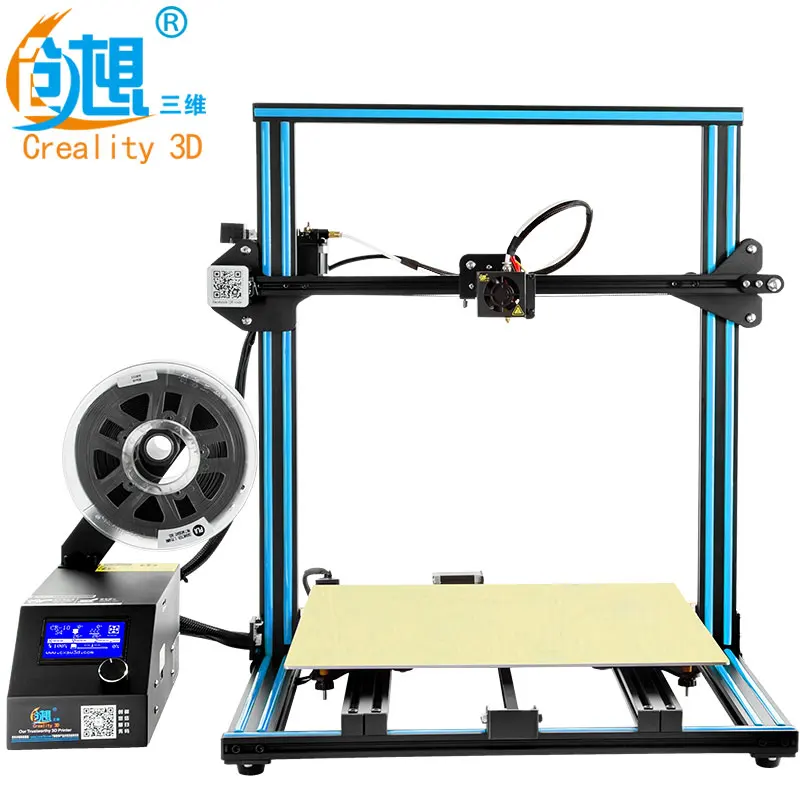
Find out more about sanding and priming in our detailed guide.
When painting with multiple colors, protect the model with a temporary coat. First, plan the order in which you will paint the model, depending on the color, transparency, and size of the area of a particular color. Start with small details so that fewer of them can be protected when painting with the main color. Apply painter's tape to the edges and corners. To quickly cover large areas, attach sheets of paper to them. Ribbon guides (laser cut) can also be useful for creating straight lines, circles and complex shapes.
When it comes to masking, figuring out the correct order is your first priority. In our case, the parts were first painted silver and the sections that would remain silver on the final part were then covered with painter's tape to hide them from the next l
painting. In our case, we first painted the parts silver and put masking tape on the areas that should remain silver in the finished model so that they do not get paint of a different color.
As with primer, several thin coats of paint should be applied for optimal results rather than one thick coat. Most spray paints will achieve the best color in warm and slightly damp conditions in the absence of wind. In this case, you must always follow the manufacturer's recommendations, which can be given on the paint container or in the technical documentation.
Consider the time the paint needs to dry: Allow layers to settle before applying the same color and allow the paint to dry completely before applying a new color.
The area where we applied masking tape is still silver.
Become an expert in painting 3D models with our detailed guide
Already wondering what your finished model will look like?
"Sorry sir, that R2-D2 over there is in excellent condition and inexpensive."
Formlabs optics designer Adrien Tanner created this R2-D2 model from 105 parts printed on a Formlabs stereolithographic 3D printer. It even has working electronics borrowed from the Form 2 printer - a galvanometer drive for sound reproduction, a cartridge dispenser for lamps, and a Z-axis drive for dome rotation.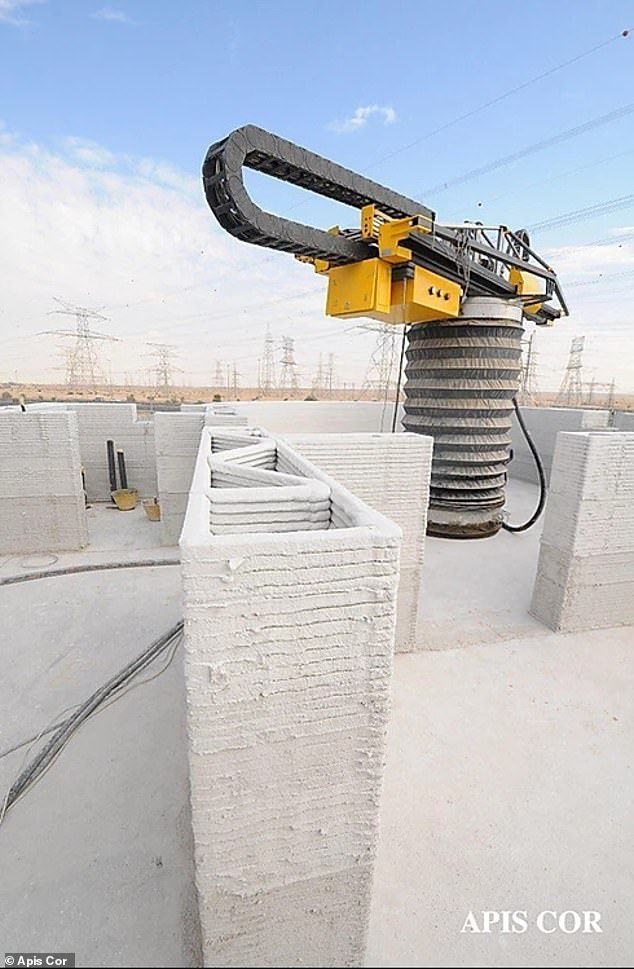 9The 0003
Form 3L is the first large-format 30 x 33.5 x 20 cm 3D printer for producing massive, industrial-quality models.
Reduce order processing time when outsourcing or manual work when assembling large-scale 3D models. Now you can print large 3D models in their entirety on the Form 3L, the first affordable large format SLA printer.
Want to see how stereolithographic parts work? Explore our resources to learn more about stereolithographic resins, or request a free sample to evaluate print quality for yourself.
Request a free print sample
17 Real 3D Printed Buildings - The Future on vc.ru
3D printing technologies are developing extremely fast and are being used in various areas of human life.
41 292 views
Recently, much attention has been paid to the printing of buildings, and printed houses are increasingly appearing in recent years in different countries of the world - in the USA, Saudi Arabia, Mexico, France, Russia, the United Arab Emirates and others.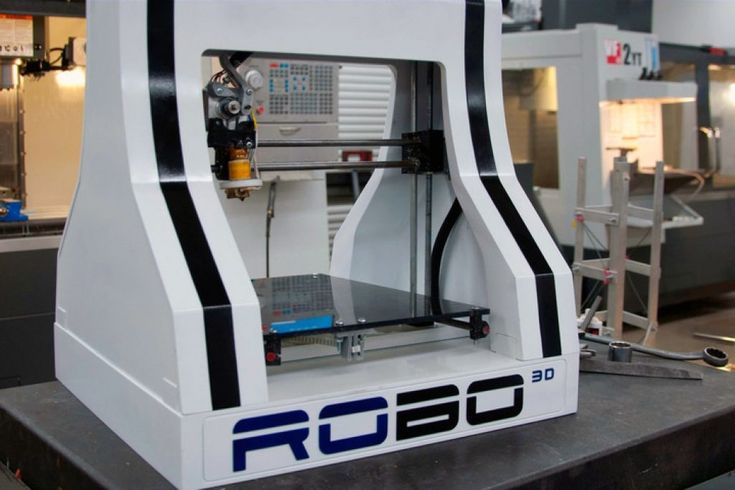 I have prepared a list of existing 3D printed buildings for 2020.
What is a 3D printer for construction.
Today's 3D construction printers differ in designs and wall construction methods. The most common printers are portal construction, two- and four-support construction, based on a manipulator arm or a circular design. The equipment allows you to create small architectural forms and elements of structures for their subsequent assembly on site, or allow you to print the entire building on the construction site. The height and dimensions of the printed building depend on the specifications of the printer being used.
How the printing process works.
The extruder extrudes a quick-hardening concrete mixture with various additives. Each subsequent layer is applied on top of the previous one, due to which a vertical structure is formed. The concrete layers below are thus compacted, thereby increasing their ability to withstand the next layers, and hence the entire weight of the structure.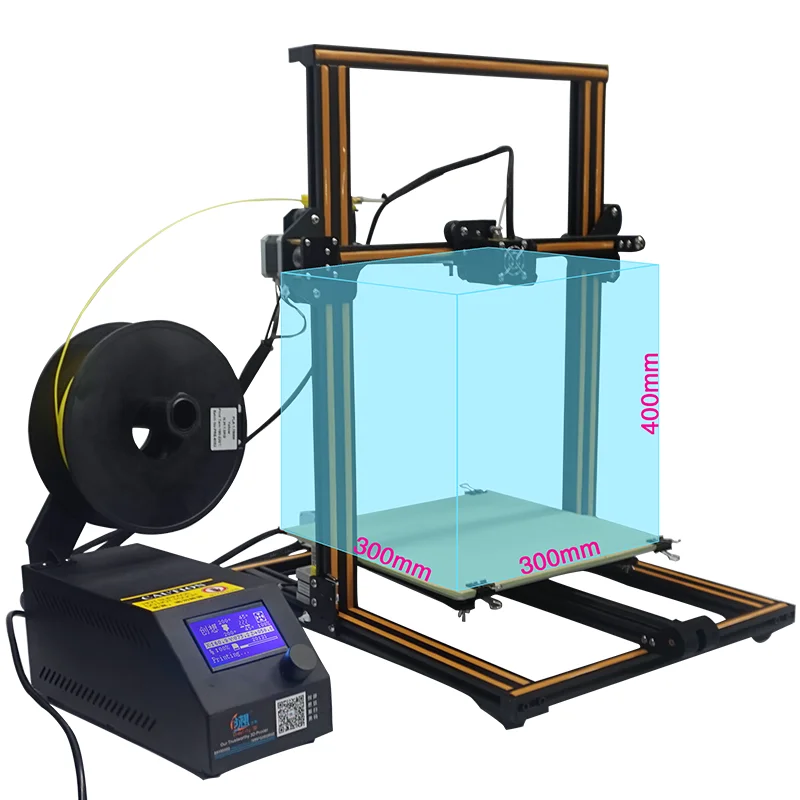 To strengthen the structure, it is reinforced, which can be both vertical and horizontal. The laying of the horizontal armored belt is carried out between the layers, the vertical reinforcement is installed after the composition has hardened, and then it is poured with concrete.
Advantages of 3D printing over other construction methods.
3D printer fabrication opens up great opportunities for construction and related industries. Practical applications have revealed the following advantages of additive manufacturing:
- It removes the limits from the imagination of designers and architects who design buildings, as it provides opportunities that are not available with the construction methods we are used to.
- High speed of construction of buildings and structures.
- Complete process automation.
- Low power equipment.
- Significant savings compared to classical construction methods by reducing labor and energy costs and accelerating construction time.
- The formation of waste building materials is completely eliminated.
- Minimization of human intervention in the construction process not only allows building in places inaccessible to people, but also eliminates the human factor in ordinary areas and reduces the likelihood of error.
1. June 2014. China. China's Shanghai WinSun Decoration Design Engineering Co has unveiled 3D printed houses at an industrial park in China's Jiangsu province. A total of ten houses were created, each of which cost a little more than three thousand pounds sterling. Over the next ten months, the technology improved and the company produced several different types of buildings for the exhibition, the tallest of which has five floors.
2. August 2014. USA. Company Totalkustom Andrey Rudenko printed the lock. The printing took a total of 2 months. The machine's printing speed was 50 cm in 8 hours. The main part of the castle, measuring 3m x 5m and 3.5m high, was printed as a single unit, and the towers were then printed separately.
3. July 2015. China. Chinese company Zhuoda assembled a two-story house in record time. The modular home, made up of six 3D printed modules, was assembled on site in less than 3 hours. Of course actually about 90% of the work was carried out in the company's workshops, and on the site they were only assembled into a single building.
4. September 2015. Philippines. Andrey Rudenko's company Totalkustom built apartments on the territory of a hotel in the Philippines, 10.5 mx 12.5 m in size and 3 meters high. The building was built using local materials - sand and volcanic ash.
5. May 2016. UAE. Chinese company Shanghai WinSun Decoration Design Engineering Co printed prefabricated structures for the subsequent assembly of an office building in Dubai. The area of a one-story building is about 250 square meters. m.
6. March 2017. Russia. Apis Cor introduced the first 37 sq. m.. The printed house has an interesting shape, but as the participants themselves say: this is just to show the flexibility of printing technology, the shape of the buildings can also be the usual square. Compared to other construction 3D printers, this printer is very compact (4×1.6×1.5 m), weighs 2 tons, and can be easily transported to the construction site.
7. October 2017. Russia. In Yaroslavl, Spetsavia presented the first residential building in Europe and the CIS, built using construction 3D printing technology. Construction of the house began in 2015. The box of the building was printed by a portal printer piece by piece and then assembled on the foundation in one month in December 2015. In the summer of 2017, the roof was completed and the bulk of the interior finishing work was carried out.
8. March 2018. France. Yhnova presented a five-room one-story house with an area of 95 square meters. For its construction, the engineers used a large manipulator, at the end of which an extruder for polyurethane foam is fixed. While working, he applied the foam in accordance with the 3D model of the building loaded into it. After applying the foam, the builders periodically filled the erected part with concrete, and also inserted the frames of doors and windows.
9. March 2018. USA. American Company Icon has built a prototype house in Texas to prove its technology works. The area of the building was 32 sq.m., printing was performed by a portal type 3D printer moving along rails installed on the site.
10. July 2018. Spain. Be More 3D printed a 24 m2 concrete building. For the construction, a two-support 3D printer was used, the width of which is 7 meters and the height is 5 meters.
11. September 2018. Denmark. 3D Printhuset printed a 50 square meter office in Nordhavn. The 3D printer used for printing is of the portal type and has a size of 8 x 8 x 6 meters. Print speed 2.5 meters / min. Each layer is 50-70 mm. The print material is concrete made largely from recycled tiles and sand.
12. October 2018. Italy. Company Crane Wasp using a three-bearing construction 3D printer erected a building in ten days. The house uses passive solar heating technology and natural ventilation. The composition for printing was created on the basis of waste from rice cultivation (it was 25% local soil (clay and sand), 40% straw, another 25% - from rice husks and 10% - from hydraulic lime).
November 13, 2018. Italy. Company Arup in collaboration with the architectural bureau CLS Architetti erected a building in 1 week with an area of 100 sq.m. The building was printed in segments with subsequent assembly at the construction site.
November 14, 2018. Saudi Arabia. The Dutch company CyBe Construction has completed the construction of a building with an area of 80 sq.m. It took about a week to 3D print the necessary elements, and a little more than a day to assemble. The walls are made up of 27 printed blocks, and the parapets needed another 21 blocks to make.
15. August 2019. USA. S-Squared 3D Printers (SQ3D) showed a prototype residential building that can be built from floor to roof in just twelve hours. The house has an area of 46 m2. During the printing process, a 3D printer of a two-support design was used.
16. October 2019. UAE. Apis Cor has announced the completion of the world's largest 3D printed building. Located in Dubai, the 650 sq. meters has a building height of 95 meters and entered the Guinness Book of Records as the largest building printed directly on the construction site.
17. December 2019. Mexico. US-based Icon has completed two residential buildings for New Story, a non-profit organization, in southeastern Mexico. The imprinted buildings have a flat roof, curved walls and an area of 46. 5 square meters
As can be seen from the impressive list of completed projects, progress in the field of construction 3D printing clearly does not stand still, new techniques are constantly being introduced, various materials are being created, including from recycled raw materials, and high-tech equipment is being developed. In a short period of time, the technology has attracted the interest of a large number of enterprises that are engaged in the development of equipment, special building mixtures, libraries of structural solutions for designing buildings for 3D printing, as well as the preparation of a legislative, regulatory and regulatory framework.
I am sure that in the future the entire construction process will be able to become fully automated, without human intervention, not only when printing foundations and walls, but also when printing ceilings and roofs, automatically install utilities, doors and windows. Also, perhaps in the future we will not be limited to printing houses of 2-3 floors, but will be able to move on to multi-storey construction.