3D print slicer
Powerful, easy-to-use 3D printing software
Trusted by millions of users, Ultimaker Cura is the world’s most popular 3D printing software. Prepare prints with a few clicks, integrate with CAD software for an easier workflow, or dive into custom settings for in-depth control.
Slicing features
At the heart of Ultimaker Cura is its powerful, open-source slicing engine, built through years of expert in-house development and user contributions.
Intent profiles print specific applications at the click of a button
Recommended profiles tested for thousands of hours ensure reliable results
‘Custom mode’ gives over 400 settings for granular control
Regular updates constantly improve features and printing experience
Integrated workflow
If you own a 3D printer, software matters. Get the most from your printer with software designed to suit your workflow.
Seamless integration with all Ultimaker products
CAD plugin integration with SolidWorks, Siemens NX, Autodesk Inventor, and more
Compatible file types: STL, OBJ, X3D, 3MF, BMP, GIF, JPG, PNG
Easy to use
Manufacturing doesn’t need to be complicated. We design our software so anyone can use it – both experienced or rookie 3D printer users.
Prepare your 3D model for print in minutes with recommended settings
Simply choose speed and quality settings, and you can start printing
Ultimaker Cura is free and open source software
Ultimaker Marketplace
Being open and collaborating is in our DNA. Now we bring this to the professional 3D printing market with the Ultimaker Marketplace.
Download material profiles from leading brands for your application
Avoid manual setup when using third-party materials
Download useful plugins to customize the print preparation experience, star-rated by our community
An Ultimaker Cura experience that keeps your infrastructure rock-solid
Ultimaker Cura Enterprise delivers stability and security with features that are tailor-made for businesses.
Utimaker Cura Enterprise can be deployed, configured, and managed with cross-platform systems distribution
Ultimaker Cura Enterprise receives two updates a year.
 These are thoroughly tested by our community and ensure the most stable desktop application. We support updates for 12 months after release (including security patches and bug fixes)
Each release of Ultimaker Cura Enterprise is independently scanned, tested, and analyzed for vulnerabilities. We publish a summary of that report and we commit to continuously improving security
Backup & sync your materials & plugins
Save projects to the Digital Library
Access 3D printing e-learning courses
Join a community of 40,000+ active users
3D printers that simply work
Our award-winning 3D printers are robust, reliable, and easy to use. They deliver quality parts time and again. Designed and tested to run 24/7, they allow you to achieve the results you need more quickly and easily.
Learn about our 3D printers
Software ready for Industry 4.0
Trusted by millions of users across 14 languages, Ultimaker Cura slices your model and integrates with any workflow through Marketplace plugins. Then scale production and digital distribution with Ultimaker Digital Factory.
Material choice like never before
Ultimaker offers the widest material choice on the market. Through our Material Alliance, choose the perfect filament for your application – from advanced polymers to carbon fiber composites.
Learn about our materials
Support dedicated to your success
Wherever you are in the world, Ultimaker support is close by. Our global network of service partners offer professional installation, training, and maintenance in your language and time zone.
Learn about our support
Software Features
The last 3D printing software you’ll ever need!
Simplify3D includes everything you need to work with your 3D printer. Model setup and plating, slicing and print file creation, pre-print simulations, customizable support structures, mesh analysis and repair, machine control and monitoring, and much more! With support for hundreds of 3D printers, Simplify3D is the last software you’ll ever need!
New! Simplify3D Version 4. 1 just released! See What's New
Amazing Features
Calibrated for Your 3D Printer
Support for Hundreds of Different 3D Printers
Simplify3D has partnered with 3D printing companies in over 30 countries to ensure the software is compatible with the latest 3D printing hardware. We have tested and optimized hundreds of different 3D printers so that you can achieve exceptional results right out-of-the-box!
Easily Switch Between Multiple Machines
Instead of learning a different software program for each 3D printer that you buy, you can now use the same application for all of your 3D printing hardware. The software can be quickly switched between different machine configurations, allowing you to control everything from one central application.
Simulate Your Prints in Advance
Incredibly Realistic Simulations
Simplify3D includes an incredibly realistic pre-print simulation that allows you to see the exact actions your 3D printer will perform before you start the print. You can literally watch an animation of the extruder as it lays down each individual line of plastic, giving you more insight than ever before!
Identify Issues In Advance
The simulation includes information about the exact speeds, sequences, and settings that are used for your print so that you can quickly verify these settings at a glance. Stop wasting time on failed prints and use the realistic simulation to spot potential issues before even turning on your 3D printer!
Award-Winning Support Structures
Improved Print Quality and Easy Break-Away Removal
Simplify3D is well-known for providing the best support structures available, allowing you to achieve the highest level of surface quality for even the most complex prints. Once the print is finished, the supports break-away easily without any special tools or post-processing.
Customize Your Supports for the Perfect Print
The software automatically suggests where support material should be added, but the ability to customize your supports is a fan favorite! Easily add more support in areas that may be prone to instability, or remove unnecessary supports for faster print times.
Expert Resources and Support
Resources to Improve Your Print Quality
Simplify3D customers have access to industry-leading resources that have been developed to help our customers improve their print quality. We’ve put decades worth of knowledge into these resources to make sure you can achieve the best print quality possible.
Experts Are Available to Help
If you encounter issues using your 3D printer, contact the 3D printing experts at Simplify3D who are here to help! Our support team has helped thousands of users improve their print quality. Buy with confidence knowing that our team is available if you run into any issues.
Universal Compatibility
Trusted by users worldwide in over 120 countries. Software translations in French, German, Italian, Japanese, Spanish and Portuguese.
Simplify3D has already been tested and optimized for hundreds of different 3D printers.
See Supported Printers
Windows, Mac, and Linux versions are available to support any desktop environment.
View Technical Specifications
Pro-Tools and Advanced Options
Built for High Performance
Simplify3D is known for its lightning-fast slicer that allows you to process incredibly complex models with ease. This allows you to spend more time perfecting your prints, and less time waiting on the software!
Variable Print Settings
Simplify3D has a unique ability that allows you to vary the slicing settings for different regions of your print. Optimize the settings for different features of your model or vary the mechanical properties of your part with only a few clicks!
Optimized for Multiple Extruders
The software contains many features that were specifically created to improve the print quality from multi-extruder printers. Quickly access these features using the built-in Dual Extrusion Wizard for simple setup.
Precision for Small Features
Innovative features allow you to print smaller shapes than previously possible on FFF/FDM printers. The software dynamically adjusts the amount of flow to print small, tapering, or sharp edges with better definition.
Multi-Part Customization
Simplify3D includes an unprecedented level of control for multi-part prints. Adjust the order of how each part is printed, optimize the settings used for different models, or print each object one-by-one to minimize travel movements.
Total Control, Improved Quality
If you’re looking to achieve the best print quality possible, the software includes many advanced tools to optimize your printer’s performance. Whether you’re seeing zits, strings, banding, or gaps, the software has the options you need!
Powerful Scripting Engine
The software includes a built-in scripting engine so that you can customize your print files. Insert custom commands at a specific layer, modify critical sequences of the print, or customize the command syntax for new applications.
Mesh Analysis and Repair
If you’ve ever worked with a problematic STL file, you know how frustrating that can be! Simplify3D includes built-in tools to help you identify and fix common mesh issues so that you can quickly get back to printing.
Machine Control and Monitoring
Simplify3D knows how to talk to your printer. The software includes a full machine interface, allowing you to manually control the 3D printer. You can also monitor the printer in real-time to make sure you know the latest status.
Start improving your print results today!
Buy Simplify3D Now - Risk Free!
Top 20 Free 3D Printing & 3D Printing Software
Looking for 3D printing software? We've rounded up the top 20 software tools for beginners and professionals alike. Most slicers are free.
What is a slicer? This is a program for preparing a digital model for printing. Models for 3D printing are usually distributed in STL files. To turn an STL file into G-code (a language that a 3D printer understands), a slicer program is required. It is called a slicer because it cuts (to slice - English) a 3D model into many flat two-dimensional layers, from which a 3D printer will add a physical object.
Which slicer should I choose? In this article, we will tell you which slicer is best for 3D printing for each stage of your work. Which one is better for preparing a 3D model for printing? But what if you need to create a 3D model from scratch? And if you are only taking the first steps in 3D?
Don't be afraid: we've answered all of these questions, including the required skill level for each program and where you can download it. The great thing is that most of these programs are completely free and open source.
- Cura
- CraftWare
- 123D Catch
- 3D Slash
- TinkerCAD
- 3DTin
- Sculptris
- ViewSTL
- Netfabb Basic
- Repetier
- FreeCAD
- SketchUp
- 3D Tool
- Meshfix
- Simplify3D
- Slic3r
- Blender
- MeshLab
- Meshmixer
- OctoPrint
#1: Cura
For beginners who need a slicer to prepare STL files for 3D printing
Cura is the default slicer software for all Ultimaker 3D printers, but can be used with most others , including RepRap, Makerbot, Printrbot, Lulzbot and Witbox.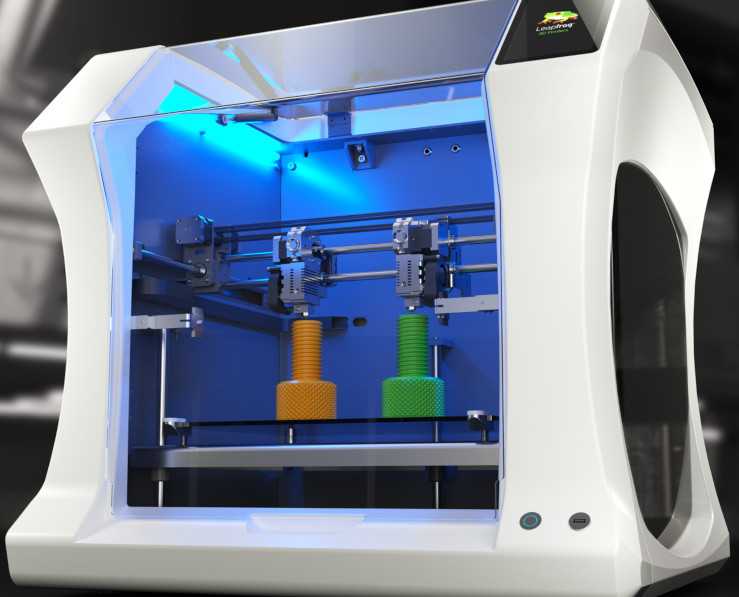 The program is completely open source, its capabilities can be extended using plugins.
This program is very easy to use and allows you to manage the most important 3D printing settings through a clear interface. Start in Basic mode to quickly get up to speed and change print quality settings. If finer control is required, switch to Expert mode.
Cura can also be used to directly control the printer, but then the printer and computer must be connected to each other.
Download: Cura
Price: Free
Systems: PC, Mac, Linux
#2: CraftWare
3D printers by the Hungarian startup CraftUnique to support their CraftBot crowdfunding machine. However, the program works with other printers.
Like Cura, CraftWare allows you to switch from "Easy" to "Expert" mode, depending on how confident you feel. It's a colorful app that features a visual G-code visualization with each function represented by a different color. But the most outstanding feature is the individual support service. As far as we know, only the paid program Simplify3D has this.
Please note, however, that this program is still in beta, so bugs may occur.
Download: CraftWare
Price: Free
Systems: PC, Mac
#3: 123D Catch
-systems, smartphones and tablets, which allows you to convert images of objects into a 3D model. Pictures can be taken with a smartphone/tablet or digital camera.
You need many photos of an object from different angles - the more the better - after which they will be compiled into a 3D model.
123D Catch is more of a fun app than a professional 3D printing tool, but after some tambourine dancing, you can get good results, especially when paired with an STL editor like MeshLab or Meshmixer.
Price: Free
Systems: PC, Android, iOS, Windows Phone
#4: 3D Slash
and surprisingly simple, and refreshingly new. With 3D Slash, you can design 3D models using your dice skills.
You can start with a large block and, like a virtual sculptor, remove small cups from it with tools such as a hammer or drill, or start from empty space and build a model from cubes and other shapes. You can paint with flowers or use template pictures.
Other features worth mentioning are tools for creating logos and 3D text. The Logo Wizard imports an image and creates a 3D model, while the Text Wizard allows you to enter and format text, and then turn it into 3D.
Recommended!
Download: 3dslash.net
Price: Free
Systems: PC, Mac, Linux, Browser
#5: TinkerCAD
- A computer-aided design (CAD) system for 3D printing, which is a good starting point for beginners. Since its capabilities are limited compared to Blender, FreeCAD and SketchUp, many users switch to more powerful tools after some time.
As in 3D Slash, here you can build models from basic shapes. At the same time, unlike 3D Slash, TinkerCAD allows you to create vector shapes in 2D and convert them into three-dimensional models.
Come in: Autodesk TinkerCAD
Price: Free
Systems: Browser
#6: 3DTin
For beginners who want to create 3D printable models
another easy and intuitive online tool choice for beginners in 3D modeling. All you need is a Chrome or Firefox browser with WebGL enabled.
Choose from a huge library of 3D shapes and add them to your sketch. All sketches are stored in the cloud, access to them is free if you honor the Creative Commons license. Everything can be exported to STL or OBJ formats.
Enter: 3DTin
Price: Free
Systems: Browser
#7: Sculptris
For beginners who want to create 3D printable models
clay. This is a fantastic 3D modeling program if figurines are your main task. For example, you can make a bust of your favorite video game or comic book character. Sculptris is completely free and bills itself as a stepping stone to the more complex (and expensive) ZBrush tool.
Download: Pixologic Sculptris
Price: Free
Systems: PC, Mac
#8: ViewSTL
For beginners who want to view STL files
ViewSTL is the easiest way to view STL files . Simply open a web page and drag the STL onto the dotted box.
The STL online viewer allows you to display the model in one of three views: flat shading (for a quick view), smooth shading (for a high-quality image), and wireframe.
Enter: ViewSTL
Price: Free
Systems: Browser
#9: Netfabb Basic
some nice features that allow you to analyze, "repair" and edit STL files before moving on to the model cutting stage.
A good choice if you need more than just a slicer and want to be able to quickly fix STL files without having to learn programs like MeshLab or Meshmixer.
Don't let the 'Basic' in the title fool you, Netfabb Basic is actually a very powerful 3D printing tool. It's "basic" only in the sense that it doesn't cost €1,500 like Netfabb Professional!
Download: netfabb. de
de
Price: Free
Systems: PC, Mac, Linux
No. 10: Repetier
For advanced to prepare STL files for 3D printing
9002 the next level of 3D printer slicer software, but if you want to stay open source, you should look into Repetier. It is the great grandfather of 3D printing software and a favorite of the RepRap community.To date, the program is moving by leaps and bounds from the level for beginners to advanced users. Packaged in an all-in-one configuration, it supports up to 16 extruders, multi-slicing via plug-ins, and virtually every fusing 3D printer on the market. Get ready to tinker!
What's more, Repetier Host works remotely via Repetier Server, so that the 3D printer can be controlled via a browser, tablet or smartphone.
Download: Repetier
Price: Free
Systems: PC, Mac, Linux
#11: FreeCAD
The program is a great option for developing your design skills. More technically, this parametric 3D modeling program allows you to easily change the project by rolling back through the history of the model and editing the parameters.
Download: freecadweb.org
Price: Free
Systems: PC, Mac, Linux
#12: SketchUp
For beginners who want to create 3D printable models
SketchUp is the perfect combination of simplicity and the perfect combination functionality, with a user-friendly interface and a relatively flat learning curve (i.e., as experience grows with the time spent), the ideal program for developing three-dimensional models.
The Make SketchUp version is free and will include everything you need for 3D modeling if you also download and install the free STL exporter. There is also a professional edition for architects, interior designers and engineers.
Download: sketchup.com
Price: Free (SketchUp Make), $695 (SketchUp Pro)
Systems: PC, Mac, Linux
#13: 3D-Tool Free Viewer
view and validate STL files
3D-Tool Free Viewer is a sophisticated tool that, among other things, allows you to check the structural integrity and printability of your file. With the Cross-Section function, for example, you can look at the model from the inside and check the wall thickness. Very useful if you want to check your STL file for killer errors before printing.
Download: 3D-Tool
Price: Free
Systems: PC
#14: Meshfix
your model for errors.
Price: Free
Systems: Browser
#15: Simplify3D
For professionals to prepare STL files for 3D printing print. A flexible algorithm checks the model for problems, fixes them, shows a preview of the printing process (ideal for identifying potential problems), and then slices it.
This slicer offers the best infill pattern options in the competition. For models that require supports, Simplify3D will create the appropriate structures on its own and give you full control over their placement. For printers with a dual extruder, when printing with different materials, the Dual Extrusion wizard will help, as a result of which, for example, it will be easier to remove the dissolving filament.
Simplify3D supports 90% of today's commercially available desktop 3D printers and is compatible with Marlin, Sprinter, Repetier, XYZprinting, FlashForge, Sailfish and MakerBot firmware. Simplify3D can also be used to directly control the printer, but then the printer and computer must be connected to each other.
Download: simplify3d.com
Price: $149
Systems: PC, Mac, Linux
#16: Slic3r
source code, which has a reputation as a carrier of super new functionality, which you will not find anywhere else. The current version of the program is able to show the model from multiple angles, so that the user gets a better preview experience.
There's also an incredible 3D honeycomb infill, the first of its kind that can extend over multiple layers rather than repeating itself like a stamp. This significantly increases the strength of the internal filling of the model and the final printout.
Another option is direct integration with Octoprint. Once the files on the user's desktop are sliced, they can be directly uploaded to Octoprint with one click.
Download: Slic3r
Price: Free
Systems: PC, Mac, Linux
#17: Blender
For professionals who want to create 3D printable models
Blender is a popular computer-aided design (CAD) system with a steep learning curve. Not at all the best choice for beginners, but what you need if you are quite experienced and need something more complex for modeling and printing.
In short, Blender is one of the most powerful tools out there. Its community is always ready to help, there are a lot of educational materials. It's also open source, so enthusiasts often write extensions to make it even better and more powerful.
Download: blender.org
Price: Free
Systems: PC, Mac, Linux
#18: MeshLab
For professionals to prepare STL files for 3D printing
MeshLab - advanced editor.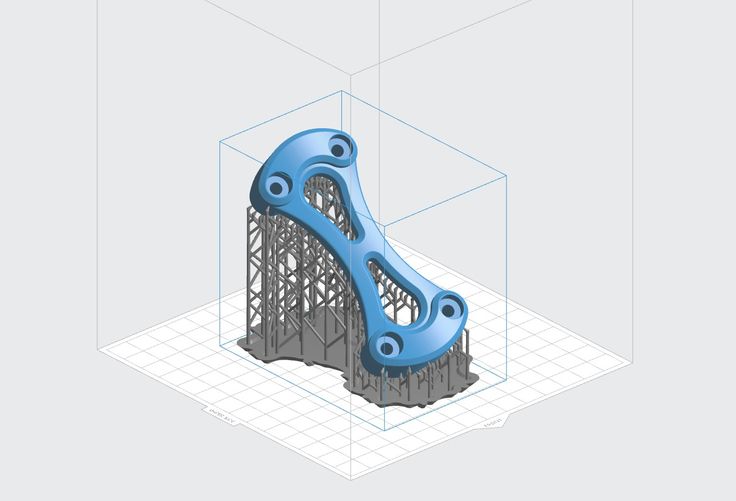 It allows you to remove parts of a 3D model, merge two models into one, patch holes. If you need a program to modify models for 3D printing or some kind of "repair" work, MeshLab is the right choice.
Price: Free
Systems: PC, Mac, Linux
#19: Meshmixer
For professionals to prepare STL files for 3D printing files. It's especially good for identifying potential problems and fixing them automatically. For example, it will show paper-thin walls that can lead to problems with 3D printing. Meshmixer is part of the Autodesk family of 3D printer software, so it should work well with tools like TinkerCAD.
Price: Free
Systems: PC, Mac
#20: OctoPrint
start, pause or interrupt 3D print jobs. Combined with Wi-Fi capable devices, it makes for a great monitor for remotely monitoring the 3D printing process.
Octoprint understands the G-codes of almost all 3D printers and slicers and includes a gCodeVisualizer to visualize this code before or during printing.
If you want to work away from your 3D printer and control it remotely, Octoprint is the best you can find.
Download: Octoprint.org
Price: Free
Systems: PC, Mac, Linux
Source
90,000 Ultimaker Cura, Simplify3D, IDEAMAKER, UP Studio, FlashPrintContent
84What is a slicer?
slice – slicer (English)
Slicer - a computer program that converts a virtual three-dimensional model layer by layer into machine code (G-code) allowing an additive automated device make a part from a specialized material.
Depending on the used technologies for layer-by-layer or surface formation of a part as a result of work slicer can be files containing data on how to form layers - vector lines, raster solids, paths, normals to surfaces and other defining or control data.
Theory of tilings (parquet) in in a simplified form it says - any surface can be paved (described) an infinite set of polygons without mutual overlaps and gaps. To paraphrase this statement, we can say that any model can be printed, cutting it into layers.
In this article we will look at several well-known slicer programs that allow you to prepare a model and print the part using the most common printing technology today with the abbreviation FDM - Simulation fused deposition modeling (FDM)
Slicers are divided into two main types: universal and specialized (corporate). Usually, specialized "sharpened" for one technology, brand or model line of printers. Universal have great variability in settings and designed for a wide range of compatible devices.
If you are only planning purchase of your 3D printer, then, among other things, ask the seller, which slicer is included in the package. Some manufacturers prefer use well-known universal slicers, supplementing them prepared specialized profiles of their equipment. Other invest in the development of their own software, as rule tightly "tied" to their equipment. While there are notable exceptions, e.g. developers and manufacturers of Raise3D printers your IdeaMaker, superbly prepared to work with native "equipment", allow set up for any compatible printer.
But if you have already bought a printer and it is supplied with a slicer, which means that the manufacturer filled the program with the necessary profiles and settings. So he tested them. and believes that you will appreciate the effort expended with your purchase. That is, he tried to make your work with the device the most comfortable and predictable.
Therefore, if you are a beginner user of new 3D equipment, do not rush to use third-party slicers, even if they are very popular. First, you first have to correctly “make friends” the printer with the program by prescribing a certain number of specific parameters, but it's not easy. Secondly, the acquired "pluses" may turn out to be unclaimed for your routine tasks. Thirdly, the basic principles of operation and the slicing results of all slicing programs are largely identical. Differences can be found in the quality of slicing, interfaces, number of available settings, the resource intensity of the program, the speed of its work and additional services, which, at times, are marketing ploys. Learn first to achieve acceptable printing results by regular means and only then start a comparative practice, being already confident in your equipment.
Other slicer segmentation in FDM printing is described by their accessibility to the user. They are paid and free. In FDM technology, the universal paid program remained, seems to be just Simplify3D.
Slicer structure
Insofar as 3D printing is a process, consisting of a large number of conditions necessary for fulfillment, then there are quite a few settings for them. And they are all multidirectional linear. Therefore, it is a big task to structure them conveniently and clearly, which is not easy to master. Developers try to build intuitively clear relationships between the main blocks of settings: printer, model, material, print profile, extruder(s), additional options, scripts and macros. They either tie the starting point to the material, then to the printer settings, then to model processing process (print profile) (Simplify, CURA), then to the settings extruder. Each slicer creator applies his own philosophy in this matter.
However, structurally everything slicers, in addition to the main computational core of the program responsible for mathematical calculations of geometric shapes and their conversion into machine language g-code controls have standard settings blocks. There are six in total.
1. Slicer program settings. They are determined by creative the potential of the developer, the presence of an adequate designer and a specialist in graphical interfaces in his team. Intuition is rare and subjective, therefore the statement "intuitive user-friendly interface of the program" lately makes potential users internally tense.
But, if we discard emotions, then rummaging through buttons, tabs and text menus, you can usually find: program language selection, some action and automation preferences processes, selection of necessary and sufficient settings, design colors, sequences upon completion of work, operations on data and settings, and also legal and marketing information blocks. For print quality, these The settings don't really matter. However, sometimes they allow the user not to "get lost in three pines" and correctly set the units of measurement, speed port connections, visualization of slicing results, model display and other useful options.
2. Your settings printer.
By this term we mean not only the "hardware" of the printer, but also its control electronics.
Software compatibility. Number of available settings varies depending on the professional "advancement" of each particular slicer.
Simplified or "Model" (regular) programs will allow you to select only the printer model. Universal "Pro" versions will require specify which G-code language the control board firmware understands. Sometimes even will allow you to set the values of movement speeds, accelerations, jerks (jerk), retracts (thread rollbacks) (For example, CURA v4.6) which will allow such a slicer more correctly calculate the time to complete the print.
Mechanics. Tell the slicer what he will have to manage. What kind of your printer mechanical movement system - delta, cartesian, hand robot, what are the dimensions of the print area, what margins from the edges are allowed,
Extruders. How many extruders does it have. What diameter is installed nozzle. What is the maximum temperature supported by the hotend design. What is the distance between the nozzles in the dual extruder version.
3. Material settings. Filament profile settings: filament diameter, melting point, density, manufacturer, price, etc.
4. Model settings. Zoom controls and positioning the model in the work area. Tools for "repair" and modifications of the loaded model.
5. Slicing settings. Tools and Options forming a part from a model. Auxiliary tools and controls objects - supports, walls, towers, rafts and service operations.
6. Additional services: command sequences - scripts, macros;
Consider in more detail how in some popular slicers implement the above ingredients to transformation of a three-dimensional model into a three-dimensional detail.
Ultimaker Cura
Official website: https://ultimaker.com/software/ultimaker-cura
Availability: Free
Platforms: Windows (64 bit), MacOS (64 bit), Linux (64 bit)
Language: Russian is.
Cura is one of the oldest universal slicers. The open source slicing patriarch, on par with Slic3r[1], conquered the minds of newly minted 3D printing enthusiasts at the dawn of the additive revolution. Built on console Cura Engine application - an improved version of the Skeinforge slicer written in C++ using Angusj's clipper system libraries (http://www. angusj.com/delphi/clipper.php).
[1] Slic3r born in 2011 within the RepRap Community and thanks to its high configurability has become the workhorse for 3D printing. First release of this guide was hosted by Lulzbot-Aleph Objects, Inc. and wrote it Gary Hodgson. It served as a platform for the implementation of several new (experimental) ideas that later became technological standards such as multiple extruders, brim, variable height layers, settings for each object, modifiers, post-processing scripts, macros G-code and more. Although it is based on volunteer efforts, Slic3r is still pushing the boundaries of 3D printing. ( https://github.com/slic3r/Slic3r )
The program was originally created by David Braam (David Braam), who was later hired by a manufacturer of 3D printers Ultimaker, for software development and maintenance collaboration security. Today, CURA is included with all branded printers. brand Ultimaker, but retained the ability to work with printers from other manufacturers, including homemade printers with compatible mechanics (RepRap printers).
According to the structural organization, this the program is a symbiosis of various mini applications - community projects with an open source code. A kind of album of "folk" creativity. List of used projects can be viewed by clicking Ultimaker Cura Help. them there over two dozen. Whether this is good or bad - we do not undertake to judge, but we note that among active users, Cura is the most popular among free slicers.
Cura's popularity is tied first of all, with the mass distribution of budget Chinese 3D printers, most manufacturers who took advantage of the opportunity to use it for free. So or otherwise, but Cura initially captivates with the ease of use of basic templates with more or less predictable print result, but at the same time has on board a huge number of options for fine-tuning the process of translating the model into detail. So much so that some novice users don't satisfied with template solutions, having seen the breadth of position variability and having spent a couple of kilograms of plastic on their research, they “run” to where everything slightly faster. For example, in Simplify3D.
Without delving into the wilds of the great many customization options, and there are so many of them that I even had to organize the "Search" line to quickly jump to the desired menu bar, consider this slicer in terms of reasonable operation, no claim to a comprehensive review.
The simplicity of the interface and the availability of settings are perhaps the most important advantage Ultimaker CURA dthcbb 4.6.1
Ultimaker Cura interface deliberately concise and claims a high degree of usability (usability - ease of use). Regular set printer profiles strikes the imagination with its endless variety. It seems that the developers have managed to collect the profiles of all 3D printers in the world from A to Z in a single set. And besides, we left you the opportunity to add your own, "custom" option.
If you didn't find your 3D printer in this list, then…
… set it up yourself.
After selection or setting parameters of your own printer, which we will briefly discuss a little later, you can choose from a fairly rich, but still not complete list materials the one with which you need to print your model.
Many well-known manufacturers can be found in the list of typical materials plastic.
But if you don't find what you need, you can create your own.
And adjust its working parameters.
It is important to note that the values nozzle and table temperature when setting up CURA printing, by default, takes from material settings, although they can be changed in the advanced options if desired Custom mode in the Print Settings panel at the top right of the screen.
And another very important note, which will save you a lot of time. You will not be able to select material with desired filament thickness until the Extruser1 tab of the Settings -> Printers menu (how to get there is another story) you don't set the correct number, which is a filter to the list of materials! For example, if you put 3, then only materials with a thread thickness of 2. 85 mm will be available to you, and if you put value 2, then you can choose only filaments 1.74-1.75 mm thick.
Such "inconsistencies" in the Cura version 4.6.1 can pop up a lot. Perhaps not all participants in the "folk art" correctly coordinate with each other, or maybe the developers decided in this way way to "simplify" the choice of material.
But since we mentioned the "custom" printer settings, then let's see what they look like.
There are several ways to get to the printer settings. This is one of them.
The main settings of your "custom" printer usually do not cause questions.
The basic settings of the extruder are also easy.
Let's return to the print settings a little later, but for now let's import and place the part in the working volume of the Ultimaker Cura slicer.
Pressing the button with the image open folder in the upper left corner of the screen and selecting the desired model in stl format we place the model on the table. Now we need to position it correctly. For To do this, you can use the tools located on the left in the center of the screen.
Briefly: Linear movements along the base axes, various scaling options, rotations and rotations models, mirroring, model parameters and supports blocker.
Almost every button has a submenu, and right-clicking the mouse will related settings.
Describe all tree and other cross-links of settings in this article, we will not intentionally. it a topic for a lot of material and, probably, the instructions for the program are better with us write fails. For important tips, visit official developer page https://support.ultimaker.com/hc/en-us/sections/360003548599-Using-Ultimaker-Cura
We will use the extreme on the right with the button in the rotation tool and, having selected the desired plane of the model, let's put it on the table.
We import the model in one of the simple ways - click on the "folder" at the top on the left
Then we do "one" . ..
..
... we do "two" ...
... and we do "three".
It remains to prepare the print profile.
Perform slicing and check if it is correct.
Send file with G-code to connected printer or write it to a flash drive.
So moving the blue dot slider to the left or right on the "Print Options" tab, we choose from standard slicer profiles the desired print quality, for example Fine, with a layer of 0.1 mm and infill of 20%. We add the support prescribed by default in the profile, and turn on additional "sticking" to the table by ticking the appropriate boxes menu.
Press the "Slicing into layers" button in the lower right corner screen.
After slicing is completed, the program can show you preview results if you click on the button "preview" at the bottom right.
On the lower information screen indicates the weight of the part, the length of the spent plastic and the approximate time printing, the accuracy of which depends on the correct settings mechanical movements of the moving parts of the printer. As a rule, it is not matches the actual print time if you are printing to a "custom" printer and did not specify the exact firmware data in the extended version of the print settings printer. In the case of using the factory profile of the 3D printer, this time calculated more correctly.
Check the results of the slicer by moving the “sliders” right and bottom for layer-by-layer and line-by-line viewing of model layers.
By moving the right slider, control the correctness of the formation layers and "hanging" parts of the model mentally representing the process of forming the part.
By moving the lower slider, you can check the movement of the extruder nozzle along layer.
Well, you checked everything and if your printer is connected to your computer and ready to print, then feel free to press the button "Seal". If you prefer offline printing, then by clicking on the button "Save to file" you save the print file with G-code to portable media in CFFFP_filename. gcode format.
This is a simplified algorithm of work with Ultimaker Cura slicer. About its advanced settings, there are many educational and informational materials on the Internet both on official resources and in user communities this truly folk slicer.
In short, to to use advanced printing options, you must first customize the visualization of the settings you need. This is done in the menu Settings -> Options. Each of the more than 200 options can be ticked separately, and you can select several at once using presets, which, in their queue are selected from the drop-down menu in the upper right corner of the window.
Here, as they say, without comments. "Seek and you shall find." This slicer opens not just big, but huge scope for experimentation. It is interesting to try new materials with him, complex forms of printing, although it has up to for some time it turned out worse than Simplify3D.
Own slicer settings Ultimaker Cura compared to advanced print profile settings looks like obscenely small.
Cura is average in terms of performance. On the modern office car, he moves confidently enough, but the slicing of complex models takes a lot of time and does not always end in success. Rotation and viewing the result of layer separation is normal and informative.
Ultimaker Cura 4.6.1 takes about 300 memory Mb. The amount of disk space occupied increases with each new version. Last The chicken "gobbled up" about 600 "mega". And she continues to "swell".
You can download the program on its official website
It should be noted that many manufacturers tried to adapt Cura to their models by cutting off part functionality and simplifying settings. However, for some reason, the matter is far from moved. For example, Cura Wanhao Edition, having undergone several iterations, quietly faded into time a couple of years ago.
To sum up this brief review of the popular slicer Ultimaker Cura can be recommended for beginners users to try first to work with this program on its basic settings. If the result is satisfactory, it makes sense to start immerse yourself in a deep study of its hidden possibilities. If they turn out redundant, then you should think about using simpler software. Try not in a hurry.
Simplify3D
Official website: https://www.simplify3d.com/
Paid ($149).
Platforms: Windows (32.64 bit), MacOS X (10.7 and later), Linux (Ubuntu (recommended Ubuntu 14.04 LTS and later), Debian, and Fedora (32.64 bit)
Language: English, Russian no.
Simplify3D universal paid personal slicer - one license per machine and a year of free updates. He is one of few professional slicers with a long history, combining relative ease of use, powerful and fast mathematical processor, a wide range of auxiliary settings and tools, stable work and, most importantly, a very high-quality result.
Has a large list on board profiles of various models of 3D printers, which helps to set the "Automated configuration assistant. However, for this you need to have access to the Internet and be the registered license holder.
Required process settings slicing can always be downloaded from the official website or customized independently creating your own process profile.
But at the same time allows create your own equipment template for your unique settings with support for a large number of kinematics options, including delta.
Simplify3D is located in Cincinnati, Ohio (USA), in the building where perhaps the most a large collection of various 3D printers in the world. According to employees companies, they work daily with new generation equipment, new materials and advanced technologies to improve their product and adapting it to the latest promising developments. All new functional features are instantly tested using our own 3D database equipment. Since its founding in 2013, Simplify3D has become the world's leading commercial 3D printing software provider, with clients in more than 145 countries. The mission of the company, according to its employees, is to empower innovation with intuitive software tools to unleash the power of additive manufacturing.
What are the possibilities of this not cheap slicer? Let's try to briefly list them, although it is not easy. chief The advantage of Simplify3D, perhaps, should be considered a large variability of settings, based on the creation of profiles or templates for different processes.
At the same time, it should be noted:
- convenient informative interface
- simplified and extended settings modes
- high speed of the slicing process even on large and complex models.
- a large set of customizable parameters for the organization correct printing of complex objects
- very readable, convenient, informative and fast slicing preview
- "smart" and editable in form and content support (no trees)
- creation of multi-process tasks with different settings for several models
- integrated treatment tool for models with wide functions.
- multi-extruder support
- control panel and control of connected printer.
- firmware configurator with support for large number of formats
- a large number of filling patterns
Here is a partial list of tools that allow the user to quickly and efficiently prepare and print a model of any complexity.
Powerful online support owners of Simplisy3D in the form of reference materials of various format on the official website of the developer will allow both beginners and experienced the user to quickly master the settings and learn how to use all the widest program possibilities.
Lots of video tutorials about the main functions of Simplify3D allows you to quickly go through the learning process and in to take full advantage of its wide range of possibilities.
And the library of materials will remove many questions about the selection the right filament for your application.
The program is easy to install and works quickly on any computers and even on laptops and tablets. FROM some restrictions for the latest in complexity of printed models.
Simplify3D doesn't have a welcome window and gets straight to the point.
After starting the program, you will prompted to launch the "Configuration Assistant" where you will burn to select a profile the model of 3D printer you need.
then you can form it yourself by selecting Tool -> Options from the menu. There you can also configure the slicer itself, units of measurement, automated operations on the model, visualization modes and network connection parameters. At you will even be able to visualize your printer's desktop if at hand there is his stl model.
After completing the settings printer and slicer, you can proceed to import the model. Just worth it first Familiarize yourself with the tools and interface menu.
More information about the initial launch of the program and its use can be found on the official website developer and on the Internet.
Our task is to carry out the first "speculative" printing entry level.
Loading a model, or several models by clicking on the "Import" button in the upper left window. Simplify3D supports stl, obj, 3mf formats.
Center and Arrange button will position your model or models in the center of the working plane and install on the surface of the table. Move or rotate, mirror and scale as well and produce other standard manipulations can be done using the top four buttons in the right panel tools.
If treatment is needed models can run the procedures listed in the drop-down list of the top repair menu. Automatic analysis of the quality of the model is not yet provided.
The next step is to create a process or several processes, printing, for all, or for each separately, models. Press the "Add" button in the lower left window of the program.
A window opens that in fact, it is the main window of the main settings necessary for preparation models for printing. Not counting the supports, about them a little later.
Having named this process, you can choose previously prepared or downloaded from the site process profiles printing, and by pressing the OK button, proceed to the slicing process. If finished profile If you don't have it, then you need to make it. The Simplify3D website has detailed recommendations, both in text and video formats, on how to do. But in a nutshell, without delving into the advanced options of options, the procedure can be described as follows.
Set up the extruder in the Extruder tab by assigning it serial number, indicating the diameter of the nozzle, the length and speed of the retract.
Adjust the layer thickness in the tab "Layer" (as a rule, this is the product of the diameter of the nozzle by its half or its two-thirds), the number of upper and lower solid walls, and the number perimeters (not in mm, but in nozzle diameters)
In the "Additions" tab, select method of adhesion of the first layer to the table. You can use a raft, skirt or border with the corresponding settings.
In the "Infill" tab, organize the shape and percentage of filling of the internal volume of the model. Great variability settings gives a wide scope for experiments aimed at achieving best quality.
Support tab needs a little more attention. In this window, you can decide whether to use support and configure their basic parameters, which will be tied to the profile and activated each time it is used again. But, for accurate sampling custom support settings it is better to use the tool on the right panels. About him later.
In the "Temperature" tab degrees Celsius are prescribed for the table and extruder (s), moreover, with reference to layers, if necessary. However, sometimes, in order to binding, you must first perform test slicing and then, back in the print profile settings, add or change temperature modes. Not very convenient, but very useful.
"Cooling" describes the modes part cooling. They are also fashionable to "bind" to the layers if necessary. As well as configure the "sharp start" (Blip fan to full power ...) of the fan so as not to to allow it to "stick" at low percentages of revolutions.
Description of G-code option settings quite specific and a novice user should focus on default settings or use profile settings. Although useful take the time to study this topic in developer tutorials or in Internet networks.
The "Scripts" tab allows you to write typical machine operations using standardized commands G-code of your 3D printer when starting and finishing printing, changing tools (extruder), retract and transition to another layer.
print areas in the "Speed" tab are defined as a percentage of the default base speed "Default Printing Speed. They can be assigned to external perimeters, internal filling, supports and movement in the XY and Z planes.
Other tab - Other allows you to set the printing parameters for bridges, diameter and filament characteristics filament, and data for changing the extruder (tool).
Detailed description of specific settings in the “Advanced” tab in this article we will omit, since for the trial printing they are not critical.
all of the above settings, you save our new profile by clicking on "OK". You can always return to editing this profile by clicking on the "Edit Process Setting" button.
Before proceeding to the next stage, remember the organization of "custom" supports that we mentioned previously. It looks like this.
Supports settings quite are simple and include definition of threshold angle and segment thickness support, which, when sliced, will be converted into certain by the support structure user. With buttons you can generate support automatically, add and delete them, import and export and clean up completely. And the result is this.
Now you can start slicing our models. Select the process and click "Prepare to print". Slicing process takes some time, but as a result the program will automatically show preview of the result.
colored with spectral colors.
"Show in Preview" can be customized visibility of various parts of the model, tool, displacements, supports, paths tool, retracts and other parameters of part formation during printing.
you can write the finished G-code file to portable media by clicking the "Save" button Toolpaths to Disk" or send it to the printer - "Begin Printing over USB" using the button above.
Separate “Control Panel for machine" - "Machine Control Panel", allows not only to control and control the units and components of your printer, but also make up a print queue from finished documents by adding and removing them from the G-code library.
Temperature reports for your printer components in on-line mode.
Printer controls and tools.
That's probably all that is possible describe in a short review of this popular Simplify3d slicer. A lot more Information can be found on its official website. Even if you're not ready yet pay 149dollars for the purchase of this wonderful program, then learn it you can use it completely free.
Although the previously popular principle use of the Trial version of the program was replaced by a two-week return of paid funds to you, nothing will stop you from watching video tutorials and reading educational articles. Perhaps this is just the beginning.
Here are just a few useful official links, following which you will collect a large number of useful information about the possibilities and nuances of working with the Simplify3D slicer:
https://www.simplify3d.com/support/articles/#level-1-:-beginner
3D printing - G-code tutorial, Working with file types, Perfecting the first layer, Importing and managing your models.
https://www.simplify3d.com/support/articles/#level-2-:-intermediate
Different settings for different areas of the model, rafts, skirts and brim! Beginner's guide for automatic site leveling, revealing and fixing common mesh errors, adding and modifying structures support.
https://www.simplify3d.com/support/articles/#level-3-:-advanced
parts, printing with multiple extruders.
IdeaMaker
Official site: https://www.raise3d.com/
Availability: Free.
Platforms: Windows (32.64 bit), MacOS X (10.7 and later), Linux (Ubuntu (recommended Ubuntu 14.04 LTS and later), Debian, and Fedora (32.64 bit)
Language: Russian yes.
Having started his life with the creation of the slicer was originally a Chinese, and now a global company, Raise3D steadily holds the highest places in the ratings of professional equipment for 3D printing. The founders of the company initially laid everything in its functionality the necessary characteristics of reliable high-quality trouble-free software, with powerful computing capabilities, with a flexible adaptive interface and with high degree of integration possibilities.
As if foreseeing the future development of the 3D industry and its gradual shift to the services of a global cloud space in symbiosis with automated mini-factories based on variety of 3D technologies, RAISE3D developers and designers paid great attention to constructive network solutions, work autonomy, process control, and storage of the necessary for the operation of information equipment.
In our slicer digest we are in First of all, let's pay attention to the "basic element" of the complex software software - the ideaMaker slicer, which in its May 2020 update made a breakthrough in the integration of the technological process into the "select and print" system, simplifying the tasks of remote preparation of the model, material selection, print settings and receiving finished model.
This is especially noticeable in the new extremely informative welcome window, where the user immediately it becomes possible to integrate your work into the cloud space, control its execution remotely, even on a mobile phone, and use the services for the selection of ready-made profiles for slicing using a wide range of materials.
opportunities became very convenient from the very first steps, without pressing extra buttons and without going through the menus, go to "Printer Setup" and thread, "Manage profiles", selecting "Preferences". Of course you can still download recent files and select the items of the standard "Start" menu. And if there is free time, then watch news, current videos, find out what's new and refresh the user manual.
Original program was developed for the Raise3D printer line with wide functionality up to built-in webcam for print control. It is based on a "64-bit engine" with “a good processor”, as ideaMaker developers succinctly report. However, the creators programs have enabled users to create and use custom printer settings, which made it even more attractive. Having gone through several major updates, this slicer could adequately compete with the generally recognized "colleagues" Cura and Simplify3D, if only no restrictions on the compatibility of kinematics. It can only support Ultimaker type print head movement mechanism and extruder type "rocker" up to 2 hotends.
The program is well Russified, although in some places there are questions about the translation, but something was not in previous versions completely translated. We hope that the new version of these shortcomings is still eliminated.
For all other aspects of evaluation quality and convenience ideaMaker will give odds to many hyped competitors. Apart from powerful engine on board the slicer there is an exhaustive set of utilities for solving almost any problems of preparing models of any complexity for printing and its successful completion.
There is an excellent repair of models. When loading a damaged stl file, an alarm will appear in the project folder. BUT in the lower right corner, an information box will give details.
By clicking on the "Fix" button with the image of a wrench with a plus in the upper panel of tools you run "treatment" process.
If ideaMaker (Implementer/implementer of ideas) coped with his task, then in the lower left A green checkbox and a detailed report will appear in the info window.
Slicer settings algorithm somewhat different from their counterparts. In addition to choosing a ready-made template printer settings or create a profile of your own, you need to configure or select the "Thread Settings" template, which in fact is an analogue of the settings material. And then bind these templates to each of the active extruders.
Then set up, or choose from predefined, print profiles.
Then select model or group models (this option requires a separate large description) and start slicing, by clicking on the appropriate button.
in the window that opens, you can immediately send the result for printing to a printer or to "cloud". Or go to the layered view by clicking the layers button.
After completing the control review result, you can return to editing models by selecting right button under the top toolbar called "Exit slicing" or start a new slicing by changing the print setup profiles in the Select Profile window that opens. Either download the print file to the printer or to cloud, or save it on a local disk (removable media).
This is, in general, not complicated how to prepare a model for printing in the ideaMaker slicer. Of course, the use of this program is most suitable for printer owners Raise3d, for example the most popular Raise3D model Pro2 or more modest models - Raise3D E2. But to a greater extent it will be appreciated by entrepreneurs working in the industry 3D print professionally. Especially in system-integrated manufacturing structures.
Although in case of compatibility mechanical parameters of your printer with ideaMaker capabilities this slicer will become, perhaps, the most balanced solution in the organization of printed process for both one and several of your printers, given it free availability. And the prospects for further development will be very are tempting, because you will get support for up to 2 extruders, separation of the model by a plane in parts for separate printing, adaptive layers and smart editable support, support for sequential printing of multiple parts and many more useful and reliable service options without use of additional third-party programs.
In general, ideaMaker has such branched, wide and deep settings infrastructure, which for detailed their descriptions and possibilities of use would require publishing a solid book.
Detailed instructions for using the ideaMaker slicer can be easy to find on the internet. For example here https://cvetmir3d.ru/blog/3d-obzory/slyser_raise3d_ideamaker/
Or here https://www.youtube.com/watch?v=F5GIP2a9ef8
UP Studio
Official site: https://www.tiertime.com/
Availability: Free.
Platforms: Windows 7 and above (32.64 bit), MacOS 10.10, (iPhone iOS, iPad iOS)
Language: Russian yes.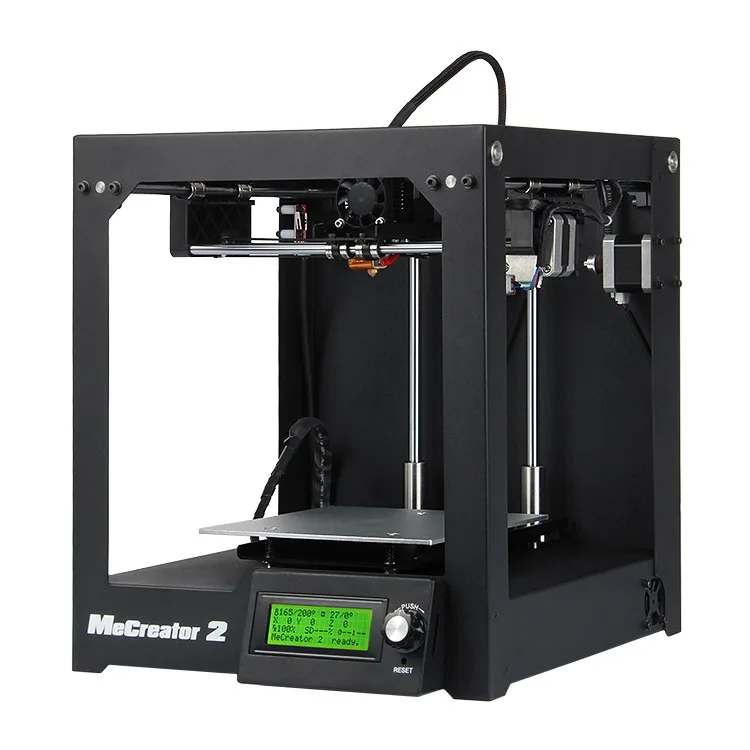
Tiertime 3D printer lineup as of May 2020: X5, UP300, UP mini 2 ES, UP Box+, UP Plus 2, UP mini 2, Cetus3D
time, the tendency of many manufacturers of 3D printers to shift emphasis from technical aspects of the equipment supplied for sale for convenience and ease of use.
Possibly because technical the advantages of "iron" have almost exhausted their uniqueness in terms of marketing appeal, and the creation of a certain user ecosystem. What is meant by the word "ecosystem"? it when your ability to access, store and prepare models for printing are so wide that they do not tie you to the equipment in time and space.
According to the developers of such complex solutions, you at any time, being in any place where there is Internet access, you can receive, prepare and send to print on any of the printers available to you the model you need. The truth rises further a question to which the developers do not give a direct answer. How to install the correct filament and remove the part after printing? Although, perhaps, we ourselves can answer. Printers (!) with different materials should always be ready to print, and you can get to the finished model while he is typing, or get it by mail or courier. And then a picture of the future opens up to us, where ads for 3D printing mini-factories will become as commonplace as delivery services pizza.
For such future owners 3D production and there is a struggle among manufacturers of volumetric printing equipment. One of which, of course, is Tiertime.
The range of printers of this The company is distinguished by stylish industrial design and comprehensive technical solutions where complex unique parts of the printer coexist with 3D printed details. And I must say, it seems to us that this is a good and correct rational trend. Not everything is certain, of course. Many knots and details cause confusion and doubt about their reliability and durability. Nonetheless, the desire to minimize operator participation in print settings and simplify the process of manufacturing a part from a model is clearly seen in all models of this companies.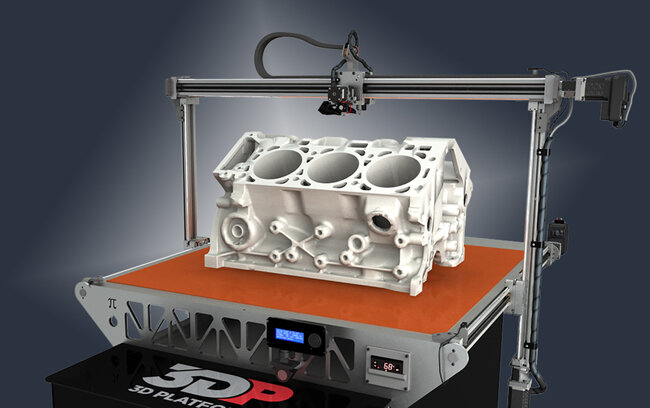 Probably, this is a conscious policy of the developer.
As already mentioned, the Up Studio slicer is purely corporate program developed by Tiertime. It is even more than just a slicer and is a key link among other software software that ensures the functioning of the "ecosystem". and interface Slicer, for all its extravagance, is convenient, understandable and functional.
If you are not yet the owner one of the Tiertime printers or it is not connected to your computer, then you won't even be able to load the model. That is, you can download something, but nothing you won't see it on the screen.
After starting UP Studio, you will first need to register yourself and your printer. If you have done this before, then log in your account.
service line.
In addition to model information connected printer and adding a new one, temperature conditions of active zones, and connection status there are 4 buttons, one of which is "Login", we have already seen in previous window. The second button in the form of a gear is “Settings (parameters)”, opens the program settings window.
It prompts you to choose one of nine interface languages, including Russian. You can select or add Printer. Moreover, it is added, including by searching the Wi-Fi network. Present the ability to check the relevance of the program version and, if necessary, update it. You can also clear the cache with a list of downloaded models and configure networks over different protocols and ports.
Also see the program license.
Third shirt button you call up the interface design menu with a "rich" choice of options program coloring.
the top information field in the form of a scroll with a pen allows you to quickly create and send a request for technical support.
Tools menu in left column consists of four sections (buttons). The "About us" button opens a screen with a general information from the manufacturer. The "Account" button duplicates the top menu and offers to register or sign in. The "Help" button opens a window with links to tutorials and informational video posted on the manufacturer's Youtube channel.
The most functional button in this list, this is the "UP" button. By clicking it, you get access to the functionality slicer. To exit this mode, you need to click on the "Home" button at the top left columns.
Let's take a closer look at this screen. The Plus button allows you to add objects that you want to print. The "Print" button opens a menu of print settings and printer options, in including in advanced mode, if you click on the double arrows in the right the top menu of the window.
Built into Up Studio functionality multiple CAD tools for creative development of users of the printer model line Tiertime.
You can use the "Add" (+) tool not only to import ready-made stl file, but also create, place and modify several "primitives": a cube, a ball, a cylinder, prisms of various shapes, a cone, a pyramid, a torus, a washer, star and text.
Plus, Up Studio is, perhaps the only slicer that integrates a transform tool 2D bitmap into 3d model.
After uploading an image, you can add thickness to it and then print.
interface tool in the form of a circular menu borrowed from programs 3D modeling from the early days of 3D Max and Maya. Looks very organic, convenient, functional and pleasant to work with.
Imported part placement in the working volume of the printer is performed by standard displacement tools and modifications located on the circular menu and with the help of the "right click" of the mouse.
The print setup menu has both a simplified standard view, as well as advanced settings.
After slicing, you can check it results by moving the slider at the bottom of the screen. Printing time and weight are also indicated there. material.
click there are many advanced options for customization and printing as simple as and "heavy" models with a complex organization of supports.
The entire Support Editor is used to form them allowing you to enable or disable the visualization of each support individually, adjust the “activation” angle for it, set the area of its coverage, set "roof density", etc.
From additional, but almost standard options printing, you can mark the printing of parts with different parameters in one printed process.
Complex organization of the 9-point determination process print dimensions and desktop alignment Martix requires a separate menu.
Of course, make a complete an overview of all the possibilities of UP Studio and cloud applications in our modest slicer digest is not possible. For those who sincerely became interested in Tiertime products, both printers and services, it remains to watch-read the video and the "manual" - instructions. (https://www.youtube.com/embed/gK9F9U1SoSQ).
Details on youtube channel https://www. youtube.com/channel/UC2DpWPWJfSNpcov5GvtYzPQ
FlashPrint
Official website: https://www.flashforge.com/
Availability: Free.
Platforms: Windows (32.64 bit), MacOS, Linux (32.64 bit)
Language: Russian is.
Zhejiang Flashforge 3D Technology Co., Ltd was established in 2011 in China and is one of the largest manufacturers of 3D printers today. The models of this company are in the top ten on the 3DHUBS website. According to many enthusiasts, the printers of this company have excellent reliability with excellent value for money.
Flashprint Slicer start window
But if you don't, at least one connected via Wi-Fi network or locally, magnificent in its simplicity and reliability of the printer from Flashforge, you can not spend time to study the manual and interface of the Flashprint slicer. It is designed to work only with model range of this company and does not know the word "flash drive".
Toolbar buttons, "Settings" and "Printer Information" in the "Tools" menu in the absence of connected printer call the same window - "Connect to printer".
Printer communication window.
The logic behind this "Corporate" slicer is obscenely simple. You are encouraged to do everything in certain sequence step by step. Opened a slicer - specify which one you have a printer and connect it to the program, and if necessary, update it firmware. Without this, all your actions will be considered only preparatory works, the stages of which, however, you can save on disk in unique slicer formats.
Some printer models do not support network discovery.
Then load the model. None you cannot make other presets without a model. Next slicer automatically checks the model for errors and, if any, treat her with your consent. It's nice if it heals correctly. Then you can put the model on the table as you like using standard tools manipulations. There is a handy option in the "Rotate" tool - "Surface on platform" will put the selected plane on the table by double-clicking on the desired polygon.
There is a function of auto -placement of the model in the working volume of
Model Auto repair also there are
and operates quickly
Function “The surface on the platform” in action
as soon as the model is correctly correct fit in the working volume, the "Support" and "Print" buttons are activated in middle of the top of the screen. This means that the slicer has allowed you to move. farther.
By clicking on "support" you get 4 buttons on the top and 3 on the left with the following functionality: parameter settings, automatic placement, adding and removing support, model selection, erasing all supports and returning to the previous menu. Parameters for two types supports - tree-like and linear - are concise, like the whole program. We will not list - look at the screenshots below.
Automatic creation of tree supports that can be edit.
Sets tree support parameters.
Support can be added or removed after the work is completed.
Tree supports can be replaced by linear ones.
These can also be edited.
You can also place supports manually however you like.
After the formation of supports, you you will be prompted to save these supports in the program's unique *.fpp format. Supposed, that you may need them in the future.
Next, by launching the "Print" button slicing settings, you can select several predefined print profiles or tabs specify the values of some standard print parameters: “height Layers, Shells, Fill, Speed, Temperature, and Others. At connected printer, you will be able to call Expert mode - advanced print settings by clicking the Settings menu and selecting the print type settings windows. In this mode, there is an option to set the internal and external compensation. When you have finished entering the parameters, press the "Select" button and start slicing procedure, along with saving the project with a unique *.gx extension
Window for selecting standard print profiles…
… and advanced settings.
Visual result of slicing can scare even an experienced user. In a single pale lilac porridge you it will not be possible to distinguish between external walls, infills, supports and other elements printing process. The developers decided that in addition to layer-by-layer control You don't have to look at the result.
Just press the button "Submit GCode" and control the printing process if you are the owner one of the company's printer models. Otherwise, you can click the button "Back" and save the result of your work in one of the available stl formats, obj, 3mf and fpp.
Regrettably, that if the program performs all the preparatory procedures quite quickly, then after slicing it starts to terribly "stupid". Terribly slow browsing sliced into layers of the object turns the work into torment. Resources are not even very a bad computer is not enough.
At the same time, there is a convenient the “Cut” button that launches the tool for separating a part by a plane for printing her in parts. Planes can be X, Y, Z or drawn with the mouse. ends close automatically. Helpful, convenient and fast.
this corporate slicer has a set of standard amenities for everyday routine work with Flashforge equipment and otherwise unsuitable. True, there is doubtful the ability to import the model even after the arrangement of tree supports save result in stl but fancy tree support in execution Flashprint look like baobabs in a birch grove and many will prefer to use it Meshmixer services.
In addition to the slicers listed, mention should also be made of Slic3R, the Prusa Slicer, which is actually redesign of the previous program, Repetier-Host, Kisslicer, lost somewhere "slicer-ancestor" Skinforge. Some of them deserve a separate review or even a detailed articles. And you can remember about a dozen different quality and convenience programs, allowing you to prepare your 3D model for printing. Even Windows 10 has built-in 3D printing application, ready to process and send to print your model to Microsoft partners, if, of course, it passes built-in expertise. The most important thing to understand for choosing a slicer, that, as with choosing a printer, you first need to focus on your goals and choose a program based on your own priorities and tasks, finding harmony in a reasonable compromise. Another trend that we already wrote about in a recent article on flexible manufacturing is the creation of so-called "farms" of 3D printing, effective management of which will be possible only if there is a cloud system managing and distributing print jobs.


