3D printer glue
What is the Best Glue for 3D Printing Bonds? PLA, ABS, PETG – 3D Printerly
3D prints can get detached and broken sometimes, so you want to find a way to stick it back together. This leads many people to wonder whether superglue works on PLA and other 3D printing materials, so I decided to look into it.
There are so many options that you can use for gluing 3D prints together and they differ across material types. This article should simplify the process and make it easier for you to choose a solid option that you can stick with.
Keep on reading through this article for some more information about getting the best glue for your 3D prints once and for all.
What is the Best Glue for 3D Printing Bonds?
The best glue for 3D printing is superglue because it provides a strong bond between plastic and is very easy to use. A good brand of superglue cures quickly, so for materials like PLA, ABS, and PETG, it should work great. It doesn’t work so well for flexible filament like TPU or Nylon.
There are other options out there that several 3D printer users have success with, but superglue is the most recommended.
Make sure you are in a ventilated place and are wearing a protective mask and goggles when using some of these adhesives. They can be fairly irritating to your breathing and skin if you come into contact with it.
If you want to get some good quality superglue for your 3D prints, I’d recommend getting yourself some Gorilla Super Glue (20 Grams) from Amazon.
This one does take some extra time to cure, so you can use a separate activator like baking soda to speed up the curing process. Other people have said even water works well to achieve this, although it’s going to run as you would expect.
You can also go with the Bob Smith Industries BSI Maxi Cure Clear Adhesive from Amazon. It comes as a combination pack of the superglue and an accelerator to cure in just 10-25 seconds.
It states that it can bond metal, plastic, wood, ceramics, rubber, leather and more.
A further read into this article will give you an insight into things you can use in gluing your 3D print.
What is the Best Glue for PLA?
The best glue for PLA 3D prints is superglue. Other popular options are 2-part epoxy resins that are mixed together to activate then cures together to bond two objects. A specialized glue that works very well for PLA is PLA Gloop. It bonds PLA 3D prints together strongly, but can also be used as a bed adhesive.
Superglue has a short time for curing and it forms just a thin layer of bonding that is mostly not visible to the eyes when done carefully. One user said you can remove excess superglue with baby oil as it penetrates the bond between the plastic and the superglue itself.
Other adhesives that join PLA are:
- Epoxy Resin
- 3D Gloop
- Contact Cement
- Hot Glue Gun
- Acetone
- Soldering Iron
- 3D Printing Pen
Epoxy Resin
Epoxy resin is a popular solution to gluing and combining up 3D prints, especially for rigid materials like PLA. It does take longer to cure than superglue though, taking around 5 minutes to set, and another 10-15 minutes to fully cure.
The difference is the level of strength that you get with the right kind of epoxy resin.
It’s a great solution to joining up those larger 3D prints like cosplay items and other similar items. You’ll get the best results with an epoxy resin by clamping it down during the curing process.
I’d recommend going with the Loctite Epoxy Instant Mix from Amazon for your 3D printing needs if you go with this option.
3D Gloop
3D Gloop is a great alternative to superglue and may even be a better product for bonding/gluing PLA 3D prints together. It is known to be a solvent which actually slightly melts the PLA plastic and weld it together.
In the video below by MatterHackers, you can see just how well this product works to stick PLA together. It also can be used as a bed adhesive to help 3D prints stick to the bed while printing.
Contact Cement
Contact cement is also great at bonding PLA, though some people have complained about the visibility of the adhesive after using it. With practice, you should be able to apply is carefully and smoothly to not show up very much.
You can also sand any areas which show the contact cement on your PLA prints with 120 grit sandpaper.
A popular one that I found on Amazon is the Permatex Contact Cement 1.5 oz. It’s known to be great for instant bonding applications, is heat and water resistant, and can even bond rubber to glass and metal.
They mention that no clamping is required for this product to work well.
Hot Glue Gun
You can’t go wrong with a hot glue gun when it comes to gluing plastics, being a very popular solution for many applications. It has pretty good strength and isn’t too difficult to apply, with a 45-second application time.
When you do use this though, the glue tends to be fairly thick, so it would be better for larger 3D prints and big projects like cosplay armor. For something like miniatures or smaller 3D prints, I wouldn’t recommend using a hot glue gun.
I’d recommend going with the Gorilla Dual Temp Mini Hot Glue Gun Kit with 30 Hot Glue Sticks from Amazon.
- It has a precision nozzle that makes operation a lot easier
- An easy-squeeze trigger
- Weather-resistant hot glue sticks so you can use it in or outdoors
- 45-second working time and withstands strong impacts
- Has an insulated nozzle that prevents burns
- It also has an integrated stand to keep the nozzle off other surfaces
Acetone
This has been known to weld and smooth PLA but only with certain types, most likely based on the manufacturing methods and chemical properties. Thomas Sanladerer shows us this in the video below.
You can get yourself a bottle of Pure Acetone from Amazon for a pretty good price.
Soldering Iron
Another method of “gluing” PLA together consists of using a soldering iron to apply enough heat to melt the PLA part, then hold it together so it hardens and joins. It’s obviously not a glue, but it works very well to bond PLA parts together.
You can also use a line of the same filament you used to print the object, then solder that into both the 3D printed plastic parts to weld it together as shown in the video below.
The basic instructions of this video are to:
- Get your 3D printed pieces and make sure the surface is good enough to together
- Get your soldering iron and set it to a temperature around 200°C
- Use a length of the PLA filament you used for printing
- Line up the length of filament with the 3D print and melt the filament to use as a solder to combine the pieces together.
 You want to filament to actually get into the gaps and holes
 - Let the PLA cool down and it should be joined together strongly.
A great one that should work well for the purpose of joining PLA together is the Anbes 60W Soldering Iron Kit from Amazon.
Here is another video which shows you how to weld together two parts. It was from a 3D print that failed halfway, which he split up and managed to print the other half and then combine it with soldering.
3D Printing Pen
A lesser known solution for gluing or joining PLA 3D printed parts together is to use a 3D printing pen. It’s not as popular since it isn’t as effective as the other solutions, but it definitely has its uses for 3D printing.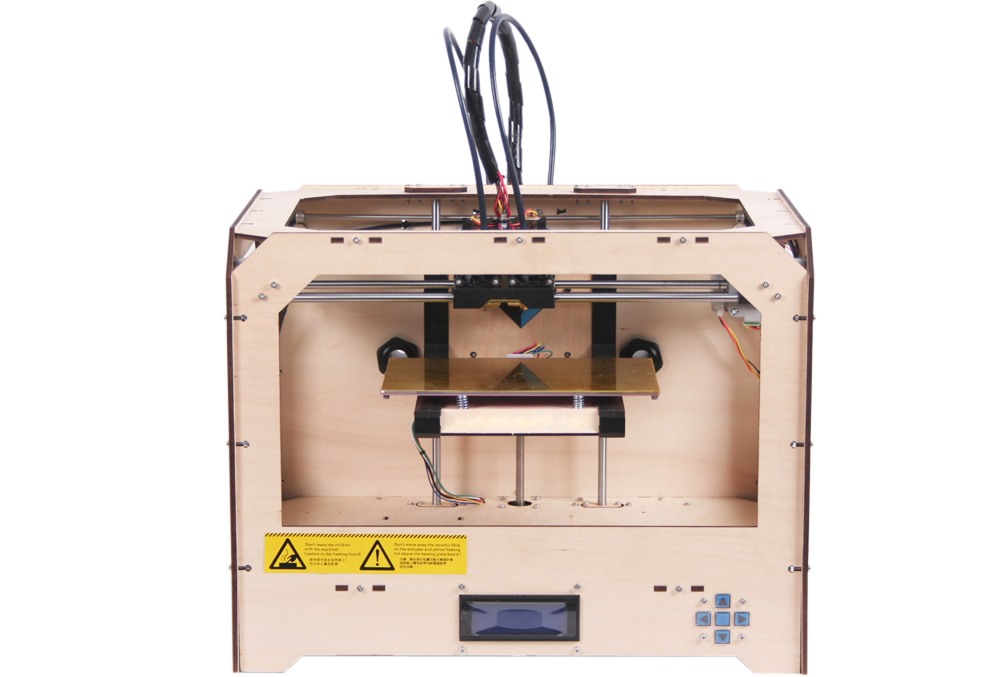
It’s similar to the soldering iron in a way, but uses the heat from a 3D printing pen to join PLA plastic parts together.
The MYNT3D Professional Printing 3D Pen from Amazon is a great choice.
One user did mention how they used this specific 3D printing pen to weld pieces of prototype parts together since they were too big to print in one part.
You can get better results with “gluing” pieces together by applying heat from a hair dryer or heat gun. It’s a pretty quick solution since you don’t have to hold things for long periods of time to set.
You should try to use fairly high temperatures to achieve this as compared to what you would usually set, though heat controls for this 3D printing pen is really simple.
It can also be used to fix small imperfections and gaps in your other 3D prints which is very practical.
What is the Best Glue for ABS?
A popular product to glue ABS 3D prints is acetone because it is a solvent which can actually dissolve ABS then harden up again. When you apply acetone to both ABS parts then hold it together, the softened part will start to form a strong bond until it cures fully. This process is called solvent bonding.
Other great glues or adhesives you can use for ABS are:
- Superglue
- ABS Juice, Glue, Slurry
- Epoxy
- Polyurethane
- Hot Glue Gun
Superglue
As previously mentioned, superglue is great for rigid objects and plastics. You can apply some superglue to your ABS 3D print and have it glue together fairly quickly.
You want to ensure that your objects are aligned nicely before you apply the superglue though because once it cures, you won’t be able to realign it nicely.
ABS Juice, Glue, Slurry
Another great set of products is ABS juice, glue and slurry, which are very similar in characteristics but mainly differ in thickness. You mainly want to use ABS slurry which is the thickest of the three to repair ABS prints and help with gluing pieces together.
It’s also used as a way to repair layer separation.
Epoxy
Epoxies are a great method for bonding and gluing ABS plastic 3D prints.
One advantage of epoxies is that they are water and chemical resistant, making them a suitable choice for high-strength bonding. It requires no heat to cure, although if you want an accelerated result, you can apply heat.
Again, I’d go with the Loctite Epoxy Instant Mix from Amazon.
Hot Glue Gun
This is another fast way of gluing your ABS together. Simply load some filaments into the gun and use the heated extrusion to join the parts. It can also fill gaps. Ensure not to move the nozzle too close to the ABS to avoid melting.
Surface Preparation: It is important to prepare the surfaces of the ABS parts you want to glue by cleaning, degreasing, and sanding.
Caution: The precautionary measure against the dangers that can arise from using acetone is keeping it away from flame because it is highly inflammable. Also, use it in a ventilated space to avoid excessive inhalation.
What is the Best Glue for PETG?
The best glue for PETG is superglue since it holds the parts together strongly and still maintains the quality and integrity of the 3D print.
You won’t need to bother about clamping the parts together as it pretty quickly bonds together and cures fast. Loctite glue and gorilla glue is some of the best.
Other adhesives that can glue PETG are:
- Two-Part Epoxy
- Hot Glue Gun
- Solder Iron
Two-Part Epoxy
A two-part epoxy is pretty popular with 3D printer users to glue PETG parts together. They usually come with another container in the pack called the hardener or accelerator.
The two products are meant to be mixed together before applying it to the surface of the PETG.
Although, the curing time varies; some take 5 minutes, while some take more time. The combination of a hardener and the glue itself will make a long-lasting and strong bond between the parts.
Hot Glue Gun
Most of the tests that were carried out on PETG using a hot glue gun prove its ability to bond two PETG permanently.
Check out this video on YouTube where a series of tests were carried out on different adhesives and the hot glue gun was confirmed to be one of the most reliable.
Again, I’d recommend going with the Gorilla Dual Temp Mini Hot Glue Gun Kit with 30 Hot Glue Sticks from Amazon.
Soldering Iron
A soldering iron with a temperature control option can glue PETG parts when used in melting the surfaces of the print. This process requires patience and it will yield good results in the end.
Ensure to wear a protective mask and goggle when using any of these adhesives. Use it in a ventilated area.
It works in the same way that it would with PLA, so you can watch the video in that section to see how you would do this with PETG.
What is the Best Glue for TPU?
The best glue for TPU is flexible superglue like Loctite 406 Superglue. It is designed in a way that allows it to bond rubber and flexible materials together with ease. The bonding and curing times of this glue is very quick and provides a strong bond which can’t easily be broken.
Other glues that work well with TPU are:
- Flexible Superglue
- DMF (N-Dimethylformamide)
- THF (Tetrahydrofuran)
- Soldering Iron
Flexible Superglue
A tried and tested product that works great to glue TPU 3D prints is the Genuine Loctite 406 Superglue Instant Adhesive from Amazon.
It has the following features:
- Rapid bonding with plastic and flexible materials
- Great adhesion of materials that are hard to bond
- Multi-purpose and works in many applications
- Very easy to use
It does have a pretty small margin of error, so you want to be very quick and accurate when using this stuff. It has an early bond strength said by users to be in just seconds, showing just how strong it is.
One user even bonded a broken rubber roller belt with this product. It’s best used to join TPU with another type of material like PLA. For TPU to TPU, it can still work well, but the solvents below are more efficient.
DMF (N-Dimethylformamide)
DMF is a solvent that can melt your two pieces of TPU or flexible filament together. When it comes to joining up TPU with another TPU 3D printed part, using a solvent is usually the best solution.
THF (Tetrahydrofuran)
THF is another pretty strong solvent which dissolves TPU and allows you to bond two separate TPU prints by applying it on the surface and holding it together.
Soldering Iron
Similar to using a soldering iron for PLA and other materials, it can also be used for TPU and flexible 3D prints.
In the video below, he uses a soldering iron with a flat mouth to create a specific space for the TPU to be bonded together. He then filled it up with TPU filament and heated it up to let the parts soften and bond together.
After the TPU parts harden, it should create a very strong bond that can’t easily be pulled apart, unless the soldering wasn’t done accurately.
What is the Best Glue for Nylon?
The best glue for Nylon is a hot glue gun. Superglue doesn’t work as well with Nylon unless you have a flexible superglue. Many people have gotten great results when gluing Nylon with a hot glue gun. You can choose a method of heat like a soldering iron to bond Nylon 3D prints together.
Other methods you can adhere nylons are:
- Hot Glue Gun
- Soldering Iron
- 3D Printing Pen
You may think epoxy and superglue can work well on Nylon but it doesn’t have the same effect, mainly because of the flexibility and composition. You could do well with some of the flexible superglues mentioned in the TPU section above.
I’d recommend going with the hot glue gun or the soldering iron option. Another great method for “gluing” Nylon together would be a friction welding method which works with a rotary tool to heat up the surface and bond it together with friction.
It actually works pretty well for all sorts of materials, though you’ll want to keep safety in mind due to the dust and fumes it can cause. Some people even recommend combining the hot glue gun and friction welding method for even better results.
Another technique which isn’t talked about a lot of friction welding. You don’t need any kind of adhesive, but you do need a special tool to get this method working properly.
A Dremel Lite 7760 Cordless Rotary Tool from Amazon is a great product to use for friction welding.
Can You Use Superglue on PLA? What To Do If It Doesn’t Work
You can use superglue on PLA as a way to join parts together. It’s one of the best options for bonding PLA 3D prints, especially for smaller parts.
In some cases where superglue doesn’t work on PLA, it could be because:
- There are too many cavities or gaps where the parts are supposed to join together
- There was the presence of moisture or water on the surface which inhibits bonding
- The quality of your superglue isn’t at its best
- The PLA is exposed to heat which might break the bonding
If it doesn’t work, I’d recommend sanding the surface of both PLA parts to ensure a better fit. You want to use fairly low grit sandpaper like 120 grit to really prepare the surface to be glued together.
You also want to get another brand of superglue that cures faster and has better bonding properties, especially if your superglue is not very effective.
Does Contact Cement Work on PLA?
Yes, contact cement does work on PLA to glue 3D printed pieces together. It usually has a strong bond and also leaves you room for correction unlike with superglue.
Contact cement dissolves the surface of the PLA when applied and this process aids the bonding. A 3D enthusiast agreed with the fact that contact cement works on PLA, but you do need to use a good, reliable product that is known to work with your material.
When you follow the instructions of the specific contact cement you have, you should be able to have success in joining your parts together.
Best Glue for 3D Printed Miniatures (Minis)
The best glue for 3D printed miniatures is standard superglue (Cyanoacrylate).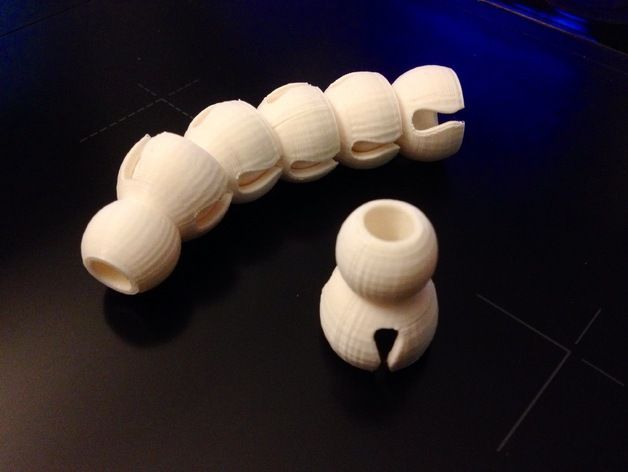 It provides a strong bond for your 3D prints and cures pretty quickly. You’ll usually have to hold the piece on the model for it to set, but you can use an activator to speed up the curing process.
Accessibility is easy as compared to some solvents, it is very effective and easy to use, as well as being really cheap and long-lasting.
Other adhesives like epoxy work too, but they tend to have a longer curing time. There are definitely some quick-curing epoxies that you can make use of for minis, which many people have had success with.
Contact cement glue is another good option for plastic minis. They bond quickly too (although not as quick as glue) through melting and subsequent fusion. This bond is lasting and more durable than CA.
I wouldn’t use contact cement for very small minis because of the noticeable damage the corrosion will do to the parts.
How Do You Connect & Join PLA Filament Together?
It’s possible to connect and join two pieces of filament or even rolls of filament using a piece of a PTFE tube and a lighter. This is great for when you have small strands of filament left over from spools, which you can join end-to-end.
The method consists of pushing through the filament through the tube, lighting one end with a lighter so it’s softened, pulled it back through the PTFE tube and pushing the second piece of filament in the tube so it can then join together and harden.
The video below shows how it’s done very clearly.
On a final note, if you have followed the instructions above in terms of avoiding certain adhesives for certain materials (like superglue for nylons), you should be good to go by sticking to the recommended ones.
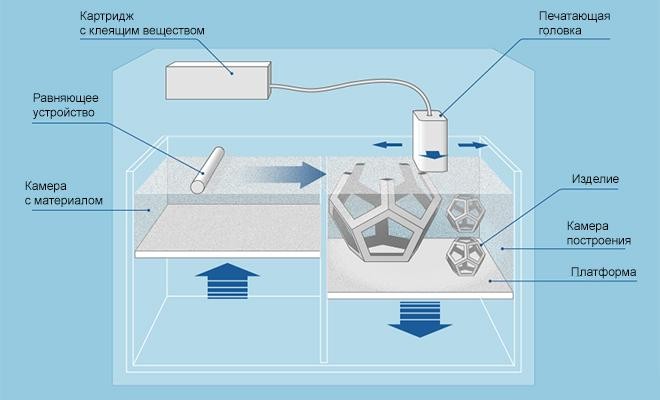
What are Bed Adhesives in 3D Printing?
One of the issues that people face when 3D printing is getting their prints to stick to the build plate. If a print does not stick to the build plate properly, then it could move during the print process which will cause it to fail.
Manufacturers have, of course, devised remedies for this. Ultimaker 3D printers have a heated build plate for better bed adhesion and reduced warping and curling (the heated plate stops prints from cooling down rapidly, avoiding contraction). Some manufacturers have taken a simpler route, though – MarkForged recommends people use an Elmer’s Glue Stick to create a sticky layer on the build plate.
The simple truth of bed adhesives – whether they are cheap glue or expensive tapes – is that all of them have the same aim: to prevent warping, curling, print failure and to reduce waste. It is important to point out though that not all materials require a bed adhesive to stick to the build plate. PLA, for instance, adheres well to a heated build plate without adhesive. However, when glue or tape is used, the risk of warping and curling is reduced considerably.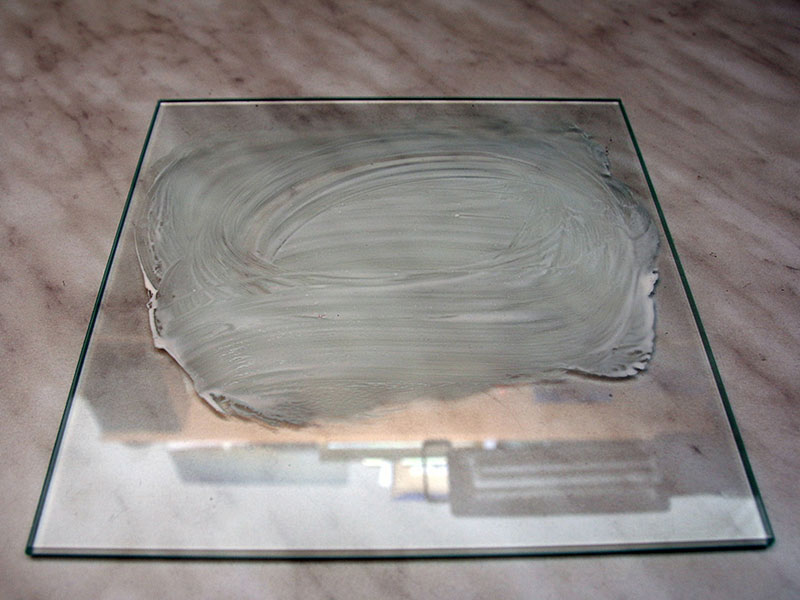
How do bed adhesives work?
Simply put, bed adhesives work by forming a stickier layer for prints to adhere to. In the case of heated build plates (which are necessary for printing materials with a higher melting point than PLA), hard materials like ABS and CPE can warp even with support structures. The reason for this is the smooth glass plate with the introduction of heat; the print material sometimes doesn’t cool quickly enough to be strong. By introducing a layer of glue, print-bed adhesion is improved, and the glue also acts as a layer of protection for the glass.
Adhesives also eliminate the risk of print movement. If a print moves just a little during the print process, then it will fail. We regularly receive questions from people asking why their prints keep failing, and it is more often than not because they aren’t using an adhesive on their build plate.
Are there alternatives to external adhesives?
It is possible to print a ‘brim’ with your print, which is a thin platform around your print that helps ensure successful adhesion.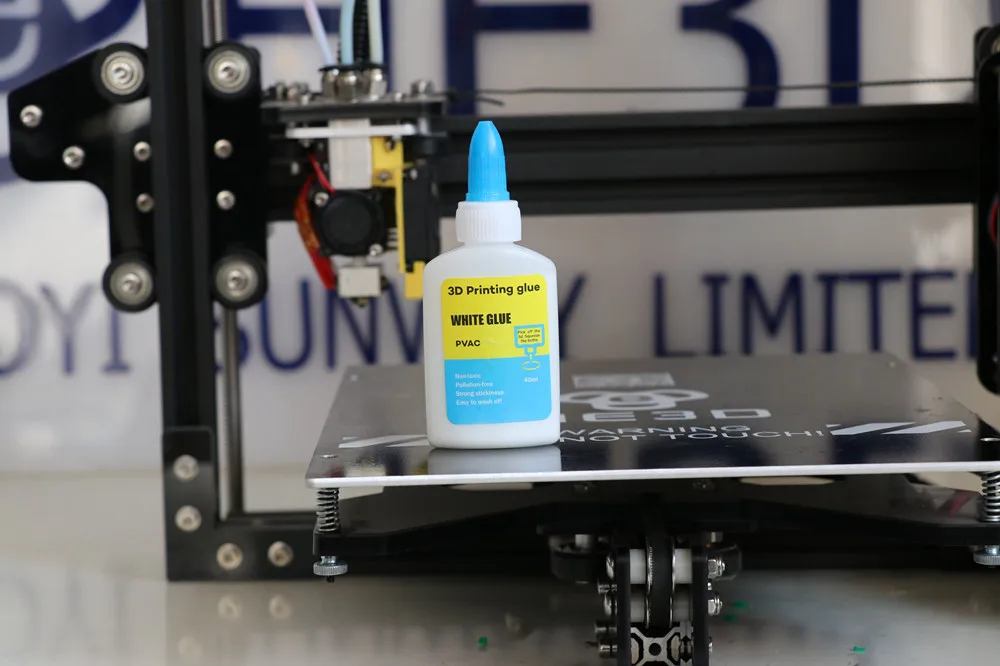 These work because your part or model will be printed on a layer of filament, rather than directly on the build plate itself. Cura, Ultimaker’s software, allows you to create a brim quickly and the brim itself can simply be cut away afterwards. However, even with a brim, we still recommend using a bed adhesive to protect the build plate.
What are the best adhesives?
We are of the belief that what works best for manufacturers and the 3D printing community will work best for you.
So, here’s a list of products and who uses them:
Elmer’s Disappearing Purple Glue Stick – Recommended by MarkForged and other brands
Cheap and effective, Elmer’s Disappearing Purple Glue Stick is used by pros and hobbyists alike to improve print bed adhesion.
UHU stic- Recommended by the 3D printing community
If you can’t get hold of an Elmer’s sick, the UHU stic is the next best thing. It works just as well, and like Elmer’s stick, it can be used with PVA support material.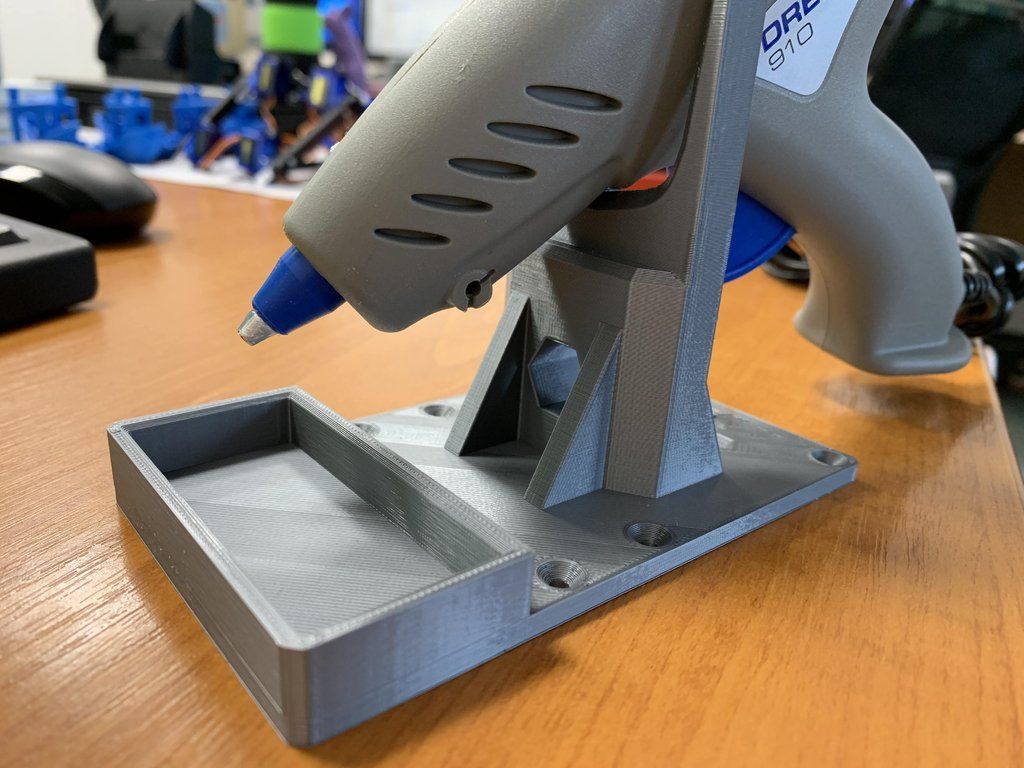
Makerbot Build Plate Tape – Recommended by Makerbot.
Makerbot’s Build Plate Tape is designed for Makerbot printers, but it can be used with any printer. The textured surface improves adhesion and lasts for several prints.
Blue Painter’s Tape – Recommended by 3D Platform
If you don’t want to use glue, the textured surface of blue painter’s tape lends itself well to bed adhesion. It can be used with PLA, ABS and high-temp thermoplastics.
Essentium’s 3D Printing Bed Adhesive – recommended by Essentium
Essentium 3D Printing Bed Adhesive is for printing nylon filaments. It works with nylon filament and other high-temp materials, formulated to reduce contraction.
Out of the above adhesives, we have had excellent results with Elmer’s Disappearing Purple Glue Stick, the UHU stic, and blue painter’s tape. Blue painter’s tape can be picked up at any hardware store, or even your local supermarket. It can be pulled away from a glass build plate easily, without leaving any residue behind, and the grippy surface is ideal for ABS and CPE. Glue sticks are another excellent option, and they don’t cost very much either.
Just be careful with what glue sticks you use. Elmer’s Disappearing Purple Glue Stick and the UHU stic are tried, tested and proven. We tried the Original Pritt Glue Stick but didn’t get good results and this sentiment is echoed by most people who’ve tried it.
Also, remember to calibrate your build plate periodically. Today, most 3D printers will do this for you, but you will need to calibrate manually if you have manual levelling. Having a level build plate is crucial for good bed adhesion, print quality and reliability.
Testing liquid adhesives for adhesion
Technician
Subscribe to the author
Subscribe
Don't want
10
So we managed to assemble the whole team of liquid products to increase the adhesion of the table in 3D printing. And this means that Mnogo3D, obsessed with adhesion, is back with you. Picaso 3D glue, 3DM 3D glue and I made 4D glue gathered in our hands at the same time. The first two are already familiar to the readers of the portal according to the test "Adhesion means: professional versus amateur". The last one just arrived. And so we will do a test of who is capable of what. In order not to be bored, the glue stick "Kalyaka-Malyaka" and Eeeee ... Povidone on isopropyl alcohol will take part in the test. Kalyaka is the standard of adhesion and it is needed as a guideline. And povidone to debunk or confirm the myth that a professional remedy can be created at home. nine0003
Since the last test, we have diluted our "Nurofen", bringing the concentration to approximately 1 sachet of medicine per 0.5 liter of alcohol. And very thoroughly mixed, getting rid of the flakes. Thanks for the recommendations on finalizing the solution to Ilya Pinchuk and advice on the test in general.
This time we decided not to test on nylon, ABS is enough. For the purity of the experiment, we will carry out the test on the material from two manufacturers. Black is Chinese, sold under the Good3D brand, and gray is from REC. nine0003
Disclaimer: I express my gratitude to the portal 3DToday because 3DM glue, as well as REC gray plastic are winnings in competitions held by him. Let's not forget Top3DShop either. Glue Picaso provided by them for the last test free of charge.
4D glues "I made" and "Kalyaka-malyaka" were bought from office. dealers without informing about the intention to conduct testing.
Introducing the participants. Glue from Picaso and 3DM are longtime players in the 3D printing market. Their composition is declared the same: Water, Isopropyl alcohol, P-complex and flavor. But manufacturers are different. 3DM smells stronger of alcohol. Either they saved on the fragrance, or the spirit was vigorous. 4D glue "I made" is different. In its composition, PVP is immediately indicated. It has a yellowish tint and is thicker. The smell of alcohol is less noticeable. On the contrary, there is a pronounced woody smell. Apparently the wombat is on the label for a reason. All three are supplied in 250 ml squeeze bottles. "I did" is also available in 100 ml bottles. nine0003
Homemade remedy is simpler and cheaper. In a pharmacy, we buy a sachet of medicine Enterodez 5 grams with the active ingredient POvidone and dissolve it in 0.5-1.0 liters of isopropyl or ethyl alcohol. Doesn't dissolve well. Therefore, you need to periodically shake the bottle until the flakes disappear. Why Povidone and where does the pharmacy?! It's simple, PVP is polyvinylpyrrolidone. And its other name is just povidone or polyvidone. This substance has a very wide range of applications in medicine and chemistry. But it is one thing to know the composition, and another to know the recipe. In the last test, homemade did not show itself in any way. Let's see what happens this time. nine0003
Magic glue stick "Kalyaka-Malyaka" is also not simple and has its own legends. We took several briquettes of this glue. we prefer this particular method of adhesion and can debunk a few more myths about it. Actually everything is in the photo.
Even in one briquette there are tubes of different shades of yolk with contents of different shades of pink. Also different ends of the glue. Some are pointed, while others are flat. And all this in one sealed pack from the dealer.
And so... to the test! nine0003
Test piece:
Frame with 0.8mm wall, 15x150mm, 50mm high. We print with a nozzle of 0.8 mm and a layer of 0.3. The first layer is 50% of the base layer height. Speed up to 50 mm/sec. Brim at 5 perimeters. Printer open Corexy with ball screw. The temperature in the room is 22-25 degrees, without drafts. The surface is a mirror. The conditions are deliberately set to be unrealistic, so that it would be easier to evaluate the result by the amount of printed material.
The idea was to put 4 parts side by side and see what happens. nine0003
But the idea turned out to be so-so. A part that went out of the way caused the test to stop. Here, either apply the Olympic system, or test it for a long time and dreary piece by piece.
We settled on the last method and started printing the same code with different adhesives. Accordingly, they waited for the platform to cool down, washed it, dried it, degreased it with pure alcohol, dried it, and applied the composition.
Contrary to advertising, one coat of compound does not work! Not even two work. Applying a large amount is also not an option. You need at least three layers. And for 3DM, even three layers do not work. In this regard, for the outsiders of the first round, the adhesives 3DM and "I did" were given a second chance to prove themselves. In the second attempt, only 3DM was given a second chance. The concentration of the substance, apparently, is less in it. Therefore, after a failed attempt on 3 layers, the printing was repeated on 4. The difference, as they say, is "on the face." Assigned seats are our subjective decision on typing comfort. And it wasn't easy. You run the test. You control that the brim began to stick to the table. If the composition is small, then a new layer of the composition was applied and the test was started again. If the print has gone, then you sit and wait for the coveted click and crackle of the extruder on skipping steps. You fix the % of the task completion and the separation. Stop printing. Table cooling, washing, drying and new. Over 100 photographs were taken. Let's show some. nine0003
Picasso 1st attempt.
Most printing stopped within 30-50%. The best results were shown only by "Kalyaka-Malyaka".
3DM glue and its 3rd attempt.
It should be noted that REC plastic, unlike Good3D, is more rigid and more prone to delamination. On it, the subjects showed poorer results. In particular, in the second attempt, when printing on a painter, the plastic tore the brim, and not completely tore it off, as in all other cases.
And almost broke another corner
Well, actually the results.
And in tabular form:
Thanks for reading.
Sincerely, Mnogo3D (3D printing in Ryazan and beyond)
PS Eta4Ever was the first in our VK mini-survey to guess which of the trinity of liquids is the best. Cool!
adhesion glue
Follow author
Follow
Don't want to
10
My experience of dealing with adhesion on a 3d printer
One of the main problems that I encountered when operating a 3d printer was sticking the workpiece to the table. This trouble has two extreme manifestations. Either the printed model does not stick to the table, or it sticks so that it cannot be torn off.
Researching the problem, I realized that there is no universal solution. And if something helps someone, then it will not necessarily work for me. Several factors affect adhesion at once: the material and geometry of the table, the temperature and uniformity of heating, the properties of the plastic, and the environment. nine0003
I've seen a lot of posts on the forums that some plastics can stick very well to clean glass. I took the same plastic, carefully wiped the glass, but did not get the desired result.
Today I settled on glue sticks. I print only three types of plastic: sbs, pet-g, flex. All of them adhere perfectly to the table through glue.
But, not all glue sticks are equally effective in our business. I found only two manufacturers whose products are great for 3D printing. These are KALYAKA-MALYAKA and Erich Krause. In addition to them, I tried a few more glue sticks, but did not get the desired result. nine0003
KALYAKA-MALYAKA for good adhesion on a 3D printer
KALYAKA-MALYAKA glue stick performed better than Erich Krause. I don’t know how in its main function, but in 3d printing it surpassed its competitor. A thin layer of glue perfectly holds all my heads. And right after the first experiments, I ordered myself a whole package of KALYAK-MALYAK.
The adhesion problem seemed to be solved. But I was in for a failure. Not all KALYAKI-MALYAKI are equally good. From tube to tube, the degree of adhesion varied. I noticed that the more saturated the color of the pencil, the better it does the job. A couple of times, when printing large models, I failed. The model came off the table surface. Pencils with a pale-colored adhesive turned out to be completely unsuitable for 3D printing. nine0003
Pencils of this type are not sold in our city. And it is not possible to check the color of a pencil when ordering via the Internet. Therefore, to my great regret, KALYAK-MALYAK had to be abandoned.
Erich Krause Glue Stick and its excellent adhesive properties for 3D printing
Erich Krause Glue Stick is also suitable for good adhesion of printed parts. On Flex and PET-G plastics, it performed excellently.