3D printer hong kong
3D Printers, Filaments and Printing Service
New Arrival+
Quick View
HK$ 178.00
+
Quick View
HK$ 178.00
+
Quick View
HK$ 228.00
+
Quick View
HK$ 3,519.00
3D Printers+
Quick View
HK$ 49,999.00
+
Quick View
HK$ 3,999.00
+
Quick View
HK$ 2,228.00
+
Quick View
HK$ 7,159. 00
+
Quick View
HK$ 2,999.00
Filaments+
Quick View
HK$ 317.00
+
Quick View
HK$ 398.00
+
Quick View
HK$ 428.00
+
Quick View
HK$ 428.00
+
Quick View
HK$ 908.00
Accessories+
Quick View
HK$ 349.00 – HK$ 799.00
+
Quick View
HK$ 399.00 – HK$ 699. 00
00
+
Quick View
HK$ 735.00 – HK$ 935.00
+
Quick View
HK$ 1,930.00
+
Quick View
HK$ 735.00
TestimonialsMy sincerest gratitude to the Addify group for being a great technical support for thenins and outs of 3D printing. Time and time again, when would face issues like our 3D printer breakingndown, or our prints were not optimal, you would be there to provide us with a solid explanation of thenissue, and of course the solution. Over time, I have learnt the ins and outs of 3D printing thanks to yournpatience and professionalism in providing us a truly wonderful customer experience. It is very rare to see such detailed advice, it is almost like you were our consultant with regards to 3D printing technologies. I look forward towards more future collaborations, especially in this interesting field of Soft, Compliant,nand Flexible Underwater Robotics!
Timothy Ng / Project Director, Vayu Project: Fastest Robotic Fish Bionics and Control Lab Dept. of Mechanical Engineering, The University of Hong Kong.
I would like to forward my sincere gratitude to you and Addify for working with me and my team, the Digital Materials Group, and providing exceptional services and the most relevant product options. Time and time again, your incredible knowledge base, outstanding expertise, and practical advices have boosted our confidence in a 3DP market filled with not only diverse but also rapid releases of new options and products. Your patience in learning the nature and needs of our project has been truly invaluable in helping us identifying the best solution possible. I can’t be more grateful with the feeling of “man, that was so informative and helpful!” every time we finish a meeting! So, thank you for all you do! A pleasure to be your customer!
Sarina Sun / Assistant Professor, Institute of Textiles and Clothing, The Hong Kong Polytechnic University
I am writing recommendation testimonial letter for Addify. Addify has worked with me in the past. Their knowledge in 3D printing technology and materials have helped me in my research studies. I feel confident in recommending Addify services.
QingYun Huang / PhD Fellow, City University of Hong Kong
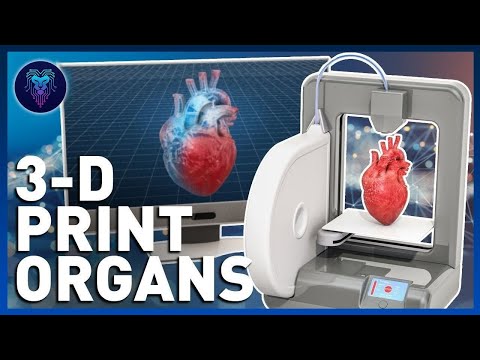
3D Printing Workshop has widen my view a lot more. It has great potential to develop but the market is still very narrow when few people knows about it… From 3D printing a toy model, deco, home appliance etc. are just basics, while it has already been using to print food and testing to print organs
⭐️假期開放安排⭐️ Dec 22 &23 closed at 15:00 Dec 26,27. Off Jan 1 2023 Off Merry Christmas 🎄 and Happy New Year #addify3d #fillament #3dprintinghk #3D打印 #3d打印香港 #creality3d #artillerygenius #lego #3dprint #3dprinting #legoland #figure #3dprint #3dmodeling #crealityender3 #christmashk #giveawayhk
Ho Ho Ho 第二彈優惠又黎喇! Addify 會免費送出兩卷 ULtrafuse BASF pla basic filament 俾第二十五張購買金額過$500 嘅客人⭐️ 我哋將會喺一月以電郵形式同埋Facebook IG上公布得獎者名單 ⭐️🎄 Merry Christmas 🎄 and Happy New Year #addify3d #fillament #3dprintinghk #3D打印 #3d打印香港 #creality3d #artillerygenius #lego #3dprint #3dprinting #legoland #figure #3dprint #3dmodeling #crealityender3 #christmashk #giveaway
Addify wish you all a Merry Christmas & a Happy New year 🎄 #addify3d #fillament #3dprintinghk #3D打印 #3d打印香港 #creality3d #artillerygenius #lego #3dprint #3dprinting #legoland #figure #3dprint #3dmodeling #crealityender3 #christmashk #giveaway
Ho Ho Ho ! 為咗答謝各位對我哋聖誕優惠嘅支持, 我哋將會免費送出hello3D milk white color filament 俾第15位購買超過$500訂單嘅顧客🥳 我哋將會喺一月以電郵形式同埋Facebook IG上公布得獎者名單 ⭐️🎄 Merry Christmas 🎄 and Happy New Year #addify3d #fillament #3dprintinghk #3D打印 #3d打印香港 #creality3d #artillerygenius #lego #3dprint #3dprinting #legoland #figure #3dprint #3dmodeling #crealityender3 #christmashk #giveaway
3D printed Gingerbread man 🎄 It’s beginning to look a lot like Christmas 🎅😉 #addify3d #3dprint #3dprinting #3dprintinghk #3d打印機 #3d打印香港 #creality #crealityender3 #crealitycr10 #artillerygenius #polywood #fillament #3d打印服務 #2022聖誕 #merrychristmas🎄 #christmasornaments
今次玩吓,漸變色嘅 顏色確係幾靚 ⭐️ #addify3d #fillament #漸變色 #legoguy #legoskeleton #3dprintinghk #3D打印 #3d打印香港 #creality3d #artillerygenius #lego #3dprint #3dprinting #legoland #figure
聖誕節優惠,又黎喇!今年我哋揀選咗特別嘅聖誕優惠🎄優惠低至25% 快啲嚟我哋嘅網站選購 www. Addify3d.com 或者WhatsApp聯絡我哋 📱 64811751 優惠期有限,欲購從速‼️ 優惠期: 12月5號至12月25號 ❄️ 此優惠不包括運費 到貨時間為大約10個工作天 #addify3d #christmassale #3Dprintinghk #3D打印機 #3Dprinter #crealityender3s1pro #fillamenthk #artillerysidewinderx2 #crealitysermoonv1pro #hello3D #pcplus #ultrafuseplabasic
100% Biodegradable 環保物料❤️ 韌性高,耐高溫 並且可以生物降解 🤩完全符合循環經濟嘅原則,可以多次重複使用!減少浪費 🌍 呢隻物料係出自Filamentum 嘅 NonOilen 好多謝@FaychuCafe 同我哋購買左呢隻物料然後3D打印咗杯、筷子、醬汁碟同埋碗仔🫡 如果你都對呢隻物料有興趣嘅話,可以上我哋嘅網站研究研究❤️ #保護地球人人有責 #3d printing #addify3d #環保
Teletubbi ❤️ laa-laa 今期大熱嘅天使得得B laa laa 唔使捱貴價,想要嘅話就自己print 要幾大有幾大,要幾細有幾細🫣 小編特別想介紹呢一隻金色有暗閃嘅Filament 係由 Fillamentum 出嘅 Gold Happened 🤩 print出嚟嘅嘢好靚好高質 ,print 出嚟嘅料都幾實 (起碼唔會掂一掂就爛🫢)有興趣嘅話可以上我哋嘅官網睇睇 Credit: thingiverse.com/thing:5395534 玩具嘅存在價值係要令小朋友開心🙂 ,並唔係玩具所值嘅價錢 🧸 #addify3D #3Dprinting #teletubbies #laalaa #3D打印 #filament
連續咁多日落咁大雨空氣嘅濕度好高 小編建議大家,如果屋企冇防潮箱就記得將filament 放喺膠箱入邊再放無限包吸濕包 filament 處喺濕度太高嘅空氣中, print 出嚟嘅嘢會起晒絲,唔靚㗎! 🫠🫠 #fillament #addify3D #記得好好保養fillament #3dprinting
3D Printers, Filaments and Printing Service
New Arrival+
Quick View
HK$ 178.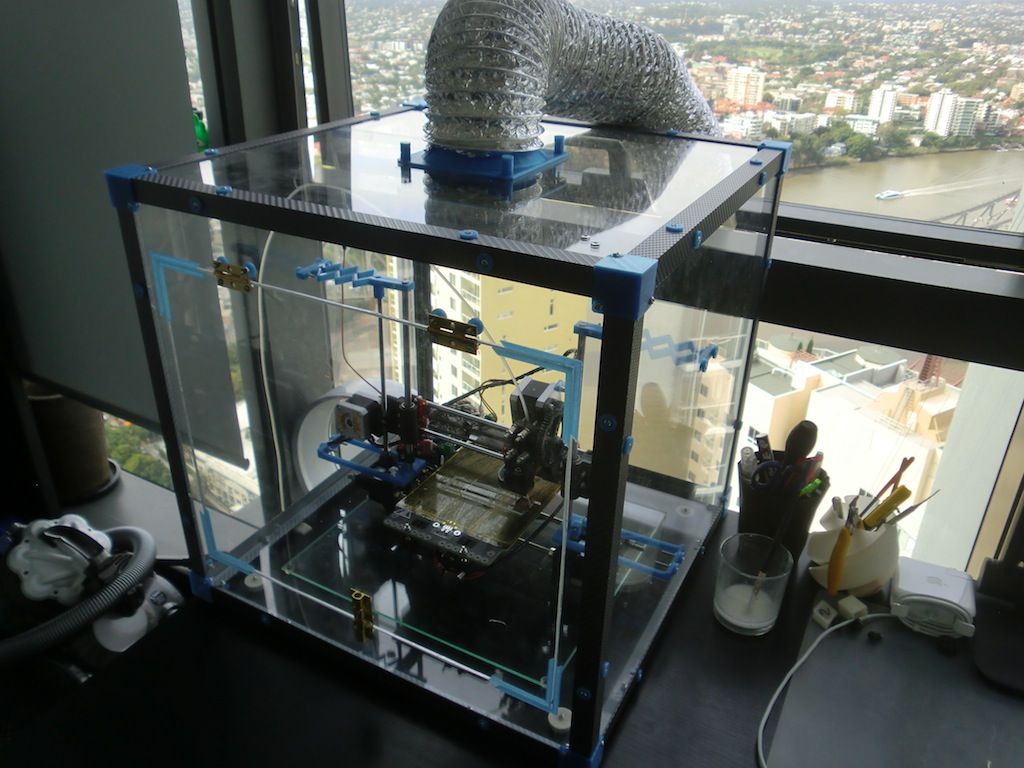 00
00
+
Quick View
HK$ 178.00
+
Quick View
HK$ 228.00
+
Quick View
HK$ 3,519.00
3D Printers+
Quick View
HK$ 49,999.00
+
Quick View
HK$ 3,999.00
+
Quick View
HK$ 2,228.00
+
Quick View
HK$ 7,159.00
+
Quick View
HK$ 2,999.00
Filaments+
Quick View
HK$ 317.00
 00
00+
Quick View
HK$ 398.00
+
Quick View
HK$ 428.00
+
Quick View
HK$ 428.00
+
Quick View
HK$ 908.00
Accessories+
Quick View
HK$ 349.00 – HK$ 799.00
+
Quick View
HK$ 399.00 – HK$ 699.00
+
Quick View
HK$ 735.00 – HK$ 935.00
+
Quick View
HK$ 1,930.00
+
Quick View
HK$ 735. 00
00
My sincerest gratitude to the Addify group for being a great technical support for thenins and outs of 3D printing. Time and time again, when would face issues like our 3D printer breakingndown, or our prints were not optimal, you would be there to provide us with a solid explanation of thenissue, and of course the solution. Over time, I have learnt the ins and outs of 3D printing thanks to yournpatience and professionalism in providing us a truly wonderful customer experience. It is very rare to see such detailed advice, it is almost like you were our consultant with regards to 3D printing technologies. I look forward towards more future collaborations, especially in this interesting field of Soft, Compliant,nand Flexible Underwater Robotics!
Timothy Ng / Project Director, Vayu Project: Fastest Robotic Fish Bionics and Control Lab Dept. of Mechanical Engineering, The University of Hong Kong.
I would like to forward my sincere gratitude to you and Addify for working with me and my team, the Digital Materials Group, and providing exceptional services and the most relevant product options. Time and time again, your incredible knowledge base, outstanding expertise, and practical advices have boosted our confidence in a 3DP market filled with not only diverse but also rapid releases of new options and products. Your patience in learning the nature and needs of our project has been truly invaluable in helping us identifying the best solution possible. I can’t be more grateful with the feeling of “man, that was so informative and helpful!” every time we finish a meeting! So, thank you for all you do! A pleasure to be your customer!
Sarina Sun / Assistant Professor, Institute of Textiles and Clothing, The Hong Kong Polytechnic University
I am writing recommendation testimonial letter for Addify. Addify has worked with me in the past. Their knowledge in 3D printing technology and materials have helped me in my research studies. I feel confident in recommending Addify services.
QingYun Huang / PhD Fellow, City University of Hong Kong
3D Printing Workshop has widen my view a lot more. It has great potential to develop but the market is still very narrow when few people knows about it… From 3D printing a toy model, deco, home appliance etc.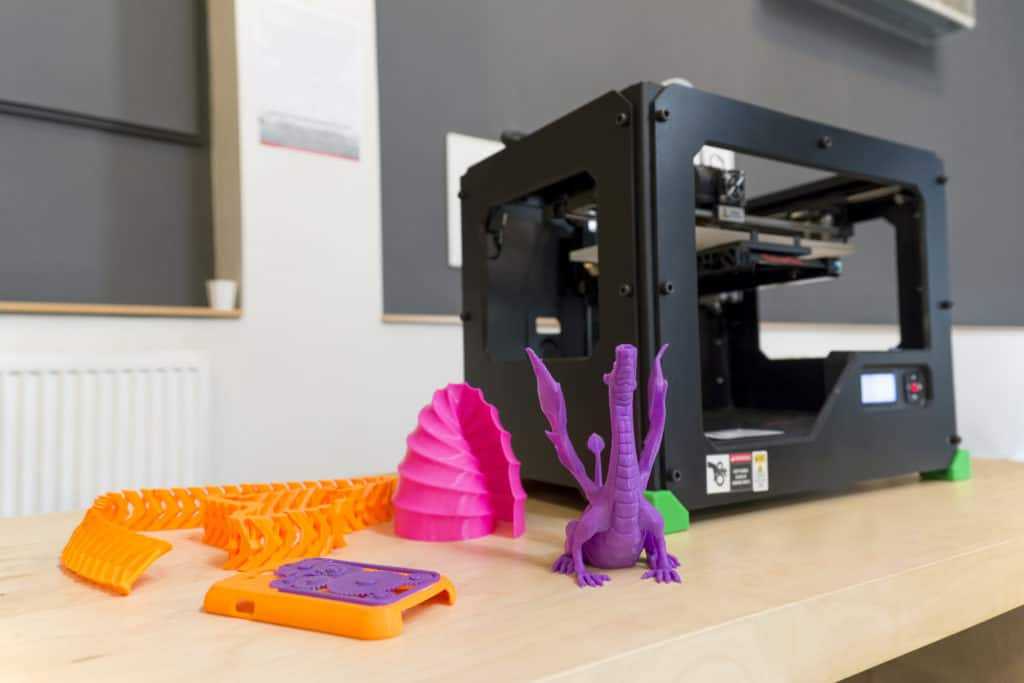 are just basics, while it has already been using to print food and testing to print organs
⭐️假期開放安排⭐️ Dec 22 &23 closed at 15:00 Dec 26,27. Off Jan 1 2023 Off Merry Christmas 🎄 and Happy New Year #addify3d #fillament #3dprintinghk #3D打印 #3d打印香港 #creality3d #artillerygenius #lego #3dprint #3dprinting #legoland #figure #3dprint #3dmodeling #crealityender3 #christmashk #giveawayhk
Ho Ho Ho 第二彈優惠又黎喇! Addify 會免費送出兩卷 ULtrafuse BASF pla basic filament 俾第二十五張購買金額過$500 嘅客人⭐️ 我哋將會喺一月以電郵形式同埋Facebook IG上公布得獎者名單 ⭐️🎄 Merry Christmas 🎄 and Happy New Year #addify3d #fillament #3dprintinghk #3D打印 #3d打印香港 #creality3d #artillerygenius #lego #3dprint #3dprinting #legoland #figure #3dprint #3dmodeling #crealityender3 #christmashk #giveaway
Addify wish you all a Merry Christmas & a Happy New year 🎄 #addify3d #fillament #3dprintinghk #3D打印 #3d打印香港 #creality3d #artillerygenius #lego #3dprint #3dprinting #legoland #figure #3dprint #3dmodeling #crealityender3 #christmashk #giveaway
Ho Ho Ho ! 為咗答謝各位對我哋聖誕優惠嘅支持, 我哋將會免費送出hello3D milk white color filament 俾第15位購買超過$500訂單嘅顧客🥳 我哋將會喺一月以電郵形式同埋Facebook IG上公布得獎者名單 ⭐️🎄 Merry Christmas 🎄 and Happy New Year #addify3d #fillament #3dprintinghk #3D打印 #3d打印香港 #creality3d #artillerygenius #lego #3dprint #3dprinting #legoland #figure #3dprint #3dmodeling #crealityender3 #christmashk #giveaway
3D printed Gingerbread man 🎄 It’s beginning to look a lot like Christmas 🎅😉 #addify3d #3dprint #3dprinting #3dprintinghk #3d打印機 #3d打印香港 #creality #crealityender3 #crealitycr10 #artillerygenius #polywood #fillament #3d打印服務 #2022聖誕 #merrychristmas🎄 #christmasornaments
今次玩吓,漸變色嘅 顏色確係幾靚 ⭐️ #addify3d #fillament #漸變色 #legoguy #legoskeleton #3dprintinghk #3D打印 #3d打印香港 #creality3d #artillerygenius #lego #3dprint #3dprinting #legoland #figure
聖誕節優惠,又黎喇!今年我哋揀選咗特別嘅聖誕優惠🎄優惠低至25% 快啲嚟我哋嘅網站選購 www. Addify3d.com 或者WhatsApp聯絡我哋 📱 64811751 優惠期有限,欲購從速‼️ 優惠期: 12月5號至12月25號 ❄️ 此優惠不包括運費 到貨時間為大約10個工作天 #addify3d #christmassale #3Dprintinghk #3D打印機 #3Dprinter #crealityender3s1pro #fillamenthk #artillerysidewinderx2 #crealitysermoonv1pro #hello3D #pcplus #ultrafuseplabasic
100% Biodegradable 環保物料❤️ 韌性高,耐高溫 並且可以生物降解 🤩完全符合循環經濟嘅原則,可以多次重複使用!減少浪費 🌍 呢隻物料係出自Filamentum 嘅 NonOilen 好多謝@FaychuCafe 同我哋購買左呢隻物料然後3D打印咗杯、筷子、醬汁碟同埋碗仔🫡 如果你都對呢隻物料有興趣嘅話,可以上我哋嘅網站研究研究❤️ #保護地球人人有責 #3d printing #addify3d #環保
Teletubbi ❤️ laa-laa 今期大熱嘅天使得得B laa laa 唔使捱貴價,想要嘅話就自己print 要幾大有幾大,要幾細有幾細🫣 小編特別想介紹呢一隻金色有暗閃嘅Filament 係由 Fillamentum 出嘅 Gold Happened 🤩 print出嚟嘅嘢好靚好高質 ,print 出嚟嘅料都幾實 (起碼唔會掂一掂就爛🫢)有興趣嘅話可以上我哋嘅官網睇睇 Credit: thingiverse.com/thing:5395534 玩具嘅存在價值係要令小朋友開心🙂 ,並唔係玩具所值嘅價錢 🧸 #addify3D #3Dprinting #teletubbies #laalaa #3D打印 #filament
連續咁多日落咁大雨空氣嘅濕度好高 小編建議大家,如果屋企冇防潮箱就記得將filament 放喺膠箱入邊再放無限包吸濕包 filament 處喺濕度太高嘅空氣中, print 出嚟嘅嘢會起晒絲,唔靚㗎! 🫠🫠 #fillament #addify3D #記得好好保養fillament #3dprinting
Desktop 3D printers for the home
Anet Anycubic Creality3D CreatBot Dremel Elegoo Felix Flash Forge FLSUN Flying Bear Formlabs IBRIDGER imprinta MakerBot Peopoly Phrozen PICASO 3D QIDI Raise3D Tiertime Ultimaker Uniz Voxelab wanhao XYZPrinting ZENIT Zortrax
Availability
In stock
Manufacturer
Phrozen Raise3D Creality wanhao Flash Forge
PICASO 3D Anycubic Formlabs Tiertime Flyingbear QIDI Uniz CreatBot Dremel DigiLab Felix Zortrax XYZprinting Ultimaker imprinta Elegoo MakerBot Anet FLSUN iBridger Peopoly snapmaker Voltera Voxelab ZENIT nine0003
Delivery
Assembled printer Assembly kit
Application
Architecture For large objects For beginners The medicine Education
Orthopedics Production prototyping Reverse engineering Advertising, exhibitions Sculpture Dentistry Hobby jewelry nine0003
Print technology
DLP/LCD/SLA FDM/FFF LFS
Thread diameter
1. 75 mm 2.85 mm 3.00 mm nine0003
Material type
ABS PLA PETG Photopolymers Flex
Nylon (Nylon) ASA Carbon HIPS PC PEEK PP TPU other Metal (Ultrafuse 316L, Ultrafuse 17-4PH) nine0003
Number of extruders (print heads)
Heating table
Yes No
Wi-Fi or other wireless network
Yes No
Country of origin
China Russia USA Taiwan Hong Kong nine0003
Netherlands Poland
Add to compare
Product added to compare Go
| Manufacturer | Creality |
| Construction area size | 220x220x250 mm |
| Number of extruders (print heads) | 1 |
| Country of origin | China |
Add to compare
Product added to compare Go
| Manufacturer | Creality |
| Construction area size | 220 x 220 x 250 mm |
| Number of extruders (print heads) | 1 |
Free Shipping
Add to compare
Product added to compare Go
| Manufacturer | Anycubic |
| On order/Transit | Goods in transit |
| Construction area size | 220x220x250 mm |
| Number of extruders (print heads) | 1 |
| Country of origin | China |
Add to compare
Product added to compare Go
| Manufacturer | Creality |
| Construction area size | 235x235x250 mm |
| Number of extruders (print heads) | 1 |
| Country of origin | China |
Free Shipping
Add to compare
Product added to compare Go
| Manufacturer | Anycubic |
| On order/Transit | nine0060 Goods on the way|
| Construction area size | 180 x 163 x 102 mm |
| Country of origin | China |
Add to compare
Product added to compare Go
| Manufacturer | Creality |
| On order/Transit | Goods on the way |
| Construction area size | 220x220x270 mm |
| Number of extruders (print heads) | 1 |
| Country of origin | China |
Free Shipping
Add to compare
Product added to compare Go
| Manufacturer | Creality |
| On order/Transit | Goods in transit |
| Construction area size | 250x250x400 mm |
| Number of extruders (print heads) | 1 |
| Country of origin | China |
Add to compare
Product added to compare Go nine0003
| Manufacturer | Creality |
| On order/Transit | Goods in transit |
| Construction area size | 350x350x400 mm |
| Number of extruders (print heads) | 1 |
| Country of origin | China |
Free shipping
Add to compare
Product added to compare Go
| Manufacturer | Phrozen |
| Construction area size | 134x75x130 mm |
| Country of origin | Taiwan |
Free Shipping
Add to compare
Product added to compare Go nine0003
| Manufacturer | Anycubic |
| Construction area size | 102x57x165 mm |
| Country of origin | China |
Free Shipping
Add to compare
Product added to compare Go
| Manufacturer | nine0060 Anycubic|
| On order/Transit | Goods in transit |
| Construction area size | 197 x 122 x 245 mm (5. 9 l) 9 l) |
| Chamber volume | 5.9 l |
| Country of origin | China |
Free Shipping
Add to compare
Product added to compare Go nine0003
| Manufacturer | Anycubic |
| On order/Transit | Goods in transit |
| Construction area size | 450 x 400 x 400 mm (capacity 72 l) |
| Number of extruders (print heads) | 1 |
| Country of origin | China |
Free shipping
Add to compare
Product added to compare Go
| Manufacturer | Anycubic |
| Construction area size | 197 x 122 x 245 mm (print volume 5.9 l) |
| Country of origin | China |
Free Shipping
Add to compare
Product added to compare Go nine0003
| Manufacturer | Phrozen |
| Construction area size | 165x72x180 mm |
| Country of origin | Taiwan |
Free Shipping
Add to compare
Product added to compare Go
| Manufacturer | Creality |
| On order/Transit | Goods in transit |
| Construction area size | 198 × 123 × 210 mm |
| Country of origin | China |
Free Shipping
Add to compare
Product added to compare Go
| Manufacturer | nine0060 Flash Forge|
| Construction area size | 200*200*250 mm |
| Number of extruders (print heads) | 1 |
| Country of origin | China |
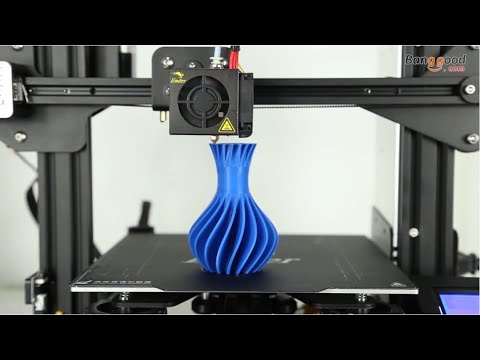
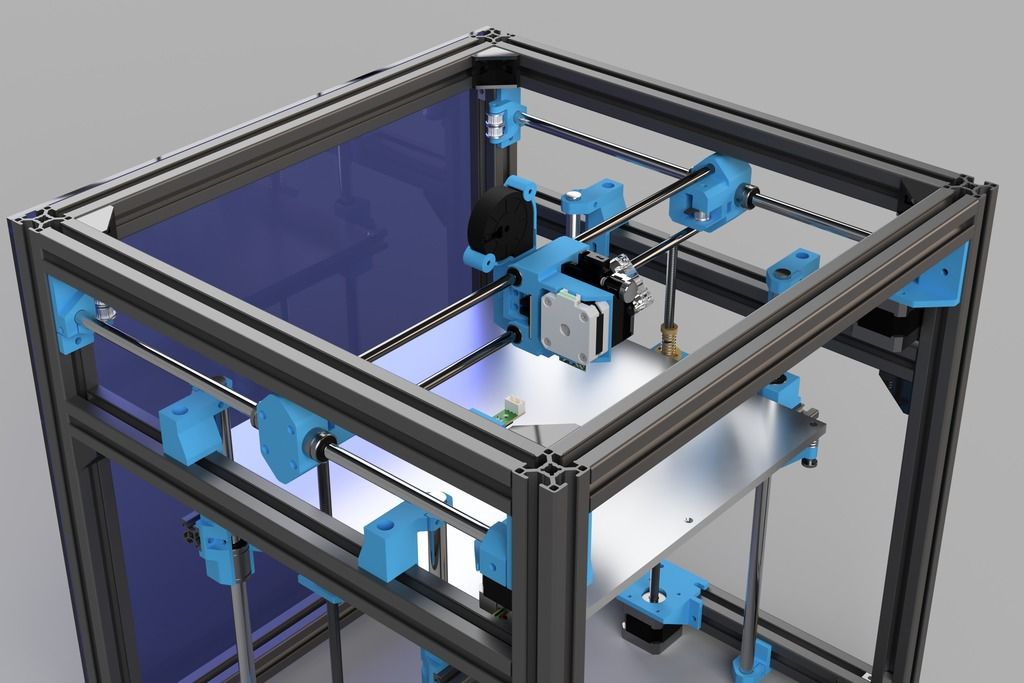
3D printing is one of the most promising areas of technological development in the 21st century.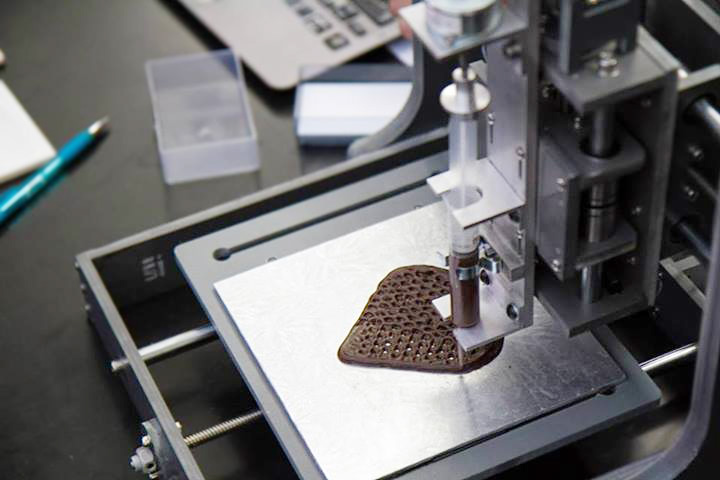 Having gone a long way from bulky and heavy boxes to compact desktop devices, 3D printers have ceased to be something inaccessible to a wide range of users. The era of mass additive manufacturing has already arrived, and every home can now house a real desktop factory. nine0003
You can buy a 3D printer capable of printing small models and prototyping of medium complexity today at the price of an entry-level laptop. The price of PLA or ABS plastic, which acts as a consumable, also no longer seems exorbitant. In a word, if you have long dreamed of getting to know the world of 3D printing and joining the ranks of makers, the right moment has come!
To save you time and make it easier to select equipment, we have collected in one section all desktop 3D printers optimized for home and office use. These are the real "workhorses" with the perfect balance of functionality, quality and price. Even a beginner can understand the settings, mount and calibrate a 3D printer, and as he gains experience, he will be able to print more and more complex three-dimensional models. nine0003
Printing 3D objects in Photoshop
User's Guide Cancel
Search
Last update Dec 13, 2021 08:23:10 PM GMT
- Photoshop User Guide
- Introduction to Photoshop
- Dream about it. Do it.
- What's New in Photoshop
- Editing the first photo
- Create documents
- Photoshop | FAQ
- Photoshop System Requirements
- Transferring presets, operations and settings
- Introduction to Photoshop
- Photoshop and other Adobe products and services
- Working with Illustrator artwork in Photoshop
- Working with Photoshop files in InDesign
- Substance 3D Materials for Photoshop
- Photoshop and Adobe Stock
- Working with the built-in Capture extension in Photoshop nine0579 Creative Cloud Libraries
- Creative Cloud Libraries in Photoshop
- Working in Photoshop using the Touch Bar
- Net and guides
- Creating transactions
- Cancellation and transaction history
- Photoshop on iPad | General questions
- Introduction to the working environment
- System requirements | Photoshop on iPad
- Create, open and export documents
- Adding photos
- Working with layers
- Drawing and painting with brushes
- Selecting areas and adding masks
- Retouch compositions
- Working with adjustment layers
- Adjusting the key of a composition with the Curves layer
- Applying transform operations
- Cropping and rotating compositions
- Rotate, pan, zoom and restore the canvas nine0579 Working with text layers
- Frequently Asked Questions | Photoshop Web App Beta
- Working environment overview
- System requirements | Photoshop 9 Web App Beta0580
- Keyboard shortcuts | Photoshop Web App Beta
- Supported file formats | Photoshop Web Application Beta
- Opening and working with cloud documents
- Collaboration with stakeholders
- Limited editing options for cloud documents
- Cloud Documents Photoshop | Frequently Asked Questions
- Photoshop cloud documents | Workflow Questions
- Work with and manage cloud documents in Photoshop
- Cloud storage update for Photoshop
- Unable to create or save cloud document
- Troubleshooting Photoshop cloud documents
- Collecting cloud document sync logs
- Cloud Document Sharing and Editing
- File sharing and commenting in the application
- Working environment basics
- Learn faster with the What's New panel in Photoshop
- Create documents
- Working in Photoshop using the Touch Bar
- Tool Gallery
- Performance settings
- Using tools
- Touch gestures
- Touch gesture capabilities and customizable workspaces
- Technology overview versions
- Metadata and comments
- Default key combinations
- Touch gesture capabilities and customizable workspaces
- Putting Photoshop images in other applications
- Installations
- Default key combinations
- Rulers
- Show or hide non-printing auxiliaries
- Specifying columns for an image
- Cancellation and transaction history
- Panels and menus
- File placement
- Positioning elements with reference
- Positioning with the ruler tool
- Presets
- Customizing keyboard shortcuts
- Net and guides
- Photoshop for design
- Artboards
- View on device
- Copy CSS from layers
- Dividing web pages into fragments
- HTML options for snippets
- Changing the arrangement of fragments
- Working with web graphics
- Create web photo galleries
- Resizing images
- Working with raster and vector images
- Image size and resolution
- Importing images from cameras and scanners
- Creating, opening and importing images
- Image viewer
- "Invalid JPEG marker" error | Opening images
- View multiple images
- Customizing color palettes and color swatches
- HDR images
- Image color matching
- Converting between color modes
- Color modes
- Erase image fragments
- Blend Modes
- Choice of colors
- Making changes to indexed color tables
- Image information
- Distortion filters not available
- Color details
- Color and monochrome corrections with channels
- Selecting colors in the Color and Swatches panels
- Sample
- Color mode (or picture mode)
- Shade
- Adding a color mode change to an operation
- Adding swatches from HTML CSS and SVG files
- Bit depth and settings
- Understanding Layers
- Reversible editing
- Create and manage layers and groups
- Select, group and link layers
- Putting images into frames
- Opacity and layering
- Layer masks
- Applying Smart Filters
- Layer compositions
- Move, arrange and lock layers
- Mask layers with vector masks
- Managing layers and groups
- Effects and Layer Styles
- Editing layer masks
- Extract resources
- Display layers with clipping masks
- Generation of graphic assets from layers
- Working with Smart Objects
- Blend Modes
- Combining several fragments into one image
- Combining images with Auto Layers
- Alignment and distribution of layers
- Copy CSS from layers
- Load selections based on layer boundaries or layer masks
- See-through to show the contents of other layers
- Layer
- Mixing
- Composite images
- Background
- Select and Mask workspace
- Quick selection areas
- Getting Started with Selections
- Selecting with the Marquee Toolbox
- Selecting with the Lasso tools
- Selecting a color range in an image
- Pixel highlight setting
- Convert between paths and selection boundaries
- Channel Basics
- Moving, copying and deleting selected pixels
- Creating a temporary quick mask
- Saving selections and alpha channel masks
- Selecting focus areas in an image
- Duplication, splitting and merging of channels
- Channel calculation
- Extraction
- Bounding box
- Perspective Warp
- Reducing blur due to camera movement
- Healing Brush Tool Examples
- Export color lookup tables
- Image sharpness and blur correction
- Introduction to color grading
- Applying the Brightness/Contrast setting
- Shadow and Highlight Detail Correction
- "Levels" adjustment
- Hue and saturation correction
- Juiciness correction
- Adjusting the color saturation in image areas
- Quick tone correction
- Applying special color effects to images
- Image enhancement with color balance adjustment
- HDR images
- View histograms and pixel values
- Image color matching
- Crop and straighten photos
- Converting a color image to black and white
- Adjustment and fill layers
- Curves adjustment
- Blend Modes
- Target Imaging for Press
- Adjusting color and tone with the Levels and Curves eyedroppers
- HDR exposure and toning compensation
- Filter
- Blur
- Lighten or darken areas of an image
- Selective Color Correction
- Replacing object colors
- Camera Raw system requirements
- What's New in Camera Raw
- Introduction to Camera Raw
- Creating panoramas
- Supported lenses
- Vignetting, graininess, and haze removal in Camera Raw
- Default key combinations
- Automatic perspective correction in Camera Raw
- Reversible editing in Camera Raw
- Camera Raw Radial Filter Tool
- Manage Camera Raw settings
- Processing, saving and opening images in Camera Raw
- Image enhancements with Camera Raw's improved Spot Remover
- Rotating, cropping and modifying images nine0579 Camera Raw color correction
- Removing objects from photos using Content-Aware Fill
- Content-aware patching and relocation
- Retouching and fixing photos
- Image Distortion and Noise Correction
- Basic troubleshooting steps to solve most problems
- Object transformation
- Crop, rotate and canvas adjustment
- Crop and straighten photos
- Creating and editing panoramic images
- Deforming images, shapes and contours
- Perspective
- Using the Liquify filter
- Content-aware scale
- Transforming images, shapes and paths
- Deformation
- Transformation
- Panorama
- Drawing symmetrical ornaments
- Options for drawing a rectangle and changing the stroke
- Drawing details
- Drawing and editing shapes
- Paint tools
- Creating and modifying brushes
- Blend Modes
- Add color to outlines
- Edit contours
- Painting with mix brush
- Brush Presets
- Gradients
- Gradient interpolation
- Fill and stroke selections, layers, and paths
- Draw with the pen tool group
- Pattern making
- Creating a pattern with the Pattern Builder filter
- Circuit control
- Managing pattern libraries and presets
- Drawing with pen tablet
- Creating textured brushes
- Adding dynamic elements to brushes
- Gradient
- Draw stylized strokes with the Art History Brush
- Drawing with pattern
- Synchronizing presets across multiple devices
- Adding and editing text
- Universal text editor
- Working with OpenType SVG fonts
- Character formatting
- Paragraph formatting
- Creating text effects
- Text editing
- Leading and letter spacing
- Font for Arabic and Hebrew
- Fonts
- Troubleshooting Fonts
- Asian text
- Creating text nine0579 Text Engine error when using Photoshop's Type tool | Windows 8
- Video editing in Photoshop
- Editing video and animation layers
- Introduction to video and animation
- Video and animation preview
- Drawing frames in video layers
- Import video files and image sequences
- Creating frame animations
- Creative Cloud 3D Animation Preview
- Creating timeline animations
- Creating images for videos
- Using the Liquify filter
- Using Blur Gallery group effects
- Fundamentals of filters
- Filter effects reference
- Adding lighting effects
- Using the Adaptive Wide Angle filter
- Oil Paint Filter
- Effects and Layer Styles
- Applying specific filters
- Image area feathering
- Saving files in Photoshop
- Export files to Photoshop
- Supported file formats
- Saving files in other graphic formats
- Move projects between Photoshop and Illustrator
- Saving and exporting video and animation
- Saving PDF files nine0579 Digimarc copyright protection
- Printing 3D objects
- Printing with Photoshop
- Printing and color management
- Checklists and PDF presentations
- Print photos in the new image layout
- Spot color printing
- Duplexes
- Printing images on a printing press
- Photoshop Color Enhancement
- Printing troubleshooting | Photoshop
- Create activities
- Creating data-driven images
- Scenarios
- File batch processing
- Operation playback and management
- Adding conditional operations
- About actions and the Actions panel
- Recording tools in operations
- Adding a color mode change to an operation
- Photoshop UI Development Kit for Plugins and Scripts
- Understanding Color Management
- Accurate color assurance
- Color settings
- Working with color profiles
- Color management of documents for viewing on the web
- Color management for document printing
- Color management of imported images
- Proofing
- Learn more about content credentials
- Identity and origin of NFT tokens
- Connecting accounts for creative attribution
- 3D in Photoshop | Common questions about deprecated 3D features
- Creative Cloud 3D Animation Preview
- Printing 3D objects
- 3D drawing
- 3D Panel Enhancement | Photoshop
- 3D Concepts and Tools
- Rendering and saving 3D objects
- Creating 3D objects and animations
- Image stacks
- 3D graphics workflow
- Measurements
- DICOM files
- Photoshop and MATLAB
- Counting objects in an image
- Combining and transforming 3D objects
- Editing 3D textures
- HDR Exposure and Toning Compensation
- 3D panel settings
Photoshop allows you to print any compatible 3D model without worrying about the limitations of a 3D printer. When preparing to print, Photoshop automatically renders 3D models impenetrable. Photoshop also generates the necessary support structures—platforms and bases—to help you achieve successful 3D printing results.
Preparing 3D objects for printing
- Select the menu item Window > Workspace > 3D to switch to 3D mode. nine0580
- Open the 3D model in Photoshop. If necessary, resize the 3D model while opening the file.
- Select menu item 3D > 3D Print Settings.
- In the 3D Printing Preferences panel, choose whether to use a printer connected to your computer via USB (local printer) or online 3D printing services such as Shapeways.com or Sculpteo.
You can now print 3D models as 3MF (3D Manufacturing Format) files. When specifying 3D printing options, select 9 for option1418 Print to is set to Local and Printer is set to 3MF file. When you send a 3D object to print, Photoshop creates a 3MF file.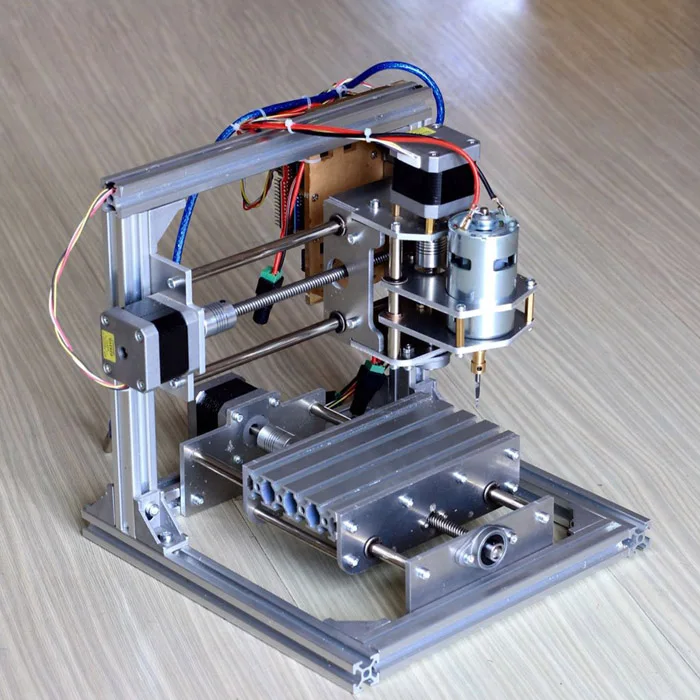 On Windows computers, Photoshop also launches the Microsoft 3D Builder application to further process the 3MF file.
To update the list of supported printers or online profiles, select Get Latest Printers from the Send to Print To pop-up menu.
- Select a local printer or Shapeways.com print profile. nine0580
View estimated prices for printing 3D models using available Shapeways.com profiles by selecting Printer > Estimated Price.
- Select the print volume units from inches, centimeters, millimeters, or pixels. This unit will serve to measure the dimensions of the volume of the printer as well as the dimensions of the printing plate.
A. 3D model B. Printing plate C. Printer volume overlay nine0003
- Select the 3D Printing Detail Level—Low, Medium, or Fine. The time it takes to print a 3D object depends on the level of detail selected.

- If you don't want to see the bounds of the 3D model's print volume, clear the Show Printer Volume Overlay check box.
- Set the Scene Size settings to the appropriate size for the 3D printed object. When you change one value (X, Y, or Z), the other two values are scaled proportionally. When resizing the Stage Volume, notice that the print plate under the 3D model resizes accordingly. nine0580
You can scroll through the Scene Volume settings by clicking the size label (X, Y, or Z) and dragging the cursor left or right. By holding down the Shift key, you can scroll through the values faster.
- Select Scale by printer volume if you want to automatically resize the 3D model so that it takes up the entire available printer volume on the selected printer.
- If your 3D model includes normal maps, bump maps, or transparency maps, you can ignore these types of maps when printing the model. Notice how the 3D model changes in real time as you change the Surface Detail settings.
 nine0580
 - Optionally, you can exclude 3D object support structures (platforms and bases) from printing. Use this option with caution as printing a 3D model without the necessary support structures may produce unsatisfactory results.
- If your printer supports multiple materials, select the material you want to use to print this 3D object.
(Experimental) Enable multitone printing for the MakerBot Replicator 2x 9 printer0131
You can enable an experimental feature that allows you to print continuous tones with your MakerBot Replicator 2x 3D printer.
Requirement: Enable experimental Photoshop features
Experimental features must be enabled in Photoshop before using multitone printing:
- Select Preferences > Experimental Features.
- Select the Enable multitone printing check box. nine0580
- Click OK.
- Restart Photoshop.
Experimental features not yet fully tested. They should be used with caution.
Choose a multi-tone surface material
- Select the MakerBot Replicator 2x printer in the 3D Printing Settings panel.
- In the Material field, select Multitone Surface. If you don't see this option, make sure the experimental Multitone 3D Printing feature is enabled. nine0580
- Set other parameters according to the generated 3D model.
- To view and print a 3D object, select 3D > 3D Print.
Preview and print 3D object
After setting the 3D printing options, follow these steps.
- Click the Start Print icon () or select the menu item 3D > 3D Print. Photoshop will combine the 3D elements of the scene and prepare it for the printing process. nine0131
- If you choose to print with a Shapeways.com profile, Photoshop will display a message that the actual print cost may differ from the estimated cost displayed. Click OK.

- In the preview window that opens, you can use the 3D camera tools to rotate, scale, or move the 3D object.
Rotate the 3D camera.
3D camera rotation.
Move the 3D camera.
3D camera slide. nine0003
Return to the home position of the 3D camera.
- If necessary, select the Show restoration check box. Photoshop displays various restoration colors such as Initial Mesh, Thickened Walls, and Hole Closed.
- You can also turn on Ray Tracing Preview. Viewing ray tracing allows you to more accurately reproduce the printed material. nine0580
- If you want to export the 3D printing settings to an STL file, click the Export button and save the file to the desired folder on your computer. This STL file can be sent to a network service server or moved to an SD card for printing with your own printer.
- View a summary of the 3D print object and click the Print button.
You can cancel the current 3D printing process using the menu item 3D > Cancel 3D Printing. nine0131
3D printing utilities
Photoshop provides interactive step-by-step utilities that you can use to set up, calibrate, and maintain your 3D printer. These utilities can only be used when the 3D printer is turned on and connected to a computer.
- Select the menu item 3D > 3D Printer Utilities.
- Select the utilities you want to run.
Print plate calibration nine0003
Helps in leveling the printing plate. This utility includes the following general steps:
- Requires you to remove all residual print materials from the 3D printer.
- Initializes the printhead.
- Allows you to adjust the amount of gap between the platen and printhead at nine nozzle positions.

You can use this utility in wizard mode or manual mode.
Download Thread nine0003
Helps load filament into a Fused Deposition Modeling (FDM) 3D printer. To facilitate filament loading, Photoshop starts the head heating process and the filament loading mechanism.
Remove thread
Helps remove the filament from the FDM 3D printer. To facilitate the removal of the filament, Photoshop starts the head heating process and the filament loading mechanism.
Replace thread nine0003
Helps to replace the old filament in the FDM 3D printer with a new one. To make changing filament easier, Photoshop starts the head heating process and the filament loading mechanism.
- Follow the instructions on the screen.
Pack objects on the base plane
Sometimes you may want to print multiple instances of an object on the same panel.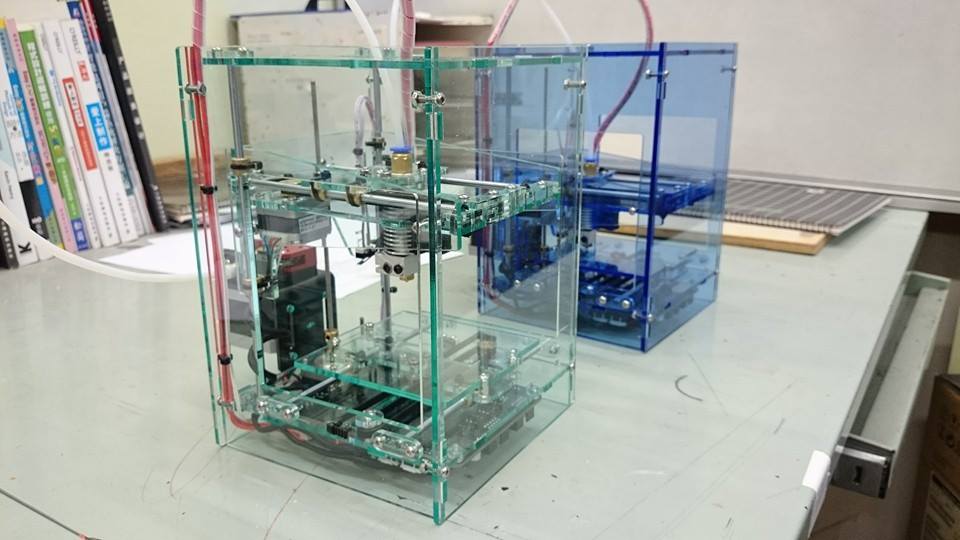 Do the following.
- Select the required objects in the 3D panel. nine0579 Select 3D > Pack Objects on Ground Plane.
- Start printing objects.
FAQ
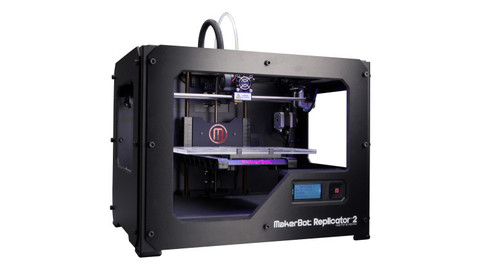
Photoshop currently supports the following 3D printers:
- MakerBot Replicator 2
- MakerBot Replicator 2x
- ZCorp Full Color
- Mcor Iris
- MakerBot Replicator Gen 5
Photoshop also supports several Shapeways.com and Sculpteo profiles. nine0003
The MakerBot Replicator 5th Generation Printer Profile does not yet support USB direct printing. You can export files to a USB drive and print them to a local printer.
Yes. Before printing, you can set a cross section to cut off part of the 3D model. Follow these general steps.
- Select the menu item Window > Workspace > 3D to switch to 3D mode.
- Open the 3D object you want to print. nine0580
- Select Scene from the 3D panel.

- In the Properties panel, select Cross Section.
- Specify the cross section options in the Properties panel.
- Select the menu item 3D > Apply Cross Section to Scene.
- Print a 3D scene.
The desired cross section must be dried before printing.
Yes. Follow these general steps. nine0003
- Select a material in the Scene panel.
- In the Properties panel, click the folder icon () next to Emboss/Transparency/Normals and load the texture. You can also specify a new texture to apply to the 3D model.
- When specifying a new texture, save the texture. The texture is applied to the 3D model as a bump map or transparency.
- Print a 3D model.