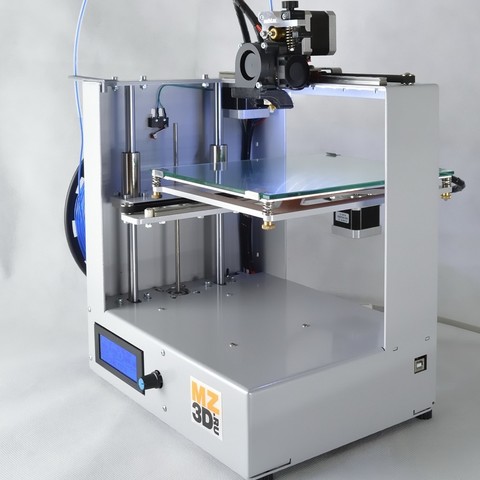
3D printer fully assembled
7 Best Fully Pre-Assembled 3D Printers of 2019
3D Insider is ad supported and earns money from clicks, commissions from sales, and other ways.
The benefits of assembled 3D printers are obvious. You don’t need to spend hours putting them together from scratch. You can go from unboxing to printing in just an hour or two, with the filament loading and print bed leveling being the only tasks that might prove to be roadblocks in some cases.
Obviously, such 3D printers also come with disadvantages. For example, they are generally more expensive than DIY kits. But a lot of people are more than willing to accept those downsides in exchange for the chance to skip the assembly process and print right away. Not everyone has the time and skills to deal with DIY kits.
This guide is for beginners who are looking for the best assembled 3D printers on the market. For this guide, we set a $1,000 price limit, effectively removing 3D printers intended for intermediate users and professionals, such as the Ultimaker 3, the MakerGear M2, and the BCN3D Sigma. We assumed beginners are unlikely to spend over $1,000 on their starter 3D printer.
| Budget |
|---|
| Monoprice Select Mini v2 |
| 4.1/5.0 |
| Resolution: 100 microns |
| Filament Diameter: 1.75 mm |
| This is highly affordable and produces a decent print quality. |
| Check Amazon |
| Best Value |
|---|
| Monoprice Maker Ultimate |
| 4.3/5.0 |
| Resolution: 20 microns |
| Filament Diameter: 1.75 mm |
| Heats up fast, good print quality, and rigid metal frame. |
| Check Amazon |
| Top Pick |
|---|
| Original Prusa i3 MK2S |
4. 6/5.0 6/5.0 |
| Resolution: 50 microns |
| Filament Diameter: 1.75 mm |
| Has an outstanding print quality and generous print area. |
| Check Prusa3D |
Assembled 3D Printers Comparison Table
| Make and Model | Rating | Resolution | Build Volume | Filament Diameter | Material Type | Weight | Connectivity | Price |
|---|---|---|---|---|---|---|---|---|
| Original Prusa i3 MK2S | 4.6 | 50 microns | 9.8 x 8.3 x 8 in | 1.75 mm | ABS, PLA, Nylon, and others | 14 lb | USB, SD card | Check Price |
| Monoprice Select Mini v2 | 4.1 | 100 microns | 4.7 x 4.7 x 4.7 in | 1.75 mm | ABS, PLA, TPU, and others | 9.9 lb | Wi-Fi, USB, SD card | Check Price |
| Monoprice Maker Ultimate | 4.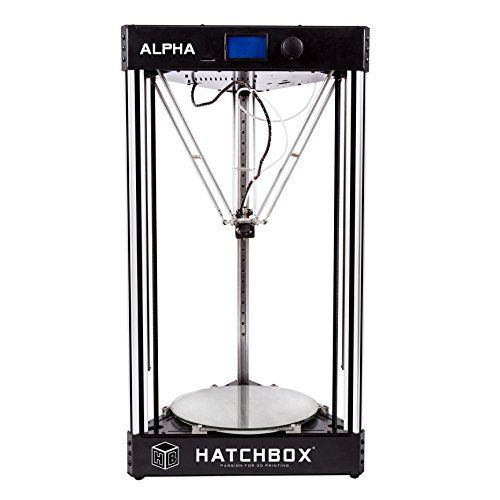 3 3 | 20 microns | 7.9 x 7.9 x 6.9 in | 1.75 mm | ABS, PLA, PVA, and others | 30.6 lb | USB, SD card | Check Price |
| FlashForge Finder | 3.9 | 100 microns | 5.5 x 5.5 x 5.5 in | 1.75 mm | PLA | 44.1 lb | Wi-Fi, USB | Check Price |
| XYZprinting da Vinci 1.0 Pro | 3.8 | 20 microns | 7.9 x 7.9 x 7.9 in | 1.75 mm | ABS, PLA, PETG, and others | 50.7 lb | Wi-Fi, USB | Check Price |
| Qidi Tech X-smart | 4.1 | 100 microns | 6.5 x 5.7 x 5.9 in | 1.75 mm | ABS, PLA | 33.1 lb | USB | Check Price |
| Dremel Digilab 3D20 | 4.0 | 100 microns | 9 x 5.9 x 5.5 in | 1.75 mm | PLA | 19.5 lb | USB, SD card | Check Price |
1. Best Pick: Original Prusa i3 MK2S
View on Prusa3D
Editor’s Rating: 4. 6/5
6/5
The Original Prusa i3 MK2S is one of the best and most reliable 3D printers on the market. A lot of users wouldn’t hesitate to recommend it for both beginners and enthusiasts, even with the newer model MK3 now out. You can get the fully assembled MK2S for about $900, which is around $300 more expensive than the DIY kit. It’s on the expensive side, but you won’t find many products under $1,000 that offer the same long-term value as the MK2S.
A Cartesian 3D printer, the MK2S is an open-structure 3D printer, with an integrated LCD interface and a top-mounted spool holder. It has a rigid metal frame built to withstand high-speed prints and comes with a heated print bed. Unlike with the MK3, the print bed is non-magnetic, which means you can’t easily pop it out for print removal and cleaning. Concerning build volume and machine footprint, the MK2S is identical to the MK3.
Setting up the MK2S is as simple as it can get, with the automatic bed leveling system eliminating the often daunting task of manually calibrating a print bed. No need for a significant amount of tinkering at the onset; the MK2S is ready to go as soon as you finish installing the software and loading the filament. Prusa Research includes a comprehensive manual, so the chances of you getting lost during the initial setup are slim, especially since no assembly is required.
What makes the MK2S worth the money is the print quality. It’s capable of producing detailed and exceptionally clean prints, the kind of results that’ll make you glad you chose to spend your money on it instead of going cheap. It’s an absolute workhorse once tuned up, producing print after print in a reliable manner. When it comes to print quality, the MK2S and the MK3 are actually not that different, one reason some owners of the older model are still not sold on upgrading to the newer model.
The MK2S offers excellent material compatibility out of the box, which can’t be said for a lot of 3D printers under $1,000. It has a well-designed print head with a very capable hotend and, as mentioned, comes with a heated print bed – both of which allow you to print with a wide selection of materials, including ABS, HIPS, Nylon, and composite filaments. The only material that will prove to be tricky to deal with is TPU, even with the direct drive setup.
In regard to community support, the MK2S will not disappoint you. It has a big community, which is sometimes more important for beginners than tech specs. It’s easy to find optimization and troubleshooting guides. The community already has you covered on some of the most common problems you might encounter down the road, as well as useful upgrades that you can check out for an even better 3D printing experience.
While not as loaded with convenient features as the MK3, the MK2S is a superb 3D printer. It’s more tried-and-tested than the MK3, with an established reputation for being one of the most reliable workhorses in the business. If you’re in the market for the best fully assembled 3D printer under $1,000, the MK2S is the first, second, and third product you should consider.
| Tech Specs |
|---|
| Resolution: 50 microns |
Volume: 9. 8 x 8.3 x 8 in 8 x 8.3 x 8 in |
| Filament: 1.75 mm |
| Type: ABS, PLA, Nylon, and others |
| Weight: 14 lb |
| Connect: USB, SD card |
| The Pros |
|---|
| Outstanding print quality |
| Automatic bed leveling system |
| Generous print area |
| Great material compatibility |
| Large community |
| The Cons |
|---|
| High price point |
| Fewer features than Original Prusa i3 MK3 |
2. Best Budget: Monoprice Select Mini v2
View on Amazon
Editor’s Rating: 4.1/5
When shopping for budget 3D printers, Monoprice is one of the first brands you should check out. It offers a solid lineup of products under $1,000, one of the most popular of which is the Monoprice Select Mini v2 – a compact desktop 3D printer that sells for about $180-200.
The Select Mini v2 is a desktop 3D printer with a small footprint. It has an open structure, featuring a single extruder and a heated print bed, the latter of which might surprise some people, considering the price. It has an integrated control unit, which allows you to start prints without a computer connection. Unlike most cheap 3D printers under $200, which often come in a DIY kit, the Select Mini v2 has a clean profile, with good cable management.
Although the Select Mini v2 is fully assembled out of the box, setting it up is not as straightforward as you might expect, due in large part to the initial print bed calibration. Unlike the Original Prusa i3 MK2S, this budget 3D printer has a manual bed leveling system. While it can be frustrating to get the print bed perfectly leveled, most especially for beginners, the process won’t take more than one hour. On the plus side, leveling the print bed is a good experience, one that will prove useful in the future.
The Select Mini v2 prints well for a cheap 3D printer, but don’t expect too much. It can print detailed 3D models once you get the settings right. Monoprice advertises an impressive list of materials the Select Mini v2 can print with out of the box. Sadly, almost all of them are not accessible until you make some upgrades to the core components, such as the hotend. So don’t get too excited about seeing TPU as one of the compatible materials you can print with on this desktop 3D printer.
Considering the “mini” in the product name and the machine size, it’s not surprising the Select Mini v2 comes with a small print area. Of all the products included here, the Select Mini v2 has the smallest print area, which makes it unappealing for some people, even after considering the price. If a large print area is more important to you than anything else, then this compact 3D printer is not for you.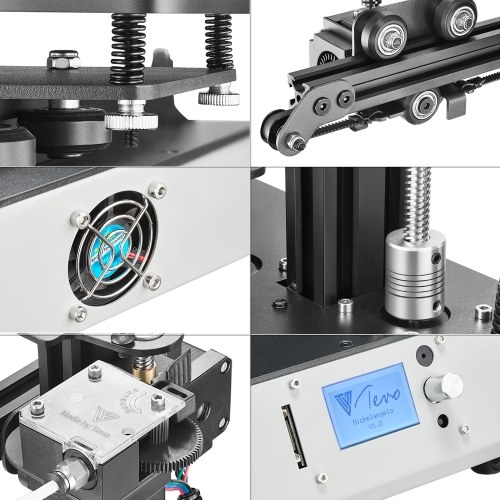
One of the best things about the Select Mini v2 is that it has a big community. Its user groups are full of helpful people who are always happy to guide beginners, not only with troubleshooting issues but also with upgrades or mods. In regard to official support, don’t expect too much as Monoprice is not exactly known for its customer service, regardless of the communication platform.
Overall, the Select Mini v2 is one of the best 3D printers under $200. It offers multiple connection options, including Wi-Fi, comes with a heated print bed, and can produce good prints for a budget 3D printer. It’s also easy to modify, courtesy of its open structure, and comes in a portable form. If you want an assembled 3D printer but can’t afford to pop more than $300 on one, go for the Select Mini v2.
| Tech Specs |
|---|
| Resolution: 100 microns |
Volume: 4. 7 x 4.7 x 4.7 in 7 x 4.7 x 4.7 in |
| Filament: 1.75 mm |
| Type: ABS, PLA, TPU, and others |
| Weight: 9.9 lb |
| Connect: Wi-Fi, USB, SD card |
| The Pros |
|---|
| Highly affordable |
| Compact and lightweight |
| Decent print quality |
| Heated print bed |
| Large community |
| The Cons |
|---|
| Small build volume |
| Manual bed leveling can be a pain |
| Slow print speed |
3. Best Value: Monoprice Maker Ultimate
View on Amazon
Editor’s Rating: 4.3/5
At around $600, the Monoprice Maker Ultimate is significantly more expensive than both the Select Mini v2 and the Maker Select v2. It’s a semi-enclosed 3D printer with a rigid metal frame and a single extruder. On the surface, it appears to be a combination of the Zortrax M200 and the Ultimaker 2: it has an all-black finish like the former and a dial-operated LCD like the latter.
Enclosed with a box-shaped frame, the Maker Ultimate is Cartesian 3D printer with a print head that moves on the X and Y (Cartesian XY). The heated print bed moves up and down on the Z, instead of side to side on the Y. It has an SD card slot out front and a USB port at the rear. The spool holder is located at the back, along with the power switch.
The Maker Ultimate has a good build volume, though it would have been better if it was taller and offered more vertical space. It’s easy to set up out of the box, with all the things you need to get started included in the package, including a set of tools, a sample filament, and some test models on the SD card. The manual bed leveling process may prove to be a slight challenge, though, especially for beginners.
Concerning overall performance, the Maker Ultimate is good. It can print in high resolutions and with different materials, including ABS, PVA, and several composite filaments. It heats up fast and can handle high-speed prints well. The cooling fan can be really loud, though, so you may want to consider replacing it in the near future.
Like the Select Mini v2, the Maker Ultimate offers long-term value. It has a big community, which sort of offsets the unreliable official support, and can produce great prints with the right setup. It’s easy to upgrade as well, which means you can turn it into an even more capable 3D printer. It offers a more complete package than all the other products on this list – except the Original Prusa i3 MK2S.
| Tech Specs |
|---|
| Resolution: 20 microns |
| Volume: 7.9 x 7.9 x 6.9 in |
Filament: 1. 75 mm 75 mm |
| Type: ABS, PLA, PVA, and others |
| Weight: 30.6 lb |
| Connect: USB, SD card |
| The Pros |
|---|
| Easy to set up out of the box |
| Rigid metal frame |
| Good print quality |
| Heats up fast |
| Good community |
| The Cons |
|---|
| Loud cooling fan |
| Unreliable official customer support |
| Tricky manual bed leveling process |
4. FlashForge Finder
View on Amazon
Editor’s Rating: 3.9/5
The FlashForge Finder is a suitable starter 3D printer for beginners, both for home use and classroom use. It comes from the same company that produced the Creator Pro, one of the most reliable and most affordable dual extruder 3D printers on the market.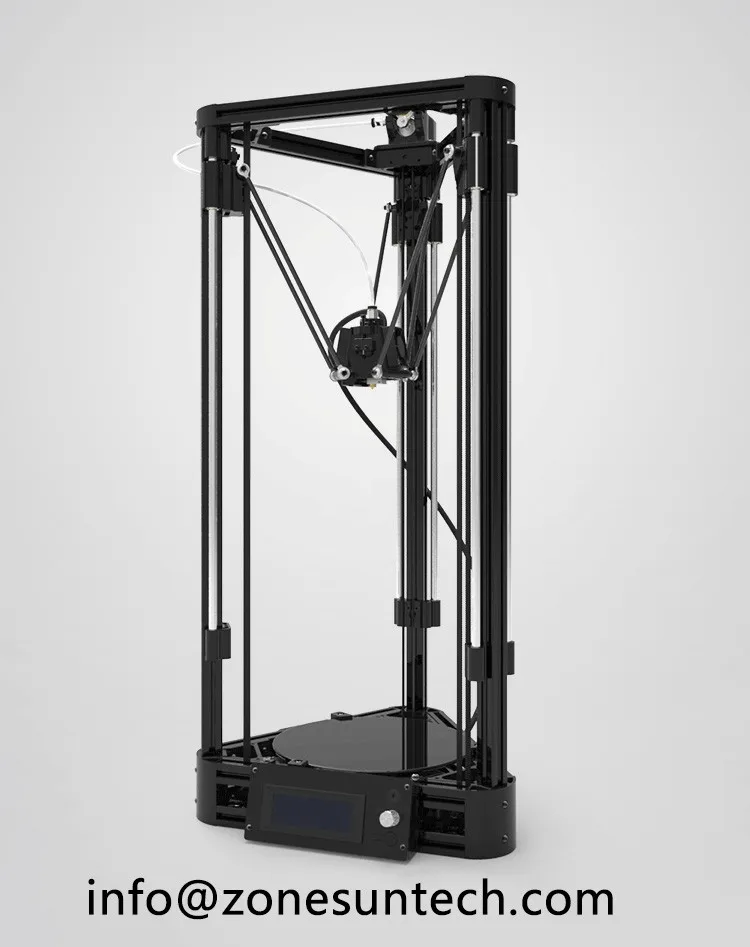 After originally selling for over $500, the Finder now goes for less than $400, making it even more appealing to beginners.
Like the Monoprice Maker Ultimate, the Finder is a semi-enclosed 3D printer, but the frame material is different. Instead of metal, the frame is made of plastic alloy. But compared to an open-structure 3D printer with a plastic frame, such as the Anet A8, the Finder is more rigid, with no need for additional braces. Obviously, the mechanical arrangement has a big hand in that, but it’s still worth pointing out considering a lot of people assume plastic-framed 3D printers have stability issues.
The Finder is cube-shaped, with a slightly larger print area than the Monoprice Select Mini v2. It has a well-secured print head with a single nozzle and a non-heated print bed, the latter of which is what makes it an ideal 3D printer for kids. It has a touchscreen interface at the top of the frame and comes with a dedicated spool compartment, which is located at the back of the machine.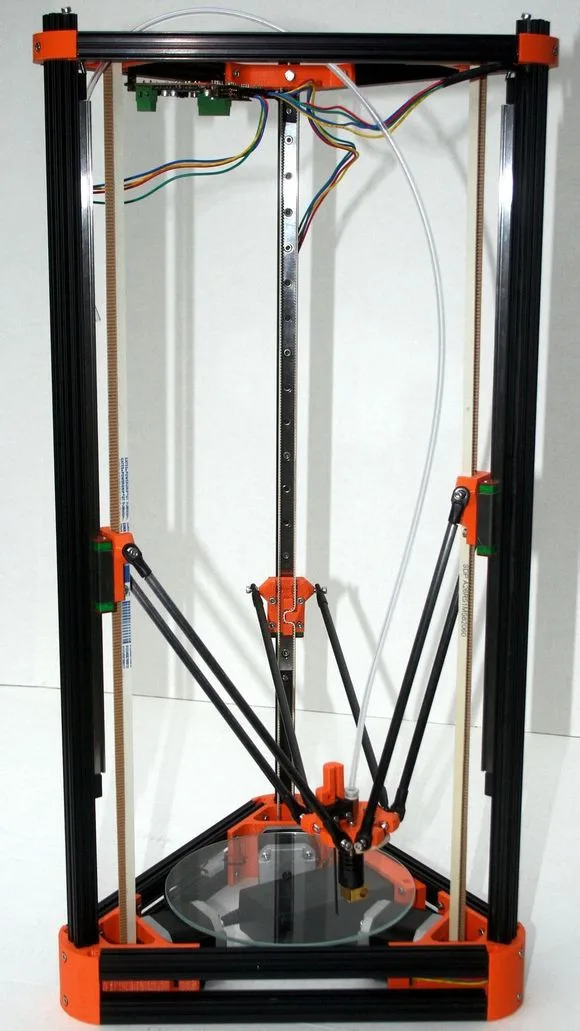
While the Finder can use filaments from other brands, the integrated spool holder is made for FlashForge-branded filaments. That means an external spool holder is required for non-FlashForge filaments, such as the ones from Hatchbox. It’s a minor inconvenience with an easy solution, but keep in mind that an external non-mounted spool holder adds to the overall machine footprint.
Other than its affordable price and fully assembled form, the Finder’s main selling point is that it’s extremely easy to use, even for complete beginners. It’s a plug-and-play 3D printer that allows you to start printing in just 30 minutes. One of the chief reasons for that is the Finder’s assisted manual bed leveling system, initialized via the onboard interface. While it can’t beat a fully automatic system, the semi-automatic bed leveling system works as intended and turns the initial bed calibration into a walk in the park.
Regarding print quality, it’d be wise not to expect a lot from the Finder. It can produce good prints but don’t count on it to produce extremely detailed and smooth prints, even in max resolution. And don’t expect to be able to experiment with different materials as well. As mentioned, the Finder is not equipped with a heated print bed, which immediately removes materials such as ABS, HIPS, and PC out of the equation.
All in all, the Finder is a good entry-level 3D printer despite its limits. It’s extremely easy to use out of the box – which is a big plus for beginners – and comes with well-designed and well-secured components. It has an assisted manual bed leveling system and a touchscreen interface, the latter of which gives it a more modern look compared to other cheap 3D printers.
| Tech Specs |
|---|
| Resolution: 100 microns |
| Volume: 5.5 x 5.5 x 5.5 in |
| Filament: 1.75 mm |
| Type: PLA |
Weight: 44. 1 lb 1 lb |
| Connect: Wi-Fi, USB |
| The Pros |
|---|
| Plug-and-play |
| Assisted manual bed leveling system |
| Removable build plate |
| Built-in spool holder |
| Responsive touchscreen interface |
| The Cons |
|---|
| Small print area |
| Limited to PLA |
| Non-heated print bed |
5. XYZprinting da Vinci 1.0 Pro
View on Amazon
Editor’s Rating: 3.8/5
The XYZprinting da Vinci 1.0 Pro is an enclosed 3D printer that offers more long-term value than the other cheap models in the da Vinci series. On paper, it appears to be a great product, especially for beginners. But it has a number of issues that hold it back and prevent it from being more than just an entry-level 3D printer.
One of the most notable enclosed 3D printers under $500, the da Vinci 1.0 Pro has a rigid frame, with well-secured components and an easily accessible LCD interface out front. Like the FlashForge Finder, it’s a cube-shaped 3D printer with a built-in spool holder designed specifically for first-party filament spools. But unlike the Finder, it has a large print area and a heated print bed.
XYZprinting is infamous for its use of proprietary filaments, one of the biggest reasons many people stay away from the company’s lineup of affordable 3D printers. We have both good news and bad news on that front. The good news is that the da Vinci 1.0 Pro is capable of printing with third-party filaments as long as the filament diameter is a match. The bad news is that the built-in spool holder, as mentioned above, is designed for XYZprinting filament spools. For third-party filaments, you’ll need to build your own external spool holder.
The initial setup is simple. You can install the software, level the print bed, load the filament, and start printing in just 30 minutes or less, but don’t expect excellent results with the default settings. Like with other 3D printers, a fair amount of tinkering is required before the da Vinci 1.0 Pro can produce good results. Don’t get too excited about that advertised 20-micron max resolution, though; it sounds too good to be true for a cheap 3D printer.
When it comes to overall performance, the da Vinci 1.0 Pro is good but not exactly a standout. It can produce good prints at decent speeds with both ABS and PLA, the two most common materials used in 3D printing. But despite being equipped with a heated print bed and a full enclosure, the da Vinci 1.0 Pro has a disappointing material compatibility overall. It needs at least a hotend upgrade before it can print with more advanced materials.
If you’re in the market for a fully enclosed 3D printer that comes assembled, the da Vinci 1.0 Pro is a solid option. It has a large build volume, accepts third-party filaments (which is notable for a 3D printer from XYZprinting), and features an easy bed leveling process. It’s also highly affordable, selling for just around $350 on a regular day.
| Tech Specs |
|---|
| Resolution: 20 microns |
| Volume: 7.9 x 7.9 x 7.9 in |
| Filament: 1.75 mm |
| Type: ABS, PLA, PETG, and others |
| Weight: 50.7 lb |
| Connect: Wi-Fi, USB |
| The Pros |
|---|
| Full enclosure |
| Good build volume |
| Easy to set up and use |
| Heated print bed |
| Open filament system |
| The Cons |
|---|
| External spool holder required for third-party filaments |
| Limited material compatibility |
| Not easy to mod |
6.
 Qidi Tech X-smart
View on Amazon
Editor’s Rating: 4.1/5
With so many products on the market, there are many good 3D printers that get overlooked. The Qidi Tech X-smart is a good example. It’s an enclosed 3D printer with a rigid metal frame and a number of features not normally seen on budget products.
In design, the X-smart is like the Qidi Tech I, but smaller and more limited. It has a smaller build area and comes with a single extruder. It’s protected on all sides, featuring a hinged front door, a couple of side panels, and a top cover. The full enclosure is a two-way defense. It protects you against fumes and protects the 3D printer from dust and other fine particles. The side panels and top cover can be easily removed, allowing you to quickly switch to an open setup.
The X-smart has a spool holder at the back and a touchscreen interface, the latter of which is uncommon for a budget 3D printer. It has a heated print bed, connected to a leadscrew-driven motion system. The build platform is removable and bendable, which allows for easy removal of completed prints. Additionally, the removable nature of the built plate makes it a lot easier to clean. The print bed is easy to level and doesn’t go out of alignment after just a few prints, both of which are not surprising for a 3D printer set in a Cartesian XY mechanical arrangement.
When it comes to print quality, the X-smart is good for a budget 3D printer. It can produce clean and surprisingly detailed 3D models when the settings are on point, though it struggles a bit with more complex objects. It can print with both ABS and PLA, with the heated print bed making the former possible.
Unlike most cheap 3D printers, the X-smart has the ability to recover from a power failure. It automatically creates a save point when interrupted in the middle of a print, allowing you to resume the print progress as soon as the power returns. It’s also possible to manually create a save point, a useful feature if you don’t want to sleep with a running 3D printer in another room.
The best thing about the X-smart is that Qidi Tech provides outstanding customer service, which is rare these days. The company attends to inquiries and customer issues in a friendly and timely manner, the latter of which is even more impressive once you remember Qidi Tech is in a different time zone. This is what separates Qidi Tech from other China-based 3D printer companies.
All in all, the X-smart is a great starter 3D printer for beginners. It can be used for both home use and classroom use. It has a rigid metal frame, a full enclosure, a power loss recovery feature, and a removable build plate, all of which instantly makes it better than many 3D printers in the same price range. The cherry on top is the exceptional Qidi Tech customer support.
| Tech Specs |
|---|
| Resolution: 100 microns |
| Volume: 6.5 x 5.7 x 5.9 in |
Filament: 1. 75 mm 75 mm |
| Type: ABS, PLA |
| Weight: 33.1 lb |
| Connect: USB |
| The Pros |
|---|
| Outstanding customer service |
| Touchscreen interface |
| Easily removable side panels and top cover |
| Removable built plate |
| Power loss print recovery |
| The Cons |
|---|
| Small build volume |
| Limited connectivity options |
| Practically non-existent community |
7. Dremel Digilab 3D20
View on Amazon
Editor’s Rating: 4/5
The Dremel Digilab 3D20 is another fully enclosed 3D printer designed for beginners. It’s from an established brand of power tools, selling for about $600, a more accessible figure than its original price of $1,000. It has a sturdy frame, with a touchscreen interface out front and an internal spool holder.
The 3D20 has a well-designed structure, with all the moving parts safely secured inside the full enclosure, making it a recommended 3D printer for classroom use in which kids are involved. It’s got a single extruder setup and comes with a non-heated print bed. It has a slightly larger build volume than the Qidi Tech X-smart, featuring a lengthier build plate.
Compared to the X-smart, setting up the 3D20 can be a bit tricky, especially for beginners, because of the manual bed leveling process. It can take several tries before you can get the print bed perfectly leveled. The good news is that you don’t have to go through that process on a regular basis as the print bed stays level for a long time. Other than the initial print bed calibration, there are no other technical roadblocks during the initial setup.
While the 3D20 can produce good prints, it doesn’t offer a lot of room for experimentation. It can only print with PLA, the most basic material. High-temperature materials such as ABS, HIPS, and ASA are not possible, considering the print bed is non-heated. TPU and other flexible filaments, which don’t strictly require a heated print bed, are also out of the equation, simply because the extruder is not built for them.
Speaking of material compatibility, the 3D20 can use third-party filaments, though Dremel encourages everyone to use its own expensive filaments. But for third-party filaments, you need to build your own spool holder. Before you print with a non-Dremel filament, make sure you understand that doing so will mean forfeiting the product warranty.
Overall, the 3D20 is a fully assembled 3D printer that will make for a good starter 3D printer for beginners. It has a decent build volume, comes with a full enclosure for safety, and produces good prints at acceptable print speeds. The price is a letdown, though, considering its limits. But at least the product warranty is for real, unlike with most other budget 3D printers.
| Tech Specs |
|---|
| Resolution: 100 microns |
| Volume: 9 x 5.9 x 5.5 in |
| Filament: 1.75 mm |
| Type: PLA |
| Weight: 19.5 lb |
| Connect: USB, SD card |
| The Pros |
|---|
| Full enclosure |
| Touchscreen interface |
| Can produce good prints |
| Decent build volume |
| Comes from an established brand |
| The Cons |
|---|
| Limited to PLA |
| Non-heated print bed |
| Stock spool holder only fits Dremel spools |
Contents
- Assembled 3D Printers Comparison Table
- 1.
 Best Pick: Original Prusa i3 MK2S
 - 2. Best Budget: Monoprice Select Mini v2
- 3. Best Value: Monoprice Maker Ultimate
- 4. FlashForge Finder
- 5. XYZprinting da Vinci 1.0 Pro
- 6. Qidi Tech X-smart
- 7. Dremel Digilab 3D20
5/51 rating
Warning; 3D printers should never be left unattended. They can pose a firesafety hazard.
Don't Buy a Self-Assembled 3D-Printer Before Reading This
Would a self-assembled large-format 3D printer be worth the price tag savings?
The answer depends on a variety of factors.
The reality is there are an array of options when choosing a 3D printer, and the right system for you is going to depend on several factors, ranging from your knowledge of 3D printers, budget, and what you want to accomplish with the printer.
How much experience do you have working with 3D printers? Are you comfortably knowledgeable of every component? Can you troubleshoot most problems yourself or do you often depend on services? Even if you can troubleshoot your own printer, how large is your margin for error?
In the right situation, self-assembled 3D printers can be an affordable option. Highly experienced users who understand 3D printer construction, maintenance, and modification with a wealth of time to build and troubleshoot their new 3D printer can make use of self-assembled offerings. Unfortunately, DIY 3D printers are too often treated as a cost-saving solution and purchased without fully understanding the expertise and time they’ll likely require.
It’s important to understand what each offering includes, and weigh them against your expectations. So, in this article we’ll go over 4 key considerations when deciding if a self-assembled (DIY) 3D printer is right for you, and why we believe premium offerings like BigRep’s 3D printers are a better choice.
Assembly Time
Time is money and your time is extremely valuable. Assembly is one of the clearest reasons to buy a premium 3D printer, so we’ll get it out of the way first.
Many businesses invest in technologies like 3D printers with specific goals in mind. They may want to reduce the lead time on parts and tooling or decrease outsourcing expenditures. Others may need a resource for agile product development to create prototypes on demand. It’s important to consider when you want to start progressing through these goals if you’re considering a self-assembled 3D printer.
Just assembling a DIY 3D printer takes time. How much time exactly will vary from user to user depending on pre-existing knowledge and clear instructions and labeling but could take a few days up to a month or more depending on labor availability, parts and any issues that could arise.
Additive manufacturing requires high precision to function effectively. Even small imperfections – in the wrong place – can render a part useless for many applications. During self-assembly it’s easy to misalign or mistakenly construct a printer that can cause excess vibrations or other inaccuracies during operation. Experienced users may know how to troubleshoot and repair these issues if they aren’t simply the result of low-quality hardware. Less experienced users may be unable to properly assemble their new 3D printer at all. In this case, and if the manufacturer doesn’t offer onsite servicing, you would need to hire a technician for assembly – likely bridging the cost gap. Either situation, requires significant time investment to ensure a system is operating properly.
With premium 3D printers like offerings from BigRep, a highly skilled technician can install your system onsite and validate its performance in as little as one day. They’ll introduce you to your new printer, train you on typical 3D printer troubleshooting, and help you to understand large-format best practices. Better yet, should unexpected problems arise, a BigRep service technician can come onsite or through a virtual service call to remedy the problem and ensure as little productivity is lost as possible.
Costs
At first glance, the price of a DIY system might seem too good to pass up. However, what many don’t realize is the price you see for many self-assembly 3D printers are “barebone” packages. These price points offer the most basic system, and a few upgrades are usually required to bring the system to an industrial standard.
Barebone systems are typically packaged en masse straight out of an affordable manufacturer, usually in China, and come with hardware of minimal quality – depending on the specific offer. If you don’t purchase upgrades before assembly, it’s likely that you’ll feel the need to once you’re using the system regularly.
When choosing upgrades, integrations are important features to pay mind. Is your build volume’s heating integrated with the 3D printer control board? If not, you might have to manually switch the heating off before the print bed can cool down. Limitations like this can severely restrict the flexibility of large-format 3D printing, like running prints overnight.
Aside from these big quality of life upgrades, there are a lot of smaller parts – like ware components – where quality will be very important.
Industrial 3D printers come fully equipped so they are ready to perform out of the box, no upgrade costs required. So yes the price tag will be more but it also comes with the assurance there are no hidden costs or components needed to bring it up to an industrial standard for printing.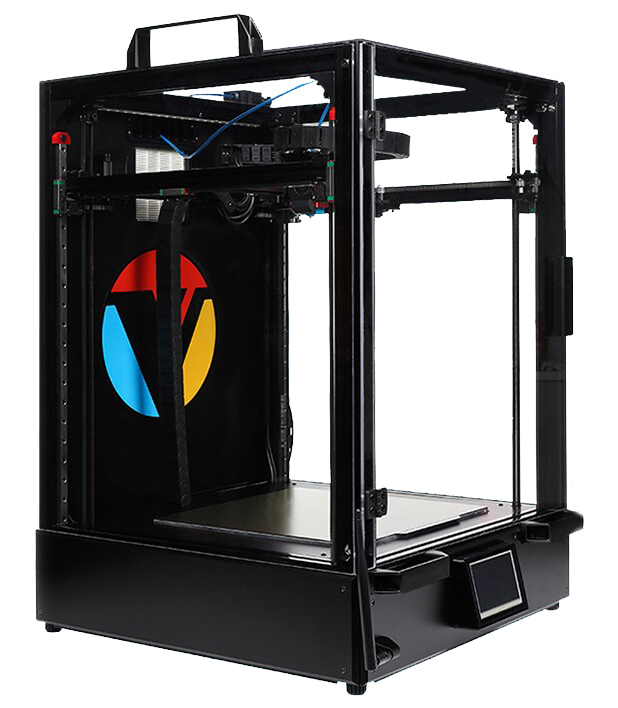
Down Time
You purchase a printer to do a job. So when the printer is down, it effects the bottom line. Most users will compare a 3D printer’s key components out the gate and upgrade self-assembly systems where they feel necessary – hot ends, filament detection, and control systems are common in the first pass. While easier to ignore, it’s essential to also examine the quality of ware components. Check various gears, bearings, and straps for quality.
All moving parts are essential to replace early on cheaper systems to ensure consistency and reliability throughout operation. Low-quality parts will ware much faster than premium industrial parts or otherwise require additional intervention when compared to parts and systems that come standard with premium industrial 3D printers like BigRep’s.
Experienced users will either upgrade low-quality moving parts from the start or when they’re skilled troubleshooters, replace them as needed. It may be difficult for less experienced users to locate these smaller components when they begin to fail and overlooking these parts can lead to serious downtime and lost business if you’re not prepared.![]()
Keep in mind that cost-cutting doesn’t stop with the quality of a system’s parts: many DIY 3D printer manufacturers maintain their low prices by offering limited support or none at all; meaning you’ll need to hire a third-party technician if you can’t fix it yourself. That’s not a slight against the companies, their systems are made to be routinely customized and upgraded by users with extensive 3D printer knowledge and familiarity. However, given to less experienced users or placed in demanding industrial environments these concessions could mean large maintenance down times and easily bridge premium cost.
Quality Assurance
You buy a printer to produce parts – prototypes, jigs, fixtures, molds or end use parts. One expectation when producing them is that they will meet your quality expectation. The quality of parts coming off your 3D printer will be directly determined by the quality of your printer in many ways. In most cases this will be obvious parts – high-quality control boards or gantries will be pivotal to high-quality parts. Even upgrading these core components can eliminate your initial savings from many self-assembled 3D printers, but it’s important that you consider the overall quality of the system you’re purchasing.
In the wrong place even a degraded nut or bolt can lead to excess vibrations that heavily impact your production quality. While replacements for these flawed support components may be very affordable, they can be far more difficult to identify as the source of a problem. In industrial settings, those issues directly impact future revenues.
Mass manufacturing is all about cost efficiency, so many DIY 3D printer manufacturers will take advantage of these hidden concessions so they can compete better with visible features. Unfortunately, even these small components have a significant impact of the quality of your parts. If your business will be negatively impacted by reduced print quality or printer downtime, it’s vital that you consider your supplier’s commitment to their product over its lifetime. A robust service offering like BigRep’s shows that corners won’t be cut on manufacturing and assembly so your business can operate smoothly with consistent quality.
Conclusion
So the question “are they worth it?” is really up to your needs, time allowance, and expectations. If you have a dedicated technician who wants to know their machine inside and out, modify heavily, has endless time and is confident they can handle all servicing, a DIY 3D printer may be an option for you – even in large-scale. However, without the right staff, available labor, and 3D printing knowledge, they have the potential to cause more problems than they’re worth.
With an industrial large-format 3D printer like one of BigRep’s, uncertainties are taken out of the equation. Our products are carefully designed to balance cost with the performance and long-term reliability expected by industrial users. With German-engineered and validated systems installed onsite by a specialized technician, you’ll waste no time getting your 3D printer up and running with every assurance of its quality and reliability.
What you need to know before buying a
3D printer
What should be considered when buying a 3D printer and how to choose the right 3D printer for your project? Find out in this post. With so many models on the market today, choosing a 3D printer can be more difficult than you might think. In this post, we will look at the key factors to consider when buying a 3D printer.
FDM / SLS / stereolithography
Most of the printers currently available on the market are FDM printers. FDM stands for fuse displacement modeling and basically means that the object is printed layer by layer.
Two other types of printers are stereolithography and SLS (Selective Laser Sintering). They are significantly more expensive and are mainly used in industrial projects.
Stereolithography provides higher print quality by using a UV light to enhance the mode, while SLS uses lasers and powders to create a layer of printed material.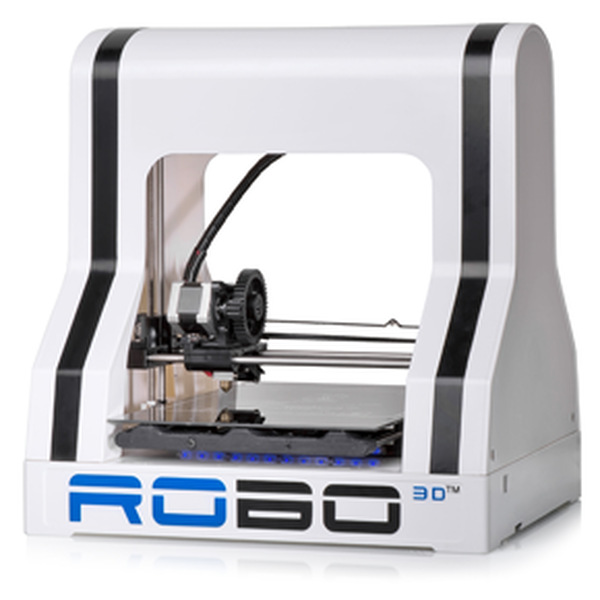
Most commercial printers are FDM - and if you're looking to buy one for your home, you'll likely be choosing between the wide range of FDM printers available on the market.
Assembled 3D printer or DIY 3D printer?
This is another question to answer when choosing a 3D printer. Since 3D printers are mostly used by manufacturers and in the creative community, it makes sense that the tool itself could be assembled by the hands of those who plan to use it.
However, making a 3D printer completely from scratch can be quite a challenge. Luckily, for your creative enjoyment, you can find a huge variety of 3D printer DIY kits with clear building instructions. If you prefer to jump right in and skip assembly, use a pre-built 3D printer model that's ready to go right out of the box.
Expensive 3D printer or cheap 3D printer?
As with most purchases, price is a major factor when choosing a 3D printer. In most cases, price is a direct indicator of product quality. However, depending on the type of projects you plan to use the 3D printer for, you may or may not need a machine that is at the top of the line.
These days, you can easily find a pre-assembled 3D printer for $300 or less—one that fits most types of home projects. If you just want to fix small items or have a fun tool to play with, you can even start with a 3D printing pen for under $30. If you've already dipped your fingers into 3D printing and are looking for a more professional 3D printer with a wider print bed and higher temperatures, you can expect to pay around $1,000 for top quality models over $2,000.
3D Print Quality
Print quality is often measured by two key metrics: end product detail and print speed. The level of detail a printer can achieve is measured in microns—the lower the number, the better the print quality. In terms of speed, the faster the printer's extruder moves, the faster your object will be created.
Another important factor to consider is print volume, the maximum size of an object that can be printed. Some printers come with a relatively small build volume, but one that fits most DIY projects is 280 x 210mm x 180mm (Geeeetech Prusa I3 M201 3D Printer), while others offer a larger build size of 340 x 500mm ( TEVO Little Monster Delta 3D). Printer ).
3D printing filament
Check which materials your printer is compatible with. While most 3D printers work with two main filament types: PLA and ABS, some models support more options that allow you to use wood, metal, and other materials. Learn more about 3D printing filaments in the 3D printer filament guide.
Is your 3D printer safe?
When working with high temperatures, it is always important to ensure that all precautions have been taken and that your work environment and tools are safe.
Some printers have specially made housings around the printable area that can be very hot. Other models do not have this type of protection. If you are not very familiar with the printing process or the tool will be used by children, it is recommended that you choose a printer in which the printing area remains covered.
Training: how to work with a 3D printer?
Before you start 3D printing, you need to spend some time learning about printer settings and the software required to print your object. Lower tier printers may require additional manual calibration, while higher tier models may have some of these features automated. Whichever model you choose, expect to take some time to get used to the printer and understand the ins and outs of the printing process. But once you do, the possibilities are wonderfully endless.
What to check and how to set up your new 3D printer?
Assembly kits, partially assembled or construction kits. Check for bad bearings. Square frame. Belt tension. Check the print table. Grease. Printing!
If you've just bought your first 3D printer, you'll no doubt be thrilled to set it up and start printing as soon as possible.
However, you must first go through a few checks and adjustments, which we guarantee will save you from frustration and wasted time in the future.
If you perform these checks now during the unpacking and/or assembly phase, your new 3D printer will work flawlessly from the first print and you won't spend countless hours trying to diagnose all sorts of printing problems.
These are tips that are not written in user manuals, but this is what we have learned by using 3D printers for thousands of hours and watching the same problems occur repeatedly due to incorrect initial settings.
Assembly kits, partially assembled or construction kits.
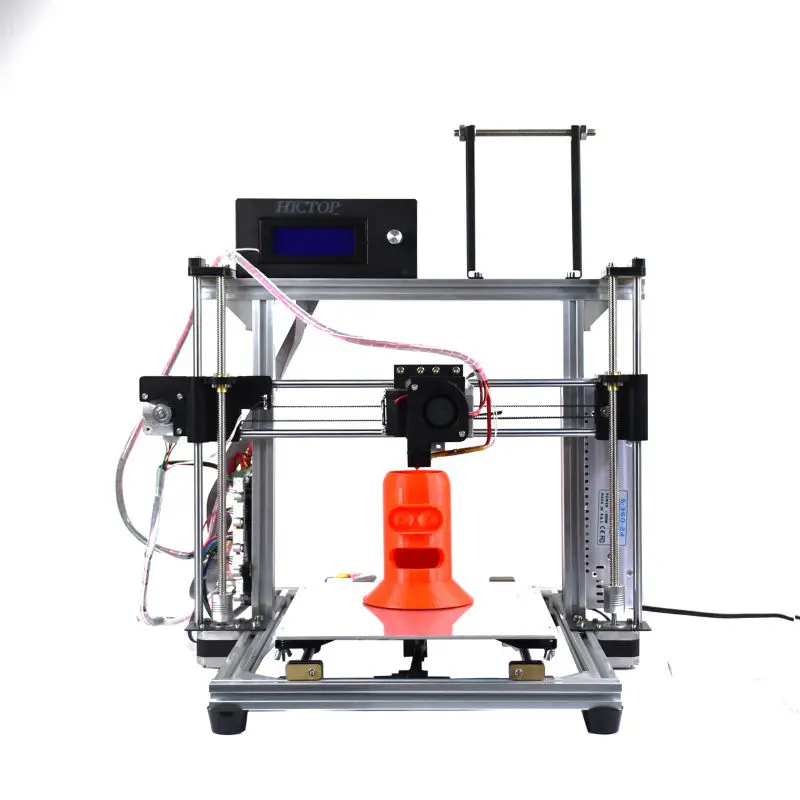
Most of these tips are suitable for partially assembled 3D printers such as Creality Ender 3 (Pro/V2) or Anycubic I3 Mega.
Many of these 3D printers come as a semi-assembled kit where you need to connect the two halves of the frame together and then plug in some electrical connectors.
These semi-assembled kits are a great compromise between a fully assembled 3D printer and a DIY DIY kit, as they reduce production and shipping costs while requiring you to do only a small amount of work to set up the printer after unboxing.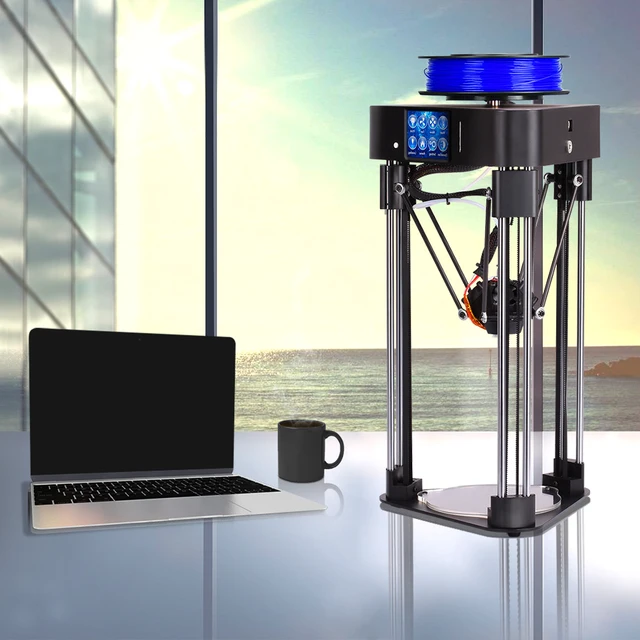
This is also a great opportunity to learn more about how your 3D printer works so you can more easily diagnose problems in the future.
But whether your 3D printer is fully assembled or not, it will still benefit from going through this basic checklist.
DIY Kit 3D printers tend to have more guidance in their manuals on how to properly set up your device, whereas in a fully assembled 3D printer, the amount of options you can control is rather limited.
Check for bad bearings.
Before doing any tuning, our top tip is to check for bad bearings. This is the number one rule for budget 3D printers and can make a big difference in print quality. The most common failures are the linear ball bearings in the X and Y axes.
Turn off your 3D printer and move all axes along their paths. This way, if you have a bad bearing, you will be able to feel it seize as you move it, and you may hear some sort of grinding sound.
On 3D printers like the Ender 3, where radial bearing wheels run in a groove in the profile, you can turn each wheel. If you feel resistance, it means the bearing needs to be replaced.
Square frame.
Our first and most important tip is to make sure your 3D printer is square.
One of the most common causes of failed prints is incorrect X-axis position.
First, make sure the X-axis is parallel to the base frame. The base frame is the part of the printer structure to which the table is attached. The X axis is the horizontal part along which the extruder moves.
To do this, you can either measure the angle of the base frame or make sure that the angle along the X-axis is the same. Or you can measure the height of the x-axis from the base frame on each side and make sure the dimensions match.
The goal is to make your 3D printer level with itself, not with respect to your desktop.
The best tool for this is a digital level, as it will allow you to create a reference angle and measure from it. Alternatively, you can measure it with a steel ruler.
This will be your starting point for all other squares.
How you set up the X axis will vary depending on the specific 3D printer model. The Creality CR-10S Pro and Ender 3 models have a cam on one of the wheels that runs the X axis.
On dual Z axis models, you can detach the motors from the control and manually turn the lead screw until it lines up.
Now move the X-Axis up in Z and make sure it stays level the whole distance.
See also: X-axis offset on Ender-3. How to fix?
Belt tensioner.
We have already written a detailed post about tensioning 3D printer belts. This is another critical aspect that you should definitely check before you start printing.
Belt tension is a rather biased parameter, the setting of which you mainly carry out by touch or by sound. However, we recommend that you keep this element in mind when setting up printing for the first time.
Take our advice and tighten the belt tight enough, but don't let it stretch or break.
Check the print table.
The next step is to check that the print bed is flat. Place the steel ruler upside down on the table and see if there is a gap between them.
If difficult to determine, light from the back. If you see a solid beam of light between the ruler and the table, then your table is not flat.
If the table is not level, it cannot be corrected properly. Ideally, you will need to replace it with a new one.
A more budget friendly option is to use Creality Ultrabase glass as it is affordable and perfectly flat.
Some printer models (Ender 3 V2, Voxelab Aquila X2) have this glass included.
Now that you know your table is flat, you can calibrate it.
Many people think that calibrating the table aligns, but what you really need to do is make sure it is aligned with the x-axis.
If your 3D printer has auto-calibration, you can use this feature.
But in most cases, the method of pushing the paper between the nozzle and the platform works fine. As you gain experience, calibrating the platform will become a simple and intuitive task for you.
Grease.
Any place in your 3D printer mechanism that has a moving metal-to-metal contact should be well lubricated.
Some 3D printers, especially very cheap ones, do not apply lubricant at all or apply it randomly.
Critical components such as lead screws need to be lubricated.
Now that your lead screw is properly installed and lubricated, you can start 3D printing.
Printing!
You are finally ready to start printing. Print your first layer slowly. Set the print speed in the slicer for the first layer to 10-20 mm/s.
This will ensure good adhesion of your model to the table and an excellent base for your part. For other layers, you can set the print speed in the range of 30-80mm/s.
Print speed directly affects the quality of your print, in one of our next posts we will definitely explain all the nuances of this setting.![]()