3D printer case ikea
How to build a simple, cheap enclosure for your 3D printer
Maybe you have already seen some of those fancy enclosures people build for their printers. How do they work? And do they work? Today, we will shed some light on this matter! Plus, we are going to dive into patent wars and explain why not all printers come with an enclosure. To top things off, we will even give you a full guide with information on how to build an enclosure for your own printer. But first, let’s start with the fundamental question: what is it good for?
- Stable printing environment – Drafts can negatively impact your print. An enclosure will keep the temperature stable and high. Big differences in ambient and printing temperatures can lead to warping and shrinking of the printed object, especially when printing with ABS. Layer adhesion may also improve with higher ambient temps.
- Reduce and contain smell – Some filaments (looking at you, ABS!) can release unpleasant fumes during printing.
An enclosure will contain these fumes, and you can quickly vent them outside through an open window when the print finishes.
- Noise reduction – As if you needed the MK3 to be any quieter 🙂 But another level of sound isolation can’t hurt, especially if you place the enclosure next to your work desk or in a living room.
- Dust collection – The bearings and smooth rods will appreciate the reduced amount of dust that settles on your printer.
- It’s fun to build 🙂
However, if you’re not printing with ABS or other high-temperature filaments that suffer from warping, you won’t see much of a difference. You might actually want to keep the enclosure open with, for example, PLA to ensure there’s enough cool air around the printer for the part cooling fan.
Enclosure for the MMU2S
If you own the MMU2S, we created a modified version of the enclosure – check it out here.
Why aren’t all the printers on the market enclosed by default?
There are two factors here – price and patents. There is no doubt that the rise of consumer 3D printers was delayed by patents. Companies like Stratasys, Zcorp or 3D Systems have patented nearly every 3D printing technology you can think of. It’s pretty crazy when you look at the sketches from 1980s-1990s and realize just how much some of the current 3D printers are similar to them.
It was only after these key patents expired in 2009 (20 years after application) that the RepRap movement started. And cheap, easy-to-build 3D printers quickly started to be developed. Even though most of these basic patents have already expired, some of them (most importantly the ones owned by Stratasys) are either still active, or have just recently expired. For example, Stratasys’s (still active) patent describes an apparatus “That builds up three-dimensional objects in a heated build chamber” (…) “The motion control components of the apparatus are external to and thermally isolated from the build chamber. ” That means if you put the stepper motors outside of an enclosure, you can’t sell the product, as it would violate the patent.
Another obstacle is the price. We have considered and even developed a Prusa enclosure quite a while ago. It was made mostly of Plexiglass. Our target was $90 price tag and considering the packing, shipping and material cost, we just couldn’t make it work. It makes much more sense to build the enclosure yourself from locally sourced materials.
How hot should the enclosure be and can the PSU stay inside?
Let’s get something straight, we are not targeting really high temperatures inside the enclosure. You don’t need an extra heater. The printer itself produces a lot of heat and all you have to do is to not let it escape. The goal is to achieve stable temperatures without any sudden changes from wind or draught. Even just 35°C inside the enclosure will make a massive difference, increase layer adhesion and may prevent ABS from warping.
The PSU is not made to work in extremely hot environments. By keeping the PSU in temperatures above 40-50°C can significantly shorten its lifespan. Ideally, you’d place the PSU outside the enclosure. You can even place the LCD outside to be able to control the printer without letting the hot air out.
2 simple enclosures
Photo studio tent – no work required at all
An enclosure can often be created from an object originally made for a completely different purpose. This photo (80×80) tent can be bought on eBay or Aliexpress for about $15-20. And all you have to do is place the printer inside the tent. It’s made of textile material, which means it’s porous. A textile enclosure won’t let you reach crazy high temperatures, so you can even keep the PSU inside. We reached temperatures around 38°C after 10 minutes of printing inside a room with the ambient temp. of 26°C – that’s a significant improvement. And as a bonus, you have a photo tent for your prints 🙂
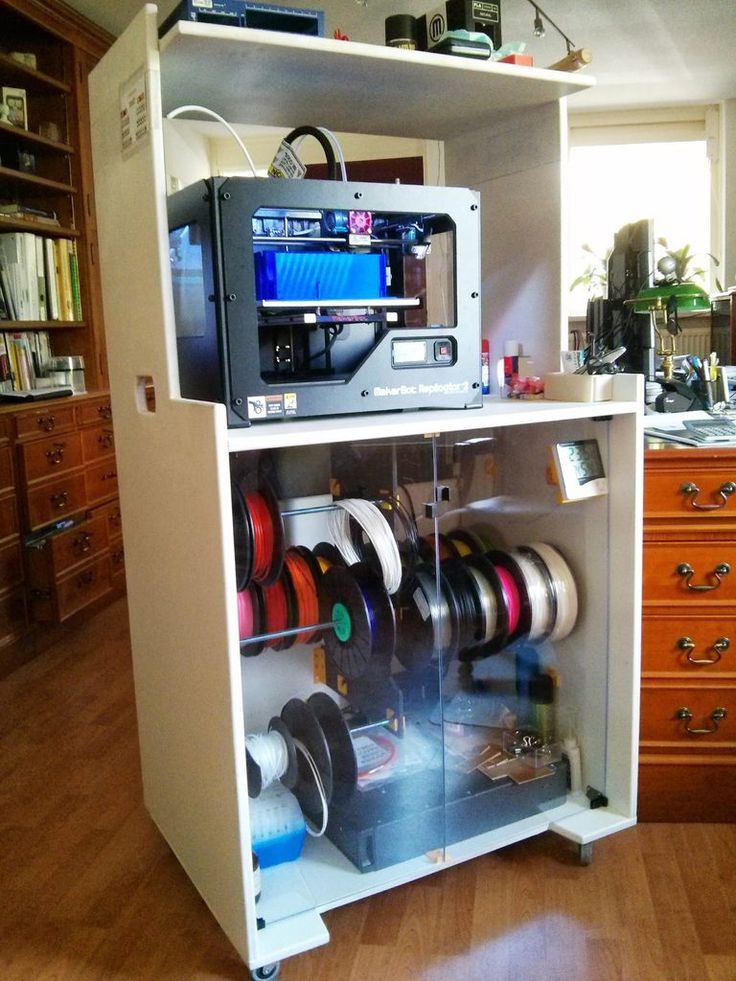
Ikea Lack – when you care about looks as well
Using Ikea Lack as an enclosure is the most popular choice among the 3D printing community. If you search online, you’ll find dozens of Ikea Lack enclosure designs. The table can be bought for under $10 and has almost the perfect size for Prusa printers. You can stack the tables on top of each other to create bays for multiple printers, or use one as filament and tools storage. Even though some of the existing enclosure designs are pretty good, we wanted to give it our own spin.
Advantages of our enclosure
- PSU placed outside in a clip-on holder, but easily placed back if you need to move the printer
- LED lighting connected to the printer’s PSU
- Hinges built into corner extensions
- Double-door opening
- Individual tables can be lifted at any time
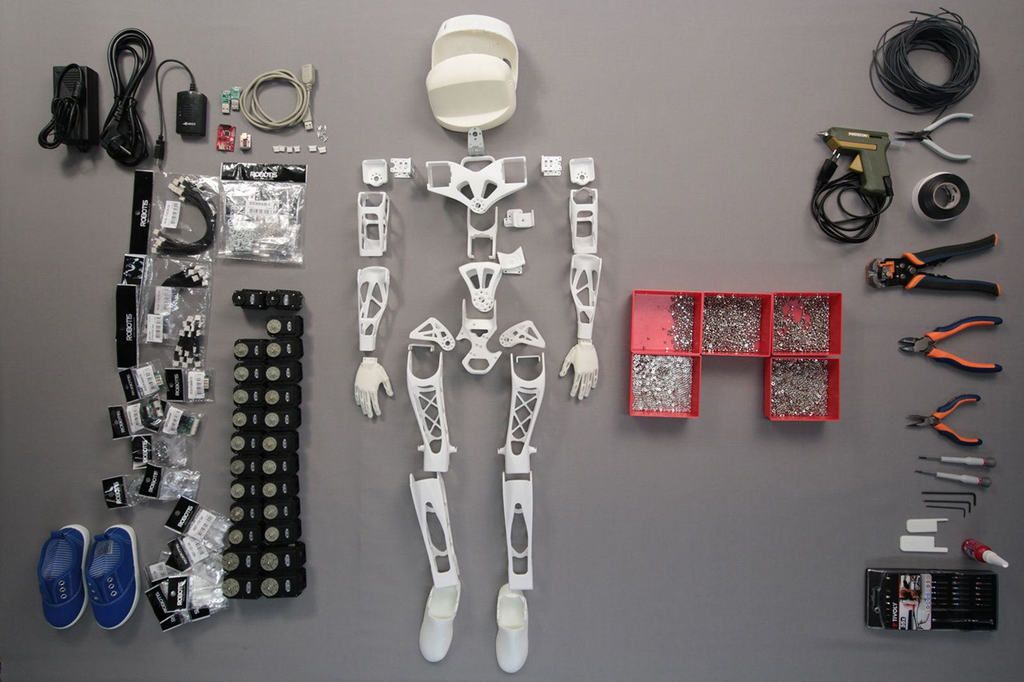
What you’ll need
Printable parts
Ikea Lack enclosure main parts
Frame brace replacing the PSU for the MK3 (silver PSU)
Frame brace replacing the PSU for the MK3 (black PSU)
Frame brace replacing the PSU for the MK2/S (remix by Martin Schnur)
60 degree heatbed cable cover for the MK3
45 degree heatbed cable cover for the MK2/S
Construction
- 2x or 3x Ikea LACK table
- 4x Neodymium magnets 20mm x 6mm x 2mm
- 3x Plexi 440 x 440 mm, 3mm thick (if you’re in the US, try Queen City Polymers)
- 2x Plexi 220 x 440 mm, 3mm thick
Electronics
- Fire/smoke detector
- Indoor/Outdoor Thermometer
- LED stripe 24V, 30 cm
- 24V for MK3, 12V for MK2/S
- If you want to use a 12V LED strip with the MK3, use a separate power supply.
- Twin cable, 100 cm
- 2x WAGO 221 or similar compact lever connector
Screws
- 12x 6×20 mm (12 x 3/4″)
- 4x 6×50 mm (12 x 2″)
Printed parts
- Upper table (enclosure box)
- Lower table (support table)
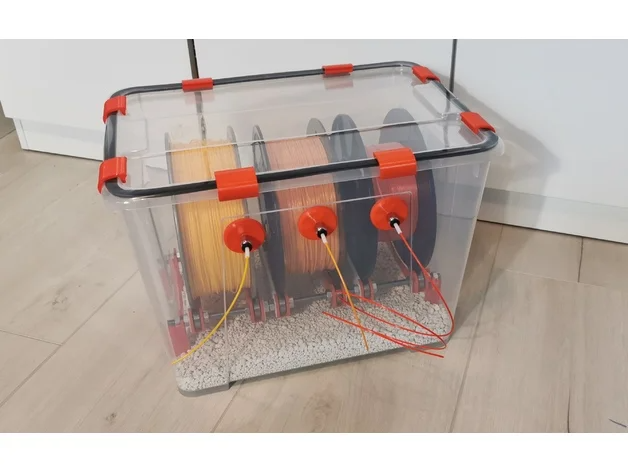
- Spool holders
Tools
- Philips screwdriver
- Allen keys
- Super Glue
- Drill + 3 mm wood drill + 10 mm wood drill
- Measuring tape
- Marker
Enclosure (upper table) assembly
Upper corner standoffs installation
Attaching the legs
LED stripe
For about $12, you can buy an LED strip with a power supply, like this one. However, if you’re feeling a bit adventurous and have some experience with wiring up electronics, you can power the LEDs directly from the printers power supply. Remember, that the MK3 runs on 24V, whereas MK2/S runs on 12V, so make sure you buy the correct LEDs.
Spool holders
Smoke detector installation
Place the smoke detector in the rear part of the table so it will not obstruct filament insertion or won’t get in the way when you’re taking the printer out from the box.
Bottom corner standoffs installation
Before you start screwing the bottom standoffs, make sure you place the Plexiglass in first. As soon as you tighten the standoffs, the Plexiglass will be fixed in place, and you won’t be able to remove it. This means you can easily lift this section of the enclosure without worrying that the glass would fall out. Note, that one of the four standoffs has a hole for cable pass-through. Make sure you place this standoff on the left side so that the cables can be routed directly to the EINSY board.
Support table (lower table) assembly
PSU holder
Electronics do not thrive in higher temperatures inside the enclosure. To preserve PSU in good condition, it’s better to place it out of the box. It is even safer!
- Unplug the printer from the power socket. Remove zip ties on the frame to release PSU cables. (Tighten the rest of the cables with new zip ties.)
- Disconnect the cables from the EINSY board. Do not forget to unplug the Power panic sensor as well.
- Unscrew the PSU form the frame.
- Hold the PSU next to the rear left leg (the one with the cable pass-through). Tighten the PSU holder printed part with two screws and then install PSU catcher printed part.
- PSU is now fixed, but it is possible to slide it out when you need it.
- You can replace the PSU on the frame with this printed part to ensure the rigidity of the frame.
Frame brace and right-angle cable cover
After removing the power supply from the frame, it’s possible to replace it with a printed part and ensure frame stiffness. The heatbed cables may hit the plexiglass in the back of the enclosure.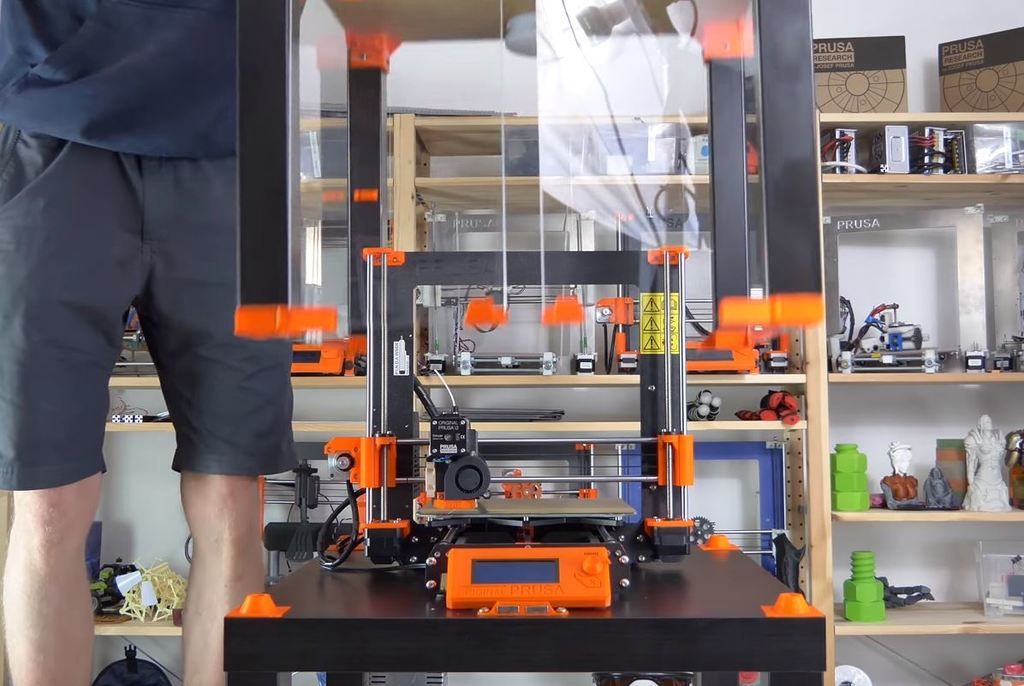 To prevent this from happening, print an alternative 60 degree heatbed cable cover. (EDIT: Users reported several problems with the right angle one shown in the video and on the pictures below, so we switched the suggestion to the 60 degree one).
Plugs fixing and magnetic handles
Fix the four bottom plugs. One of them has a hole for cable pass-through. Place it in the rear left corner of the enclosure. Glue two magnets to the door stopper and screw it to the front of the table. Leave enough space for the plexiglass and the handles (1 cm).
Finished enclosure
Now just stack the two tables on top of each other and the enclosure is complete. Optionally, you can add another Ikea Lack table to the bottom to raise the printer to a more comfortable height.
3D Printer Enclosure for Ikea LACK Tables: Works With Most FDM
This is the perfect way to build up a fancy-looking enclosure for your 3D Printer without hassling with all of the parts. You can select as many or as few parts as you need in order to build your Ikea LACK enclosure. This way, you can save time and money while receiving high-quality, PETG prints in the color that matches your style.
***This enclosure does NOT fit the Creality Ender 3 V2 printers (and similar). If you have the Ender 3 V2 or a printer of similar size, please select the link to our other listing below which is resized to fit these printers:
https://www.etsy.com/listing/1327146072/resized-3d-printer-enclosure-for-ikea
The base kit comes with the least amount of parts, consisting of only the 3D Printed parts you would need for putting together 2 Ikea LACK tables. The upgraded kit features a number of addons together for a discounted price. Then lastly, the upgraded kit with plexiglass includes all of the previous items and adds a set of five plexiglass sheets, two of which make up a door to make opening up the enclosure for accessing your printer a lot easier. **NOTE: The plexiglass will be shipped according to your home address from a separate company.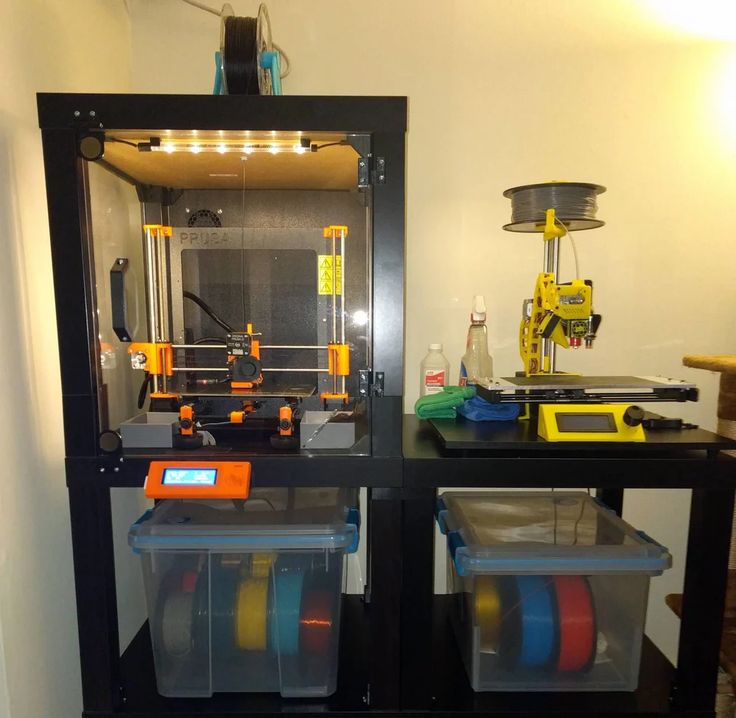 It will come as a separate package with no extra charge.**
There is also an additional parts option. This option is recommended to be purchased along with any of the kits that come with the enclosure. The contents of the additional parts are listed below. The filament spool holders come with screws on them so they can be mounted to the top of the Ikea LACK table. The filament guides require a hole to be drilled through the table so the filament can go into the enclosure without being scratched or chipped. The tap light is a basic light that can be mounted to the inside of the enclosure (adhesive pads included), making it easy to work with your printer inside the enclosure. The thermometer has a plastic stand and can be placed inside the enclosure. It has a highly accurate gauge that measures temperature and humidity. Note that the light and thermometer do not come with batteries. The additional parts will make your enclosure look and feel complete and have many incredibly helpful benefits.
There are a couple of helpful videos that you should consider checking before you buy it and during the build:
Chris Riley's Video:
https://www.youtube.com/watch?v=laTXCyLQIYs&list=WL&index=47&t=2s
Prusa Printers' Video:
https://www.youtube.com/watch?v=oS7ZtBNh3hE
Please contact us with any questions, comments, or concerns and we will try our best to answer them as quickly as possible. You can also contact us to have specific parts in different colors to match your dream setup.
Base Kit:
- Top Table Leg Connecters (With 3mm Plexiglass Slots) - x4
- Top Table Connector Door Hinges (For The 3mm Plexiglass) - x2
- Bottom Table Leg Connecters (With 3mm Plexiglass Slots & Table Stacker Slot) - x4
- Table Stackers - x4
- Door Knobs (With 3mm Plexiglass Slots & Magnet Inserts) - x2
- Door Holder & Stopper (With Magnet Inserts) - x1
Upgraded Kit:
- Base Kit - x1
- 1-Inch Screws - x20
- 3/8-Inch Screws (For Door Holder & Stopper) - x3
- 20mm x 6mm x 2mm Magnets (For Magnetic Door Set) - x4
Free Optional Add-ons: (COMMENT IN PERSONALIZATION IF NEEDED)
- Prusa PSU Holder - x1
Contains: PSU Holder - x1, Upper Bracket - x1
- Table Stackers & Couplers - x1 (Only if you are using 3 Ikea LACK Tables)
Contains: Bottom Table Leg Connectors (With No Plexiglass Slots) - x4, Bottom Table Stackers - x4
Upgraded Kit With Plexiglass:
- Upgraded Kit - x1
- 440mm x 440mm x 3mm Plexiglass (Sides & Back of the Enclosure) - x3
- 440mm x 220mm x 3mm Plexiglass (Front Side Doors) - x2
Additional Parts:
- Filament Spool Holders - x3
- Filament Guides - x3
- Tap Light - x1
- Digital Indoor Thermometer - x1
Best STL Files for Ikea・Cults
3D PrinteriPhone 11, 12, 13, 14 Charging stand IKEA NORDMÄRKE
1. 62 €
62 €
Ikea Leg Extension
Free
Ikea omlopp mounting bracket
Free
spool holder
0,50 €
nine0002 Magnetic storage box(磁吸收纳盒)Free
Stand Ikea IHÄRDIG
Free
D-tool holder
Free
FHW: Keep 'Em Close, Clippers and Scratch (Ikea SKEDIS)
Free
FHW: Ikea Billy Bookcase 9 headphone mount kit0003
Free
FHW: For one who must stand guard (Skadis figurine stand)
Free
FHW: The pin that rules all ( Ikea SKÅDIS )
Free
FHW: Organizer IKEA Ivar
Free
Tool rail VW MIP
Free
Tubular 5" freestyle frame - super light and super rigid - assemble it at home - no CNC required
Free
LongRange 8" tubular frame - super light and super rigid - build it at home - no CNC required
Free
Volkswagen Golf slider on strešné okno
Free
Interior for SiJat Baja Bug
Free
Wheel holder A
Free
Square pen holder 1RR
Free
Wheel holder B
Free
Mounting arm pivot
Free
Elephant 3d animal model
Free
Fanatec clubsport pedals vibration motors
Free
Weather protection for external padlock and deadbolt
Free of charge
IKEA compatible rail support
1 €
nine0002 Storage boxFree of charge
Ikea Samla Hanga spool holder small version = more spools (remix)
Free
Ikea Besta hole cover / cover
Free
Shelf divider IKEA EKET
0,75 €
Replacement hook for IKEA roller blind
0. 75 €
75 €
Ikea Mosslanda shelf bracket
Free
IKEA - ceiling fixture FIRTUR / TRETUR
0,99 €
Legs for IKEA ROSÉPEPPAR; plant pot made of steel.
Free
Arlo baby camera mount for Ikea SNIGLAR 9 bed0003
Free
Arlo Baby Camera Mount for Ikea KURA Bed
Free
Skadis USB Mount
Free
Skadis Washitape
Free
Bracket Ikea Symfonisk
Free
nine0002 IKEA Fjällbo Wall Mount Screw CapFree
IKEA UTÅKER bed addition
Free
Ikea Waterproof LED Holder 90 Degree
Free
Watch holder for IKEA shelving unit PLATSA
1 €
nine0002 IKEA SKADIS BASKET (SPORT)0,50 €
IKEA SKADIS COLOR ART
0,50 €
IKEA SKADIS BUNNY / RABBIT
0,50 €
Cable holder for shelving unit IKEA PLATSA
1 €
Headphone holder for IKEA shelving unit PLATSA
1 €
nine0002 Lid for IKEA glass vaseFree
13 original things you can 3D print right now
3D printing technology is evolving day by day.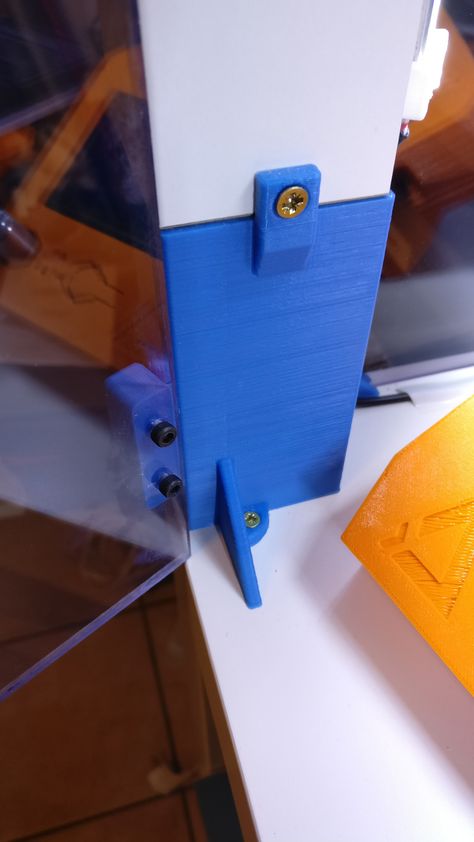 The range of materials used is expanding, it becomes possible to create more complex objects. At the same time, the demand for 3D printing is also growing.
Nowadays, anyone can buy a 3D printer, and a wide range is available to customers in a number of online stores. These devices are able to recognize STL files containing ready-made models for printing, of which there are a great many: knives, dishes, sculptures, jewelry, various household items, etc. nine0005
3D printer manufacturer MakerBot has published a list of over 100,000 models available for download and printing.
We bring to your attention 13 truly non-standard items created using new technology.
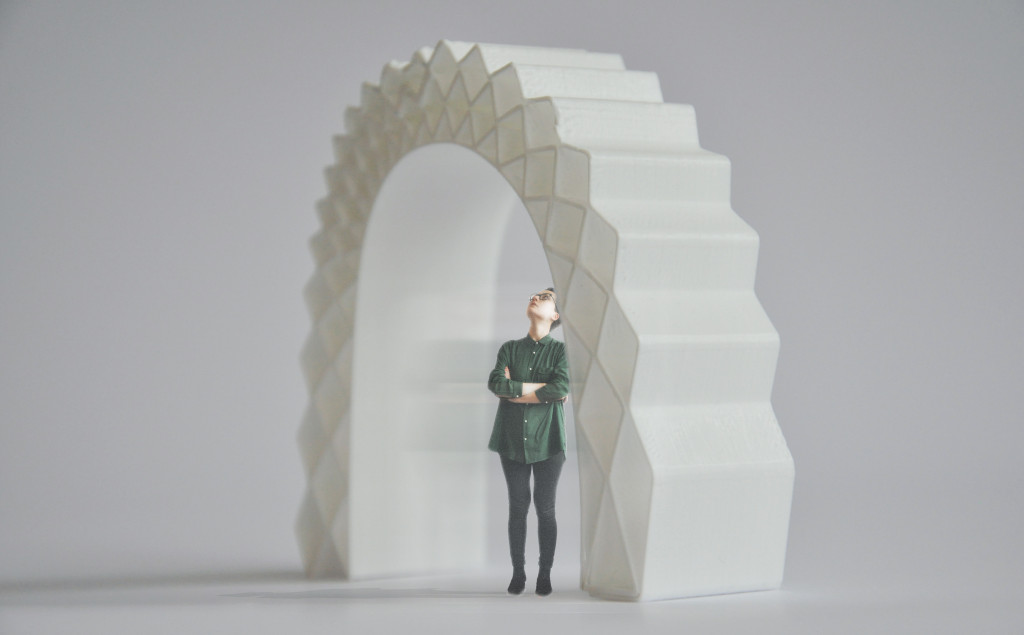
Pentagonal hexecontahedron motif bracelet
Do you want to print a piece of jewelry on a 3D printer or buy a finished product? There are many options. The model of the bracelet shown in the photo above, for example, has been downloaded by users for printing more than 1100 times.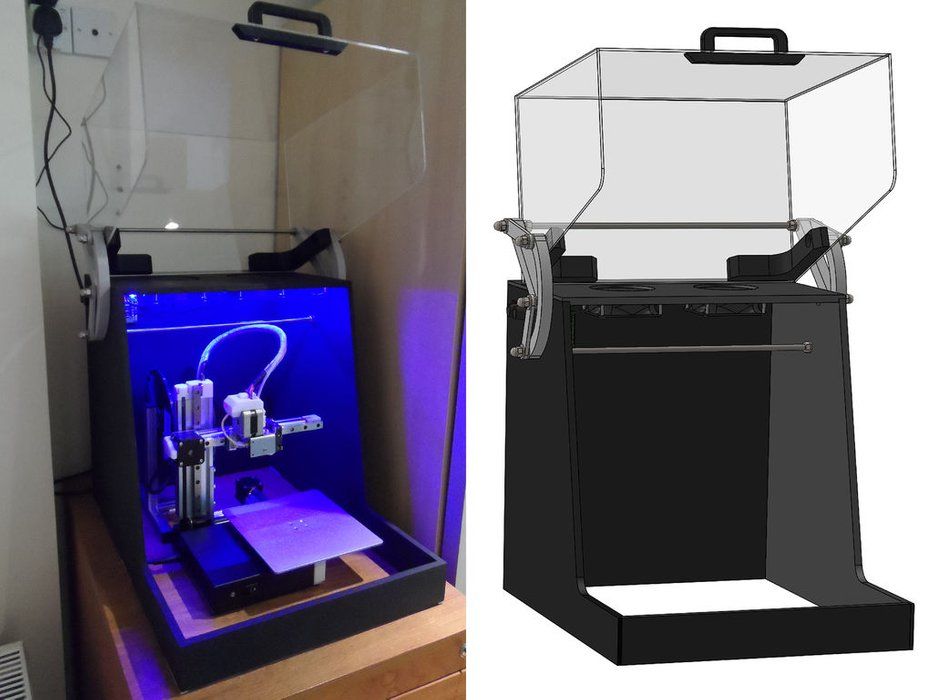 nine0005
Lunar Ring
Cunicode offers anyone who wants to purchase a 3D printed metal ring, the shape of which exactly repeats the relief of a section of the lunar surface (real topographic data was used in its creation).
- How does the cost of a wedding affect divorce statistics?
Your miniature
Twinkind creates incredibly realistic replicas of people. All you have to do is go through the 3D scanning procedure, after which you can get as many of your "mini-clones" as you want. nine0005
Guitar
Quality musical instruments are very expensive. No wonder some people are trying to make them more accessible through 3D printing. And it is worth recognizing that they do it not without success.
The guitarist of the British indie rock band Klaxons, for example, used a 3D printed instrument at one of their concerts. Of course, for some, such experiments may seem like a form of mockery of music, but the fact remains: guitars made in this way sound very tolerable. nine0005
Fantasies from your childhood
Designed by experimental designer Bernat Cuni, Crayon Creatures gives you a unique opportunity to make your childhood dreams come true. Crayon Creatures will create a beautiful (and maybe a little scary) figure based on your children's drawing.
Pet feet
Has your pet injured its paw and can't run and play like it used to? The 3D-printed prostheses developed by 3D Systems will allow him to quickly get back on his feet. nine0005
- Pet discrimination, or why people don't like black dogs?
New hands for you
Three-dimensional printing is actively used in the treatment of people. 3D-printed instruments help doctors perform operations on the spine, knee joint, and various organs.
Last year, MakerBot made a donation to the Robohand project. The aim of this project is to create a prosthetic hand with wrist-controlled fingers. nine0005
Stool bicycle toy
It never crossed your mind to convert an IKEA stool into a bicycle, right? And someone has already done it. If you want one for yourself, you'll need a $15 Frosta stool and a 3D printer.
Generation Z snow scooters
If you and your children decide to spend a fine winter day outdoors, don't forget to take a snow scooter with you. As you may have guessed, you do not have to buy it in the store. Just 3D print a scooter and go! nine0005
- Children in 20th century advertising images
Smartphone cases and covers
Are standard iPhone 6 cases boring? You can always print your own version.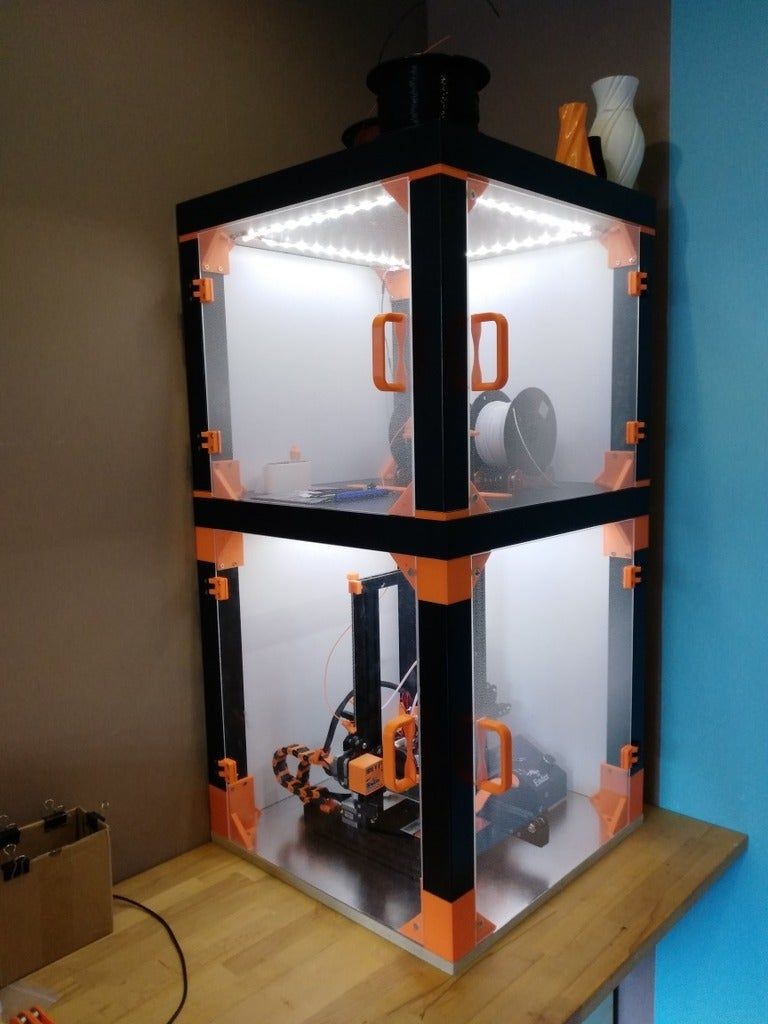
We also note that owners of Nokia Lumia 820 smartphones now have the ability to print back panels for them.
Chopstick Training Device
Do you love oriental cuisine but can't figure out how to use Chinese chopsticks? Print a device that helps you master this art and you will no longer have to demand a fork in Asian restaurants.
Crazy crockery
Bernat Cooney spent 30 days using a 3D printer to create 30 different mugs. When developing the design, Bernat did not particularly care about the practicality of the dishes, focusing on the visual component. nine0005
- Interesting statistics: from 1 to 1,000,000
Model of your heart
Recently, with the participation of the US Department of Health, a system was launched that allows doctors and researchers to search and download three-dimensional models of viruses, molecules and laboratory equipment, as well as anatomical models.