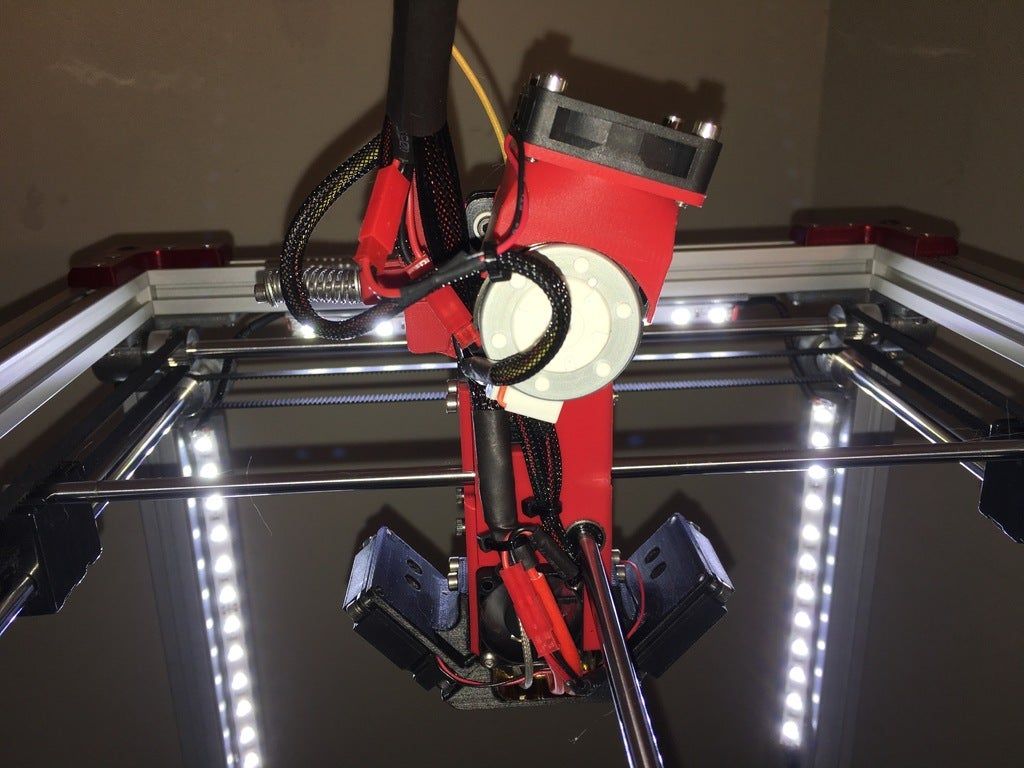
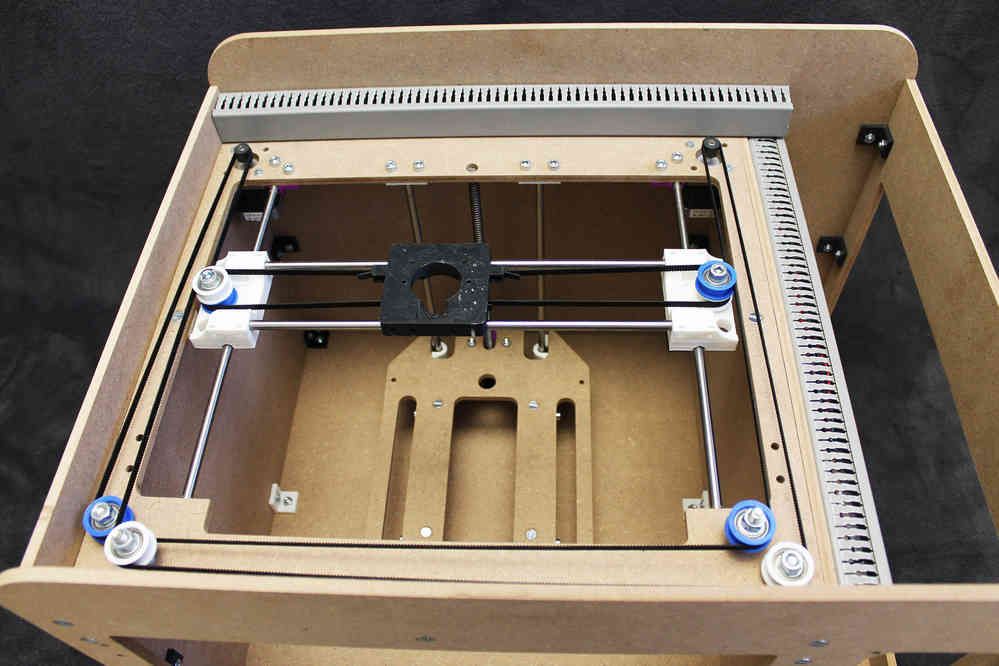
Pinda 3d printer
P.I.N.D.A./SuperPINDA Sensor testing | Prusa Knowledge Base
Relevant for
:
MK2.5MK2.5SMK3MK3SMK2SMK3S+
Last updated
a year ago
This article is also available in following languages:
P.I.N.D.A. stands for Prusa INDuction Autoleveling sensor and is a vital component facilitating the calibration of our printers. There are 3 different versions:
- P.I.N.D.A. V1 - used on MK2/S and MINI.
- P.I.N.D.A. V2 - used on MK2.5, MK2.5S, MK3, and MK3S.
- SuperPINDA - Compatible/used with MK2.5/S, MK3/S/+, and MINI+.
The difference between P.I.N.D.A V1 and V2 is that the P.I.N.D.A V2 has an inbuilt thermistor to compensate for the difference in cold and hot measurements. V1 and V2 are not interchangeable. However, SuperPINDA and PINDA V2 are interchangeable but may require a firmware update. The SuperPINDA does not have a thermistor, as its high-quality components and manufacturing remove the need for one.
For MK2.5/MK2.5S printers that have the SuperPINDA installed, you MUST use firmware version 3.9.3, or above! In addition to this, you must let the printer know you have the SuperPINDA installed, and not the P.I.N.D.A. V2, by navigating to LCD Menu -> Settings -> HW settings -> SuperPINDA -> ON.MK3S & MK3S+ owners using the SuperPINDA must use firmware version 3.9.2, or above!
Testing the P.I.N.D.A./SuperPINDA sensor
Firstly, we need to check if the sensor works at all. For this test, you need a small and thin metal object (spatula, scissors, pliers). Your printer should also be running on the latest firmware version for your printer model.
- Press the knob next to the LCD for 3 sec and turn it to raise the extruder approximately 10 cm above the heatbed. This is to distance it from any metal.
- If you have firmware version 3.5.3 and later (unless you have an MK2/S), go to the LCD Menu -> Support -> Sensor info and see the sensor value ('PINDA:' 1 or 0)
Before firmware version 3.5.3, the P.I.N.D.A. sensor value was found in LCD Menu -> Calibration -> Show end stops. If you have an MK2/S, you can find the Z-value there.
- Place the metal object (spatula, screwdriver, etc.) underneath the P.I.N.D.A./SuperPINDA sensor. The value should change from 0 to 1, and the red light on top of the sensor should turn off.
- Move the extruder by hand all along the X-axis and wiggle with the extruder's cable-bundle. The value should still be 1, as long as there is something metallic under the sensor.
- If the value does not change, make sure the sensor is connected correctly. Please refer to the Einsy RAMBo electronics wiring (MK3/MK3S/MK3S+) or Mini RAMBo electronics wiring (MK2S, MK2.5, MK2.5S) articles.
- If the value is 1 but flicks to 0 at some point, the cable may be broken at some point. Please contact support via email or chat.
One of the most frequent issues is an overtightened zip-tie, which causes the P.I.N.D.A. sensor cable to fail when it reaches a specific position. Double-check all the zip-ties and make sure they are not too tight.
Testing the P.I.N.D.A. sensor-readings in Pronterface
There is another way to check whether or not the P.I.N.D.A. sensor works correctly. Please perform the following procedure 3 times. For the sake of consistent measurements, please make sure the tests are done under identical conditions.
Pronterface may not be supported on newer versions of iOS (Apple Laptops) after they dropped the support of 32-bit apps with Catalina. However, there are some workarounds. See this Github thread.
- Connect the printer to your computer following the Pronterface and USB cable guide.
Make sure the nozzle is clean, and the print surface is clear of any obstructions.
- Issue a G80-command into the command-line. It triggers the mesh bed leveling process.
- Once the process is complete, issue a G81-command which gives you a report of the interpolated Z values for a 7 x 7 array of values.
Compare the data arrays. Keep in mind that every number in the matrix has their pre-defined positions, always compare the numbers in the same position. You want to make sure there are no significant deviations (>0.2) between the 3 measurements.
After adjusting the P.I.N.D.A. sensor or any other hardware, we recommend running the Calibration Wizzard from the beginning.
Original Prusa SuperPINDA | Partsbuilt 3D
Now: $29.95
- Description
- Additional Information
Description
SuperPINDA
The SuperPINDA replaces the P.I.N.D.A. V2 (MK3/S, MK2.5/S) and M.I.N.D.A. (MINI).
SuperPINDA is temperature-independent, with higher quality sensor, and doesn't need a thermistor. Making the first layer calibration and mesh bed leveling much easier and consistent.
Note: When replacing the original probe with SuperPINDA make sure to use the 3.9.2 or higher firmware version.
Includes: SuperPINDA (1 pcs)
Fits:
MK2.5
MK2.5S
MK3
MK3S
MK3S+
Mini
Mini+
To replace this part, please consult the Prusa Assembly Manuals. Make sure to follow the manual for your printer model.
View AllClose
Additional Information
PSC: | Electronics & Switches |
Brand Name: | Prusa Research |
View AllClose
- Related Products
- Customers Also Viewed
Related Products
Add to Cart
Galaxy PLA Opal Green - 1.
 75mm 750g | Formfutura
 Formfutura
Now: $34.95
Galaxy PLA Opal Green - 1.75mm 750g Deep metallic green PLA Based on Formfutura's easy-to-print EasyFil PLA filament Added aluminium-flake content gives your prints a sparkling, glittering...
Add to Cart
ApolloX ASA Red - 1.75mm 750g | Formfutura
Formfutura
Regular Price: $39.95
Now: $34.95
Red ApolloX ASA Filament by Formfutura 1.75mm, 750g High performance, high precision, high strength Great UV, heat and weather resistant properties Great for
Add to Cart
ApolloX ASA Gray - 1.75mm 750g | Formfutura
Formfutura
Regular Price: $39. 95
95
Now: $34.95
Formfutura ApolloX ASA Filament - Gray 1.75mm, 750g High performance, high precision, high strength Great UV, heat and weather resistant properties
Add to Cart
ApolloX ASA Black - 1.75mm 750g | Formfutura
Formfutura
Regular Price: $39.95
Now: $34.95
Formfutura ApolloX ASA Filament - Black 1.75mm, 750g High performance, high precision, high strength Great UV, heat and weather resistant properties Gre
Customers Also Viewed
Add to Cart
PINDA Probe V2 - MK2.5/S, MK3/S | Prusa Compatible
PB Select™
Now: $19.95
PB Select™ Prusa Compatible V2 P. I.N.D.A Probe
Includes: V2 PINDA (1 pcs)
Fits:MK2.5MK2.5SMK3MK3S
To test your current PINDA probe, follow this guide from the Prusa Knowledge Base.
I.N.D.A Probe
Includes: V2 PINDA (1 pcs)
Fits:MK2.5MK2.5SMK3MK3S
To test your current PINDA probe, follow this guide from the Prusa Knowledge Base.
Add to Cart
Bearing Clips - MK3S+ | Original Prusa
PRUSA RESEARCH
Now: $6.99
Bearing Clips for Prusa MK3S+ Includes: Bearing Clip (3 pcs)Screws (6 pcs)Nyloc Nuts (6 pcs) Fits:MK3S+ Note: Bearings not included To replace this part, please consult the...
First layer calibration problems Prusa i3 MK3 latest version
prusa-i3 layer-height
I'm trying to calibrate the first layer, but no matter what I do, I can't get the lines to stick to the table.
My first question is distance to P.I.N.D.A. What I did was what Prusa recommends in this picture:
I'm using Prusa Slic3r with PLA and all defaults. I'm calibrating the first layer of the setup menu and got lines you can remove and a final square that raises the nozzle so it's not on the print bed. The very first line in the left corner is not actually compressed. I'm looking for some newbie help here. nine0003
@Juergen Schubert, 👍4
2 answers
▲ 3
First layer height calibration involves two steps:
The first step, as shown in this figure, is to adjust the PINDA probe approximately the desired distance above the nozzle. PINDA has a measurement range of only about a millimeter, so if it is too high, it will not be able to detect the printing device; if it is too low, it will interfere with the printed object.
The second step you're having trouble with is calibrating the exact distance between the PIND and the nozzle tip. The printer prints a test pattern; while printing, you turn the dial on the printer's control panel to adjust the "live-Z" value. Typical values for a properly assembled printer are in the range of -0.5 to -1.0 (more negative values closer to the print table). If the live-Z value is outside this range, you will need to adjust the position of the PINDA probe. nine0003
The official Prusa procedure is good for getting a rough calibration. If you want more precision, the "Life is my way" procedure on the Prusa forums is a good one. Basically, you print out a big one-layer square, adjust the live-Z value halfway through, and see which half has the best first layer. Repeat until you are satisfied.
, @ Mark
▲ 0
Your problem is that you need to identify the nozzle level offset sensor and store it in the printers memory. nine0003
When you place the printer at home, the nozzle should be at a certain level where the sensor trigger point is now defined relative to the table. The next step is to link the actuation point to the level of the nozzle, instruct the nozzle to descend to the mounting plate (by placing a piece of paper on the plate), using the menu buttons to move the Z axis. When you feel friction as you pull the piece of paper, you have reached the correct offset. Now store the value read from the Z axis display as a Z offset in the menu. Alternatively, use G-code
 M851 Z-x.xx where x.xx is the value you are reading from the display. M500 will store it in memory.
, @ 0scar
causes and solutions - qbed
| What should I do if the printer fails to calibrate? How to test the correct operation of the P.I.N.D.A. and reflash the Prusa printer? |
|---|
Successful 3D printer calibration is an integral part of creating good printouts. If your printout is loose and loose on the platform, or the edges and layers of the printout are uneven, there is a good chance your printer needs to be recalibrated. Any freshly assembled printer will also need calibration: if you are going to purchase Prusa i3 MK3 kit (disassembled printer), then keep in mind that assembling it is half the trouble (well, or half the fun :)), - the real struggle can unfold in the process its calibration after assembly. nine0003
In this article I will tell you what problems I encountered when calibrating Prusa and share ways to solve them. But each case is, of course, individual, and this list of recommendations is not exhaustive.
Contents of the article:
Calibration process
History
Typical XYZ calibration problems and troubleshooting
P.I.N.D.A sensor test.
Does P.I.N.D.A. work?
Testing cable P.I.N.D.A.
Testing P.I.N.D.A. in Pronterface
Re-flashing the Prusa printer
Resetting the printer to factory settings
Re-flashing the printer
Prusa technical support
How I solved the calibration problem
Calibration process
First, I’ll say a few words about the calibration process that you have to go through after assembling the printer. When starting Prusa for the first time, users are prompted to follow the Calibration Wizard which will guide you through several calibration steps. nine0003
The first step in the calibration will be Selftest , which will check the printer for basic user assembly errors and verify that the printer electronics are properly connected. This step checks the extruder, coolers, platform and hot end wires, XYZ wires and motor function, XY axes length, XY belt tension, proper operation of pulleys and filament sensor.
The second step is to calibrate XYZ , which aims to detect XYZ misalignment and find the location of the four calibration points on the print platform to properly align it. This step consists of 3 parts: first, you need to remove the steel sheet (which is being printed on) from the platform, then the printer will search for the location of 4 touch points on the platform to avoid the nozzle and platform from touching during subsequent printing. The printer then determines the position of these points even more carefully. During the third phase of the XYZ calibration called Mesh bed leveling you will return the steel sheet to the platform and the printer will measure the height above the 9 sensor points and store this information in non-volatile memory for future reference.
In the third step of calibrating the printer, you load the filament into it, and then calibrate the first layer , or measure and adjust the distance between the P.I.N.D.A. and nozzle tip. At this stage, you will be able to fine-tune the nozzle height to ensure that the material is delivered to the platform correctly. nine0003
At each of the above calibration steps, the printer may generate several error messages . Tips for their elimination are contained in 3D PRINTING HANDBOOK , which can always be downloaded from the official Prusa website. But, to be honest, in 2018 these instructions look rather minimalistic and not very informative, for me personally they did not help to fix the calibration problem, which will be discussed later.
Back to content
History
Actually, what went wrong with the calibration of my Prusa i3 MK3? The story is like this. Initially, I successfully assembled the kit (assembly takes about 1-2 days), launched the printer, then followed the instructions of the Calibration Wizard and went through all the calibration steps without any problems. On the same day, I created one single printout, the Prusa logo, which can be found on the SD card that came with the printer. Then my printer stood idle for about a month. No one touched it, no one printed on it. He stood absolutely motionless and covered himself with a rag. nine0003
A month later, I decided to add a little, but my printouts mercilessly came off the platform. I tried to print different models, but each time the layers came out uneven, the filament fell out of the extruder in unnecessary places, in general, it was not very good. I decided to re-calibrate the printer. I started the calibration of the first layer in the printer menu Calibration > First layer calibration through the LCD display, the result was adequate, the filament lay flat and kept on the platform, but the line thickness varied. Then I decided to run Calibration > Selftest , the test passed successfully. By the way, if you have problems at the Selftest stage, sometimes they can be solved by sending the extruder to the home position Auto home . Go to menu Calibration > Auto home , the extruder will drive home, after that go through Selftest again, everything should be fine.
Next, I decided to check the XYZ calibration in Calibration > Calibrate XYZ , and then the printer gave me an error "XYZ calibration failed. Please consult the manual." nine0067 This message means that the printer could not find the touch points on the platform, which is a little strange, because a month ago it found them, then it was idle, and now for some reason it is blind. Of course, I turned to the instructions, but there I did not find a solution to the problem.
Back to content
Common XYZ Calibration Problems and Troubleshooting
Then I began my search of forums and websites looking for possible XYZ calibration problems with the Prusa i3 MK3. nine0003
Prusa's official knowledge base has a list of recommendations for troubleshooting XYZ calibration problems. Below I provide a translation of the list, supplemented by a couple of points of problems that happened to my printer and interfered with normal calibration.
-
First of all, make sure the printer is on a level and stable surface;
-
Next, check that the Y-axis of the printer is assembled correctly: remove the anti-vibration feet with LCD display from the printer and check that the front and rear support plates are firmly attached to the surface on which the printer is standing. Try to move the printer by hand (as shown in the picture below), make sure that none of the corners of the plates are lifted off the surface. If the plates do not fit snugly or wobble, unscrew the screws from the plates, press the printer frame firmly against a flat surface so that the bottom edges of the plates adhere to it as best as possible, and tighten the screws again; nine0003
Move the printer by hand and make sure the base plates are firmly on the surface on which the printer is standing. Original picture here
Proper assembly of the Y axis: press the printer frame firmly against a flat surface so that the bottom edges of the base plates fit as best as possible, and tighten the screws. Original picture here
-
Check that the bundle of wires leading from the extruder does not fall on the cover of the box with the EINSY RAMBo board when moving from the beginning to the end of the X axis;
-
Check the correct assembly of the E-axis. Check that the hot end is inserted into the extruder correctly;
Correct position of the hot end in the extruder. Original picture here
-
Make sure that nothing blocks the movement of the X, Y and Z axes. To do this, go to menu Settings > Move axis and move all the axes one by one from one side to the other, seeing if something is preventing their movement;
-
Look for cracks in the plastic parts of the printer.
 It is possible that during assembly you tightened the screw too much, and some part cracked - this can lead to the failure of the printer mechanisms;
-
Next, check the location of the P.I.N.D.A. in the Auto home position. Go to printer menu Calibration > Auto home and run the command. P.I.N.D.A. sensor should stop at the center of the first (lower left) calibration point. If the sensor is misaligned, then your axes are not quite straight, or the sensor itself is faulty (see "Testing the P.I.N.D.A." Sensor). Also check if the printer is assembled correctly: if the sensor is not in the center of the lower left calibration point, your U-mounts may have misaligned with the center of the Y-axis bearings under the print platform;
Offset U-fastener. U-fasteners must be centered on bearings
P. I.N.D.A. should be approximately 1 mm above the tip of the
-
Check that all wires are connected correctly. Also look to see if any of the wires are interfering with the movement of the print head. In the photo below, for example, the wire from the front cooler is located incorrectly; nine0003
The wire from the front cooler came out on the wrong side of the print head, was not correctly routed along with the rest of the extruder wires and prevented the printer print head from moving along the X axis
-
Just in case, check the tension of the X and Y belts. As a rule, a successful Selftest means that the belts are tensioned correctly, but you can additionally verify this by going to the printer menu Support > Belt Status (after passing Selftest). Normal values are in the range 240 +/- 40;
-
Check that the teeth on the belts are pointing up and are not skewed to the left or right;
-
If the printer has been idle for a long time, be sure to clean the metal rods and lubricate them with machine oil.

If these steps do not work, check that your P.I.N.D.A. sensor is working properly. using the three tests that I describe below. nine0003
Back to content
P.I.N.D.A sensor test.
P.I.N.D.A. is an essential component in the calibration of the Prusa i3 MK3. If you are having problems with calibration, one possible solution is to check that the P.I.N.D.A. is working properly. To do this, perform 3 sensor tests according to the instructions in the Prusa Knowledge Base.
Does P.I.N.D.A. work?
First you need to find out if the sensor is working. Go to printer menu Calibration > Show end stops or if you have a newer firmware version, then Calibration > Show PINDA state . We take a small metal object (for example, scissors or pliers supplied with the printer) and bring it under the sensor. The Z value should change from 0 to 1. You can also use the red light above the sensor for control: the red light should turn off when you put a metal object under the sensor.
If the sensor reacts to metal objects, then it is working properly, and we can proceed to the second test. If not, then you need to check the correct connection of the P.I.N.D.A. to EINSY miniRAMBo or replace the sensor. nine0003
Testing the cable P.I.N.D.A.
Check if the sensor cable is damaged. Go to the menu Settings > Move axis > Move Z (or just hold down the handle of the LCD panel) and raise the nozzle at least 10 cm from the platform.
Go to Calibration > Show end stops or in new firmware versions go to Calibration > Show PINDA state . Move the extruder from one end of the x-axis to the other (if you can't move the extruder, let the printer sit for a couple of minutes until it's in idle mode). The Z value should remain at 0 (or see if the red light above the sensor is flashing: the red indicator should be on throughout the entire movement). If the value changes (red light flashes), then the P. I.N.D.A. out of order. Check if you have tied the cable with a plastic tie during assembly. nine0003
Testing P.I.N.D.A. in PronterFace
In the last test, we will check the readings of the P.I.N.D.A.
Download drivers for your printer model on the Prusa website, install. Among them will be the 3D printer control program Pronterface . We open it. Connect the printer to the computer using the supplied USB cable.
Connecting Prusa to a computer via USB port
When connecting, do not forget to use the correct printer port (you can see it in the program menu Slic3r from the same driver package by connecting the printer to the computer: go to the menu Configuration> Flash printer firmware and see the port in the Serial port line) and baud rate 115200.
In the Configuration > Flash printer firmware menu of the Slic3r program, you can view printer port
Set correct port and baud rate 115200 in Pronterface
Make sure nozzle and platform are clean. We type the command G80 in the bottom right line of Pronterface and click Send - this will start the process of leveling the platform according to the values of the Mesh bed leveling virtual grid. Once the process is complete, send the command G81 - you will get the interpolated Z values for the platform grid 7 x 7.
Repeat this process at least 3 times (try to keep the test conditions the same). Compare the data obtained for each 7 x 7 grid. Verify that there are no significant deviations between measurements (> 0.2). Note that the numbers in the matrix have their own predetermined positions, so always compare the numbers in the same positions.
It was at this stage of the test that possible problems with my calibration were revealed: I did 2 runs of the G80 and G81 commands and saw that the values in the grid differ enormously. At first I thought the P.I.N.D.A. out of order. I contacted tech support, described the situation to them, sent the test results, and they agreed that P. I.N.D.A. not working properly and sent me a new sensor. However, it was not about him. I describe the cause of the problems with my calibration at the very end of the article. nine0003
My values from two runs of the G80 and G81 commands differed significantly. P.I.N.D.A. sensor was faulty
Back to content
Flashing the Prusa printer
If none of the above helps, you can try updating the printer firmware to the latest version (the latest firmware can be downloaded from the Prusa website under the Firmware heading) - this helps some users fix calibration problems. In passing, if you contact technical support with your calibration problem, one of the recommendations will just be a flashing. One of the important nuances: before flashing, you need to reset your printer and return it to factory settings. This recommendation was given to me directly in technical support. Let's start with the reset. nine0003
Download new firmware
Resetting the printer to factory settings
Before flashing, it is recommended to erase the configuration data from the printer's memory by resetting all settings. For firmware 3.0.11 and later (you can find out the firmware version in the printer menu Support > Firmware ) the procedure is as follows (see the original version of the article here): ) nine0003
When the text "Original Prusa i3 Prusa Research" appears, quickly press and hold the control knob until a beep sounds
Release the control knob
If everything is done correctly, the menu with 4 - parameters:
-
Language resets the language preferences and allows you to select a new language;
-
Statistics clears printer memory of total print time and media usage statistics; nine0003
-
Shipping prep only resets the language selection.
 All calibration data, including Live adjust Z , remains in the printer's memory, but note that the printer will still ask you to run the Calibrate Z function. This type of factory reset is used before freshly assembled Prusa printers are sent to the customer, so that he himself chooses the language and calibrates Z after unpacking;
 -
All data resets everything, including calibration data, completely resetting the EEPROM. After such a reset, you will need to go through the full calibration procedure described above again; nine0003
-
Bowden length - This option is only available to owners of Multimaterial printers and is used when you want to replace Bowden cables and the length of the new cables is different from the factory ones. After the reset, you can set the new cable length in this menu.
Those who are going to reflash the printer should select the All data option.
Some users reset the printer to factory settings via the Pronterface mentioned above by sending command 9 to the printer0066 M502 to reset settings and M500 to save settings (see full list of commands for Pronterface here).
Flashing the printer
Download the latest printer driver package according to the instructions in "Testing P.I.N.D.A. in Pronterface" here. From the same page, download the new firmware under the Firmware heading and remember the folder in which we save it.
Among the downloaded drivers will be Slic3r. Run Slic3r, go to program menu Configuration > Flash Printer Firmware , connect the printer to the computer (see the pictures in the section "Testing P.I.N.D.A. in Pronterface") and select it in the Serial Port line. If your printer is not there, click Rescan. Click Browse, then find and select the downloaded firmware (*.hex). Press Flash! If the flashing was successful, you will see the message Flashing succedded! in the status line.
Flashing window in Slic3r
nine0002 After flashing, you will need to go through the calibration process again.If none of the above steps resolve your XYZ calibration problems, you can contact Technical Support.
Back to content
Prusa Technical Support
If during the above tests you find that the sensor or other electronic component of the printer is faulty, you can contact Prusa support at [email protected] or write to the technical support chat in the online store. You will be asked to provide Pronterface test scores, a video and/or photo of your problem, your original order number, and Prusa will send you a new part (assuming you purchased your printer from them and not through a reseller). nine0003
If you still can't figure out why the calibration doesn't work, you can also write to [email protected], support chat or the forum (to do this, you need to log in using the data you provided when placing an order). As my experience shows, chat works faster, because there you will discuss all the details and questions in real time, while you can wait for a response to letters for several days. The people on the forum are also quite knowledgeable and willing to help, you should definitely try to write there. nine0003
The support chat is quite crowded on weekends
Back to content
How I Solved the Calibration Problem
When I ran into the XYZ calibration problem, I first did some of the checks in this article, but could not test the P.I.N.D.A. in Pronterface, because the printer did not respond to the commands of this program. Then I contacted the support chat, where they told me that before flashing, I need to reset the printer (which I did not do). I reset and reflashed the printer, it began to respond to Pronterface, I ran the G80 and G81 commands several times, compared the data and saw that they are quite different. I communicated with technical support in real time via chat, so I was able to immediately send them the grid readings, a photo of the sensor and a video with the calibration process. Support agreed that most likely P.I.N.D.A. out of order. They sent me a new sensor, which I received within 3 working days. nine0003
I replaced the sensor, but I still couldn't successfully calibrate. I returned to the idea that the printer had been idle for a whole month and it was unlikely that something could break in it. Taking into account the readings of the mesh during Mesh bed leveling and the P.I.N.D.A.’s serviceability, most likely it was the surface on which the printer was standing (I ruled out all other assembly problems): the table could well have been moved, or the printer could have been moved along it, or, maybe, the table was wobbly. I moved the printer to a level and very stable surface, tightened the X and Y straps, reset the printer again, ran the calibration, and - wow! - he passed it.