3D printer battery backup
Best Uninterruptible Power Supply (UPS) for 3D Printers 2022
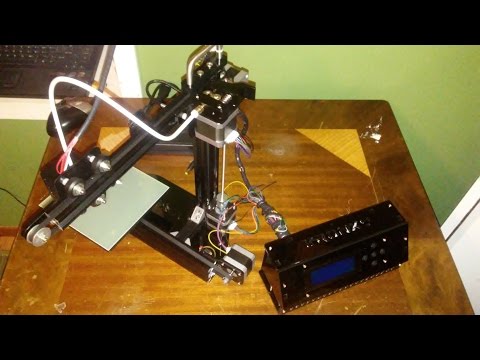
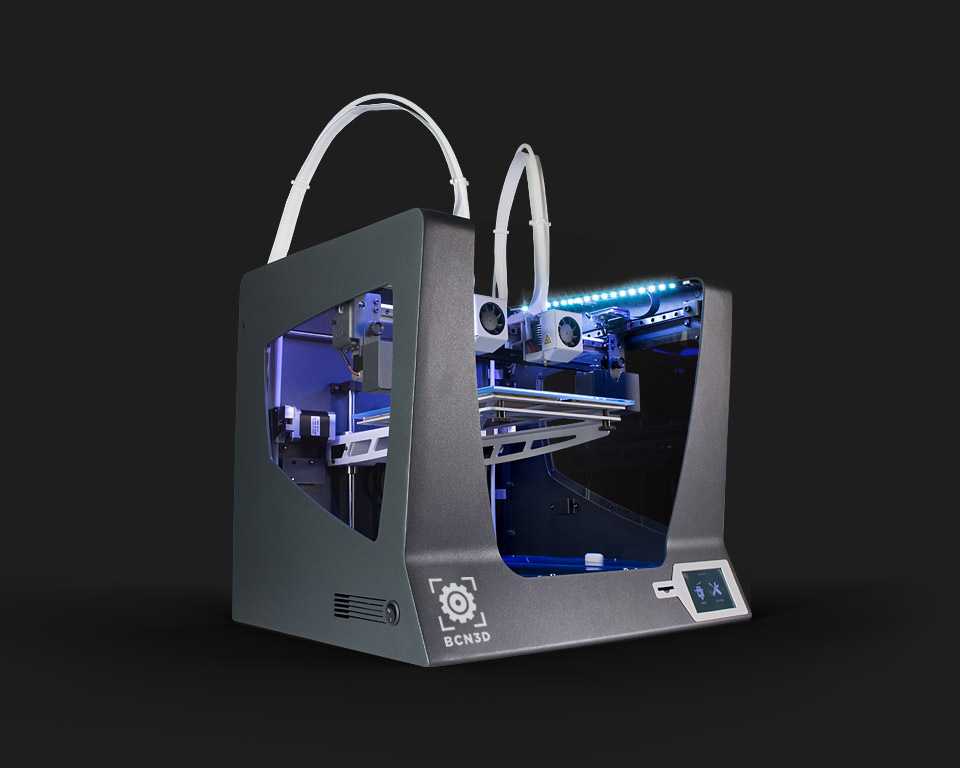
Jackery And 3d Printer (Image credit: Windows Central)Power cuts are par for the course out here in California and in many places around the world. Even a one-second power cut to your 3D printer is enough for a 22-hour print-to-stop to be ruined. An Uninterruptable Power Supply (UPS) like the CyberPower CP1500 will keep power flowing to your printer via high-capacity batteries and magic (OK, maybe not real magic), so you should never have to worry. If you're looking to get started in 3D printing, then a UPS is an important first step. Here are the best UPS for 3D printers.
CyberPower CP1500 Intelligent LCD UPS System
The one I use
This was the first UPS I used on my 3D printers, and it works wonderfully. Using a system called Automatic Voltage Regulation (AVR), the CyperPower regulates all the power going into your printer so you have a consistent feed of electricity at all times, even when the power goes out. The 1500va and 900w battery backup is enough to get you through about 15 minutes of a power outage.
APC BackUPS Pro
Hot swappable batteries
Like most of the UPS on this list, the APC BackUPS has AVR and the added bonus of hot-swappable batteries. This gives you the option of changing batteries out with replacement batteries to keep your UPS running for longer. Anything you can do to keep your printer running until the power comes back is a good thing.
CyberPower Sinewave UPS System
Powerhouse
This one is for those of you with multiple printers you want to attach to the same UPS. With eight battery backup sockets and a whopping 1540w of power, the Sinewave is a powerhouse and will keep your printers going for much longer than the standard UPS. It also comes with a three-year warranty covering you for $300,000 of connected equipment damage to rest easy.
Jackery Solar Generator 1000
The overkill you need
The Jackery 1000 with solar panels is a little different from the rest of the UPS options in this list. The solar panels allow it to generate power while in use, and in my Jackery 1000 review, I used it to power a 3D printer for almost 11 hours. If you know you are likely to have a long power cut for the day, then a Jackery might save you from printing delays.
CyberPower Compact UPS System
Budget power
While this is a perfectly good UPS for keeping a server or router going for an hour or two, it isn't going to give you more than five or six minutes of printing time. However, if you live in an area with a fairly good track record of tiny outages, then this could work for you. Sometimes you only need it to last 10 seconds anyway, so why spend a fortune?
Goal Zero Yeti
Good for travel
The Yeti is slightly different from the other UPS in this collection. It's designed for charging multiple devices while traveling or in an emergency rather than being attached all the time. Because of that, however, it's a great purchase if all you want is a UPS for planned outages at your home as well as using it for its original purpose: travel.
Forza - UPS 1000VA
Small and cheap
This is another budget offering, this time by Forza. The smaller UPS work great if you aren't using a heated bed since the stepper motors use such a small amount of power. So if you're using a printer without a heated bed or don't use it when you are printing PLA, something like the Forza may be just enough to keep you going in a short power outage.
CyberPower PR3000
Small business protection
This is overkill for a hobbyist with one or two printers, but if you're a small business owner using 3D Printers, this one UPS could power them for as long as you needed to get a backup generator running. Its 3000va 2700w batteries will keep a rack of printers running for at least an hour, and the three-year warranty covers $375,000 of equipment.
Why you can trust Windows Central Our expert reviewers spend hours testing and comparing products and services so you can choose the best for you. Find out more about how we test.
These UPS will give your 3D printing a fighting chance when it comes to power outages, and really, the bigger, the better when it comes to power. If you're lucky and live with constant power but still want a UPS as added security, remember to use your UPS occasionally anyway. The batteries need to be used, so they don't fail when you need them most.![]()
Most 3D printing people choose the APC BackupPro for their UPS needs from the research I have done, but I am partial to the Jackery 1000 as it has many other applications, not just as a battery backup. I've used the Jackery to power a printer at a talk I gave on 3D printing, and it worked so well I forgot it wasn't on mains power at all.
Get the best of Windows Central in in your inbox, every day!
Contact me with news and offers from other Future brandsReceive email from us on behalf of our trusted partners or sponsorsJames built his first PC when he was 13 and has never looked back. He can be found on Windows Central, usually in the corner where all the 3D printers are, or huddled around the Xbox playing the latest games.
How To Choose UPS Battery Backup For 3D Printer? – DIY Appliance Repairs, Home Repair Tips and Tricks
DISCLOSURE: This post may contain affiliate links, meaning when you click the links and make a purchase, we receive a commission at no additional cost to you
3D printers can print virtually anything that you design on a computer. However, the printing process must run uninterrupted for extended periods to succeed. A UPS battery backup is vital for 3D printers, as even a brief power outage could cause a failed print job.
Choosing a UPS battery backup for your 3D printer begins with identifying which critical devices you need to keep the 3D printer running. Then, consider the power supply risks in your area. Next, calculate your backup power needs and shortlist UPS models that can provide the necessary power. Lastly, choose the UPS with value-added features that support your 3D printer’s operations.
This guide will walk you through a step-by-step process of choosing a UPS battery backup for your 3D printer.
How Do I Choose A UPS Backup Battery For A 3D Printer?3D printers have unique backup power needs. You’ll have to understand those needs and match them with your UPS options to find the best model for your needs.
Here are the steps you can follow to find the best UPS backup battery for your 3D printer:
Step 1: Identify Critical DevicesThe first step to choosing the best UPS battery backup is to decide which devices are the most critical and require UPS protection.
Never forget that all UPS models have limited resources, regardless of their brand or how much you pay for them.
Those resources are their backup battery capacities and the number of power outlets (i.e. the number of devices you can connect to it at one time).
Of course, your 3D printer is the most critical device you want to protect with the UPS. But are there others as well?
Depending on your 3D printer setup, you might also want to provide backup power for things like:
- The computer that your 3D printer is connected to.
- The WiFi router that your 3D printer connects to, primarily if the printer is controlled and monitored remotely.
- Multiple 3D printers operate in the same place, like if you’re running a printing business.
- Any other supporting devices you need for your 3D operator to function correctly.
At this step of the process, you’ll want to list down all the devices you use. Then, narrow down that list by identifying the critical ones that require a UPS battery backup.
Read: How To Choose UPS Battery Backup For Desktop PC? – Troubleshooting Guide
Step 2: Understand Your RisksNext, you must understand the risks you face regarding the power supply in your area.
Is your area prone to blackouts or other power disruptions? And when they happen, do they typically occur for brief periods or several hours?
Understanding your risks is crucial to ensure you don’t under or over-invest in the UPS battery backup you purchase for your 3D printer.
Let’s look at two examples:
- Example 1: Suppose your area is prone to frequent blackouts that only last a few seconds each time. In that case, you won’t need to buy a UPS with an excessive battery capacity to keep your 3D printer running.
- Example 2: Suppose blackouts or voltage disruptions only rarely happen in your area.
 But when they do, they can last for an hour or more. In that case, you’ll want to consider investing in a UPS with a high battery capacity to keep your 3D printer running for longer.
Remember: you can buy a UPS with as high a battery capacity. However, the higher the battery capacity, the more expensive it’ll be. That’s why it’s best to find one with just enough battery capacity for your particular needs.
Read: Why UPS Not Working In AC Mode?
Step 3: Calculate Backup Energy NeedsNow comes one of the most crucial steps in this process. When choosing the best UPS battery backup for your 3D printer, you must calculate your backup energy needs.
These calculations are crucial for two reasons:
- The UPS backup battery must store enough power to keep your 3D printer running during a blackout.
- The battery capacity also affects how long the UPS can power your 3D printer, particularly during extended blackouts.

The battery capacities of different UPS models are typically measured in volt-amps (VA). The higher the VA, the more backup power the unit can provide.
Start by calculating the VA needs of your 3D printer and other devices. You can sometimes find this information in the user manual.
Alternatively, you can calculate it manually by multiplying the printer’s voltage and amperage (volts x amps).
Then, multiply that figure by x1.2 to add a 20% safety buffer. Doing that will give you a total that includes your VA needs and an additional 20% extra battery capacity.
Once you have that total figure, you can compare it with the VA ratings of the UPS models you’re considering.
Read: How Reset APC UPS After Battery Replacement?
Step 4: Shortlist Suitable UPS UnitsJust because a UPS model has a sufficient battery capacity to cover your VA requirements doesn’t make it the best choice for your 3D printer.
That’s why it’s worth taking the time to shortlist a few suitable UPS units with sufficient VA requirements.
A shortlist allows you to compare different models based on price, battery capacity, and other value-added features.
Read: How To Choose UPS Battery Backup For Garage Or Attic? – Troubleshooting Guide
Step 5: Consider Value-Added FeaturesThe final step in this process is to compare your shortlisted UPS battery backups based on their value-added features. That includes features like:
- LCD screens and other indicators
- UPS management and monitoring software
- Different form factors (e.g. one that fits on your desktop or one that stands independently)
- And more.
When providing backup power for 3D printers, an important feature is support for hot-swappable batteries.
Some UPS models allow you to switch out their batteries even when the device runs during a blackout. That will enable you to keep the UPS working for much longer because you can replace a drained UPS battery with a fully-charged one.
That ability to replace the battery without shutting down the UPS is called ‘hot-swappable’.
As you might imagine, a UPS that runs longer because of hot-swappable batteries can keep your 3D printer running indefinitely during a blackout as long as you have enough batteries.
That can be a lifesaver if you work on high-priority 3D printing jobs.
Read: How To Choose The Right Size UPS Battery Backup? – Troubleshooting Guide
Frequently Asked Questions (FAQs)The following are frequently asked questions (FAQs) that you’ll find helpful for understanding your 3D printer and its UPS needs:
What Happens If Power Goes Out While 3D Printing?A power outage while 3D printing can cause a failed print. However, that depends on your 3D printer and whether or not it has power-loss recovery features. Still, having a UPS battery backup reduces the risk of a failed print during a blackout.
Leaving a 3D printer running unsupervised overnight is dangerous. That’s because no one is around to monitor the printer and shut it down if problems like short-circuits occur. Connecting the 3D printer to a UPS can reduce the risk of electrical faults from voltage spikes, but the printer should always be supervised.
Can A Power Outage Damage A 3D Printer?A power outage can cause temporary damage to a 3D printer. Disruptions in the power supply can cause the printer’s components to malfunction. As a result, digital files could become corrupted. A UPS battery backup would reduce the risk of damage.
Can You Stop A 3D Print And Resume It Later?Yes, you can choose to stop a 3D print that’s in progress to continue later. However, you can’t stop it manually during a sudden power outage. A UPS battery backup would provide power for long enough that you can pause the print job safely to resume later.
No, a typical 3D printer is connected directly to a computer through a USB cable. Some 3D printer models might require the internet if they are controlled remotely. You should only connect the router to your 3D printer’s UPS battery backup if the printer is controlled or monitored remotely.
Industrial 3D printer for printing with engineering plastics CreatBot PEEK 300. Review 2020.
Contents:
- Creatbot Peek 300 general information
- Creatbot PEEK 300 Features and Package Contents
- Appearance and interface
- CreatBot PEEK 300 build chamber and print unit
- Mechanics and kinematics
- Electronics and electrical
- Slicer and print examples
- Output
Hello Friends! 3Dtool is with you!
Creatbot has firmly established itself in the market of professional FDM solutions and has a whole line of high-temperature 3D printers for working with engineering and refractory plastics. Starting with the junior model Creatbot F160 peek edition, ending with the giant Creatbot D600 PRO and Creatbot F1000. Now the lineup has been replenished with another new 3D printer CreatBot PEEK 300. It already follows from the name that this device is designed to work with engineering refractory materials and differs from its predecessors. Whether this is so, and how the printer architecture differs from other models of the line, we will try to determine in this review. Go! nine0004
General information about Creatbot Peek 300
Creatbot PEEK 300 is the manufacturer's application for the industrial FDM segment. This can be seen from several indirect and direct signs at once. Firstly, the kinematics removed from the active heating zone, secondly, thick two-layer walls of viewing windows, thirdly, a full-fledged system for heating the volume of the working chamber and, like a cherry on a cake, a water cooling system for the printing block.
Even compared to other models of the company, PEEK 300 looks more serious, which, in fact, the manufacturer himself claims. nine0004
Let's take a closer look at the device and consider it in detail
Creatbot PEEK 300 Specifications and Contents
Let's start with the classic features and equipment. The manufacturer declares the following characteristics of this model:
A rather large print area, a very impressive heating temperature of the extruder and table, the ability to “fire” materials like Polyether Efirketan directly in the chamber and a weight of almost 100 kilograms is another confirmation that we have a serious device. nine0004
Let's touch on a detailed analysis of the characteristics a little further. What is included in the package?
Absolutely standard set for CreatBot 3D printers, like the D600 Pro.
Also included is a woven carbon fiber adhesive platform already installed on the printer that can withstand very high temperatures. Similar to the one on the F430 Peek Edition.
Appearance and interface
Let's consider the 3D printer externally and get acquainted with the control interface. nine0004
Coated in signature gray powder paint, the Creatbot’s body looks quite powerful and at the same time concise. On the front panel we can see a viewing door, controls and a large blue company logo. On the right side, you can see the handles for transportation and the ventilation grille of the chamber.
On the right side are the same handles for transportation, the door of the coil compartment and the buttons for selecting the heating temperature of this compartment. You can dry the material at 40 or 60 degrees. The buttons are provided with pictograms. The same system is on Creatbot D600 Pro, for example. nine0004
There is another viewing window on top to facilitate access to the printing unit, loading plastic and other operations. In total, the camera can be accessed from two directions, from above and from the front, for most cases this is enough.
The front door has an impressive thickness, this is done to reduce heat loss during printing, the same thermally insulated doors were, for example, in the Total Z450, a similar industrial 3D printer, which we reviewed earlier. nine0004
Glass is also used double, to create an air temperature barrier. Material - apparently plexiglass on the outside and natural glass inside. The layers are laid with special bushings - white.
Estimate the thickness of the “nut” of the working chamber, the body of Creatbot PEEK 300 more like an armored tank than just a 3D printer.
On the right side of the front panel there is a Creatbot branded touch display with a USB connector and an indicator, as well as a temperature controller for the blower heaters of the DAC system. nine0004
Below is the model marking, emergency shutdown button and power button.
Go to the display interface.
Since all Creatbots have a single platform, their control interface is also approximately the same, so when the device is connected to the network, we are greeted by the already familiar blue touch screen interface with quite familiar icons, but still a little, there are changes. nine0004
In addition to the temperature icons at the top right, in the main window you can see the buttons for quickly turning on the preheat (Preheat), the filament change menu (Filament), the memory card menu (USB), the menu for moving along the axes (Move) and advanced settings (Settings).
Here we are offered to adjust the movement parameters (accelerations and jerks), change the temperature of automatic preheating, adjust the speed of the fans blowing the model, or perform auto-calibration of the platform. nine0004
Here you can reset the settings to the factory settings.
The axis movement menu contains axes familiar to the eye with a choice of movement step, buttons for positioning the head in the "Home" state for different axes and displaying the current coordinates.
The memory card window has not changed either. Here, everything is also divided into subfolders, but the display does not display the Cyrillic alphabet, alas. Use English titles.
The filament menu allows you to select a gentle extruder and, similar to the motion menu, load or unload material. The temperature is set during the process. nine0004
CreatBot PEEK 300 build chamber and print unit
Creatbot Peek-300 has a rather impressive volume of the working chamber - 300x300x400 mm. At the same time, according to the assurances of the manufacturers, most of it can be used for almost all refractory materials.
PEEK 300 has one of the "hottest" heating tables. The system allows you to reach 200 degrees on the surface. This is enough to print with any available refractory material. nine0004
The table rests on a thick base, the silicone is laid with a heater, the glass is fixed on the clamps.
There is LED lighting on the front. As you can see, the straps do not intersect, we have a classic H-Bot.
Media is fed from the spool slot on the left side of the machine. Here we see a heating module for drying the material, brackets for attaching two coils and a thread presence sensor. nine0004
At the top of the compartment is a temperature sensor.
A HEPA filter and a ventilation grille are installed in the right wall of the working chamber.
Lining the surface of the filter with activated carbon additionally purifies the air from harmful impurities.
Printing unit
Of course, the most interesting node of this device is the printing unit, because it has water cooling and a cunning hot blowing nozzle system. In the rear compartment of the printer there is a reservoir with water, a pump and a cooling radiator, through which the liquid heated in the printing unit is removed and cooled. The compressor and heater for the hot air system (DAC system) are also located there.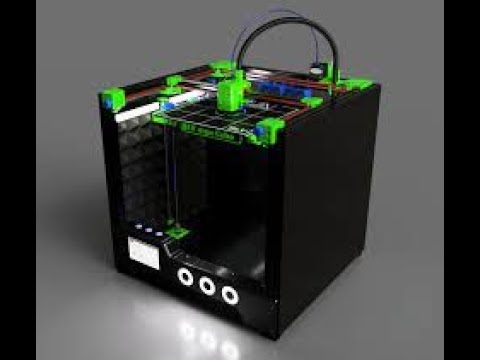 The performance of such a water-cooling solution is much higher than with conventional air-cooling, and given the maximum heating of the nozzle up to 500 degrees, the system must be productive. nine0004
The print unit is also equipped with the unique and exclusive Direct Annealing System. Near it is an air duct, the air flow temperature of which can reach up to 120 degrees Celsius. This allows materials such as PEEK and PEI to be pre-fired, and thanks to the same high chamber temperature, the final polymerization process can occur much faster than with the classic method.
Printing unit - top view.
View - from below and the BlTouch table level sensor.
The print unit is equipped with two feed mechanisms and two hot ends, the extruders are motorized (as in Raise3D 3D printers). The rise/lowering of the hot ends is due to the torsion of the screw gear. The inactive nozzle rises during printing, and then lowers when they need to print (and so alternately each of the nozzles) the rise / fall occurs automatically using the electronics of the device. The BL Touch table calibration sensor is installed on the back wall, as on other professional Creatbot models. nine0004
Creatbot allows you to use nozzles with a diameter of 0.3 to 1.0 mm, brass or steel. But if the printer works with refractory and abrasive materials, it is preferable to use a steel nozzle.
The extruder tubes are all-metal, they correspond to their high-temperature counterparts on the D600 Pro models, except that they cool better and withstand heating up to 500 degrees, unlike 420 for the D600 Pro.
Mechanics and kinematics
Unlike predecessors Creatbot PEEK 300 has H-Bot kinematics, the belts are separated by height, classic steppers act as a drive.
The X-axis carriages are milled, metal, thick Hiwin rails and a 10 mm steel cord belt, the kinematics are perfectly implemented and finally built on a modern kinematic scheme. The blue substance in the photo is shipping lubricant. nine0004
The belts extend beyond the chamber, all delicate electronics, except for the control of the printing unit, are placed outside the chamber.
The Z-axis, as expected, moves with the help of a fixed ball screw along two 16-mm guides. There is nothing new here, we have seen a similar scheme on past models of the manufacturer.
The steppers themselves are hidden behind the back wall and are located in the electronics compartment. Paired - along the X / Y axes and Z stepper motors with a belt drive. Pay attention to the format of the motors, these are far from the classic Nema 17. In an industrial 3D printer, everything should be done in an adult way. It would be interesting to see a modification of the Peek-300 using servos like the D600 Pro. nine0004
Electronics and electrical
Let's move to the holy of holies of any 3D printer - the electronics compartment, in the CreatBot PEEK 300 it should be quite interesting.
This is true. The compartment stretched over the entire body of the device is packed with knots and elements to the eyeballs. Let's try to figure out what's what.
First of all, a powerful 14.6 ampere power supply catches the eye, which powers all the kinematics, the motherboard and other low-current piping of the device. nine0004
To the left of it are the electronics compartment cooling fans and a backup battery in case of a power outage, here we see a 220 relay in the amount of 4 pieces serving the printer's heating elements. There are 5 such relays in total. Separately for the table, printing unit and heating elements.
On the right you can see the heating element of the chamber volume, please note that the entire chamber is glued with thermal insulation from the inside, it is clearly visible from the electronics compartment. Heat loss with this approach should be reduced to zero. nine0004
On the left side you can see the elements of the water cooling system of the printing unit, which we talked about earlier.
Above is a reservoir with liquid with tubes connected.
As well as a radiator with a fan for active cooling.
At the very bottom is the pump and heater of the DAS system, which supplies hot air to the nozzle. nine0004
In the center of the compartment is the proprietary Creatbot motherboard, familiar to us from other company printers. Proven, reliable solution.
Quiet drivers with the ability to replace, a huge number of functions and high-quality factory industrial assembly. We hope the company will continue to practice this approach to production.
By the way, as befits such a device, Creatbot uses two power lines. Power - for heating elements and low-current for controlling kinematics and low-current piping. Also, without fail, the device must have access to grounding. nine0004
Slicer and print examples
Creatbot PEEK 300 can work with any open slicer on the market. Be it Cura, Kisslicer or Simplify 3D. However, the manufacturer recommends using its own solution - CreatWare, based on one of the old Cura builds. We considered this slicer in detail in one of our previous reviews on Creatbot printers.
As a test, let's print a product made of Ultran, this is a rather capricious material, and we just have a coil dried for another review. nine0004
Let's omit the slicer setting, we will only make a reservation that Ultran is printed at a temperature of at least 300 degrees on the extruder and 120 on the table.
Let's choose a layer thickness of 0.2 mm.
As a result, we get such a beautiful spiral made of durable material, without the use of supports, in excellent quality.
For better sintering, we set the temperature in the chamber to 70 degrees, as you can see, this is quite enough for printing with carbon-filled polyamide. nine0004
By the way, we printed the same impeller from FormaX, you can see the printing process and the result in the video review of this 3D printer on our Youtube channel. The details are very similar. Both externally and on quality of the press.
Output
CreatBot PEEK 300 a logical continuation of the manufacturer's industrial line of devices.
By correcting and improving the design, the company provides the possibility and quality of printing with refractory engineering materials 3 times cheaper than solutions from well-known manufacturers Stratasys and Funmat, while not worse. nine0004
Print control systems, electronics removed from the heating zone, professional and modern kinematics, a well-thought-out system for drying and feeding plastic, reliable and well-proven electronics, a motorized double printing unit with the function of firing a part, these are unconditional trump cards in favor of CreatBot PEEK 300.
By expanding and refining the experience gained in the development and implementation of the D600 Pro, the company has created a truly worthy solution that fully corresponds to the tasks assigned to it. nine0004
Creatbot declares full support for the most common refractory engineering materials, and judging by our test, the printer can really print with them with high quality.
Who is the Peek-300 for?
This is clearly not a homemade solution. Large size, huge current consumption, such, without exaggeration, a large organization, a manufacturing company, a research institute or a laboratory can afford such a machine.
Such a device will perform well in R&D chains, where you need to quickly get a running prototype or final functional part and immediately introduce it into production. nine0004
This 3D printer will perfectly cope with the task of manufacturing rare and loaded spare parts of other machines or mechanisms.
It will also perfectly fit into the scheme of modernization and optimization of existing production, or will become the basis for a new one.
Well, that's all we have! See you soon!
You can purchase the Creatbot PEEK-300 3D printer from our company. We are the official distributor of the manufacturer's plant for the sale and service of CreatBot3D equipment in the Russian Federation. nine0004
To place an order, or contact us for other questions, you can:
-
By email: [email protected]
-
Phone: 8(800)775-86-69
-
Or on our website: https://3dtool.ru
Don't forget to subscribe to our YouTube channel:
Join our groups in social networks:
INSTAGRAM nine0004
In contact with
| 3DNews Technologies and IT market. The most interesting in the reviews 08/17/2021 [11:30], Gennady Detinich American startup Sakku unveiled a prototype 3D printer for printing solid-state lithium metal batteries. According to the developer, printing allows you to create the perfect battery, which will not have anything superfluous. This means that the element will have the highest energy storage density, and industrial printing will reduce production costs. nine0004 Image Source: Sakku Sakku's prototype 3D printer can print test batteries with a capacity of 3 Ah. The company does not disclose other characteristics, but reports that it was able to increase the energy storage density by 100 times in a year of development. “In order to get batteries with maximum energy density, we want to minimize the volume of all elements that do not add anything to battery performance, ,” said Karl Littau, CTO of Sakku. In its development, Sakku used the technology of metal printing, proposed by scientists at the Massachusetts Institute of Technology. To this technology is added the printing of a ceramic composition using special binders. Ceramics in this case plays the role of an electrolyte and is the highlight of the Sakku solid-state battery. The company plans to introduce the first automated printer for industrial printing of solid-state lithium batteries by the end of this year. Compared to the existing prototype, the production of battery cells will increase by an order of magnitude or more. The company is not going to limit themselves to one or another application for batteries, they promise to print batteries for any application. nine0004 It should be added that lithium metal batteries, one option offered by Sakku, have problems such as the growth of needle dendrite on lithium metal electrodes. Each charge causes the growth of dendrites, which can eventually puncture the separator and cause a short circuit in the battery. |
 News at the forefront of science Americans have created a 3D printer for industrial...
  - nine0424 That's what printing really does."